Articles / Guidesupdated for DaVinci Resolve 21 (current version checked November 12, 2026)
Change Timeline Frame Rate After Editing in DaVinci Resolve
Quick answer
To change the frame rate of an edited Resolve timeline, preserve the original, create a new empty timeline with its own frame-rate setting, then copy or conform the edit into it and review the result. If only the exported file needs a different frame rate, keep the approved timeline and test that output instead.
I wouldn't try to force a locked frame-rate field to change. First find out whether the requirement applies to the timeline or only to the exported file. If the edit itself needs a different rate, protect the original and make a new timeline you can compare against it.
What should I change: the timeline, the export, or one clip?
Start by naming the frame rate you mean. Resolve works with several rates in one project, and the controls don't do the same job. A source clip has a capture or interpreted rate. A timeline has an editing rate. A rendered file has an output rate. Playback and monitoring have their own behavior too.
A mismatch between those rates isn't automatically an error. A camera may record at 60 fps for slow motion, while the project timeline is 24 fps and the final file is also 24 fps. Another project might use a 24 fps timeline but need a file encoded at 30 fps. Those are different workflows, even if both begin with someone saying, “Change the frame rate.”
| What you need to change | Where to start | First question to answer |
|---|---|---|
| The edit's frame-by-frame timeline cadence | Create a separate timeline with the target rate | Does the delivery specification require a timeline at that rate? |
| The encoded rate of the final file | Deliver settings and a short test render | Is the approved timeline already correct? |
| The speed or interpretation of one source clip | That clip's attributes or retiming controls | Is the problem limited to this shot? |
| Uneven playback in the Resolve viewer | Playback and monitoring diagnostics | Does the rendered file stutter too? |
| A project-wide mismatch after an interchange import | Import/conform settings and source references | What rate did the originating sequence use? |
The fastest safe fix is usually the narrowest one. If a single camera clip runs at the wrong speed, changing the whole timeline creates extra work and may change the cadence of every other shot. If a client asks for a 30 fps file but has approved a 24 fps edit, test the export before rebuilding the edit.
A timeline-rate change, a clip-rate change, and an export-rate change are three different operations.
Resolve's Reference Manual describes project and timeline settings separately. The DaVinci Resolve 21 New Features Guide also documents a timeline-import dialog that displays the imported timeline's settings. Treat those as useful controls and information, not as proof that a transfer has preserved every frame of a complex edit.
Before touching a setting, read the delivery request closely. “30 fps” might refer to the file's encoded rate, a timeline standard, a camera capture setting, or a display rate. If the person who will receive the edit hasn't specified which, ask. A quick clarification can save a conform you didn't need.
Why is the frame-rate setting greyed out?
The setting you're looking at may be the project's global rate, the current timeline's own rate, or a control that Resolve locks because of the current edit state. Check which one it is before deciding that Resolve has malfunctioned.
In Resolve, Project Settings and Timeline Settings aren't interchangeable. A project can contain timeline-specific settings. A timeline created with Use Project Settings enabled inherits the project setup. A timeline created with that option disabled can use its own settings, subject to the state of that timeline and the controls available in your Resolve version.
The Resolve 18 Beginner's Guide explains that custom frame rates can be set for an individual timeline when Use Project Settings is turned off. It also notes that frame-rate changes have restrictions once timelines or clips exist. The exact lock you see can depend on whether you're editing a project-level setting or a timeline that already contains clips.
That distinction matters. Deleting clips from the visible edit doesn't necessarily make a project equivalent to a new, empty project. The Media Pool may still contain media, and a timeline may still exist. Don't keep importing and deleting files to try to unlock a value. Instead, inspect the scope of the setting and use a new, empty timeline if the edited timeline can't be changed.
Try this diagnostic sequence:
- Open Project Settings and note whether you're looking at the project-wide timeline rate.
- In the Media Pool, locate the actual timeline you want to inspect.
- Right-click the timeline and choose Timeline Settings if that command is available.
- Check whether Use Project Settings is selected for that timeline.
- If the timeline already contains clips and its rate is locked, leave it alone and create a separate empty timeline.
- Set the new timeline's rate before you add clips.
- Reopen its settings to verify the rate rather than trusting the timeline's name.
The Resolve 18 Editor's Guide shows the Media Pool context-menu route to Timeline Settings. Labels can move between releases, so if your 21.x layout differs, use Blackmagic's current manual rather than copying a screenshot from an older tutorial.
A greyed-out rate is a reason to check which setting you're viewing, not a reason to force a change.
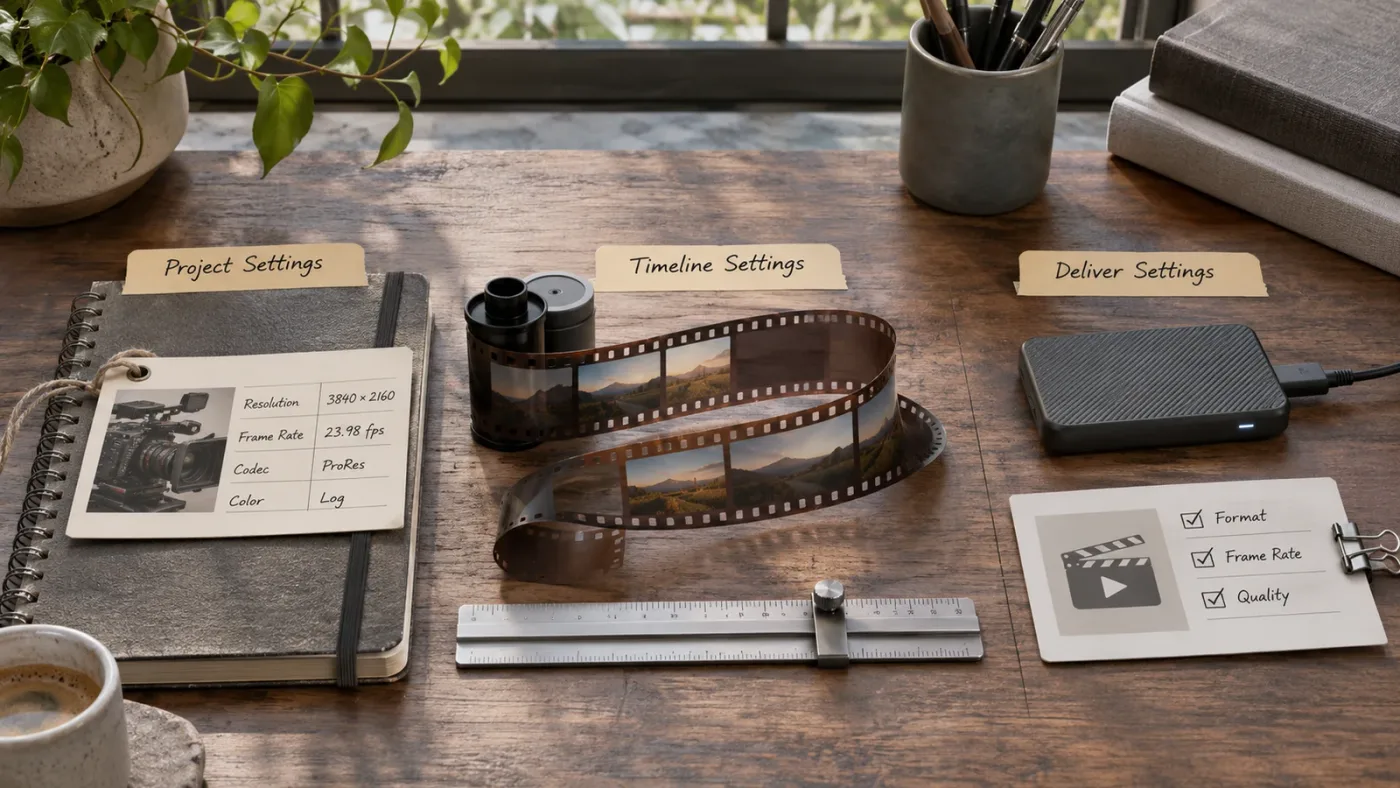
How do I change the timeline frame rate without risking the edit?
Use a copy of the project or a clearly separated working version, create a new empty timeline at the target rate, transfer the edit, then review it against the original. That gives you a known-good reference if anything shifts or behaves differently.
This is a controlled conform, not a guarantee that every timeline element will transfer exactly as expected. A simple cut sequence is easier to compare than a timeline with nested edits, keyframes, multicam clips, retiming, subtitles, and layered effects. The workflow below limits risk by preserving the original and giving each stage a check.
1. Protect the original project
Save a separate project copy before experimenting. Use a name that makes the working relationship obvious, such as ProjectName_24fps_original and ProjectName_30fps_conform. These are naming examples, not required Resolve conventions.
If the project is important, keep another backup using the method that fits your project library and storage. The sibling guide to backing up a Resolve project before updating explains broader backup choices. For this task, the essential point is that you can reopen the original timeline unchanged.
Write down the facts you're trying to preserve or change:
- Original timeline rate.
- Target rate and the reason for it.
- Timeline resolution and orientation.
- Approximate duration and start timecode.
- Required delivery codec, container, and audio layout, if specified.
- Whether the timeline contains nested sequences, multicam edits, retimed clips, subtitles, or heavy keyframing.
- Whether the request is for a different timeline or just an encoded output.
Don't infer a full delivery specification from a single rate. A request for 25 fps doesn't, by itself, specify raster size, progressive versus interlaced scan, timecode convention, codec, audio channels, or color space.
2. Create an empty timeline with its own settings
Create a new timeline in the Media Pool. When the creation dialog offers Use Project Settings, turn it off so you can choose timeline-specific settings. Select the requested rate before putting any clips in the new timeline.
Then verify the setting. Find the new timeline in the Media Pool, open Timeline Settings, and read the frame-rate field. A name such as Sequence_25fps is only a label. It doesn't prove that the timeline runs at 25 fps.
If the creation dialog doesn't show a rate, pause. Check that you're creating a new timeline rather than duplicating or opening the existing one. Confirm that Use Project Settings is actually disabled. If the control still isn't available, consult the current manual for your installed version instead of guessing at a different project control.
3. Transfer the edit in a way you can compare
For a straightforward edit, copy the selected timeline material, open the new timeline, position the playhead at the intended start, and paste. Confirm which tracks are enabled and what is selected before you copy. A selection that leaves out an audio track, title, or adjustment layer can make the destination appear to have transferred successfully when it hasn't.
For a more complex project, consider a controlled timeline import or another conform workflow you can audit. Resolve 21's New Features Guide documents importing a Resolve timeline file (.drt). Its import dialog displays the timeline settings and can offer to set project settings from the imported timeline, as well as link to existing Media Pool clips.
Those options help with an import, but they don't certify the result. Check whether media linked, whether the imported rate is the one you intended, and whether the edit's timing matches your reference. Don't make the transferred version your only timeline until you've reviewed it.
4. Compare before continuing the edit
Keep the original timeline available. Compare both versions at the start, at important edit points, and at the end. If the project has timeline backup snapshots, Resolve 21's guide describes a Compare with Timeline Backup function that can show a current timeline beside a backup. That can help review changes, but it doesn't replace a playback and render check.
5. Render a short test
Choose a section that includes representative movement, a cut, a transition, any retimed shot, and a sync point. Render it using the intended delivery settings. Watch the result outside the Resolve viewer, then check its reported frame rate and duration.
A test render is more useful than staring at a paused frame. It shows how motion behaves across consecutive frames and whether audio remains in sync through the tested section. Keep the original and the new version until the new timeline and output have been approved.
How do I set the target rate on the new timeline?
The critical moment is before the new timeline contains clips. Create it with project settings disabled, select the target rate in the timeline's own settings, and verify before pasting. Don't assume that a timeline inherits a change made elsewhere after it was created.
A practical sequence is:
- In the Media Pool, use the command to create a new timeline.
- Give it a clear working name that distinguishes it from the original.
- Turn off Use Project Settings in the creation dialog, if shown.
- Choose the target timeline frame rate and any other required timeline format settings.
- Create the timeline without adding clips yet.
- Reopen the timeline's settings and confirm the rate.
- Only then copy or import the edit into it.
This gives you a checkpoint before the edit enters the new timeline. If you discover that the rate is wrong, you can correct the empty timeline or create another one without having to untangle a pasted edit.
If the dialog offers resolution, pixel aspect ratio, monitoring, or output options, don't change them casually while you are focused on frame rate. Change only the settings required by the delivery. A frame-rate conform and a resolution or color-management change are separate decisions. Altering several at once makes it harder to identify why a result looks different.
There are three common reasons a new timeline ends up at the wrong rate:
- Project settings were inherited. The checkbox remained selected, so the timeline adopted the project's setup.
- The wrong timeline was opened. The editor created a new timeline but continued working in the original.
- The timeline name was mistaken for its setting. The name includes “30fps,” but the actual rate was never verified.
If you spot one of these before editing, correct it while the timeline is empty. If it already contains clips, don't assume its rate can still be changed. Make a clean target timeline and transfer into that one instead.
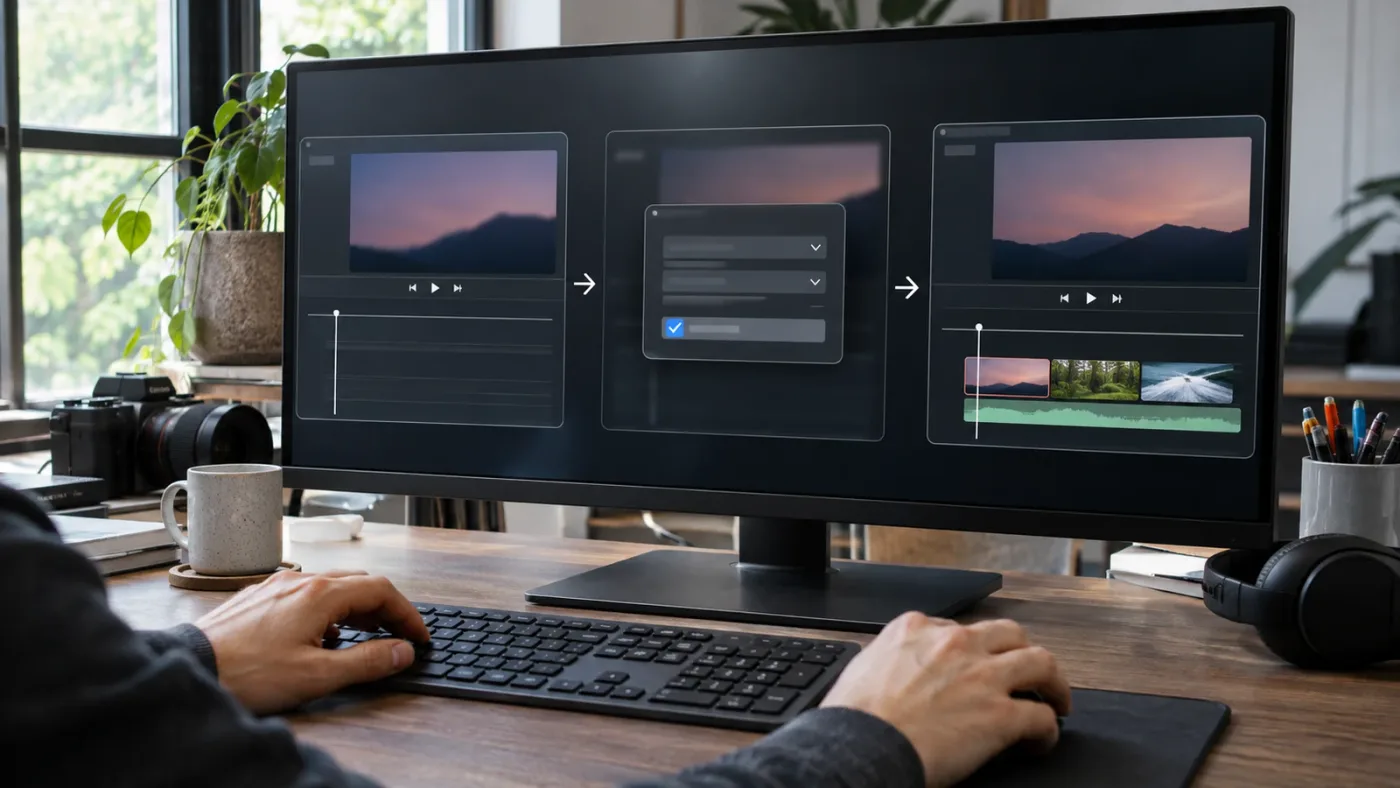
Should I copy and paste, import a timeline, or rebuild the edit?
Use the least complicated transfer method that lets you verify the result. Copy and paste can suit a simple timeline. A .drt import can be useful when transferring a Resolve timeline, especially when its import options match your project needs. A complex or damaged interchange may call for a careful conform or selective rebuild instead.
| Timeline situation | Reasonable first approach | Main risk to check |
|---|---|---|
| A short edit with ordinary video and audio cuts | Copy and paste into the verified empty timeline | Missing tracks or an unintended paste position |
| Many tracks, titles, and effects | Copy on a working project, then audit track by track | A selection or track state excludes material |
| Moving a Resolve timeline between projects | Consider .drt import and inspect the import options | Media linking or project settings don't match expectations |
| Imported XML or AAF with uncertain timing | Confirm source rate and compare against a reference | Interchange interpretation or timecode mismatch |
| A sequence with many fragile, frame-specific effects | Transfer a test section first or rebuild selectively | Effect timing and keyframes don't behave as expected |
| A deadline-critical, approved master | Keep the original as authority and render a short proof | An unreviewed conform replaces the approved master |
Copy and paste is simple, but it depends on selection, track targeting, playhead position, and the structure of the edit. Before copying, check whether linked selection is on, which tracks are enabled, and whether the selection includes the whole edit or only the current section. After pasting, compare track count and timeline duration before you inspect individual shots.
A timeline import gives you a dialog that may show the timeline's resolution and rate. In Resolve 21, the New Features Guide says the dialog can also automatically link to existing Media Pool clips and set project settings based on the imported timeline. Those are practical conveniences. They don't guarantee that every source file, retime, effect, title, or linked audio item will match the receiving project.
Rebuilding is slower, so it shouldn't be the default for a routine rate change. It can make sense for a short sequence with a small number of timing-sensitive elements, especially if transferring the whole timeline creates more cleanup than reconstruction. If you rebuild, retain the original as a visual and audio reference and verify every cut against it.
The point is not to choose one method for every project. It's to keep the transfer reversible and visible. A method you can inspect is safer than a faster method whose assumptions you can't explain.
What changes when a 24 fps edit moves to 30 fps?
The new timeline has a different number of frame positions per second. That doesn't give 24 fps source footage additional captured moments. Resolve has to map the existing motion to the target cadence, and the exact appearance depends on the source, the edit, and the conversion method.
Here's a worked arithmetic example, not an observed Resolve test: a 10-second timeline at 24 fps contains 240 timeline frames. A 10-second timeline at 30 fps contains 300. The difference comes from multiplying duration by frame rate. It doesn't mean the 30 fps version has 60 newly captured moments in the source footage.
Frame-based edits can be affected because a frame number represents a different amount of elapsed time at different rates. If you place a cut at frame 120, that is five seconds into a 24 fps timeline and four seconds into a 30 fps timeline. A transfer is therefore not just a relabeling exercise. You must check whether cuts and other events land at the intended time.
Common conversion approaches have different trade-offs:
- Frame sampling or repetition: The output uses source frames that exist, sometimes repeating a frame to fill the target cadence. Repetition can show as uneven motion.
- Frame blending: Neighboring images can be blended to form an intermediate-looking frame. Fast movement may appear soft or show a ghosted edge.
- Motion interpolation: Software estimates motion between images and synthesizes intermediate frames. It can look smooth in some shots, but complex movement, occlusion, flashes, or fine detail may produce visible artifacts.
These are general descriptions of frame-rate conversion, not a claim that a particular Resolve setting will always use one behavior or produce a certain result. Check the options available in your version and judge the rendered material. A static interview, a whip pan, a scoreboard, and a rolling shutter shot can reveal different problems.
A 30 fps timeline cannot create motion the camera never recorded.
Duration, speed, and cadence are related but not identical. A clip may retain its intended real-time duration while its frame cadence changes. A deliberate speed effect may instead alter duration. A conform may preserve a frame-based position while changing its relationship to elapsed time. That's why a single number in a settings panel can't tell you whether the finished edit feels right.
Audio needs independent attention. Listen for dialogue sync near the beginning, middle, and end. Check music transients at cuts and impact sounds against picture. If audio is linked to video, don't stretch speech simply because the timeline rate changed. First find out whether the transfer changed the edit's time placement, the clip's speed, or only the frame cadence.
For subtitles, check more than the first caption. Confirm that each caption still begins with the spoken words and ends at the right moment. A caption can look correct in the first scene and drift later if the duration or edit points have changed.
What happens in a 23.976-to-25 fps conform?
First establish whether the request means a 25 fps timeline or a 25 fps rendered file. If it is a file-rate request, test a render from the approved timeline before transferring the edit. If it is a timeline requirement, create a separate 25 fps timeline and review its cadence and timing against the source edit.
This worked example uses a documentary sequence assembled at 23.976 fps. The producer asks for 25 fps. That request alone doesn't tell you whether they need a 25 fps timeline, a 25 fps export, or a broader delivery package with additional technical requirements.
If the timeline itself must be 25 fps, make the new timeline empty and verify its settings first. Then transfer the edit and check motion that makes cadence easy to see:
- A slow pan across a room or landscape.
- A person walking across the frame.
- A long lateral camera move.
- Scrolling credits or a moving lower third.
- A shot with a steady mechanical movement.
- A dialogue cut tied to a consonant or visible gesture.
Martin Richards, a finishing professional interviewed by the International Documentary Association, said: “We still do lots and lots of frame-rate conversions.” The full IDA interview discusses situations where footage arrives at a different rate from the surrounding edit. That observation supports treating conversion as a normal post-production task, not pretending that every conversion is invisible or safe without review.
If the rate request affects a broadcast or archival deliverable, ask for the full specification. Confirm whether the recipient expects progressive or interlaced video, the exact fractional or integer rate, timecode requirements, and any codec or audio constraints. “25 fps” is not a complete delivery specification.
What if the source footage was shot at 60 fps?
A 60 fps source clip in a 24 fps edit is not, by itself, a reason to make the whole timeline 60 fps. Decide how that clip should play. If you want slow motion, use the source's extra captured frames as part of a deliberate speed choice. If you want normal-speed motion, Resolve has to map that source to the timeline cadence.
Imagine a short sports shot recorded at 60 fps and intended to play in slow motion in a 24 fps sequence. Changing the entire sequence to 60 fps could alter the look of every other shot, title, and transition. It also doesn't automatically tell Resolve that the sports shot should be slowed down. The source clip's speed treatment is a separate choice.
If the problem is that one shot plays too fast or too slow, inspect that clip's interpretation and retiming first. The related guide on a Resolve clip playing too fast because of a wrong frame rate covers that narrower diagnosis. If several clips need changed attributes, see how to change clip attributes for multiple clips.
A useful way to separate the choices is to ask:
- What rate did the camera record?
- At what speed should the shot appear to play?
- What frame rate does the timeline require?
- What frame rate does the delivery file require?
Write down the answer to each. The four answers may differ. Changing the timeline setting to solve a source-clip speed issue can hide the symptom while leaving the actual interpretation problem in place.
Can I export at 30 fps from a 24 fps timeline instead?
Often, yes, if Resolve's Deliver settings allow the requested output for the selected render configuration. If the timeline is approved and only the file must be 30 fps, test that route before creating a new timeline. The output still has to represent the timeline's 24 fps cadence in a 30 fps stream.
Don't assume every codec, container, preset, or render mode exposes the same options. Look at the rate shown in the Deliver page after choosing the intended output configuration. Then inspect the rendered file's metadata with a media-information tool or the recipient's system.
For the test, include a section with smooth movement and a section with a precise sync point. Check:
- The displayed output rate. Confirm the actual value selected for the render.
- The preset. A preset may set other output values or constrain the available choices.
- The actual file metadata. Confirm the encoded rate is the one requested.
- Motion cadence. Watch pans, fast movement, scrolling text, and repeated patterns.
- Audio sync. Compare a visible impact or mouth movement with its sound at multiple points.
- Duration. Check the file's runtime against the specification.
- The rest of the deliverable. Confirm resolution, scan type, codec, audio channels, and color requirements as applicable.
A file can report the requested rate and still have motion that looks wrong. Conversely, a viewer can look uneven during playback while the rendered file is acceptable. The rendered artifact, not the settings panel alone, is what the recipient will receive.
If the needed rate is unavailable, don't guess at combinations of settings. Check the current Resolve Reference Manual, try a short test with an appropriate render configuration, and clarify the specification with the recipient. If they can provide a reference file or a written delivery sheet, use that to resolve ambiguity.
For multiple deliverables, don't automatically make a new timeline for every file rate. Keep an approved source timeline and use separate output configurations when that meets the requirements. Create additional timelines when the edit itself needs different frame timing, framing, or cut decisions.
Does changing the timeline rate fix choppy playback?
No. A timeline-rate change isn't a general performance fix. Find out whether the stutter appears in the viewer only or in a rendered file as well.
Run a short diagnostic before rebuilding anything:
- Play the source clip in the Media Pool or source viewer.
- Play the same section in the timeline.
- Render a short section using the current timeline settings.
- Watch the rendered file in a separate player.
- If only the viewer stutters, inspect playback and monitoring conditions.
- If the render stutters too, inspect source cadence, retiming, conversion, and the edit itself.
If the viewer stutters but the render is smooth, changing the timeline from 24 to 30 fps may make the preview harder to play without improving the delivered file. If the render also stutters, changing the rate can simply produce a different pattern of repeated or missing frames.
Check whether the problem affects every clip or just one. A single problematic clip points toward its source media, interpretation, speed change, or effects. A problem that appears across the whole sequence may involve a broader timeline or monitoring mismatch. These are clues, not definitive diagnoses, so change one variable at a time and render a short comparison.
Resolve's playback and monitoring settings are separate from the timeline's primary rate. A playback value used for monitoring does not rewrite the timeline. The Reference Manual is the right place to confirm the exact controls in the installed version.
Don't use a rate change as the first response to choppy playback. First prove that the exported file has the problem. That one check can save an unnecessary conform.
What should I check after transferring the edit?
Treat the new timeline as a conform candidate, not a finished replacement. Review structure, timing, image, sound, and output. The amount of review should match the complexity and stakes of the edit.
Check the timeline structure
Compare track count, track names, and track states. Confirm that expected video, audio, subtitle, title, and adjustment tracks are present. Look for tracks that are muted, disabled, hidden, locked, or empty in the new version.
Check the first and last clips. Verify that the edit begins at the intended point and ends on the expected final frame. Confirm that the new timeline hasn't been pasted at an unintended playhead position or shifted by a selection.
Check frame-sensitive work
Inspect every transition, retime, freeze frame, speed ramp, and reverse clip. Check keyframed transforms, masks, and effects that rely on specific frames. Verify lower thirds, animated titles, credits, and logos. A title can still be present but start a few frames early or late.
For multicam sections, check angle changes and audio selection. For compound clips and nested timelines, open representative sections and confirm that the expected material plays. A correct-looking outer clip doesn't guarantee that the internal edit has the timing you intended.
Check captions and markers
Review subtitle in-points and out-points against the spoken words, not just against the original timeline's ruler. If review notes refer to timecode, find several of those points in the new timeline and confirm that the notes still identify the intended shot.
Markers can retain their position in a way that no longer matches the reviewer’s assumption about elapsed time. If markers are critical to the handoff, record what they refer to and verify them after transfer. Don't assume their labels alone make their timing unambiguous.
Check sound and sync
Listen at the beginning, middle, and end. Check dialogue against mouth movement, impacts against visible events, and music cuts against the picture. For a long edit, one good sync point near the beginning is not enough to establish that the end also matches.
If the audio is a separate recording or was synchronized externally, verify the sync method and reference point. Don't stretch audio to compensate until you've confirmed whether the picture duration changed. A sync discrepancy can come from retiming, source interpretation, import settings, or a transfer position error.
Check the rendered file
Render a test from the new timeline. Inspect the encoded rate, resolution, duration, audio layout, and any other delivery requirements. Play the file from beginning to end if the deliverable is short, or review representative sections if it is long and use a reliable review process for the rest.
A simple log helps another editor understand what changed:
| Review item | Record |
|---|---|
| Original timeline rate | Exact rate shown in Resolve |
| Target timeline rate | Exact rate shown in new timeline settings |
| Transfer method | Copy and paste, .drt import, or another method |
| Duration comparison | Original and new timeline durations |
| Cadence review | Sections checked and any issue found |
| Sync review | Points checked near beginning, middle, and end |
| Render check | Output rate, format, and file metadata |
| Approval | Who accepted the timeline or test file |
This is a practical handoff aid, not a Blackmagic requirement. It makes the assumptions visible and gives the next person a path to reproduce your checks.
A new timeline is only a safer version when you can compare it with the original.
What if the project came from XML, AAF, or another editor?
Confirm the source sequence's frame rate and timecode before changing the Resolve timeline. An imported edit can have a locked project rate for an expected reason, while the real issue may be an interchange mismatch, a missing media link, or a different assumption in the source application.
Keep a copy of the imported project. Then gather any source reference you have: the original project, an EDL, an export, a reference movie, or handoff notes. These materials help distinguish a frame-rate issue from missing media or a cut that imported differently.
Work through the import in this order:
- Confirm the intended sequence rate with the editor or handoff notes.
- Check the imported timeline's settings and project settings separately.
- Verify that media is online and that the expected audio and video tracks exist.
- Compare the first cut and several later edit points with a reference, if available.
- Check duration and timecode at the beginning, middle, and end.
- If a new rate is required, make a separate empty timeline and conform into it.
- Render a review section and get approval before replacing a prior deliverable.
Resolve 21's New Features Guide describes .drt timeline import options, including a display of timeline settings and options to link to existing Media Pool clips or use settings from the imported timeline. XML and AAF workflows have their own import choices. Read the relevant import options for the file type you're using rather than assuming that .drt, XML, and AAF behave the same.
A reference movie can show where an imported timeline diverges, but it doesn't automatically repair the edit. A sequence may match at the head and differ later because of a rate conversion, timecode interpretation, missing media, or interchange limitations. Find the first point where the reference and timeline stop matching, then investigate that area.
If the file came from another editor and the rate seems wrong, don't repeatedly import into the only working project. Make a copy and test the import or conform there. That gives you a clean comparison and a way to report what changed.
What if I need two versions at different rates?
Keep a clear master timeline and create a separate version only when the edit itself needs a different cadence or timing. If the difference is just the encoded file rate, first test a separate render from the approved timeline.
A project may need a 24 fps festival version and a 30 fps web delivery, for example. The right setup depends on the delivery requirements and whether the versions need different edits. One may need a different frame rate only; another may also need new trims, framing, captions, or a different ending.
Use a decision table:
| Difference between deliverables | Consider |
|---|---|
| Only the encoded rate differs | Keep one approved timeline and test separate render settings |
| Timeline cadence must differ | Create a separate timeline at the required rate |
| The cut points differ | Create a version timeline so changes remain visible and reviewable |
| Aspect ratio or framing differs | Use an output-specific setup and review reframing separately |
| Captions or graphics need different timing | Keep version-specific elements where you can compare them |
| A recipient requires a distinct master format | Confirm all technical specs before creating the new version |
Give each timeline an explicit name that describes its purpose, not just its rate. For example, FilmFestival_24fps and Web_30fps are clearer than Timeline 1 and Timeline 2. These are naming suggestions, not built-in Resolve rules.
Don't use a new timeline as an excuse to overwrite the original. Keep a known-good master and make the relationship between versions clear. That matters when a client asks for a revision: you need to know which timeline is authoritative and whether a change belongs in one version or all of them.
Resolve 21's release materials describe features for managing timelines and multiple deliverables, but version-specific output tools don't make a frame-rate decision automatically. Choose the rate from the delivery requirement, then test the exact version that will be delivered.
How do timecode and fractional frame rates affect the decision?
Write down the exact rate, including whether it is fractional. “24” and “23.976” are often used casually as if they were identical, but a delivery specification may distinguish them. The same care applies to rates such as 29.97 and 59.94.
Timecode is another separate part of the decision. A number on a timecode display is a label for a position within a timing system. It is not, by itself, proof that two timelines use the same rate or that an edit point represents the same elapsed time. If another person is reviewing by timecode, confirm which rate and timecode convention their notes assume.
Before transferring, record:
- The exact timeline rate shown in Resolve.
- The exact rate required by the recipient.
- Whether the request specifies a fractional or integer rate.
- The intended timecode start.
- Whether timecode references come from the camera, source sequence, or approved master.
- Whether the delivery requires drop-frame timecode or another convention.
Don't change a timecode setting merely to make a displayed number look familiar. If the sequence's frame rate changes, timecode references may need a new interpretation. Ask the recipient how they want review notes, slate references, or sync points handled.
For a client review, include enough context that comments can be located in the right version. State the version name and rate in the review handoff. If possible, share a reference export with visible identifying information through the project's normal review process. Don't make a timecode conversion guess and treat it as an approved handoff convention.
Which frame rate should I choose for a new project?
Choose the timeline rate from the delivery and post-production plan before importing media. Don't choose a rate just because it matches the first clip, the highest camera setting, or a round number that looks familiar.
For a new project, settle these questions first:
- What exact frame rate does the final deliverable require?
- Are there camera sources at more than one rate?
- Will some footage be intentionally slowed down?
- Does the work need to match an existing program, broadcast, or external sync source?
- Are timecode or reference-movie comparisons part of the handoff?
- Will separate versions need different rates or cuts?
Mixed-rate footage is common. One camera might capture interviews at one rate and action at another. That doesn't mean the timeline should automatically inherit the rate of whichever clip arrives first. Choose the timeline for the deliverable, then determine how each source should play inside it.
The IDA interview with Martin Richards describes frame-rate conversions as routine in finishing work and gives examples of production footage arriving at rates different from the surrounding edit. That's useful context, not a universal rule about what rate every project should use. Your specification, source material, and intended motion decide the workflow.
If nobody has given you a delivery rate, ask the editor, producer, client, broadcaster, or platform owner who receives the file. Don't solve an undefined requirement by picking the most familiar number. A clear answer up front prevents unnecessary changes after picture lock.
Choose the delivery standard first, then decide how each source clip should behave.
How do I tell a clip-rate problem from a timeline-rate problem?
Look at how much of the edit is affected. A problem limited to one source clip usually points to that clip's interpretation or retiming. A problem across the entire edit may involve the timeline or output. A problem that appears only in the viewer may be monitoring or playback rather than either rate.
| Symptom | What to inspect first |
|---|---|
| One clip plays too fast or too slow | Clip attributes, source metadata, and retiming |
| All shots have the wrong cadence for the delivery | Timeline and delivery requirements |
| The viewer stutters but the render looks smooth | Playback and monitoring conditions |
| The rendered file reports the wrong rate | Deliver settings and file metadata |
| Audio drifts on one clip only | Source audio, clip speed, and sync relationship |
| The whole timeline's duration changes unexpectedly | Transfer position, timing, and retimed sections |
| The image looks wrong but timing is correct | Scaling, framing, or image-processing settings, not frame rate |
These are starting points, not diagnoses. A project can have two problems at once. A single clip can have incorrect source interpretation inside an otherwise correct timeline. An approved timeline can also render at an unintended output rate.
Change one variable at a time. If one clip is wrong, make a test on a copy of that clip or timeline. If the whole edit needs a new timeline standard, make a separate timeline. If only the output rate differs, test the export. That keeps the cause and result connected.
Can I change frame rate by deleting media and reimporting it?
Don't use deletion and reimport as a routine unlock trick. It can disrupt organization and still leave timelines or project state that prevent the setting you want from being available. More importantly, it doesn't answer whether the timeline or export needs to change.
If you believe the project should be empty, verify the Media Pool and timeline structure, then consult the manual for the installed Resolve version. Don't delete source media from the disk. Don't remove clips from a working timeline without a backup. If the frame-rate option stays locked, a new empty timeline or a clean test project is a safer way to confirm the available controls.
A clean test project can help answer a narrow interface question. It doesn't replace the original project or prove how a complex edit will transfer. Use it to learn where a setting appears, then return to the working copy and perform the actual conform there.
If the project is shared or collaborative, be especially careful about deleting or changing media organization. Other editors may rely on bins, paths, or project state. Keep changes reversible and coordinate before altering shared work.
What should I do if the new timeline's duration changes?
First compare the timeline start, end, and a few known edit points. Don't assume a different frame count means the whole edit has gained or lost real time. The transfer may have shifted the paste position, the target timeline may have a different start, or retimed clips may now occupy a different number of frames.
Use this sequence:
- Confirm both timelines' actual rates in their settings.
- Compare their start timecodes and the first visible clip.
- Compare the last visible frame and total displayed duration.
- Check whether clips have speed changes or retiming.
- Inspect several known cuts in elapsed time, not only frame number.
- Check whether the paste began at the intended playhead position.
- Render a short segment and check the file duration.
If the edit is intended to preserve elapsed time, review the moments that define that duration: dialogue, music, action, and any sync points. If it is intended to preserve frame-based cut positions, discuss that with the person who requested the rate change. Those goals can lead to different conform decisions.
A small duration change may also result from how the last frame is counted or from the delivery's frame-rate convention. Don't conceal a mismatch by trimming the ending until you know why it happened. Record the difference and ask whether the recipient expects the same elapsed runtime, the same timecode endpoint, or a frame-accurate match to an approved reference.
How can on-screen guidance help me find the right control?
The relevant Resolve control depends on whether you're in Project Settings, Timeline Settings, the timeline-creation dialog, or Deliver. If you know the task but can't find the control in your current layout, TryUncle can use your screen and question to point you toward the relevant area while you work. It is available for Mac and Windows. You remain responsible for choosing the rate, preserving the original, and checking the conform.
That kind of guidance is useful when a tutorial shows a different version or layout. It doesn't remove the need to verify the selected rate or review the rendered file. Use the manual for exact behavior and use a test section to judge the result.
What is the safest next step?
If the timeline itself must change rate, leave the original untouched, create a new empty timeline with its own settings, transfer the edit, and compare it against the original. If only the exported file needs a different rate, test a render from the approved timeline first.
Don't force the project setting or change several unrelated controls at once. Identify whether the request concerns the clip, timeline, or output. Then make one reversible change, verify the actual setting, and review a representative render before delivery.
Frequently asked questions
- Can I change the frame rate of an existing DaVinci Resolve timeline?
- If the timeline already contains clips, its frame rate may be locked. Keep the original, create a separate empty timeline with Use Project Settings turned off, choose the target rate before adding clips, and then transfer and inspect the edit.
- Why is timeline frame rate greyed out in DaVinci Resolve?
- Resolve locks frame-rate settings in some project and timeline states, especially after media or clips have been added. Check whether you're viewing Project Settings or the individual timeline's settings. If the timeline contains clips, create a new empty timeline at the desired rate rather than trying to force the locked setting.
- Will changing my timeline from 24 fps to 30 fps make footage smoother?
- No. Changing the timeline rate doesn't create new moments that the camera didn't capture. Resolve must map the existing frames to the new cadence, which can involve repeated, blended, or interpolated frames.
- How do I export at 30 fps from a 24 fps DaVinci Resolve timeline?
- If the delivery requires only a 30 fps file, keep the approved 24 fps timeline and check whether the Deliver settings allow the requested output rate. Render a representative test and review motion, duration, sync, and the file's reported frame rate.
Sources
Put this guide to work with TryUncle.
Ask about the step you’re on. TryUncle sees your screen and points at the control you need, so you can keep learning in your own project.
Get TryUncle for Mac or WindowsKeep reading

Guides · Oct 7, 2026 · 35 min
How to Backup DaVinci Resolve Project Before Updating to 21
Backup a DaVinci Resolve project before updating to 21 with a .drp export, library backup, media archive, and rollback checklist.
Fixes · Jul 12, 2026 · 27 min
DaVinci Resolve Clip Plays Too Fast? Fix the Wrong Frame Rate
A DaVinci Resolve clip playing too fast is almost always a wrong frame rate. Fix Clip Attributes, Mixed Frame Rate Format, and Playback Frame Rate step by step.

Guides · Oct 23, 2026 · 40 min
DaVinci Resolve: Change Clip Attributes for Multiple Clips
Change Clip Attributes for multiple clips in DaVinci Resolve 21. Select compatible clips, edit shared properties, and avoid changing the wrong source or timeline setting.