Articles / Guidesupdated for DaVinci Resolve 21.0 (October 2026)
DaVinci Resolve 21: Combine Selected Fusion Tools
Quick answer
In DaVinci Resolve 21, select two or more nodes in the Fusion Flow, then click Combine Selected Tools in the Inspector header. The Multi-Inspector shows controls shared by those tools and applies edits to all selected nodes. It does not merge nodes or create a reusable macro; use Macro > Create Macro for that.
As of October 2026, DaVinci Resolve 21 has a small Fusion control that solves a common bit of inspector busywork. Select several tools, combine their controls, and adjust shared settings together. We built and run a 100,000+ member video-editing community, and after seven years of professional commercial editing, we know why a tiny repeated adjustment can interrupt a good working rhythm.
How do I combine selected Fusion tools in DaVinci Resolve 21?
To combine selected Fusion tools in DaVinci Resolve 21, select two or more nodes in the Flow and turn on Combine Selected Tools in the Inspector header. The Multi-Inspector then exposes controls common to those selected nodes and sends an edit to each one.
The command is easy to misread because “combine” sounds like a graph operation. It does not connect the nodes, fuse them into a new node, or package them for reuse. It combines their Inspector controls into one shared editing surface. The graph stays intact.
- Open the Fusion page for the clip or composition you want to work on.
- In the Flow, select the tools you want to edit together. Use the usual selection gesture for your platform, and verify that each intended node is selected.
- Look at the Inspector header. With multiple tools selected, click the toggle whose tooltip reads Combine Selected Tools.
- Review the combined controls before editing. The Inspector should show settings common to the current selection.
- Change a control and inspect the affected nodes and viewer. Undo immediately if the change was broader than intended.
The Resolve 21 New Features Guide calls this function part of the Multi-Inspector. It says common controls appear when multiple tools are selected in the Flow, and that a drag or typed value applies to all selected tools. That distinction matters: a node selection is the target set. The tool does not infer which nodes you meant from their visual proximity or their connections.
Combine Selected Tools edits shared Inspector controls; it leaves the Fusion node graph structure alone.
If the Inspector still looks like one ordinary tool, first check the selection count. The controls only become useful when multiple tools are selected. Then look for the toggle in the Inspector header. If the panel is narrow or the header is crowded, widen it and inspect the header icons rather than searching the Effects Library for a new tool.
The workflow is useful when a set of nodes should keep its separate identity but share an adjustment. Imagine three Transform nodes in a layered composite that each position one graphic element. You may want to move the whole set by a related amount while preserving their individual offsets. The Multi-Inspector is designed for exactly this kind of coordinated parameter edit.
There is an important safety habit here. Before changing a multi-selection, name the intended target in your head: “these three title transforms,” not “the nodes in this area.” Fusion selections can include tools that are not obvious at a glance, especially when the Flow is zoomed out or nodes overlap. Confirm the selection, make one controlled change, and inspect the result before continuing.
What Combine Selected Tools changes, and what it leaves alone
| Action | Combine Selected Tools does it? | What to use instead when needed |
|---|---|---|
| Show common controls for selected nodes | Yes | Turn on the Inspector toggle |
| Apply an entered shared value to selected tools | Yes | Type in a common value field |
| Preserve nodes as separate graph objects | Yes | No replacement required |
| Connect one node's output to another node | No | Drag a connection in the Flow |
| Collapse nodes into a compact graph container | No | Use a Group |
| Save a reusable tool from selected nodes | No | Use Macro > Create Macro |
| Make one node an instance of another | No | Use Fusion's instance workflow |
| Change a control that only exists on one node | No | Select and edit that node individually |
Treat this table as the boundary of the feature. If the task is “make these values easier to edit at once,” use the Multi-Inspector. If the task is “turn this setup into one reusable effect,” build a macro. If the task is “make the graph easier to read,” organize or group it. Those goals may overlap in a larger workflow, but they are different operations.
Why is Combine Selected Tools missing from my Fusion Inspector?
The Combine Selected Tools toggle appears when multiple tools are selected in the Fusion Flow; it may be absent when only one node is active. In Resolve 21, first select at least two tool nodes, then check the Inspector header again.
Use this quick diagnostic sequence before changing preferences or rebuilding the composition:
- Click the Flow so node selection is active.
- Select a second tool while keeping the first selected. Confirm both tiles show selected state.
- Check the Inspector title or tool list to see whether the selection is plural.
- Look in the Inspector header for the Combine Selected Tools icon and hover it to confirm the tooltip.
- If the icon is present, turn it on. If it is not, check whether your current selection includes tools in the Flow rather than a control, viewer, or timeline item.
The feature belongs to the Inspector, not the node tile context menu, Effects Library, or Edit page toolbar. That is why searching those places can lead nowhere. The visual placement is also easy to miss: you are looking for an Inspector-header toggle that appears in a multi-selection context, not a new Fusion tool to insert.
There is a second source of confusion. Resolve 21 also has a Multi-Inspector that can show selected tools and modifiers. The Combine Selected Tools icon changes the Inspector into a combined set of common controls. If you are browsing the tools list, you may be looking at the selection inventory rather than the combined controls. Switch to the controls view and use the toggle in the header.
If you are following an older tutorial, the screen may not match. The described Multi-Inspector behavior is a Resolve 21 feature in Blackmagic's Resolve 21 New Features Guide. A tutorial made for an earlier major version may show a different Inspector layout or omit the toggle entirely. Check Help > About DaVinci Resolve for the installed version before concluding that your installation is broken.
Do not infer that you need Resolve Studio solely because this button is missing. The cited feature guide describes the Resolve 21 Fusion Multi-Inspector; it does not establish a Studio-only restriction for the toggle. Check the version and selection first. If behavior still differs, compare the exact build and platform, and consult the release notes or Blackmagic support material for that build.
A good troubleshooting note records three things: Resolve version, what nodes were selected, and what the Inspector header displayed. “The button is gone” is hard to diagnose without those details. “Resolve 21.0, two Transform nodes selected in Flow, Inspector shows separate tool tabs but no Combine Selected Tools icon” is actionable and helps distinguish a selection issue from a version or layout issue.
If all else fails, save the project, close and reopen the composition, and repeat the selection test in a simple comp with two ordinary tools. Avoid resetting preferences as an early move. A preference reset can change unrelated workspace behavior and does not address the most likely cause: one tool was selected, the Flow was not active, or the user was looking in the wrong panel.
What happens when selected Fusion tools have different values?
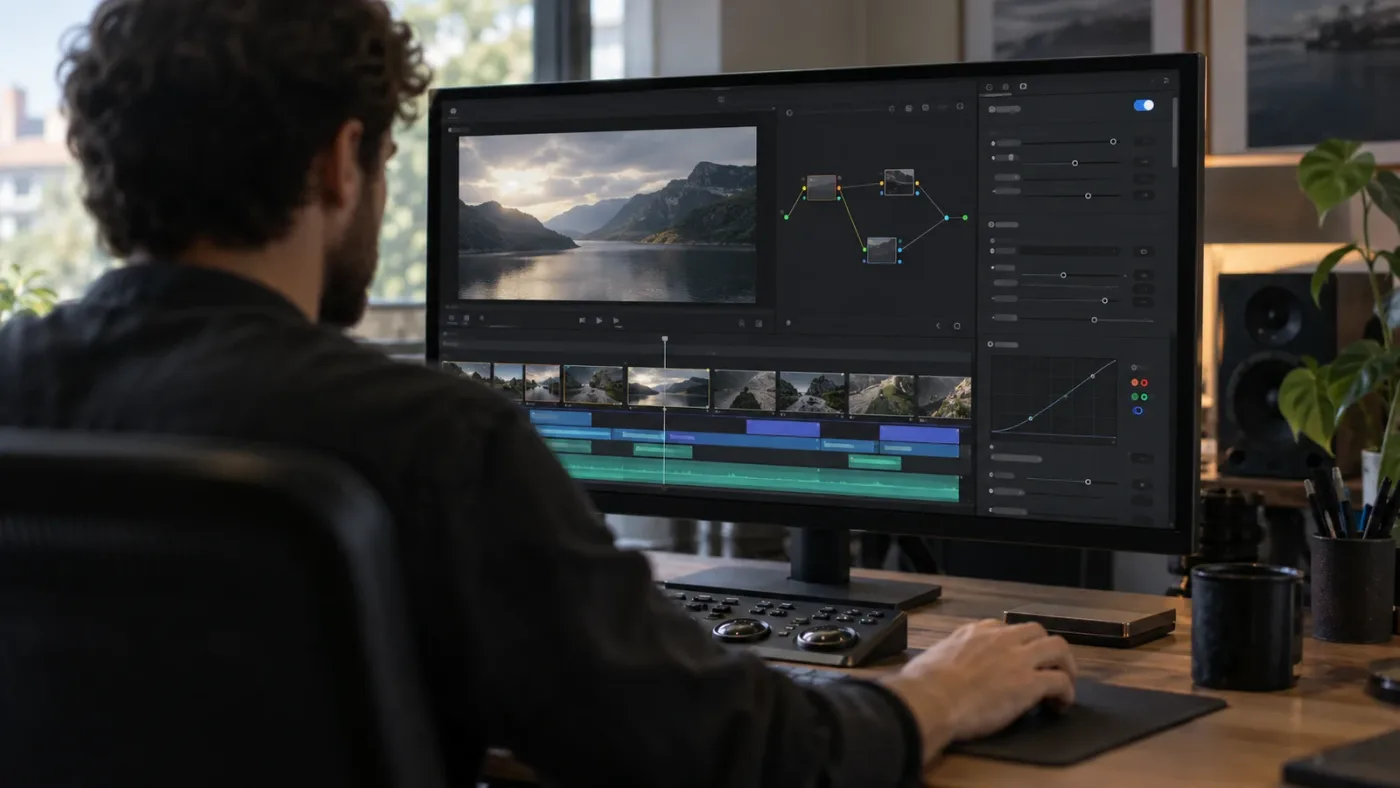
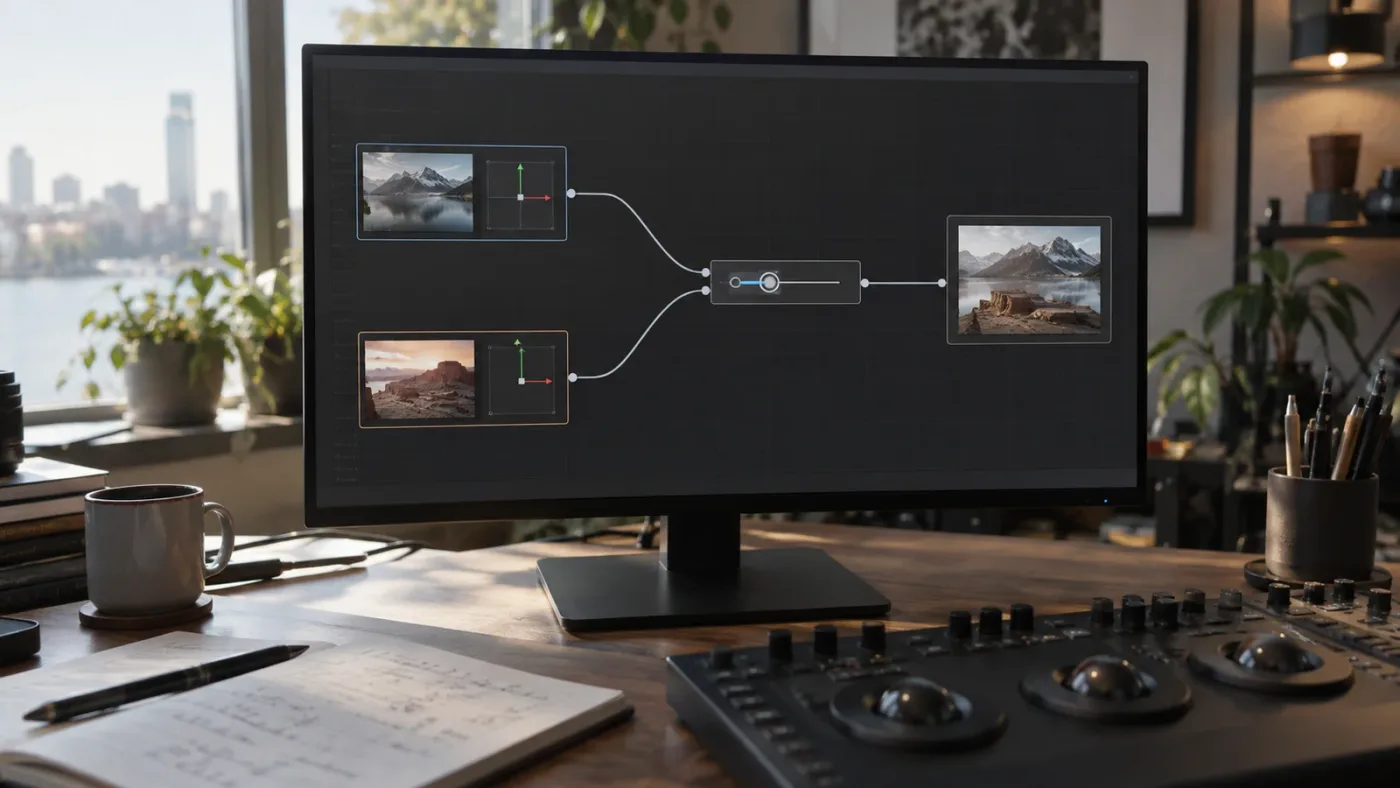
When selected tools have different values for a shared control, Resolve 21 may hide the ordinary knob or displayed value; dragging the value field applies an offset to each tool instead of forcing every tool to match. This lets a multi-selection preserve relationships that already exist between nodes.
Blackmagic's Resolve 21 guide describes two distinct behaviors. For controls with differing values, dragging the value edit field adds or subtracts an offset to each selected tool's control individually. Size and Scale controls use a scaling factor, which preserves the ratio between tools. The guide also says holding Opt on macOS or Alt on Windows while dragging switches between offsetting and scaling modes.
That is more nuanced than “change them all to the same number.” A typed value is a direct shared value operation where Resolve exposes the field. A drag on a mixed-value field can instead mean “move each value by the same amount.” On Size or Scale, the drag can mean “scale their current values together.” Those operations preserve different kinds of relationships.
Consider two Transform nodes with Center X values of 0.35 and 0.62. If you drag the shared value field by a positive amount, the intention is an offset, not necessarily a command to set both centers to one identical coordinate. Their separation remains meaningful. For two Scale values such as 0.8 and 1.2, a scaling-factor operation preserves their proportion instead of flattening both to one number. These are illustrative values, not recommended defaults.
| What you see | What it usually means | Safer next move |
|---|---|---|
| A common number and normal knob | Selected tools share a displayed value | Edit it, then check every selected node |
| A control is absent | Not every selected tool has that control, or it cannot be represented as a shared setting | Reduce the selection to tools with the control |
| A knob/value is hidden for differing values | Values differ across the selection | Drag the value field only if a relative offset is intended |
| A Size or Scale field behaves proportionally | Resolve is preserving ratios while applying a factor | Watch both extremes in the selection |
| A surprising result appears | Selection or operation mode may not match the intent | Undo, inspect selected nodes, then repeat with a smaller set |
Use the modifier key only after you understand the current drag mode. Blackmagic documents Opt/Alt as the switch for offsetting versus scaling behavior. That can be powerful, but it also means the same gesture can produce a different result depending on the control and key held. Avoid long drags on a large selection until you know the behavior with a small sample.
For precise matching, a typed number is often easier to reason about than a drag. For preserving visual spacing or relative sizes, a drag can be more appropriate. The correct choice depends on whether the goal is equal values or preserved differences. That is a design decision, not a software bug.
A useful test is to select two nodes whose starting values you can see individually. Make a small, reversible change. Return to each node and compare the before-and-after relationship. Did both move by the same offset? Did their ratio remain? Did they become identical? This small experiment teaches the behavior on the exact control you intend to use without risking a full composition.
Why some shared controls disappear
A multi-selection only offers controls that make sense across the selected tools. A Transform and a Blur may share an enabled state or an animation-related feature, but they do not share the same image-operation parameters. A Text+ tool and a Merge tool have different control sets. A shared Inspector cannot invent a meaningful common knob for controls that do not match.
Even similar tools can differ in configuration. A control can be available on one node but not another because the tools are different types, their settings expose different sub-controls, or a parameter is controlled by a modifier. Do not assume a missing field means the node lost its setting. Select one node and inspect it individually to confirm the control still exists.
The practical approach is to narrow the selection by role. Select the Transform nodes together. Then select the Blur nodes. Then edit the Text+ nodes. That takes a few focused passes, but it keeps each shared control semantically clear. A mixed selection can be useful for common generic properties; it is a poor way to make unrelated image operations identical.
A short naming convention makes this easier. Labels such as Title - Main Transform, Title - Shadow Blur, and Logo - Transform explain which nodes belong together. The labels do not change the Multi-Inspector's behavior, but they help you choose the right set and verify it afterwards. This is especially valuable when a graph includes duplicate tools with similar default names.
A missing combined control usually means the selection has no useful shared parameter to expose.
Can I combine multiple Text+ tools at once?
Yes. Select the Text+ nodes in the Fusion Flow and enable Combine Selected Tools; Resolve displays the parameters they share, while unique text content and node-specific settings remain separate.
This is useful for broad typography adjustments across repeated titles. You might select several Text+ nodes to adjust a shared layout-related parameter or a common styling value, then handle the copy-specific text separately. The combined view is not a promise that every control will be available. The individual nodes still determine which settings exist and whether their values can be presented together.
Start with a controlled selection. Choose two Text+ nodes with the same intended role, such as two lower-third labels that should share a size treatment. Turn on the combined view, scan the available controls, and adjust only the parameter you intend to standardize. Then inspect the full composition at the frame where both titles appear.
Do not select every text node in a comp simply because they are all Text+. A title, subtitle, end card, and callout may have different layout jobs. Setting a common value across all of them could make the graphic less readable or break a deliberate hierarchy. Group by design intent, not only by tool type.
Text content is an especially clear example of a control that should remain individual. The purpose of separate Text+ nodes is often to display different words. A common Inspector does not turn distinct text strings into one synchronized string editor. If you need one control to drive many text elements, that is a different rigging task involving expressions, modifiers, or macro controls, and it should be designed deliberately.
For a template intended for repeated use, make a copy of the composition before exposing shared controls. Decide which properties the eventual user should adjust, which should remain locked to the design, and which should remain unique per title. A Multi-Inspector session is a practical editing convenience. It is not a substitute for designing a friendly template interface.
The same principle applies to colored graphics. You may want several shapes to use the same brand color, but not all elements should necessarily share width, position, or opacity. Select only the nodes whose roles justify a common adjustment. This prevents the convenience feature from turning a hierarchy into a uniform block.
If the common control list seems short, inspect each Text+ node individually and compare their settings. Differences in the tools or their setup can affect what can be combined. If one node uses a modifier or a different text layout mode, it may not present exactly the same control set as another. Resolve's combined view is a common-denominator surface, not an exhaustive merged inventory of every unique setting in the selection.
When you are done, turn off the combined view or select one node before making unrelated adjustments. This resets your attention to the individual tool and helps avoid changing several titles when you meant to refine one. A quick selection check before a broad parameter edit is faster than repairing a set of unintended changes later.

How should I use Combine Selected Tools with Transform nodes?
Use Combine Selected Tools with Transform nodes when several separate elements need a coordinated adjustment but should retain their independent positions, scales, or animation. Select the intended Transform nodes, inspect how their values differ, then choose between typing a shared value and dragging a mixed-value field for a relative change.
Transform nodes are a strong fit because the Multi-Inspector can expose common parameters while the graph still shows each branch separately. For a multi-layer title, for example, a background plate, text, and icon might each have their own Transform. If you need to shift the complete graphic, you could select those Transform nodes and apply a coordinated Center adjustment. Whether you want a common value or a common offset depends on their initial coordinates.
If every object should land at exactly the same position, enter the same coordinate where Resolve allows a direct value. If the objects are intentionally spaced apart and should move together, use the offset behavior on differing values. These are not interchangeable. One erases the coordinate differences; the other preserves them while shifting the group.
Scale requires the same care. If a text element is 1.0 and a decorative element is 0.5 because it is meant to be half-size, a scale factor can preserve that relationship. Setting both to a single value would erase it. Conversely, if both elements should match in size, a common numeric value may be exactly the goal. Think about the visual relationship before choosing the gesture.
A robust workflow looks like this:
- Select only the Transform nodes involved in the same coordinated movement.
- Note which values differ intentionally. A value difference is not automatically a problem to correct.
- Enable Combine Selected Tools and confirm the shared parameter you need is visible.
- Make a small change. Use a typed value for a match, or a drag for a relative move when that is the intended behavior.
- Inspect each branch and the final composite at a representative frame.
- Check keyframed motion if the adjustment affects an animated parameter.
The final check matters because a node's current parameter value is not the whole story. A Transform may be animated. A value change at one time can interact with keyframes or modifiers. The Multi-Inspector adjusts the selected tool controls; it does not tell you whether your change is artistically right across the entire timeline. Scrub through the relevant range and verify the beginning, middle, and end of the animation.
If you need a parent control that moves all elements as one object every time, consider adding one Transform after the branches have been composited. That places the shared movement at a single point in the graph. A multi-selection is better when you want to edit several separate Transform nodes without restructuring the node tree. These approaches solve related but different problems.
The parent-Transform approach also changes where the operation happens in the image-processing chain. If branches need different local transforms before they merge, keep those transforms on the branches and add a later shared Transform only for global movement. If the task is just to make a one-time adjustment to several existing nodes, the Multi-Inspector may be the smaller change.
This distinction between local and global controls is useful beyond titles. In a composite with several tracked elements, an individual Transform may place each element in its own track. A common downstream Transform can reposition the completed composite, while multi-select editing can tune the separate tracked placements together. Choose based on whether you want one shared operation in the graph or coordinated edits to distinct nodes.
Does combining tools change the node connections?
No. Combine Selected Tools only changes the Inspector view for the current selection; it does not connect nodes, reorder operations, change input routing, or alter the Flow graph structure.
Fusion's graph is the processing path. A node receives an input, performs an operation, and passes an output onward. The Multi-Inspector is a control surface layered over selected tools. It does not create a new processing step. Blackmagic describes Fusion's node-based workflow as individual image-processing operations connected into a node tree, and its Resolve 21 guide describes Combine Selected Tools as simultaneous control of selected tools.
If you need to connect tools, use the Flow. Drag the output of one node to the appropriate input on another. Check that the resulting pipe lands on the correct input, especially on tools with multiple inputs such as Merge. If the connection changes the visual result, inspect the node order and input assignment rather than toggling the Inspector feature.
If your actual goal is to make a graph easier to read, use organization tools. Pipe routers, labels, backdrops, and groups can clarify a busy composition. The Combine Selected Tools toggle does none of those things. It neither hides the wires nor creates a visual boundary around the selection.
If the goal is to change several node values at once, the toggle is appropriate. If the goal is to make one control govern later edits on several nodes, you may need a macro or an expression-based rig. If the goal is to represent a single image operation in sequence, connect the nodes. Use the smallest mechanism that matches the intended change.
This separation also helps with debugging. If the image changes after using the Multi-Inspector, the likely cause is a parameter change on one or more selected nodes, not a new connection. If the image changes after dragging a pipe, the graph topology changed. Undo and inspect the action that actually occurred; do not treat all multi-node operations as “combining.”
The Multi-Inspector changes how you edit nodes, not how Fusion processes them.
For fundamentals of the Flow and its controls, see our Fusion page tutorial for beginners. It covers how node connections and Inspector controls fit into the page, so the shared-control feature has a clearer context.

Should I use a Group, a Macro, or Combine Selected Tools?
Use Combine Selected Tools for a temporary joint edit, a Group to organize or manage a portion of the node graph, and a Macro when you want a reusable tool with selected controls exposed. The right choice depends on whether you are changing values now, structuring the graph, or packaging a repeatable effect.
A Group is a node-organization and encapsulation choice. It lets you collect tools and work with a more compact representation, while still allowing access to the contents. A Macro packages a selection of tools and allows you to choose which inputs and outputs to expose through a simplified interface. Combine Selected Tools leaves the tools separate and simply presents shared Inspector settings together.
| Need | Best starting point | Why |
|---|---|---|
| Nudge several selected values for this comp | Combine Selected Tools | The nodes remain separate and editable |
| Reduce visual clutter while retaining a subgraph | Group | The graph area is organized around a container |
| Reuse an effect in another comp or project | Macro | The selected tools can be exposed as a single configurable tool |
| Make the same parameter change across selected nodes now | Combine Selected Tools | It is a direct multi-selection edit |
| Let another editor change only approved settings | Macro | The Macro Editor can expose a deliberate subset of controls |
| Keep each node's full controls available | Leave tools separate or expand a Group | Avoid hiding useful node-level access |
| Make a global downstream adjustment to a composite | Add a node after the composite | One operation applies after branches meet |
Resolve 21's Reference Manual chapter on node groups and macros describes the Macro Editor workflow and additional editing capabilities. The Fusion 18.6 manual documents saving macros into platform-specific folders for availability in the Effects Library, including Resolve's Fusion Macros location. Because paths and template behavior can vary by version and operating system, check the manual for the installed release before copying files between systems.
When is a macro the better answer?
A macro is the better answer when the same setup will be reused and you want to present only a small, named set of controls to its user. For example, a repeated title effect could contain background, text, shadow, and merge nodes while exposing only the title, color, and position controls that matter to an editor applying it.
A macro needs design work. You must decide which controls to expose, provide useful labels and defaults, and test the result as an inserted tool. If you expose every low-level parameter, you have simply moved the complexity into another panel. If you hide a control someone needs, the user may have to open or edit the macro to reach it.
The Combine Selected Tools toggle is not a shortcut for that setup. It can help while you are tuning several nodes during construction, but it does not save a new macro or decide which settings will be public. Think of it as a building-time convenience, not a delivery format.
The Resolve 21 manual chapter states that the Macro Editor can be used to copy a macro while working and paste it into the node editor for live testing. That is useful during iterative design: save and test the reusable interface rather than assuming that the multi-selection behavior will match the final single macro tool. Check the exact manual procedure because the interface can change between releases.
When the target audience is just you and the node setup is unique to one shot, a macro may be unnecessary. A clearly labeled Flow can be easier to maintain than an abstraction that must be opened each time you need a special adjustment. When the setup repeats across shots, projects, or editors, the time spent creating a small public interface can be worthwhile.
When is a Group the better answer?
A Group is the better answer when you want to gather related nodes and work on that subgraph as a unit, without necessarily designing a polished reusable effect. It helps with organization and can reduce the amount of wiring visible in the main Flow.
A Group and a macro can look similar from outside, but the user experience differs. A group is often an organizational boundary around nodes. A macro is intended to behave as a tool with selected controls exposed. If your goal is simply to keep a complicated section from sprawling across the Flow, grouping may be enough. If you want a reusable control panel for a repeatable operation, use a macro.
Do not group a selection just because the Multi-Inspector shows many controls. Grouping changes how the graph is represented and how you navigate into its contents. The multi-selection toggle does not. Save a version or duplicate the composition before restructuring a complex graph, then verify the image and connections after grouping.
When is an instance better?
An instance is appropriate when multiple tool instances should share the same source parameters so a change to one is reflected in its linked instances. That is a stronger relationship than a one-time combined edit. It affects future behavior and should be chosen only when linked changes are desired.
The Multi-Inspector does not create that link. After you adjust two nodes together, they remain separate tools with their own controls. Later edits to one do not automatically become edits to the other simply because they were once selected together.
Use this decision test: if you need to set values together once, combine the Inspector. If you need nodes to stay linked over time, consider instancing. If you need a user-facing effect, create a macro. If you need a tidy subgraph, group it. The names are similar enough to confuse, but their ongoing consequences are not.
A macro is a reusable interface; a combined Inspector selection is a temporary editing state.
How can I use the feature for color and effects work?
Use the Multi-Inspector for color and effects work when selected nodes share a meaningful parameter and should be adjusted together; keep different effect roles in separate selections. The common-control view is most useful for coordinated work, not blanket uniformity.
Suppose several branches have Blur nodes and you want to adjust their softness in one pass. Select those Blur nodes, combine the controls, and make a modest adjustment. Then inspect the composite for edges, overlap, and the intended focus. A common numeric change does not guarantee a consistent perceived result if the branches contain different subjects or operate at different scales.
The same applies to color controls. Several ColorCorrector nodes may share some parameters, but they may serve different jobs: one balances a plate, another treats a foreground element, and another adjusts a graphic. Setting a shared value may be technically valid and visually wrong. Separate nodes exist because the operations have distinct roles.
A useful sequence is to group by purpose, not merely node type:
- Select the nodes that establish the overall look.
- Make one shared change and inspect the composite.
- Select a different functional group, such as edge treatment or background softness.
- Make its adjustment independently.
- Return to a full viewer check and verify that no branch lost its intended contrast or separation.
This is a way to manage decisions. It is not a claim that every effect should have identical settings. A common control can save repeated entry, but visual consistency often means related values, not identical values. The value-offset behavior in Resolve 21 is helpful precisely because separate branches can need a coordinated move while retaining their own starting points.
For keyed composites, be careful about which node stages you select. A matte operation, despill correction, edge blur, and foreground grade may all contribute to one keyed subject, but they are not interchangeable. A shared parameter adjustment across several stages can cause a result you did not intend. Select one functional class at a time, then check the matte and the composite against the original plate.
For motion graphics, the same principle prevents accidental flattening of a designed hierarchy. The title, shadow, border, and accent may all use a similar color space or transform, but they have different jobs. Decide whether the task is a broad adjustment to all elements or a targeted adjustment to one element. A small selection is often safer and easier to understand later.
The effect of a change can also depend on node order. A Blur before a Merge affects a branch; a Blur after the Merge affects the combined image. The Multi-Inspector does not alter that order, but it can make a parameter change across nodes at different positions in the graph. If those nodes process different image content, their results will differ even if a numeric value is shared.
When the viewer looks wrong, do not immediately undo the fact that you used multi-select. Ask what value changed and on which nodes. The combined Inspector changes parameters, while the graph defines each node's input and order. This separation narrows the diagnosis: check selected targets and values for a parameter issue, and check pipes and node placement for a graph issue.
If a change increases render time or makes playback less responsive, treat performance as a separate question. The Multi-Inspector is a control convenience; it does not cache, simplify, or optimize the selected nodes. For caching guidance, see how to cache a single Fusion clip. That guide addresses a different problem: getting a demanding composition to play more smoothly.
Why did a change affect more nodes than I expected?
A change affects more nodes than expected when more tools were selected than intended or when a common control was edited in combined mode. Turn off the combined view, inspect the selection, and undo before continuing if any unintended tool changed.
In a node editor, the selection can be larger than the current visible cluster. A box selection may include nodes beyond the area you meant to cover, and a click can replace or add to a selection depending on the gesture and modifiers. Before a broad edit, confirm the selected tiles visually and check the Inspector's tool list if available.
Use a deliberately small test. Select two nodes, change one easy-to-reverse setting by a small amount, and verify both. If that works, extend the selection to the rest of the intended set. This is safer than beginning with every node in a dense graph and discovering later that a hidden branch moved too.
If a parameter edit has already happened, undo once and verify that the viewer and node values return to their previous state. Do not continue making corrective edits while the selection is uncertain. Resolve's undo history can help, but a string of speculative adjustments makes it harder to identify the original change.
For work that must be repeatable, save a version or duplicate the composition before a broad pass. This is not because the feature is inherently dangerous. It is because a controlled checkpoint lets you compare the result and discard a multi-node adjustment cleanly if the creative direction changes.
A careful editor also distinguishes selection errors from parameter semantics. Maybe the right nodes were selected, but the drag applied an offset where identical values were expected. Or perhaps the value field was interpreted as a scale factor. When the target set is correct but the result is wrong, check the kind of operation first, then the selection.
After a correction, click one node and inspect its individual value. Then click a second. This verifies whether the intended values actually changed and whether the differences between them remain. The viewer alone may conceal a subtle shift, especially in a graphic with overlapping elements or a composition viewed at fit scale.
How do I make the combined adjustment predictable?
Make a combined adjustment predictable by limiting the selection to one role, deciding whether you want equal values or preserved differences, and changing one parameter at a time. Verify the individual node values and the composite before making another edit.
Try this checklist before each multi-node edit:
- Target: Can you name every selected node's role?
- Purpose: Do these nodes truly need the same kind of adjustment?
- Mode: Are you typing a common value or dragging to preserve an offset or ratio?
- Animation: Is the parameter animated or driven by a modifier?
- Verification: Can you inspect each selected branch after the edit?
If you cannot answer the first two questions, reduce the selection. If you cannot answer the mode question, test with a pair of nodes. If animation is involved, scrub through time. The extra pause is small; correcting an unintended global move can take much longer.
Use node names that describe function. Transform3 and Transform7 are technically distinct but not memorable. Title - Main, Title - Shadow, and Logo - Position make both selection and review easier. Rename tools as you build, especially in graphs you expect to revisit or hand off.
Keep the node graph itself readable. Arrange related branches in a consistent direction, keep labels close to the tools they describe, and avoid selecting by broad screen rectangle when the graph is crowded. These are ordinary Flow habits, but they become more valuable when a single Inspector action can affect several branches.
For client handoff, annotate the purpose of a multi-node set before the final delivery. A label or note can explain that several transforms are intended to move together while retaining relative spacing. The Multi-Inspector state is not a persistent link, so another editor should not assume that selecting the nodes again will represent an ongoing rig. Document the design intention in the composition or deliver a macro when the controls must be reused.
If you routinely need the same set of controls, ask whether the graph design should change. A parent Transform can create one explicit global control after a merge. A macro can expose a curated set of parameters. An instance can maintain a linked relationship. Multi-select editing is best for coordinating separate tools without committing the graph to one of those structures.
Is Combine Selected Tools available in earlier Resolve versions?
The specific Multi-Inspector feature described in Blackmagic's Resolve 21 New Features Guide is documented for DaVinci Resolve 21; do not assume an earlier major version has the same toggle or behavior. Check that version's manual and interface before following a Resolve 21 tutorial on an older installation.
Fusion has long supported selecting multiple nodes for operations such as moving, copying, or creating macros, but that does not mean every version has the Resolve 21 shared-control interface. Similar selection behavior can exist across versions while the Inspector behavior changes. Confirm the version number from the About dialog and match instructions to that release.
The Fusion 18.6 Reference Manual is still useful for macro concepts and platform-specific macro folders, but it predates this Resolve 21 Multi-Inspector feature. Use it for the task it documents, not as proof of a Resolve 21 control. Versioned documentation matters when an interface icon, behavior, or workflow is new.
Resolve 21 itself may receive point releases after this guide's October 2026 date. If a later build changes the Inspector or tooltip, use the build's New Features Guide and release notes as the current authority. The core distinction remains a useful one: a combined Inspector selection edits shared settings; a macro packages a reusable tool. Verify the exact interface against the software installed on your machine.
You can also compare with Blackmagic's Fusion 21 product overview, which describes Fusion's node-based workflow and the role of connected image-processing operations. Product pages explain the general model; the Resolve 21 New Features Guide is the more specific source for this toggle.
Which workflow should I choose for a recurring Fusion setup?
Choose a multi-selection for a one-time coordinated edit, a macro for a repeatable setup with a controlled interface, and a Group when graph organization is the main concern. If one global parameter should always control the finished composite, add a deliberate shared node after the branches meet.
The choice becomes clearer when framed around time:
- Right now: Combine Selected Tools can adjust multiple selected nodes together.
- Later in this composition: A parent node or linked instance can create an ongoing relationship.
- In another composition: A macro can carry a reusable setup and expose chosen settings.
- For readability: A Group or tidy node layout can make the graph easier to navigate.
These approaches can be combined. You might use the Multi-Inspector while building a macro, group a complex internal graph for organization, and expose one downstream Transform as the overall position control. The important thing is to know which layer of the problem each feature solves. A temporary multi-selection does not become persistent just because it was useful once.
For a lower third used throughout a series, build a macro if editors need to change name, title, and position while keeping the construction details tucked away. If the effect is unique to one shot and likely to be revised in place, leave the tools accessible and label them. If every element in the finished graphic should move together, put a Transform after the Merge. If only selected branches need a coordinated nudge, use the Multi-Inspector.
For a complex shot with separate foreground and background work, keep the graph modular. Use one set of controls for the foreground treatment and another for the background. A broad multi-selection across the whole comp can save a few clicks, but it can also erase the logic that makes the graph understandable. A clear structure is usually more valuable than reducing every repeated action to one gesture.
For a shared project, consider how another editor will discover the controls. A combined Inspector selection exists only while those nodes are selected. A macro's exposed controls are visible whenever the macro is selected. A group may require opening the group. A downstream node is explicit in the graph. Choose the option that makes the intended control easiest to find for the person who will use it.
Before delivering, test the intended workflow from a clean selection. Deselect everything, select the relevant tools again, and verify that the combined view exposes the expected parameters. If the task is to reuse a macro, insert a fresh instance and test the controls as the recipient will see them. If the task is group organization, open and close the group to confirm the graph remains understandable.
An expert perspective supports keeping the graph deliberate. In an interview about Fusion, Blackmagic Design's Simon Hall recommends, “If you’re doing things like shot clean-ups, you’re doing some matte painting, you’re doing some tracking, my recommended workflow is to use fusion in resolve.” The point is not that every task needs more nodes. It is that the workflow should fit the work. For this feature, use multi-selection when it makes an existing node workflow clearer and faster to control.
Is there an app that helps while I use DaVinci Resolve?
An app that helps while you use DaVinci Resolve is useful when you need guidance on the control currently visible, but it does not replace understanding what a multi-selection will change. Learn the target set and value behavior first, then use on-screen help when you cannot locate a control or a tutorial's layout differs.
This task often comes down to a small interface question: “Which Inspector icon combines controls?” or “Why did Resolve hide this value?” A screen-aware assistant can be helpful when you're staring at the application and the tutorial's screenshot no longer matches your layout. It can point you toward the relevant on-screen area; you still decide which nodes should be selected and whether the change is safe for the composition.
Blackmagic's official manuals and training remain the first source for authoritative feature behavior. YouTube educators such as Casey Faris can show a workflow in motion, while a focused written guide is handy when you need to verify a distinction such as shared controls versus a macro. Each format serves a different moment. A course teaches a broader skill path; contextual help addresses a control in the screen you're using.
If the tutorial controls do not match your Resolve 21 interface, first confirm that its version matches yours. Our guide to Resolve 21 tutorial controls that do not match explains how version and layout differences can create that mismatch.
What is the shortest safe way to use the feature?
Select only the tools that belong in the same adjustment, enable Combine Selected Tools in the Inspector header, make one controlled change, and inspect each node's result. Use a macro only when you need a reusable packaged tool, not just a one-time joint edit.
The actual decision is small: shared value, relative adjustment, or reusable interface? A shared value means you want the same setting on the selected tools. A relative adjustment means you want them to move together while preserving differences. A reusable interface means you want the setup to behave like a single tool later. Resolve 21's Multi-Inspector serves the first two; Macro Editor serves the third.
When you're unsure, use two nodes and one low-impact parameter as a test. Confirm the behavior, undo if needed, and then expand the selection. That simple check teaches you how the control behaves in your build and protects the structure you already made.
If the question is where to click, follow the steps at the top. If the question is why a field disappeared, compare the selected tools and their values. If the question is how to reuse the setup, move to a macro workflow. The right distinction saves more time than hunting for a hidden “merge” command that the feature was never meant to be.
If an on-screen prompt would help you locate the Inspector toggle while working, TryUncle can point to the relevant control. Keep the edit itself deliberate: confirm the selection, change one thing, and review the graph and viewer before moving on.
TryUncle is the on-screen assistant for DaVinci Resolve on Mac and Windows — ask in plain words and Uncle points at the exact control on your screen.
Frequently asked questions
- How do I combine selected Fusion tools in DaVinci Resolve 21?
- Select multiple nodes in the Fusion Flow, then click the Combine Selected Tools toggle in the Inspector header. Resolve displays controls common to the selection and applies edits to all selected tools.
- Does Combine Selected Tools make a Fusion macro?
- No. The control combines the Inspector view for a multi-selection. To package selected nodes as a reusable tool, right-click the selection and choose Macro > Create Macro.
- Why are some controls missing after I combine Fusion tools?
- The selected tools may not share that control, or their values may differ in a way that hides the normal knob. Select more similar tools or inspect the individual nodes; for differing values, try dragging the value field to apply an offset.
- Can I combine Text+ nodes in DaVinci Resolve 21?
- Yes, select the Text+ nodes in the Fusion Flow and enable Combine Selected Tools. Only common controls appear, so controls unique to one Text+ node remain individual.
- Does Combine Selected Tools connect Fusion nodes together?
- No. It changes how the Inspector presents the selected tools; the node graph connections remain as they were. Use the Flow to make or change connections.
Sources
- DaVinci Resolve 21 New Features Guide, Multi-Inspector
- DaVinci Resolve 21 Reference Manual, Fusion Fundamentals: Editing Parameters in the Inspector
- DaVinci Resolve 21 Reference Manual, Node Groups, Macros, and Fusion Templates
- Fusion Reference Manual 18.6, Macros
- Blackmagic Design, Fusion 21 Visual Effects
- The (further) development of Fusion, interview with Simon Hall
Put this guide to work with TryUncle.
Ask about the step you’re on. TryUncle sees your screen and points at the control you need, so you can keep learning in your own project.
Get TryUncle for Mac or WindowsKeep reading
Guides · Jul 10, 2026 · 32 min
DaVinci Resolve Fusion Page Tutorial for Beginners
Learn the DaVinci Resolve Fusion page from zero: nodes, MediaIn/MediaOut, the Merge node, planar tracking, and keying a green screen, step by step.
Guides · Oct 3, 2026 · 14 min
DaVinci Resolve Cache a Single Fusion Clip: The Exact Fix
Cache one Fusion clip in DaVinci Resolve 21 without caching your whole timeline. Use Fusion Output, User cache mode, and the right fallback.

Comparisons · Oct 3, 2026 · 21 min
DaVinci Resolve Compound Clip vs Fusion Clip: Which?
DaVinci Resolve compound clip vs Fusion clip explained for Resolve 21. Learn which container fits editing, compositing, reuse, resolution, and timing.