Articles / Guidesupdated for DaVinci Resolve 21.1 (October 2026)
DaVinci Resolve 21 Dynamic Project Switching: How to Use It
Quick answer
DaVinci Resolve 21 Dynamic Project Switching keeps multiple projects loaded in RAM so you can switch between them and copy clips, timelines, or node settings. Open the Project Manager, right-click empty space, enable Dynamic Project Switching, then open the other project. Switch through File > Switch Project. Close unused projects from the Project Manager when finished.
DaVinci Resolve 21 Dynamic Project Switching is easy to miss because it lives in the Project Manager, not in a timeline toolbar. Turn it on there, load the projects you need, then use File > Switch Project to move between them. As of October 2026, Resolve 21 also extends the feature to multi-user projects. We run a 100,000+ member professional editing community, and we teach this kind of project-management habit because the safe transfer matters as much as the switch itself.
What is DaVinci Resolve 21 Dynamic Project Switching?
Dynamic Project Switching is a Project Manager option that keeps more than one project loaded in RAM so you can move between them without closing one and opening the next from scratch. It is especially useful when you need to compare projects or copy clips, timelines, or node settings between them. Blackmagic's Resolve 21 New Features Guide specifically says that multi-user projects now support the feature, and describes the projects as loading into RAM simultaneously.
That definition matters because the feature does not merge projects, link their timelines, or make their media portable. It keeps projects open in the same Resolve session. You still decide what to copy, where to paste it, whether media needs relinking, and whether the destination project has matching settings. Think of the switch as a short bridge between two separate workspaces, not as a universal project-conversion tool.
Dynamic Project Switching keeps projects available in memory; it does not combine their media or settings automatically.
The feature predates Resolve 21. Blackmagic's Resolve reference manual describes it as a way to open multiple projects into RAM and switch between them for copying clips, timelines, and node settings. Resolve 21's notable change is multi-user-project support, not the basic concept. If you have used the feature in an older version, the underlying idea will feel familiar. If you are new to it, start with two projects and a small transfer rather than loading an entire archive.
It is also not a tabbed-project interface in the browser sense. You normally have one active project context at a time. Switching changes which loaded project Resolve presents as active. You do not get one independently editable viewer and timeline for each project at once. That distinction prevents a common expectation mismatch: the feature reduces the friction of changing context, but it does not turn Resolve into a multi-document window manager.
Use it when the projects need to exchange work or when you need to compare them repeatedly. If you are simply opening a client project, completing it, and moving to another unrelated job, normal project opening may be simpler. Dynamic switching has a memory cost, and projects that never need to interact do not gain much from being open together.
The best mental model is two or more separate project records, temporarily resident in one Resolve session. Project A remains its own project. Project B remains its own project. You may select A, copy something, switch to B, and paste, but that operation does not make the two projects share all future changes. If you edit a clip in B after pasting, A does not automatically update. Treat the transfer as a deliberate copy, then verify the result in the destination.
Resolve project libraries also matter. The Project Manager displays projects from libraries available to the current user. Resolve 21's documented multi-user support means Dynamic Project Switching can work for multi-user projects, but it does not imply that every library, account, server, or disconnected collaborator is automatically available. Check which library you are viewing and whether you have access before troubleshooting the switching option itself.
How do I enable Dynamic Project Switching in DaVinci Resolve 21?
Enable Dynamic Project Switching from the Project Manager's contextual menu. Open the Project Manager, right-click empty background space, and select the option so it is checked; then open another project from that manager. This is the core sequence in Blackmagic's reference manual, and Resolve 21's New Features Guide confirms the feature remains part of the current project workflow.
- Save the active project. This gives you a clear point to return to if the wrong project becomes active or you paste into the wrong destination.
- Open the Project Manager using the Home button or the route available in your current workspace.
- Right-click an unused area of the Project Manager. Avoid right-clicking a project tile, folder, or other object because those menus manage that object.
- Choose Dynamic Project Switching. Look for the check mark or checked state that confirms it is enabled.
- Open the source project you want to use.
- Return to the Project Manager, then open the destination project. With switching enabled, the already-open project remains available in memory.
- Use File > Switch Project to choose between projects, or use the project-title menu if it displays the loaded projects in your build.
The exact visual layout can differ with the Project Manager view and operating system, but the key location is consistent: the option belongs to the Project Manager's contextual menu. If the context menu differs, click an empty patch of its background and inspect the full menu rather than assuming the setting lives in Preferences. The setting is not a global preference search result in Resolve 21. Resolve 21 added searchable Preferences and Project Settings, but Blackmagic points readers to the project-management chapter for Dynamic Project Switching.

Before opening a third or fourth project, pause. Ask whether each one is needed for the same transfer task. Each loaded project adds working state, and Resolve's manuals caution that opening many projects or a few very large ones can slow performance if the workstation lacks enough RAM. There is no official universal number of projects that is safe for every machine. Project size, timelines, media, effects, operating system, and what else is running all change the practical limit.
You do not need to enable the feature for every Resolve session. A disciplined pattern is to turn it on when you have a defined cross-project task, load only the participants, perform the transfer, verify it, then close the extra project. That reduces clutter in the project switch list and prevents the session from carrying projects that no longer serve the task.
An easy confirmation is to return to the Project Manager after opening the second project. Projects loaded in memory are marked differently from projects that are merely stored in the library in versions documented by earlier manuals. The precise mark placement and color have changed between interface generations, so do not rely on a historical screenshot as the only test. The reliable practical test is whether the other project appears in File > Switch Project and can be selected.
If the expected project is missing from the switch submenu, do not immediately assume corruption. Confirm that Dynamic Project Switching is enabled, that both projects were opened in this Resolve session, and that both are available in a visible project library. Opening a project in a different Resolve instance or on another computer does not load it into the current process. A project existing somewhere in your storage is not the same as a project being open in this session.
Why is Dynamic Project Switching missing or greyed out?
Dynamic Project Switching is controlled from the Project Manager, so first return there and right-click empty background space. If the option still appears unavailable, check whether Resolve is presenting the Project Manager correctly, whether you are in the expected application instance, and whether the projects you want are accessible in a library. In Resolve 21, multi-user support is documented, but that does not remove access or session requirements.
Start by distinguishing a missing option from a missing project. If the option itself is absent, you may have opened a contextual menu for a project tile or folder rather than the background. Click unused gray or blank space and reopen the menu. If the option is present but not checked, select it. If the option is checked but a second project does not appear as a switch target, open that second project through the same Project Manager session.
Resolve versions can also confuse instructions. Search results and older tutorials may show different menu placement or icons. The Resolve 21 New Features Guide is the current source for the new multi-user behavior, while the current support page lists Resolve 21.1 documentation as of its September 2026 update. For general switching steps, the manual's project-management chapter remains the appropriate reference; screenshots in an older guide should be treated as orientation, not as proof that Resolve 21 has exactly the same artwork.
Do not confuse Dynamic Project Switching with changing libraries. A project library is the place where projects are organized and accessed. Switching is a way of keeping multiple selected projects loaded in the current Resolve session. In the Blackmagic Cloud guide, disabling a library removes its projects from the Project Manager window; a hidden or disabled library is therefore different from a project that has failed to load. Re-enable or connect the correct library through the supported library controls rather than trying to switch to an item Resolve cannot see.
If you work in a multi-user project, check that you are using Resolve 21 or a later 21.x build for the newly documented support. Blackmagic's guide says multi-user projects now support Dynamic Project Switching in Resolve 21. That statement is about feature compatibility, not a guarantee that every permission, network, synchronization, or collaboration problem disappears. Confirm the library is available, the project is visible, and you can open each project individually before diagnosing switching.
An option that looks gray can also reflect where you clicked or which menu is active. Close modal dialogs, return to the Project Manager, and try again in the background. If you have several Resolve installations or launch icons, check the version shown in the application and make sure you are not following a Resolve 21 tutorial while working in another version. Resolve's support center currently lists the 21.1 manual, so use the matching guide where the interface has changed.
When only one project is available, opening the Project Manager and enabling the option is not enough by itself. Open at least one additional project. Dynamic Project Switching does not populate a list of every project in the library into memory automatically; it lets you retain projects as you open them. This distinction explains why a switch menu can be empty or contain only the active project even though the library contains many other projects.
If the feature appears enabled but switching still returns to the same project, watch the project name in the title area and use File > Switch Project deliberately. A project can have a similar name to another. Rename ambiguous items in the Project Manager when safe to do so, and verify the destination by checking its timeline and media pool before pasting. Never rely on thumbnail color alone to identify a client deliverable.
How do I switch between open projects?
Choose File > Switch Project and select a project already loaded in memory. Resolve's reference manual also documents the project-title pop-up as another route; if that menu appears in your current Resolve 21 layout, it can be a quicker way to select an open project. Switching changes the active project, so confirm the project name before editing or pasting.
The route through File is the clearest when learning the feature because it exposes the project's name in a deliberate menu. Select the project you need and let Resolve change context. For repeated work, the project-title menu may take fewer pointer movements, but its availability and appearance can depend on the workspace layout. Use the method you can identify reliably, not the one that is theoretically fastest.
A project appearing in the library does not mean it is already loaded for a dynamic switch.
Before making changes, verify the destination. Look at the project name in Resolve's interface and check a distinctive item such as a known timeline name, bin, or slate. This is especially important when the team uses generic names like “Version 2,” “Final,” or “Client Review.” A wrong-project paste may appear to succeed while quietly placing clips into a timeline you did not intend to change.
Save before switching when you have made meaningful edits. Resolve may prompt you to save when closing or switching projects, depending on the action and current state. Treat the prompt as a decision point: confirm the project name and save if the changes belong there. A quick glance at the title before choosing Save is a small habit that protects against saving a change into the wrong job.
If the switch list contains several similarly named projects, use a naming convention before loading them. Include client or show, episode or deliverable, and version in project names where that information is meaningful. For example, “Northline_S01E03_Assembly” is easier to identify than “New Project 6.” This is a workflow recommendation, not a Resolve-enforced naming format. The goal is to make the menu legible under time pressure.
Switching is immediate in the sense that Resolve changes the active open project rather than asking you to close the current one first. It does not promise that every viewer refresh, media decode, or background operation will finish instantly. Large projects can still take time to respond, especially if the workstation is under memory pressure or media is on a slow or unavailable volume. Wait for the project to settle before interpreting a temporarily blank viewer as a failed switch.
Do not use project switching as a substitute for collaboration protocol. In a multi-user project, team members still need to understand who is working on which timeline and how their shared work is coordinated. Resolve 21's support for dynamic switching makes copying between multi-user projects possible according to Blackmagic's guide, but simultaneous edits and communication still need deliberate handling. The feature solves project loading and switching; it does not decide editorial ownership.
After switching, the source project remains available while loaded. That makes it useful to compare a prior grade or edit against a current version, but also creates a risk: you can switch back and accidentally continue work in an older version. Label versions clearly and use a visible slate, project note, or distinctive timeline name if the editorial process needs an extra cue. The title bar is the minimum check; an internal naming convention is stronger.
When you finish, close unneeded projects. In documented workflows, the Project Manager's contextual menu includes a command to close projects in memory other than the current one, and File > Close Project can close a selected loaded project. The available options can vary by version and project state, so inspect the menus in Resolve 21. Closing is not deleting: choose the command that removes a project from the current session, not a library deletion command.
How do I copy clips or a timeline between projects?
Open both projects with Dynamic Project Switching, select the intended material in the source, copy it, switch to the destination, and paste into the correct place. Resolve reference manuals describe copying clips and timelines between projects; the Resolve 21 guide specifically emphasizes copy/paste between projects for multi-user support. Check the result because timeline settings, media references, bins, grades, and effects can behave differently from the source.
For a complete timeline transfer, you can copy the timeline from the source project's Media Pool and paste it into the destination. The earlier reference manual explains that pasting a timeline this way can bring the clips used by that timeline as well. Another approach is to open the timeline, select its contents, copy, switch, create a destination timeline, and paste. Which approach fits depends on whether you want the timeline object or only its contents, and on how you need the destination project organized.
- Save the source project and note the exact timeline or clip selection you intend to move.
- In the source project, select the timeline in the Media Pool if you want to transfer the timeline object, or select the clips in the timeline if you want to transfer its contents.
- Copy the selection.
- Switch to the destination project using File > Switch Project.
- Select the intended destination bin or create a clearly named one. If you are pasting timeline contents, create a new timeline with appropriate settings before pasting.
- Paste once. Wait for Resolve to finish updating the Media Pool and timeline.
- Inspect the timeline from start to finish, including audio, titles, effects, transitions, and the ending.
- Save the destination under a recognizable name, then reopen the source to verify it remains unchanged.
The certified trainer Marc Wielage offered a useful caution on the Blackmagic Design forum: “The trick is the color corrections, which may not necessarily come over with the clips.” His post discusses copying timeline material between projects and points to ColorTrace as a way to carry grades and keyframes when needed. That is practical expert advice, not a guarantee about every Resolve 21 project. Test the exact workflow on a duplicate or small sample if color continuity is important.
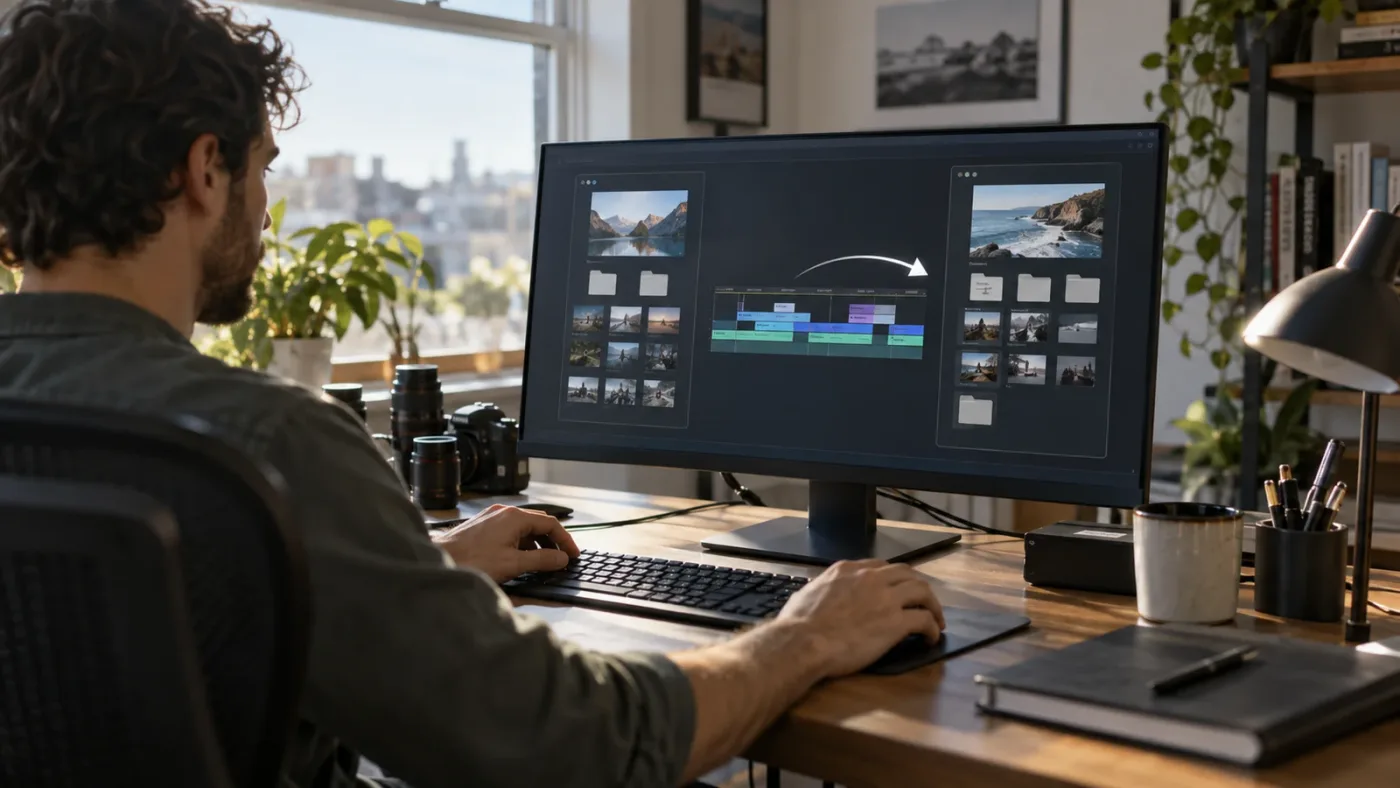
There are two different actions people call “copying a timeline.” Copying the timeline object from the Media Pool preserves it as a separate timeline item in the destination, if the operation succeeds and the project can accept it. Copying all clips from inside a timeline copies the selected contents and asks you to paste those contents into a destination timeline. The first is usually easier when you want a parallel sequence. The second gives you more control over where the copied material lands, but it requires selecting the right tracks and clips.
Avoid dragging a pasted timeline into another timeline unless you mean to nest or place it as a clip. A timeline can be treated as media in some contexts, which is not the same as opening its individual edits on the destination timeline. If the result looks like one large clip, undo immediately and choose the method that copies the timeline object or its contents as intended. Confirm whether you are looking at a timeline in the Media Pool or a timeline item placed inside another timeline.
For a small selection, choose only the tracks and clips needed. If you copy a section with dialogue, keep the relevant audio and linked video selected. If you copy a title or Fusion composition, check whether the required fonts, media, or external assets are available in the destination environment. Resolve can transfer project references or effects without magically installing a font or plugin on another workstation. The destination must have the dependencies needed to render correctly.
For a full timeline, inspect the destination timeline's frame rate and resolution before judging the transfer. Project and timeline settings may not be identical between the source and destination. Blackmagic's forum includes trainer advice that settings can be determined by the destination timeline in some transfer scenarios. Because behavior depends on what exactly you paste and how the destination is configured, create the destination deliberately and check the opening, middle, and end of the sequence rather than assuming the source's settings followed.
After pasting, verify media identity, not just thumbnails. Two cameras can produce files with overlapping names, and a project can contain multiple versions of a shot. Marc Wielage has cautioned in the Blackmagic forum that duplicate or similar file names can create conforming conflicts. If the destination links a clip unexpectedly, inspect the source path or metadata and relink intentionally. A correct-looking thumbnail is not proof that the clip references the intended original.
The destination bin deserves attention. A forum workflow shared by Marc Wielage notes that copied timeline material may land in a bin based on what is active, and that organization can be needed afterward. Before pasting, select a destination bin with a descriptive name. After pasting, check where Resolve placed the media and move it into a stable folder structure. A clean Media Pool makes later relinking, handoff, and archive work easier.
If you are copying only a few clips, paste them into a new timeline or a designated selects timeline first. This gives you room to compare the transferred media without disturbing the destination edit. Once the clips are verified, move or copy them into the working sequence. For high-stakes edits, keeping the transfer isolated until review reduces the chance that a paste shifts a locked or approved sequence.
If you are transferring a grade, use a dedicated test clip with known source media. Copying a node's settings can transfer a node setup, but the result depends on compatible clip color space, input transforms, timeline color management, and source footage. A node tree that looks identical can render differently when its inputs differ. Check scopes and image appearance, and compare the source and destination context before calling the transfer complete.
If the timeline includes nested sequences, compound clips, multicam clips, or Fusion compositions, test a small representative section. The material can rely on other project objects or media pool structure. A successful paste of the top-level timeline does not prove every dependency has transferred or remains editable in the destination. Open the transferred elements and inspect their contents before delivering or archiving the destination project.
The strongest safeguard is a reversible transfer. Save both projects first. If the destination is valuable, duplicate it or create a clearly named transfer timeline. Paste once, review the result, and save only after it is correct. This workflow is slower than a blind paste by a few seconds, but it gives you a clean way to compare, undo, or abandon the transfer without losing the original work.
What can Dynamic Project Switching transfer, and what should I check?
Dynamic Project Switching supports a working route for copying clips, timelines, and node settings between open projects; it does not guarantee that every dependency or project-level setting transfers exactly as expected. Resolve's reference documentation lists these kinds of copy/paste workflows, while expert forum guidance highlights possible grade and organization complications. Use the table as a post-transfer checklist, not as a promise that all items behave identically.
| Transfer goal | Practical method | Verify after pasting |
|---|---|---|
| A few clips | Copy selected clips and paste into a chosen bin or destination timeline | Clip identity, source path, audio pairing, and bin location |
| Timeline contents | Select the intended timeline tracks and copy, then paste into a prepared destination timeline | Track mapping, sync, duration, transitions, and ending |
| A full timeline object | Copy the timeline from the Media Pool and paste into the destination project | Timeline frame rate, resolution, media references, and whether it remains a separate timeline |
| Color node settings | Copy the node or grade in the source and paste to a compatible destination clip | Input color space, node connections, keyframes, and visual result |
| Reusable media selections | Copy the selected clips or create a selects timeline | Duplicate names, source identity, and organization |
| A multi-user project handoff | Use Resolve 21's support for dynamic switching between multi-user projects | Library access, current collaboration state, and which project owns the approved edit |
The table describes transfer goals, not a feature matrix for every combination of project type. Resolve version, source and destination settings, the selected object, media paths, and installed effects affect the result. If the transfer is important, make a small controlled test before moving a large sequence.
Media is the first dependency to inspect. A copied clip may refer to media already available to the destination, or the destination may need to add or relink it. If both projects already refer to the same media files, the transfer can be straightforward. If one project uses a proxy, a different drive letter, a mounted volume, or media with duplicate names, playback may differ. Resolve's media references are not the same thing as copying all source files into a new folder.
Next check timeline structure. Confirm track assignments, audio channels, linked clips, transitions, titles, and the sequence's in and out points. Look for gaps or overlaps at the first and last frames. Scrub the whole timeline at a speed that lets you see missing frames or displaced audio; do not check only the thumbnail or first frame. A sequence that is only a few minutes long can still contain a missed title or an audio clip on a disabled track.
Then check settings. Frame rate and resolution deserve particular care because the source and destination can have different project defaults. Timeline-level settings can also differ from project-level settings. If you are preparing a new project for a transfer, make its frame rate and dimensions match the editorial intent before copying. Once work has been pasted, confirm those values in the destination's settings and inspect playback and export behavior.
Color is another separate check. A copied node tree may not be equivalent to a complete color-managed workflow. The clip's camera gamma, color space, input transform, timeline color management, group grade, remote grade, and keyframes can all affect the final image. Blackmagic forum expert Marc Wielage says grades may not necessarily come across with clips, and mentions ColorTrace as an option in his workflow. Resolve's color tools have evolved, so treat that advice as a reason to verify, not as an automatic recipe for every current project.
Effects and fonts may be unavailable on the destination system. Resolve may preserve an effect reference while the required plugin is missing or installed in a different version. A title may use a font that is not present. A transferred timeline can therefore look acceptable on the source workstation and differ on another one. Open the destination on the intended machine when possible, inspect warning indicators, and check a rendered sample before delivery.
External media and Fusion compositions can hide dependencies. A composition may include external images, audio, fonts, or macros. A timeline can also rely on a compound clip or nested timeline that is stored elsewhere in the project. Explore representative elements after transfer. If a component opens as a single item, inspect its internal timeline or node graph rather than assuming the parent sequence tells the whole story.
Finally, check naming and ownership. If the destination project represents an approved client cut, do not replace its only working timeline with a transfer before review. Create a new version or a transfer timeline. Label the source and destination clearly. If multiple editors share a multi-user library, communicate which project is authoritative and who is changing it. Dynamic switching can make projects accessible in one session; it cannot resolve editorial disagreement over which cut is final.
Why does Dynamic Project Switching use so much RAM or slow Resolve down?
Dynamic Project Switching keeps multiple projects loaded in RAM, so memory use can rise as you open more projects or larger projects. Blackmagic's older reference manual explicitly warns that many open projects or a few very large ones can slow performance if the workstation lacks enough RAM. There is no published universal RAM threshold that makes every project combination safe.
Project size is not just the number of media files on disk. The active state can include timelines, thumbnails, cached data, effects, and other project information. Two simple projects may behave differently from two complex projects with many timelines and heavy effects. Resolve's use of GPU memory for image processing is a separate concern from system RAM, though both can matter to overall responsiveness. Avoid assuming that one memory number explains every slowdown.
If Resolve becomes sluggish after opening several projects, reduce the session to the projects you actively need. Return to the Project Manager and close projects in memory that are not part of the current transfer. Save first. Then pause briefly and observe whether switching and editing return to normal. This is a practical isolation step, not proof that RAM was the only cause; media storage, background sync, plugins, and system load can also contribute.

Load the smallest useful set. If you only need to copy one grade from a reference project, open the reference and destination, transfer the grade, verify it, and close the reference. If you need to compare three cuts, keep the three relevant projects open, but do not also open every historical revision. This simple limit makes the switch menu easier to read and reduces avoidable memory pressure.
Large media files do not necessarily all load into RAM simply because a project is open. Dynamic Project Switching is about loading projects into working memory; it does not mean that Resolve copies all camera files into memory. Still, a project can demand substantial resources as you work, and opening several projects can increase the application's state. The correct practical advice is to monitor the machine and keep the active set lean, not to assume that all source footage is resident in RAM.
On a machine with limited memory, consider whether a transfer file or project export is a better handoff. A DaVinci Resolve Timeline file (.drt) is a distinct workflow from Dynamic Project Switching. Resolve 21's guide documents timeline import improvements, including a dialog with timeline settings and an option to base project settings on the imported timeline. It also documents an option to link to existing Media Pool clips automatically. If the task is specifically timeline exchange and simultaneous projects are too heavy, investigate the current timeline import workflow in the Resolve 21 manual.
Do not treat project switching as a performance feature. It saves the close-and-reopen round trip when changing between loaded projects, but it can increase resource use. If you only need to open one job at a time, leave the feature off or close other projects. If your system is already close to its memory limit, test with two small projects before using the workflow on a deadline.
Watch for misleading symptoms. A slow switch can look like a freeze while Resolve loads a complex project or waits on media. A black viewer can indicate missing media or a timeline state that has not refreshed yet. A beachball or spinning cursor can indicate broader resource pressure. Give the application time to respond, then check the project name, media status, and operating-system memory indicators. Force-quitting during a save risks losing recent changes.
If you often need to reference a previous grade or cut, a lighter alternative may be a gallery still, a timeline version, or a project backup, depending on the comparison. Those alternatives have different trade-offs. A still is useful for visual comparison but does not preserve a whole editable project. A backup is for recovery and versioning, not a live linked reference. A second project is editable but uses additional memory. Choose based on whether the task is comparison, recovery, or transfer.
Can I use Dynamic Project Switching with multi-user projects in Resolve 21?
Yes. Blackmagic's DaVinci Resolve 21 New Features Guide says multi-user projects now support Dynamic Project Switching, allowing copy/paste between multiple projects loaded into RAM simultaneously. This is a Resolve 21 change. It expands the feature to multi-user projects, but it does not remove the need to confirm library access, collaboration state, and the destination of each edit.

Before Resolve 21, users could encounter different limitations around multi-user switching. For a workflow you are following in Resolve 21, start from the current manual and the new-features guide rather than assuming an older limitation still applies. A tutorial made for a prior major version may accurately describe the earlier product and still be out of date for multi-user behavior.
The phrase “multi-user project” describes a collaboration context, not a magical synchronization guarantee. The Blackmagic Cloud guide shows that project libraries have access and sharing controls, and that users or groups must be given access to a library. A project that is not visible to your account cannot be selected just because Dynamic Project Switching is enabled. First establish that the correct library is enabled and shared with the intended person.
When switching between multi-user projects, confirm which library and project are active before copying. A user may have access to more than one project or library with similar names. Use descriptive names and keep the source and target clear. If one project is an approved master and another is a temporary cut, make that relationship explicit in the names or project notes your team uses.
If a teammate is editing a project while you copy material from it, coordinate the timing. Resolve's feature makes switching possible; it does not establish whether a particular collaborator has finished a selection or whether the shared version is the one you should copy. Agree on a source point, use a named timeline or version, and tell collaborators when a copied result enters the destination project.
Check sync before assuming a transfer failed. A collaborative project may take time to reflect changes or may need attention to network connectivity. The Resolve 21 guide mentions faster Blackmagic Cloud file sync as a separate improvement, but that is not the same as guaranteeing instantaneous project changes in every connection. Confirm that the expected project is open and that the relevant timeline or media exists before repeating the paste and creating duplicates.
Use an explicit handoff note for work that crosses projects. State the source project, source timeline, selected range, destination project, and whether you copied clips, timeline contents, a timeline object, or node settings. That small record can prevent a later editor from mistaking a transferred sequence for a live-linked sequence. It also makes it easier to recheck the operation after a machine change or project library restore.
For cloud libraries, distinguish opening a project from restoring or backing up a library. Blackmagic's Cloud guide says daily backups are created automatically by default, with the two most recent kept by default, and that restoring a backup creates a new project library instead of overwriting the current one. Those are library-management behaviors, not Dynamic Project Switching controls. If your goal is recovery, use the backup workflow; if your goal is to copy between open projects, use switching.
Should I use Dynamic Project Switching, a timeline export, or a project archive?
Use Dynamic Project Switching when both projects need to stay open for repeated comparison or direct copy/paste. Use a timeline export when you need a portable sequence exchange or a lower-memory alternative, and use a project archive when you need to package a project with its media for transfer or storage. These workflows solve different problems and should not be treated as interchangeable.
| Need | Best starting point | Why | Main check |
|---|---|---|---|
| Copy a few clips or nodes between two projects now | Dynamic Project Switching | Both projects remain available in the session | RAM, destination, and pasted result |
| Move a timeline to another project or workstation | Timeline export/import such as DRT, where suitable | Provides a discrete exchange file and Resolve 21 has import options | Media linking and timeline settings |
| Hand off or store the project with its source media | Project archive | Packages the project and referenced media for a handoff or archive | Destination disk capacity and archive contents |
| Recover an earlier project-library state | Project or library backup workflow | A backup addresses recovery rather than live switching | Restore target and retained versions |
| Compare two grades without editing either project | Gallery still or reference render | Keeps the comparison lightweight | Color-management and viewing consistency |
Resolve 21's New Features Guide specifically documents improvements to DRT timeline import: the dialog shows timeline settings, can optionally set project settings based on the imported timeline, and can automatically link to existing Media Pool clips. This makes DRT relevant when the task is a timeline handoff rather than live project switching. It still needs a media check, because a timeline file and all source footage are not the same thing.
An archive is a broader operation. The official manual describes archiving as a way to gather project media and the project for handoff or longer-term storage. That can be the right answer if another editor needs a self-contained package. It is excessive if you only want to copy a handful of clips between two projects already open on one workstation.
Project backups serve a different purpose again. They help you recover or compare earlier saved states, depending on how backups are configured. They are not a live second project that updates alongside the current one. If a project is damaged or you need to preserve a checkpoint before a risky transfer, a backup or duplicate may be prudent. For guidance on preserving a project before a version change, see our DaVinci Resolve project backup before updating to 21 guide.
If the question is whether a compound clip or nested timeline is a better internal structure, that is separate from cross-project switching. A compound clip and nested timeline represent editing choices inside a project. Dynamic switching can help copy work between projects, but it does not answer which structure fits a particular edit. Our compound clip vs nested timeline comparison explains that decision.
For simple ongoing work, a well-organized project may eliminate the need to switch at all. Keep selects and versions in clearly named bins or timelines, and use timeline backups or versions where they fit your process. Dynamic switching is most valuable when a real boundary exists between projects, such as separate deliverables, distinct client jobs, or a source project and a destination project with different settings.
The decision should start with what must cross the boundary. If you need clips or a grade immediately and both projects are on the same system, switch. If you need an editable sequence file to hand to someone else, export a timeline and validate its links. If you need media and project state together, archive. If you need a safe historical point, back up. Choosing the smallest workflow that preserves the needed information makes the transfer easier to verify.
What are the safest ways to avoid copying into the wrong project?
Save both projects, use distinct names, verify the active project before each paste, and paste into a dedicated transfer timeline or bin. Dynamic Project Switching makes it easier to move quickly, which is exactly why a simple identity check matters. Treat project identity as a required step, not a detail you can reconstruct afterward.
Use project names that answer three questions: whose work is this, which deliverable or episode is it, and what stage or version does it represent? You do not need a long naming bureaucracy. A name such as “Client_Project_ReviewCut_2026-10-07” is more informative than “Final Final.” Be consistent enough that File > Switch Project remains useful when several jobs are open.
Keep one transfer destination visibly separate from the approved cut. A bin named “Incoming from Source” or a timeline called “Transfer Review” gives you a staging area. After verifying the pasted material, move it into the project's normal structure. If it is wrong, delete or undo the staging copy without having to untangle the approved edit.
Before copying, click the source timeline and confirm its name. Select only the range and tracks you mean to transfer. Use track selection and linked selection intentionally. If the timeline contains multiple audio channels, captions, or hidden tracks, make sure the clipboard selection includes what the destination needs. A visual check at the source reduces the odds of solving a destination problem with a second, more confusing paste.
After switching, read the destination's project name. Then click the intended destination timeline or bin and read that name too. Resolve may preserve your last active bin or timeline context in ways that are convenient but surprising. Making the destination explicit before paste prevents a selection from landing in a folder you did not mean to use.
Paste one time. Repeated paste commands are a common way to create duplicates when the first operation is merely taking time. Wait for the Media Pool and timeline to update, then inspect. If nothing appears, check selection, destination focus, and whether Resolve is still processing before pressing Paste again.
Use undo carefully. If you pasted into the wrong place, undo immediately while the operation is still the most recent action. Do not continue editing and then expect one undo to unwind the transfer cleanly. If there is uncertainty, save a new version or reopen the destination without saving if no other work has happened since the mistake.
Record the transfer briefly if more than one editor is involved. Note what was copied and from which project. This can be a project note, a team message, or your normal handoff log. The point is not paperwork for its own sake; it is to prevent someone from treating copied material as a live-linked edit or assuming the source has been updated.
If you routinely transfer work between project families, create a small, repeatable checklist: source identity, destination identity, settings, media, timeline result, grades, and save. Check each item once. The checklist need not live inside Resolve, and it should not grow into an obstacle. A clear six-point review is enough to catch the common silent failures without turning every paste into a formal audit.
How do I close projects loaded in memory?
Return to the Project Manager and close the projects you no longer need, or use the File menu's close-project options where available. Earlier Resolve manuals describe closing a specific project and using the Project Manager command to close other projects in memory. In Resolve 21, inspect the current menu labels and save changes before closing.
Closing a project from memory is not the same as deleting it from its library. Choose a command that closes the session copy. Do not use a library delete option to reduce RAM use. The Cloud guide notes that deleting a project library cannot be undone, which is a completely different and much more destructive operation than closing an open project.
Before closing, check the title and save prompt. If Resolve asks whether to save, make sure the project name is the one you intended to change. If the dialog names a source project and you meant to save the destination, cancel and switch deliberately. A prompt is an opportunity to verify context, not a button to click automatically.
Close the source after the transfer if you no longer need to compare or copy from it. Keep the destination active and save it. If you want to keep a source open for reference, that is fine, but name it clearly and understand that it remains part of the session. A project left open can be useful; an unexplained project left open can become a source of confusion.
The “close projects in memory” style command is useful when several old projects have accumulated. Confirm that the current project is marked as the one to keep open before using it. Review the menu wording carefully. If the command says to close other projects, it should preserve the current project, but verify the selection and save work first.
Once you close a project, it should no longer appear among the open-project switch targets, though it remains in its library unless you separately delete or disable the library. If you need it again, open it from the Project Manager. That distinction is the core memory-management idea: close the live session copy while retaining the project record.
What should I do if a project disappears after switching?
First confirm the project is not simply inactive, hidden by the current library view, or closed from memory. Open the Project Manager, select the correct library, and check the project's name and availability. If a project library was disabled, Blackmagic Cloud's guide says its projects are removed from the Project Manager window until the library is enabled again.
If the project is visible in the library but absent from File > Switch Project, open it. The switch menu is for projects loaded in the current Resolve session, not necessarily every project stored in the library. This is expected behavior, not evidence that the project has vanished.
If the project is absent from the Project Manager, check which library is active and whether the correct user or Cloud account is selected. The project may belong to a different library, user profile, or server. In a shared workflow, ask whether access changed or the library was disabled. Resolve cannot switch to a project that is not available in the current manager view.
If you recently closed the project, reopen it from the library. Closing is not deleting. If it was accidentally deleted, do not make further changes to the library until you understand the recovery route. Cloud project-library backups and local project backups are separate recovery paths; choose the one that matches where the project was stored.
If a library was restored, note that the Blackmagic Cloud guide says restoration creates a new project library and does not overwrite the current one. Look for the restored library by its new name or selected server and region. A restored copy may look like a duplicate but can be the recovery target you need. Verify its contents before replacing any working project with it.
If the project opens but its media is offline, that is a media path issue rather than a switching failure. The project record can open successfully while its linked source files are unavailable. Check mounted drives, paths, and relinking. Avoid repeating the switch or copying the timeline until you know which project and which media references are active.
If Resolve closes unexpectedly, reopen the application and inspect the Project Manager before concluding that work is lost. Check the project and available backups. Resolve's save and backup behaviors depend on preferences and project-library configuration. Our guide to saving work in DaVinci Resolve covers the separate habit of saving and preserving recoverable versions.
When is Dynamic Project Switching the wrong tool?
It is the wrong tool when you do not need simultaneous access, when memory pressure is already affecting the workstation, or when you need a portable handoff rather than a live session transfer. Opening one project at a time is simpler for unrelated jobs. A timeline file or archive is more suitable when another editor needs a discrete deliverable or the media package.
It is also a poor substitute for project organization. If all sequences belong in one project and the only need is to compare cuts, use clearly named timelines and versions. If you need common assets across multiple client projects, a shared or reusable media workflow may fit better than copying the same items repeatedly. The goal is not to keep every project open; it is to choose a structure that makes the work easy to find and maintain.
Avoid switching when a critical export or other sensitive operation is underway and you are uncertain about its state. Let the operation finish, confirm its output, save the project, then switch. A project switch is not a method for managing a render queue or guaranteeing that every background task continues in a particular way. Keep delivery tasks separate from transfer tasks unless your workflow explicitly requires otherwise.
Avoid using it as a backup. Two projects open at once are not independent protection against a mistaken edit if you later overwrite or delete the wrong project. Make a backup or duplicate when preserving a checkpoint matters. For cloud library recovery, use the documented backup controls. For portability, create an archive. Switching provides convenience, not redundancy.
Avoid it as a universal color-management bridge. Copying nodes between projects can be helpful, but matching node structure does not ensure matching images. If the source and destination differ in camera encoding, transforms, timeline color management, or clip-level settings, inspect the result. Use a deliberate color workflow or a purpose-built grade transfer approach when the grade must match exactly.
Avoid loading a long list of old revisions simply because switching makes it possible. Keep the versions relevant to the decision in front of you. Too many similar names make it easier to choose the wrong source, and every loaded project can add to memory use. Archive or close older work according to your team's retention policy rather than keeping it all active.
What is the simplest reliable workflow for a real transfer?
For a dependable transfer, open only the source and destination, enable switching in the Project Manager, copy one clearly defined item, paste it into a staging destination, and verify media, settings, and appearance before saving. This sequence keeps the task small and reversible. It works for a timeline transfer, a handful of clips, or node settings, with checks tailored to the material.
Imagine an editor has a source project containing an approved interview selects sequence and a separate project for a short social cut. The editor needs several selects but does not want to replace the destination timeline. They save both projects, open the source and destination with switching on, create a “Source Selects Review” bin or timeline in the destination, and copy the chosen clips. After switching back, they inspect source identity and audio. Then they review the destination sequence before adding the selects to the active cut.
For a color reference, the workflow is different. The editor opens a reference project and a destination project, finds the known reference clip, copies the grade or node settings, switches, and pastes to a comparable destination clip. Then they compare the result in the Color page and review the color-management context. If the grade does not match, they do not keep pasting variants blindly. They inspect the input transform, node connections, groups, and keyframes, then consider a dedicated grade transfer workflow.
For a multi-user project in Resolve 21, the editor adds one more check before copying: confirm the shared source is the intended current state and the target is the correct collaboration project. Blackmagic documents the new support in Resolve 21, but team ownership and timing remain human decisions. A short note to the collaborator can prevent simultaneous edits from making the copied material ambiguous.
For a memory-constrained workstation, the editor first asks whether a DRT import would do the job. Resolve 21's import dialog can show timeline settings and offers options for project-setting conformity and automatic links to existing Media Pool clips. If a discrete timeline transfer is sufficient, use that route and close unnecessary projects. If the task needs repeated comparison or a direct copy of nodes, dynamic switching may still be the right tool, but test it with the actual projects.
For an archive handoff, the editor does not leave projects open and assume that the receiver can see the same media. They use the archive workflow to package the project and media, choose a destination with adequate capacity, and verify the package. Switching may help prepare or compare content before the handoff, but it does not make the archive itself.
These examples share a useful order: name the source, name the destination, identify the object, move it once, verify dependencies, and save deliberately. That order is simple enough for a one-minute transfer and strong enough to prevent many avoidable mistakes. If a step cannot be verified, pause at that step instead of continuing with assumptions.
How can I learn the control without guessing at the interface?
Use Blackmagic's current Resolve 21.1 manual and its New Features Guide to confirm version-specific behavior, then follow one project-switching practice task in the application. Tutorials can help you see the sequence, but interface layouts vary by version and screen size. If you are stuck on the control while Resolve is open, an on-screen assistant can point you toward the relevant area while you work.
The best way to learn DaVinci Resolve depends on the task. For Dynamic Project Switching, a short guided practice is more useful than memorizing an isolated menu name: enable the option, open a second project, switch, copy a harmless clip, inspect it, and close the extra project. That exercise teaches both the control and its boundary. The free official manual remains the authority for the feature's documented behavior.
If you want to learn DaVinci Resolve fast, use a tiny practice project with duplicate or sample media rather than experimenting in an approved client cut. Make one transfer, deliberately check the project name, and undo or discard the test. A safe sandbox lets you learn the menu and observe what the destination does without risking a delivery timeline.
An AI tool to learn DaVinci Resolve is useful only if it helps answer the problem in front of you. A generic chat answer can explain what Dynamic Project Switching means, but it may not know which project or menu is visible in your current workspace. An app that helps you while using DaVinci Resolve can reduce that context gap by guiding you from the screen itself. Keep the official manual close for authoritative feature details, and verify any instruction against the version you run.
TryUncle is the on-screen assistant for DaVinci Resolve on Mac and Windows, ask in plain words and Uncle points at the exact control on your screen. If you are stuck finding the Project Manager option or following a tutorial whose controls differ from yours, TryUncle can provide on-screen guidance while you work in Resolve.
We have taught more than 100,000 students on Udemy and are an official Udemy Business Partner, so we know that workflow skills stick when people practice the actual decision, not just the menu path. For this feature, the decision is whether projects need to stay open together and what must cross between them. The buttons come second.
The safest project transfer is the smallest one you can verify before building on it.
What should I remember before switching projects?
Enable Dynamic Project Switching in the Project Manager, open the projects you actually need, switch through File > Switch Project, and verify the active project before every transfer. Resolve 21 adds multi-user-project support, but the feature still loads projects into RAM and does not automatically merge settings, media, or ongoing edits. Close unused projects after the work is checked.
If you only need to move one timeline, DRT import may be cleaner. If you need a portable project with its media, use an archive. If you need to compare two loaded projects repeatedly or copy clips and node settings between them, Dynamic Project Switching is the right tool. Choose the workflow that matches the object you need to move, then verify the result in the destination.
Start with two projects and a reversible test. That is enough to learn the feature and see whether it fits your workstation and project setup. When the transfer is sound, save the destination, close the projects you no longer need, and return to the edit with one clear active project.
Resolve 21 Dynamic Project Switching is best used as a short, verified bridge between projects, not as a replacement for project structure or backups.
Frequently asked questions
- How do I turn on Dynamic Project Switching in DaVinci Resolve 21?
- Open the Project Manager, right-click an empty area, and select Dynamic Project Switching. Open a project, return to the Project Manager, and open another project; Resolve keeps both loaded so you can switch between them.
- Why is Dynamic Project Switching missing or greyed out?
- You need to open the Project Manager and right-click its empty background, not a project thumbnail or timeline. In DaVinci Resolve 21 the feature also works with multi-user projects, but projects must be accessible in the library and you should verify that your version is 21 or later for that collaboration behavior.
- How do I switch between open DaVinci Resolve projects?
- Choose File > Switch Project and select an open project. You can also use the project-title menu in the interface when it lists loaded projects.
- Can I copy a timeline between projects with Dynamic Project Switching?
- Yes. Open both projects, copy the timeline or its contents in the source project, switch to the destination, create or select a suitable timeline, and paste. Check media links, bins, frame rate, resolution, grades, and effects after transfer.
- Does Dynamic Project Switching use more RAM?
- Yes. Resolve keeps multiple projects loaded in memory, so memory use can rise with large projects or many open projects. Close unused projects from the Project Manager when you finish transferring or comparing work.
Sources
- DaVinci Resolve 21.1 Manual and Support Downloads
- DaVinci Resolve 21 New Features Guide
- DaVinci Resolve 15 Reference Manual, Dynamic Project Switching
- DaVinci Resolve 11 Reference Manual, Dynamic Project Switching
- Marc Wielage, Blackmagic Design Forum: Copying timelines between projects
- Marc Wielage, Blackmagic Design Forum: Sharing selections among projects
- Blackmagic Cloud Guide: Managing Project Libraries
Put this guide to work with TryUncle.
Ask about the step you’re on. TryUncle sees your screen and points at the control you need, so you can keep learning in your own project.
Get TryUncle for Mac or WindowsKeep reading
Guides · Oct 7, 2026 · 35 min
How to Backup DaVinci Resolve Project Before Updating to 21
Backup a DaVinci Resolve project before updating to 21 with a .drp export, library backup, media archive, and rollback checklist.
Comparisons · Jul 16, 2026 · 31 min
Compound Clip vs Nested Timeline in DaVinci Resolve: Which One?
Compound clip or nested timeline in DaVinci Resolve? The real difference in linking, grading, audio buses, multicam, and render load, plus a decisive pick.
Guides · Jul 24, 2026 · 39 min
How to Save Work in DaVinci Resolve (and Never Lose It)
DaVinci Resolve saves automatically via Live Save, but Ctrl+S, Project Backups, and a .drp export still matter. Here's how each works and when to use it.