Articles / Fixesupdated for DaVinci Resolve 21.1 (October 2026)
DaVinci Resolve 21 Fusion Controls Missing for Keyframes
Quick answer
If DaVinci Resolve 21 Fusion controls are missing for keyframes, first identify whether you selected a Fusion effect, title, generator, transition, or a normal Fusion clip. Effects can expose selected parameters in the Edit or Cut page Keyframe Editor, while normal Fusion clips use the Fusion Inspector, Keyframes Editor, and Spline Editor.

If DaVinci Resolve 21 shows a Fusion clip but not the controls you need, stop clicking random panels. The missing control usually belongs to a different editor, a different selected object, or a parameter that the Fusion effect has not exposed.
We see this question in our 100,000+ member editing community because Resolve uses the word Fusion for several different things. After seven years of professional commercial editing, we’ve learned that naming the object first solves this class of problem faster than resetting the whole interface.
As of October 2026, DaVinci Resolve 21.1 has two facts that matter here. Resolve 21 added Edit and Cut page keyframing for Fusion effects, generators, and text tools. Blackmagic’s guide also says that normal Fusion clips and compositions still use Fusion’s own extensive keyframe editor. Read the official Resolve 21 guide before treating a missing row as a broken installation.
Why are DaVinci Resolve 21 Fusion controls missing for keyframes?
DaVinci Resolve 21 Fusion controls are usually missing because the selected object does not expose those controls in the editor you opened. A normal Fusion composition is edited in Fusion, while a Fusion effect or title placed on the Edit page can expose a smaller set of parameters to the Edit page Keyframe Editor.
The phrase “Fusion controls” hides four separate questions:
- Which object is selected?
- Which page is open?
- Which node or parameter is selected?
- Which editor are you expecting to show the animation?
Answer those in that order. If you skip the first question, every later step can look wrong.
Blackmagic’s Resolve 21 New Features Guide makes the version distinction unusually explicit. It says Fusion effects, generators, and Text tools can be keyframed using their Fusion parameters in the Keyframe Editor. It then adds that normal Fusion clips and compositions continue to use Fusion’s extensive keyframe editor. Those are not two names for one panel. They are two workflows with different visibility rules.
That distinction explains a common tutorial mismatch. A tutorial may select a Text+ title on the Edit page, open the Keyframe Editor, and show a compact list of exposed controls. You may instead have created a Fusion Composition, opened the Fusion page, selected MediaOut, and expected the same list. Resolve is not required to show the same controls there because the object and editor are different.
DaVinci Resolve 21 does not show every Fusion parameter in the Edit page Keyframe Editor.
Start with this short identification table.
| What you selected | Where the useful controls normally live | What “missing” usually means | First action |
|---|---|---|---|
| Fusion effect on an Edit page clip | Edit page Inspector and Keyframe Editor | Parameters are filtered or not exposed | Select the effect and open the Keyframe Parameters menu |
| Fusion title or Text+ title | Edit page Inspector, then Fusion for deeper work | You selected the clip but not the title or node | Select the title and check the title’s exposed controls |
| Fusion generator | Edit page Inspector and Keyframe Editor | The item has many parameters or selected display is off | Use Display Selected Parameters |
| Fusion transition | Edit page Inspector, Keyframe Editor, and Fusion button | You are viewing the wrong side or wrong transition | Select the transition and confirm its handles |
| Fusion Composition | Fusion page Inspector, Keyframes Editor, and Spline Editor | You are looking in the Edit page keyframe lane | Open Fusion and select the animated node |
| Macro or third-party tool | The controls published by the author, plus Fusion for internals | The desired control was never published | Inspect the macro’s exposed controls and open Fusion |
Do not delete the effect or reinstall Resolve yet. Most missing-control cases are selection or scope problems, not damaged projects.
How do I identify the Fusion object before fixing keyframes?
Identify the timeline item by its label, icon, and page behavior before changing settings. A Fusion effect, Fusion title, Fusion generator, transition, and Fusion Composition may all involve Fusion code, but Resolve presents their controls differently.
On the Edit page, click the item once and read the Inspector header. If you see a clip with a Fusion effect applied, the Inspector may show the effect beneath the ordinary video controls. If you see a title or generator, the Inspector typically exposes the published controls for that template. If you see a Fusion Composition, the item represents a composition whose internal nodes are edited on the Fusion page.
Then press the Fusion page button with the item selected. A normal Fusion clip should open a node graph containing inputs and outputs for that composition. Select the node whose parameter you want to animate. The Inspector changes with the selected node. If you select MediaOut and expect the Center, Angle, Size, or Text controls from another node, the controls have not vanished. You selected a node that does not own them.
The selected node matters because Fusion is node based. The Inspector is not a universal control drawer for the whole composition. It displays controls for selected nodes, and the available fields depend on what that node does. A Transform node exposes transform-related controls. A Blur node exposes blur-related controls. A Text+ node exposes text, layout, shading, and animation-related controls. A MediaOut node is an output node, not a replacement for those tools.
This is also why a tutorial may say “select the title” while the visible action is actually “select the Text1 node.” The first instruction chooses the clip. The second chooses the internal node. You need both when the animation lives inside Fusion.
Use this five-second test:
- Select the timeline item.
- Read the Inspector header.
- Switch to Fusion.
- Click the node that owns the parameter.
- Watch whether the Inspector changes.
If the Inspector does not change when you click the expected node, check that the node is actually selected. A red or highlighted node outline should indicate selection in the node graph. If the graph is off-screen, use the Fusion page’s frame or fit command, then select the node directly.
When you’re learning Fusion, the DaVinci Resolve Fusion Page Tutorial for Beginners is the right sibling resource for node selection and page vocabulary. This article stays focused on the narrower keyframe-controls problem.

Why can I see the Fusion control in the Inspector but not in the Edit page Keyframe Editor?
You can see a Fusion control in the Inspector but not in the Edit page Keyframe Editor when the control belongs to a normal Fusion composition, is not exposed by the effect, or has been filtered out of the Edit page display. The Inspector is the broader diagnostic point; the Edit page editor is a narrower view.
Think of the Inspector as the place where Resolve lets you edit a parameter, and the Keyframe Editor as the place where Resolve lets you manage a supported set of animated parameters in time. A parameter can be editable without appearing in the compact editor you expected.
Resolve 21’s official guide gives the clearest boundary. Fusion effects found on the Cut and Edit pages can show Fusion parameters in the Keyframe Editor. Normal Fusion clips and compositions still use the Fusion keyframe editor. The word “still” matters. The improved Edit page workflow did not replace the Fusion page workflow.
Here are the three practical cases.
The parameter is filtered out
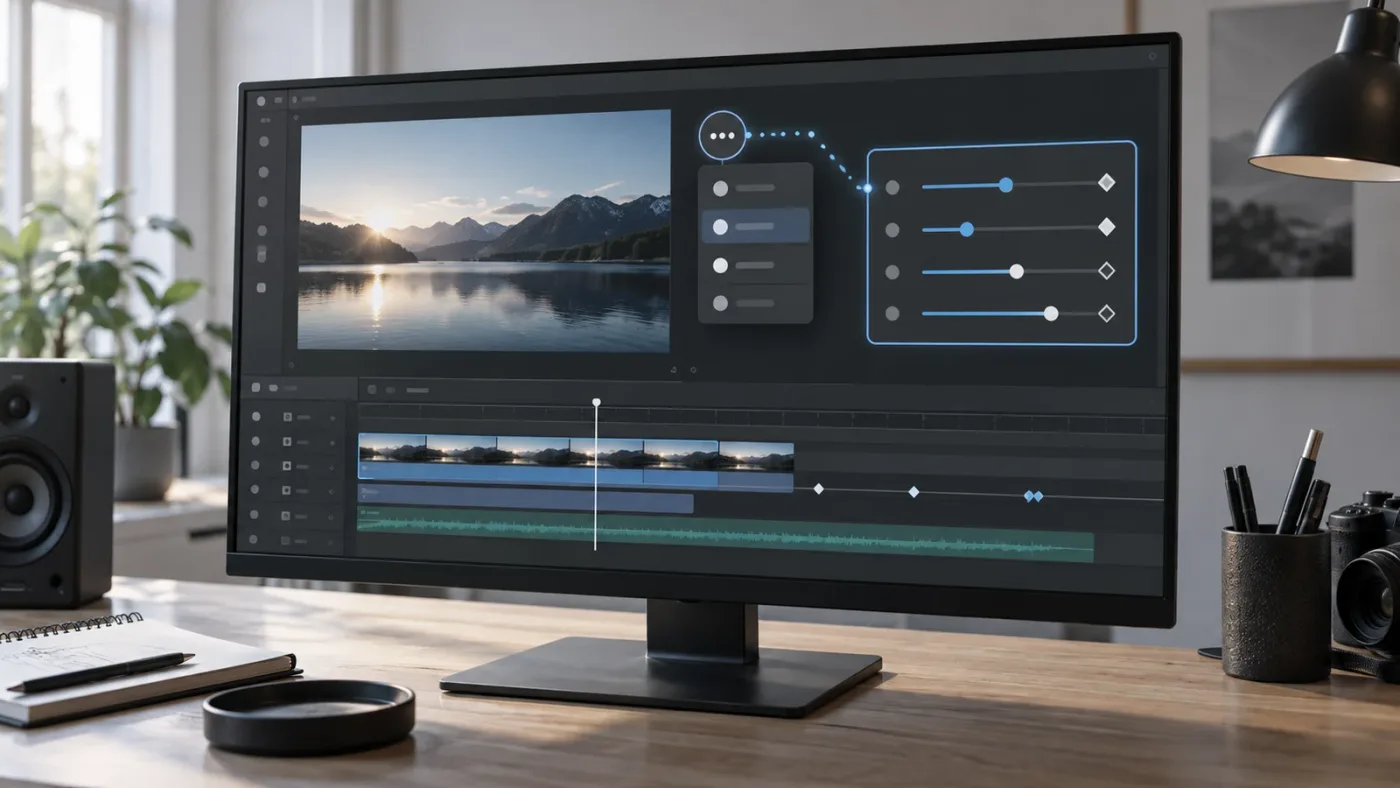
Fusion-based clips can have many associated parameters. Resolve 21 therefore provides Display Selected Parameters in the Keyframe Parameters three-dot menu. If the editor is blank, crowded, or shows only a few rows, open that menu and check the display mode. Select the parameter in the Inspector, then use the command that limits the editor to selected parameters.
This is a visibility filter. It does not create a new keyframe control, and it does not publish a hidden macro field. It tells the editor which available parameters you want to see.
The parameter belongs to a normal Fusion composition
If the item is a Fusion Composition, stop trying to force its internal nodes into the Edit page editor. Open the Fusion page. Select the node. Use the Inspector’s keyframe buttons, the Fusion Keyframes Editor, or the Spline Editor. This gives you access to the composition’s actual animation structure.
Fusion’s documentation describes a keyframe button beside each keyframable parameter. The gray button creates a keyframe at the playhead. Once a keyframe exists, moving to another frame and changing the value can add another keyframe. When the playhead sits on a keyframe, the button changes state and navigation arrows can jump between keyframes. The Resolve 21 Inspector documentation documents this behavior.
The author did not expose the parameter
Macros, templates, and Fusion effects can present a friendly group of published controls instead of every internal node parameter. The exposed control list is a design choice. If the author exposed Size but not Pivot, you cannot make Pivot appear in the Edit page Inspector by changing a view option.
Open the Fusion page and inspect the internal nodes if the tool is editable. If the macro is locked or packaged without editable internals, the missing field may be unavailable by design. Look for a version of the tool with the needed control, or rebuild the effect from native nodes when the project requires deeper animation access.
The important decision is not “which checkbox restores every control?” It is “which layer owns this parameter?”
A visible Inspector parameter is not automatically an Edit page Keyframe Editor parameter.
Fusion page keyframes belong to selected nodes, not to the timeline clip as a whole.
How do I show missing Fusion parameters in the Resolve 21 Keyframe Editor?
To show supported Fusion parameters, select the Fusion effect, title, generator, or transition on the Cut or Edit page, open the Keyframe Editor, then use its Keyframe Parameters three-dot menu to choose Display Selected Parameters. Select the parameter in the Inspector first so Resolve knows what you want to display.
Follow this procedure in order.
- Open the Edit page.
- Click the Fusion effect, title, generator, or transition in the timeline.
- Open the Inspector.
- Confirm that the Inspector header names the item you think you selected.
- Find the control you want to animate.
- Move the playhead to the frame where the animation begins.
- Click the control’s keyframe button, or use the parameter’s animation command where the interface provides one.
- Open the Keyframe Editor below the timeline.
- Open the Keyframe Parameters three-dot menu.
- Choose Display Selected Parameters.
- Move the playhead to a later frame and change the value.
- Confirm that a second keyframe appears.
The purpose of step 7 is diagnostic as much as creative. If the parameter has no keyframe button or animation command, it may not be keyframable in that context. If it gets a keyframe in the Inspector but does not appear in the Edit page editor, you may be looking at a normal Fusion clip or an unsupported exposed parameter. If it appears after Display Selected Parameters, the problem was filtering.
Do not confuse the keyframe button with the parameter’s value field. The value field changes the current value. The keyframe button records a value at the current time. A parameter can show a value without being animated.
Also check the playhead. A keyframe created at the wrong frame can look like a missing keyframe when the editor is zoomed out. Resolve 21 added several keyframe tools in the Cut and Edit pages, including loop, ping-pong, reverse, and shape-box operations, but those tools operate on visible keyframes. They do not reveal internal controls that the selected object does not expose.
If you see a row but no curve, select the row or expand its disclosure triangle. Some editors start with rows collapsed. If you see a curve but no points, zoom into the relevant time range and check that the parameter has at least two keyed values. A single keyframe is a stored point, not an animated change.
Why are the Fusion controls missing when I select a Text+ title?
Fusion controls can seem missing on a Text+ title when you selected the timeline clip instead of the internal Text+ node, or when you are expecting Fusion page controls in the Edit page’s smaller exposed-control set. Text+ is a Fusion tool, but its Edit page controls are not a mirror of every Text+ and modifier control.
Start in the Edit page. Select the title and look for the title’s published controls. Basic text, layout, transform, and shading controls may be available there, depending on the title type and how it was created. If you need to animate one of those exposed controls, use the title’s Inspector keyframe button and the Edit page Keyframe Editor.
If the tutorial asks you to open the Fusion page, switch pages with the title selected. In Fusion, select the Text+ node. The Inspector should now show the node’s controls. Open the Fusion Keyframes Editor or Spline Editor when the animation is inside the composition.
A Text+ title can have more than one animation layer. A text value may be animated directly. A style or layout field may be controlled by a modifier. A modifier may have its own controls. A template may publish only a subset of those fields for the Edit page. If you keyframe the published control, you are animating the exposed interface. If you need to edit a modifier’s spline, you are working inside Fusion.
This is where people often blame keyframes. The keyframe system may be working exactly as designed. The missing control is actually a boundary between a front-end template and its internal node graph.
Test Text+ with a simple transform. Select the Text+ node, locate a Center or Size-like control, create a keyframe at the start, move forward, and change the value. If the Inspector button changes and the Fusion Keyframes Editor shows the parameter, Fusion animation is working. If the Edit page still shows no matching row, the title is using a page-specific exposure boundary.
That result tells you what to do next. Continue the animation in Fusion, or use a separate Transform node whose controls are easier to expose and manage. Adding a dedicated Transform node can make the animation clearer because it separates layout changes from text styling. It also reduces the chance that a template update changes the meaning of a published title field.
When a tutorial’s Text+ layout looks different, compare the object type before comparing buttons. A Text+ title from the Effects Library may not behave like a manually created Fusion Composition containing a Text+ node, even when the viewer looks similar.
How do I animate a Fusion Composition when the Edit page controls are missing?
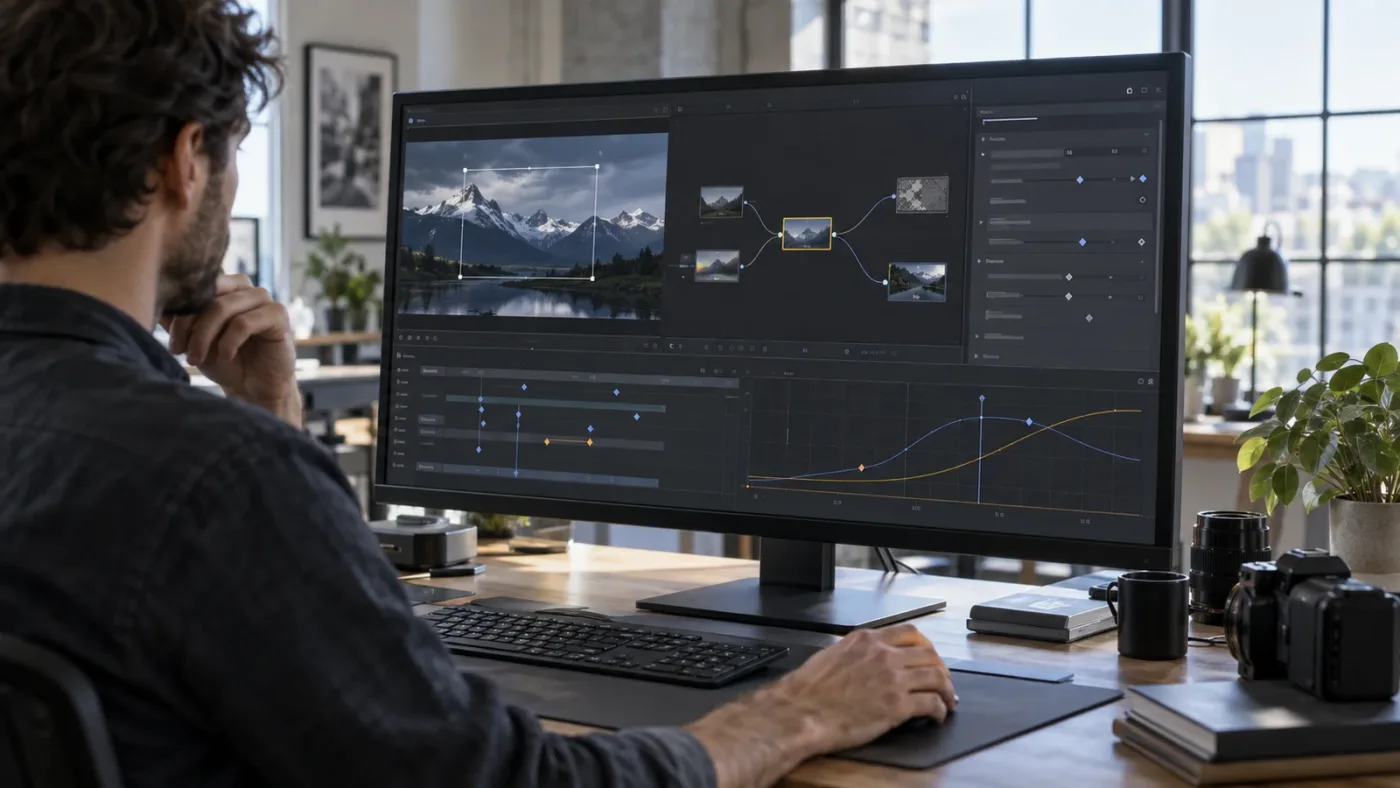
Animate a Fusion Composition from the Fusion page, not the Edit page Keyframe Editor. Select the node that owns the parameter, create keyframes in the Inspector, and refine timing in the Fusion Keyframes Editor or Spline Editor.
The Edit page still controls the composition’s clip timing, duration, and placement in the timeline. It does not need to expose every internal animation parameter for you to animate the composition. Separate the outer clip job from the inner node job.
Use this workflow for a normal Fusion Composition.
- Select the Fusion Composition on the Edit page.
- Move to the Fusion page.
- Select the node that owns the control.
- Open the Inspector if it is hidden.
- Find the parameter.
- Click its keyframe button at the first desired frame.
- Move the playhead to the second desired frame.
- Change the value or click the keyframe button again.
- Open the Keyframes Editor to move keyframes in time.
- Open the Spline Editor to adjust interpolation and curve shape.
The Fusion Reference Manual describes the Spline Editor as the place where animated controls are manipulated. It also defines the animation model: explicitly specified values are keyframes, while values between them are calculated from the spline. That is why the Spline Editor is the right place for easing, overshoot, hold behavior, and curve shaping.
The Keyframes Editor and Spline Editor solve different problems. Use the Keyframes Editor when you need to move, trim, or inspect the timing of animated objects. Use the Spline Editor when you need to shape the value between keyframes. The Inspector is where you create and inspect keyframes on individual parameters.
If the Keyframes Editor looks empty, check whether the node is selected and whether you have expanded the node in the editor tree. If the Spline Editor looks empty, select the animated parameter or use its view filters. If the node has a modifier, switch to the Modifiers tab in the Inspector. The base parameter may not carry the animation you are looking for.
Do not create a new keyframe on the wrong node just because its name sounds close. A Transform node’s Center and a Text+ node’s Layout Center can produce similar viewer movement but remain separate controls with separate animation curves.
This is also the safest answer when the user says, “The tutorial’s keyframe controls are below the timeline, but mine are not.” The tutorial may be using a Fusion effect in the Edit page. Your Fusion Composition belongs in Fusion.
Why are only some Fusion controls available in DaVinci Resolve 21?
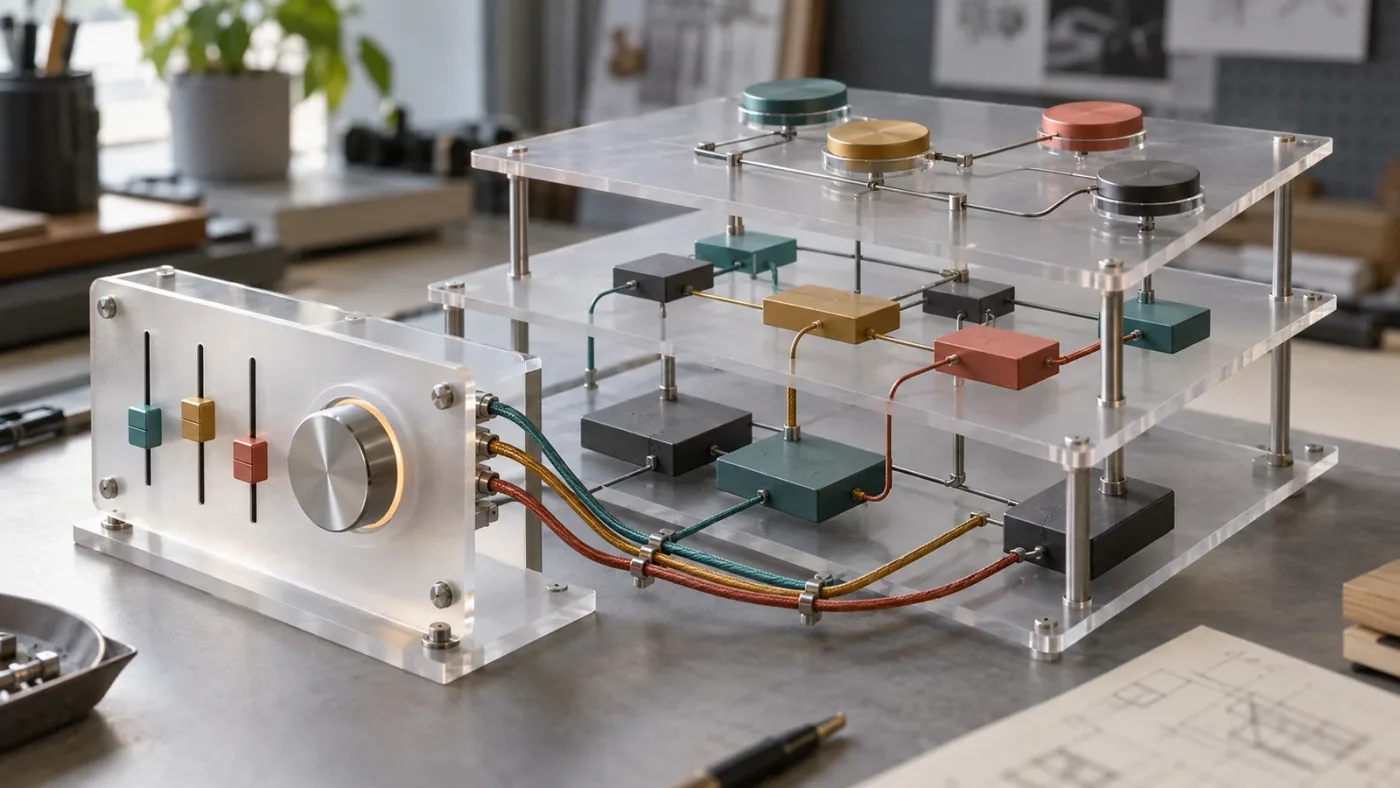
Only some Fusion controls are available because Edit page effects and templates expose a curated parameter set, while the full composition contains internal nodes, modifiers, expressions, and connections. The exposed set is the interface the effect author chose to make editable outside Fusion.
A macro is not a screenshot of a node graph. It is a reusable tool with an interface. That interface can publish a control such as Amount, Size, Position, or Color. Internal controls may remain hidden because the author wants to keep the tool simple, protect a setup, or prevent changes that would break the design.
This has two consequences.
First, a missing control may be intentional. If the macro exposes a slider called Position, you may not get separate X and Y fields in the Edit page. If it exposes a single Size control, you may not get the internal transform’s pivot. If it exposes a text field, you may not get every character-level styling control.
Second, keyframing a published parameter does not guarantee access to the underlying node’s spline. The Edit page can store the exposed value over time. Detailed curve editing may still require Fusion.
Use the Inspector to look for signs that a value is connected or modified. Fusion documentation describes modifiers as expressions, calculations, trackers, paths, and other components attached to parameters. Their controls appear separately in the Inspector’s Modifiers tab. If the value is driven by a modifier, changing the base field may not produce the animation you expected.
For example, a tracker can drive a position. An expression can calculate a value. A path can determine motion. A keyframe on the base parameter may exist, but the visible result may be controlled elsewhere. This is not the same as a missing control.
Before changing a macro, write down the exact behavior you need:
| Need | Look for | Best editor |
|---|---|---|
| Change one published slider over time | Orange keyframe button beside that slider | Edit page or Fusion Inspector |
| Adjust several keyframes together | Visible rows and points for the published parameter | Edit page Keyframe Editor or Fusion Keyframes Editor |
| Shape easing or overshoot | Spline or curve representation | Fusion Spline Editor |
| Change tracker-driven motion | Modifier or tracker controls | Fusion Inspector and modifier editor |
| Expose a hidden internal value | Editable node or macro source | Fusion page, if the tool permits it |
| Make a reusable public control | User control or published parameter setup | Fusion tool or macro authoring workflow |
If you did not author the macro, do not assume the missing control can be added safely. A macro may depend on node names, expressions, and connections. Duplicating it and experimenting in a copy is safer than rewriting a production title in place, but back up the project before structural edits.
The practical answer is simple: expose the control you need, use the editor that owns it, or choose a tool whose published interface matches the animation you need.
How do I use the Fusion Keyframes Editor when the Inspector button is confusing?
Use the Fusion Keyframes Editor to inspect object timing after you have created at least one keyframe, and use the Inspector to confirm that the correct parameter owns the keyframe. The editor becomes useful when you distinguish parameter animation from object timing.
In the Inspector, a keyframe button sits beside a keyframable parameter. A gray state means no keyframe exists at the current frame. After you create one, the button changes state. Move the playhead and change the parameter to create a second point. The arrows beside the control can move between keyframes when more than one exists.
In the Keyframes Editor, expand the selected node or tool. You may see a hierarchy of tools and parameters. The hierarchy is not an error. Fusion compositions can contain many nodes, and each node can have several animated controls. Expand only the node and parameter you need.
If you see a keyframe marker but cannot drag it, check whether you are in the right editor mode and whether the point belongs to the selected parameter. A marker can indicate timing while the actual value curve is managed elsewhere. Select the point or row, then use the editor’s available tools.
If the curve is outside the visible range, use the editor’s framing controls. A composition can begin before or after the part of the timeline you are viewing. A Fusion clip can also be extended on the Edit page while its internal animation remains timed to a composition range. Do not judge the curve from a single zoom level.
Resolve 21 added new Cut and Edit page keyframe operations such as Loop, Ping Pong, Reverse, and Shape Box for the page-level editor. Those features are useful when the selected item supports them. They are not a replacement for Fusion’s Spline Editor, and they do not turn a normal Fusion Composition into an Edit page Fusion effect.
Use the Spline Editor when the problem is not “where is the keyframe?” but “why does the animation move this way?” A linear-looking move may need a Bezier curve. A repeated effect may need a loop. A sudden change may need a stepped interpolation. The correct control is often visible only after you select the curve or control point.
When you edit several parameters, avoid hiding the relationship between them. Keep related curves visible for the adjustment, then hide unrelated parameters. The goal is not to make every curve visible. The goal is to make the timing relationship understandable.
The best debugging move is to create a tiny test animation on a native node. Add two keyframes to a Transform node, move the playhead, and watch the curve. If that works, the editor is healthy and the missing control belongs to the original tool or object. If the native test also fails, investigate interface state, selection, project behavior, and version.
Why does the tutorial show controls that my DaVinci Resolve 21 project does not?
Tutorial controls differ when the tutorial uses another Resolve version, another page, another object type, another node, or a custom macro with different published controls. “DaVinci Resolve” is not enough information to reproduce a Fusion screen.
Compare the tutorial and project across these fields:
| Comparison | Tutorial question | Your project question |
|---|---|---|
| Version | Does the tutorial say Resolve 21, 20, or an earlier release? | Are you on Resolve 21.0, 21.0.2, or 21.1? |
| Page | Is the instructor on Edit, Cut, or Fusion? | Which page is open when the control is missing? |
| Object | Is it a title, effect, generator, transition, or Fusion Composition? | What does the Inspector header identify? |
| Node | Which node is selected? | Which node owns the desired parameter? |
| Tool | Is it native, a macro, or third-party? | Is the same tool installed and the same version? |
| Exposure | Is the field published to the Edit page? | Does the current tool publish it? |
| Editor | Is the action in Inspector, Keyframes, or Spline? | Are you looking at the corresponding editor? |
Resolve 21.0 and 21.1 should not be treated as identical snapshots. Blackmagic’s Support Center lists the Resolve 21.1 manual and update information, and the 21.1 announcement describes additional feature and tool changes. If a guide says “Resolve 21” without a point release, treat its button placement as a clue, not a guarantee.
The same applies to free and Studio editions. Do not assume a missing keyframe control is caused by edition licensing unless the documented feature is edition-specific. First check object type and editor scope. If a tutorial uses a Studio-only effect, the effect itself may not be available in the free edition, but that is different from a missing control on an available native tool.
Tutorial pacing creates another trap. In a five-minute video, the instructor may have opened the Inspector, selected the node, expanded a category, and enabled a filter before the clip you are watching. The visible control appears without the hidden setup. Rewind to the selection step, not just the animation step.
You can make tutorial matching easier by writing down three labels from the video: page name, object name, and node name. Search for those exact labels in your project. If two of the three differ, you are not debugging the same object.
The DaVinci Resolve 21 Tutorial Controls Do Not Match? Fix It sibling page covers the broader tutorial mismatch problem. Use it when the discrepancy is not limited to Fusion keyframes.

Could a hidden panel, layout, or selection state cause missing Fusion controls?
A hidden Inspector, collapsed panel, wrong workspace layout, or stale selection can make controls look missing, but these checks should come after object identification. Resetting the whole workspace is a fallback, not the first diagnosis.
Run the low-risk interface checks in this order.
- Confirm the correct page.
- Confirm the correct timeline item.
- Confirm the correct node.
- Show the Inspector.
- Expand the parameter category.
- Show the Keyframe Editor or Spline Editor.
- Fit the editor view to the current composition or selection.
- Reopen the page if the panel remains stale.
Fusion’s Inspector can be resized, and the reference documentation describes different Inspector heights. A short Inspector may show a category header without the fields below it. Scroll inside the Inspector, not the timeline, when the field is below the visible area.
A panel can also be open but showing the wrong context. If the Inspector header belongs to MediaOut, selecting a Transform node should replace its controls. If it does not, click the node again and check whether a multi-selection is active. Multiple selected tools can show only common properties through Multi-Inspector behavior. A multi-selection can therefore hide a parameter that appears when one node is selected alone.
This is a useful test: select exactly one node, then compare the Inspector. If the control returns, the prior problem was selection scope. If the control is still absent, compare the node type with the tutorial.
Do not reset a saved layout while a project is actively loading, saving, or processing. Let Resolve finish its current operation. If the interface is unresponsive, save what you can, note the project and version, then restart the application normally. The local project state matters more than a clean panel.
If you do reset a workspace layout, do it after recording what was wrong. A reset may hide the symptom while removing your preferred panel arrangement. A good bug report includes the original layout state, but the layout is not the only useful evidence.
A missing keyframe lane can also be caused by a narrow timeline area. Expand the panel or increase its height. A row may be present but compressed into a line that looks empty. Zoom into the relevant clip and inspect the disclosure arrows before concluding that no controls exist.
These checks are boring, but they are cheap. More importantly, they preserve the distinction between a UI visibility issue and an unsupported parameter.
Is the missing Fusion control a Resolve 21 bug or expected behavior?
Treat the missing control as expected behavior until the documented object and editor workflow fails in a small reproducible project. A bug becomes more plausible when a supported native parameter appears in the Inspector, accepts keyframes, and still fails to appear in the documented editor after correct selection and filtering.
Use an evidence ladder.
Level one: selection error
You selected the wrong clip, effect, node, or panel. Fix the selection and the control appears. Stop there.
Level two: exposure boundary
The control exists inside Fusion but is not published to the Edit page. Use the Fusion page or choose a tool with the required published control. This is expected behavior.
Level three: editor filter
The control is supported but hidden by Display Selected Parameters or a collapsed hierarchy. Change the filter or expand the row. This is expected behavior.
Level four: version mismatch
The tutorial describes a behavior added or changed in another release. Check the Resolve 21 and 21.1 documentation and release notes. Update only after saving a project copy and checking compatibility.
Level five: reproducible defect
The same native tool, parameter, page, and editor fail in a new project with a clear sequence. Record the exact Resolve build, operating system, edition, object type, node name, parameter name, and steps. Then use Blackmagic Design’s support channels or forum with that evidence.
Blackmagic’s Support Center distinguishes the final release, point releases, and manuals. It also directs free-version technical support to the community forums. That gives you a more useful route than posting “Fusion keyframes are broken” without the object and build details.
The Blackmagic forum contains real examples of interface-dependent behavior. In one report, Don Colacino described Fusion Inspector controls that appeared after moving through the Cut page, while another contributor said the behavior did not reproduce in a later build. That is not proof that your project has the same bug. It is a reason to include page sequence, version, operating system, and hardware in a report.
For a topical expert perspective, Fusion community contributor KrunoSmithy wrote in a Blackmagic forum discussion: “You don't control fusion form edit page, you expose fusion controls in the edit page to control fusion.” The spelling is preserved from the original post. The useful point is precise: the Edit page is a front end for exposed controls, not the complete Fusion authoring environment. Read the forum discussion.
A reproducible native-tool failure is evidence of a bug; a missing unpublished macro field is not.
The correct Fusion keyframe editor is determined by the object that owns the parameter.
How should I update DaVinci Resolve 21 before troubleshooting Fusion keyframes?
Check your installed point release and read the matching release notes before updating. Updating can improve behavior, but it cannot make an unpublished parameter appear in a template’s interface.
Blackmagic’s current Support Center lists DaVinci Resolve 21 and 21.1 manuals and update information. The 21.0.2 notes mention improved text display in the Inspector, while the 21.1 announcement describes further changes and new controls. Those notes are useful context, but they do not mean every missing Fusion field is fixed by installing the newest build.
Use this safe update checklist.
- Open Resolve’s About or version information and record the exact build.
- Duplicate or back up the project before updating.
- Check third-party Fusion effects and plugins for version compatibility.
- Read the release notes for the installed and target builds.
- Update from Blackmagic Design’s official download or support path.
- Reopen the project and test the missing control in a copy.
- Compare the result with a new test project.
Avoid updating in the middle of a deadline without a rollback plan. A version change may affect templates, plugins, render behavior, or project compatibility. The question is not whether the latest version is good. The question is whether the update is a controlled test for your particular composition.
Resolve 21 itself introduced meaningful keyframing changes. The official New Features Guide describes new Edit and Cut page operations and Fusion parameter access for supported Fusion effects. That makes version-aware troubleshooting more important than old tutorials suggest.
If the tutorial was recorded before Resolve 21, the old workflow may direct you to Fusion for every animation. If it was recorded for Resolve 21, it may use the Edit page Keyframe Editor for a Fusion effect. Both instructions can be correct for their objects.
If the tutorial was recorded for Resolve 21.1, the point-release difference may affect labels or available tools. Use the exact guide version where possible. Do not infer a missing control from a thumbnail, because a thumbnail often compresses the Inspector and hides the selected object.
When an update resolves the issue, record the build that changed it. When it does not, that record prevents repeated installs and improves a support request.
What if the Fusion keyframe controls are missing only after opening a macro or plugin?
If controls disappear only for a macro or plugin, inspect the tool’s published interface and compatibility before changing Resolve settings. The macro may expose fewer parameters than the underlying nodes, or the plugin may provide its own animation model.
Third-party Fusion tools often sit between two interfaces. The Edit page sees the published controls. Fusion sees the tool, its internal nodes, and any modifiers that the tool author made accessible. A tutorial using the same brand name may still use a different tool version or a native equivalent.
Check these items:
| Check | What it tells you |
|---|---|
| Tool name and version | Whether the tutorial uses the same package |
| Page of insertion | Whether the tool is an Edit page effect or Fusion node |
| Published controls | What the author intended to expose |
| Modifier tab | Whether the visible result is driven by a separate modifier |
| Locked or grouped nodes | Whether internal controls can be inspected |
| Keyframe button state | Whether the exposed parameter is animatable |
| Native test | Whether Resolve’s editor works outside the plugin |
Create a native test before blaming the plugin. Add a native Transform node in a copy of the composition. Animate its Center or Size control. Open the Keyframes Editor and Spline Editor. If the native test works, the plugin’s exposure or compatibility is the likely boundary. If the native test fails too, return to the page, selection, and version checks.
Do not edit a third-party macro’s source unless you understand the node connections and have a recoverable copy. A published control can drive expressions, paths, or multiple nodes. Adding a new control in the wrong place can make the tool harder to maintain and may change its behavior for existing titles.
If the package author provides a version for Resolve 21, prefer that over manually editing an older macro. If the author does not document the exposed controls, describe the missing field clearly when asking for support. “The Position field is absent from the Edit page Keyframe Editor, but the internal Transform node exists in Fusion” is actionable. “It doesn’t work” is not.
When the tool is essential and the published interface is too narrow, rebuild the small part you need with native nodes. That takes longer once, but it gives you control over the node and parameter names. Choose that route only when the animation requirement justifies ownership of the setup.
What is the best way to learn DaVinci Resolve when controls keep moving?
The best way to learn DaVinci Resolve is to connect every control to an object, page, node, and editor instead of memorizing isolated button locations. Official Blackmagic training is the baseline reference, focused tutorials can add examples, and live on-screen help can shorten the gap when your project differs from the lesson.
Blackmagic’s own documentation remains the authority for Resolve 21 behavior, version changes, and Fusion terminology. The Resolve 21 New Features Guide gives the exact boundary for Edit page Fusion keyframing. The Inspector documentation explains the keyframe-button state and modifier behavior. Use those sources to settle what the software supports.
YouTube educators such as Casey Faris can help with demonstrations and visual pacing, but a video still depends on the same variables: version, object type, page, node, and exposure. Community forums can reveal edge cases, especially when a behavior is new or inconsistent, but forum advice should be checked against the manual and your exact build.
Courses on Udemy and Coursera can provide a sequence and practice exercises. They are useful when you need a curriculum, but they cannot remove the need to identify your own project’s object type. We have taught 100,000+ students on Udemy, work as an official Udemy Business Partner, and have taught and worked with Fortune 500 companies. The same lesson comes up in every format: a tutorial is a map, not a substitute for reading the selected object in front of you.
Here is the practical comparison.
| Learning route | Strongest use | Limitation for missing Fusion controls |
|---|---|---|
| Blackmagic official manuals and training | Version-correct definitions and workflows | Dense, with fewer answers to your exact project state |
| Focused YouTube lesson | Seeing the clicks and page changes | The instructor’s object and version may differ |
| Community forum | Edge cases and bug reports | Advice quality varies; verify claims |
| Structured course | Progressive practice and exercises | Cannot inspect your selected node or macro |
| Chat assistant | Translating a symptom into possible checks | May hallucinate a control or confuse pages |
| On-screen assistant | Pointing at a relevant control in your current app context | It still cannot expose a control the tool does not publish |
TryUncle is the on-screen assistant for DaVinci Resolve on Mac and Windows — ask in plain words and Uncle points at the exact control on your screen.
If you want an app that helps you while using DaVinci Resolve, TryUncle can be useful after you understand the boundary described here: on-screen guidance can help locate the selected object, Inspector, or editor, but it does not promise to create unpublished macro controls or automatically fix a Fusion composition.
The best way to learn DaVinci Resolve fast is to practice one small task and name its ownership. For this problem, say out loud: “This is a Fusion effect on the Edit page, and I need its published parameter in the Edit page Keyframe Editor.” Or: “This is a Fusion Composition, and I need the Transform node in the Fusion Spline Editor.” That sentence is more useful than another hour of watching a mismatched tutorial.
How do I compare an on-screen assistant with Fusion learning alternatives?
Choose the learning method based on the problem you have, not on the novelty of the tool. A manual answers what Resolve documents, a course supplies sequence, a forum supplies community context, and an on-screen assistant can help map your words to the control currently visible in your app.
Real alternatives exist. Sottocut, PremiereCopilot, heyeddie.ai, and cutagent.ai represent different approaches to editing assistance and automation. They are not interchangeable with a Resolve-specific on-screen teaching workflow. Some answer chat questions or automate parts of an edit. Check each product’s current support and claims before relying on it for Fusion.
The honest decision matrix is this:
| If you need... | Start with... | Why | Trade-off |
|---|---|---|---|
| The official rule for Resolve 21 | Blackmagic manual | It defines page and feature behavior | You must translate the text to your project |
| A complete beginner sequence | Blackmagic training or a structured course | It reduces what to learn next | It cannot see your current selection |
| A visual explanation of a common technique | A focused YouTube lesson | You can watch the page and node sequence | The version and project may differ |
| A report of a suspected bug | Blackmagic forum and support | Other users may have the same build | A forum answer may describe an edge case, not a fix |
| Help finding a control on your screen | TryUncle | It points at a relevant visible control while you work | It cannot change what a macro author exposes |
| Automated editing or chat-based assistance | A tool such as Sottocut, PremiereCopilot, heyeddie.ai, or cutagent.ai | It may focus on automation or questions | It may not teach the Fusion object and editor boundary |
Choose the manual when the dispute is about what Resolve supports. Choose a course when the problem is sequence. Choose a forum when the problem is a reproducible edge case. Choose on-screen help when you know the task but cannot locate the relevant visible control in your current Resolve window.
Do not use an assistant as evidence that a control exists. Evidence comes from the object type, the documented editor, and the behavior in a reproducible test. An assistant can help you navigate to a control. It cannot make a parameter appear if the effect or macro does not expose it.
That limitation is a strength of an honest workflow. It keeps the answer grounded. If the right answer is “use the Fusion page,” the best tool should help you get there instead of inventing an Edit page button.
What should I record before asking for help with missing Fusion controls?
Record the exact object, page, node, parameter, Resolve build, operating system, edition, and expected editor before asking for help. Those nine details turn a vague UI complaint into a reproducible question.
Use this support template:
Resolve version and build:
Edition: Free or Studio
Operating system:
Object: Fusion effect, title, generator, transition, or Fusion Composition
Page: Cut, Edit, or Fusion
Selected node:
Parameter:
Expected editor:
What appears instead:
Steps that reproduce the issue:
Add whether the control is native, a macro, a template, or a third-party plugin. Add whether the Inspector can create a keyframe. Add whether the same behavior occurs in a new project. Include a short screen recording only when it shows the selection and page sequence clearly.
Avoid deleting caches, preferences, templates, or project databases as a first move. Those actions can remove evidence without fixing an exposure boundary. Save a copy, use a narrow test, and preserve the project state until you know what depends on it.
The DaVinci Resolve 21 Keyframe Copy Paste Not Working? Fix It page is relevant only when the controls exist and the problem is moving animation between clips. Do not use a copy-paste fix for a parameter that never appeared in the correct editor.
If you post to a forum, quote the exact control name. “Transform Center is visible in the Fusion Inspector and keyframes correctly there, but it does not appear in the Edit page Keyframe Editor for this Fusion Composition” is a clear boundary. “Fusion controls missing for keyframes” is a useful search phrase, but it needs the object details for a reliable answer.
What is the fastest decision tree for DaVinci Resolve 21 Fusion controls missing for keyframes?
The fastest fix is to classify the object, choose the owner editor, expose supported parameters, and only then investigate version or bug behavior. This four-stage decision tree covers the common cases without resetting the project.
Stage one: what is the object?
If it is a Fusion effect, title, generator, or transition on the Cut or Edit page, continue in the page-level Inspector and Keyframe Editor. If it is a normal Fusion clip or composition, open the Fusion page.
Stage two: what owns the parameter?
If the parameter belongs to the selected node, select that node. If it belongs to a modifier, open the Modifiers tab. If it belongs to an internal macro node, check whether the macro exposes it.
Stage three: is it visible in the current editor?
For supported Edit and Cut page Fusion items, use Display Selected Parameters in the Keyframe Parameters three-dot menu. For Fusion compositions, use the Fusion Keyframes Editor and Spline Editor. Expand rows and frame the timeline when points are outside the visible range.
Stage four: does a native test reproduce it?
Animate a native Transform or Text+ parameter in a small project. If the native control works, the original tool’s exposure or version is the problem. If the native control fails in the same editor after correct selection, document the build and report it.
Use this compact matrix when you are stuck.
| Symptom | Likely cause | Fix |
|---|---|---|
| Inspector shows the control, Edit page does not | Normal Fusion composition or unpublished parameter | Use Fusion or a published control |
| Keyframe button is absent | Parameter is not keyframable in that context | Select the correct node or use another parameter |
| One keyframe exists but no motion appears | Only one value has been keyed, or a modifier overrides it | Add a second value and inspect modifiers |
| Row exists but looks empty | Collapsed row, zoom, or filter | Expand, frame, and display selected parameters |
| Tutorial has a different panel | Version, page, or object mismatch | Compare version, page, object, and node |
| Macro has fewer sliders | Author exposed a limited interface | Use exposed controls or edit the tool in Fusion |
| Native test fails too | Possible layout, version, or bug issue | Reproduce in a new project and report evidence |
This decision tree is intentionally conservative. It prevents the most expensive mistake: rebuilding a working effect because the wrong editor hid the control.

Should I use the Edit page or Fusion page for keyframes?
Use the Edit page for exposed, practical controls on Fusion effects, titles, generators, and transitions. Use the Fusion page for normal Fusion compositions, internal node animation, modifiers, expressions, detailed splines, and controls that the Edit page does not publish.
The choice is not about which page is more powerful. It is about which page owns the object. Resolve 21 makes the Edit page more capable for supported Fusion effects, but the Fusion page remains the complete authoring environment for compositions.
Use the Edit page when:
- You need to animate a published title or effect control.
- You want to manage a compact set of parameters alongside the timeline.
- You are adjusting a Fusion transition or generator as part of an edit.
- The Keyframe Editor shows the needed rows after filtering.
Use the Fusion page when:
- You need to select a specific node.
- You need to edit a modifier or expression.
- You need full Spline Editor access.
- You are working inside a Fusion Composition.
- The control is visible only on an internal node.
- A macro or plugin exposes a deeper interface there.
Keep the animation in the page that makes its ownership clear. A simple published title move can stay on the Edit page. A tracked, expression-driven, multi-node motion design belongs in Fusion. Moving back and forth is possible, but it can make troubleshooting harder when you forget which layer contains the actual animation.
If a clip has both ordinary Edit page animation and internal Fusion animation, document the split. The Edit page can move or transform the resulting clip, while Fusion animates the image or title inside it. Two animations can combine, so a viewer movement may appear even when the control you expected is not the one driving it.
This layered model also explains why copying keyframes between contexts can fail. A keyframe from an Edit page parameter may not map to a Fusion node parameter with a different data type or name. The solution is to copy within the same owner context or recreate the animation on the correct node.
Our AI screen assistant comparison can help if your problem is locating the correct visible panel. It cannot change this editor boundary, and the manual remains the source for feature behavior.
What is the final fix for “DaVinci Resolve 21 Fusion controls missing for keyframes”?
The final fix is to stop treating every Fusion object as the same thing. Identify the object, select the node or published control that owns the parameter, use Display Selected Parameters for supported Edit and Cut page items, and move to the Fusion Keyframes or Spline Editor for normal compositions and advanced animation.
Use this order one last time:
- Select the timeline item.
- Name the object type.
- Confirm the page and version.
- Select the owning node.
- Check the Inspector keyframe button.
- Use the correct keyframe editor.
- Inspect modifiers and published controls.
- Test a native node in a new project.
- Record evidence before reporting a bug.
If the control appears in the Fusion Inspector but not the Edit page editor, that is often the answer, not the failure. The parameter belongs to Fusion’s full composition workflow or has not been exposed to the Edit page. If the control belongs to a supported Fusion effect and is merely hidden, the Keyframe Parameters menu and Display Selected Parameters option are the direct fix.
Resolve 21’s keyframing improvements are useful because they reduce page switching for exposed effects. They do not erase the difference between a front-end control and an internal Fusion parameter. Once you make that distinction, “missing controls” becomes a short classification problem.
Open the page that owns the animation. Select the node that owns the value. Then keyframe the control you can actually defend.
Frequently asked questions
- Why are my DaVinci Resolve 21 Fusion controls missing for keyframes?
- The most common reason is that the selected item is a normal Fusion clip or composition, not a Fusion effect, title, generator, or transition supported by the Edit and Cut page Keyframe Editor. Normal Fusion clips use the Fusion page's Inspector, Keyframes Editor, and Spline Editor.
- How do I show missing Fusion controls in the DaVinci Resolve 21 Keyframe Editor?
- Select the Fusion effect, title, generator, or transition in the Cut or Edit page, open the Keyframe Editor, open its three-dot Keyframe Parameters menu, and choose Display Selected Parameters. Then select only the controls you need in the Inspector.
- Why can I see Fusion controls in the Inspector but not in the Edit page keyframes?
- The Inspector and the Edit page Keyframe Editor do not expose the same parameter set. If the item is a normal Fusion clip, use the Fusion page editors; if it is an Edit page Fusion effect, only its exposed parameters can appear in the Edit page editor.
- Can DaVinci Resolve 21 keyframe Fusion titles and macros?
- Resolve 21 can keyframe Fusion titles and effects through exposed Fusion parameters in the Edit and Cut page Keyframe Editor. A macro can expose only the controls its author published, and advanced node animation, modifiers, and splines may still require the Fusion page.
- Does DaVinci Resolve 21.1 fix missing Fusion keyframe controls?
- Resolve 21.1 is a later release with additional updates, but a missing control is not automatically a software bug. Check the object type, selected node, exposed parameters, and page-specific editor first, then update and report a reproducible issue if the documented control remains unavailable.
Sources
- DaVinci Resolve 21 New Features Guide
- Blackmagic Design DaVinci Resolve Support Center
- DaVinci Resolve 21.1 announcement
- DaVinci Resolve 21 announcement
- DaVinci Resolve 21 Inspector documentation
- Fusion Reference Manual 18.6
- Blackmagic forum: Controls Missing from Fusion Inspector
- Blackmagic forum: Keyframe and Spline Editors discussion
- Blackmagic forum: Keyframe editor on Edit page
Put this guide to work with TryUncle.
Ask about the step you’re on. TryUncle sees your screen and points at the control you need, so you can keep learning in your own project.
Get TryUncle for Mac or WindowsKeep reading
Guides · Jul 10, 2026 · 32 min
DaVinci Resolve Fusion Page Tutorial for Beginners
Learn the DaVinci Resolve Fusion page from zero: nodes, MediaIn/MediaOut, the Merge node, planar tracking, and keying a green screen, step by step.

Fixes · Sep 29, 2026 · 38 min
DaVinci Resolve 21 Keyframe Copy Paste Not Working? Fix It
Fix DaVinci Resolve 21 keyframe copy paste problems with the right editor, focus, shortcuts, Paste Attributes, timing, and Fusion workflow.

Comparisons · Oct 3, 2026 · 17 min
AI Screen Assistant for DaVinci Resolve Mac: Best 2026 Options
Compare screen-aware and editing assistants for DaVinci Resolve on Mac in 2026, including TryUncle, Sottocut, CutAgent, Eddie and free training.