Articles / Guidesupdated for DaVinci Resolve 21.1 (September 2026)
DaVinci Resolve Fast Noise Follow Tracker: Fusion Guide
Quick answer
To make DaVinci Resolve Fast Noise follow a tracked object, add a Fusion Tracker node, track a clear feature in the clip, set the Tracker to Match Move, and connect Fast Noise as its foreground. Adjust the noise layer’s position and appearance at the reference frame, then inspect the full shot and correct any drift or edge problems.
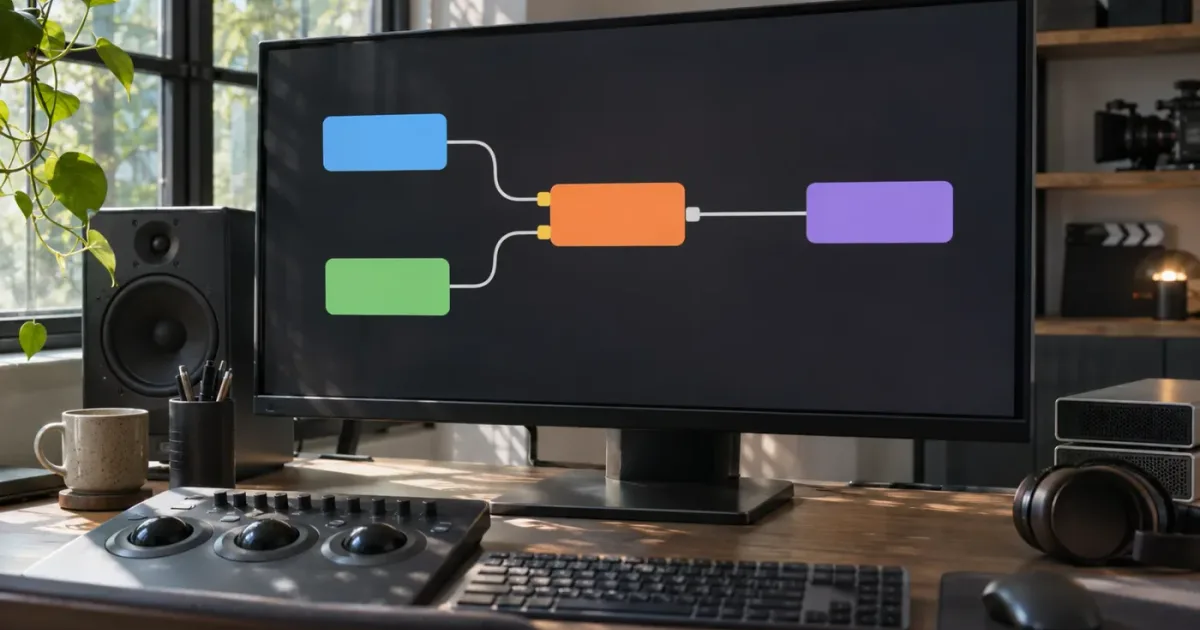
I start with the motion, not the texture. A Fast Noise layer can look convincing on one frame and still slide away from the thing it’s meant to follow. As of November 2026, this guide is for DaVinci Resolve 21.1 and the Fusion page.
What does “Fast Noise follow tracker” mean in DaVinci Resolve?
Making Fast Noise follow a tracker means using tracked motion to carry a generated noise layer along with something moving in the footage. Fast Noise generates the texture; the Tracker supplies motion data. They do different jobs.
The phrase can describe two related looks. You might want a texture to travel with a point in the image, as if a patch of vapor or energy were attached to a moving object. Or you might want a noise texture to distort the footage while that footage’s features move through the frame. Those are not the same composite. The first is a tracked overlay. The second is a distortion effect whose input or mask may need its own positioning and motion design.
For a tracked overlay, the central node idea is simple:
MediaIn1 ───────> Tracker1 [background input]
FastNoise1 ─────> Tracker1 [foreground input]
Tracker1 ───────> MediaOut1
The diagram describes the intended connection, not a guarantee that every composition will look right without adjustments. The Tracker needs usable image detail to analyze. Fast Noise needs a suitable visible area, scale, color, and blend. The finished output needs review across the entire shot.
Blackmagic describes Fusion as a node workflow in which images are merged, effects are inserted, masks isolate areas, and controls are adjusted in the Inspector. Its Fusion page overview also distinguishes 2D tracking, planar tracking, and 3D camera tracking by the kind of movement they analyze. That distinction matters here: a single tracked feature is not a substitute for tracking a plane or reconstructing camera motion.
Fast Noise creates the texture; the Tracker decides how a connected layer follows image motion.
How do I make DaVinci Resolve Fast Noise follow a tracker?
Use a Fusion Tracker node in Match Move mode: feed the clip to the background, analyze a clear feature, and connect Fast Noise to the foreground. Then tune the noise at the reference frame and check the result throughout the shot.
This is the general point-tracker workflow in DaVinci Resolve 21.1. Names and available controls can vary by tool and version, so if your screen differs, use the Tracker node’s Inspector and the version’s manual rather than assuming another tracker’s controls will be identical. Blackmagic’s Resolve 21.1 manual page links to the current manual; its Fusion overview describes using Fusion trackers to follow objects and attaching effects to tracked motion.
- Open the clip on the Fusion page. Select the timeline clip and open Fusion. Confirm that the clip appears in the node graph, usually between a MediaIn node and MediaOut. If the graph shows a different source structure, identify which node carries the image you want the tracker to analyze before adding anything.
- Add a Tracker node. Open the Select Tool window with Shift-Spacebar, type
Tracker, and add the Tracker node. Blackmagic lists Shift-Spacebar as the Fusion tool-search shortcut on its Fusion page. The shortcut opens a tool search; it does not run the track. - Connect the clip as the background. Connect the clip’s image output to the Tracker’s background input. In Fusion, node inputs are color-coded by function; check the input tooltip or manual if you’re uncertain which connector is which.
- Choose a reference frame. Scrub to a frame where the feature you want to track is clearly visible. A good reference frame has a distinct edge, corner, mark, or contrast change that stays recognizable as the shot progresses.
- Place the tracker over that feature. Keep the tracking pattern focused on something that belongs to the intended motion. Avoid a flat patch, a reflection that changes independently, a moving shadow, or a detail that disappears behind another object.
- Analyze the motion. Track forward, backward, or both directions as appropriate for the shot. A track that begins halfway through a clip cannot provide reliable motion for earlier frames unless you also analyze them or otherwise create the missing motion.
- Set the operation to Match Move. The Tracker’s operation determines what its data does. For an attached foreground, choose Match Move. If the node remains set to a different operation, the noise may not behave as an attached layer even when the track itself exists.
- Add Fast Noise and connect it as foreground. Search for
Fast Noise, add the node, and connect its output to the Tracker’s foreground input. Keep the Tracker’s background connected to the source clip. - Position and style the noise. Select Fast Noise and tune its pattern and colors. Adjust the foreground placement at the reference frame so the visible texture begins where you intend it to sit. If the effect covers too much of the image, use its mask input or another compositing step to limit the visible region.
- Check the result across the shot. Inspect the first tracked frame, a middle frame, the last tracked frame, and any moment when the object turns, blurs, or becomes occluded. A successful track is not established by one good still.
If the Tracker output does not include the source image in the way you expect, inspect the node graph before changing noise settings. Confirm that the Tracker is the final image path to MediaOut and that the source clip reaches its background input. A misplaced node or disconnected branch can make the viewer show only the generated texture, only the clip, or an earlier node’s output.
There’s also an important reference-frame question. A tracker records motion relative to where its pattern was placed when the analysis started. If the noise needs an offset from that feature, set the offset at the reference frame rather than dragging it into place on a later frame and expecting the entire track to realign. Work from the frame where you established the track, make the initial positioning there, then inspect the motion again.
What should the first working version look like?
For a basic test, make the noise easy to see and the tracking target easy to recognize. Don’t begin by trying to make a polished smoke simulation. First establish that the generated layer follows the selected motion. Then refine the look.
A useful worked example is a soft, irregular texture that follows a distinct mark on a moving object. This is a hypothetical setup, not a measured test result. Track the mark, connect Fast Noise as foreground, and choose a subdued two-color gradient. Keep the texture’s detail modest enough that you can still judge whether the layer drifts. Once the attachment is sound, adjust the noise scale, gradient, brightness, and opacity to suit the shot.
The node output is the check. Scrub through the footage and watch the relationship between the texture and the feature. If the noise keeps its intended offset as the object moves, the basic match move is working. If the noise leaves the feature behind, troubleshoot the tracking data before polishing the texture.
Which tracker should I use for Fast Noise: point, planar, or surface?
Use a point Tracker when a distinct feature provides the motion you need, a Planar Tracker when the texture should stick to a flat surface, and a Surface Tracker when the target bends or deforms. The best tracker is the one whose motion model matches the object, not the one with the most impressive name.
| What the texture should follow | Start with | Why it fits | Common limitation |
|---|---|---|---|
| A small feature or location in the frame | Fusion Tracker | A point pattern supplies motion for a foreground layer or parameter. | The feature can become obscured, blurred, or indistinct. |
| A sign, screen, panel, or other flat area | Planar Tracker | Blackmagic describes planar tracking as tracking image planes and flat objects. | It is unnecessary complexity if you only need a simple point attachment. |
| A surface that bends or changes shape | Surface Tracker | A surface track is designed to follow a deforming surface rather than one rigid point. | Mesh setup and correction require more attention than a basic point track. |
| The camera’s movement through a scene | 3D Camera Tracker | It analyzes camera motion and reconstructs a 3D scene solution. | It solves a different problem from attaching a flat noise layer to one point. |
Blackmagic’s official Fusion page summarizes these tracker types, while the Fusion 21 comparison page lists Fusion 21 tracking capabilities. The Resolve 21.1 manual is the place to check the version-specific controls.
A point track can work well when the noise is meant to follow a small, recognizable point. But it doesn’t automatically make the texture conform to a surface. If you attach a broad patch of noise to a point on a turning card, the layer may translate correctly while still looking as if it floats over the card rather than sitting on it. A planar solution is a better starting point when perspective changes across a flat surface matter.
A deforming object presents a different problem. A single point can follow the object’s general movement while missing local motion across its surface. A surface tracker can represent that changing shape more closely, though setup and correction are more involved. The official Resolve manual’s tracking chapters cover the controls and correction workflow; consult the chapter for the exact tracker you choose rather than transferring settings from one tool to another.
A 3D Camera Tracker is for reconstructing camera motion in a 3D scene. That can be useful for placing elements into a scene with perspective and parallax, but it’s not the default answer for a small noise texture attached to one moving feature. If the camera pans while the object stays still in the frame, or if an object moves independently from the camera, decide which motion you need to follow before choosing the tracker.
The fastest reliable choice is often the simplest. For a point-like attachment, try a point track. For a flat plane, use planar tracking. For a flexible surface, use surface tracking. For scene-level camera movement, use the camera tracker. If the first choice fails, change the motion model instead of endlessly increasing tracker search settings.
Why does Fast Noise not move with my tracker?
Fast Noise won’t follow the footage if the Tracker has no valid motion data for the current frame, the foreground is connected incorrectly, or the Tracker operation isn’t set to Match Move. Check those three things before changing the noise’s pattern or color.
This diagnosis separates the tracking problem from the texture problem. Fast Noise can generate a texture even when no useful track exists. And a visible tracking path does not prove that the foreground is being transformed as intended.
Is the node connection wrong?
Inspect the graph one connection at a time. The source clip should enter the Tracker’s background input. Fast Noise should enter its foreground input. The Tracker’s output should continue to the next compositing step or to MediaOut.
If the clip enters the foreground and Fast Noise enters the background, the Tracker is analyzing the wrong image and transforming the wrong layer. The nodes may still produce a picture, which makes this error easy to miss. Follow the wires rather than relying on node placement or color alone.
If you have inserted a Merge node, confirm that the merge order and the Tracker output are intentional. Multiple ways of combining images can be valid, but adding a Merge without a clear reason can duplicate the source or bypass the tracked result. For the first diagnostic pass, reduce the graph to the simplest working chain and only add extra compositing nodes once motion is correct.
Is the Tracker set to Match Move?
Select the Tracker and inspect its operation. For a foreground that should follow the tracked motion, use Match Move. A track can be present in the Inspector while the chosen operation does something else, so do not treat the existence of track points as confirmation that a foreground layer is being carried with them.
The Blackmagic Fusion overview explains tracking as a way to attach objects and effects to scene motion. The exact node controls are documented in the Resolve manual linked from Blackmagic’s manual page.
Is there tracking data at the frame you’re checking?
Go to the start of the track and scrub forward. Then check the middle and the end. If tracking began after the clip’s first frame, earlier frames won’t have the same analyzed path. If analysis stopped before the end, the final section may be untracked too.
A frequent mistake is to start analysis at a frame where the feature is easy to see, then judge the effect at the beginning of the clip. If the track was only analyzed forward from that later frame, the early frames have no track from that run. Track backward from the chosen reference frame, or begin on the clip’s first usable frame and proceed forward. Choose the direction based on where the feature is clearest.
Is Fast Noise visible as a foreground?
For diagnosis, temporarily make the generated layer visually obvious. This is a reversible viewing aid, not a suggested final grade. If the Tracker output shows the source but not Fast Noise, inspect the foreground connection and any foreground visibility or compositing controls. If Fast Noise appears but doesn’t move, check Match Move and the track’s reference frame.
A generated texture can also be hard to judge when its colors blend into the footage. In that case, temporarily use contrasting colors, then restore the intended appearance after confirming the attachment. Don’t mistake a subtle result for a tracking failure.
Is another node hiding the result?
Trace the output path from Tracker to MediaOut. If another node sits downstream, bypass it briefly or inspect its effect. A downstream mask, transform, merge, or color adjustment may hide, crop, or reposition the tracked layer after the Tracker has done its work.
If bypassing a downstream node changes the expected motion, the track may be fine and the issue may lie later in the graph. Restore the node and inspect its controls rather than rebuilding the tracker.
A visible tracking path is not proof that the noise layer is being match-moved.
How do I track Fast Noise without drift?
Reduce drift by tracking a stable, high-contrast feature, checking the reference frame and analysis range, and choosing a tracker suited to the motion. When the pattern stops matching the object, correct the track or switch tracker types before adding more noise detail.
A point tracker follows image information, not your intention. It doesn’t know that a certain object is important. It searches for a pattern. If the pattern changes, repeats elsewhere, goes soft, or gets covered, the tracker may jump or lose its match.
A useful professional observation appears in a Blackmagic Design release about an editor’s work. U-dai Ryoki, an editor at Bull, said: “In scenes where I needed to replace a car's license plate, we used tracking in the Fusion page, followed by Magic Mask in the Color page.” The example is about a specific compositing task, not a guarantee about every tracker or shot. It does illustrate a practical point: tracking and isolating an object can be separate steps in a workflow. Blackmagic Design’s account identifies Ryoki as an editor and describes the workflow.
What makes a good point to track?
Look for a feature that is:
- Distinct. A corner, mark, or clear edge is easier to recognize than a blank, uniform area.
- Stable. The feature should belong to the motion you want the noise to follow.
- Visible. Avoid a reference point that disappears behind another object for much of the track.
- Clear in the chosen channel. If color contrast is weak, luminance or another available channel may provide better separation, depending on the Tracker’s controls.
- Appropriate in scale. A tiny feature can become hard to locate with blur or movement. A broad pattern can be ambiguous if similar detail repeats nearby.
A moving highlight can be a poor target if it slides across a surface independently of the object. A shadow can change shape while the object moves. A repeating pattern can make the tracker jump from one similar mark to another. For each candidate, ask: “If this point moved independently, would the effect still look attached to the object?” If the answer is yes, it may be the wrong feature.
What should I do when the target is temporarily hidden?
Plan the track around the interruption. If the target disappears briefly, track from a clear section toward the obstruction, then inspect the frames around the interruption. Depending on the tool and the shot, you may need to stop, adjust the tracker at a later clear frame, and continue from there. The manual describes the controls for the selected tracking node; the names and behavior are not interchangeable across point, planar, and surface trackers.
Do not assume that every missing interval can be repaired by interpolation. A short gap between reliable track sections may be manageable, but a long occlusion or a sudden move can leave too little information to infer the path. When the tracked feature reappears, check whether it is still the same feature and whether the tracker resumed on the correct detail.
When should I track in both directions?
Track in both directions when the best reference frame is in the middle of the shot, or when one direction has a clearer starting point than the other. If the best reference frame is near the start and the target remains visible, tracking forward may be sufficient. If you choose a middle frame, a forward-only track leaves earlier frames without data from that run.
The useful question is not “Which direction is faster?” It is “From which frame can I establish the most trustworthy pattern, and how much of the clip must be covered?” Set the reference frame accordingly, then confirm coverage at the clip’s usable start and end.
What if the camera moves as well as the object?
Decide whether the effect should follow the object, the scene surface, or the camera. A point tracker can follow a point on the object even while the camera moves, if the point remains visible and recognizable. A planar tracker may fit a flat surface whose perspective changes. A 3D camera tracker addresses camera motion in a scene, which is a different goal from following an independently moving object.
When both camera and subject motion are present, inspect how the target moves relative to the background. If it moves independently, a camera-only solution may not keep the texture attached to it. If the texture should float in the scene rather than stay on the object, tracking the camera or scene may be the better creative choice.
How do I correct a track that jumps?
Find the first frame where the track becomes wrong. Don’t start by adjusting every later frame. A sudden jump often points to a specific cause: occlusion, blur, a similar pattern entering the search area, or an abrupt lighting change. Correcting around the first bad frame can be more effective than changing the entire track.
The Resolve 21.1 manual is the authority for the controls in your installed version. In the general troubleshooting sequence, inspect the pattern, search region, and tracking direction. If the object changes shape or the feature vanishes, consider a different tracking method. If the feature remains clear but the tracker loses it after a sudden movement, adjust the track at a good frame and resume analysis where the target is visible.
Keep a copy of the composition before making large corrections. That’s a workflow precaution, not a special Tracker feature. It lets you compare the original track with the corrected one and avoids losing a usable version while experimenting.
How should I animate Fast Noise separately from tracked movement?
Treat the noise pattern and the tracked layer as separate motion controls. Fast Noise’s Seethe changes the generated pattern over time; Match Move carries the foreground according to tracked image motion. You may use either, both, or neither, depending on the intended look.
The official Resolve 21 manual documents the Fast Noise node and its controls. Blackmagic describes Fast Noise as a generator for noise patterns, and its Fusion feature comparison lists noise-detail and brightness-map capabilities. Those are texture controls, not substitutes for a tracked transform.
Should Seethe be on or off?
Use Seethe when you want the texture to evolve. Leave it unchanged when a stable pattern should travel with the tracked motion. If you animate the pattern and the layer at the same time, you’re combining two types of motion. That can be useful, but it can also make a track harder to evaluate.
For troubleshooting, temporarily disable or minimize the texture’s evolution if the node exposes the relevant controls. First establish that the layer follows the feature. Then bring back the intended pattern movement. This isolates the cause when the result looks unstable.
How do I make the texture less dominant?
Start by adjusting the noise’s colors and its visible contribution to the composite. If the texture should be subtle, a high-contrast, opaque result makes both the look and the tracking harder to judge. A restrained gradient, a mask, or a blend adjustment can help the texture sit more naturally in the image, depending on the node chain and the controls available.
Don’t use a mask to hide a tracking error. A soft edge can make a poorly placed layer less obvious for a moment, but the underlying motion will still be wrong. Fix attachment first. Refine edges and opacity second.
Can I use Fast Noise as a mask?
Fast Noise can serve as a generated texture or map in a Fusion composition, but the way it behaves depends on where you connect it and which receiving node uses it. Blackmagic’s official Fast Noise documentation in the Resolve manual describes Fast Noise as a source for other effects, including as a noise source for effects and particle systems. It also documents map inputs that can control noise detail and brightness.
If your goal is to have a noise-driven effect follow a moving feature, you may need to track or transform the generated map, the affected image, or both. These are distinct graph designs. A noise map plugged into a receiving effect’s map input isn’t automatically the same as a visible Fast Noise foreground connected to a Tracker.
Why does animated noise look like it slides through the object?
Because the texture’s internal evolution and its layer transform can produce different apparent motion. Match Move can carry the layer. Seethe can change the pattern within that layer. If the pattern itself changes, the detail you’re watching may not remain fixed even when the layer is attached correctly.
Decide what should stay fixed. If the texture should behave like a printed surface, minimize its internal evolution. If it should look like fluid, smoke, or energy, evolving detail may be appropriate. In either case, check the silhouette and overall attachment separately from individual noise features.
Match Move carries the layer; Seethe changes the texture inside it.
Why does my Fast Noise layer look cropped, stretched, or too large?
A tracked layer can look cropped or stretched because its source dimensions, position, scale, tracking motion, or downstream transforms don’t suit the shot. Diagnose the image bounds and the node chain before assuming the track is broken.
Fast Noise is generated imagery. It may fill the composition, and moving or scaling a foreground changes how that generated image occupies the frame. As the tracked layer shifts, the frame can expose an edge or a less useful area of the texture. A point track can be correct while the visible texture still looks wrong.
Why do I see an edge when the layer moves?
The generated image may not extend far enough in the direction the tracked layer travels, or a downstream crop may clip it. Scrub to the frame where the edge first appears. Check whether the edge belongs to Fast Noise, a mask, a transform, or the composition boundary.
If the edge comes from a mask, inspect the mask’s size and position. If it comes from the generated layer, adjust its scale or framing so the tracked movement doesn’t expose an unwanted boundary. If a downstream node crops the result, inspect that node’s frame and sizing controls.
Increasing the source’s apparent size can hide a boundary, but it may also change the texture scale. A larger layer is not always the right answer. Check both edge coverage and the texture’s apparent detail after the adjustment.
Why does the noise look stretched?
Look at the Fast Noise scale and any transform applied to the layer. The texture may have different horizontal and vertical scale values, or a transform may be changing its proportions. The Fast Noise Inspector includes scale controls; Blackmagic’s manual describes independent X and Y control when the lock is disabled.
That can be intentional for a directional texture. But if the goal is a uniform pattern, inspect whether the axes are linked and whether another transform is stretching the foreground. Change one control at a time and compare the same frame.
Why does the texture cover the whole image?
A generated image may occupy the entire frame until you limit where it contributes. Use an effect mask or a separate mask-driven compositing approach if only part of the frame should show the noise. The Resolve manual documents Fast Noise’s effect-mask input and its noise-detail and brightness map inputs. These inputs control different parts of the effect, so choose the one that matches the desired restriction.
An effect mask restricts where the Fast Noise effect appears. A noise-detail map controls detail. A brightness map controls the noise map’s brightness behavior. Don’t connect a map just because it is available. Identify what you want to control first.
If the noise should remain inside a moving object, tracking the mask or the mask’s position may be part of the solution. That still doesn’t guarantee the noise will conform to a deforming outline. For a flexible shape, a surface or mask-tracking workflow may be more suitable than a single point attachment.
Why does the result look offset from the tracked feature?
The offset may come from where the foreground is positioned at the reference frame, from a transform before or after the Tracker, or from tracking a feature that isn’t the visual center of the object. Compare the tracked point to the texture’s intended anchor at the reference frame. If they differ, decide whether that offset is deliberate.
Then inspect the same relationship at several points in the shot. A consistent offset suggests placement. An offset that changes over time suggests tracking, deformation, or an additional transform. Treat those as separate diagnoses.
How do I make a Fast Noise follow tracker look convincing?
A convincing result begins with a clear reason for the texture to be there. Choose a tracked anchor that supports the effect, keep the movement plausible, and make the noise’s scale, contrast, and edge treatment fit the image. A correct track can still produce a distracting composite.
The following are worked examples, not observed results or guaranteed presets. They show how the same node idea can serve different visual goals.
Worked example: a soft texture attached to a small feature
Suppose a clip contains a clearly visible feature and you want a small patch of textured light to follow it. Use a point Tracker, choose the feature as the reference, and connect Fast Noise as foreground. Set the initial offset and scale so the visible patch is near the feature without obscuring it. Keep the noise evolution restrained while you check the movement.
The decision is about anchoring. If the effect should stay at a constant distance from the feature, set that relationship at the reference frame. If it should cover the feature itself, align the texture accordingly. Review turns and partial occlusions. A point that remains attached to a corner may not stay visually centered when the object rotates.
Worked example: fog or smoke near a moving subject
Suppose you want a generated mist layer to move with a subject for part of a shot. First choose whether the mist should be attached to the subject or simply occupy a region of the scene. For an attached patch, track a stable feature and use Match Move. For atmospheric haze that fills a region, tracking a single point may be the wrong design; masks and compositing may matter more than a direct point attachment.
A moving subject does not automatically make all nearby fog move with it. Real atmosphere can drift independently. If the effect should feel like smoke trailing the subject, combine a tracked anchor with internal noise evolution and a shape that extends behind the motion. If it should appear fixed in the room, tracking it to the subject could make it look pasted on.
Worked example: noise on a flat sign or screen
A sign or screen is a plane, not just a point. If the camera angle changes, a point match move can keep one feature attached but won’t necessarily make a texture conform to the whole plane. A planar tracker is the more relevant starting point when the texture should follow perspective across a flat surface.
Build the noise and composite with the intended plane in mind. Inspect all four corners of the sign or screen as it moves. If one point looks right but the rest slides, the motion model may be too simple for the shot. Check the Planar Tracker controls in the installed version’s manual and follow the tool-specific workflow.
Worked example: a texture on a deforming surface
For a surface that bends, such as fabric or skin, the layer may need to follow more than translation and rotation. A point track can follow a recognizable feature while missing local deformation elsewhere. A Surface Tracker can represent changing surface shape, but it requires its own setup and correction.
Choose a mesh or surface reference that spans the area where the texture should stick. Then inspect the region across the shot, especially where the surface changes shape. If the track is good in the center but poor at the edges, the texture may need a smaller region or a better surface setup. Don’t judge the whole surface from one anchor point.
Worked example: abstract energy around a moving object
An abstract effect can tolerate some internal movement that a literal overlay cannot. Use a tracked position to keep the effect generally attached, then let the Fast Noise pattern evolve if that supports the look. Keep the two motions in mind: the outer position follows the object, while the inner texture changes independently.
If the result appears to slip, pause the internal animation and inspect the attachment. If the attachment is correct, the apparent slip may be the noise pattern changing. If the whole layer is moving incorrectly, revise the track or the node connections.
What changes in DaVinci Resolve 21.1?
DaVinci Resolve 21.1 is the version context for this guide, and Blackmagic published its 21.1 manual on September 8, 2026. Blackmagic’s release materials describe updates to multiple pages and tools, but the core distinction in this workflow remains: Fast Noise generates a texture, while tracking data supplies motion.
Use the official manual page to open the documentation for your installed release. A manual from a different major version may still explain familiar Fusion concepts, but it can differ in tool labels, options, or interface layout. When a control described in an older tutorial isn’t visible, confirm which version and which tracker the tutorial uses before concluding that your installation is missing a feature.
Blackmagic’s 21.1 release announcement, dated September 8, 2026, notes changes across DaVinci Resolve 21.1, including new tools and performance work. It does not say that the Fast Noise follow-tracker workflow has been replaced. For this reason, don’t infer a new tracking behavior solely from the Resolve version number. Check the manual’s node-specific chapter and your installed interface.
For editions, check the current Blackmagic Fusion 21 comparison and the feature list for your installed Resolve version if a control or tool is unavailable. Feature tables can distinguish Fusion inside DaVinci Resolve from Fusion Studio, and may identify edition-specific capabilities. Avoid relying on a general claim that every feature is identical in all editions.
If you’re new to the node graph, the Fusion page beginner guide can help with basic node navigation. For a workflow centered on camera motion, the Fusion camera tracker tutorial covers a different tracking task. If your question is actually about reducing footage noise rather than generating a Fast Noise texture, see the guide to DaVinci Resolve video noise reduction settings.
What is the fastest way to troubleshoot the finished composite?
Troubleshoot in a fixed order: confirm the image connections, confirm Match Move, confirm track coverage, confirm the reference-frame placement, then inspect the noise and downstream nodes. This order prevents you from adjusting texture settings to compensate for a tracking or graph error.
- Check the connections. Source clip to Tracker background; Fast Noise to Tracker foreground; Tracker output to the intended next node or MediaOut.
- Check the operation. Select the Tracker and confirm Match Move for an attached foreground.
- Check the analysis range. Scrub the first, middle, and last frames that need a track. Confirm the feature remains trackable through that range.
- Check the target. Look at the tracker pattern over the feature. If the pattern no longer describes the same feature, correct or replace the track.
- Check the reference frame. Verify the noise is positioned as intended where the tracking relationship was established.
- Check for downstream changes. Bypass or inspect later nodes that could crop, reposition, mask, or hide the result.
- Check the texture last. Adjust its scale, colors, mask, and evolution after the motion and composite path are sound.
If you’re comparing a tutorial to your current screen, remember that the selected page, node, and panel affect which controls appear. Resolve’s manual is the primary reference for its current version. Blackmagic also offers official training and a user forum for questions that depend on a particular setup. A tutorial can be useful for seeing a procedure, but a different project or screen layout can change where a control appears.
TryUncle is the on-screen assistant for DaVinci Resolve on Mac and Windows, ask in plain words and Uncle points at the exact control on your screen. If you want help locating a control while your project is open, TryUncle is one option; the Blackmagic manual remains the primary source for version-specific behavior.
Should I use a point tracker or redesign the node graph?
Use a point tracker when the goal is a texture attached to a recognizable image feature. Redesign the graph or choose another tracker when the real goal is to follow a plane, conform to a deforming surface, or create a scene-level 3D effect.
Here’s the decision in plain terms:
- The noise should follow one visible feature. Start with a point Tracker and Match Move.
- The noise should stick to a flat surface that changes perspective. Start with planar tracking.
- The noise should conform across a bending surface. Consider a Surface Tracker.
- The noise should live in the scene as the camera moves. Consider whether a 3D camera track is appropriate.
- The noise should distort footage rather than appear as a layer. Build a distortion workflow and decide how the noise map and affected image should move.
- The track works, but the effect looks wrong. Adjust the texture, mask, scale, blend, and reference-frame offset.
- The effect works on one frame only. Check track direction and coverage before changing the noise.
Don’t add a more complex node because it sounds more powerful. Use it when the simpler motion model cannot represent the shot. A point track is often the clearest test. It can also be the wrong tool for a surface effect. Match the tracker to the job.
The right tracker is the simplest one that matches the motion you need.
For a first pass, build the smallest node graph that can prove the idea: a clip, one Tracker, and one Fast Noise layer. Confirm the motion at the beginning, middle, and end. Then add masks, extra transforms, or more complex tracking only where the shot demands them. If the noise follows the wrong thing, change the tracking target or motion model. If it follows correctly but looks artificial, refine the texture and composite. Start with the motion. Finish with the look.
Frequently asked questions
- How do I make Fast Noise follow a tracker in DaVinci Resolve?
- In Fusion, connect the clip to a Tracker node's background input, track a clear feature, set the operation to Match Move, and connect Fast Noise to the foreground input. Place and tune the noise at the reference frame, then check the track across the shot.
- Why does Fast Noise not move with my tracker in Fusion?
- The Tracker may still be set to its default operation, the noise may be connected to the wrong input, or the tracking data may not cover the frames you are viewing. Confirm the node connections, choose Match Move, and inspect the track at its start, middle, and end.
- Can I track Fast Noise to a moving object in DaVinci Resolve 21 Free?
- The workflow uses Fusion's Tracker and Fast Noise nodes. Check the current Blackmagic feature comparison and the controls available in your installed edition if a feature is missing, since feature availability can differ between Resolve Free and Studio.
- Should I use a point tracker, planar tracker, or surface tracker for Fast Noise?
- Use a point Tracker for a texture that follows a distinct feature or point, a Planar Tracker when the effect must stick to a flat surface, and a Surface Tracker when it must follow a deforming surface. The right tool depends on the motion and what the noise should appear attached to.
- How do I make Fast Noise look like smoke or fog that follows a subject?
- Use Fast Noise as a texture source, shape its visible area with masks or compositing controls, and drive the layer with tracking data. Keep the noise’s movement and the tracked layer’s movement as separate choices: Seethe changes the pattern, while Match Move carries the layer with tracked motion.
Sources
- DaVinci Resolve 21.1 Manual
- DaVinci Resolve Fusion: Track and Follow Any Object
- Fusion 21 feature comparison
- Blackmagic Design, DaVinci Resolve 21.1 release notes
- Fusion Visual Effects with DaVinci Resolve 18, official training guide
- DaVinci Resolve 20 Colorist Guide
- DaVinci Resolve 21.1 Manual, Tracking Nodes chapter
- TryUncle
- U-dai Ryoki discusses a Resolve workflow using Fusion tracking
Put this guide to work with TryUncle.
Ask about the step you’re on. TryUncle sees your screen and points at the control you need, so you can keep learning in your own project.
Get TryUncle for Mac or WindowsKeep reading
Guides · Jul 31, 2026 · 34 min
DaVinci Resolve Fusion Camera Tracker Tutorial (3D Tracking)
Learn DaVinci Resolve's Fusion Camera Tracker: solve a real camera's 3D path, judge the solve error, and lock text, objects, or patches to the shot.
Guides · Jul 10, 2026 · 32 min
DaVinci Resolve Fusion Page Tutorial for Beginners
Learn the DaVinci Resolve Fusion page from zero: nodes, MediaIn/MediaOut, the Merge node, planar tracking, and keying a green screen, step by step.
Guides · Jul 8, 2026 · 29 min
DaVinci Resolve Noise Reduction Settings: Temporal and Spatial
The exact Temporal and Spatial Noise Reduction settings in DaVinci Resolve: frame count, threshold values, motion range, and when to use each.