Articles / Fixesupdated for DaVinci Resolve 21 (November 2026)
DaVinci Resolve Grades Entire Video Instead of Clip? Fix It
Quick answer
If DaVinci Resolve grades the entire video instead of one clip, select the intended timeline clip on the Color page and check the node-editor mode. Use Clip for a shot-specific grade; Group Pre-Clip and Group Post-Clip affect group members, while Timeline affects the timeline. If Clip mode is already active, inspect group membership, shared nodes, and effects on other tracks.
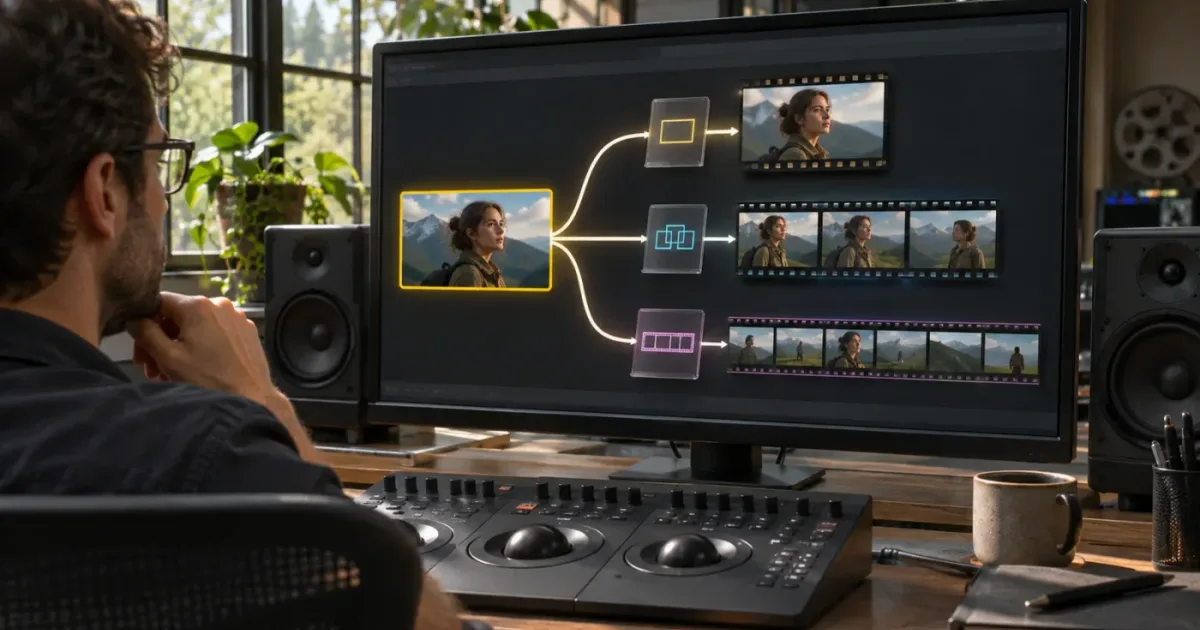
I change one shot, and another shot shifts with it. Or the whole sequence takes on the same cast, even though I selected a single clip.
The first place I check is the node-editor mode on the Color page. Clip is the context for a shot-specific grade; Group Pre-Clip, Group Post-Clip, and Timeline are broader contexts. If Clip is already selected, I look for a group, shared node, or effect elsewhere in the timeline before rebuilding anything.
Why is DaVinci Resolve grading the entire video instead of one clip?
Resolve may be applying a group grade, a timeline grade, or another shared effect even though you’re looking at a particular shot. The image in the viewer doesn’t tell you, by itself, where the current correction is applied. The mode label in the node editor is the first useful clue.
Think of the active grade as having a scope. A Clip grade belongs to an individual timeline clip. A Group grade is shared by members of a group. A Timeline grade applies at timeline level. An adjustment clip or a track effect can also change the composite over part of the edit, even if it isn’t part of the selected clip’s Color page node graph.
Blackmagic Design’s Color page overview describes group grading as a way to apply processing across clips in a group. The DaVinci Resolve reference manual describes the Color page timeline as reflecting the Edit page timeline while providing grading controls and clip information. That distinction matters: the viewer shows an image, but you need to confirm both the selected timeline clip and the active grade context.
A grade follows its node-editor context, not just the clip visible in the viewer.
Use the pattern of affected shots to choose where to investigate:
| What changes when you adjust a control? | First place to look | Possible explanation |
|---|---|---|
| The selected shot changes and nearby shots do not | Node-editor mode | Likely a Clip grade |
| Several clips in a scene change together | Group Pre-Clip or Group Post-Clip | Those clips may be members of one group |
| Shots across the timeline change | Timeline mode or an effect spanning the timeline | The correction may be broader than one clip |
| Another appearance of the same source changes | Shared node or grade relationship | The two timeline instances may share grading data |
| Only shots beneath a certain overlay change | Adjustment clip or upper-track effect | The effect may process the composite below it |
| The viewer changes but the intended timeline clip does not | Selection and playhead | The selected clip may not be the shot you think it is |
These patterns are diagnostic clues, not proof. A project can combine multiple scopes. One clip can have its own grade, belong to a group, use a shared node, and sit beneath an adjustment clip at the same time.
So I don’t start by deleting nodes or resetting the grade. First, I find where the change lives. Removing a useful group or timeline correction can change the project in ways that have nothing to do with the shot I meant to fix.
A small, reversible test helps separate a scope problem from an image problem. Make a modest temporary adjustment, check one other shot, then undo the test. You’re asking whether another image responds, not judging whether the temporary look is good.
Keep two questions separate throughout the diagnosis:
- Where is the processing applied? This is the scope question.
- Does the resulting image look right? This is the grading question.
A grade can be properly isolated and still look wrong. Or a look can be pleasing on one frame while being applied at the wrong scope. Resolve’s viewer doesn’t answer both questions for you, so check scope first and visual quality second.
How do I make a DaVinci Resolve grade affect only one clip?
Select the intended timeline clip on the Color page, set the node-editor mode to Clip, and check a nearby shot after a small test adjustment. If the other shot stays unchanged, undo the test and make your real correction in Clip mode.
- Open the project and go to the Color page.
- Select the timeline clip you want to correct. Use the Color page timeline or clip thumbnails to confirm the selection, rather than relying only on the playhead position.
- Find the node-editor mode selector. Its arrangement can look different depending on the workspace, but the mode name is what matters.
- Choose Clip. Avoid Group Pre-Clip, Group Post-Clip, or Timeline if the correction should belong only to one clip.
- Make a small temporary adjustment. Keep it easy to recognize and easy to undo.
- Select a neighboring timeline clip and compare its image with the test adjustment active.
- If the neighbor didn’t change, undo the test and make the intended correction in Clip mode. If it did change, continue with the group and shared-processing checks below.
The confirmation is three-part: the intended timeline clip is selected, the mode reads Clip, and a nearby shot doesn’t inherit the test. That confirms the correction’s scope in this test. It doesn’t tell you whether the final grade is visually right.
The Color page timeline and the Edit page timeline represent the same timeline content, but they provide different ways to navigate it. Blackmagic’s reference manual describes the Color page timeline and thumbnail timeline as grading-oriented ways to move among clips and see clip information. Use those visible selection indicators when you’re unsure which timeline instance is active.
Don’t confuse the clip under the playhead with the selected clip. Scrubbing can move the viewer to another moment. It doesn’t replace the simple check: which clip is selected, and what does the node-editor mode say?
If the selector is hard to find, give the node-editor area more room or inspect the Color page workspace controls. Resolve 21 also offers a Layer List view of the node graph. Blackmagic’s Resolve 21 New Features Guide describes Layer List as an alternate way to display and manage nodes. A list instead of a graph can make the interface look unfamiliar, but the display choice alone doesn’t mean the grade is timeline-wide.
A quick, safe test can be more useful than trying to interpret every node in a complicated project. Use one change that’s easy to identify, such as a modest lift or saturation move, then inspect one nearby clip. Don’t stack several changes during the test. If you do, it can be harder to tell whether you’ve changed the scope or merely altered the look enough to notice it.
If the selected shot is the last clip in the timeline, choose a different comparison. You can inspect another clip that should be unaffected, such as one earlier in the sequence. The important point isn’t that the test clip must be adjacent. It’s that you compare a clip outside the intended scope.
Clip mode is the starting point for one-shot corrections, but the selection still matters.
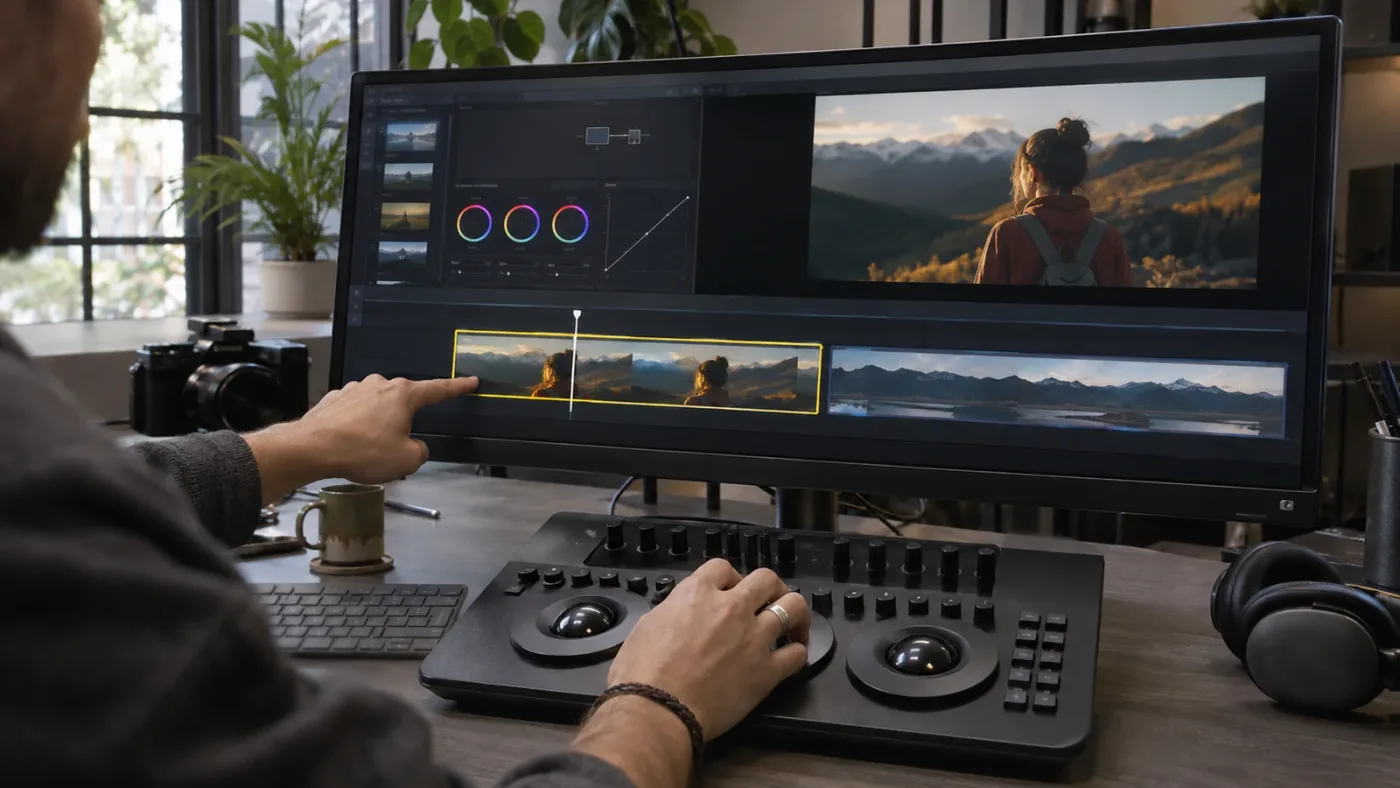
Why does Group Pre-Clip or Group Post-Clip change several shots?
Group Pre-Clip and Group Post-Clip are group contexts. A correction made there is intended to be shared by members of the group. If several shots change together, the mode label may explain the behavior without any problem in the project.
A group can be useful when related shots need a common part of their grade. For example, you might want a shared treatment for a scene or for shots from one camera, while still balancing individual differences in Clip mode. The group grade doesn’t make different exposures or lighting conditions identical. It gives the group members a common processing stage.
The Pre-Clip and Post-Clip names refer to where the group processing sits in the grading workflow. The DaVinci Resolve 20 Colorist Guide describes Group Pre-Clip as a place for common preparatory work, individual Clip adjustments for shot-specific needs, and Group Post-Clip for group-level processing after those clip adjustments. Treat that as a useful workflow description, not a rule that every project must follow in the same order.
If the shared treatment is useful but one shot needs a unique adjustment, keep the group processing and add the shot-specific work in Clip mode:
- Select the shot that needs an individual correction.
- Set the node-editor mode to Clip.
- Make the local correction on that clip.
- Compare the result with the other group members.
- Leave the group grade intact if it still serves the rest of the group.
This is often narrower than removing the clip from the group. Removing membership changes the clip’s relationship to group processing, so check what the group is doing before you change it. If only one shot is the outlier, a local correction may preserve the intended shared look for the other shots.
A group should have a reason to exist. Clips might belong together because they share a scene, camera, setup, or intended treatment. But proximity in the timeline isn’t enough by itself. Two neighboring shots might use different cameras or have different lighting and creative intent. If they shouldn’t share a correction, inspect the group membership rather than repeatedly fighting the group-level result.
Resolve 21 adds grade versioning for clip groups. Blackmagic’s New Features Guide says you can create and manage versions for clip groups, and selecting a version for a group affects all clips in that group. This is useful for changing a shared group look. It isn’t a way to isolate one member.
A worked example: imagine a two-camera interview with several timeline cuts. You want a common creative treatment for the interview, but one close-up looks too warm. A group-level change may affect all the interview cuts. If the problem belongs only to the close-up, switch to Clip and make a local correction rather than changing the common group look. This is a hypothetical workflow example, not a report of a test performed in Resolve.
A second example: imagine three shots from the same camera in a room with changing window light. You may use a group stage to establish a common treatment, then correct the bright and dark shots individually in Clip mode. The group doesn’t need to be removed just because one shot needs a local adjustment. The decision depends on whether the shared part is still useful.
Before removing a clip from a group, record the current behavior. Does the group contain a shared look you want to keep? Do several other shots rely on it? If you remove one clip and the shot changes, that change may reflect the loss of group processing rather than the fix of a defective grade. Keep a way to restore the original assignment until you know which result you want.
Group versions introduce another useful distinction: changing the active version changes the group’s look for all members. If a particular shot needs a unique result, that’s a reason to use its Clip context, not to make a new group version and expect only one member to change.
Why does changing one clip affect another clip from the same source?
A source file can appear more than once in a timeline. If two appearances respond to the same correction, inspect whether the relevant node or grade relationship is shared. The fact that the source media is the same doesn’t, by itself, identify which grading relationship is active.
A repeated source might appear as an opening shot, a later cutaway, and a retimed section. Those are separate timeline appearances. The project can still be configured to reuse certain grading elements across clips, so a change to shared processing may show up in more than one place.
Blackmagic’s Color page overview explains that shared nodes can be used across clips, with changes transferring to clips that share the node. If you intended to adjust only one instance, inspect the node graph and the node’s shared status before changing it again.
For an isolated correction, use a regular, local node in Clip mode. If the shared node is intentional, leave it in place and add a separate local correction for the outlier. The exact node names and graph layout in a project are choices made by whoever built the grade, so don’t assume similarly named nodes have the same scope.
Resolve also has local and remote grade relationships and grade versions. Blackmagic’s Resolve 21 guide shows controls for local and remote versions and for copying local grades to remote grades and vice versa. Those controls aren’t interchangeable with the Clip, Group, and Timeline mode selector. If one source’s timeline instances behave alike, inspect both the mode and the specific grade relationship instead of changing a project-wide preference as a guess.
A useful diagnosis is to select each timeline appearance in turn and compare:
- Does the mode label show Clip, Group Pre-Clip, Group Post-Clip, or Timeline?
- Does either clip show a group relationship?
- Does the node you’re changing indicate shared status?
- Are you using a local or remote grade version?
- Does the same change appear on all uses of the source, or only some?
- Does the link remain if you make the test on a local node rather than on the suspected shared node?
Don’t edit the shared node during the first test. That would repeat the broad change you’re trying to diagnose. Instead, make a small adjustment on a local Clip node, observe the other source instance, then undo the test. If the other instance stays unchanged, you have a useful clue that the local correction is isolated.
A practical decision: if the source appearances should always match, a shared relationship may be intentional. If the same source appears once in daylight and once in a different lighting condition, an independent local correction may be more useful. Don’t break a link simply because you’ve noticed it. First decide whether the link serves the project.
For more on the distinction between node types, see shared nodes vs. regular nodes in DaVinci Resolve. A shared node can be the right tool when the same treatment should stay linked. The problem arises when the link is accidental or the intended correction is local.
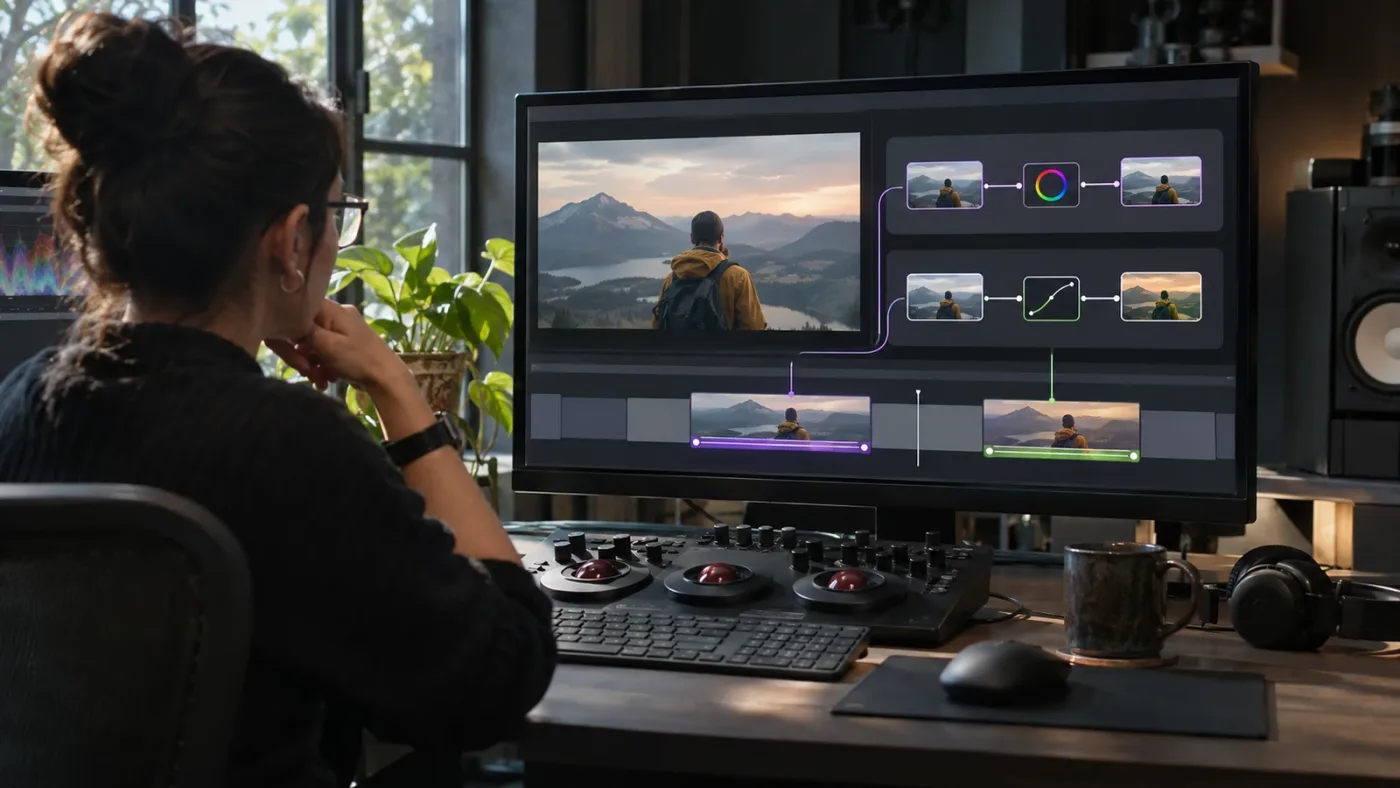
Why does a Timeline grade affect the entire video?
A Timeline grade is a broad grading context. If the node-editor mode is set to Timeline, a change isn’t confined to the selected shot. Use Timeline only when you want processing at timeline level.
The mode label is the first check. If it reads Timeline, select the target clip and switch to Clip before making a shot-specific correction. Then use the reversible test to see whether the neighboring image stays unchanged.
A timeline-level correction can be intentional. It might be part of a finishing workflow or a treatment that should apply across the program. The mistake isn’t using a broad scope; it’s using one when you meant to change a single shot.
Before deleting a Timeline node, ask what role it serves. A node may contain a finishing treatment, an output-related operation, or another adjustment that is supposed to affect the program. Deleting it can change all shots, not just the one that prompted the troubleshooting. If you don’t know what the node does, preserve the current state and test on a duplicate timeline or project version.
If the mode says Clip but the final image still changes across the timeline, the selected clip’s node graph may not be the only processing layer. Look at group nodes, timeline nodes, and effects on higher tracks. The final image can reflect more than one layer of processing.
You can test a suspected node by bypassing it temporarily, if you can identify it and restore it. Change one thing at a time. If you bypass a timeline node and disable an adjustment clip in the same test, you may stop the symptom without learning which one caused it. That makes the next correction less certain.
A worked example: suppose a slight contrast change appears on every shot. First check whether the active mode is Timeline. If it is, switch to Clip and repeat the small test. If the change still appears broadly, restore your test and inspect the timeline for another effect. This example shows a diagnostic sequence, not a measured Resolve result.
Another clue is the extent of the effect. If a change appears on every timeline shot, a Timeline correction is one plausible cause. If the change appears only for a particular time range, a track-level effect or adjustment clip may fit the pattern better. If only repeated instances of one source change, inspect shared-node or grade relationships. Use these patterns to choose what to inspect, not to declare a cause before checking it.
If the project contains more than one timeline, confirm you’re testing the timeline you intend to deliver. A grade change in one timeline doesn’t establish what’s happening in another. When comparing, stay within the same timeline and select clips in that timeline so you don’t mix results from different edits.
Could an adjustment clip be affecting every shot underneath it?
Yes. An adjustment clip or an effect on a higher video track can affect a range of the timeline, making multiple shots appear to share a grade. If Clip mode is active but the viewer still changes across several shots, inspect the Edit page timeline.
A Color page node graph isn’t the only place that can alter the final image. In a layered edit, an effect on an upper track may cover multiple underlying shots. That can look like a grade applied to every clip even though the clip grades themselves are independent.
Check the Edit page:
- Find the time range where the affected shots appear.
- Look at the video tracks above those shots for an adjustment clip or another overlay spanning the same range.
- Select the suspected item and inspect its Inspector and applied effects.
- Temporarily disable the suspected effect or track, if appropriate, and compare the viewer.
- Restore the effect or track after the test. If it’s the cause, decide whether to shorten its range, move it, or keep it.
Check the actual result before removing the item. An adjustment clip may contain several effects, not just a color treatment. Deleting it could remove a blur, glow, transform, or another effect that was meant to remain.
An effect’s range matters. If only the shots underneath one section change, compare that section with a nearby part of the timeline outside the overlay’s range. If the affected area lines up with the item’s duration, that’s a clue to investigate. It doesn’t prove the adjustment clip is the only cause.
Compound clips and nested timelines add another boundary to inspect. A correction can sit inside a nested sequence or on the parent timeline. If the problem appears only when you view the combined item, check both levels. Make sure you know whether the selected clip is an ordinary shot, a compound clip, or a nested timeline before changing its grade.
A useful test is to compare a frame inside the suspected effect’s range with one outside it. Don’t change the effect yet. Just identify whether the symptom follows the range. If it does, temporarily disable only that item and compare again. Restore it before testing another item.
Also check whether the item is actually above the shots you’re comparing. A clip on a different track or outside the relevant time range won’t explain a change that appears elsewhere. Track order and clip duration help narrow the search.
If a track effect affects several layers beneath it, the visible result may not be limited to a single source clip. That’s why a local Clip grade can appear to have a broad impact when another layer is also active. The Color page tells you about the selected clip’s grade; the Edit page helps you inspect the layered composite.
What should I check if the node mode already says Clip?
If Clip mode is active, verify the selected timeline clip, then inspect other shared processing. Clip mode tells you where the current node graph is working, but it doesn’t rule out groups, shared nodes, timeline nodes, or Edit page effects.
Work through the checks in order:
- Confirm the selected clip. Make sure the selected item in the Color page timeline is the shot you intend to correct.
- Check group membership. If the clip belongs to a group, see whether a Group Pre-Clip or Group Post-Clip correction is part of the result.
- Inspect shared nodes. Confirm whether the node you’re adjusting is shared with other clips.
- Check local and remote grade relationships. Determine whether multiple timeline instances are intentionally using related grades.
- Inspect the Timeline context. A timeline-level grade can remain part of the final processing while you work on a Clip grade.
- Look at Edit page tracks. Check for an adjustment clip or effect over the affected range.
- Inspect compound or nested content. Look both inside the nested item and on its parent timeline.
- Test one possibility at a time. Use a duplicate or saved project state if the existing grade is important.
The order helps you avoid mixing up symptoms. If only members of one group change, group processing is a stronger lead than a timeline-wide effect. If only repeated instances of one source change, inspect shared-node and grade relationships. If every shot beneath one overlay changes, inspect the upper track. If the entire timeline changes, inspect the Timeline context.
Those patterns are clues, not guarantees. A project can contain several of these mechanisms. Diagnose each relevant layer instead of assuming one cause rules out the others.
Avoid removing a clip from a group, deleting a shared node, and disabling a timeline effect all at once. If the symptom stops, you won’t know which change mattered. You may also remove processing the rest of the project still needs.
When Clip mode is active, shared processing can still come from outside the clip node graph.
A controlled test is simple:
- Save a new project version or duplicate the timeline if the grade matters.
- Write down the selected clip and current node-editor mode.
- Choose one suspected source of shared processing.
- Make one small, reversible change or temporarily disable that one item.
- Check the same neighboring shots again.
- Undo the test before trying the next suspected cause.
This approach takes longer than clicking several controls at once, but it preserves the ability to explain what happened. That matters if the same project will be revised later or handed to another editor.
What if the selection and viewer don’t seem to agree?
Pause before changing any grade. A mismatch between the image in the viewer and the selected thumbnail can make a scope problem look much stranger than it is.
Check the selected item in the Color page timeline, then move the playhead deliberately to a frame inside that item. If the selected item and the playhead point to different parts of the edit, you may be looking at one shot while changing another. Use the visible clip highlight as your selection check, not just the viewer image.
A clean test sequence is:
- Click the timeline clip you intend to correct.
- Confirm its selection highlight.
- Place the playhead inside that clip.
- Read the node-editor mode.
- Make a small test adjustment.
- Select a different clip and compare.
- Undo the adjustment.
If the test changes the wrong item, undo immediately and recheck selection. Don’t try to compensate by changing a second clip. That can leave you with two unrelated corrections and no clear diagnosis.
What if the viewer changes but the grade seems missing?
Sometimes the viewer changes when you adjust a control, but the result doesn’t appear on the clip you expected. Start by checking the selected item and mode again. Then ask whether you’re examining the timeline composite, an individual clip, or a nested item.
If the selected clip is a compound clip, the visible result may depend on processing inside the compound and on the parent timeline. If an upper track contributes to the composite, it may also affect what you see. Check one boundary at a time:
| What you’re viewing | What to confirm |
|---|---|
| An ordinary timeline shot | The selected clip and active grade mode |
| A compound or nested item | Both the parent timeline and the contents of the item |
| A layered composite | The relevant upper-track clips and effects |
| A repeated source appearance | Whether nodes or grades are shared |
| A group member | Whether group processing is active |
This is a map for investigation, not a promise that every project uses each type of processing. Follow the layers that actually exist in your timeline.
How do Clip, Group, and Timeline grades differ?
Clip is for one selected timeline clip. Group is for clips assigned to a group. Timeline is for the timeline as a whole. Shared nodes and Edit page effects are related sources of linked changes, but they aren’t the same node-editor mode.
| Grade or effect context | Intended scope | Useful when | Common scope mistake |
|---|---|---|---|
| Clip | The selected timeline clip | One shot needs its own balance or creative adjustment | Assuming selection alone proves Clip mode is active |
| Group Pre-Clip | Members of the selected group, at a pre-clip stage | Group members need common preparatory processing | Making a one-shot change in the group context |
| Group Post-Clip | Members of the selected group, at a post-clip stage | Group members need a shared treatment after their clip-level work | Expecting one group member to change independently |
| Timeline | Timeline-level processing | The intended treatment belongs across the program | Forgetting the broad mode while working on one shot |
| Shared node | Clips using that node | The same correction should remain linked | Editing a shared correction when only one use should change |
| Adjustment clip or track effect | The portion of the timeline and composite covered by the effect | A broad effect should cover a defined time range | Looking only at the selected clip’s node graph |
Think from narrow to broad. Start with Clip when correcting one shot. Use a group when the shared processing should remain common to a known set of clips. Use Timeline when the operation belongs at program level. Use a shared node when clips should deliberately reuse the same correction.
The right choice depends on the job, not on which mode feels more advanced. A group grade can make sense for related shots, but it doesn’t automatically match their exposure or color. A timeline grade can be appropriate for a program-wide treatment, but it’s too broad for a unique adjustment to one face or object.
If you’re learning the underlying grade process, DaVinci Resolve color-grading basics covers the broader task. This troubleshooting guide focuses on scope: the question isn’t how to make a particular look, but why a control affects more than the intended shot.
Use Clip for a single-shot correction, Group for shared shots, and Timeline for a program-wide change.
What does “scope” mean when several processing types are present?
Scope is a practical way to describe which parts of the project a correction can affect. It isn’t a promise that only one layer of processing exists. A shot can have a local Clip grade and still be affected by group processing, a Timeline grade, or an effect on another track.
For example, switching the selector to Clip doesn’t erase a timeline-level node. It changes the context in which you work in the node editor. The final picture may still include other processing in the project. That’s why the test uses a neighboring shot: it helps you see whether your new adjustment is isolated, even if the underlying image already has a shared look.
A useful mental model is to separate the edit item you selected from the complete image you see. The selected item tells Resolve which clip or scope you’re working with. The viewer shows the result of the processing and compositing that contribute to that frame. When those don’t seem to match, inspect the additional layers rather than assuming the selected clip controls everything in the viewer.
Should I use a group grade or copy a grade to each clip?
Use a group grade when multiple clips should share a correction that remains linked. Use individual Clip grades when the shots need independent treatment. Copying a grade can provide a starting point, but check whether the copied elements remain shared or become local in your workflow.
A group can keep a common treatment easier to revise. Instead of maintaining the same group-level change separately on several clips, you can adjust the shared group processing. That convenience comes with a scope: group members respond together.
Copying a grade is a different choice. It may make sense when several shots need a similar starting point but should be finished independently. After copying, inspect the node or grade relationship rather than assuming that two similar-looking node graphs are independent.
| Your goal | Consider | What to verify |
|---|---|---|
| One shared treatment for a scene | Group grade | All group members should receive the shared treatment |
| A unique exposure correction | Clip grade | Neighboring clips remain unchanged |
| One correction reused across selected clips | Shared node | Only intended clips use the shared node |
| A similar starting point with separate finishing | Copy a grade, then make local changes as appropriate | The copied processing isn’t unintentionally linked |
| An effect across the full program | Timeline grade | The whole timeline is meant to receive it |
| A treatment over a defined time range | Adjustment clip or track effect | Its duration and affected layers match the intended range |
Don’t group clips just because they’re adjacent. Group them because a part of their processing should be shared. A scene can include coverage with different cameras and lighting; a single group treatment may still be useful, but individual clip corrections may be needed.
Resolve 21 group grade versions allow different group-level looks to be managed, but Blackmagic says the selected group version affects all clips in the group. If one member needs a unique treatment, use its Clip context rather than expecting a group version to isolate it.
When does copying a grade make more sense than grouping?
Copying can be more useful when the shots should start from similar settings but diverge during finishing. A group is more useful when the linked behavior itself is part of the plan.
Suppose you have a set of shots from one setup. If they all need the same shared creative adjustment and you want one place to revise it, a group may fit. If you only want to start each shot with similar settings and then adjust them independently, copying may fit better. The visible similarity of the node graphs doesn’t establish whether the underlying correction is shared, so verify the relationship before you rely on it.
The decision isn’t “groups are better” or “copying is safer.” It’s a question of how you expect the grade to behave on the next revision. If changing one shot later should update its siblings, a shared relationship may save work. If changing one shot must leave its siblings untouched, use local processing and confirm that with a test.
How can I test the fix without damaging my grade?
Make a small, reversible test and change one suspected cause at a time. If the project contains approved work or you’re unsure how its grading relationships are set up, preserve a separate version before testing.
A good test answers one question. For example: “Does switching from Group Post-Clip to Clip stop the adjacent shot from changing?” It shouldn’t also remove the clip from its group, delete a shared node, and disable an adjustment clip.
Use this sequence:
- Save a project version or duplicate the timeline if you need a safe comparison.
- Select the target clip.
- Note the mode label and any visible group relationship.
- Make a modest temporary adjustment.
- Select one nearby shot that shouldn’t change.
- Undo the test.
- Change one suspected scope or relationship.
- Repeat the test and compare.
- Once you know the cause, make the actual correction in the intended context.
Keep the test easy to see, but not dramatic. You’re checking whether the neighboring image responds. A subtle adjustment reduces the chance that an extreme temporary look distracts you from the scope question.
If the project is under review or has an approved grade, don’t rely on memory to restore it. Preserve the previous state first. A duplicate timeline or project version gives you a way to compare the test with the original.
A small note can also help: record the clip selected, the mode label, and which other shots changed. This is especially useful when the behavior depends on a group or shared node that isn’t obvious from the viewer. You don’t need a long report. A few observations are enough to keep the diagnosis grounded.
A simple test log might look like this:
| Test | Selected clip | Mode or item changed | Other shots affected? | Result |
|---|---|---|---|---|
| 1 | Interview close-up | Clip | No | Local adjustment appears isolated |
| 2 | Interview close-up | Group Post-Clip | Other group members | Group processing is a likely explanation |
| 3 | Interview close-up | Upper-track effect temporarily disabled | Shots within that range | Track effect needs closer inspection |
This table is a hypothetical example of how to track a diagnosis, not a record of Resolve testing. Use whatever notes help you keep each test separate.
If undo doesn’t restore the expected state, stop and compare against the saved version rather than continuing to experiment. Don’t build another correction on top of a test whose status is uncertain. Restore a known state, then begin again with one controlled change.
Does the Resolve 21 interface change this diagnosis?
Resolve 21 adds features that can change how nodes are displayed or how group versions are managed, but those interface differences don’t make a group grade equivalent to a Clip grade. Check the active mode and the grade relationship rather than judging only by the node display.
Blackmagic’s Resolve 21 guide describes Layer List as an alternate view of the node graph. It also documents grade versioning for clip groups. These changes are relevant if a tutorial’s screen differs from yours or if several group members switch to a new group version together.
The available Blackmagic Design release notes list updates by version. Don’t assume a particular update changed grade scope unless its release notes or manual describe that change. The reliable troubleshooting questions remain: which clip is selected, which mode is active, and what other grade or effect relationships are present?
When a control doesn’t match a tutorial, check:
- The Resolve version shown in About DaVinci Resolve.
- Whether you’re on the Color page.
- Whether the node editor is shown as a graph or a Layer List.
- Whether the mode says Clip, Group Pre-Clip, Group Post-Clip, or Timeline.
- Whether the selected clip belongs to a group.
- Whether the node is shared.
- Whether an Edit page effect covers the affected shots.
The 21.1 reference manual and Resolve 21 New Features Guide aren’t interchangeable with a tutorial from an earlier version, but the scope labels are the useful reference for this problem. If your screen differs, search the current manual for the name of the control instead of following a sequence of clicks that assumes the same workspace.
A grading problem can also be confused with a selection problem. If the viewer is on one shot but the selected thumbnail highlights another, pause and resolve that mismatch before adjusting anything. Otherwise, you might make a correct grade to the wrong clip and believe the scope is broken.
Resolve 21’s group version feature is particularly easy to misread if a tutorial shows a previous version. Blackmagic’s guide says a group version applies to clips in that group. If you choose a different group version, don’t expect only the currently selected member to change. Verify the group scope before using the version controls for a one-shot correction.
Layer List changes the way nodes are presented, not the basic question of which grading context you’ve selected. If you switch between graph and list and suddenly can’t find a node, first identify the node by its label or position in the processing order. Don’t assume the list view has turned a local node into a group or timeline node.
What if a tutorial’s controls don’t match my screen?
Check the tutorial’s Resolve version and node-editor display, then identify the mode by its function. A different layout can hide or relocate a control without changing what a group or timeline grade does.
A tutorial may use a different workspace or show the node graph while your Resolve 21 workspace uses Layer List. Translate the instruction by asking what the operation is meant to do. Is the correction for one clip, all members of a group, or the full timeline? Then find the matching context in your interface.
Pause before copying a group-based sequence of steps into a project that isn’t grouped the same way. If the tutorial selects a group version, its result may affect the entire group. If you need one shot, choose Clip instead.
TryUncle can give on-screen guidance when you know the task but can’t locate the relevant control in your Resolve layout. It’s a desktop companion for Mac and Windows: you ask a question, and Uncle uses your current screen and conversation to guide you one step at a time while you perform the actions.
That kind of help is most useful after you’ve identified the goal. It doesn’t replace checking the selected clip or understanding why a group correction is shared. Keep the diagnostic in view: confirm the scope before making the grade.
A tutorial mismatch isn’t always a version problem. The author may be showing a different page, a different clip selection, a different node-editor view, or a project with different groups. Before deciding that the control moved, compare the task and the state of the example:
| Tutorial shows | Your project should be checked for |
|---|---|
| A selected clip with a local correction | Clip mode and the intended selection |
| A group of similar shots | Group membership and group mode |
| A node graph | Whether Layer List is active instead |
| A broad final look | Timeline context or an effect on an upper track |
| A specific source clip | Whether the timeline appearances share a grade or node |
If you can’t tell from the video, use the current manual and the labels visible in your interface. A screenshot from a different release may still teach a valid concept, but don’t copy its clicks without checking whether the context matches your project.
When is a grade supposed to affect the whole video?
A broad grade is appropriate when the treatment belongs to the entire timeline or to a defined group of shots. It’s only a problem when that scope doesn’t match the intended correction.
Use the correction’s purpose to choose:
- One shot is too warm, dark, or saturated: use Clip.
- Several related shots need common processing: consider a group grade, with individual Clip corrections where needed.
- The whole program needs a shared treatment: consider Timeline.
- A specific time range needs an effect: inspect an adjustment clip or track effect.
- Repeated uses of a source should remain linked: confirm the shared node or grade relationship is intentional.
Shared processing doesn’t guarantee every shot will look identical. Different lighting, exposure, camera settings, and image content can respond differently to the same correction. That’s one reason a shared group treatment and local Clip work can coexist.
Colorist and educator Ollie Kenchington described the importance of judging a grade in context: “the most important thing is how good are they at taking a step back and seeing how their work affects and supports the narrative.” That’s from a CineD interview with Kenchington. Here, the practical point is simple: don’t judge a grade only on the selected frame. Check the neighboring shots and the sequence the correction is meant to serve.
A worked example: a single close-up looks cooler than the shots around it. If you want to match that one close-up, use Clip and compare it with its neighbors. If the goal is to give an entire interview scene a shared look, a group treatment may be more suitable. These are different intentions, so they call for different scopes. This is an illustrative scenario, not a report of testing.
A neighboring-clip check is the fastest way to confirm whether a grade is truly isolated.
There’s a useful middle ground between “everything needs the same look” and “every clip must be entirely independent.” A group can establish a common foundation, while Clip mode handles shot-by-shot differences. That makes sense when several shots belong together but don’t have identical exposure, white balance, or framing.
For example, a conversation might cut between a wide shot and two close-ups. The whole scene may need a common creative treatment, but one camera angle could be brighter or warmer. A group adjustment may serve the scene’s shared look; a local correction can address that one angle. The best scope is the one that follows the creative and technical intent.
What should I do if Clip mode still doesn’t fix it?
If switching to Clip doesn’t isolate the change, stop changing the grade and identify which other processing layer links the shots. Check the group, shared node, timeline grade, adjustment clip, and nested timeline separately.
| Result of the test | Next diagnostic |
|---|---|
| The neighboring shot changes only in Group mode | Check whether both shots should remain in the same group |
| Another appearance of one source changes | Inspect shared nodes and local or remote grade relationships |
| All shots change while the mode says Timeline | Switch to Clip for a one-shot correction |
| Only shots under a certain timeline region change | Inspect adjustment clips and upper-track effects |
| The viewer changes, but the selected timeline shot doesn’t | Confirm clip selection and playhead position |
| Only the selected clip changes, but the image still looks wrong | Treat it as a grading or matching problem, not a scope problem |
If the grade is isolated but visually wrong, that’s a different problem. Resetting the grade won’t fix a selection mismatch, a group relationship, or an effect on another track. For general grading fundamentals, start with how to color grade in DaVinci Resolve.
If a project behaves differently from the current manual, note the Resolve version, selected clip, mode label, and exact pattern of shots that change. Those details make a support question more useful than “the whole video grades at once.” Include whether the change affects group members, repeated source clips, every shot, or only clips under an overlay.
The best next step is still the narrow one: select the intended clip, read the mode label, and test one small adjustment against a neighbor. Keep a broad grade only when you intended it to be shared.
What if the change is actually a visual matching problem?
If only the intended clip changes, the scope may already be correct. The remaining issue could be that the shot still doesn’t match its neighbors. That calls for a grading decision, not a scope fix.
Before you reset nodes, compare the shots in sequence and ask what differs. Is the mismatch in exposure, color balance, contrast, saturation, or a localized area? A clip-specific correction may need more than one adjustment. That doesn’t make the grade shared or broken.
A simple distinction:
- If the neighboring clip responds to the test adjustment, investigate scope or shared processing.
- If only the selected clip responds but still looks different, investigate the image and the intended match.
- If the selected clip doesn’t respond as expected, confirm the selected item, active mode, and whether the viewer shows the expected timeline frame.
For a broader walkthrough of balancing and building a look, use DaVinci Resolve color-grading basics. Keep this diagnosis focused on the original symptom: whether the adjustment affects more clips than you intended.
What if only one part of a clip changes?
A correction can be isolated to one timeline clip and still target only part of its image. If a mask, qualifier, or other selective operation is involved, the affected region may be limited even though the clip-level scope is correct.
That’s a different question from “why does the whole video change?” First confirm that other timeline clips remain unchanged. Then inspect the node and any selection or masking tools used within that clip. Don’t remove a group or shared relationship to solve an issue that’s actually about which pixels the correction affects.
Likewise, a tracked or animated operation may behave differently over time within a single clip. Compare frames in that clip before concluding that the grade is being applied elsewhere. Scope asks which clips are affected; a mask or keyframe asks which part of a clip or which moments are affected.
What if a project contains a deliberate finishing layer?
A finishing node or track effect may be intended to affect the entire timeline. If you find one, don’t remove it just because the original symptom appears while that layer is active. Determine whether the broad processing is part of the intended finish.
To isolate a one-shot correction while preserving the finish, make the correction in Clip mode and compare the shot within the full timeline. If the clip looks right alone but wrong in context, the shared finishing layer may be contributing to the result. That can be expected. The goal is not to remove every shared operation; it’s to place the new correction at the intended stage and scope.
When in doubt, preserve the current project state, test on a duplicate, and ask the editor who built the grade before changing a finishing layer you don’t understand. A project can be technically consistent even when its node structure isn’t obvious to the next person who opens it.
Frequently asked questions
- Why is DaVinci Resolve grading my entire video instead of one clip?
- The node-editor mode is the first thing to check. Group Pre-Clip or Group Post-Clip affects clips in a group, and Timeline applies processing at the timeline level. If the mode is Clip, check the selected timeline clip, group membership, shared nodes, grade relationships, and effects on upper tracks.
- How do I make a DaVinci Resolve grade affect only one clip?
- Select the intended timeline clip on the Color page and set the node-editor mode to Clip. Make a small, reversible test adjustment and check a nearby shot. If the neighbor stays unchanged, undo the test and make the intended correction in Clip mode.
- Why does changing one clip change every clip in its group?
- A Group Pre-Clip or Group Post-Clip grade is designed to affect group members. Switch to Clip mode for a shot-specific correction. If the clip should not share group processing, inspect its group assignment before removing it.
- What is the difference between Clip, Group, and Timeline grades?
- Clip grades apply to an individual timeline clip. Group grades apply to members of a group, with Pre-Clip and Post-Clip placing group processing at different stages of the grade. Timeline grades apply at timeline level. The node-editor mode tells you which context is active.
- Can DaVinci Resolve 21 apply a grade version to every group member?
- Yes. Blackmagic Design's Resolve 21 New Features Guide says group grade versions apply to all clips in that group. Use a Clip grade when a change should apply only to one timeline clip.
- What if the node-editor mode already says Clip?
- Confirm the selected timeline clip, then check group membership, shared nodes, local or remote grade relationships, timeline nodes, adjustment clips, and effects on upper tracks. Change one suspected source at a time so you can identify the link.
Sources
Put this guide to work with TryUncle.
Ask about the step you’re on. TryUncle sees your screen and points at the control you need, so you can keep learning in your own project.
Get TryUncle for Mac or WindowsKeep reading

Guides · Jul 7, 2026 · 35 min
How to Color Grade in DaVinci Resolve: The Basics
Learn how to color grade in DaVinci Resolve: build a node chain, balance shadows and highlights with Lift, Gamma, and Gain, and read the scopes.
Guides · Jul 26, 2026 · 32 min
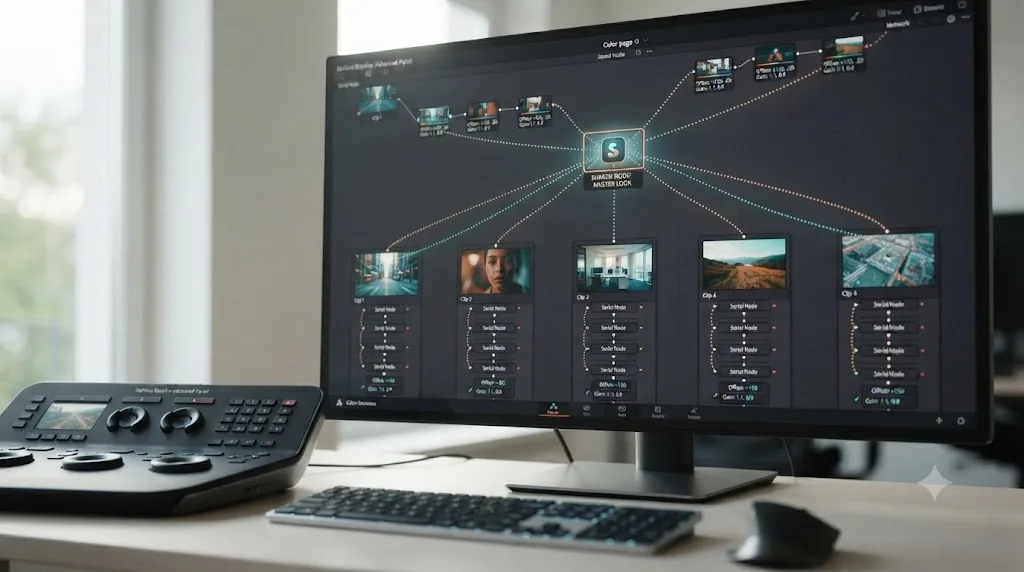
DaVinci Resolve Shared Nodes vs Regular Nodes, Explained
Shared nodes update every clip using them at once; regular nodes affect just one. How to create, apply, lock, and undo a shared node in DaVinci Resolve.
Reviews · Nov 20, 2026 · 40 min
Is the DeMystify Color Grading Course Worth It in 2026?
A research-based review of DeMystify Colorgrading’s curriculum, current pricing, certification claims, strengths, limitations, and alternatives for Resolve users.