Articles / Guidesupdated for DaVinci Resolve 21.0.1 (June 2026)
How to Color Grade in DaVinci Resolve: The Basics
Quick answer
Color grading in DaVinci Resolve happens through nodes, not layers. Add a serial node, balance shadows, midtones, and highlights with the Lift, Gamma, and Gain wheels, then check your work against the waveform and vectorscope instead of your monitor. Add a second node for secondary adjustments, and keep one task per node so the grade stays easy to undo.

You don't grade in DaVinci Resolve by dragging sliders on a flat image. You build a chain of nodes, one small decision at a time, and the chain is what you adjust later instead of starting over.
That structure is the entire learning curve. Once it clicks, color grading in Resolve stops feeling like a separate skill and starts feeling like an extension of the edit you already cut.
What do you need before you start color grading?
Three things, and you probably already have two of them. First, a rough cut that's locked, or close to it. Grading a shot that later gets trimmed or replaced is wasted work, so finish the story before you touch color. Second, DaVinci Resolve's Color page, which you open from the page selector at the bottom of the interface, not from Edit. Third, a GPU that can keep up. Per Blackmagic's tech specs, Resolve wants at least 4 GB of VRAM to stay responsive, and grading is one of the heaviest jobs you'll ask your GPU to do. If you've ever hit a "GPU memory is full" warning while stacking nodes, our guide to that error covers the fixes in more depth.
If you haven't cut a timeline yet, our beginner's guide walks through installing Resolve and getting a rough cut onto the timeline first.
Should you set up color management before you grade?
Yes, and the decision takes two minutes. Open File > Project Settings, click the Color Management tab, and look at the Color Science dropdown. Everything else in this guide behaves slightly differently depending on what you pick here, which is why it comes before the first node.
The default is DaVinci YRGB. In this mode, Resolve converts nothing. Footage displays exactly as it was encoded, and every transform is your job. If you shot on a phone or a mirrorless camera in a standard picture profile, the image already looks normal, and this default is the right choice for your first projects.
The alternative is DaVinci YRGB Color Managed. Now Resolve handles the conversions. You tell it what each clip is, what space you want to grade in, and what you're delivering, and it builds the math between those three points. Turn on the Automatic color management checkbox and Resolve reads camera metadata to pick input spaces for you, or leave it off to set Input Color Space, Timeline Color Space, and Output Color Space by hand.
| Setting | What it describes | Typical value for web delivery |
|---|---|---|
| Input Color Space | What each camera actually recorded | Set per camera, e.g. Sony S-Gamut3.Cine/S-Log3 |
| Timeline Color Space | The space your grading controls operate in | DaVinci Wide Gamut Intermediate, or Rec.709 |
| Output Color Space | What the viewer's screen expects | Rec.709 Gamma 2.4 |
When does color managed mode earn its complexity? Log footage, mixed cameras, or an HDR deliverable. Drop clips from three different cameras into a DaVinci YRGB timeline and each lands looking different, so the same correction behaves differently on each. In color managed mode they all arrive at one consistent starting point. For a single-camera Rec.709 project, the default mode plus the workflow below produces the same result with fewer settings to misconfigure.
One per-clip override worth knowing either way: right-click any clip in the Media Pool and choose Input Color Space to fix a wrong assumption for that clip alone, without touching the project setting. And if this feels like a lot of ceremony before touching a wheel, consider that Blackmagic's own Colorist Guide, a free PDF on the official training page, spends its early chapters on this setup before it introduces a single grading control.
How does DaVinci Resolve's node system actually work?
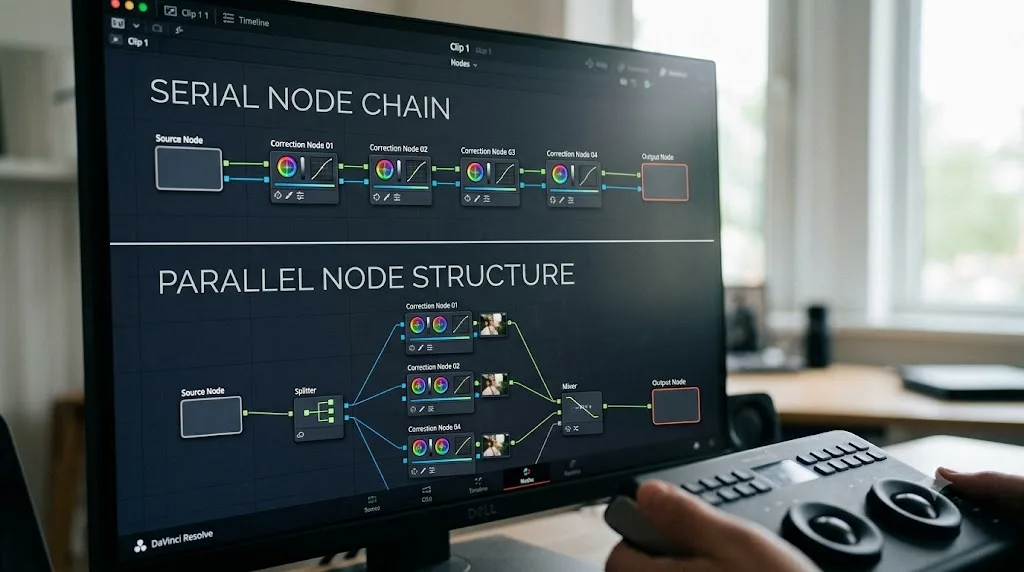
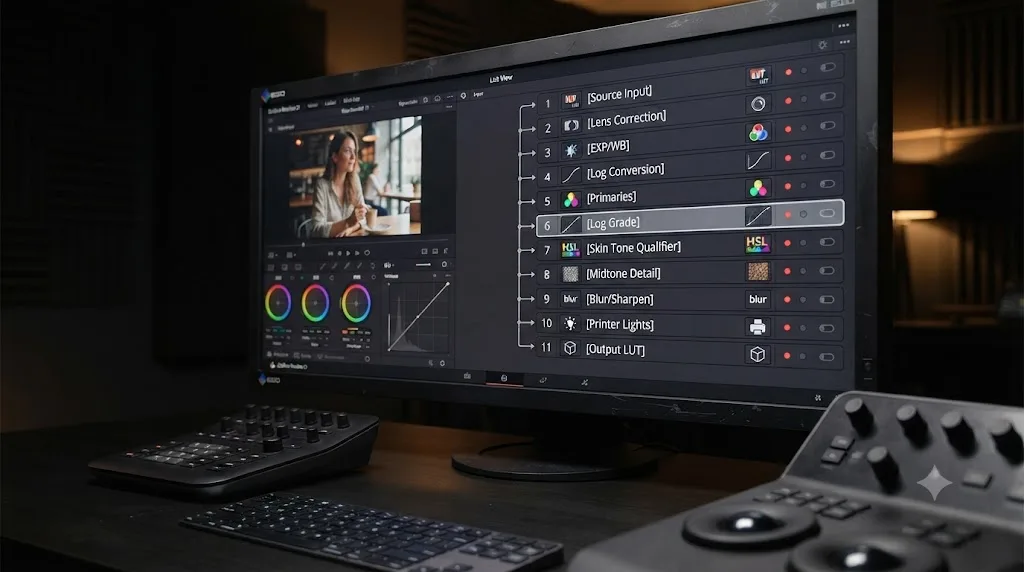
A node is one step in the grade, and nodes connect left to right in a visible flowchart above your clip. Per Blackmagic's own Color page description, the image starts at the left and passes through each correction or effect node until it reaches the output on the right. Nothing is baked in until you're done, so you can reorder, disable, or delete any node without touching the others.
In DaVinci Resolve, a color grade is a chain of nodes, not a single stack of sliders applied to one layer. That's the opposite of how most photo editors work, and it's the reason Resolve scales from a quick corporate video to a feature film without changing tools.
Nodes come in a few flavors, and knowing which one to reach for saves you from rebuilding a graph you already built correctly:
| Node type | What it does | Use it for |
|---|---|---|
| Serial | Passes its output straight into the next node in line | The default grading chain: balance first, refine after |
| Parallel | Splits the same source into separate corrections, then combines them | Corrections that should stack evenly instead of compounding |
| Layer | Stacks corrections like layers in a compositing app, priority to the lower node | Blending multiple looks with control over how they combine |
| Outside | Inverts a mask or key so the correction applies everywhere except the selection | Adjusting a background after isolating a subject |
Source: Frame.io, "DaVinci Resolve's Most Useful Nodes".
Two habits keep a graph readable as it grows. Label every node as you create it: right-click the node, choose Node Label, and type what it does, "balance", "sky", "skin". And build your chains in the same order on every shot, balance first, secondaries after, look last, so that six weeks into a project you know where each decision lives without clicking through the chain to hunt for it.
How do you set up your first node for a basic grade?
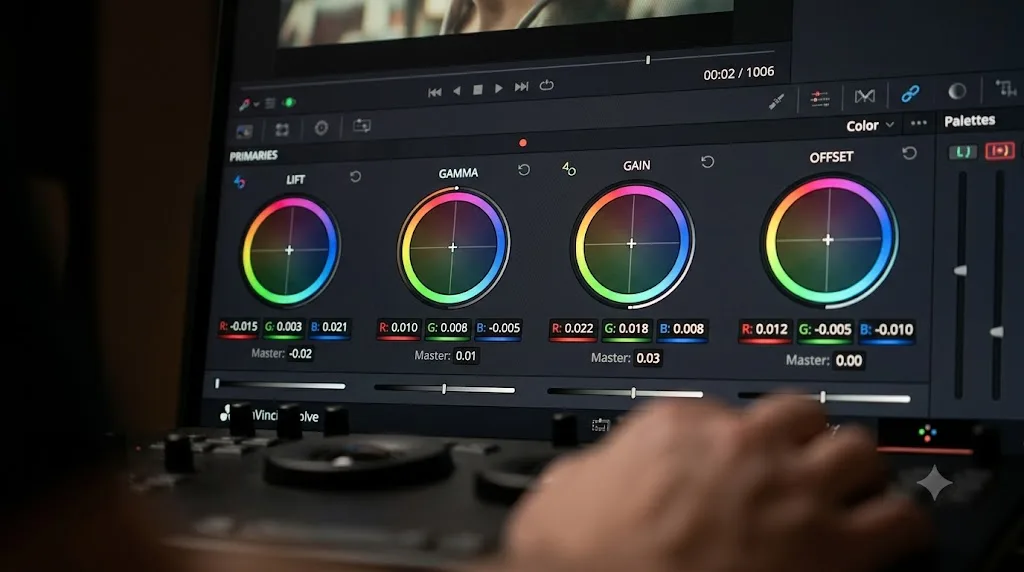
Start with one serial node, added with Alt+S on Windows or Option+S on Mac, and the primary wheels. Resolve maps four wheels to specific parts of your image, per Blackmagic's Color page documentation:
- Lift controls your shadows and black point. Pull it to neutralize a color cast in the dark areas of the frame.
- Gamma controls your midtones, which is where skin tones usually sit. Small moves here have a big visual effect.
- Gain controls your highlights and white point. Use it to set how bright your brightest areas read.
- Offset moves all three ranges at once, which is the fastest way to do a rough white balance correction before you touch the other three.
Work in that order: shadows, then highlights, then midtones. Fixing the extremes first gives you an honest midtone to grade against, instead of guessing at skin tone while your blacks are still crushed or your whites are still blown out.
What order should exposure, white balance, and saturation happen in?
Exposure first. White balance second. Saturation last. The order matters because each judgment depends on the one before it: your eye reads color balance relative to brightness, and it reads saturation relative to contrast. Saturate a flat image until it looks right, then add contrast later, and the color suddenly reads as cartoonish, because contrast increases perceived saturation all by itself.
Here's the full pass, all inside that first serial node:
- Set exposure and contrast. Use Lift and Gain as described above, or reach for the Contrast and Pivot controls in the adjustment row beneath the color wheels. Contrast stretches the tonal range around the Pivot point, so raising Pivot protects highlights while deepening shadows, and lowering it does the reverse.
- Correct white balance. The Temp and Tint sliders sit in the same adjustment row. Drag Temp down to cool a warm shot or up to warm a cool one, and use Tint to kill the green or magenta shift that fluorescent and cheap LED lighting leaves behind. For a fast manual version, push the Offset wheel away from the cast.
- Set saturation. The Saturation control lives in the adjustment row and defaults to 50. Nudge it only after the contrast is final. Its neighbor, Color Boost, is the more surgical option: it lifts saturation only in areas that are barely saturated, which wakes up skin without pushing already-vivid colors over the edge.
If a step won't settle, go back one. A white balance that never looks right usually means the exposure underneath it is off, not that you need a stronger correction.
There's a name for what this pass produces: correction, not a look. Correction makes the shot neutral, accurate, and consistent, and it works the same way on every project you'll ever grade. The look, teal shadows, a warm filmic wash, lifted blacks, is a separate creative decision that comes later, on its own node at the end of the chain. Keep the two apart and you can restyle an entire project by swapping one node per shot without re-balancing anything.
Should you use curves instead of the color wheels?
Use both, for different jobs. The wheels move broad tonal ranges that overlap smoothly, which is exactly what balance needs. Curves give you surgical control over where a change starts and stops, which is what you want once balance is done and one specific region still bothers you.
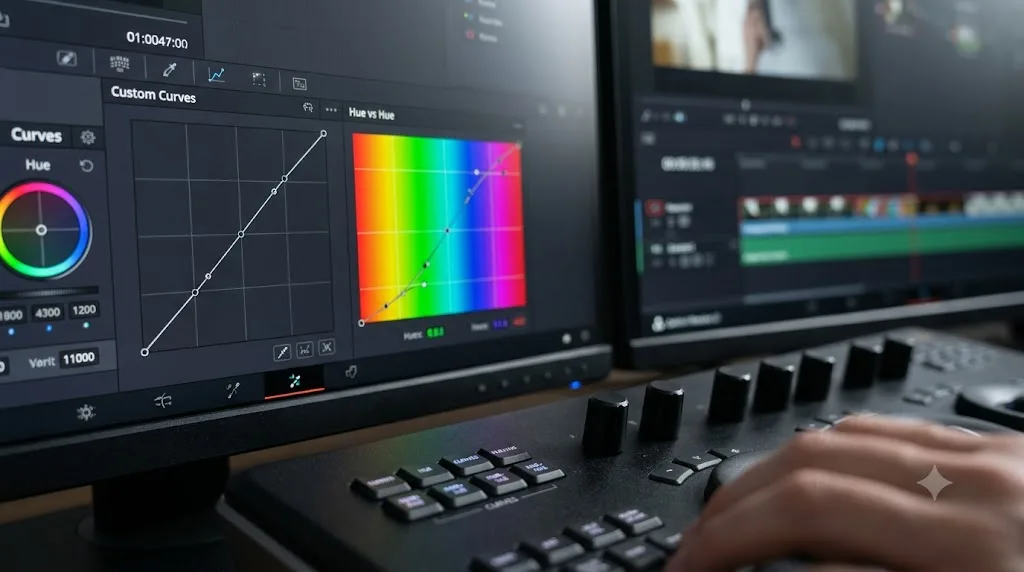
The Curves palette sits in the same toolbar row as the color wheels. Custom mode behaves like every curve tool you've met: input brightness runs along the bottom, output brightness up the side, and a gentle S shape adds contrast with more finesse than the Contrast slider, because you decide exactly where the shoulder and the toe land. Keep the channels ganged with the chain-link toggle and you're adjusting luminance. Ungang them and you can bend a single color channel, which is how you remove a cast that lives in only one part of the tonal range, like a blue tint that sits in the shadows and nowhere else. Custom curves also hide Resolve's soft clip controls beneath the graph, low and high thresholds with softness knobs, which roll off harsh clipped whites instead of leaving a hard digital edge.
The specialty curves are where Resolve outruns most editors' expectations:
| Curve | What it maps | Reach for it when |
|---|---|---|
| Hue vs Hue | One hue to another | A dull lawn should read more emerald, or a blue shirt needs to go teal |
| Hue vs Sat | Saturation per hue | The reds are screaming and everything else is fine |
| Hue vs Lum | Brightness per hue | A sky should darken without touching skin |
| Lum vs Sat | Saturation per brightness | Shadows look chalky and need desaturating, a classic film-look move |
| Sat vs Sat | Saturation per existing saturation | The most saturated areas need taming while flat areas stay put |
In DaVinci Resolve, the Hue vs Hue curve changes the color of one object without a mask, a window, or a qualifier. Click the object in the viewer with the curve's picker and Resolve drops control points onto its hue range. Drag those points, and only that slice of color moves.
The catch is that curves select by image property, not by region. If the lawn and the jacket share a hue, they move together. The moment that happens, you're back to a power window or qualifier to split them apart, so think of curves as the tool for changes that should apply everywhere a property appears.
What about the HDR wheels, Color Warper, and Color Slice?
Three newer palettes, all sitting in the same toolbar row on the Color page, and all optional for a first grade. Knowing what they're for stops you from wondering whether you're missing something.
The HDR grading palette, despite the name, isn't only for HDR delivery. It replaces the three-zone Lift, Gamma, Gain model with narrower tonal zones, Blacks, Dark, Shadow, Light, Highlight, and Specular, plus a Global wheel, and each zone's boundaries can be widened or narrowed per shot. It's designed around a color managed, wide gamut timeline, and its advantage is isolation: a move in the Light zone doesn't drag the shadows along the way a Gain move can. When the wheels start feeling blunt, this palette is the sharper knife.
The Color Warper is a mesh of hue and saturation points. Click any color in the viewer and drag; the mesh warps neighboring colors progressively less, so the change stays smooth instead of posterizing. It solves the "make the sunset more orange without breaking skin" class of problem in one gesture instead of three curves.
Color Slice divides the image into a fixed set of color vectors, including a dedicated skin tone vector, with saturation, hue, and brightness controls per vector. It's the fastest of the three for a quick global stylization pass, because the segmentation decisions are already made for you.
The decision shortcut: wheels and curves for correction, the HDR palette when tonal zones need to move independently, the Warper for one stubborn color relationship, Slice for a fast stylization pass. All of them end up as ordinary nodes in the graph, so nothing about the one-task-per-node habit changes.
How do you use the scopes instead of trusting your monitor?
Your eyes adapt to a room, a monitor's backlight, and whatever you looked at five minutes ago. Scopes don't adapt to anything. They read the actual signal.
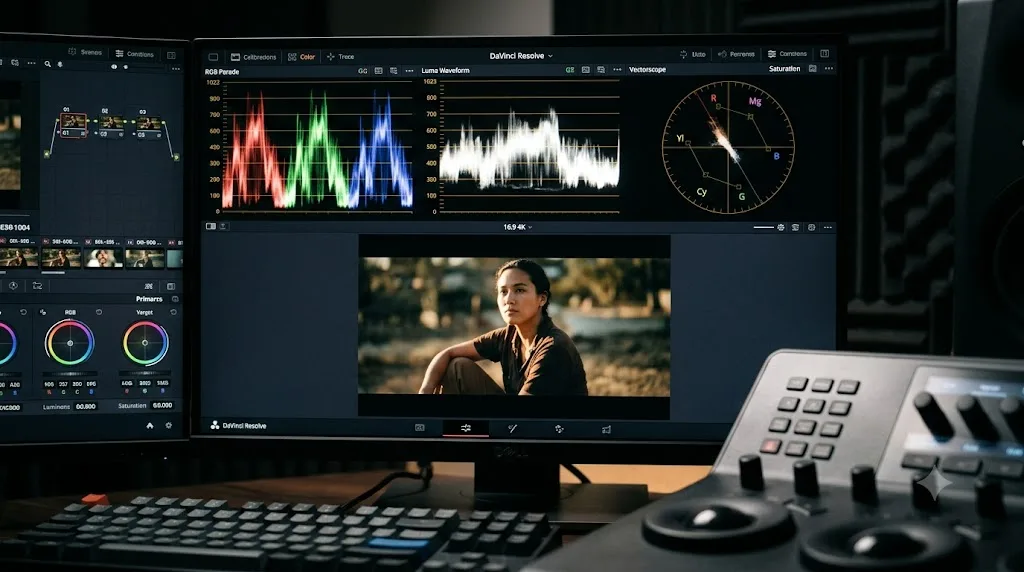
The waveform and vectorscope tell you the truth about a shot. Your monitor only tells you an opinion. Resolve gives you five scope types, according to Blackmagic's own documentation: the Waveform for luminance and color values, the Parade for separate RGB or YCbCr channels side by side, the Vectorscope for hue and saturation on a circular graph, the Histogram for tonal distribution per channel, and CIE Chromaticity for checking whether your colors fall inside a target color space.
You don't need all five open for a basic grade. Waveform and Vectorscope cover most decisions: waveform tells you if your exposure and contrast are reasonable, vectorscope tells you if your color balance and saturation are under control. Open Parade once you're chasing a specific channel imbalance, like a green cast that's only showing up in the shadows.
What should a correctly balanced shot look like on the scopes?
Numbers first. Resolve's waveform runs from 0 at the bottom to 1023 at the top, a 10-bit scale, and you open the scopes from Workspace > Video Scopes or the scope button at the top right of the Color page's palette area.
On the waveform, a balanced shot keeps its shadows just above 0 and its highlights just below 1023. A flat line pressed against the bottom means crushed blacks, and the detail inside that line is gone for good in the delivered file. Same logic at the top: a flat line at 1023 is clipped highlights, not bright ones. A healthy image uses most of the range without slamming into either end.
On the RGB parade, find something in the frame that should be neutral: a white shirt, a gray wall, pavement. In a balanced image, the red, green, and blue traces for that object sit at the same height. If red rides higher than blue there, the shot is warm. If blue wins, it's cool. This is the fastest white balance check that exists, and it works in rooms and on monitors where your eyes don't.
On the vectorscope, enable the skin tone indicator in the scope's settings menu and you get a diagonal reference line between the red and yellow targets. Skin of every complexion falls close to that line when it's balanced. Complexion changes how far from center the trace reaches, not its angle, so a trace drifting off the line means a color problem, not a different person. Saturation reads as distance from the scope's center, and an ordinary natural scene stays well inside the color targets at the graticule's edge.
Colorists' rule of thumb puts average diffuse skin somewhere around the middle to upper-middle of the waveform, but treat that as a sanity check rather than a law. Lighting, complexion, and the mood of the scene all move it legitimately.
Does your monitor and room change how you should grade?
More than any plugin does. Scopes protect you from a lying monitor, but you still make the creative calls with your eyes, so the viewing environment sets a ceiling on how good those calls can be.
Three free wins before you spend anything on hardware. Grade in a dim, consistently lit room, not next to a window whose light shifts across the afternoon. Set your monitor to a fixed, moderate brightness and leave it there; SDR mastering environments are built around far lower screen brightness than most laptops ship at, which is one reason grades done on a maxed-out laptop screen come back dark and murky everywhere else. And turn off your operating system's auto-brightness and night-shift features while grading, because both quietly re-balance the exact thing you're trying to judge.
Calibration comes next, not first. A hardware probe brings a decent monitor surprisingly close to reference behavior, but fix the room and the brightness habit before buying one. A calibrated screen in a bright room with auto-brightness still on is still lying to you.
How should you handle log footage: LUT or manual correction?
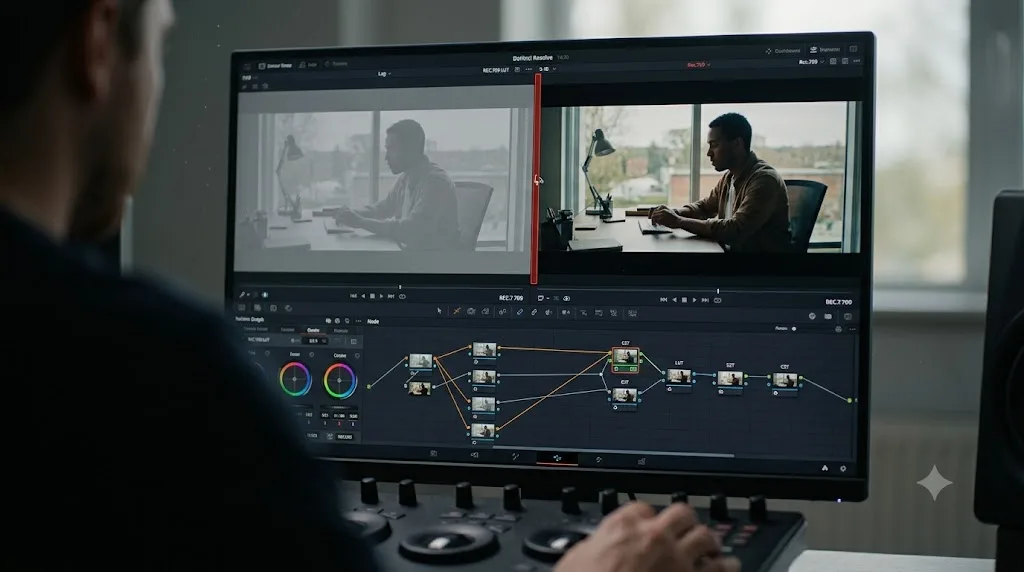
If your footage came off a camera in a log profile, S-Log3, Canon Log, ARRI LogC, it looks flat, gray, and desaturated on the timeline. That's not a defect. Log is a curve that squeezes the camera's full dynamic range into the file, and it has to be stretched back to normal, a step colorists call normalization, before any grading judgment means anything.
Resolve gives you three ways to do it:
| Method | How | Trade-off |
|---|---|---|
| Conversion LUT | Right-click a node, open the LUT submenu, and pick the manufacturer's conversion (ARRI, Sony, Panasonic and others ship inside Resolve) | Fast, but a LUT hard-clips values outside its expected range and its rendering is fixed |
| Color Space Transform | Drag Color Space Transform from the Effects panel (under ResolveFX Color) onto a node, set the input to your camera's color space and gamma, and the output to Rec.709 / Gamma 2.4 | The same conversion with adjustable math and built-in tone mapping, no hard clip |
| Color management | Set DaVinci YRGB Color Managed and per-clip input spaces, as covered earlier | Zero per-node work, but the conversion is invisible in the graph |
For a first log project, use the Color Space Transform and give it its own labeled node. Then do your balancing in the nodes before that transform. Corrections made upstream of the conversion operate in log space, where an exposure move responds more like adjusting the camera did on set, and the transform's tone mapping catches the extremes on the way out.
Keep creative LUTs, the film emulation looks you can download by the thousand, out of this step entirely. A creative look belongs on its own node after the image is normalized and balanced. Dropped onto raw log footage, a look LUT amplifies whatever was wrong underneath it, which is why so many downloaded looks never resemble their preview image. To install one you've downloaded: Project Settings > Color Management > Lookup Tables > Open LUT Folder, drop the file in, then click Update Lists.
One format skips the debate entirely: Blackmagic RAW. BRAW clips decode through the Camera Raw palette at the far left of the Color page's palette row, where ISO, white balance, and gamma are adjustable non-destructively before the node graph even sees the image. If your project is BRAW, set the decode there and treat the node chain as pure grading.
When should you add a second node, and what goes in it?
Once your first node has the shot balanced, resist the urge to keep piling adjustments into it. Add a new serial node instead, and give that node exactly one job.
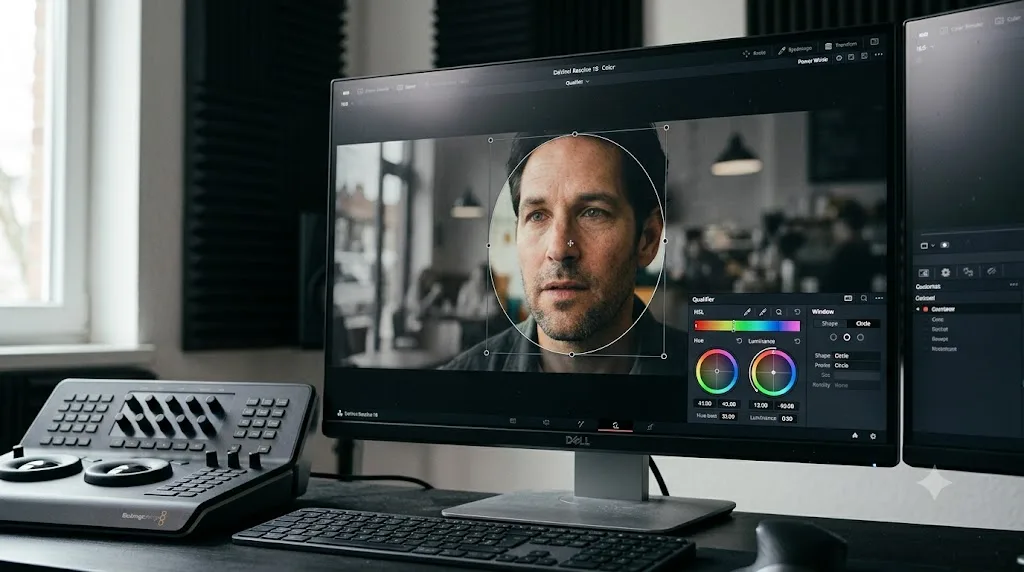
Common second-node jobs: a qualifier that selects a color range by hue, saturation, or luminance so you can push just that range, or a power window, a shape drawn over part of the frame, isolating a face, a sky, or a piece of wardrobe for a targeted correction. Cullen Kelly, a Los Angeles-based senior colorist whose credits include Netflix, HBO, Hulu, Microsoft, McDonald's, and Sephora, explained why he rebuilt his own workflow around this habit in a Frame.io interview:
"Going forward, all of my color management is going to happen in nodes. I feel like it's easier to understand what's happening when you're working this way."
Pulling your first qualifier key takes about a minute. Add a serial node, open the Qualifier palette, and click the eyedropper on the color you want: a sky, a shirt, a skin tone. Press Shift+H to toggle the highlight view so you can see exactly what's selected, then widen or narrow the selection with the Hue, Saturation, and Luminance range controls. The key will look ragged at first. That's what the Matte Finesse controls on the right side of the palette are for: a touch of Clean Black removes stray speckles outside the selection, Clean White fills holes inside it, and a small Blur Radius softens the edge so your correction doesn't draw an outline around the subject.
One node, one task. That habit is what makes a grade easy to undo six months into a project instead of one you're afraid to touch. If a client asks you to pull back a skin tone adjustment later, you want to find it in one node, not untangle it from three other changes stacked on top.
If you're grading at 4K with several qualifiers and power windows stacked in a row, budget more GPU memory than you'd expect. Puget Systems' hardware guide recommends at least 12 GB of VRAM for a 4K timeline, and heavy node stacks push that number higher.
How do you keep a power window locked to a moving subject?
A window you draw over a face is only correct for the frame you drew it on. The subject moves, the camera moves, and the correction stays behind. Tracking fixes that, and Resolve's tracker is good enough that this is a thirty-second job on most shots:
- Draw and position the window in the Window palette on a frame where the subject is clear.
- Open the Tracker palette and check that its mode, at the top right of the palette, is set to Window.
- Press the Track Forward button. Resolve analyzes pan, tilt, zoom, rotation, and 3D perspective by default, and the window follows the subject through the shot. If your playhead started mid-clip, press Track Reverse as well to cover the frames behind it.
- If the track drifts, switch the palette from Clip to Frame mode at the frame where it goes wrong and drag the window back into place. Frame mode sets a manual keyframe, and Resolve interpolates between your corrections.
For subjects a shape can't describe, a person walking behind lamp posts, hair blowing across a face, the Studio version's Magic Mask traces people and objects automatically. Our Magic Mask guide covers when it beats a tracked window and when a plain window is still the better tool.
What does a first grade look like from start to finish?
Theory becomes muscle memory faster with a concrete case, so here's one. Say you've shot an interview on a Sony mirrorless in S-Log3. On the timeline the footage looks gray and lifeless, the waveform is squeezed into the middle of the scale, and the whole frame leans warm because the room mixed window daylight with a cheap warm LED panel.
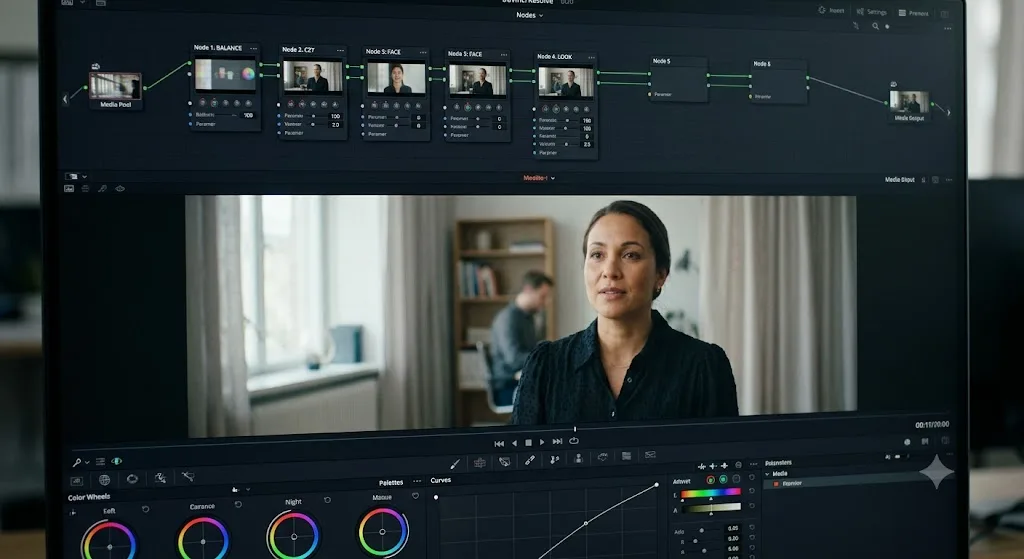
- Normalize first. Add a serial node, label it "cst", and drop Color Space Transform onto it from the Effects panel. Input: S-Gamut3.Cine/S-Log3. Output: Rec.709, Gamma 2.4. The image snaps into normal contrast and saturation. Judge nothing before this step, because every flaw you see in raw log is half illusion.
- Add a balance node upstream of it. Select the node to the left of the transform, then press Option+S or Alt+S so the new node lands before the conversion. Label it "balance". Corrections made here operate in log space, and the transform's tone mapping cleans up the extremes on the way out.
- Set the floor and the ceiling. The waveform shows the blacks floating well above 0 and the bright window in the background sitting far below the top. Pull Lift down until the darkest areas rest just above 0, then raise Gain until the window reads bright without a flat line at 1023. The face comes up with it.
- Fix the warmth. A white shirt in frame makes this easy: the parade shows red clearly above blue on the shirt. Pull Temp toward cool until those traces level out. The shot suddenly looks the way the room did.
- Saturation last. With real contrast in place, the shot needs less saturation than you expected five minutes ago. Nudge Saturation up a few points, then let Color Boost wake up the flat areas instead of pushing everything at once.
- One secondary, if the shot earns it. The interviewee's face reads slightly dark against the bright window. New node, label it "face", circular power window over the face, soften its edge, small Gamma lift inside it, then track it forward so it follows the inevitable slow lean.
- The look, gently. Final node, label it "look": a whisper of teal in Lift, a touch of warmth in Gain, and a small Lum vs Sat pull in the deep shadows. If a viewer would notice any one of these moves on its own, halve it.
- Grab a still and move on. Right-click the viewer, Grab Still, and the rest of the scene now matches against this reference instead of your memory.
Eight decisions, six nodes, each one undoable on its own. That's the entire shape of a professional grade. Everything else in this guide is refinement of one of these steps.
What do you do when a shot fights back?
Four scenarios that stall beginners, and the honest way through each.
The blown-out sky. If the sky clipped at capture, that flat line at the top of the waveform, the detail does not exist and no slider invents it. In log or RAW footage there's often more headroom than the default decode shows, so try the Highlights slider in the adjustment row first: it rolls the top of the range down softly instead of dragging the whole image with Gain. If the sky is truly gone, colorists fake it. A gradient power window over the sky with a slight blue push and a small luminance drop reads as sky to an audience that never sees your waveform.
The underexposed night shot. Noise lives in the shadows, so the more you lift, the more you reveal. Raise Gamma rather than Lift so the noisy floor stays anchored near black, accept a darker image than you originally wanted, and let night be night. Resolve Studio's temporal noise reduction can buy back several usable stops, but it's Studio-only and heavy on the GPU. On the free version, a modest lift with honest shadows beats a bright, crawling mess.
The mixed-light interview. Half the face is lit by a window, half by a tungsten practical, and no single Temp value fixes both. Balance to the dominant source first. If the second source still bothers you, isolate it: qualify the warm region by hue, or draw a soft window along the boundary, and cool just that side. And sometimes the right answer is editorial rather than technical, because a warm lamp glow on one side of a face reads as intentional the moment the rest of the scene is consistent.
The light that changes mid-take. A cloud crosses the sun, or an auto-exposure camera drifts, and one static grade can't fit both halves of the shot. This is what the Keyframes panel at the bottom right of the Color page is for. Park where the shot still looks right, right-click in the keyframe track for your node and add a dynamic keyframe, move to the changed section, add another, and adjust the grade there. Resolve animates smoothly between the two states. Two keyframes fix most drifts; a take that pumps continuously may need one per pump, at which point it's worth asking the editor whether another take exists.
What's new for color grading in DaVinci Resolve 21?
If you graded on an older version, three changes are worth knowing about. Per Blackmagic's release notes, Resolve 21 added a layers view for the node editor, so nodes list in rows by their position in the graph instead of a scattered flowchart, which helps once a graph passes ten or twelve nodes. It also added a MultiMaster trim manager for generating multiple HDR and SDR deliverables from a single timeline in one pass, and group grade versions, so you can manage multiple looks across a group of clips instead of one clip at a time.
The same node tools you use on video now apply to still images too, on the new Photo page. That means a colorist moving between video and photo work reuses one mental model instead of two separate ones.
Do you need DaVinci Resolve Studio to color grade at a professional level?
No, not for standard grading. The free version includes the full node system, the primary wheels, qualifiers, power windows, and every scope covered above. What Studio adds, per Blackmagic's product page, is advanced HDR grading, Dolby Vision and HDR10+ metadata palettes, and the DaVinci Neural Engine's AI-assisted tools like Magic Mask.
That gap only matters once a project specifically requires an HDR deliverable or an AI-assisted mask. Our DaVinci Resolve 21 review breaks down the full free-versus-Studio decision if you're weighing the $295 upgrade for reasons beyond color.
Does your OS or hardware change how you grade?
The grading workflow is identical on Windows, Mac, and Linux. The friction points aren't.
On a Mac, Resolve runs on Metal, and Apple silicon machines decode H.264, H.265, and ProRes in hardware, which keeps node-heavy playback responsive on camera originals. The platform trap sits at the other end of the pipeline: QuickTime's gamma interpretation of finished Rec.709 files, covered in the export section below.
On Windows, set the GPU processing mode under DaVinci Resolve > Preferences > System > Memory and GPU: CUDA for NVIDIA cards, OpenCL otherwise, though Auto usually chooses correctly. The sharper limitation is decode. Blackmagic reserves hardware accelerated H.264 and H.265 decoding for the Studio version on Windows, so free-version users grading phone or drone footage lean on the CPU, and many transcode to DNxHR or ProRes on ingest to get smooth playback back.
On Linux, the free build has long shipped without H.264, H.265, or AAC support at all, which is why Linux users either transcode everything on ingest or buy Studio.
Two notes that apply everywhere. Sustained grading throttles thin laptops long before it strains a desktop, so plug in, expect fan noise, and don't judge performance from the first five minutes. And one hardware rule surprises almost everyone: DaVinci Resolve outputs clean, full-screen video to a reference monitor only through Blackmagic's own DeckLink cards and UltraStudio devices. A second HDMI monitor on your GPU gives you a bigger GUI viewer, not a clean feed, and that viewer passes through your operating system's color management on the way to the glass. It's one more reason the scopes outrank your eyes, and the reason grading suites budget for an I/O box alongside the monitor itself.
Is a grading control panel worth buying?
Not while you're learning. A mouse teaches you what every control does, because you have to find each one before you can move it.
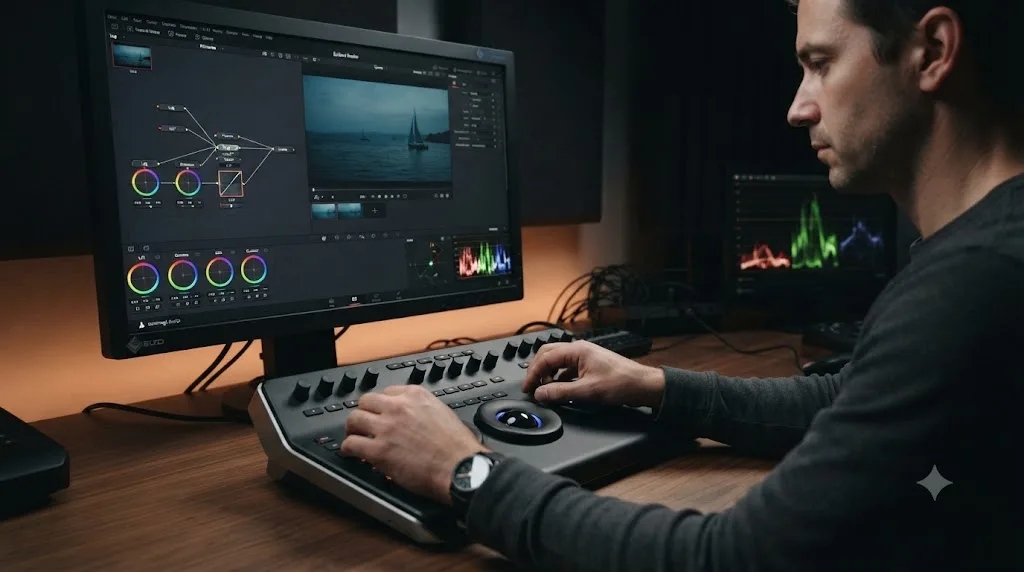
What a panel changes is bandwidth. Trackballs map to Lift, Gamma, and Gain, rings around them drive the master wheels, and both hands adjust simultaneously while your eyes never leave the image. Blackmagic makes three tiers: the Micro Color Panel, small enough for a backpack and also usable with the iPad version of Resolve, the Mini Panel, which adds screens and direct access to more palettes, and the full Advanced Panel built for grading suites. The moment one makes sense is when grading becomes paying work or a daily habit, because the gain is speed and comfort, not capability. Nothing on a panel is missing from the software.
How do you save a grade and reuse it across a project?
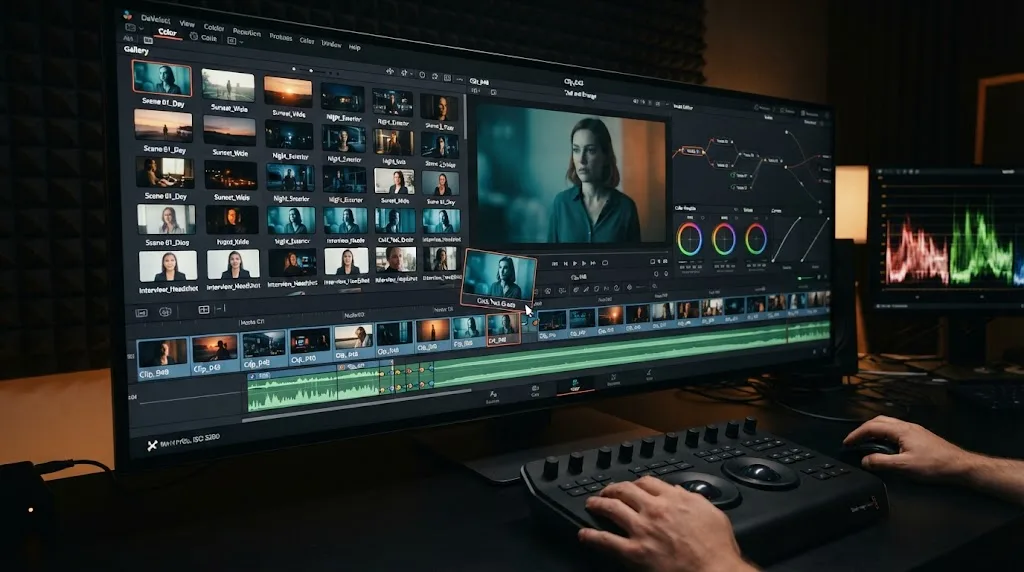
Once a shot's grade is right, grab a still in the gallery, found at the bottom right of the Color page. Stills store the node graph, not just a flattened image, so you can apply that exact grade to another clip and adjust it from the same starting point instead of rebuilding it by hand.
Grouping clips that share a look, matching interview angles or a whole scene shot under one light, saves more time than grading each one individually. Apply a grade to the group's pre-clip node graph and every clip in it grades together, which also means one fix updates all of them at once.
Groups actually give you four places to hang a grade, selectable from the dropdown at the top of the node editor: Group Pre-Clip, Clip, Group Post-Clip, and Timeline. Pre-clip nodes run before each clip's own grade, the natural home for a scene-wide normalization. Post-clip runs after, which suits a scene look. And the Timeline graph applies to every clip in the project, which is where a project-wide final trim or grain treatment lives. The Clip level is where everything you've built so far in this guide happens.
How do you try a different look without losing the current one?
Versions. Right-click a clip's thumbnail in the Color page's mini timeline and choose Local Versions > Create New Version. Resolve snapshots the entire node graph under a name you pick, and you can flip between versions from the same menu as fast as a client can change their mind.
That last part is the real use case. "Can we see it warmer?" stops being a risk the moment the current grade is a version you can return to in two clicks. Build the warm variant as its own version, play both, keep the winner, delete the loser.
Remote versions, the older sibling in the same menu, follow the source clip into every timeline that uses it, while a local version belongs to this one timeline clip. Local is the default and the safer habit for a project that's still being edited, because a change made for the director's cut shouldn't silently restyle the trailer.
How do you carry a grade from one project to the next?
Stills again, one level up. The Gallery's album list, at the left edge of the Gallery panel, includes a special album type called a PowerGrade. A still saved into a PowerGrade album is available in every project on the same system, not just the one you're in, which makes it the natural home for your personal look library and your standard node layouts.
To hand a grade to someone else, right-click a still and choose Export. The .drx file Resolve writes carries the full node graph, and the recipient imports it into their own gallery and applies it like any local still. That's how looks travel between colorists without shipping an entire project.
Build one PowerGrade album early, even with just two stills in it: your base node layout, and the first finished look you're proud of. Six months from now, that album is your toolkit and your portfolio at once.
How do you match shots across a scene?
Grade the scene's best shot first, the one with the most useful reference points in it, and treat it as your hero. Grab a still of it: right-click the viewer and choose Grab Still. Every other shot in the scene now gets matched against that still, not against your memory of it.
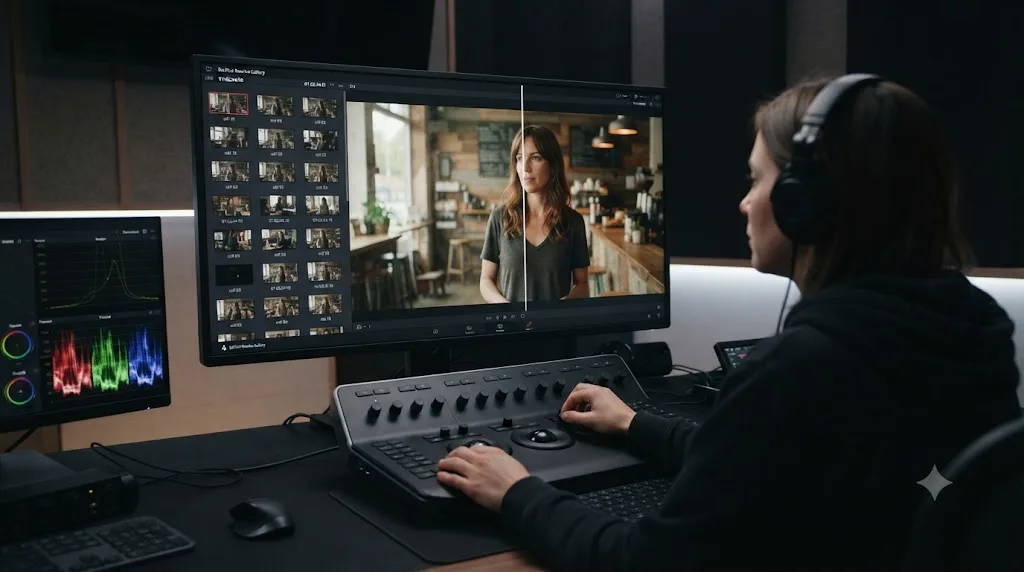
Park on the next shot and double-click the hero still in the Gallery. The viewer wipes the still against your current clip, and you can drag the wipe line across the frame to compare any region directly. Toggle the comparison off with the Image Wipe button in the viewer's toolbar when you want the full frame back.
Match with the parade, not your eyes. Bring the new shot's shadows to the same height as the hero's, then the highlights, then check that the channel balance in neutral areas lines up. When the traces agree, the shots cut together cleanly even if the two frames look a little different side by side, because the content of the frames differs even when the grade matches.
When two shots come from the same camera setup, skip the wipe entirely: park on the ungraded shot and middle-click the graded clip's thumbnail in the mini timeline. The entire grade copies over in one click, and you adjust from there instead of starting from zero.
Resolve also has an automatic option. Select the ungraded clips in the thumbnail timeline, then right-click the graded reference and choose Shot Match to This Clip. Treat its result as a starting point, not a finish line: it gets levels into the neighborhood, and skin usually still needs a manual pass afterward. And once a scene matches, the clip grouping covered above keeps it matched, so a later tweak to the scene's look lands on every shot at once instead of reintroducing drift shot by shot.
How do you grade a full timeline without burning out?
One shot at a time, front to back, is how beginners run out of patience by scene three. Colorists work in passes across the whole timeline instead.
Professional colorists grade a timeline in passes: normalize everything, balance everything, match each scene, then apply the look. Each pass is one kind of decision, so your eye stays calibrated to that decision instead of resetting on every clip.
The passes, in order:
- Normalization pass. Color management or a Color Space Transform on every log clip, and nothing else. The timeline goes from mixed gray-and-normal to uniformly viewable.
- Balance pass. Clip by clip, first node only: exposure, white balance, saturation, scopes open, no creative choices allowed. This pass moves fast precisely because it's constrained.
- Matching pass. Scene by scene, hero stills and wipes, groups for anything shot under one lighting setup.
- Look pass. On groups or the Timeline node graph, not on individual clips, so the style stays coherent and adjustable from one place.
Two habits make the passes sustainable. Flag the problem children, right-click a thumbnail and set a flag color, and keep moving instead of sinking twenty minutes into the one shot that fights back; come back to the flags at the end, when your eye is warmed up. And take real breaks away from the screen, because the adaptation that makes your monitor untrustworthy also happens inside your own visual system across a long session.
What do you do when playback stutters mid-grade?
Every node costs GPU time on every frame, so a chain that played smoothly at node two can stutter at node six. You have three levers to pull before blaming your hardware.
Drop the display resolution: Playback > Timeline Proxy Resolution > Half, or Quarter. The grade math doesn't change, only the size of the image processed for display, and for drawing windows and running trackers the difference is usually invisible. Switch back to Full before judging fine texture like grain or noise reduction.
Cache what's finished: Playback > Render Cache > Smart tells Resolve to pre-render the taxing parts of graded clips in the background and play the cached result, and a clip's bar in the timeline turns from red to blue as its cache completes. User mode gives you manual control per clip, and right-clicking a clip offers Render Cache Color Output for stubborn cases.
And find the expensive node, because nodes aren't equal: noise reduction is the classic single-node performance killer, far heavier than any wheel move or curve. Toggle the current node off and on with Ctrl+D on Windows or Cmd+D on Mac to identify the culprit, then cache it or save it for last. If playback stutters even with the grade bypassed, the problem is upstream of color; our slow playback guide covers the editing-side fixes, from proxies to codec choices.
What mistakes should beginners avoid when color grading?
Almost every beginner grading mistake has the same root: adjusting the picture until it looks good on one screen, right now, instead of building a grade that holds up everywhere. Here's the short list, with the fix for each:
| Mistake | Why it hurts | The fix |
|---|---|---|
| Grading before the edit is locked | Hours of work on shots that get trimmed or cut | Finish the story first, then grade |
| Trusting a laptop screen at full brightness | The grade reads differently on every other display | Judge exposure and balance on the scopes |
| Crushing blacks and clipping whites for punch | Detail slammed to 0 or 1023 is gone in the deliverable | Keep the waveform off the floor and the ceiling |
| Oversaturated skin | It's the first thing every viewer notices | Check skin against the vectorscope's indicator line |
| One giant node holding every correction | You can't undo one decision without losing five | One node, one task |
| A creative LUT as the first move | The look amplifies problems instead of hiding them | Normalize and balance first, add the look last |
| Ignoring color management on mixed cameras | The same correction lands differently on each camera | Normalize inputs before grading, per the setup above |
| Never comparing against a reference | Your eyes adapt and the scene drifts over a session | Wipe against stills as you work |
The pattern worth internalizing early: subtlety wins. A grade the viewer consciously notices is usually a grade that's too loud. If someone watches your scene and talks about the story instead of the color, the color did its job.
How do you make sure the grade survives export?
You don't need to bake or flatten anything. The Deliver page renders every clip through its node graph automatically, so the grade is in the file by default. When an export looks different from the Resolve viewer, the grade didn't disappear. The file is being interpreted differently on playback, and that almost always traces back to one of two settings.
First, data levels. In the Deliver page's Advanced Settings, leave Data Levels on Auto unless the receiving system explicitly demands otherwise. Forcing Full on a codec that players treat as video levels washes out your blacks, and forcing Video where Full is expected crushes them.
Second, the gamma tag. QuickTime playback on a Mac interprets standard Rec.709 files through its own gamma handling, so a grade that's perfect in Resolve can look slightly lifted or washed out in the player. The color space and gamma tag options in the same Advanced Settings section exist for exactly this. Our export settings guide walks through the exact combinations per platform, including the YouTube-specific choices, so I won't duplicate the numbers here.
One check catches everything: render ten seconds of your most saturated scene, play it in the app your audience will actually use, and compare it against the Resolve viewer before you commit to rendering the full timeline.
What's the fastest way to get better at color grading?
Grade real footage, not a tutorial project you're following along with. A tutorial teaches you which buttons exist. Your own footage teaches you when to reach for which one, because you'll actually notice if a face looks wrong or a sky looks fake.
A practice structure that beats binge-watching tutorials: grade the same one minute of footage three times on three separate days, without peeking at the earlier attempts. Then wipe the three versions against each other using stills. The comparison shows you exactly where your eye is getting faster, and it's more honest than your memory of how good yesterday's grade felt.
If you get stuck on a specific control mid-grade rather than the whole workflow, TryUncle is built for exactly that gap, an AI tutor that looks at your actual Resolve window and points at the control instead of sending you searching through a video for a ten-second answer.
Where do you go from here?
One serial node, balanced with Lift, Gamma, and Gain, checked against the waveform and vectorscope. That's a complete, professional-looking grade, and it's the foundation everything else in this guide builds on.
Pick one clip from your own footage and run it through that process today. Don't reach for a qualifier or a power window until the base grade earns it.
And when the base grade starts feeling automatic, the rest of this guide is sequenced in the order you'll actually need it: normalize your log footage, learn the curves, track your windows, match your scenes in passes, and render the result with the grade intact.
Frequently asked questions
- Should you use a LUT to color grade log footage in DaVinci Resolve?
- A camera manufacturer's conversion LUT is the fast way to normalize log footage, but the Color Space Transform effect does the same job with adjustable math and no hard clipping. Either way, balance the image in nodes before the conversion, and save creative look LUTs for after the image is normalized.
- What do the Lift, Gamma, and Gain wheels actually control?
- Lift sets your black point and shadow color, Gamma adjusts the midtones where skin tones usually sit, and Gain sets your white point and highlight brightness. A fourth wheel, Offset, moves all three tonal ranges together at once, which is useful for a fast white balance correction.
- What's the difference between serial, parallel, and layer nodes in DaVinci Resolve?
- A serial node passes its output straight into the next node in line, which is the default and most common setup. Parallel nodes split the same source into separate corrections that combine afterward, and layer nodes stack corrections the way layers stack in a compositing app, with priority given to whichever node sits lower in the stack.
- Should you trust your monitor when color grading?
- No. Monitors vary in calibration, brightness, and viewing conditions, so a shot can look fine on your screen and clip in the highlights on someone else's. Use the waveform, vectorscope, and parade scopes to confirm exposure and color balance instead of relying on your eyes alone.
- Do you need DaVinci Resolve Studio to color grade at a professional level?
- No, not for standard SDR work. The free version includes the full node system, primary wheels, qualifiers, and power windows. Studio adds advanced HDR grading tools, Dolby Vision and HDR10+ metadata palettes, and the DaVinci Neural Engine's AI-assisted tools, which matter for HDR delivery specifically, not for a standard grade.
- How many nodes should a basic color grade have?
- Two is often enough: one serial node for overall balance using the primary wheels, and a second for a specific secondary adjustment like a qualifier or power window. Add more only when a specific problem in the shot calls for it, not as a routine.
- What order should you make color corrections in DaVinci Resolve?
- Exposure and contrast first, white balance second, saturation last. Your eye judges color balance relative to brightness and saturation relative to contrast, so working in that order keeps each decision from invalidating the one before it.
- Why does an exported video look different from the DaVinci Resolve viewer?
- The grade renders into the file automatically, so the difference comes from playback interpretation, usually a data levels mismatch or a gamma tag issue. Check Data Levels and the color space and gamma tags under Advanced Settings on the Deliver page before re-grading anything.
Sources
- DaVinci Resolve - Color (Blackmagic Design)
- DaVinci Resolve - Tech Specs (Blackmagic Design)
- DaVinci Resolve - What's New (Blackmagic Design)
- DaVinci Resolve's Most Useful Nodes: Serial, Parallel, and Outside (Frame.io Insider)
- A New Approach to Grading Color in DaVinci Resolve, featuring colorist Cullen Kelly (Frame.io Insider)
- Hardware Recommendations for DaVinci Resolve (Puget Systems)
- Official DaVinci Resolve Training - The Colorist Guide (Blackmagic Design)
Put this guide to work with TryUncle.
Ask about the step you’re on. TryUncle sees your screen and points at the control you need, so you can keep learning in your own project.
Get TryUncle for Mac or WindowsKeep reading
Guides · Jul 7, 2026 · 32 min
DaVinci Resolve for Beginners: The Complete Starter Guide
Learn DaVinci Resolve from zero: what it costs, what it needs to run, the seven pages you'll actually use, and the steps to cut your first project.
Fixes · Jul 7, 2026 · 25 min
DaVinci Resolve GPU Memory Is Full: Every Real Fix
Why DaVinci Resolve throws 'GPU memory is full,' and which fixes actually work: timeline resolution, drivers, effects, and how much VRAM you need.
Guides · Jul 7, 2026 · 23 min
DaVinci Resolve Export Settings: Numbers That Actually Work
The exact DaVinci Resolve export settings for YouTube, client handoffs, and ProRes archives, plus what changed with Resolve 21's H.265 encoder.