Articles / Guidesupdated for DaVinci Resolve 21.0.2 (July 2026)
DaVinci Resolve Shared Nodes vs Regular Nodes, Explained
Quick answer
A regular node in DaVinci Resolve grades one clip. A shared node is a regular node saved so every clip using it updates together the moment you change it. Create one by right-clicking a Corrector node and choosing Save as Shared Node, then add it to other clips from the Add Node menu or Append Node to Selected Clips.
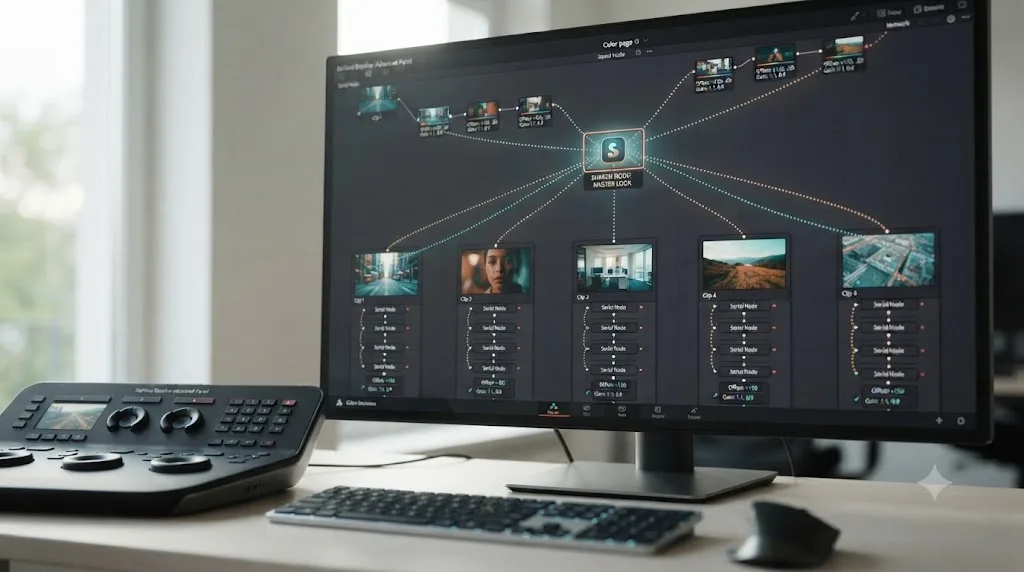
I've watched a colorist spend forty minutes re-pulling the same warmth adjustment across twelve interview clips, one at a time, because nobody had told them DaVinci Resolve has a node type built specifically to avoid that. They weren't doing anything wrong. Regular nodes just don't work that way, and shared nodes look enough like regular nodes in the node editor that it's easy to go a whole career without noticing the difference exists.
In our 100,000+ member editing community, and across teaching 100,000+ students on Udemy as an official Udemy Business Partner, this exact mix-up comes up constantly: someone asks how to change one correction on thirty clips at once without touching thirty nodes by hand. The answer has been sitting in Resolve's right-click menu since Resolve 15. This guide covers what actually separates a shared node from a regular one, how to create and apply one, where it sits in Resolve's node graph hierarchy, how it compares to two other node-linking tools people confuse it with, what happens when you delete or unlock it, and where it stops working, because it does, specifically around collaboration.
What's the difference between a shared node and a regular node in DaVinci Resolve?
A regular node only affects the single clip it's attached to. A shared node is the exact same kind of node, a Corrector by default, saved in a way that links it to every clip carrying a copy of it, so a change made on any one instance updates all the others at once. As of July 2026, on DaVinci Resolve 21.0.2, that mechanic hasn't changed since it was introduced in Resolve 15.
A shared node is not a different tool. It's a regular node with a memory of every other clip that's using the same copy of it. That's the whole concept in one sentence, and it's also why the feature is so easy to overlook: nothing about the node's controls, its wheels, curves, or qualifiers, looks any different once you're inside it. The difference lives entirely in what happens when you close that node and move to the next clip.
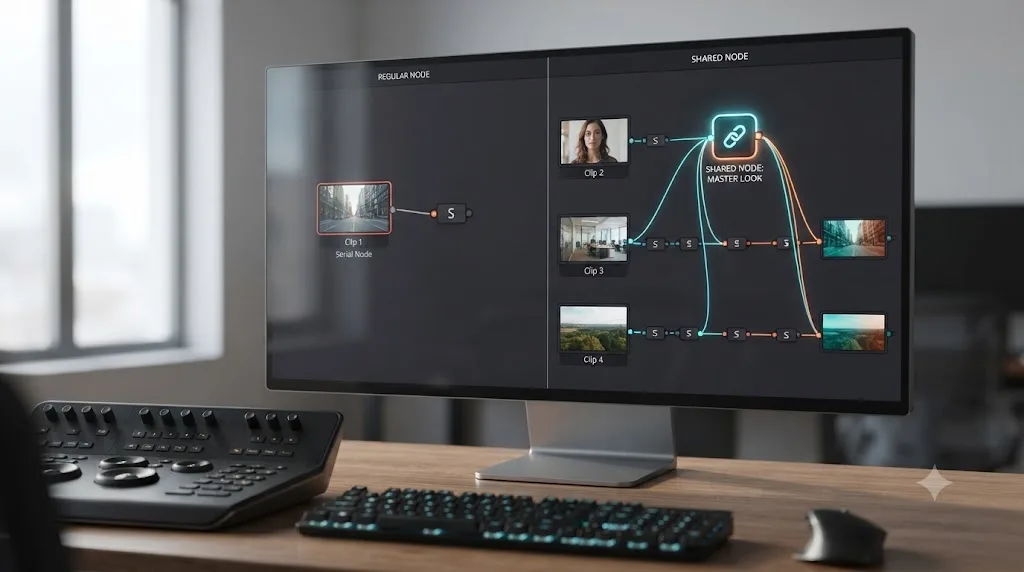
What is a regular node, and why doesn't it update other clips?
A regular node, what Resolve's interface calls a Corrector node, is the default building block of every node graph on the Color page. Per Blackmagic's own description of the Color page, the image passes through each node's correction or effect, left to right, on the way to the output. Every node you add by default, right-click and Add Node, or the keyboard shortcut for a serial node, is scoped to the clip you're standing on. Nothing about it reaches out to any other clip in your timeline.
That scoping is correct behavior almost all the time. A skin-tone secondary on one interview subject shouldn't touch a different subject's face two clips later. A power window tracking a specific hot window in the background of one shot has no business existing on a wide shot of an entirely different location. Isolation is the feature, not the limitation, for the vast majority of nodes you'll ever build.
The limitation only shows up in one specific situation: you've built a correction you genuinely want repeated, identically, on a defined set of other clips, and you expect to keep tweaking it. Copy-pasting the node's settings gets you the same starting values on every clip, but the moment you revise your mind, you're back to editing each copy separately, because a pasted node has no memory of where it came from.
What is a shared node in DaVinci Resolve, exactly?
A shared node is a Corrector node you've explicitly saved as shared, which changes nothing about what it can do and everything about how many clips feel its effect. Lewis McGregor, covering the feature's introduction for PremiumBeat, described it as "a new feature in Resolve 15 that allow colorists to share individual nodes across multiple clips, allowing for simultaneous correcting and grading on all clips while maintaining the properties from the clip-specific nodes," per his PremiumBeat walkthrough.
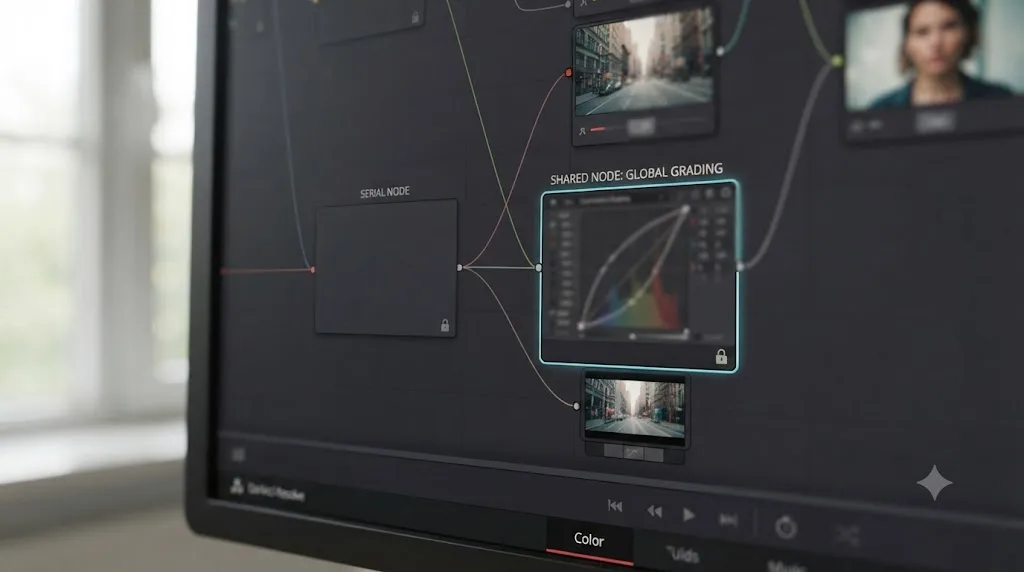
That last clause matters more than it first sounds. A shared node lives alongside regular, clip-specific nodes in the same node tree, not instead of them. Per Resolve's own reference manual page on using shared nodes, "you can add as many Shared nodes to a grade as you like, and arrange them in any order" while intermixing them freely with ordinary Corrector nodes in the same chain. A typical clip might run a regular balance node first, a shared look node in the middle, and a regular secondary correction after it, all in one line, with only the middle node broadcasting its edits elsewhere. The same page marks the node visually with what the manual calls a badge, layered on top of the lock icon that appears the moment you save it as shared.
Colorist Jason Bowdach, writing for Mixing Light, summarized the practical payoff plainly: "Shared nodes are an expedient tool that can offer consistency, and predictability, to your node graph," per his Mixing Light tutorial on alternate uses for shared nodes, published March 1, 2024. Consistency because every clip carrying the same shared node genuinely matches, not just at the moment you applied it but every time you touch it again. Predictability because you know exactly where a given correction lives, since it's the same node object no matter which clip you're viewing it from.
A shared node's edits don't get copied to other clips, they get broadcast to them, live, from a single source. That's the mechanical distinction underneath every practical use case in this guide, from a base interview grade to a title-card style repeated across a series.
How is a shared node different from an instanced node in DaVinci Resolve?
This is the confusion that trips up colorists who already know the node editor well, because Resolve has a second, older mechanism that also links node settings together, and it isn't a shared node at all. It's an instanced node, and the two solve different problems that happen to sound similar on paper.
Per the reference manual's page on instancing nodes, "Instanced nodes are nodes that have been created using the Paste Instance command, and which share settings with the original node so that a change made to one instanced node is also automatically applied to all other instances of that node." You build one by copying a node, Command-C, then right-clicking in the node editor and choosing Paste Instance, Command-Shift-V, instead of a plain paste. Resolve names the result something like Instance_NameOfNode, appending a number if you create several, and a regular copy-paste beside it produces a fully independent node with no such link.
The manual's own examples and mechanics describe instancing as a within-one-node-tree tool, reusing a single correction more than once in the same chain, say, applying the same denoise settings before and after a resize, so a later tweak updates both spots at once. Nowhere does the reference manual document Paste Instance as a route for linking a node across different clips the way it explicitly documents Save as Shared Node, Add Shared Node, and Append Node to Selected Clips for that exact purpose. If you've only ever used instancing to double up a correction inside one clip's tree, and you're now trying to spread that correction to twenty-nine other clips, you're reaching for the wrong tool. Copy the instanced node's settings into a plain node first, then save that as a shared node.
Instancing links copies of a node within one node tree. Sharing links copies of a node across different clips. They can coexist in the same project without conflicting, but neither one substitutes for the other, and mixing up which is which is the single easiest way to end up with a correction that updates in the wrong place, or doesn't update at all where you expected it to.
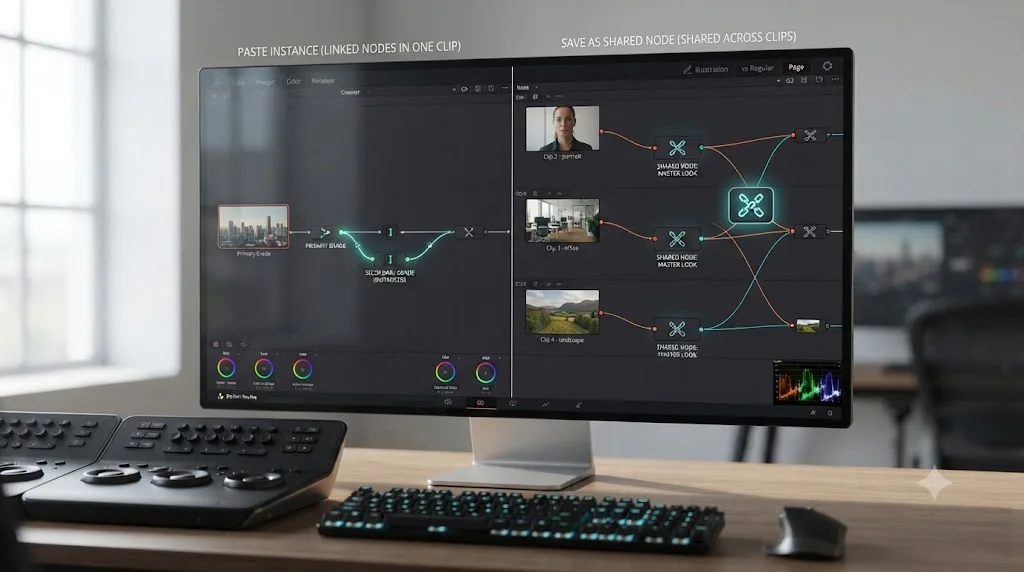
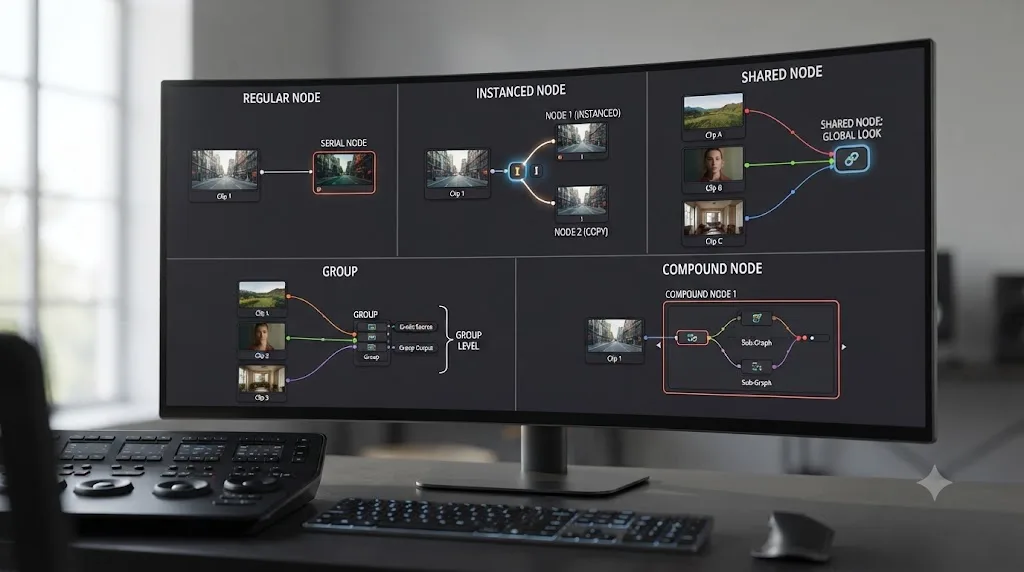
Shared node vs regular node vs instanced node vs Group vs Compound node: how do all five compare?
DaVinci Resolve gives you five different ways to organize or link corrections, and they solve five genuinely different problems. Confusing them, particularly shared nodes with Groups or with instanced nodes, is the single biggest source of "why didn't this update the way I expected" complaints in Resolve's node system.
| Tool | What it links | Scope | Requires grouping clips first? | Best for |
|---|---|---|---|---|
| Regular (Corrector) node | Nothing, it's clip-specific | One clip only | No | Any correction unique to one shot |
| Instanced node (Paste Instance) | Copies of one node, live, within the same node tree | One clip's chain (documented use) | No | Reusing one correction twice in the same clip's node graph |
| Shared node | One node's settings, live, across every clip carrying a copy | Any clips you choose, within one project | No | A base look, a camera fix, or a stylistic node repeated on specific clips regardless of grouping |
| Group (Pre-Clip / Post-Clip) | An entire node graph, applied automatically to every clip in the group | Every clip inside a defined Group | Yes | Batch normalization or balance across a whole scene, camera, or shoot day |
| Compound node | Nothing across clips, it collapses several nodes on one clip into one visual block | One clip only | No | Tidying a long node chain visually, not linking anything between clips |
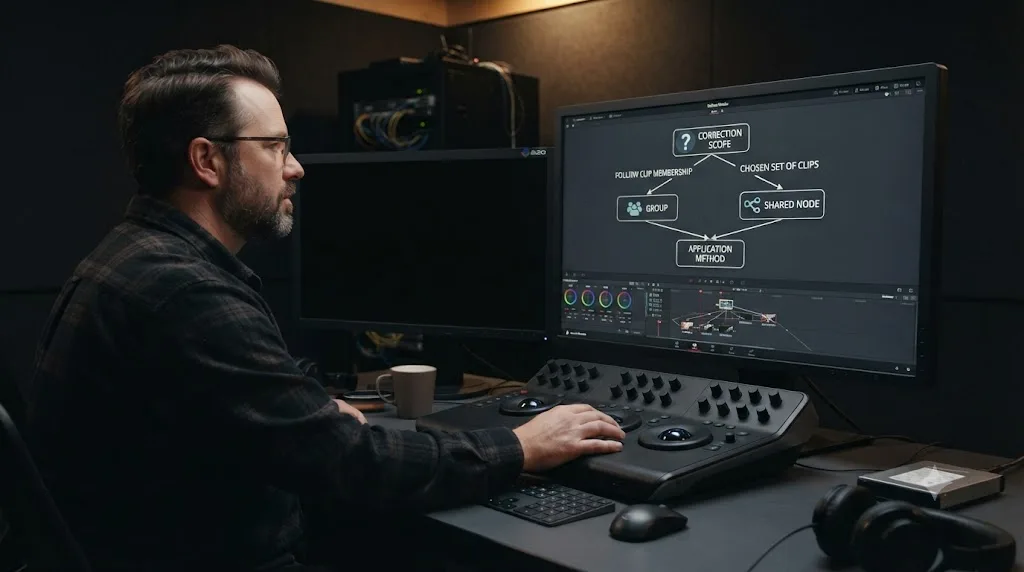
The row that trips people up most is shared node versus Group, because both let one edit affect several clips at once. The difference is membership. Per Peder Morgenthaler's Mixing Light tutorial on combining shared nodes and Group grades, "most colorists treat Shared nodes and Groups as an either/or approach," when the more useful mental model treats them as answering different questions. A Group answers "which clips belong together." A shared node answers "which specific correction should these particular clips share," and per the reference manual, shared nodes work "shared across multiple shots" without requiring those shots to belong to the same Group at all.
Groups link clips by membership. Shared nodes link specific corrections by choice, regardless of membership. That's the sentence to keep in mind the next time you're deciding which tool actually fits the problem in front of you. A shared node can even sit inside a Group's own node graph, doing double duty, which is exactly the combined workflow Morgenthaler's tutorial walks through for applying Color Space Transforms and LUTs across multiple Groups from a single point of revision.
Where does a shared node sit in Resolve's node graph, Clip level, Timeline level, or inside a Group?
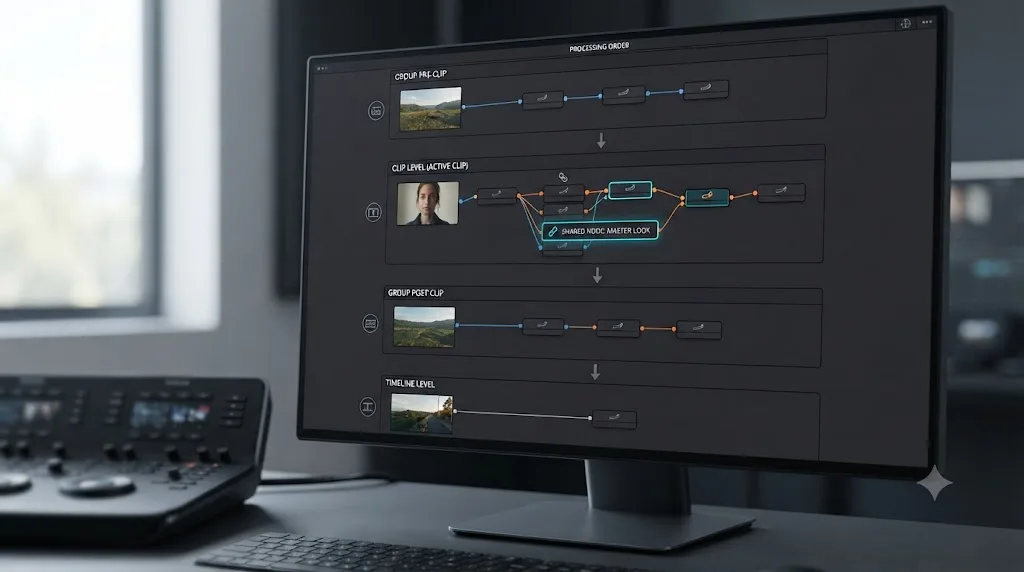
Every clip's node graph in Resolve actually has more than one level, and a shared node can live in any of them, which is part of why the feature is more flexible than it first looks.
Per the reference manual's page on identifying nodes, "Two dots at the top of the Node Editor let you switch between Clip and Timeline modes via a single click." A Clip-level node tree is what you've been building this whole guide, specific to the one clip you're viewing. A Timeline-level node tree, by contrast, sits downstream of every clip and applies to the entire program at once, a final vignette, a viewing LUT, a broadcast-safe clamp, without you touching a single clip's own grade. "If you're working on a clip that's part of a group," the same page continues, "four dots will be displayed to allow fast access to the Pre-Clip and Post-Clip Group modes as well."
Group Pre-Clip and Group Post-Clip add two more levels that sit on either side of the Clip level, and per the reference manual's page on Group modes, "Node trees you create using the Group Pre-Clip and Group Post-Clip modes automatically ripple changes to every member of a group. Node trees created with the Clip mode are specific to each clip." Put the full processing order together and it runs Group Pre-Clip, then Clip, then Group Post-Clip, then Timeline, each level's output feeding into the next.
A shared node most commonly lives at the Clip level, since that's the level this guide has walked through, right-click a Corrector node on one clip, save it as shared, apply it to other clips. But nothing restricts it to Clip level only. Bowdach's Mixing Light tutorial on shared nodes frames the entire feature around exactly this flexibility, describing how shared nodes work by "minimizing the need to switch between the clip-level and timeline-level node graphs," per the same tutorial cited earlier in this guide. Instead of building a look at the Timeline level, where it can't be selectively excluded from a handful of shots, you can build it as a shared node at the Clip level and apply it only to the clips that need it, while a genuinely universal adjustment, output color space, a broadcast clamp, still belongs at the true Timeline level where it touches everything without exception.
A shared node isn't locked to the Clip level of the node graph. It's a Clip-level tool by default, but the reason it exists at all is to give you Timeline-level reach without Timeline-level indiscrimination. That's the piece of the mental model most tutorials skip, and it's the reason a shared look node and a Group Post-Clip node graph can coexist on the same project doing genuinely different jobs.
How do you create a shared node in DaVinci Resolve?
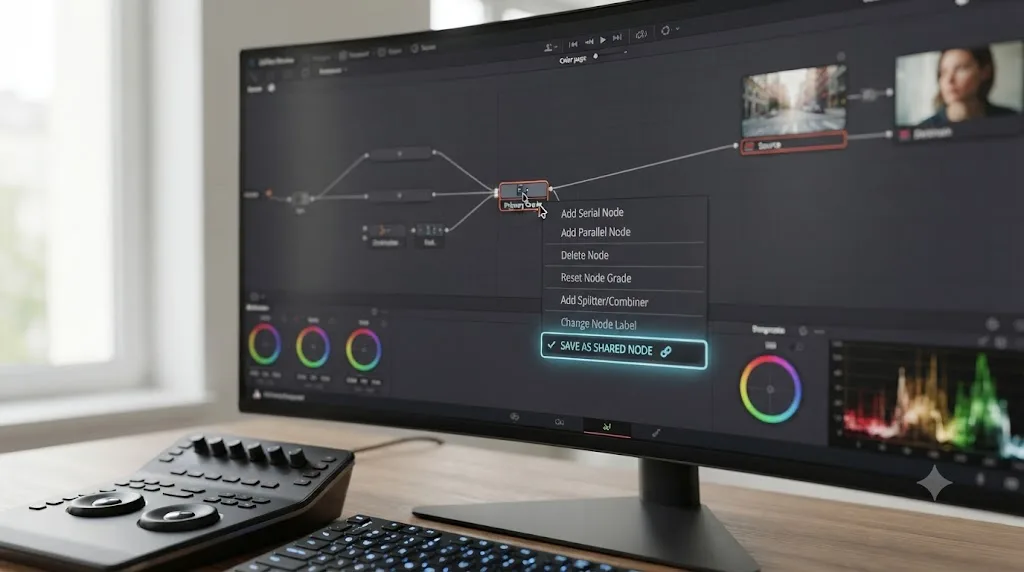
The creation step is a single right-click, and it's the same whether you're starting from an empty node or a node you've already built out.
- Build the correction on the Color page, a base grade, a camera-specific fix, a stylistic node, on whichever clip you want to originate it.
- Right-click that node in the node editor.
- Choose Save as Shared Node.
Per the reference manual's page on creating shared nodes, the moment you do this, "that node is automatically locked, preventing you from accidentally making adjustments to it that would affect all other grades using that same Shared node." Nothing else about the node changes visually except that small lock icon, which McGregor's walkthrough describes appearing "on the bottom-right of the node" as the signal that it's now a protected, linked object rather than an ordinary Corrector.
That automatic lock is deliberate friction, not a bug to work around. A node you just spent time building, now instantly capable of rewriting every clip that later adopts it, is exactly the kind of object you want protected from a stray drag on a wheel while you're reaching for something else in the interface.
How do you apply a shared node to other clips?
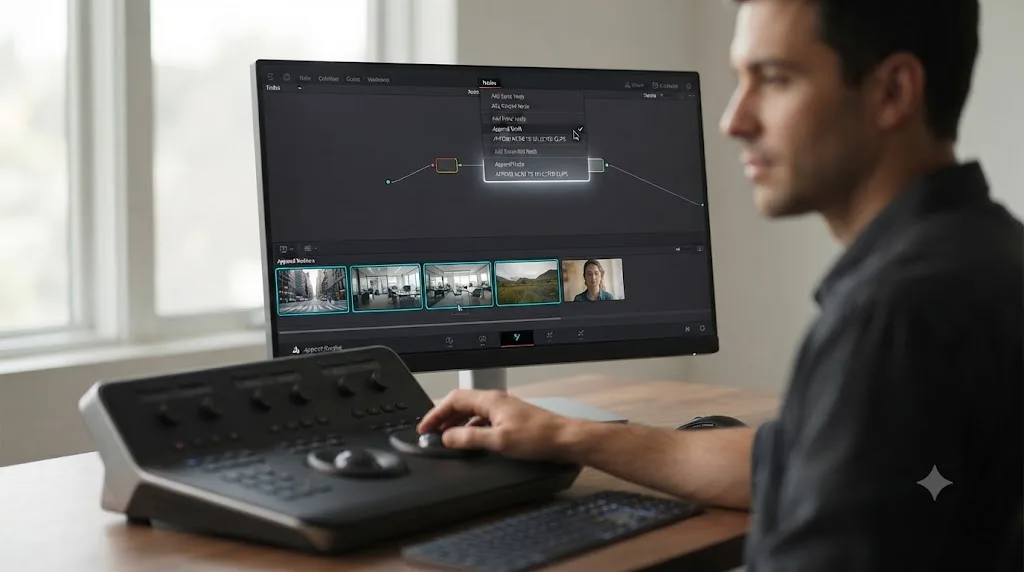
Resolve gives you several routes to spread a shared node across clips, and which one you reach for depends on how many clips you're targeting and whether you're mid-session or planning ahead.
| Method | How it works | Best when |
|---|---|---|
| Add Node submenu | Right-click any other clip's node editor, open Add Node, and the shared node is listed at the bottom | Adding to one clip at a time as you work through a timeline |
| Append Node to Selected Clips | Select several clips first, then apply the append command from the color menu | Batch-applying to a defined group of clips in one move |
| Gallery still | Save a grade containing a shared node to the Gallery; every clip you apply that still to inherits the shared node too | Distributing a full multi-node look, where the shared node is one piece of a larger grade |
| Remote Version to Local | Converting a Remote Version that already contains shared nodes preserves the linked adjustments | Collaborative pipelines using Resolve's version system before final lock |
Per the reference manual, "once you save a node as a Shared node, it becomes available from the bottom of the Add Node submenu of the Node Editor contextual menu," which is the route you'll use most often for ad hoc additions. For a defined batch, thirty interview clips, every angle from one camera, select them together first and use Append Node to Selected Clips, which adds the same shared node to all of them in a single action instead of thirty individual right-clicks.
Applying a shared node to a new clip doesn't copy its settings, it adds a live connection to the same node object every other clip already has. That distinction is what makes the workflow worth learning in the first place. A copied node is a snapshot. A shared node is a subscription.
How do you unlock and edit a shared node without breaking every clip that uses it?
You can't accidentally break anything by editing a shared node correctly, since rippling the change to every linked clip is the entire point. What the automatic lock protects against is an edit you didn't mean to make at all, a wheel bumped while scrolling, a curve point dragged mid-click.
- Right-click the shared node, or click its lock icon directly in the node editor.
- Choose Unlock.
- Adjust the node exactly as you would any regular Corrector, wheels, curves, qualifiers, whatever it contains.
- Watch the change apply live to every other clip currently carrying that same shared node, not just the one you're viewing.
- Right-click again and choose Lock, or click the icon, once you're finished, to restore the protection before you move on to unrelated work.
This is the moment the feature earns its keep. A client note like "warm the whole piece up slightly" against thirty interview clips built on one shared base node becomes one unlock, one wheel nudge, and one lock, instead of thirty separate visits to thirty separate node trees.
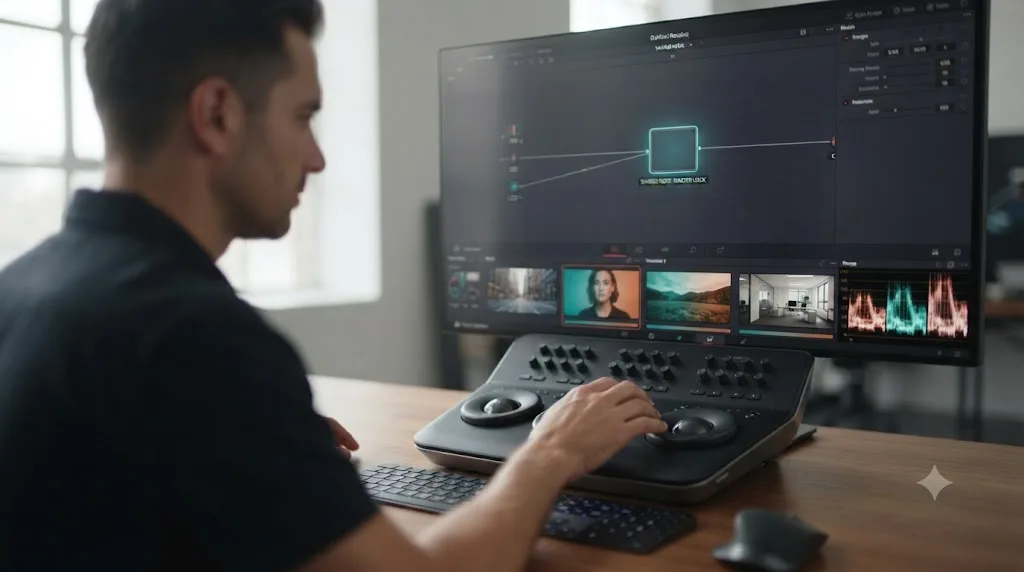
Unlocking a shared node to make one edit updates every clip that references it, which is exactly the behavior a regular node can never give you no matter how carefully you copy and paste. Keep that lock closed the rest of the time, though. An unlocked shared node sitting open during a long grading session is a live wire, one accidental drag away from an unintended change spreading across a project you thought was finished.
What happens to power windows, qualifiers, and tracking data inside a shared node?
A shared node isn't limited to primary wheels and curves. You can save a node containing a qualifier, a power window, even a tracked power window, as shared, and every clip that carries it inherits the whole node exactly as built. That's useful for a mask you genuinely want repeated in the same screen position on every clip, a static lower-third area, a fixed watermark region, a logo bug you're isolating the same way across an entire series.
It gets less useful the moment framing changes between clips. Because a shared node is one node object, not a copy, its power window's position and any tracking keyframes on it live on that single object too, the same way its color values do. Colorists on Blackmagic's own user forum have specifically asked for a way to decouple a window's position from a shared node's color settings, per a Blackmagic Forum thread on the topic, so that the correction stays shared while each clip keeps its own independently tracked window. As of this writing, Resolve doesn't offer that split. Save a tracked power window as a shared node and apply it to a clip with a different framing, a different subject position, or a different lens, and the window follows wherever it was tracked on the original clip, not wherever the subject actually sits in the new one.
The practical rule: save wheels, curves, and untracked qualifiers as shared nodes without hesitation, they're the whole point of the feature. Before you save a node with a tracked power window as shared, check every clip you plan to apply it to for matching framing first, or split the correction into a shared color node plus a separate, per-clip regular node that holds the window and its tracking. That second node stays independent by design, which is exactly what you want when the mask has to move differently on every shot even while the color underneath it stays identical.
How do you delete a shared node, and what happens to the clips using it?
Deleting a shared node doesn't erase the node slot from every clip that had it, it severs the link and leaves an empty placeholder behind. That distinction matters if you're troubleshooting a grade that suddenly looks unfinished.
- Right-click any shared node, on any clip that carries it.
- Open the Delete Shared Node submenu.
- Choose the specific shared node you want removed, since a project can have several.
Per the reference manual's page on deleting shared nodes, this action "leaves the now unlinked nodes intact within each node tree in which they appear, but clears their effect." Every clip that had the shared node keeps a node in that position in its chain, structurally, but that node stops doing anything, since its settings and its link to the shared object are both gone. The deleted shared node also disappears from the Add Node submenu, so you can't accidentally re-add a reference to something that no longer exists.
That behavior is worth knowing before you delete one on purpose. If ten clips are carrying a shared look node and you delete it, expect ten flat, unstyled clips afterward, not ten clips silently reverted to some earlier state. Grab a still of the shared node's settings first, right-click the viewer and Grab Still, if there's any chance you'll want to rebuild the correction later as a regular node or a fresh shared node.
How do you convert a shared node back into a regular node on just one clip?
Sometimes one clip out of a batch needs to break away from the pack, a close-up that needs its own skin adjustment on top of what was a shared base look, without dragging every other clip's grade along for the ride.
Right-click the shared node on that specific clip and choose Convert to Corrector. Per the reference manual, this is the documented path for exactly this situation: "if you want to copy a grade from another scene to use as the starting point for a new grade, you don't want any shared nodes to continue being shared, so you can convert the Shared node back to a regular Corrector node, make any adjustments you need to customize it for the new scene, and then turn that node into a brand new Shared node."
The important part: converting affects only the clip you ran the command on. Every other clip still carrying the original shared node keeps its live link, untouched. What you get on the converted clip is a frozen snapshot of the shared node's settings at the moment of conversion, now yours to customize freely, independent of what happens to the shared version elsewhere in the project afterward.
Shared nodes vs Groups: when should you use each?
Reach for a Group when the organizing principle is membership: every clip shot on Camera A, every clip from Tuesday's shoot day, every clip in one scene. Group Pre-Clip and Post-Clip node graphs apply automatically to every clip you've added to that Group, no per-clip setup required once the Group exists and its node graph is built at that level of the hierarchy covered earlier in this guide, which our guide to color matching different cameras covers in more depth for the specific case of normalizing mismatched camera sources.
Reach for a shared node when the organizing principle is the correction itself, not clip membership. A stylistic look you want on specific clips scattered across several scenes and several Groups. A title-card treatment repeated on a handful of clips that have nothing else in common. A base interview grade you might later want on a B-roll clip that was never part of the interview Group to begin with. Per the reference manual, shared nodes work "shared across multiple shots" with no membership requirement at all, which is precisely the flexibility a Group-based approach can't offer.
The two aren't rivals. Morgenthaler's Mixing Light tutorial specifically advocates combining them rather than picking one, using a shared node inside a Group's own node graph so "apply grading operations across multiple groups while maintaining a single point for revision of our Group grades." That combined approach is the recommended pattern for Color Space Transforms, ACES Transforms, LUTs, and looks that need to reach across several Groups at once, exactly the case where a single Group's Pre-Clip graph isn't broad enough on its own.
How does a shared node compare to DaVinci Resolve 19's Node Stack layers?
Node Stack is a different, newer feature, and it's worth naming explicitly here because the two get lumped together in casual conversation despite solving opposite problems. Node Stack arrived with DaVinci Resolve 19 and, per CG Channel's coverage of the 19.1 update, lets colorists "break up a node graph into up to four layers to simplify complex grading workflows," with grade operations like ripple, reset, and editing available on a per-layer basis.
The distinction is scope, same as the shared node versus instanced node comparison earlier in this guide, just at a different level. Node Stack organizes one clip's own node graph into layers you can toggle, reorder, or apply selectively, a tool for taming a single clip that's grown a sprawling forty-node chain. It doesn't link anything to any other clip. A shared node does the opposite: it links one specific node to other clips while leaving the rest of each clip's own graph, layered or not, completely untouched.
You can use both on the same project without conflict, since they operate at different scopes entirely. A clip with a Node Stack broken into four organizational layers can still carry a shared node inside one of those layers, that shared node still rippling its changes out to every other clip that carries it, layered or not. If you're hunting for a way to make one clip's node graph less overwhelming, Node Stack is the answer. If you're hunting for a way to make one correction ripple across multiple clips, that's a shared node, and Node Stack won't get you there.
Do shared nodes travel across different DaVinci Resolve projects, or work in collaboration?
No to both, and these are the two limits that catch people who assume a shared node behaves like a PowerGrade.
A shared node lives inside the project it was created in. Per the reference manual's own description of how you spread one, copying a Gallery still that contains a shared node to "another clip" carries the shared node along, but that mechanism operates within your current project's node database, not across separate project files the way a PowerGrade does. If you want the identical look available in every project you ever open on that machine, save it as a PowerGrade instead. If you want it linked live across a defined set of clips inside the project you're currently grading, a shared node is the right tool.
The collaboration limit is more absolute, and it's worth knowing before you build a whole grading pipeline around shared nodes on a multi-user project. Per the same reference manual page on using shared nodes, "Grades using shared nodes cannot be used in collaborative workflows." Resolve's own documentation adds that it's "hoped that this limitation is temporary," language that signals Blackmagic is aware of the gap rather than treating it as permanent by design, but as of Resolve 21.0.2 the restriction still stands.
Shared nodes are a single-project, single-user tool, and treating them as a substitute for PowerGrades or collaboration-safe grading will cost you exactly the moment a second colorist opens the same project. If your workflow genuinely needs multi-user collaboration through Blackmagic Cloud or a Resolve Project Server, keep shared nodes out of any grade that will be touched by more than one person at once, and lean on Groups or individually applied corrections instead for that specific scenario.
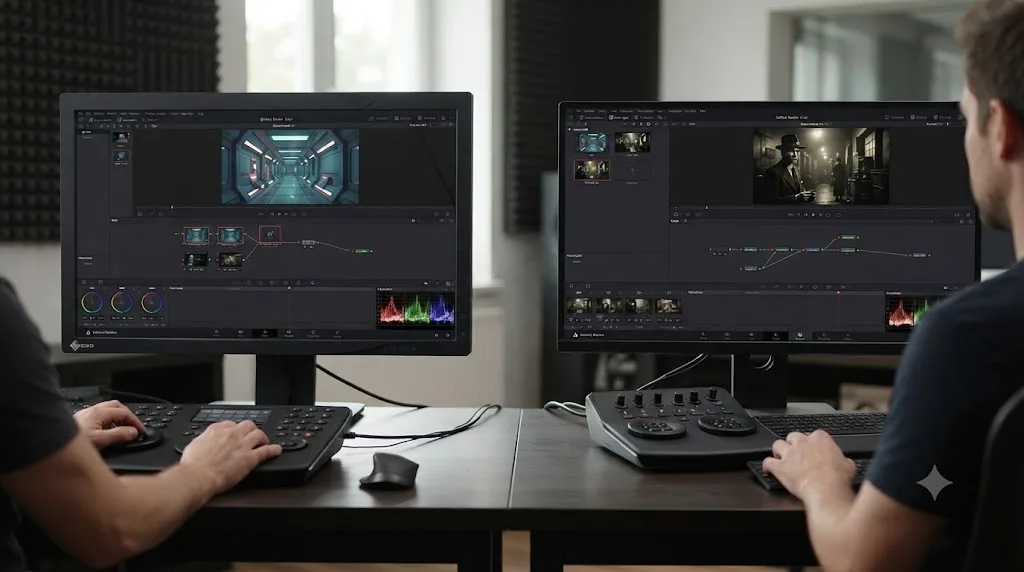
How does DaVinci Resolve 21's Photo page use shared nodes?
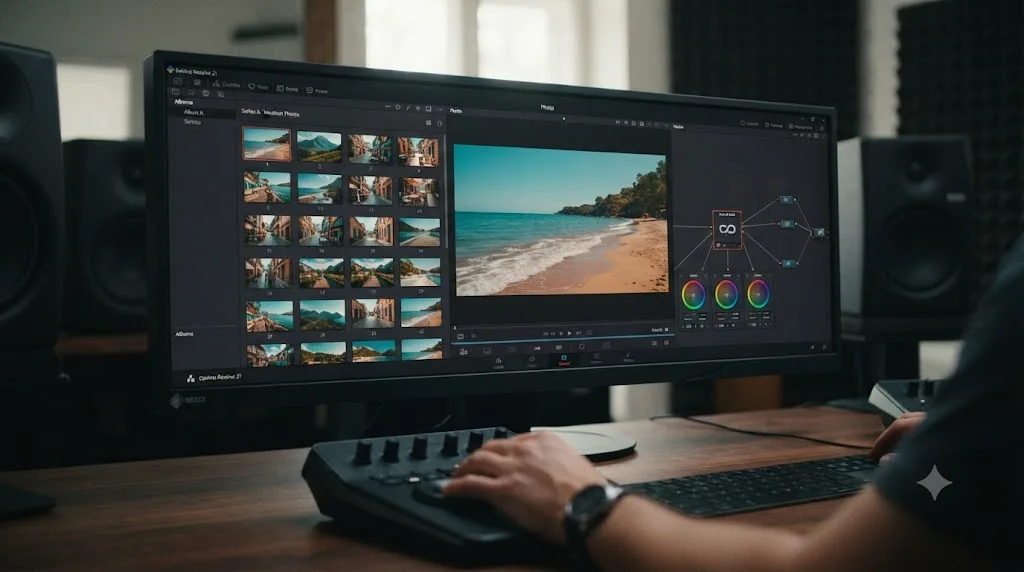
This is the freshest use case for the feature, and it extends shared nodes beyond video clips for the first time. DaVinci Resolve 21 added a Photo page for editing and organizing still images, built on the same underlying color engine as the Color page, and Blackmagic's own description of it explicitly names shared nodes as part of the workflow: "It's possible to add nodes in series or parallel to build complex grades, apply different corrections to different parts of an image simultaneously and use shared nodes to apply the same look across an entire album of photos at once," per Blackmagic's description as reported by PetaPixel's coverage of Resolve 21's photo tools and confirmed in Newsshooter's Photo page preview from the same NAB 2026 announcement.
The mechanics are identical to the Color page. Build a look on one photo, save the relevant node as shared, apply it across the rest of an album, and a later adjustment to that shared node updates every photo in the album at once instead of requiring you to reprocess each image individually. For a photographer moving from Lightroom's batch-editing habits into Resolve's node-based system, this is the closest equivalent Resolve offers to a synced develop preset, except the sync stays live rather than being a one-time copy.
If you're a video colorist who hasn't touched the Photo page, the practical takeaway is simpler: whatever intuition you've built for shared nodes on the Color page transfers directly, since it's the same feature applying the same rule to a different kind of source. The power-window caveat from earlier in this guide carries over too. A shared node with a tracked mask, applied across an album of photos with different subject positions in frame, will misplace that mask on every photo where the subject didn't land in the same spot as the original.
A worked example: one shared base node across thirty interview clips
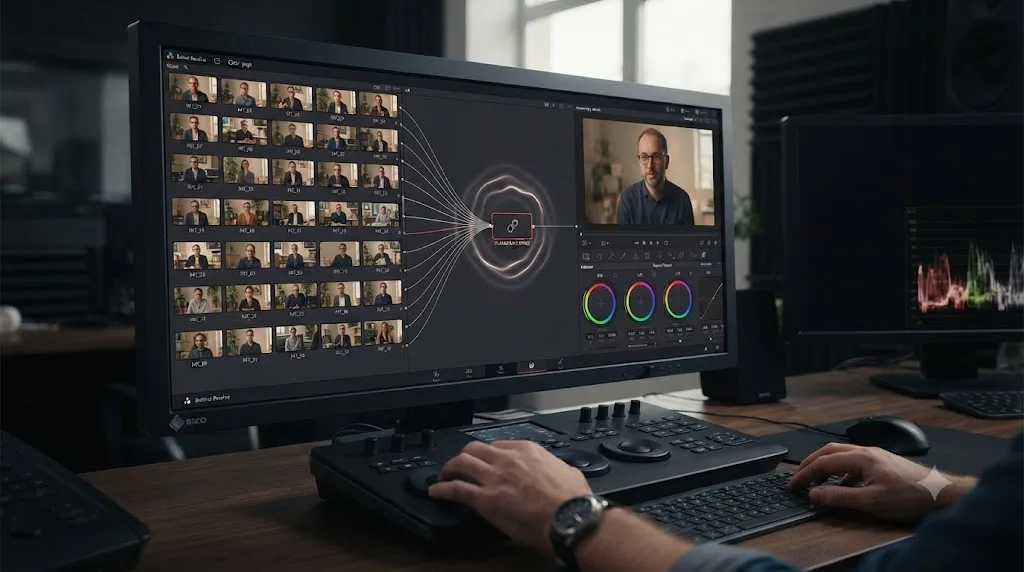
Theory holds up better with a concrete case. Say you've shot thirty short interview clips for a single project, same lighting kit, same rough setup, and the client's one note after reviewing the first cut is "can the whole thing feel a touch warmer."
- Build the base correction on your first graded clip. A serial node handling exposure, white balance, and a light warmth push, tuned until that one clip looks right.
- Right-click the node and choose Save as Shared Node. It locks automatically, and now sits ready to spread to the other twenty-nine clips.
- Select the remaining clips in the timeline, all twenty-nine at once, either by shift-clicking in the thumbnail timeline or selecting them in the Media Pool.
- Use Append Node to Selected Clips to add the shared base node to every selected clip in a single action, rather than opening each one's node editor individually.
- Review a handful of clips to confirm the base grade landed identically everywhere, since every clip is now referencing the same node object, not a copy of it.
- Add any clip-specific fixes as separate, regular nodes downstream of the shared one, a stray highlight on one subject's glasses, a slightly different white balance correction on a clip shot near a window, so those stay isolated to their own clip.
- When the client note comes in, right-click the shared node on any one clip, choose Unlock, nudge the warmth up slightly, and lock it again. All thirty clips update together, in seconds, without you revisiting a single one of them individually.
That last step is the entire payoff. Without a shared node, "make it warmer" against thirty clips means thirty separate visits to thirty separate node trees, each one a chance to introduce a slight inconsistency between clips that were supposed to match. With one, it's a single unlock, a single wheel nudge, and a single lock.
A second worked example: a shared title-card look across a multi-episode series, combined with a Group
The interview example covers the single-project, single-scene case. Here's a messier one: a five-episode series, each episode its own timeline within the same project, where every episode opens on a title card that needs to look identical, and every episode's B-roll needs its own camera normalization that has nothing to do with the title cards.
This is exactly the situation from the comparison section earlier in this guide, where a Group answers "which clips belong together" and a shared node answers "which specific correction should these particular clips share," and the two need to work at once without stepping on each other.
- Build a Group for each episode's B-roll, one Group per camera or per shoot day, whatever actually varies between clips within that episode. Set the Group Pre-Clip node graph to handle exposure and white balance normalization for that specific camera source, so every clip in the Group inherits it automatically.
- Grade the title card on episode one as a normal Clip-level correction, the specific color and contrast treatment the client approved for the opening graphic.
- Save that title-card node as a shared node. It's now independent of any Group, since title cards across five episodes have nothing in common with each other's B-roll camera sources.
- Add the shared title-card node to the corresponding clip in episodes two through five, using the Add Node submenu on each one, since there are only five instances total and Append Node to Selected Clips works just as well if they're all selected across open timelines.
- Leave each episode's B-roll Groups completely separate from the shared node. The title cards update together through the shared node. The B-roll clips update together, within each episode, through their own Group. Neither system touches the other's clips.
- When the client wants the title card's accent color adjusted after episode three ships, unlock the shared node once. All five episodes' title cards update, including the four still in progress, without touching a single Group or a single B-roll clip.
The lesson underneath the mechanics: a shared node and a Group aren't competing tools fighting over the same clips, they're two independent systems that happen to coexist peacefully because they're organized around entirely different questions, correction identity for the shared node, clip membership for the Group. Building both into the same project isn't a compromise. It's the intended use case.
What goes wrong with shared nodes, and how do you fix it?
A handful of patterns account for most of the confusion people run into once they start using shared nodes regularly.
You edited a shared node and every clip using it changed, when you only meant to fix one. That's not a bug, it's the feature doing exactly what it's built to do. If one clip genuinely needs its own version, right-click the shared node on that clip and choose Convert to Corrector first, then customize it. Editing the shared node directly always affects every clip still linked to it.
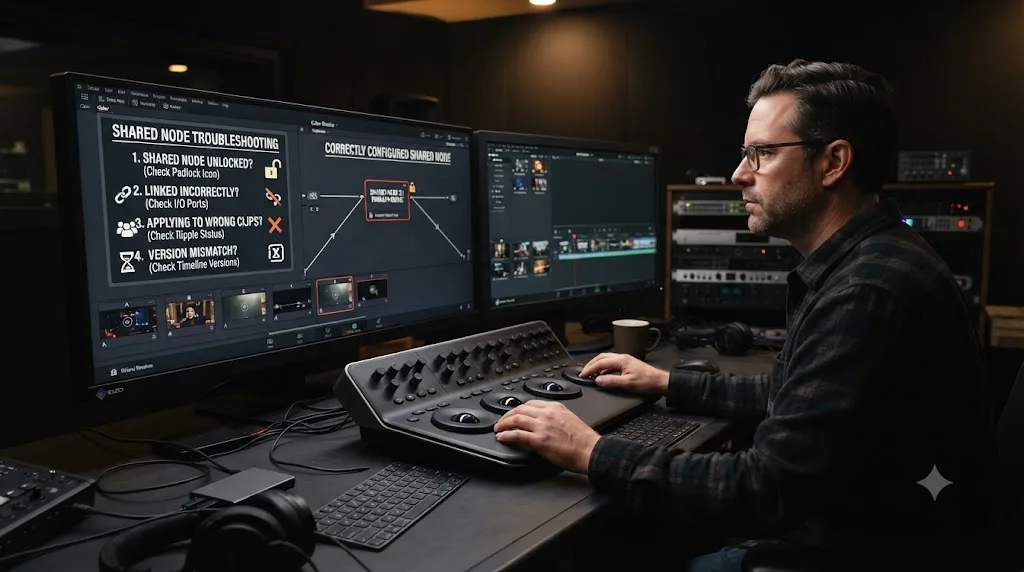
You can't figure out why a node won't respond to your wheel adjustments. Check for the lock icon. A freshly created or freshly applied shared node is locked by default, specifically to prevent the accidental edit this checklist item describes. Right-click and Unlock before adjusting it.
A shared node's effect vanished from several clips at once, and you're not sure why. Someone, possibly you, deleted the shared node. Per the manual, deletion clears the node's effect on every clip that carried it while leaving an empty node slot behind, rather than reverting anything. If you have a Gallery still saved of the original settings, reapply it and re-save as a new shared node.
A tracked power window inside a shared node landed in the wrong place on a new clip. This isn't a bug either, it's the shared node applying the exact same tracked geometry it was built with, on a clip with different framing. Rebuild the correction as a shared color node plus a separate, per-clip regular node for the window, as covered earlier in this guide, so the mask can track independently on each clip while the color underneath stays shared.
You built an instanced node hoping it would update a correction across several clips, and it didn't. Instancing and sharing look similar but solve different problems. Paste Instance links copies of a node within one clip's node tree; it isn't documented as a cross-clip tool the way Save as Shared Node is. If the goal is spreading a correction across clips, convert the correction to a shared node instead.
Your grade won't open correctly, or behaves unpredictably, on a collaborative multi-user project. You're hitting the documented collaboration limitation covered above. Shared nodes aren't supported in collaborative workflows. Rebuild the affected correction using regular nodes copied to each clip, or a Group, instead.
You want the same look in a completely different project, and the shared node isn't there. Shared nodes don't cross project boundaries. Save the look as a PowerGrade instead, following our guide to using PowerGrades, which is specifically built for reuse across every project on your system.
You built a huge node chain and now can't tell which nodes are shared and which are regular at a glance. Pair every shared node with a distinct label and color, following the same discipline our guide to node labels and colors covers for regular nodes, using the Node Color pop-up in the Inspector or the right-click Set Color submenu. A shared node's lock icon and badge tell you it's shared, but a consistent color makes it recognizable from across the room, not just up close.
Do you need DaVinci Resolve Studio to use shared nodes?
No. Shared nodes are part of the node editor, and the node editor, including Groups, Compound nodes, instanced nodes, and the full set of primary and secondary tools, ships in the free version of DaVinci Resolve exactly as it does in Studio. Per Blackmagic's product pages, the free version includes the full Color page node system, and Studio's exclusive feature list runs through Dolby Vision metadata authoring, HDR10+ tools, and DaVinci Neural Engine features, not through shared nodes or any other node-linking mechanic.
Whether you're grading on the free version or Studio, right-clicking a Corrector node gets you the same Save as Shared Node option either way, and every mechanic covered in this guide, creating, applying, locking, deleting, converting, works identically regardless of license.
Where do you go from here?
Reach for a regular node for anything unique to one clip, which covers most of what you'll ever build. Reach for an instanced node when you need to reuse one correction twice inside the same clip's chain. Reach for a shared node the moment you notice you're repeating the same correction on more than a couple of clips and expect to revise it later, a base grade, a camera fix, a stylistic node that needs to move together across a batch, at any level of the node graph from a single Clip up through a whole Group. Right-click, Save as Shared Node, apply it with Append Node to Selected Clips, and keep it locked except for the moment you're actually editing it.
The value of a shared node isn't the time it saves you once, it's the time it saves you every single time you change your mind after applying it. That's the entire case for learning this feature over copy-pasting node settings by hand. A copied node freezes a decision. A shared node keeps that decision open across every clip it touches, for as long as the project needs it to.
TryUncle is the on-screen assistant for DaVinci Resolve on macOS - ask in plain words and Uncle points at the exact control on your screen, which is exactly the kind of help worth having mid-session if you can't remember whether the command you want is Save as Shared Node or Append Node to Selected Clips. TryUncle is a paid app, currently at founder pricing, macOS only, and you can check the current rate on TryUncle's site before deciding if that live, on-screen guidance fits your workflow.
Once you've got shared nodes and regular nodes sorted, the next place this distinction pays off is a full grade. Our color grading basics guide picks up from there, covering node order, the primary wheels, and reading the scopes to confirm a correction actually did what you meant it to.
Frequently asked questions
- What's the difference between a shared node and a regular node in DaVinci Resolve?
- A regular node, technically called a Corrector node, only affects the one clip it lives on. A shared node is the same kind of node, saved so that every clip carrying a copy of it updates together the instant you change it on any one of them. Nothing about how you grade inside the node changes, only how many clips feel the edit.
- How do you create a shared node in DaVinci Resolve?
- Right-click any Corrector node in the node editor and choose Save as Shared Node. Resolve locks it immediately. From then on it appears at the bottom of the Add Node submenu, so you can drop it onto any other clip's node tree from that menu, or select several clips first and use Append Node to Selected Clips to add it to all of them at once.
- How do you edit a shared node without breaking every clip that uses it?
- You don't break anything by editing it, that's the entire point of a shared node. Right-click it and choose Unlock, or click its lock icon directly, then adjust it like any other node. The change ripples to every clip carrying that shared node automatically. Lock it again afterward to prevent an accidental nudge later in the session.
- Can you mix shared nodes and regular nodes in the same node chain?
- Yes, freely. Per DaVinci Resolve's reference manual, you can add as many shared nodes to a grade as you like and arrange them in any order, intermixed with ordinary Corrector nodes in the same tree. A typical chain might run a regular balance node, then a shared look node, then a regular secondary, all in one line.
- Do shared nodes work across different DaVinci Resolve projects?
- No, not the way PowerGrades do. A shared node lives inside the project it was created in and links clips within that project. To reuse a look across separate projects, save it as a PowerGrade instead, which is stored at the database level specifically so it follows you into every project you open.
- Why is my shared node locked, and can you unlock it?
- Resolve locks every shared node automatically the moment you create it, specifically to stop an accidental adjustment from silently changing every clip that uses it. Right-click the node, or click its lock icon in the node editor, and choose Unlock to edit it. Lock it again once you're done to restore that protection.
- What happens to your clips if you delete a shared node?
- Right-click any shared node and choose a node to delete from the Delete Shared Node submenu. Per the reference manual, this leaves the now-unlinked nodes intact within each clip's node tree, but clears their effect, so the clips don't lose the node slot, they just stop grading anything until you rebuild that node manually.
- Do you need DaVinci Resolve Studio to use shared nodes?
- No. Shared nodes, along with the rest of the node editor, Groups, and Compound nodes, are part of the free version. Blackmagic's Studio-exclusive features cover things like Dolby Vision authoring and DaVinci Neural Engine tools, not the mechanics of linking a node across clips.
Sources
- DaVinci Resolve Reference Manual: Using Shared Nodes (Blackmagic Design, mirrored)
- DaVinci Resolve Reference Manual: Creating Shared Nodes (Blackmagic Design, mirrored)
- DaVinci Resolve Reference Manual: Deleting Shared Nodes (Blackmagic Design, mirrored)
- DaVinci Resolve Reference Manual: Instancing Nodes (Blackmagic Design, mirrored)
- DaVinci Resolve Reference Manual: Identifying Nodes (Blackmagic Design, mirrored)
- DaVinci Resolve Reference Manual: Using Group Modes to Control Which Grades Ripple and Which Don't (Blackmagic Design, mirrored)
- How To Use The Shared Node Feature In DaVinci Resolve 15, by Lewis McGregor (PremiumBeat)
- Alternate Uses For Shared Nodes in DaVinci Resolve, by Jason Bowdach (Mixing Light)
- Combining Shared Nodes and Group Grades in DaVinci Resolve, by Peder Morgenthaler (Mixing Light)
- Blackmagic Design Releases DaVinci Resolve 19.1 (CG Channel)
- Blackmagic Forum: Option to Decouple Windows on Shared Nodes?
- DaVinci Resolve 21 is Now a Lightroom Alternative: RAW Editing, Tethering, Masking, and More (PetaPixel)
- Blackmagic Design DaVinci Resolve 21 Photo Page Preview, NAB 2026 (Newsshooter)
- DaVinci Resolve - Color (Blackmagic Design)
- DaVinci Resolve - Studio (Blackmagic Design)
- DaVinci Resolve product page (free version)
- DaVinci Resolve - What's New (Blackmagic Design)
Keep reading
Guides · Jul 16, 2026 · 29 min
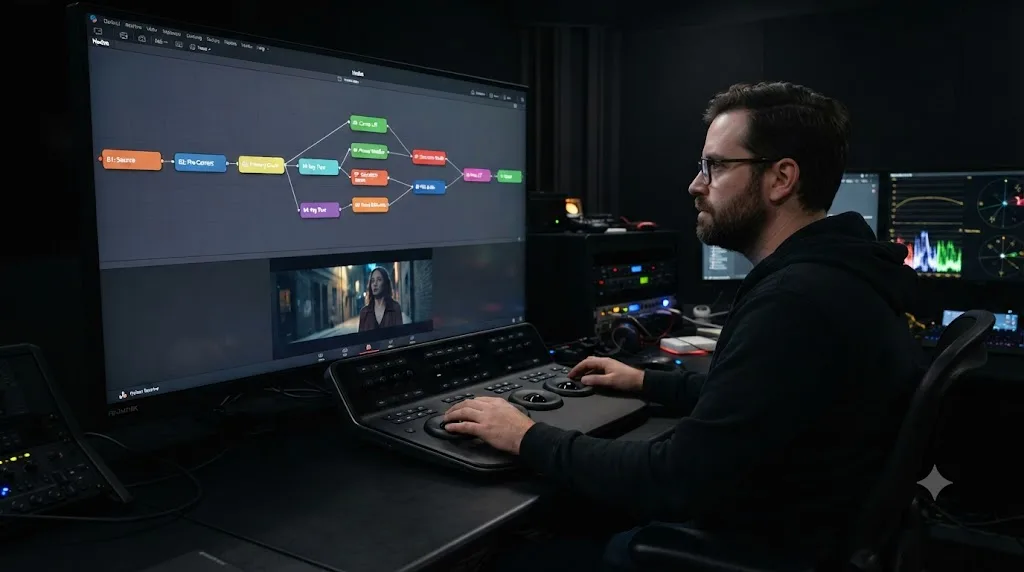
DaVinci Resolve Node Labels and Colors for Organized Grading
Rename and color-code DaVinci Resolve nodes so a six-node grade still makes sense months later. Labels, colors, badges, and a system that actually holds up.
Guides · Jul 17, 2026 · 25 min
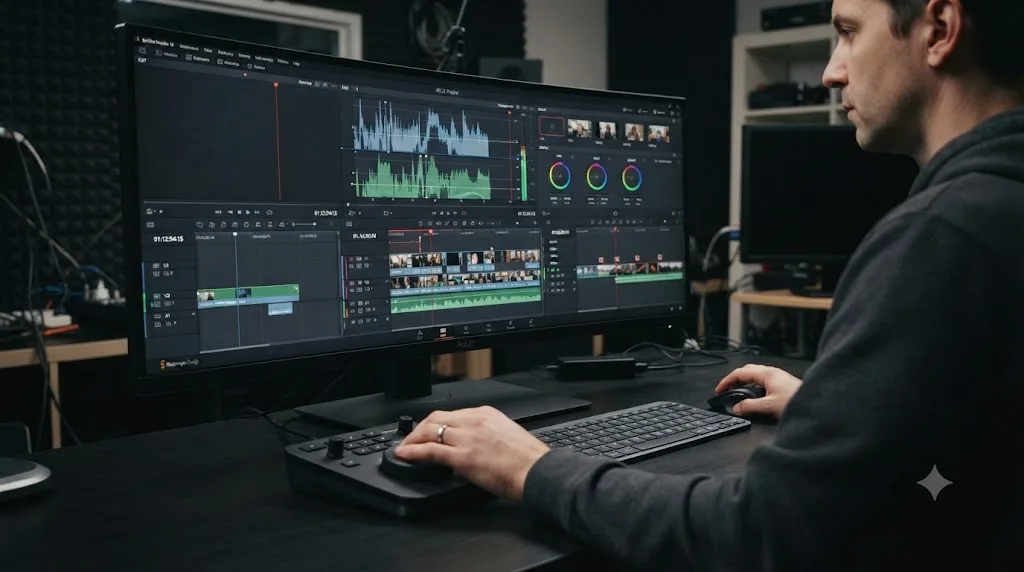
How to Use PowerGrades in DaVinci Resolve
Save, apply, and organize PowerGrades in DaVinci Resolve: grab a still, build an album, apply or append a full node tree, and share it as a .drx file.

Guides · Jul 7, 2026 · 35 min
How to Color Grade in DaVinci Resolve: The Basics
Learn how to color grade in DaVinci Resolve: build a node chain, balance shadows and highlights with Lift, Gamma, and Gain, and read the scopes.