Articles / Guidesupdated for DaVinci Resolve 21.1 (November 2026)
DaVinci Resolve: Keep Crop Position With Paste Attributes
Quick answer
Copy the source clip, select the destination, open Edit > Paste Attributes, and select only the Crop settings you want to transfer. Leave Position, Zoom, and Scale unchecked if each destination should keep its own Transform values. In Resolve 21, Retain Image Position controls how crop behaves when you resize an image; it does not preserve each target clip’s original framing.
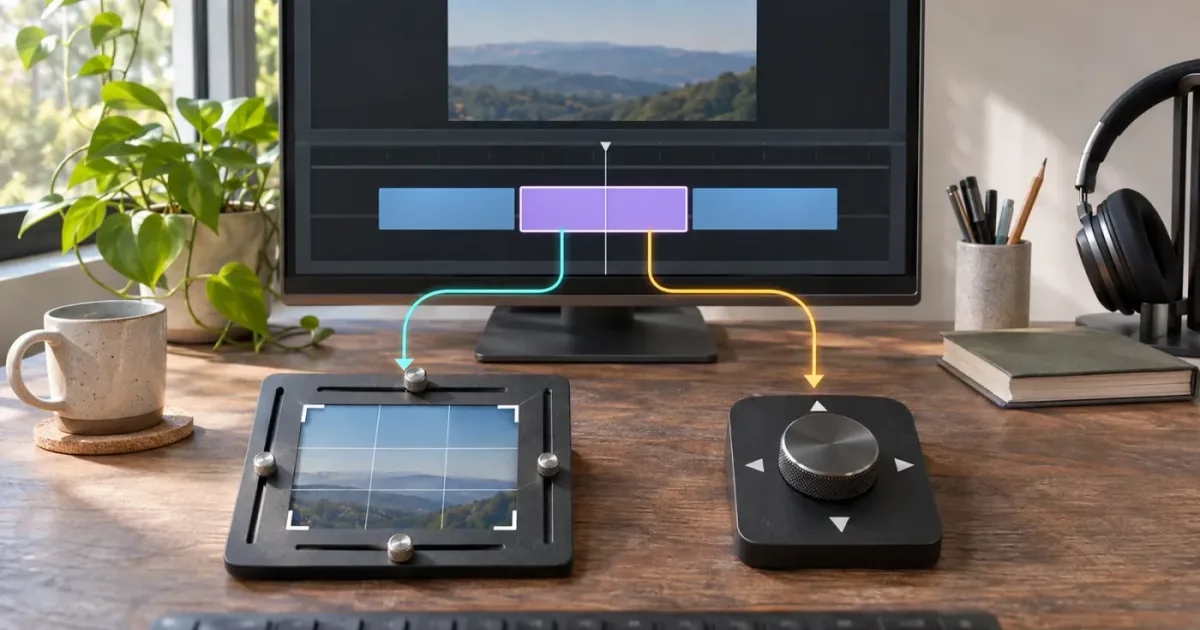
I’ve copied a crop from one shot and pasted it onto another, only to find the subject sitting in the wrong place. Usually, two decisions have been mixed together: which crop values to copy and whether to copy the source clip’s Transform settings too.
How do I keep crop position with Paste Attributes in DaVinci Resolve?
Copy the source clip, select the destination, open Edit > Paste Attributes, and select only the Crop settings you want to transfer. Leave Position, Zoom, and Scale unchecked if the destination should keep its own Transform values. In Resolve 21, Retain Image Position controls how crop behaves when you resize an image; it does not preserve each target’s original framing.
The short version: Crop and Transform are related, but they aren’t the same setting. Crop trims the visible edges of the image. Transform changes how the image sits in the timeline frame through controls such as Position and Zoom. Selecting both groups can make the destination look quite different from selecting Crop alone.
Blackmagic’s Resolve 21 New Features Guide says the Crop section of the Paste or Remove Attributes window now includes Retain Image Position. The guide describes it as a way to choose whether crop parameters stay locked in place when you resize the image with the Transform tool.
That checkbox is easy to misread. It is not a promise that Resolve will preserve each target clip’s existing Position while copying a source crop. If the target needs to keep its own Transform framing, the important choice is not to paste the source’s Position and Zoom values.
Paste Attributes copies the settings you select, so treat its dialog as a list of replacements, not a universal “match this shot” command.
For the safest result, start with one destination clip. Apply the paste, inspect the image in the viewer, and only then repeat the operation on a larger selection. That quick check can catch the common mistake: transferring the source clip’s entire frame placement when you meant to transfer only its crop.
What do Crop, Position, Zoom, and Scale mean?
In the Edit page Inspector, Crop adjusts the visible edges of the image. Transform controls how the image is positioned, sized, or oriented within the timeline frame. Paste Attributes lets you choose which clip attributes to transfer, so selecting Crop does not require selecting Position or Zoom.
The phrase “crop position” can mean several different things:
- You want the same crop values on another clip.
- You want the same crop and the same subject placement.
- You want to copy a crop while preserving the destination’s current framing.
- You want the crop boundary to stay fixed while you resize the image behind it.
Those are different goals. One checkbox combination won’t solve all four.
| Goal | Select in Paste Attributes | Leave unchecked if you want to preserve the destination |
|---|---|---|
| Copy only the crop values | Crop or the required crop values | Position, Zoom, Scale X, Scale Y, and other unwanted attributes |
| Match crop and framing | Crop plus the Transform values needed for the match | Unrelated effects, audio, color, or other settings |
| Keep the target’s existing Transform framing | Crop only | Position, Zoom, Scale X, and Scale Y |
| Copy a crop and a plug-in effect | Crop and the relevant plug-in attribute | Other settings that should remain unique to the target |
| Remove an unwanted crop | Remove Attributes, then select Crop or the crop values | Transform and any other settings you want to keep |
The exact checkboxes depend on the version and the dialog layout. Some versions present a general Crop option alongside individual crop values such as Left, Right, Top, Bottom, or Softness. If the dialog exposes both a parent option and specific values, read the labels before applying the paste. Select the scope you mean, not every similarly named box by reflex.
The Inspector’s Position controls place the image in the timeline frame. Zoom changes its size. Scale X and Scale Y can change horizontal and vertical scale separately. Anchor Point, rotation, pitch, yaw, and flip controls can change geometry too. If those settings are included in the paste, the destination can lose its original composition.
Crop has its own values for the left, right, top, and bottom edges, plus a softness control. Those values describe how much of the image is trimmed, not where the subject should sit. If two clips have different source dimensions or aspect ratios, equal crop values need not produce equal-looking compositions. The numbers can match while the pictures do not.
Project-level Input Scaling is another factor. The Reference Manual describes options such as Scale full frame with crop and Scale entire image to fit for media whose resolution differs from the timeline. Those settings affect how mismatched clips enter the timeline before you add a clip-specific crop or Transform adjustment. A shot that begins with a different fit may not look like another shot after receiving the same crop values.
So compare the subject’s size and placement in the viewer, not just the numbers in the Inspector. Matching values are useful evidence. They are not proof of matching composition.
How do I paste crop without changing the destination position?
Copy the source clip, select the target, open Paste Attributes, and enable Crop while leaving Position, Zoom, Scale X, and Scale Y off. The selected crop values transfer; the unchecked Transform values remain the destination’s own settings.
Use this sequence on the Edit page:
- Select the timeline clip whose crop values you want to reuse.
- Copy it with Command-C on macOS or Ctrl-C on Windows.
- Select one destination clip. You can select several, but begin with one if you’re unsure how different the shots are.
- Choose Edit > Paste Attributes. Blackmagic’s Resolve 20 Beginner’s Guide lists Option-V on macOS and Alt-V on Windows for opening the window.
- Select Crop or only the crop values you need. Leave Position, Zoom, Scale X, and Scale Y unchecked unless you intend to replace them.
- Consider Retain Image Position separately. It controls crop behavior during resizing, not whether destination Transform values are preserved.
- Apply the settings and inspect the destination in the viewer.
- If the composition is right, repeat the operation on other targets that share the same framing needs.
If your shortcut differs, use the menu path. Resolve keyboard shortcuts can be customized, and a shortcut listed in a guide may depend on the operating system or keyboard map.
There’s an important limitation. Selecting Crop transfers the source clip’s crop settings; it doesn’t create a new crop based on the target’s subject. If the source crop leaves a person on the left, pasting those values onto a shot where the person is on the right can trim the wrong area. Leaving Position unchecked preserves the destination’s Position value. It does not make the source crop content-aware or automatically reframe the target.
After applying the paste, look at all four edges and the subject’s placement. Check for a blank edge, a clipped face, or a composition that feels shifted. If something is wrong, undo and reconsider the attributes. Don’t select every box in the hope that Resolve will infer what you meant. That can replace settings you wanted to keep.
If each destination must keep its own framing, paste Crop first and add Transform only when you deliberately want the source framing too.
What does Retain Image Position do in DaVinci Resolve 21?
Retain Image Position changes how Crop and Transform interact when you resize an image. It is not a “keep the target’s original position” switch. Blackmagic identifies it as a new option in the Crop section of the DaVinci Resolve 21 Paste or Remove Attributes window.
That behavior is separate from choosing which attributes to paste. The checkbox concerns the relationship between cropping and resizing with the Transform tool. Blackmagic’s Resolve 21 New Features Guide describes the choice as whether to lock crop parameters in place during that kind of resize.
Keep these three decisions distinct:
- Position unchecked: don’t copy the source clip’s Position value as a separate Transform attribute.
- Retain Image Position: choose whether crop parameters stay in place as the image is resized with Transform.
- Crop selected: transfer the source clip’s crop-related settings to the selected destination or destinations.
Those controls answer different questions. If the result looks wrong, check both the selected attributes and the Retain Image Position state. Don’t assume that toggling Retain Image Position restores values you already pasted.
The option matters when you crop a clip, then resize or reposition the image and want the crop boundary to behave in a particular way. It is not a substitute for checking the viewer, especially when the source and target clips have different aspect ratios or subjects in different places.
The Resolve 21 New Features Guide calls the Paste or Remove Attributes option new in version 21. Earlier versions may not show it in that window. The concept of Retain Image Position in the Inspector’s Cropping controls predates that specific dialog addition. The Resolve 17 New Features Guide documents the Inspector option, and the Resolve 17 Editor’s Guide explains the older crop-order behavior. That earlier guide helps explain the concept, but the Resolve 21 guide is the better reference for the new Paste or Remove Attributes checkbox.
If a tutorial shows the option somewhere else, check which version it covers and whether it is showing the Inspector or Paste Attributes. Similar names do not mean the controls are in the same place or perform the same part of the workflow.
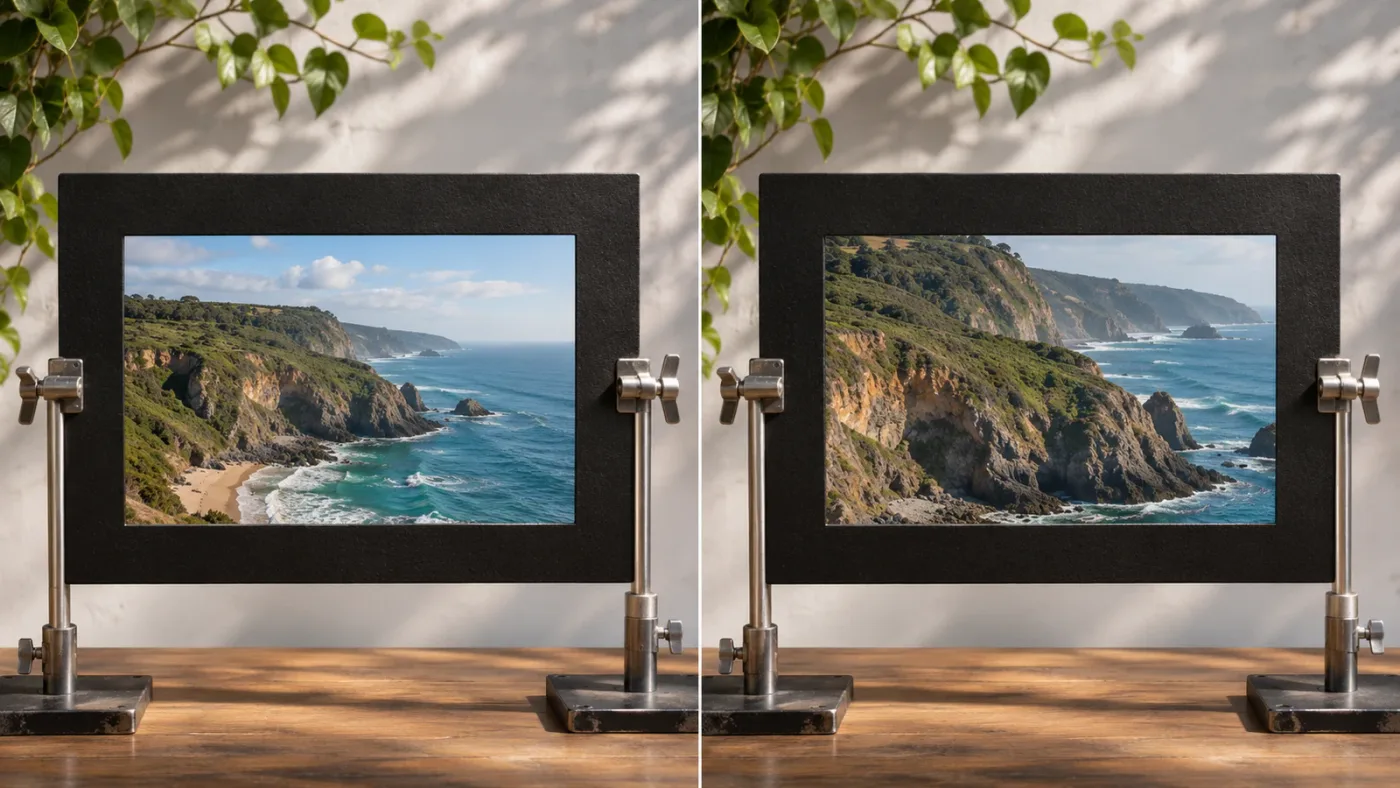
Should I copy Crop alone or copy Crop and Transform together?
Copy Crop alone when the crop values should transfer but the destination’s existing placement and scale should remain. Copy Crop with selected Transform controls when the destination should inherit the source’s framing as well.
The following are worked examples, not reports of hands-on tests. They show how to reason about the choices.
Worked example: repeat a crop across similar shots
Imagine you have several shots from the same camera setup. One shot has a crop that removes distracting edges, and the other shots need the same crop. If they’re already framed appropriately, select Crop and leave Transform settings unchecked.
This is the narrowest transfer. It avoids bringing the source clip’s Position or Zoom values along for the ride. Still inspect every target. Shots from the same setup can differ in subject position, camera movement, or the amount of source image visible inside the frame.
If the destination has an existing Transform adjustment, that adjustment remains relevant. A crop applied on top of a zoomed-in target may look different from the same crop applied to a clip at its default scale. That isn’t necessarily an error. It means the clips do not share the same starting composition.
Worked example: match a punch-in across an interview
Suppose one interview angle is framed tightly, and you want another shot to have the same apparent image size and placement. Crop alone may not create that match. You may need Crop plus some Transform values, such as Position and Zoom.
Before applying the values to several shots, compare the source and target. Are their aspect ratios similar? Is the speaker in the same part of the frame? Were they recorded at the same resolution? If not, the same numbers can produce different visual results.
Test one destination. Compare the speaker’s size and location, then check the edges. If you select Position and Zoom, you’re telling Resolve to replace those target values with the source’s values. That may be what you want, but it’s a deliberate replacement, not a harmless addition.
Worked example: crop a vertical version while keeping different subject placement
Suppose you’re adapting a widescreen edit for a vertical deliverable. A crop that works on one shot may not work on another because people or objects sit in different parts of the source image. Copying Crop values can be a useful starting point, but it won’t automatically center or track each person.
If you want to preserve the target’s own Position value, leave Position unchecked. The target may still need individual adjustment after the crop is applied. If you want it to inherit the source framing, select the Transform controls you need and accept that those target values will be replaced.
For example, one shot may place a speaker near the left third while another places the speaker near the right. One shared crop may remove too much of the second person or leave an awkward amount of empty space. In a vertical edit, adjust each clip based on the action that matters in that particular shot. Don’t assume a matching numerical crop creates a matching vertical composition.
Worked example: crop first, then resize
Suppose you want the crop boundary to stay fixed while you resize the image behind it. In Resolve 21, use Retain Image Position when its described behavior matches that intent. The option concerns the relationship between crop and Transform; it doesn’t decide whether a target keeps its own Position value.
If you’re uncertain, test the setting on one clip. Note the current crop and Transform values, change the relevant option, and resize the image. Observe which part of the picture stays fixed and whether the crop boundary behaves as you expect. Undo if the result is not what you want. This simple comparison is more reliable than inferring the control’s purpose from its name.
| If you need to… | Start with… | Then check… |
|---|---|---|
| Transfer only edge trim | Crop | Whether the content in each shot still fits inside the trimmed frame |
| Transfer edge trim and placement | Crop plus only the needed Transform values | Whether source and target have comparable aspect ratios and framing |
| Preserve the target’s Transform values | Crop, with Position and Zoom left unchecked | Whether Crop alone gives the intended composition |
| Keep the crop boundary fixed during a resize | Retain Image Position, if its behavior matches your goal | Whether the image and crop behave as intended in the viewer |
| Use one vertical crop on different shots | Crop as a starting point, then adjust targets separately | Whether each important subject remains visible |
A useful rule is to copy the smallest set of attributes that gets you close. Every additional selection creates another opportunity to replace a target value you meant to keep.
Why did Paste Attributes change my framing?
Paste Attributes can change framing because the selected attributes include source Transform values, because the crop doesn’t suit the target, or because the clips are scaled differently before the clip-level adjustments. Check those causes separately.
Start with the dialog. If Position, Zoom, Scale X, or Scale Y was selected, the source’s values may have replaced the destination’s. If only Crop was selected, ask whether the crop values make sense for the destination’s frame and subject.
Then check the footage and project:
- Different aspect ratios: The same crop values can remove a different-looking part of a picture with different proportions.
- Different source resolutions: Matching crop numbers don’t guarantee that the subject will appear the same size.
- Different input scaling: Project-level scaling can make source clips enter the timeline at different sizes or with different blanking.
- Different subject positions: A crop that keeps one face clear may cut into another face.
- Different existing Transform values: The destination may already have its own Zoom, Position, scale, or rotation.
- Different crop-order choice: In Resolve 21, Retain Image Position affects the crop-and-Transform relationship during resizing.
- Different timeline dimensions: A clip copied between timelines with different frame dimensions can appear differently even when the clip-level values match.
A useful diagnostic is to compare one setting group at a time. First inspect Crop. Next inspect Position and Zoom. Then review the timeline and project scaling. If you change several things at once, you won’t know which one caused the shift.
Also distinguish a timeline clip adjustment from the underlying media properties. Paste Attributes transfers selected settings between timeline clips. Clip Attributes is a separate command and dialog for properties of media clips. If a tutorial says “Clip Attributes” but describes copying Crop and Transform values from one timeline clip to another, it may be describing the wrong command.
If the viewer shows a black edge, don’t assume Crop alone is responsible. The image may be too small or moved too far to cover the timeline frame. If the crop looks correct but the subject is missing, the crop may be valid while the Transform position needs attention. Undoing the paste and applying only Crop can help isolate the problem.
A matching Crop value is not the same as a matching composition when the source clips differ.
Why is Paste Attributes greyed out or missing?
If Paste Attributes is unavailable, confirm that you copied a timeline clip and selected one or more destination clips in the timeline. The command acts on copied clip attributes. Selecting a media-pool item or clicking an Inspector field may leave you in the wrong context.
Try this check:
- Click a video clip in the timeline.
- Copy it with Command-C or Ctrl-C.
- Click a different video clip in the timeline.
- Open Edit > Paste Attributes from the application menu.
- If the command is still unavailable, confirm that the destination clip is selected and that focus is in the timeline rather than a text field or another panel.
Keyboard focus can matter. If you were typing in a clip name or an Inspector value, the copy shortcut may have copied text instead of a clip. Click the clip itself, copy again, and use the menu to see whether the command is available.
The copy step matters too. Ordinary Paste and Paste Attributes are separate commands. Paste is for placing copied material. Paste Attributes transfers selected settings to clips. If you copied text, a file, or another type of item, the attributes dialog may not have a valid source clip.
Blackmagic’s Resolve 20 Beginner’s Guide shows the standard sequence: copy a clip, select target clips, open Paste Attributes, choose attributes, and apply. If your version or interface differs, use the application menu and the manual for your version rather than assuming every shortcut and dialog looks the same.
If a dialog opens but Crop is absent, check that you copied the right kind of clip and that the source has the relevant video attributes. A source without the adjustments you expect can make it harder to understand what the paste will do. Select the source clip, inspect its Crop values in the Inspector, and confirm they are the settings you intend to transfer before copying again.
How do I paste crop to multiple clips safely?
You can paste crop to multiple selected clips in one operation, but the same selected source values are applied to every target. Use a small test selection when the shots vary in framing, aspect ratio, or source scaling.
A safe batch workflow looks like this:
- Pick a source clip whose crop is appropriate for the intended targets.
- Copy it.
- Select a small group of destination clips that share the same framing problem.
- Open Edit > Paste Attributes.
- Select Crop and only the Transform values you intend to replace.
- Apply the paste.
- Scrub through each destination and check the subject, edges, and blank areas.
- If the results are consistent, continue with the next group.
Selecting many clips is efficient, but it doesn’t make their images identical. A group of matching camera angles may accept a shared crop well. A group of varied b-roll shots may not. Group by what the shots have in common, not merely by their proximity on the timeline.
Before making a large selection, consider whether the shots share:
- The same camera position and similar focal length.
- Similar subject position in the frame.
- The same source aspect ratio and input scaling.
- Similar headroom or space around the subject.
- The same intended output frame, such as widescreen or vertical.
Those are useful grouping criteria, not guarantees. Review the results. A crop can be technically consistent but editorially wrong if it cuts off an important person, sign, product, or action.
If the timeline has linked video and audio, select with care. You’re changing picture framing, not audio settings. In the dialog, keep audio attributes unselected unless you have a separate reason to copy them. The same principle applies to color correction, plug-ins, Fusion effects, and other categories. A crop transfer doesn’t require transferring the clip’s grade or sound.
Use a sample that represents the group, not an unusually easy shot. If the source clip has a centered subject and every target puts the subject off-center, it’s a poor template even if its crop is technically correct. Choose a source whose content resembles the majority of the batch, then adjust outliers separately.
If a batch has already gone wrong, use Undo promptly, before doing unrelated work. Blackmagic’s Resolve 21.1 manual documents Undo through Edit > Undo and Command-Z on macOS; on Windows, use the corresponding Ctrl-based shortcut. Check the menu if your keyboard map has been customized. After undoing, repeat the operation on a smaller selection.
For a large timeline, you can also divide the work by deliverable. First handle clips that need a widescreen crop. Then handle those intended for vertical framing. Don’t mix both groups just because they’re adjacent. The goal is to make each paste operation predictable and easy to verify.
How should I choose a source clip for copying crop values?
Choose a source that resembles the destinations in the ways that affect framing. The best source is not necessarily the clip with the most polished-looking crop. It’s the clip whose image geometry and subject placement make its values useful for the target group.
Before copying, compare the source and target on four points:
- Aspect ratio: Are both source images shaped similarly?
- Subject position: Are faces, products, or action in roughly the same area?
- Starting scale: Do both clips fill the timeline frame in a comparable way?
- Existing adjustments: Does the destination already have a deliberate zoom, pan, rotation, or other Transform change?
If the answer to several of these is no, you can still use Paste Attributes, but expect to adjust the destination afterward. The source is a starting point, not a universal preset.
Consider a sequence of product shots. The first clip shows a bottle centered on a clean table. The next shows the same bottle near the right edge, with a hand entering from the left. Copying the same crop may trim away the hand or leave the product too far off-center. If the crop is intended to remove a constant edge artifact, copying the crop might still make sense. If the crop is intended to create a balanced composition, the target needs a separate judgment.
This distinction helps prevent a common false choice: either copy everything or do everything manually. You can transfer only the technical crop values that are shared, then make individual Transform adjustments where the composition differs.
A second useful source-selection question is whether the source’s crop was created for the same purpose. A crop used to remove a sensor edge, boom microphone, or unwanted background may be transferable among similar shots. A crop used to create a specific close-up or visual emphasis is more editorial. It may not belong on every clip in a group.
You can organize targets into practical batches:
| Group type | What the clips share | What still needs checking |
|---|---|---|
| Same camera setup | Similar framing, lens, and background | Small shifts between takes or camera movement |
| Same interview subject | Similar face size and composition | Different gestures, lean, or eyeline |
| Same vertical deliverable | Same output shape | Subject position and safe visual space in each shot |
| Same source format | Similar dimensions and scaling | The actual subject may still occupy different areas |
| Same cleanup crop | A shared unwanted edge | Whether removing that edge cuts off useful action |
Don’t treat this table as a promise that a group will accept one crop. It’s a way to decide which clips are worth testing together. The viewer remains the final check.
Should I use Paste Attributes, copy values, or another workflow?
Use Paste Attributes when you want to transfer selected clip-level values from one timeline clip to another. If different subjects need different crops, use the paste as a starting point and adjust each target rather than forcing one shared composition.
| Method | Best fit | Main caution |
|---|---|---|
| Paste Attributes | Reusing selected Crop, Transform, or other clip attributes | Each target receives the selected source values |
| Entering values manually | Repeating a known value on a few targets or making a precise correction | Recheck every field; similar-looking results may use different values |
| Adjusting each target in the Inspector | Shots with different subjects, aspect ratios, or compositions | Requires individual review and adjustment |
| Remove Attributes | Resetting crop settings without rebuilding the whole clip | Select only the attribute you mean to remove |
| A reusable clip or effect setup | Repeated projects with a stable, known layout | Check the setup against each new source |
The best method depends on what should stay the same. If the numerical crop should match, Paste Attributes is direct. If the content needs its own framing, individual adjustment makes more sense. If you want to remove a crop but keep Transform settings, use Remove Attributes and choose only Crop or the crop values.
A copied attribute is a value transfer, not a shot-matching judgment. Resolve can apply the selected settings, but the command can’t decide whether a face needs more headroom or whether the left side of the picture contains important action. That decision remains yours.
If you’re uncertain whether the source has the right values, inspect them before copying. You can write down or note the relevant numbers, then compare the target afterward. This is useful when only one crop edge should change or when you want to confirm that the destination retained its own Position and Zoom values.
Manual entry can be safer when you need to change one or two values across only a few clips. It also avoids copying unrelated attributes accidentally. But it is not automatically safer for a large group: entering values one clip at a time can introduce inconsistent numbers. For a big batch, Paste Attributes is efficient if the shots genuinely share the same need and you inspect the result.
A reusable setup is useful when the framing is stable across a recurring series, such as a fixed product shot or a repeatable split-screen layout. It still needs checking against different footage. A template that worked for one camera, subject distance, or timeline format may not work unchanged on another.
For the related multi-clip workflow, see how to change clip attributes for multiple clips in DaVinci Resolve. If a copied keyframe or animation is also part of the problem, DaVinci Resolve 21 keyframe copy and paste issues covers that separate case.
What if I only want to remove the crop or undo a bad paste?
To remove only the crop, select the target clip or clips, open Edit > Remove Attributes, and choose Crop or the specific crop values you want to clear. To reverse a recent paste, use Undo before making unrelated edits.
Remove Attributes is the companion to Paste Attributes. The Resolve 21 New Features Guide confirms that Retain Image Position appears in both windows. When clearing a crop, don’t select Transform or other attributes unless you intend to reset them too.
Undo is usually the quickest recovery after an accidental paste. Check the picture, then undo before continuing with other work. If you’ve already made more edits and don’t want to undo them, use Remove Attributes on the specific affected setting. Inspect the dialog before applying it. A reset can be just as destructive as a paste if you select more than Crop.
If you aren’t sure which step changed the picture, compare the source and destination in the Inspector. Look at Crop, then Position and Zoom, then other Transform controls. A changed field can point to the cause. Don’t reset every control as your first move. That may erase a correct adjustment along with the problem.
A practical recovery sequence is:
- Stop before making more changes.
- Use Undo once if the paste was the last operation.
- Check whether the composition returned to its earlier state.
- If the change is older, inspect the destination’s Crop and Transform values.
- Remove or restore only the setting you can identify.
- Test the corrected operation on one clip before repeating it.
If the clip’s previous framing was intentional, note that fact before resetting anything. You may have to restore the earlier Position or Zoom manually if the value has already been replaced and you can’t undo the paste. For that reason, a one-clip test is especially useful on a finished timeline.
Remove Attributes is precise only when you select the attribute you actually want to remove.
How do aspect ratio and input scaling affect a pasted crop?
Aspect ratio and input scaling can make matching Crop values look different because they affect how much source image is available and how it sits in the timeline frame. A copied crop does not erase those differences.
Imagine two source clips with different frame shapes. One is wider than the other. The same numerical crop on the left edge can remove a different proportion of the visible subject or background in each clip. Even when the Inspector values match, the visual boundary may not feel equivalent.
Now add project-level scaling. If one source is fit to the timeline and another is cropped to fill it, their starting frames may differ before you apply Crop. A copied crop then operates on images with different visible areas. You may see a black edge, a tighter subject, or a cut-off object even though the Crop values match.
When the result is unexpected, use this order:
- Compare the source and target in the viewer before pasting.
- Check whether the timeline dimensions and output shape are the same.
- Check the project’s Input Scaling choice.
- Inspect the destination’s existing Transform values.
- Apply Crop alone to a test target.
- Decide whether Transform needs a separate adjustment.
This order keeps the diagnosis manageable. If you immediately alter scaling, crop, and zoom at the same time, you can make the picture look better without understanding why it was wrong. That makes the next clip harder to handle.
This is especially important when building different deliverables from the same footage. A widescreen sequence and a vertical version have different compositions by design. The same crop values might be useful for one group but not the other. Keep targets grouped by output purpose, and review each group in its own timeline context.
A simple rule helps: if the target already looks different before the paste, don’t expect the same crop values to produce the same result. Decide whether you’re transferring a technical crop, a composition, or both. Then choose attributes accordingly.
What should I check if only one edge looks wrong?
If one edge looks wrong after the paste, first determine whether the Crop value changed as intended, then decide whether the source content can support that crop. A single bad edge doesn’t automatically mean the whole paste failed.
Check the corresponding crop side in the Inspector. If Left, Right, Top, or Bottom is unexpectedly different, you may have transferred more crop values than intended. Undo or use Remove Attributes selectively, then repeat the paste with the needed values only if your dialog allows that level of selection.
If the numerical value is correct, inspect the source picture. Perhaps the target contains important action close to that edge. In that case, the crop is doing exactly what it was told to do, but the value is a poor fit for the shot. Adjust the crop for that target rather than trying to force the source’s composition onto it.
A black or empty edge points to a different issue. The source image may not cover the frame after the combined crop and Transform. Check whether the target has a lower Zoom value or a Position offset that moves the picture away from the edge. If you pasted Transform too, the source’s values may be responsible. Undo and test Crop alone.
Softness can change the appearance of an edge without moving the crop boundary. If the edge looks feathered or less distinct, inspect the crop softness control as well as the edge values. A softness value may have been included with the crop settings, depending on the dialog’s options.
Use the following symptom map:
| Viewer symptom | First thing to inspect | Likely next decision |
|---|---|---|
| Subject is cut off on one side | Crop value on that edge | Adjust that target’s crop or use a different source |
| Picture shifted inside the frame | Position and the selected Transform attributes | Undo if Position was copied unintentionally |
| Black edge appears | Zoom, Position, and source coverage | Increase or reposition the image only if that is the intended composition |
| Crop edge looks soft | Crop Softness | Keep or change softness independently if the dialog allows |
| All targets shifted similarly | Source Transform values or common scaling | Review the attributes selected and the shared project setup |
| Only one target looks wrong | That clip’s source content and existing adjustments | Treat it as an outlier and adjust it separately |
A useful distinction is whether the problem appears on every target or only one. If every target shifts in the same way, suspect an attribute selection or shared source setting. If one target fails while the others look right, suspect that shot’s content, dimensions, or previous adjustments.
How should I handle crop keyframes and animation?
If a crop changes over time, check whether you’re copying a static setting or animated behavior. Paste Attributes can involve keyframes for some attributes, and the way keyframes are handled can affect the result on clips with different durations.
The Resolve 20 Beginner’s Guide illustrates a Paste Attributes window with keyframe handling choices such as maintaining timing or stretching to fit in its example. The exact options depend on the attributes and version. If the dialog presents a keyframe choice, read it before applying the paste, especially when the source and destination durations differ.
A static crop is straightforward: you want the same edge values throughout the target clip. An animated crop is different. It may move or change during the source clip, and the destination can have a different duration or action. Copying animated values could make the framing change at the wrong moment or stretch the motion in a way you didn’t intend.
Before copying a crop animation, ask:
- Is the source crop animated, or is it constant?
- Does the destination have the same duration?
- Should the crop movement occur at the same timecode or span the full target duration?
- Does the subject move in the same direction and at a similar pace?
- Is the animation attached to the crop controls or to Transform controls?
If the source and target have different motion, a copied animation may not follow the target’s subject. It is still a value transfer. Inspect the start, middle, and end of the destination, not just the frame where the playhead happened to be when you checked.
For a simple static edge trim, avoid copying unrelated keyframed settings. If the goal includes movement, test one target and review the full duration. If you’re troubleshooting copied animation rather than crop itself, use the separate keyframe copy and paste guide.
How can I confirm the crop was copied correctly?
Confirm the result in two ways: check the relevant values in the Inspector, then watch the image in the viewer. The Inspector tells you whether selected settings transferred; the viewer tells you whether the composition works.
A reliable review has four parts:
- Check the crop values. Confirm that the intended edges match the source or the values you meant to transfer.
- Check Transform values. Confirm that Position, Zoom, and Scale remain unchanged if you left them unchecked.
- Inspect the frame edges. Look for blank areas, clipped subjects, or an edge you meant to remove but can still see.
- Review the shot over time. Scrub through the clip if the subject or camera moves.
Don’t check just the first frame. A person may lean into the edge later. A product may move. A pan may reveal an area that was hidden at the start. A crop that looks clean at one frame can fail during the rest of the shot.
For a multi-clip paste, review each target rather than assuming that one good result proves the batch worked. Watch for outliers: a shot from a different camera, a different aspect ratio, or a different camera distance. Those clips may need their own values.
It can help to separate technical correctness from editorial correctness:
- Technical correctness: The intended Crop values transferred, and unwanted Transform settings did not.
- Editorial correctness: The chosen frame keeps the important subject and action visible.
- Delivery correctness: The composition still works in the timeline and output format you intend to use.
A paste can pass the first check and fail the second. The numbers can be exactly right while the picture is poorly framed. Make the viewer the final authority.
Where can I get help when the controls don’t match my screen?
When a tutorial’s controls don’t match your screen, verify the Resolve version, page, and selected clip before following its steps. Resolve 21 adds Retain Image Position to the Paste or Remove Attributes window, so an older tutorial may not show the option there.
The same control name can appear in different contexts. The Inspector’s Cropping controls are not the same window as Paste Attributes, even if the labels overlap. A screenshot from an earlier Resolve release may show a different layout or fewer choices.
Blackmagic’s DaVinci Resolve 21.1 Reference Manual is the vendor manual for the version named here. The Resolve 21 New Features Guide is more concise for the Retain Image Position change. For the basic copy workflow, Blackmagic’s Resolve 20 Beginner’s Guide shows the Paste Attributes workflow and categories.
If you want guidance while you work rather than comparing screenshots, TryUncle is an on-screen assistant for Mac and Windows. You can ask where a control is or describe what you’re trying to preserve, then follow the guidance while you remain in control of the edits.
Blackmagic Design EMEA’s Simon Hall described a broader principle in an interview about Resolve 21: “The important thing is that the user stays in control.” The quote is about Resolve’s tools generally, not a specific Paste Attributes behavior. It fits this workflow because you choose which values to transfer and decide whether the framing works. The interview appears in TechRadar’s conversation with the DaVinci Resolve team.
What should I do before applying the paste to a finished timeline?
Before using Paste Attributes on a finished timeline, make a deliberate selection, test one target, and review the result before expanding the operation. The risk is not that Resolve secretly changes every clip. It’s that a selected attribute replaces a destination value you meant to keep.
Use this decision check:
- Do I need Crop, Transform, or both? If you need only crop values, don’t select Position or Zoom by habit.
- Should the target keep its own framing? If yes, leave the source’s Transform controls unchecked.
- Does the target have a different aspect ratio or source fit? If yes, test the crop on that specific target.
- Am I resizing after cropping? If yes, decide whether Retain Image Position gives the crop behavior you want.
- Does the viewer confirm the result? Check the image, not just the highlighted checkbox.
- Are unrelated settings selected? Leave them off unless you intend to transfer them.
- Is the crop animated? If so, inspect the entire duration and any keyframe options.
- Does this group contain outliers? Separate clips with different formats, subject positions, or framing needs.
When the first result is right, apply the same selection to other clips that genuinely share the same framing needs. When it’s wrong, undo and change one decision at a time. That keeps the fix understandable and avoids turning a crop adjustment into a general reset of the shot.
The practical answer is simple: copy Crop alone when you want to preserve each target’s Transform values. Include selected Transform controls when you want to copy the framing too. Treat Retain Image Position as a separate crop-and-resize behavior. Start with one target, inspect the viewer, then repeat the workflow only on clips that fit the same rule.
Frequently asked questions
- How do I copy only crop in DaVinci Resolve?
- Copy the source timeline clip, select the destination, choose Edit > Paste Attributes, and select Crop or the crop values you want to copy. Leave Position, Zoom, Scale X, and Scale Y unchecked if you want the destination to retain those Transform values. Apply the paste to one clip first and inspect the viewer.
- What does Retain Image Position do in DaVinci Resolve 21?
- Retain Image Position controls how crop parameters behave when you resize an image with the Transform tool. In Resolve 21, the option is also available in the Paste or Remove Attributes window. It does not mean that Paste Attributes preserves every destination clip’s original Position or Zoom.
- Why did Paste Attributes change my framing?
- Position, Zoom, Scale X, or Scale Y may have been included in the paste, replacing the destination’s values. The crop itself may also be unsuitable for the target’s aspect ratio or subject position. Undo, check which attributes are selected, then test Crop alone on one destination.
- Can I paste crop settings to several clips at once?
- Yes. Copy one source clip, select multiple destination clips, choose Edit > Paste Attributes, and select the crop and Transform attributes you intend to replace. The same selected values are applied to each target, so test a small group first and review every shot.
Sources
Put this guide to work with TryUncle.
Ask about the step you’re on. TryUncle sees your screen and points at the control you need, so you can keep learning in your own project.
Get TryUncle for Mac or WindowsKeep reading
Guides · Oct 23, 2026 · 40 min
DaVinci Resolve: Change Clip Attributes for Multiple Clips
Change Clip Attributes for multiple clips in DaVinci Resolve 21. Select compatible clips, edit shared properties, and avoid changing the wrong source or timeline setting.
Fixes · Sep 29, 2026 · 38 min
DaVinci Resolve 21 Keyframe Copy Paste Not Working? Fix It
Fix DaVinci Resolve 21 keyframe copy paste problems with the right editor, focus, shortcuts, Paste Attributes, timing, and Fusion workflow.
Comparisons · Nov 17, 2026 · 22 min
DaVinci Resolve Timeline Viewer vs Source Viewer: Difference
Learn the DaVinci Resolve timeline viewer and source viewer difference, when to use each, how selection and focus affect them, and what changes in Resolve 21.1.