Articles / Guidesupdated for DaVinci Resolve 21.1 (September 2026)
DaVinci Resolve: Learn by Recreating an Edit
Quick answer
To learn DaVinci Resolve by recreating an edit, choose a short reference you can study, identify its cuts, shot order, titles, and sound, then rebuild those choices with different footage in Resolve 21. Compare your version with the reference, note what differs, and repeat the process without following a step-by-step tutorial.
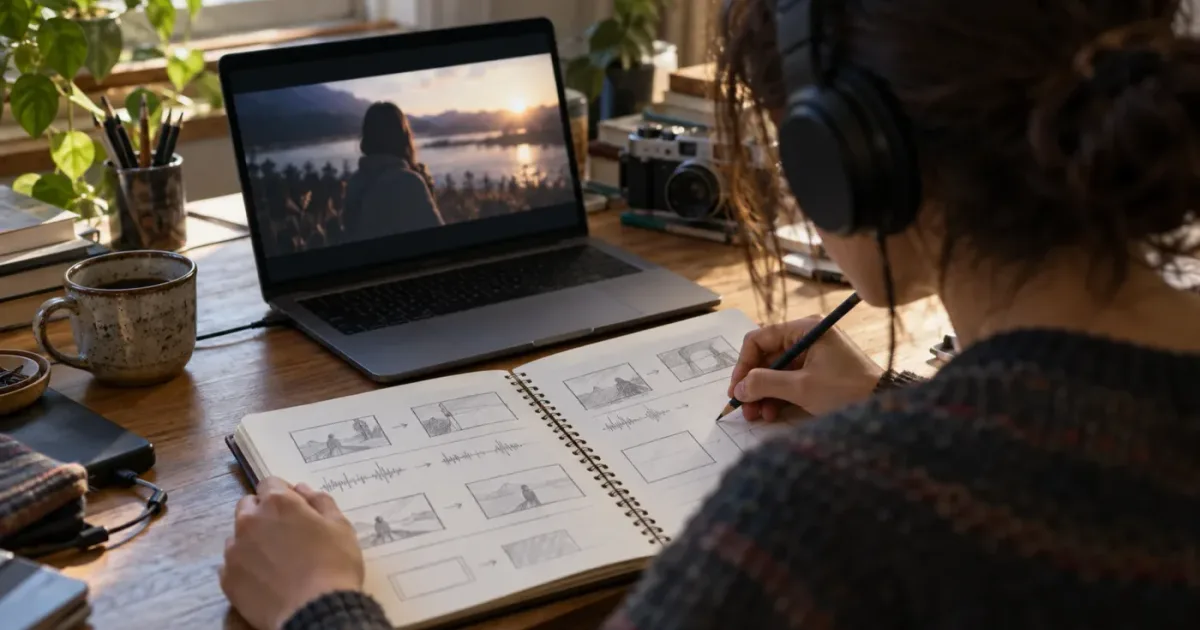
I learn a control best when I have a reason to use it. Recreating an edit gives me that reason: I’m not collecting buttons, I’m trying to make a particular moment land. The trick is to copy the decisions, not the creator’s files or identity.
How do I learn DaVinci Resolve by recreating an edit?
To learn DaVinci Resolve by recreating an edit, study a short reference, describe what it does, and reproduce those editorial decisions with different media. Work in passes: structure first, then timing, sound, titles, and finishing. Compare your cut with the reference and choose one specific difference to improve.
As of October 2026, DaVinci Resolve 21.1 is the current version covered here. Blackmagic Design’s support center lists the Resolve 21.1 reference manual, and its training page offers lessons and project files. The practice method in this guide works with earlier versions too, but menu names, page layout, and controls can shift between releases. When a tutorial disagrees with your screen, check its version before assuming you’ve missed a button.
Recreating an edit is a deliberate study exercise, not a shortcut around editing. You borrow a structure to give yourself a clear problem: when does the shot change, what information arrives first, and how do sound and image work together? Then you solve that problem using material you can legally use. The source can be a short public video, a class exercise, a personal project you want to rebuild, or a sequence from footage you recorded yourself.
The distinction matters. A finished piece may look like a chain of effects, but its impact often comes from choices you can observe without knowing which effects were used. A cut may arrive just before a movement completes. A reaction shot may hold after the line ends. Music may start under a new image rather than on the cut. Those are editing decisions. You can investigate them without duplicating the original media, graphics, or exact presentation.
Recreating an edit teaches you to explain what a cut is doing before you try to reproduce how it was made.
This guide uses a simple rule: look, describe, rebuild, compare, and revise. You don’t need to recreate an entire commercial or music video. Pick a small passage and give it a boundary. A clean exercise can be one short sequence with an opening, a few purposeful cuts, a sound choice, and an ending. The goal is not to finish a portfolio piece in one sitting. The goal is to notice why your first attempt differs from the reference, then make a more informed second attempt.
DaVinci Resolve gives you one place to practice that sequence. Blackmagic describes the Edit page as a full timeline-editing environment and provides official training videos for introductory editing, rough-cut refinement, titles, effects, audio, and delivery. Its Resolve 21.1 manual covers editing alongside color correction, Fusion, Fairlight, and finishing. You can learn from those materials while using a reconstruction as your working project, instead of treating the lesson and your own edit as separate activities.
What this method is, and what it isn’t
This method means rebuilding the observable shape of a reference with different material. You’re learning to make and explain choices, not to obtain the same source project or reproduce a creator’s work for publication.
It isn’t a promise that one exercise will make you proficient. Nor is it a claim that copying is better than every course. A course can give you a reliable sequence of instruction. Recreating an edit can give that instruction somewhere to stick. Use the course to answer a question, then return to your own timeline and apply the idea.
What you should have at the end
A useful practice session leaves you with more than a timeline. Keep four small artifacts:
- A reference map: a plain-language description of the passage’s structure.
- A Resolve project: your reconstruction, organized so you can reopen it.
- A comparison note: a few visible or audible differences between your cut and the reference.
- A next-action note: one change to test in your next pass.
That record prevents a common frustration: opening Resolve again later and remembering only that the edit “didn’t feel right.” You’ll know what you were studying, what you tried, and what you want to adjust.
What kind of edit should I choose to recreate?
Choose a reference short enough to study closely, with a clear beginning and ending, a manageable number of visual changes, and an aspect you can describe without guessing. A self-contained passage is easier to analyze than an entire short film or a montage packed with effects.
As a worked example, imagine a 20-second product sequence: a wide shot establishes the setting, two close shots show details, a hand interacts with the object, music rises, and a final image holds long enough to read a title. Those details are invented for this exercise, not observations from a tested Resolve project. The useful part is the scope. You can identify a small set of decisions and find your own footage that could perform similar jobs.
A strong reference gives you something specific to investigate. “Make it cinematic” isn’t a useful brief. “The music starts before the close-up, the close-ups get shorter as the music rises, and the last shot holds for the title” is. If you can’t yet explain what the reference is doing, watch a smaller passage or choose a simpler one.
| Reference type | What you can study | A sensible first exercise | Common trap |
|---|---|---|---|
| Talking-head excerpt | Pauses, sentence rhythm, reaction shots, cutaways | Rebuild the opening exchange using a separate recording | Cutting every breath without checking whether the speaker still feels natural |
| Short travel montage | Shot order, movement, music, visual rhythm | Match a clear opening-to-ending progression with your own clips | Trying to copy every transition instead of learning shot selection |
| Product sequence | Detail shots, action coverage, title timing, sound accents | Make a beginning, demonstration, and final hold | Adding effects before the basic sequence reads clearly |
| Simple social clip | Framing, caption placement, pace, aspect ratio | Rebuild a short passage with your own footage and words | Treating fast cuts as a substitute for a clear idea |
| Personal older edit | Your own past choices, timing, organization, and weak spots | Rebuild one passage from its original media | Assuming the old cut is a perfect reference rather than a starting point |
Choose a reference with visible decisions
You don’t need to know the original editor’s reasoning. You need to see a pattern you can test. Look for a noticeable contrast: a quiet opening followed by faster cuts, a line of dialogue that continues over a new image, or a music cue that changes the energy. One visible pattern can carry a whole exercise.
Avoid selecting a reference only because it looks impressive. A highly stylized sequence may depend on production design, lighting, camera movement, custom animation, licensed music, or effects that you can’t replicate with your material. That doesn’t make it a bad reference. It makes it a poor first exercise if your purpose is to learn editing decisions.
A more useful question is, “What part of this can I isolate?” Maybe you’re curious about the timing of three cuts, not the entire visual treatment. Maybe you want to see how a voiceover leads into a cutaway. Name that skill, and ignore the other techniques for now.
Set boundaries before you start
Decide what you’ll reconstruct and what you’ll leave alone. Write the limit in one sentence, such as: “I’m rebuilding the 15-second opening rhythm using my own location footage; I’m not copying the title design or the color look.” That boundary makes the practice honest and manageable.
You can also decide what counts as a reasonable stopping point. If the reference uses a complicated compositing effect, your exercise might match the timing of the shot change while leaving out the effect. If it uses a graphic you don’t have permission to reproduce, use a plain title with your own text. If a music cue is unavailable for your intended use, study its timing in the reference and use a track you’re allowed to use, or practice the edit without music.
Reconstruction is not imitation for its own sake. You’re separating an editorial choice from the assets and production circumstances that surrounded it.
How do I break down a reference before editing?
Break down the reference by watching it once for the overall idea, then watching again for one kind of decision at a time. Record approximate cut points, shot purpose, sound changes, text, and moments that need attention. The notes are a map, not a frame-accurate specification.
Begin with the full passage at normal speed. Don’t pause to inspect every frame. Write down the broad arc in plain words: “opens with a person entering; shows what they’re carrying; cuts to a close detail; music rises; ends on a held image.” If you can’t summarize the arc, you may not yet understand the sequence well enough to reproduce it.
Watch again, this time tracking image changes. You can note the order and approximate duration of each shot without trying to measure exact time. A simple list works:
| Beat | Picture job | Approximate point | Question to answer |
|---|---|---|---|
| Opening | Establishes place or person | Beginning | What does the audience need to understand first? |
| Detail | Reveals an important object or action | Early middle | What does this shot add that the first one could not? |
| Change | Introduces a new angle, action, or idea | Middle | What visual or story event motivates the cut? |
| Build | Increases energy or information | Late middle | Does the pace change, or does the sound create the lift? |
| Ending | Gives the sequence a destination | End | Does the last image resolve, surprise, or leave a question? |
These labels are prompts, not rules. Some references start with a detail, end abruptly, or avoid a conventional arc. Describe what you see. Don’t force the passage into a formula because a table has five rows.
On a third viewing, listen without concentrating on the picture. Notice when music begins and ends, whether natural sound remains under the music, whether dialogue carries across a visual cut, and whether a sound effect marks a visible action. The sound layer may reveal a cut’s purpose more clearly than the image does. A conversation can continue while the picture shows the listener. A footstep can make an otherwise ordinary cut feel intentional.
Finally, mark text and motion only if they matter to your chosen exercise. Ask whether a title appears before or after the music change, whether it covers a cut, and how long it remains legible. You don’t need to identify a font or transition plugin. You need enough information to make an equivalent choice with your own assets.
Use a cut log that leaves room for uncertainty
A cut log is a short list of events and rough timings. It helps you remember the sequence without pretending you know its exact frame count. Label estimates as estimates. If you’re unsure whether a shot lasts longer because the image holds or because the camera moves slowly, write down the uncertainty and test your interpretation in the edit.
For example:
Reference passage: opening section
Estimated length: about 18 seconds

1. Wide view establishes the place.
2. Cut to a person moving through the frame.
3. Close detail appears as the music changes.
4. Action continues over a second angle.
5. Final image holds while a short title appears.

Things to test:
- Does the detail shot arrive before or after the music lift?
- Does the action feel clearer with a wider shot first?
- Is the last hold long enough to read the title?
This is a worked-example template. It isn’t a claim that every viewer will interpret the sequence the same way. Two editors may see the same passage and describe different reasons for a cut. That disagreement is useful. Your job is to form a testable interpretation, not to guess the original editor’s private intentions.
Make a reference map, not a shot-for-shot recipe
The map should state what each beat contributes. “Close-up” names a shot type; “shows the detail the viewer needs before the action begins” names a purpose. Purpose gives you flexibility when your source footage differs from the reference.
If you have five clips and the reference has ten, you can still study the sequence’s logic by reusing a shot only when it makes sense, finding a substitute angle, or simplifying the pattern. If the reference uses a close-up you don’t have, consider whether a crop from a wider shot can communicate the same information. If it can’t, make a conscious change to the plan instead of forcing a weak match.
The reference is a prompt for a decision, not a demand to own the same footage.
How do I rebuild the edit in DaVinci Resolve 21?
Rebuild the edit in a simple order: create a project, organize a small set of source clips, assemble the story, refine timing, add sound and titles, then review the result. Resolve 21.1’s reference manual is the right place to confirm current controls; the exercise itself doesn’t depend on special Studio-only features.
-
Create a dedicated project. Give it a name that tells you what you’re practicing, such as
opening-rhythm-study. Keep the exercise separate from a live client project or a project you rely on for other work. If you already have a project structure you understand, use it rather than reorganizing everything for one lesson. -
Bring in only the media you need. A smaller source set reduces searching and makes it easier to compare the jobs each clip can do. Use clips you created, own, or have permission to use. If the exercise depends on dialogue, identify the relevant take. If it depends on movement, select a shot where the movement is visible.
-
Check the project’s basic timeline choices before assembling. Frame rate and frame size affect how your timeline behaves and what you deliver. Resolve can prompt about matching a timeline to imported footage, but don’t accept a setting automatically just because it appears first. If you know the intended delivery format, choose deliberately. If you don’t, use a straightforward practice setting and record what you chose so the next project isn’t an accidental comparison across different conditions.
-
Make a rough assembly from the map. Put the shots in the order that tells your version of the sequence. Ignore polished transitions, advanced effects, and color matching for now. Ask whether the viewer can follow the action and whether each shot adds something.
-
Refine the edit points. Play the sequence around each cut. Trim a shot earlier or later when the image change clarifies an action, thought, or rhythm. Don’t trim only because the reference has a fast pace. The same duration may feel different with different movement, speech, or music.
-
Add the sound structure. Place dialogue, natural sound, and music where they support the beats you identified. Keep the sound tied to the picture purpose. If you add a sound accent, check whether it emphasizes an action or merely decorates the cut.
-
Add text and finishing choices only when they serve the exercise. A title can be a simple text element. Use it to practice timing and legibility, not to reproduce another creator’s branding. Match the reference’s function, not its exact identity.
-
Review the whole sequence at normal speed. Don’t judge only a still frame or a single isolated edit point. Watch once for story, once for rhythm, and once for sound. Write down the largest difference you notice. Change one thing, then watch again.
That sequence keeps the practice focused. Resolve 21 has multiple pages, but you don’t need to visit every page just because the software offers them. If your exercise concerns shot order and timing, the Edit page may be enough. If a particular color adjustment is part of the reference, you can study it in a later pass. If a title requires custom animation, first confirm that the simpler edit works.
Keep the first timeline pass plain
A first pass should make the order visible. Put the shots on the timeline, listen for the core audio, and check that the viewer can understand what happens. Leave a complicated transition out until the cut itself works. A transition can soften or decorate an edit; it can’t make unclear story logic clear.
If you’re unsure where to place a cut, compare neighboring frames and the action around them. Does the cut show a new piece of information? Does it interrupt a gesture? Does it remove a pause that matters? Try one version, play it, and make a note. Then try the alternative. Watching a small section around the edit point helps you see whether your change improved the passage or just made it shorter.
Don’t judge your reconstruction against the original as if the footage were identical. A person walking at a different speed may need a different edit point. A different camera angle may reveal an action earlier. A shot with more visual clutter may need to be shorter or replaced. Your comparison should ask whether the underlying purpose is similar, not whether your frames match.
Use markers for questions, not decoration
A marker is useful when you need to remember a decision at a particular time. For example, you might note “music turns here” or “check whether this action reads before cutting.” Resolve’s 21.1 manual documents the current timeline controls and marker behavior. If you use a shortcut, confirm it in your keyboard settings because shortcuts can be customized.
Markers also help you pause without abandoning the practice. You can leave a question on the timeline, save the project, and return to that exact point later. Keep marker notes short. A marker that says “fix” doesn’t tell you what to inspect. “Compare the end of the gesture with the next shot” does.
Check the image and sound together
A visual cut can seem too early when the audio is missing, and a sound edit can feel rough when you only listen without the image. Review both. For dialogue, listen for a chopped word or an unnatural gap. For music, listen for a sudden level change or a phrase that seems to stop without purpose. For natural sound, make sure a useful action isn’t muted by the music.
When the reference uses sound to create momentum, you don’t need to match the exact sound. You can identify the role: a low background bed, a rise before the next beat, or a brief accent on a visible action. Use sounds you’re allowed to use and decide whether the effect helps the story. If it doesn’t, leave it out.
What if I don’t have the right angle?
Use a substitute that performs a similar job, or revise the map. If the reference uses a close-up to show a hand pressing a switch and you only have a wide shot, you can crop the wide shot if the resolution and framing allow it, find another angle from your own footage, or change the beat to show the wider action clearly.
The wrong response is to keep searching for a perfect match until the exercise stalls. A reconstruction is a way to practice decisions under imperfect conditions. It’s normal to alter the sequence when your source material doesn’t support the same cut. Write down the substitution so you can separate a media limitation from an editing mistake.
What if the reference relies on a feature I can’t use?
Replace the feature with a simpler technique that teaches the same general idea, or select a different reference. Some tools and features are specific to Resolve Studio, and the exact list can vary by version. Check the current Blackmagic Design feature information and manual rather than assuming every tutorial step applies to the free version.
If a practice reference depends on a Studio feature, you have options. You can leave that effect out and study the surrounding cut. You can find a built-in alternative that’s available in your edition. You can use the exercise to learn the concept, then revisit the feature if you later have access to it. None of those choices makes the practice invalid.
How do I compare my edit with the reference?
Compare one category at a time: story order, cut timing, sound, titles, and overall rhythm. Write down the largest difference you can explain, then change one thing and review again. A useful comparison creates a next step; it doesn’t just label your version “worse.”
Watch your reconstruction once without stopping. Write your first reaction as a concrete observation. “The opening takes too long to explain the place” is more useful than “it feels off.” “The music rises after the close-up, but the reference builds into it” gives you a possible edit to test.
Then compare in passes:
| Pass | Compare | Ask yourself |
|---|---|---|
| Story | Order and purpose of shots | Does each shot tell the viewer something new? |
| Timing | Length of shots and cut placement | Does a cut interrupt action, or does it arrive after the point has passed? |
| Sound | Dialogue, music, ambience, accents | Does sound lead, follow, or bridge the picture? |
| Text | Appearance, wording, time on screen | Can the viewer read it without missing the image? |
| Rhythm | Energy across the whole passage | Does the pace change for a reason, or only because the reference cuts quickly? |
Don’t try to compare every aspect at once. A slow opening might be caused by a shot lasting too long, but it might also be caused by a missing audio cue or a shot that doesn’t establish enough information. Isolate the category before you start changing multiple elements.
Compare the intended effect, not just the edit points
A reconstruction can use different footage and still achieve a similar effect. Maybe the original opens with a smooth camera move and yours opens on a static wide shot. You can’t copy the camera movement, but you can still build a clear opening, introduce a detail, and increase pace later. Compare what the sequence communicates and how it moves the viewer’s attention.
This keeps you from chasing surface resemblance. If the reference uses a bright color grade, a moving title, and a music cue, you might assume all three create the mood. Test one at a time. The mood could come mostly from the music and pacing, while the title is incidental. You’ll learn more by separating those components than by piling them all onto your timeline.
Keep a short revision log
Use a few lines, not a diary. Name what you expected, what happened, and what you’ll try next.
I expected the close-up to make the action clearer.
The wide shot already showed the action, so the close-up felt repetitive.
Next: try the close-up earlier, before the action begins.
That note records an edit decision rather than a subjective score. After a few sessions, patterns may show up: perhaps you cut too late after movement, add titles before the sequence has settled, or leave no breathing room after dialogue. Those patterns give your next exercise a useful focus.
A good comparison ends with a change you can make, not a score you can’t act on.
How do I practice without copying someone’s work?
Practice privately with a reference, your own media, and a clearly different presentation. Treat the edit as a study of timing or structure. Don’t publish a near-copy of another person’s work, reuse their footage or music without permission, or make viewers think your reconstruction is theirs.
There’s a difference between learning from a reference and distributing a derivative work. The law and platform rules depend on the material, how it’s used, and where it’s published. This guide isn’t legal advice. If you intend to publish or monetize a reconstruction, get permission or use assets whose license covers your use. Don’t assume that credit alone gives you permission.
Safer practice sources include your own camera footage, media supplied for a course exercise, public-domain material whose status you’ve verified, or stock assets licensed for the intended use. Keep a note of where the media came from and what its terms allow. If a course gives you lesson files, read its stated usage conditions instead of assuming that a practice download can be republished freely.
You can also reconstruct an edit without copying its distinctive content. Use your own subject, wording, music, colors, and title design. Study a general principle such as “hold the shot through the action” or “let the next line of dialogue begin before the image changes.” Those choices are useful to learn, and your finished piece can still be your own.
What does a responsible study exercise look like?
A responsible exercise is clear about its purpose and materials. For instance: “I’m studying how a cutaway changes the pace of a spoken passage. I recorded my own dialogue and b-roll. I’m not using the original creator’s clips, music, graphics, or wording.” That statement keeps the learning goal separate from the original work’s identity.
If you do share your exercise with a teacher or peer for feedback, explain what you’re trying to learn. Ask for comments on a particular choice: whether the action reads, whether the dialogue flows, or whether the final hold feels long enough. This is more useful than asking someone to rate a copy against the original.
A reference can be a private exercise even when you later publish an original project based on what you learned. The important step is to rebuild with your own content and decisions. The more your work depends on the original’s exact footage, text, music, graphics, and timing, the less it resembles a general skill exercise and the more careful you should be about rights and permission.
How can I change the exercise if I’m new to editing?
Start with one skill and one short passage. If you’re just learning how to select and arrange clips, don’t add complex effects, color grading, captions, and layered audio all at once. If you already understand basic cutting, use the same method to study the next problem, such as a dialogue bridge or music transition.
The beginner practice-project guide offers other project starting points if you don’t have a reference in mind. If you want a more structured routine around available time, the DaVinci Resolve learning plan for a full-time job can help you choose when to practice and when to review. For a brief that adds a client-style constraint, see the practice guide built around a client brief.
What is the best way to learn DaVinci Resolve alongside courses and YouTube?
The best way to learn DaVinci Resolve is to combine a structured source with active practice: use lessons to understand a control, then use a small editing challenge to decide when that control helps. Blackmagic Design’s official training is a strong starting point; YouTube creators, community advice, and marketplace courses each suit different needs.
Blackmagic Design’s training page lists official Resolve lessons, downloadable project files, and training books. Its introductory Edit training includes a 1-hour, 9-minute lesson and a second 44-minute lesson about refining a rough cut; the page also lists lessons for multicam, effects, color, audio, and delivery. Those timings are the published lesson durations, not a promise about how quickly you’ll learn.
Blackmagic’s official online seminar page lists six free 90-minute seminars for Resolve 21. Its training is worth starting with because it’s maintained by the software maker and pairs lessons with project materials. But it may not answer every question raised by your specific practice edit, and a complete lesson can cover many controls you don’t need today.
Casey Faris’s Resolve 21 beginner course on YouTube is another practical option. The course description identifies it as a beginner walkthrough and points viewers to a community where media is available. A transcript of the course records Faris saying, “I've been editing videos for almost twenty years, and this is most of it. Get good at this part. Master the basics.” The quote is from the course segment on editing fundamentals, not a claim that one specific practice routine guarantees progress.
Marketplace courses can be useful when you prefer a chaptered curriculum or a particular instructor’s teaching style. For example, a current Udemy Resolve 21 course listing describes a course covering editing, color, audio, and visual effects. Check its version, lesson-file access, update date, and refund terms before buying. Course catalogs and curricula change; a listing is not proof that its workflow matches every Resolve 21.1 control.
Community advice is less uniform, but it can help you see how working learners approach practice. In discussions on Reddit, users often suggest making personal projects, trying to reproduce a technique, and looking up the specific control only when they get stuck. Treat those posts as individual experiences, not official instruction or a universal method. The Blackmagic Design forum is a more direct place to look for Resolve-specific discussion, while still checking answers against current documentation.
| Learning source | What it does well | What it can’t replace | Best use in a reconstruction |
|---|---|---|---|
| Blackmagic Design official training | Software-maker lessons, books, and project materials | Personal review of your particular edit | Learn a named page or core workflow, then apply it to your own footage |
| Casey Faris and other YouTube educators | Walkthroughs that make a process visible | A guarantee that their workspace or version matches yours | Follow a focused lesson, pause, then attempt the choice from memory |
| Udemy or similar course marketplaces | Chaptered instruction and a defined course outline | A guarantee that every listing is current or suits your learning style | Compare the instructor, Resolve version, files, and update information before enrolling |
| Reddit and user forums | Peer questions and varied practical approaches | Verified technical documentation or consistent advice | Find the question you need, then confirm software behavior in the manual |
| Learning by reconstruction | A concrete reason to make editing decisions | A full curriculum or automatic correction of mistakes | Test one concept, compare the result, and write your next question |
If you learn best by completing a guided lesson, use the official course first. If you’re stuck on one visible control, find a focused tutorial or consult the manual. If you know the basics but don’t know what to practice, choose a short reference and make a reconstruction. These approaches work together.
What do I do when a lesson is too broad?
Pause at the first point where the instructor’s action connects to your goal. You don’t need to finish a whole course to answer one question. Write the question down in Resolve terms: “How do I trim the end of this shot without moving the next one?” is more useful than “How does the Edit page work?”
Then try the action yourself. If the result doesn’t match the lesson, check whether the project, page, version, or keyboard preset is different. Blackmagic Design lists the Resolve 21.1 manual and support materials; the manual is the primary reference for the current documented behavior. You can return to the broader course when the next part becomes relevant.
For on-screen help while you work, TryUncle is an on-screen assistant for DaVinci Resolve on Mac and Windows. Ask a question about the control you’re looking at, then make the edit yourself and judge the result against your reference.
How do I learn DaVinci Resolve fast without skipping the important work?
Learn DaVinci Resolve faster by narrowing each practice session to one question, keeping the media set small, and comparing your result before adding another technique. “Fast” should mean fewer aimless detours, not skipping the attention that makes editing choices clear.
A broad goal like “learn the Edit page” can turn into a tour of tools you won’t use. A narrower goal gives you a way to test progress: “Can I make the next shot arrive at the moment the action changes?” You can answer that by building a short sequence, playing it, and comparing your choice with the reference.
Use a compact session pattern:
- Name one skill. Choose timing, shot order, dialogue continuity, music placement, or title timing.
- Study one example. Watch the relevant passage and write down what you think is happening.
- Rebuild from memory. Try the edit before replaying the reference. That forces you to make your own decisions.
- Compare. Watch both versions and note one difference you can describe.
- Revise once. Change one decision, play the passage again, and record what changed.
- Stop with a next question. Save the project and write down what you want to test next time.
This routine has no guaranteed number of minutes or sessions. Your footage, available time, and prior editing experience change how long an exercise takes. Don’t turn a sample schedule into a rule about how quickly you should improve. The useful measure is whether you can explain a decision and make a deliberate revision.
How much should I watch before I start editing?
Watch enough to understand the goal, then get into Resolve. For a short reference, an initial viewing and a few focused passes may be enough to make a rough map. If you keep watching without making a timeline, you may be gathering examples instead of practicing decisions.
That doesn’t mean you should never pause a lesson. Pause when the instructor demonstrates a control you haven’t used. Rewind when you missed a step. Then close or minimize the lesson and try the step with your own material. A tutorial is a reference, not a substitute for operating the software.
If a lesson demonstrates a result without explaining the reason behind it, add your own question. “What does this cut tell the viewer?” or “Why does the music begin here?” shifts your attention from the click sequence to the decision. When you understand the decision, you’re more likely to recognize when the same tool is useful in another edit.
What should I learn first: editing, color, or audio?
For a reconstruction, start with the part of the reference you’re studying. If the exercise is about a scene’s rhythm, arrange and trim the shots first. If it’s about a music-led montage, listen for the musical structure early, but don’t let sound effects or color distract from the sequence. Add the other disciplines after the central edit communicates.
There isn’t one universal order for every project. A dialogue scene may need clear speech before fine visual work. A visual montage may need a rough sequence before a precise music mix. A color-focused exercise may depend on the shots being in a stable order. Choose the order that lets you test the specific question you wrote down.
A practical way to avoid scope creep is to decide what you’re not learning in this session. You might leave detailed color work for another day. You might use a plain title instead of creating animation. You might use a single music track without mixing several layers. A clear limit turns “not doing everything” into an intentional choice rather than a failure.
Why doesn’t my DaVinci Resolve edit feel like the reference?
A reconstruction may feel different because its footage, timing, sound, or underlying action differs from the reference. Check those elements one at a time before adding effects or changing the color. A surface mismatch doesn’t always mean the software action is wrong.
Start with the footage. Does your clip show the same kind of movement, information, or reaction as the reference? If not, a matching cut length may still feel wrong. Next, check the order. Does the viewer see the necessary information before the action? Then check timing. Are you cutting before a gesture finishes or holding after the useful moment has passed?
Listen to sound separately from the picture. If the reference uses a music change to create a lift, but your replacement track has a different arrangement, copying the same timecode won’t produce the same effect. Mark the moment where your music changes and decide whether the image should lead, follow, or align with it.
Finally, remove decoration and review the basic cut. A transition, grade, or effect can distract from an edit that hasn’t found its rhythm. If the plain version works, add only the treatment you intended to study. If it still doesn’t work, return to the shot’s purpose and ask what the viewer needs to understand.
Why are my cut points different even when I copy the timing?
Your footage may contain different movement, speech, or visual information, so a cut at the same approximate time can land differently. Treat the reference timing as a starting point, then adjust for the action in your own source clips.
Consider an action that lasts longer in your version. If you cut at the same point as the reference, your viewer may miss the end of the gesture. Or your source shot may reveal the important detail sooner, so holding it as long as the reference makes the sequence drag. Match the function of the cut first; compare clock time second.
A timeline zoom level can also make visual comparisons harder. Don’t decide that a cut is early or late based only on the width of a clip on screen. Play the surrounding shots at normal speed. If you need a closer comparison, mark the moment you’re studying and review the same small passage repeatedly.
Why does my music timing feel wrong?
Music can feel wrong when a cut follows an approximate timestamp but ignores the track’s actual phrasing. Listen for changes in intensity, repeated patterns, pauses, and the point where the music seems to invite a new image. Then decide whether the cut should happen on that event or deliberately before or after it.
Don’t cut every shot on a beat just because the music has a clear pulse. Repeatedly cutting on the beat can make a sequence feel mechanical when the visuals need varied pacing. A cut just before a beat might create anticipation. A longer shot across several beats might give a meaningful moment room to breathe.
Use the reference to ask what role the music plays. Does it set a mood beneath dialogue, drive the montage, or become more prominent as the sequence approaches its end? You can reproduce that role with a different track without copying the source recording. If you don’t have suitable music for the exercise, practice the picture rhythm first and revisit sound later.
Why does my title look or feel different?
A title can feel wrong because its wording, timing, placement, or contrast doesn’t serve the same purpose as the reference. Identify whether the title introduces the subject, labels a section, or simply adds a visual beat. Use your own wording and design, then check that the viewer has time to read it.
A title’s duration depends on how much text it contains, the viewer’s reading context, and what else is happening on screen. Don’t assume that the reference’s exact hold will suit your different words. Play the section and ask whether the text is readable without competing with the action.
If you’re practicing title animation, keep the underlying cut simple. First decide when the text appears and disappears. Then test movement or a transition only if it contributes to the idea. You’ll be able to tell whether the title timing works much more easily when the rest of the sequence isn’t changing at the same time.
What if DaVinci Resolve tutorial controls do not match my screen?
First check the Resolve version shown in the lesson, then confirm that you’re on the same page and using the same workspace or keyboard preset. Resolve’s interface and features can change between versions; Blackmagic Design’s support center lists the Resolve 21.1 manual for current documentation.
The first sentence beneath this heading is the direct fix: check the version, page, and workspace before searching for a missing control. Resolve 21.1 added and changed features, and Blackmagic’s 21.1 release information and manual are better references for that release than a tutorial recorded for an older version.
Use this sequence when the display differs:
- Check the lesson’s version. Look at its title, description, publication date, or opening screen. Don’t assume a Resolve 20 lesson shows every Resolve 21.1 control.
- Check the page. The same project can expose different tools on the Edit, Cut, Color, Fusion, Fairlight, or Deliver pages.
- Check the selected object. Some controls appear only when a clip, edit point, track, or effect is selected.
- Check the panel or workspace. A collapsed panel, changed layout, or different viewer arrangement can hide controls without removing them.
- Check the keyboard mapping. Resolve allows keyboard customization, so a shortcut from a tutorial may not match your current mapping.
- Consult the Resolve 21.1 manual. Search for the tool’s name or operation instead of guessing based on how the instructor’s screen looks.
Don’t click around randomly to make the interface look identical. If your goal is to learn the edit rather than reproduce the instructor’s workspace, identify the needed operation and find it in your version. The visual layout can differ while the editing concept stays the same.
A Resolve 21.1 tutorial might also use a new feature that an earlier version lacks. If the feature is essential to the reference, update only after checking system and project considerations. If it isn’t essential, find a supported equivalent or simplify the exercise. The Resolve 21 tutorial-controls guide addresses version and interface mismatches in more detail.
What if I’m using Resolve 20 or an older version?
Use the same practice method, but treat Resolve 21.1-specific instructions as version-dependent. Core decisions such as selecting shots, arranging a timeline, reviewing cuts, and comparing sound still apply. The precise menu, button, or feature available on your system may not.
Check the manual and support materials for the version you actually have. A Resolve 21.1 manual can help you understand the current interface, but it’s not a guarantee that the same controls exist in earlier releases. If a lesson depends on a new feature, choose a different exercise or work on the surrounding editorial choices.
Keep version differences out of your comparison notes unless they matter. “My version doesn’t have this control” is a software limitation. “My cut hides the action” is an editorial observation. Separating the two saves you from treating a version mismatch as a failure to learn.
What should I do after my first reconstruction?
Make a second pass with a new constraint, or choose a new reference that isolates a different editing decision. Don’t repeat the first exercise unchanged just to accumulate hours. Decide what you learned, then move one step beyond it.
For a second pass, keep the same footage and rebuild the sequence from scratch without looking at your first timeline. You’ll see which choices you remember and which depended on trial and error. Or keep the rough sequence and change only its pacing. If the first version was music-led, try a version that makes dialogue or natural sound carry more of the scene.
You can also change the source material while keeping the editorial question. If you studied how a cutaway supports dialogue, use a new speaker and a new set of cutaways. If you studied a three-beat montage, make a different montage with your own footage. That variation helps you test whether you learned a flexible idea or memorized one particular sequence.
The point isn’t to reproduce the reference forever. The point is to make its decisions easier to recognize when you’re editing something original. Once you can explain why a cut works in the practice sequence, try using the same reasoning on a subject you chose yourself.
How do I know when to stop practicing a reference?
Stop when you can describe the sequence’s main decisions, make a version that communicates the same broad idea, and name one reason your version differs. You don’t have to make an exact copy or exhaust every possible improvement.
You may want another pass if your edit is hard to follow, if you can’t explain why a shot is there, or if you haven’t tested the question that motivated the exercise. You can move on when the result is coherent and the next revision would only add polish outside your learning goal.
That decision is personal. One learner may need more time with trims; another may already understand the timeline but need practice choosing shots. Avoid using an arbitrary number of hours or projects as proof that you’ve “finished” learning a skill. The useful signal is that your decisions are becoming more deliberate and easier to explain.
What should I make after the study exercise?
Make something original using the same skill. If the reconstruction taught you to use a reaction shot, build a small scene with your own dialogue and decide when the listener should appear. If it taught you to build a music-led sequence, film a simple action and choose which moments deserve emphasis.
An original project reveals problems a reconstruction can hide. The reference gives you a model; your own idea gives you a reason to make choices the model never answers. You’ll need to decide what the viewer should notice, what information to leave out, and how to shape the ending. That’s where practice turns into authorship.
You don’t need a perfect brief. A one-sentence intention is enough: “Show the steps of making coffee without narration,” or “Make a quiet walk feel like the start of an adventure.” Then use the editing decision you practiced to help that idea. Keep the project small enough that you can finish it and review the result.
Should I learn through recreation, official training, or a course?
Choose recreation when you need a concrete editing problem, official training when you want software-specific foundations, and a course when you want an instructor-led sequence. Most learners benefit from combining them instead of treating them as competing choices.
| If you need… | Start with… | Then do this |
|---|---|---|
| A clear introduction to Resolve controls | Blackmagic Design’s official training and manual | Use a short reconstruction to apply one relevant lesson |
| A working example from start to finish | A creator-led YouTube course such as Casey Faris’s Resolve 21 lesson | Pause after a technique and try it on different media |
| A set curriculum with chapters | A current marketplace course whose version and materials you’ve checked | Treat the course as structure, then do your own edit |
| A way to practice when you already know the basics | A reference passage or one of your own older projects | Rebuild one decision, compare, and record what changed |
| Help with a control while you’re inside Resolve | Current documentation or an on-screen assistant | Confirm the action in your own project and judge the result yourself |
Blackmagic Design’s official resources deserve a fair place in the mix. They are the first stop for version-specific behavior and structured training, with manuals and lesson materials that support hands-on work. A course creator may explain a concept in a style that clicks faster for you. Peer communities can offer practical ideas and troubleshooting context. Recreating an edit gives you a personal test of what you’ve learned.
None of these options can make every editorial decision for you. A walkthrough may show where to click without explaining whether the cut serves your story. A manual may document a tool without supplying a creative brief. A reconstruction may keep you active but still needs reliable instruction when you don’t know how a control works. Use each resource for what it does best.
The best learning setup combines reliable instruction with a project that makes you use it.
If you’re choosing a course, look beyond the headline. Confirm the Resolve version, whether lesson media is supplied, which pages the course covers, and whether its scope fits your next project. Don’t buy a broad course because you’re frustrated with one specific control; start with the manual or a focused lesson. And don’t assume a free video is automatically incomplete. Blackmagic’s official lessons and individual creator tutorials can be substantial, while a paid course still requires you to practice.
If you’re starting from zero, learn enough to create and reopen a project, import media, identify the viewer and timeline, place clips, and play the result. Then choose a small reconstruction. You don’t need to study every page before making a simple edit. If you already edit in another program, focus on where Resolve puts familiar operations rather than relearning the entire craft.
What is the next step if I want to learn by recreating an edit?
Choose one short passage today, write down what changes and why, then rebuild those decisions with media you’re allowed to use. Keep the first pass simple. Compare it at normal speed, record one difference, and make one revision before moving on.
Don’t chase a perfect match. Look for a clearer decision. If you can explain why the image changes, what the sound contributes, and what you want to test next, the practice has done its job. Save the project and make something original with the same skill.
Frequently asked questions
- How do I learn DaVinci Resolve by recreating an edit?
- Pick a short reference, map its cuts and sound, then rebuild the structure in Resolve with different footage. Compare the result, write down the differences, and repeat one decision at a time.
- Is recreating someone else's video a good way to learn DaVinci Resolve?
- Yes, as a private study exercise. Recreating a short edit helps you notice timing, shot choice, sound, and transitions, but it doesn't replace learning the interface or making original work. Use your own or properly licensed footage, and don't publish a close copy without permission.
- How can I learn DaVinci Resolve fast without only watching tutorials?
- Use a short lesson to learn a specific control, then close it and apply that control to your own reconstruction. Active editing, comparison, and a brief written review keep the practice tied to a finished result.
- Can I recreate an edit in the free version of DaVinci Resolve 21?
- You can practice core timeline editing in DaVinci Resolve's free version. If a reference depends on a Studio-only feature, use a different method or choose another reference rather than treating that feature as a requirement.
- What should I do when my DaVinci Resolve controls don't match the tutorial?
- Check the tutorial's Resolve version, page, workspace, and keyboard preset first. Blackmagic Design's support center lists the Resolve 21.1 manual, so use that version's documentation to confirm current controls.
Sources
- DaVinci Resolve 21.1 Manual and Support Center
- DaVinci Resolve Training
- DaVinci Resolve Online Seminars
- DaVinci Resolve 21.1 Manual
- DaVinci Resolve 21 New Features Guide
- DaVinci Resolve 21.1 release information
- Making Videos in Resolve 21: Full Course for Beginners
- Casey Faris course transcript and chapter notes
- DaVinci Resolve 21: Edit & Color Grade Like a Pro
Put this guide to work with TryUncle.
Ask about the step you’re on. TryUncle sees your screen and points at the control you need, so you can keep learning in your own project.
Get TryUncle for Mac or WindowsKeep reading
Guides · Jul 15, 2026 · 37 min
DaVinci Resolve Practice Projects for Beginners: 10 to Try
10 ranked DaVinci Resolve practice projects for beginners, from a 3-clip hard cut to a full capstone edit, plus where to find free practice footage.
Guides · Oct 5, 2026 · 33 min
Best Way to Practice DaVinci Resolve With a Client Brief
The best way to practice DaVinci Resolve is to turn a client brief into a timed edit, review, revision, and delivery exercise.
Guides · Jul 15, 2026 · 34 min
DaVinci Resolve Learning Plan for a Full-Time Job
A realistic DaVinci Resolve learning plan for people with a full-time job: weekly hour budgets, a 12-week schedule, and how to protect practice time.