Articles / Fixesupdated for DaVinci Resolve 21.0.2 (July 2026)
How to Remove Background Noise from Audio in DaVinci Resolve
Quick answer
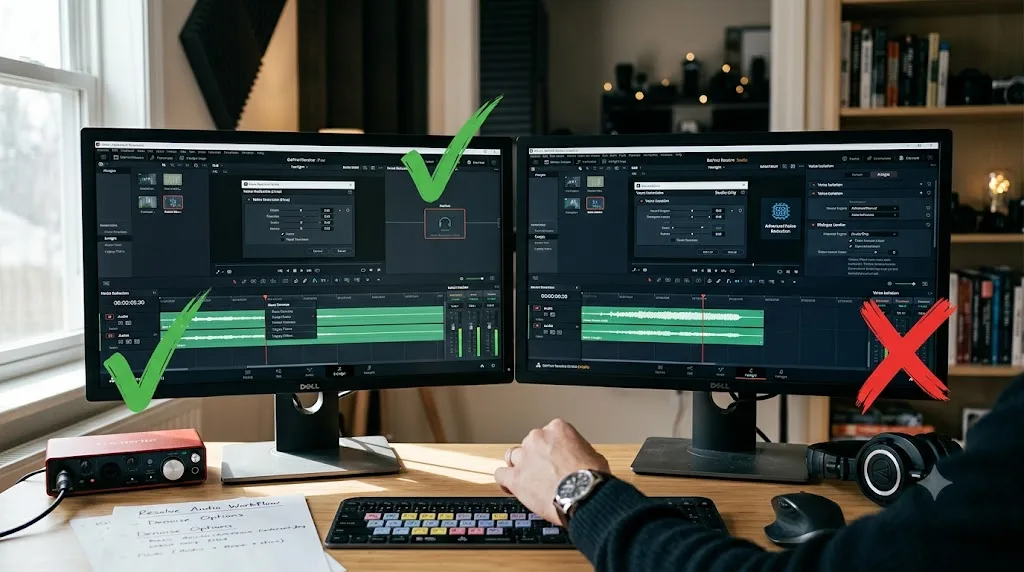
On the Fairlight page, add the Noise Reduction plugin to the noisy track, select a noise-only region and click Learn (or switch to Auto Speech Mode), then lower Sensitivity until dialogue sounds clean. For heavier noise under the voice itself, add Voice Isolation as a track effect instead, but expect some vocal thinning at higher intensity.
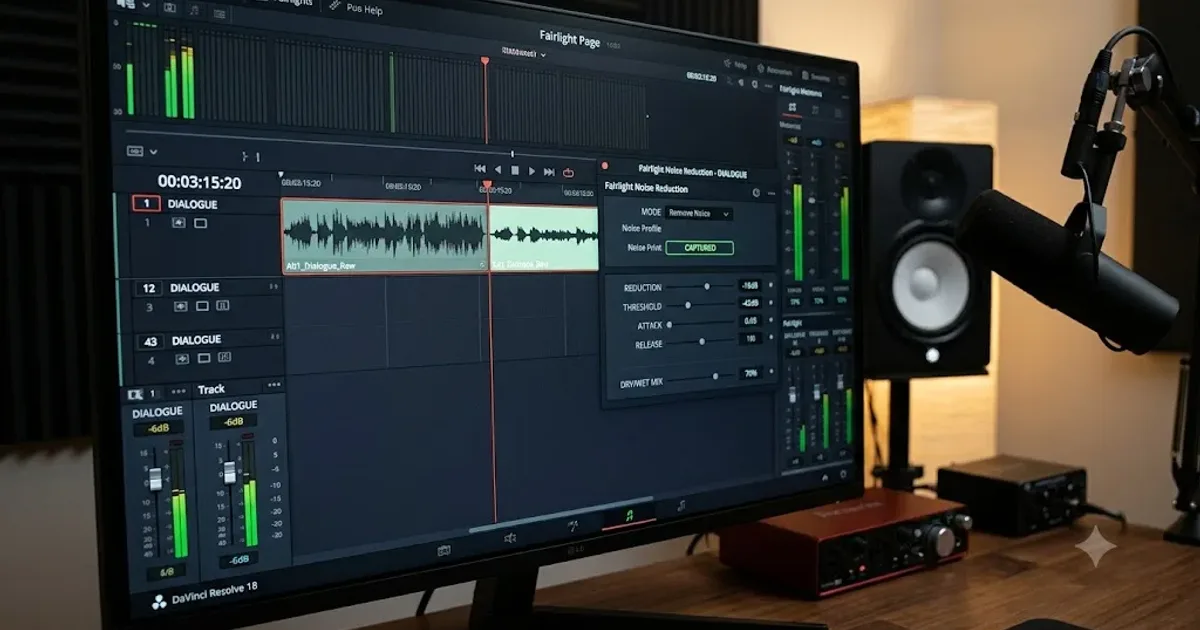
Your dialogue is usable. The words are clear. But there's a hiss under every sentence, or a hum that gets worse every time the fridge kicks on, or a fan that never shuts up. You don't need to reshoot. You need the right Fairlight plugin, in the right order, and about ten minutes.
This guide covers every noise-removal tool on DaVinci Resolve's Fairlight page: the Noise Reduction plugin, De-Hummer, De-Esser, Gate and Expander, the Dialogue Processor, and Voice Isolation. It's a different problem than grainy video, which our video noise reduction settings guide already covers. This one is about what's coming out of your speakers, not what's on screen.
How do you remove background noise from audio in DaVinci Resolve?
Start with diagnosis, not with the biggest hammer on the shelf. Solo the clip on the Fairlight page and listen closely to what's actually wrong, because the fix depends entirely on the type of noise, not just its presence.
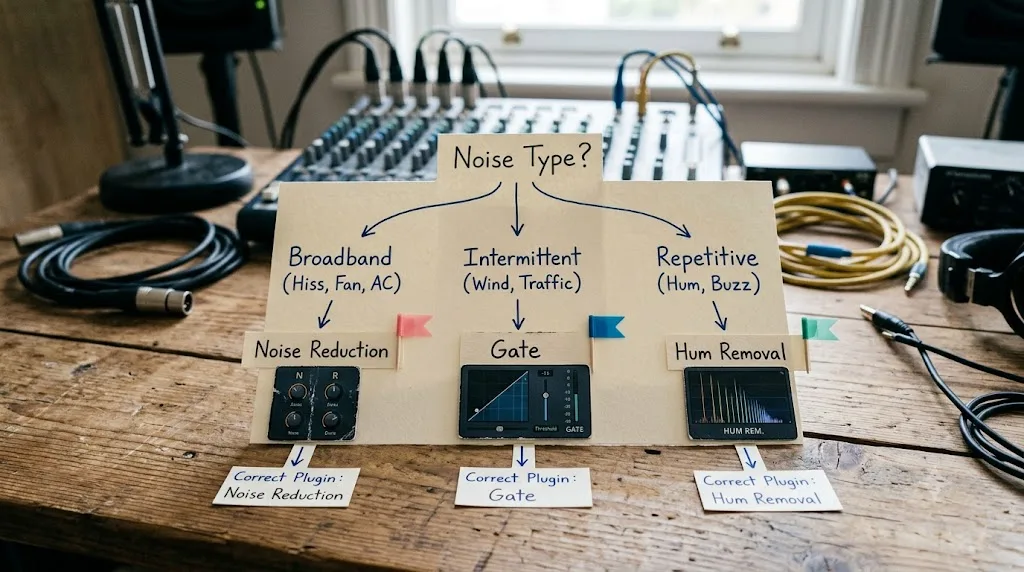
Steady, even noise, the kind that sits under the whole clip at roughly the same level, whether it's hiss, room tone, an air conditioner, or a computer fan, is what the Noise Reduction plugin is built for. Low-frequency buzz that tracks with your power outlet, the classic 50Hz or 60Hz hum, belongs to De-Hummer. Harsh "s" and "t" sounds that jump out of an otherwise clean take need the De-Esser. Noise that's only audible in the gaps between words, not during them, is a job for a Gate or Expander. And noise that's loud, chaotic, and layered directly under the voice, traffic, a crowd, wind that a lav mic couldn't escape, is the one case where Voice Isolation earns its Studio price tag.
Most noisy clips need two or three of these tools stacked together, not one tool doing everything. A location interview with fan noise, sibilant dialogue, and quiet room tone between answers needs Noise Reduction for the fan, De-Esser for the sibilance, and a Gate for the gaps. Reaching for Voice Isolation first, before trying the more surgical tools, is the single most common reason editors end up with thin, artificial-sounding dialogue when a two-minute Gate would have solved it cleanly.
Which tool should you reach for first: Noise Reduction or Voice Isolation?
Noise Reduction, almost every time. It's more precise, it's free, and it degrades the voice less at equivalent settings.
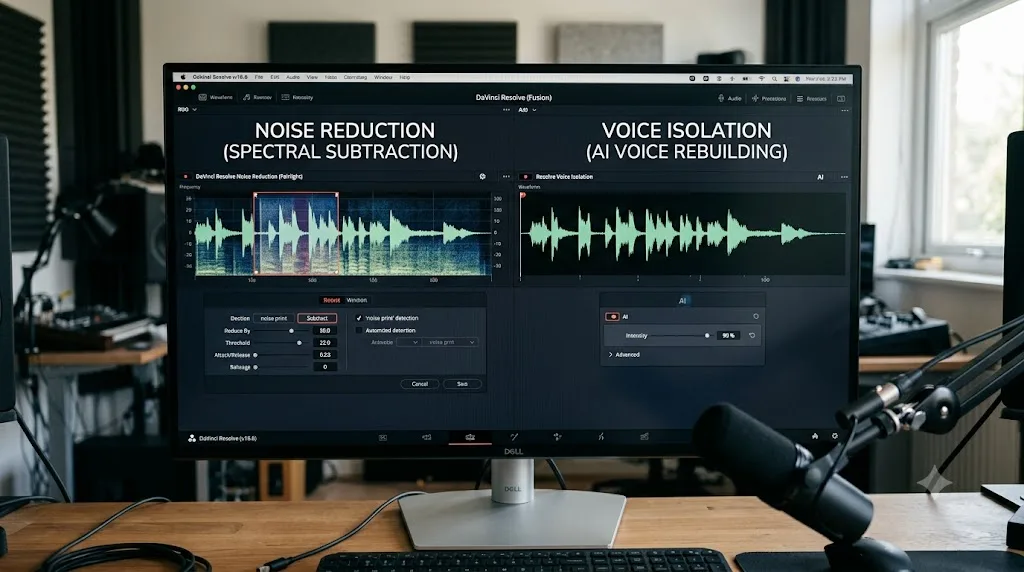
The Noise Reduction plugin analyzes a spectral profile of the noise you tell it to target and subtracts a matching pattern from the whole signal. According to Blackmagic's own Fairlight product page, the plugin "automatically detects noise in a selection or you can teach it by selecting noise" and clicking learn, after which "anything that matches the noise is removed." That's traditional spectral subtraction: it knows exactly what it's removing because you showed it, which keeps the process predictable.
Voice Isolation works the opposite direction. Instead of identifying and removing noise, it uses a neural network to recognize what a human voice sounds like and rebuilds that voice from the signal, discarding everything else. Blackmagic's own announcement of the feature described it plainly: "Voice isolation is perfect for interviews and dialogue recordings from noisy locations," able to eliminate "everything else from moderate noise to aircraft and explosions leaving only the voice," according to the company's DaVinci Resolve 18.1 press release. That's a genuinely different, more powerful capability for chaotic noise. It's also a blunter instrument, because the model is guessing at what counts as voice rather than measuring a noise profile you gave it directly.
| Situation | Reach for |
|---|---|
| Steady hiss, room tone, fan or AC noise under the whole clip | Noise Reduction plugin |
| Low buzz or hum from AC power | De-Hummer |
| Harsh "s" and "t" sounds | De-Esser |
| Noise only audible between words, not during speech | Gate or Expander |
| Loud, chaotic noise directly under the voice (traffic, crowd, wind) | Voice Isolation |
| Several of the above at once | Stack the specific tools first, Voice Isolation last if anything remains |
Try the specific tools first. They're faster to apply, cost nothing extra, and don't touch the parts of your voice that were never the problem.
How does the Fairlight Noise Reduction plugin actually work?
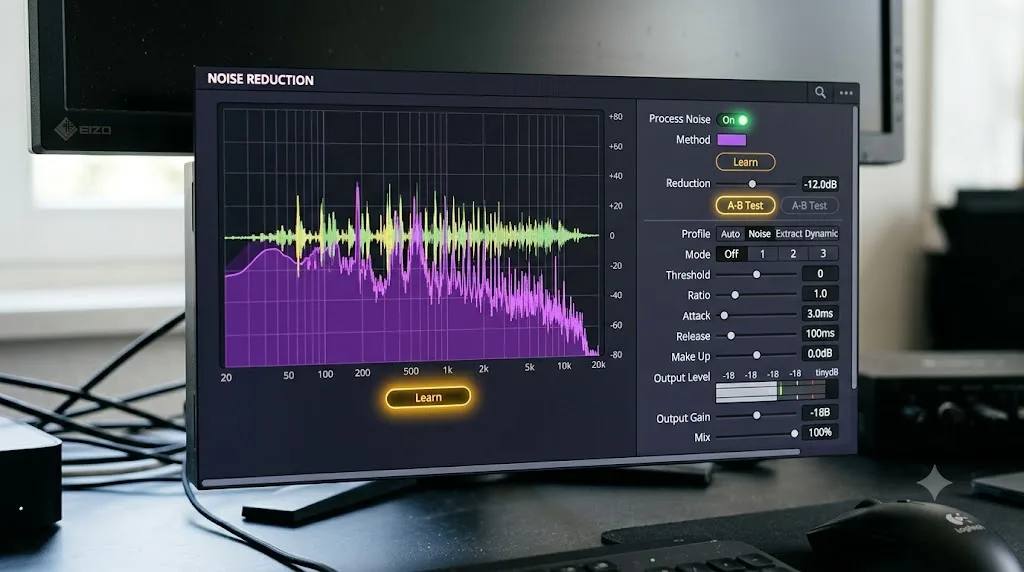
Open the Mixer on the Fairlight page, click the Effects slot near the top of the noisy track's channel strip, and choose Noise Reduction from the FairlightFX list. The panel that opens shows a spectral analysis of the audio, with a purple overlay marking exactly what the plugin considers noise, per Blackmagic's own manual entry on the plugin.
You have two ways to teach it what noise looks like. Select a stretch of the clip that's noise only, no dialogue at all, even half a second of room tone between sentences works, and click Learn. The plugin builds a profile from exactly that sample and applies it across the whole clip. Alternatively, enable Auto Speech Mode, and the plugin adapts its noise profile in real time as dialogue plays, without you having to find and select a clean noise sample first. Auto Speech Mode is faster to set up and works well on clips with fairly consistent noise; manual Learn mode gives you more control when the noise character shifts partway through a take.
Three presets ship with the plugin as starting points: De-Hiss, De-Rumble, and De-Rumble and Hiss, according to the same manual entry. They're a reasonable jumping-off point if you'd rather adjust from a baseline than build settings from zero.
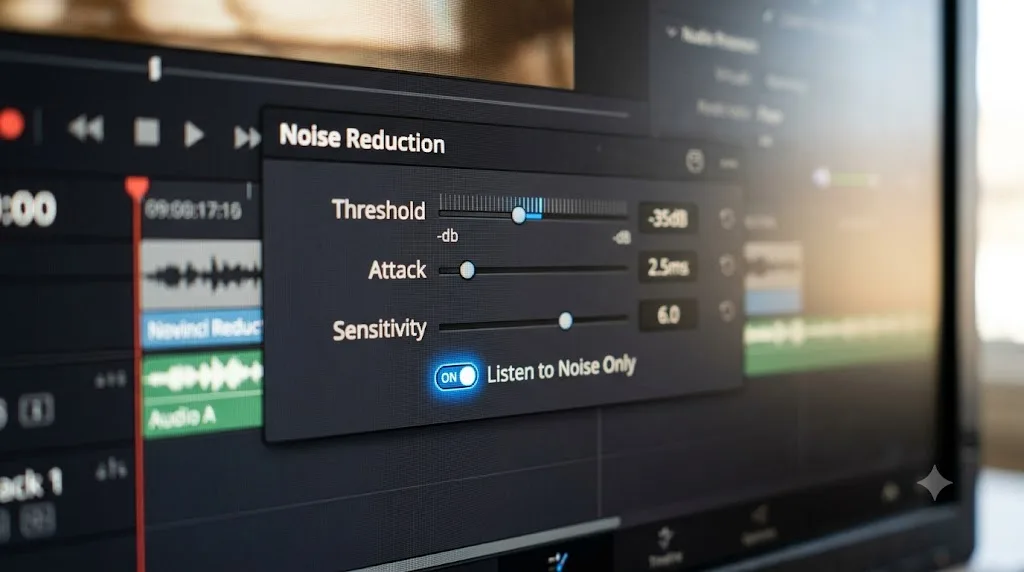
Before you trust your ears on the result, use the Listen to Noise Only toggle. It plays back exactly what the plugin is removing, isolated from the dialogue, which is the fastest way to catch the plugin eating parts of a voice it shouldn't. If Listen to Noise Only sounds like it contains actual words, your Sensitivity is set too aggressively, and it's time to back off before you commit to the setting.
What Threshold, Attack, and Sensitivity settings should you use?
The plugin exposes five controls that matter, and understanding what each one actually does saves you from turning knobs randomly until something sounds better.
Threshold (in dB) sets the level below which the plugin treats sound as noise rather than signal. Attack (in milliseconds) controls how quickly the plugin's detection responds when it's operating in Auto Speech mode, essentially how fast it reacts to changing noise conditions. Sensitivity is the one that does the most damage when it's wrong: Blackmagic's manual describes it directly, noting that "higher sensitivity values exaggerate the detected noise profile" so "more noise will be removed, but more of the dialogue you want to keep may be affected." That's the plugin's own documentation warning you about the exact tradeoff every noise removal tool in this guide makes in one form or another.
Sensitivity controls how aggressively the plugin treats anything similar to your noise sample as noise, and pushed too high it starts eating dialogue along with hiss. The two remaining controls, master Gain (adjustable up to plus or minus 18 dB) and Q, shape the overall output level and frequency focus after the noise reduction itself, useful for fine-tuning tonal balance once the noise is gone.
Work in this order and you'll land on usable settings faster than turning every knob at once: capture your noise profile first, set Threshold so it sits just above your actual noise floor, raise Sensitivity gradually while checking Listen to Noise Only, and stop the moment you hear a hint of dialogue in that isolated noise feed. That's your ceiling. Back off slightly from it for a safety margin, because noise character can shift a little across a long clip even when the level stays consistent.
| Control | What it does | How to set it |
|---|---|---|
| Threshold | Level below which sound counts as noise | Set just above your measured noise floor |
| Attack | Reaction speed in Auto Speech mode | Leave at default unless noise character changes fast |
| Sensitivity | How aggressively similar sound gets treated as noise | Raise until hiss clears, then back off at the first sign of dialogue in Listen to Noise Only |
| Gain | Output level after noise removal | Adjust to match the rest of your mix |
| Q | Frequency focus of the noise profile | Fine-tune only after Threshold and Sensitivity are dialed in |
Andre Bluteau's step-by-step walkthrough of the plugin puts the tradeoff in blunt, practical terms: "too little and you won't hear it, too much your clip might get a little muffled," in his Envato Tuts+ guide to Fairlight noise reduction. His tutorial also flags a shortcut worth knowing: press R to range-select a section of the clip, then loop it with Option and the forward slash key while adjusting settings, so you're not replaying the whole clip from the start every time you nudge a slider.
How do you use Voice Isolation, and what does it cost you?
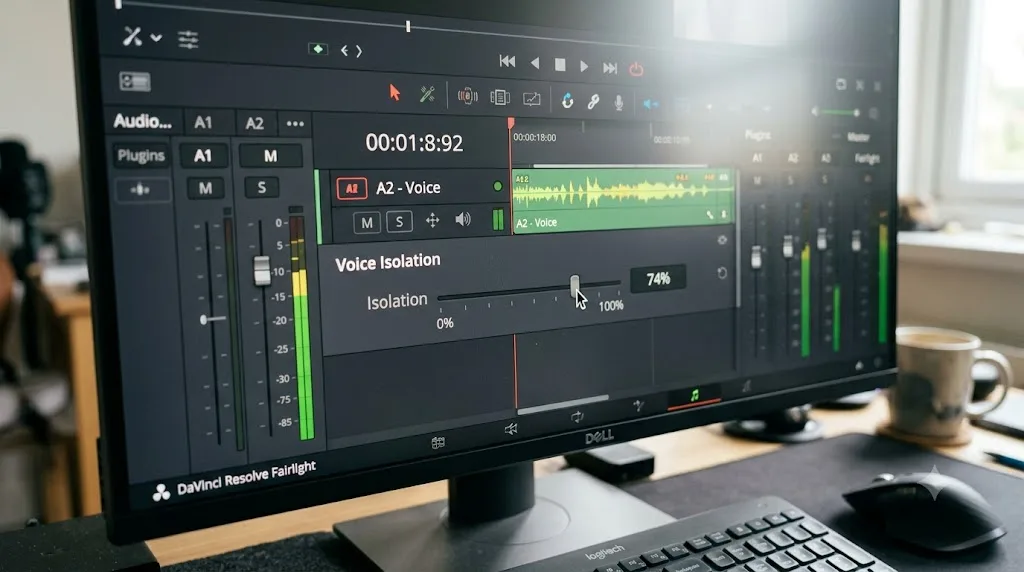
Voice Isolation lives as a track effect, not a standard channel plugin. Open the Mixer on the Fairlight page, click the Effects slot on the noisy track's channel strip, and choose Voice Isolation from the list, the same way you'd add De-Esser or Noise Reduction. It exposes a single intensity control, running from 0 to 100 percent, per dvresolve.com's breakdown of the tool.
That single slider is deceptively simple. At low values, Voice Isolation acts like a gentle noise reduction pass, cleaning up moderate background noise while leaving the voice largely untouched. Push it higher and it starts aggressively rejecting anything the model doesn't recognize as speech, which is exactly what lets it cut through noise that would defeat a spectral tool like Noise Reduction, at the cost of naturalness the harder it works.
Blackmagic significantly upgraded the tool in DaVinci Resolve 19, adding true stereo support and improved buffering, according to audioXpress's coverage of the release. That same release added a related but distinct tool, Dialogue Separator, which splits a track into separate dialogue, background, and ambience layers with individual level controls, useful when you want to keep some ambience rather than strip it entirely. Colorist and video creator Luke Riether, reviewing the AI Voice Isolation tool's improvements, wrote plainly: "Blackmagic Design has supercharged the AI Voice Isolation tool, and honestly, it's kind of wild," in his hands-on review.
Voice Isolation removes background noise by rebuilding the voice from scratch, not by simply subtracting the noise around it. That distinction is the whole reason it can handle noise nothing else on this page touches, and the whole reason it's also the tool most likely to leave an audible fingerprint on your dialogue if you push it too far.
Is Voice Isolation available in the free version of DaVinci Resolve?
No, and this is the one clear license line in this entire guide. Every other tool covered here, Noise Reduction, De-Esser, De-Hummer, Gate, Expander, and Dialogue Leveler, is a standard FairlightFX plugin that ships with the free version, since Blackmagic's own manual lists them as part of the same Fairlight FX plugin set available across the whole app.
Voice Isolation is different because it runs on the DaVinci Neural Engine, Blackmagic's machine learning layer, and the company's own Studio product page groups it with the app's other AI-driven premium features, listing "DaVinci Neural Engine AI voice isolation, music remixer and dialogue separator" among what DaVinci Resolve Studio includes. Dialogue Leveler, despite sounding like it belongs in the same AI category, is available in both the free and Studio versions, since it's a simpler automatic-gain tool rather than a neural network rebuild of the voice, per dvresolve.com's tool breakdown.
The Fairlight page ships free and full-featured for hum removal, sibilance control, and manual noise reduction. Voice Isolation is the one tool in this guide that Blackmagic reserves for Studio. If you're weighing whether the $295 one-time Studio license is worth it for reasons beyond audio, our free vs. Studio breakdown covers the full list of what the license actually unlocks, and it's a longer list than most editors expect.
Practically, that means a free-version editor facing heavy location noise isn't stuck. Noise Reduction, De-Hummer, De-Esser, and a Gate stacked together handle a surprising amount of what Voice Isolation is often reached for first, and they cost nothing beyond the time to learn where the sliders live.
How do you remove hum or buzz from a clip?
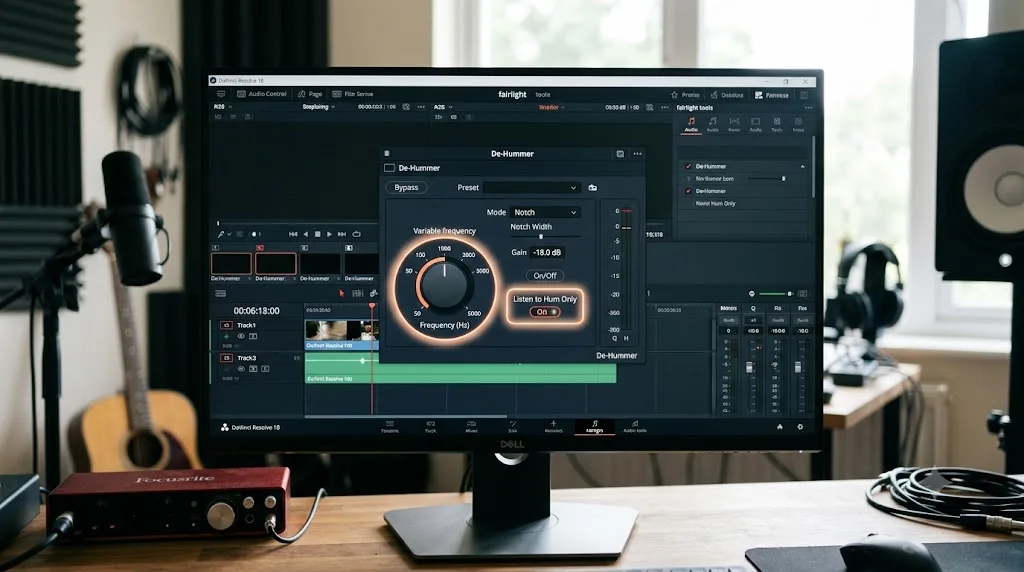
Add De-Hummer to the noisy track's Effects slot. Hum has a specific signature: a fundamental frequency tied to your local AC power, 50Hz in most of the world, 60Hz in North America and parts of South America and Asia, plus a stack of harmonics rising in octaves above it. That's why a single narrow notch filter rarely kills hum completely on its own, it only catches the fundamental and leaves the harmonics buzzing.
Hum has a fundamental frequency and a stack of octave harmonics above it, which is why a single narrow notch filter rarely kills it completely. De-Hummer is built around that structure. Enable Listen to Hum Only first, which isolates exactly what the plugin is targeting, and turn the Variable knob, which sweeps roughly between 50Hz and 400Hz, until the hum locks in cleanly and nothing else bleeds into that isolated feed. Raise Amount to reduce the hum once you've pinpointed the frequency, and use the Slope control to shift emphasis between the low fundamental, which reads as "hum," and the higher harmonics, which read as "buzz." Disable Listen to Hum Only once you're satisfied, and check the result against the rest of the mix, not in isolation.
Filmmaker and educator Ross Papitto, walking through this exact workflow, offers a caution worth taking seriously: "Cut too much and you'll start to hear the energy of the voice quiet as well," in his guide to fixing audio hum with Fairlight. Hum frequencies can overlap with the low end of a voice, especially deeper male voices, so an Amount pushed too far doesn't just kill the hum, it starts thinning the voice sitting right next to it on the frequency spectrum.
If your hum drifts, gets louder or quieter across the clip rather than staying constant, that's usually a sign of a ground loop or a loose cable connection at the source, not something De-Hummer alone will fully resolve. A steady hum from a single consistent power source responds to De-Hummer reliably. A hum that pulses or varies with camera movement often means the interference is coming from inside your rig, and re-recording with a different cable or power source beats chasing it in post.
How do you fix harsh "s" sounds with the De-Esser?
Sibilance isn't background noise in the usual sense, it's a byproduct of the recording itself, an "s" or "t" sound that carries more high-frequency energy than the mic or the compression chain can handle gracefully. It shows up as a sharp, almost painful hiss riding on top of specific consonants, and it gets worse the closer a mic sits to the mouth.
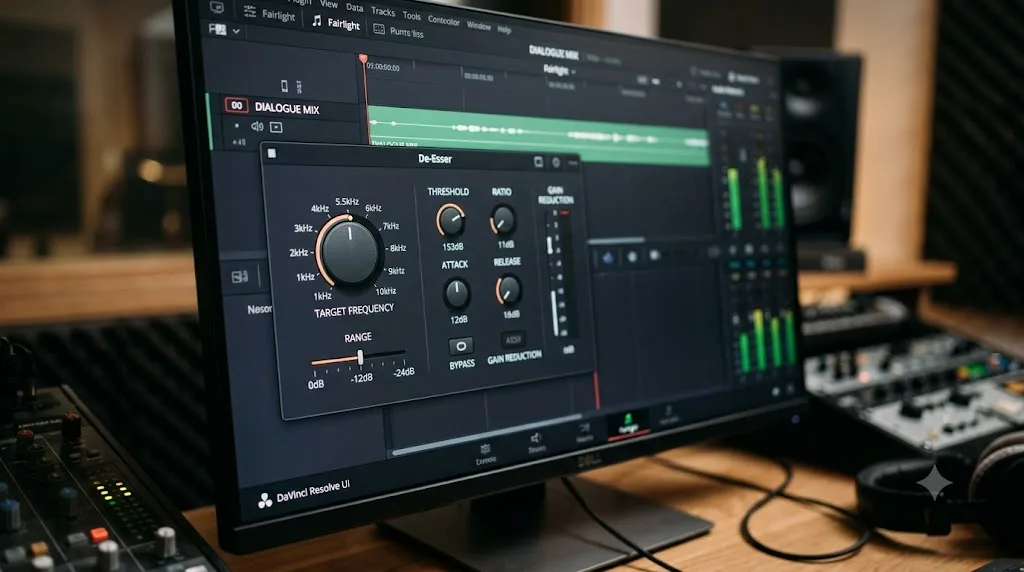
Add De-Esser to the track. Blackmagic's manual describes it as "a specialized filter that's designed to reduce excessive sibilance, such as hissing 's' sounds or sharp 'ts' sounds, in dialogue or vocals." The plugin's Target Frequency knob is where you find the exact pitch of the offending sound, and sibilance typically lives between 5kHz and 8kHz, according to the same manual entry. Enable Listen to Ess Only while you sweep the Target Frequency knob, the same isolate-and-confirm pattern as De-Hummer's Listen to Hum Only, and stop when the isolated feed contains only the hissy consonant sound and nothing else.
From there, three more controls shape how the plugin behaves. Range chooses how broad a slice of the spectrum gets treated: Narrow Band for a tightly targeted fix, Wide Band for a broader dip, or All High Frequency for cases where sibilance is smeared across a wider range than usual. Amount sets how much reduction gets applied once the plugin detects sibilance. Reaction Time, offered as Slow, Medium, or Fast, controls how quickly the de-essing engages and releases, and it matters more than editors expect: a Reaction Time set too slow can let the front of a harsh "s" through before the plugin catches up, and one set too fast can create a subtle pumping effect audible on rapid speech.
Start with Narrow Band and Medium Reaction Time, and only widen the Range if a single frequency target isn't catching every instance of sibilance in the take. Different speakers and different mics produce sibilance at slightly different frequencies, so a De-Esser dialed in for one voice on a multi-person interview may need its own instance and its own settings for each speaker.
How do you silence noise between words with a Gate or Expander?
Some noise problems aren't about what's under the voice, they're about what fills the silence around it. A computer fan, an air conditioner, or general room tone that's tolerable while someone's talking can suddenly feel loud and distracting the moment they stop, because there's nothing else in the mix to mask it.
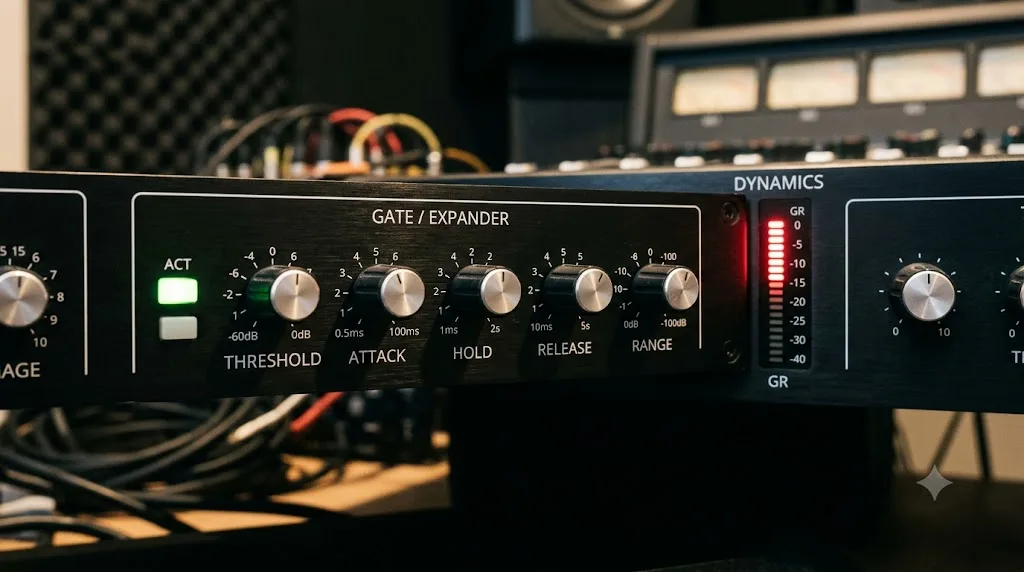
A gate doesn't clean noise, it silences the gaps between words where noise would otherwise be heard. Open the Dynamics panel in the Fairlight mixer and choose either Gate or Expander, since Resolve doesn't let you run both at once on the same channel. A Gate applies a harder cutoff below its threshold, useful for noise that needs to disappear completely between phrases. An Expander applies a gentler, more proportional reduction, useful when you want the noise to duck down rather than vanish outright, which can sound more natural on a clip with subtle ambient sound you'd rather not eliminate entirely.
Andre Bluteau's tutorial on this exact workflow gives a concrete starting point: a default Threshold "around -35dB, which works well for fan/CPU noise typically between -30dB to -40dB," in his Envato Tuts+ guide to expanders and gates. He recommends a Hold time around 500 milliseconds and a Release between 500 and 700 milliseconds, giving the gate enough time to stay open through natural pauses in speech rather than chopping every breath and hesitation into silence. Watch the Gain Reduction meter while you adjust, since it shows exactly how much the gate is pulling down in real time, which is a more reliable guide than trying to judge the effect by ear alone on a first pass.
Boris FX's own walkthrough of background noise removal in Resolve lands on a similar figure from a different angle, describing a Gate threshold set to "approximately 32-33" while watching the input meter during the noise segment, in Marco Sebastiano Alessi's tutorial on removing background noise. That convergence, two independent tutorials landing in the same -30 to -35dB neighborhood for typical fan and CPU noise, is a useful sanity check if your own clip's noise floor sits somewhere close to that range.
Set Threshold too high and the gate clips the quiet start of words, a soft "h" or a trailing "s" getting swallowed before the gate opens. Set Hold too short and it chatters, opening and closing rapidly on breath sounds. Andre Bluteau's closing advice on the topic is worth repeating here: "Less is more and that great audio starts with a great recording," a reminder that a gate cleans up noise between words, it doesn't fix a fundamentally bad recording.
Should you use the Dialogue Processor instead of stacking plugins?
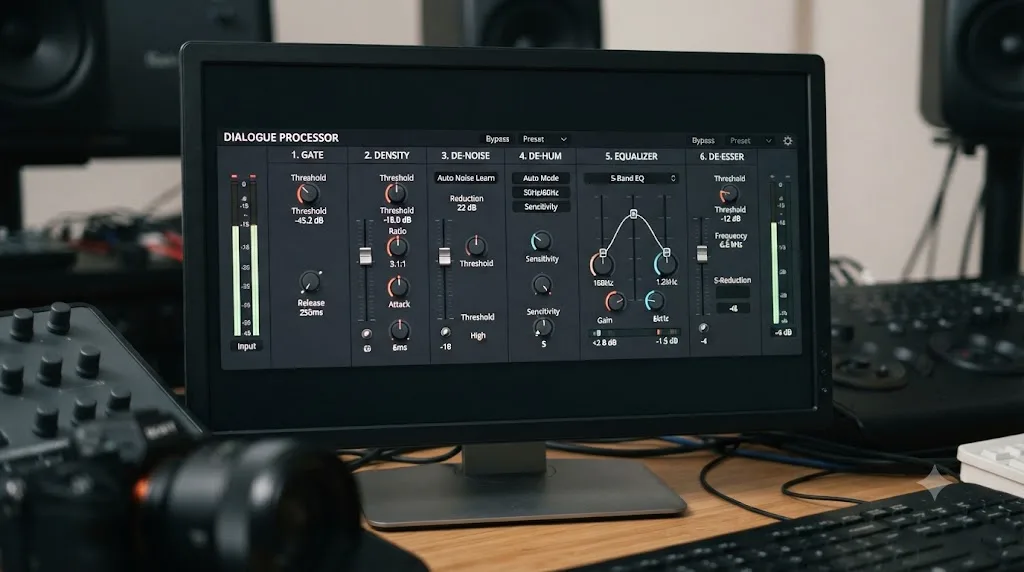
If you find yourself reaching for the same three or four plugins on every clip, there's a shortcut. Dialogue Processor combines six effects into a single plugin: De-Rumble, De-Pop, De-Ess, Comp, Expander, and Excite, according to dvresolve.com's guide to every Fairlight audio effect. It's built specifically for dialogue that needs a full pass rather than one targeted fix, low-frequency rumble removed, plosive pops smoothed, sibilance controlled, dynamics compressed, quiet gaps expanded down, and a touch of high-frequency excitement added back for clarity, all from one panel.
The same guide offers a piece of advice worth taking seriously with any multi-stage plugin: "More FX isn't always better," and recommends toggling off whichever stages you don't actually need for a given clip rather than running all six at full strength by default. A clean studio recording with no rumble and no plosives doesn't need De-Rumble and De-Pop fighting problems that were never there, and leaving unnecessary stages active just adds processing that can subtly color a voice that didn't need coloring.
Dialogue Processor works well as a starting point for interview and voiceover work where you expect the same general category of issues clip after clip. It works less well as a replacement for diagnosing an unusual problem, like hum specific to one location or heavy background noise that needs Voice Isolation, since it wasn't built to handle those cases the way the dedicated plugins are.
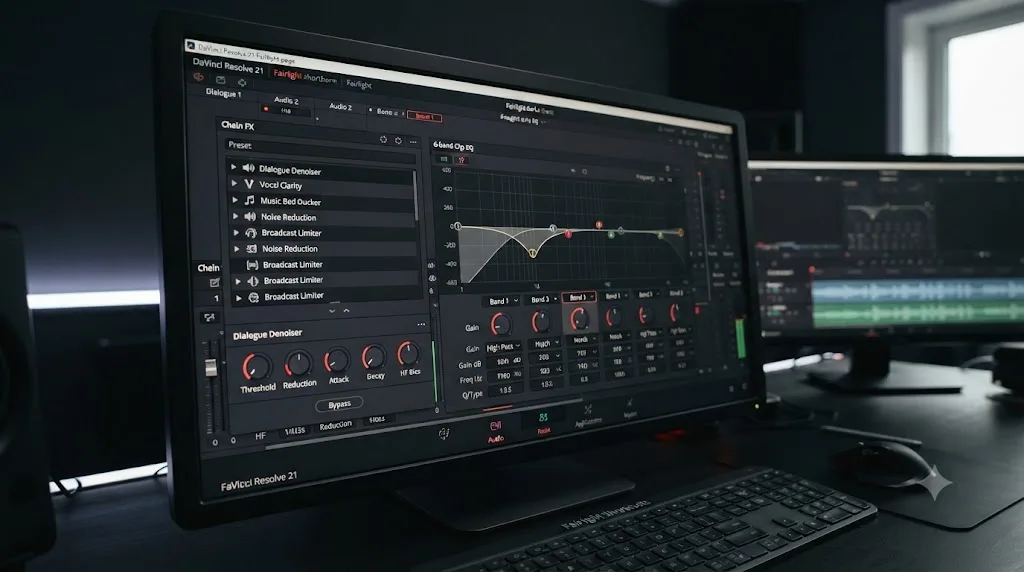
Chain FX, new in DaVinci Resolve 21, solves a related but different problem: it bundles up to six plugins of your own choosing, in whatever combination and settings you land on, into a single saveable, reusable preset. Build a chain once, of Noise Reduction plus De-Esser plus a Gate, tuned exactly the way you like it, and applying that same chain to every clip in a project becomes one click instead of rebuilding the stack from memory each time.
What changed for dialogue cleanup in DaVinci Resolve 21?
Resolve 21 didn't add a new noise-removal plugin, but it added tools that make the plugins you already have easier to use consistently across a project. Chain FX, covered above, is the most directly relevant. Alongside it, Fairlight picked up a 6-band clip EQ that now matches the full capability of the track-level EQ, with settings that copy and paste between the clip, track, and plugin levels, per Blackmagic's own What's New page. Before this release, clip-level EQ was noticeably more limited than track EQ, which pushed editors toward the track level for anything beyond a minor tweak even when the problem lived on a single clip.
The release also added an EQ and level matcher, aimed at the intercut-interview problem: two people recorded on different mics or in different rooms, cut together, sounding like two different recordings spliced into one. It's not a noise-removal tool by itself, but it addresses a related annoyance that often gets confused with a noise problem, tonal and level mismatch between cuts rather than actual background noise. If you're chasing loudness consistency across a whole timeline rather than noise in a single clip, our loudness normalization and LUFS guide covers that separate but related workflow in full.
None of Resolve 21's additions replace Voice Isolation, Noise Reduction, or the other tools covered in this guide. They sit one layer above them, making it faster to apply a consistent cleanup chain across a whole project instead of rebuilding your settings clip by clip. Practically, that means the order worth building into your workflow is: diagnose and fix noise per clip using the tools above, save your go-to combination as a Chain FX preset once you've got settings you trust, and apply that preset across future clips instead of starting from scratch every session.
Why does Voice Isolation make dialogue sound robotic or underwater?
Because of how the tool actually works, not because it's malfunctioning. Voice Isolation doesn't subtract noise the way the Noise Reduction plugin does. It uses a neural network to predict what parts of the signal are voice and discards the rest, rebuilding the voice from that prediction rather than cleaning the original recording.
At low to moderate intensity, that prediction is usually close enough to the real voice that the difference is inaudible or minor. Push the intensity higher, especially on a clip where noise is loud relative to the voice, and the model has to make more aggressive guesses about what counts as speech. Those guesses aren't always right, and the parts of the voice it discards along with the noise are exactly what produces the thin, tinny, or underwater quality editors report. The effect gets worse specifically when background noise is loud enough to be comparable to the voice itself, since the model has less clean signal to work from when making its predictions.
This is a known enough tradeoff that it shapes how experienced editors sequence their tools. Rather than reaching for Voice Isolation at 80 or 90 percent to solve a heavily noisy clip in one pass, the more reliable approach is running Noise Reduction and a Gate first to clear whatever they can, then applying Voice Isolation at a much lower intensity to mop up what's left. The AI model has less work to do, makes fewer aggressive guesses, and the resulting voice sounds noticeably more natural than the same clip processed with Voice Isolation alone at a high setting.
If a clip still sounds artificial after a moderate Voice Isolation pass, that's usually the sign to stop increasing intensity and instead go back to whatever specific noise remains, hum, sibilance, or gaps between words, and address it with the more targeted tool built for that exact problem.
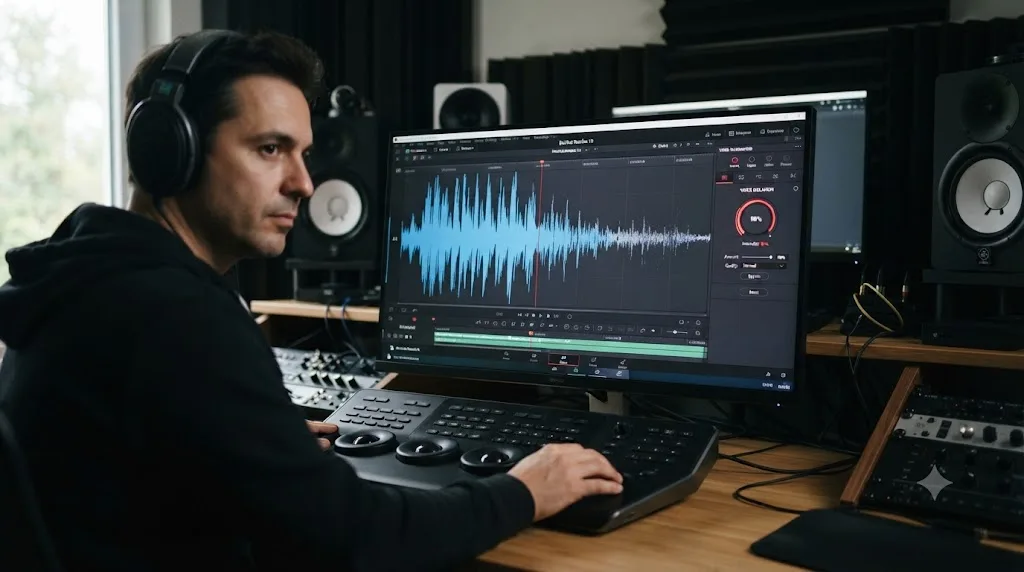
Which tool fixes which kind of noise?
Match your symptom to the row below before opening any plugin panel.
| Noise symptom | Cause | Fix |
|---|---|---|
| Steady hiss or white noise under the whole clip | Preamp noise floor, cheap mic, high gain | Noise Reduction plugin, Learn mode or Auto Speech Mode |
| Low buzz that doesn't change with the scene | AC power hum, ground loop, nearby electronics | De-Hummer, Variable knob near 50Hz or 60Hz |
| Sharp, painful "s" and "t" sounds | Sibilance from mic proximity or compression | De-Esser, Target Frequency between 5kHz and 8kHz |
| Fan, AC, or room tone audible only between words | Ambient noise below the dialogue level | Gate or Expander, Threshold set 5-10dB above noise floor |
| Loud, chaotic noise directly under the voice | Traffic, crowd, wind, uncontrolled location audio | Voice Isolation, low to moderate intensity |
| Combination of several of the above | Real-world location audio | Stack Noise Reduction, De-Hummer, De-Esser, and a Gate; Voice Isolation last if anything remains |
| Two speakers sound tonally different when intercut | Different mics or rooms, not actual noise | EQ and Level Matcher, not a noise-removal tool at all |
| Recurring stack of settings you use on every clip | Consistent problem set across a project | Save the combination as a Chain FX preset |
The table exists because most editors default to whichever tool they learned first, usually Voice Isolation because it's the one that gets talked about most, rather than the tool that actually matches their specific noise. A five-second diagnosis at the start saves a much longer session of pushing one slider further and further past the point it should have stopped.
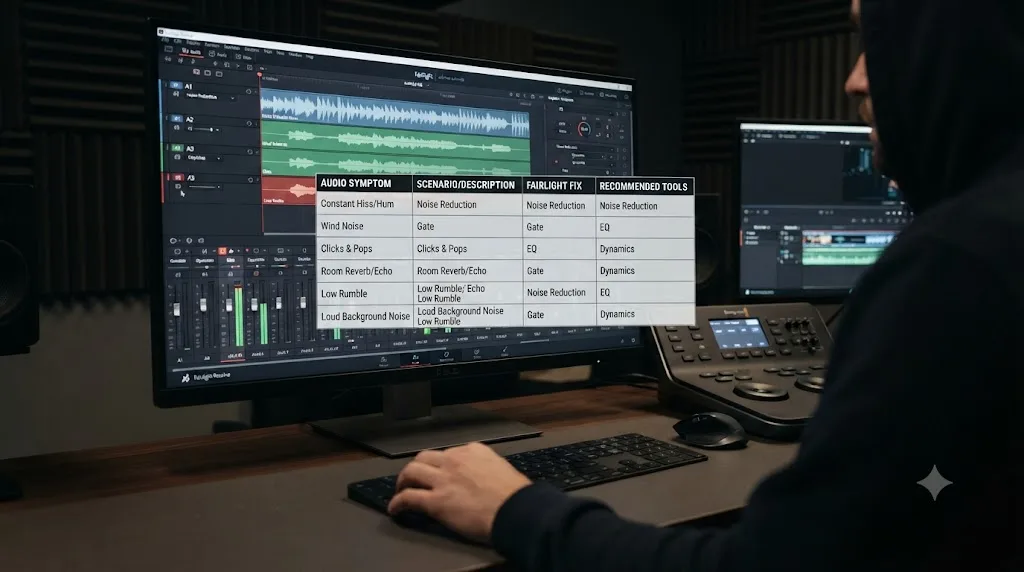
What does a full noise cleanup pass look like on a real clip?
Here's the method applied to a realistic case, so the order of operations makes sense in practice rather than as an abstract list.
Say you're cutting a documentary interview recorded in a small home office. The subject sat near a window air conditioner that was running the whole time, their lav mic occasionally caught a soft hum from a desk lamp's dimmer switch, and their voice has a slight sibilant edge on words with a lot of "s" sounds.
First pass: add Noise Reduction to the track, select a stretch of the pre-roll where the subject isn't speaking yet, and click Learn. The AC hiss drops noticeably. Listen to Noise Only confirms the profile is catching air conditioner noise and nothing that sounds like speech, so Sensitivity can sit fairly high without risk.
Second pass: with the AC hiss handled, the dimmer hum becomes more noticeable by contrast, the way a quieter room makes a remaining sound stand out more than it did before. Add De-Hummer, enable Listen to Hum Only, and sweep the Variable knob. It locks in around 60Hz with a light second harmonic. Amount at a moderate setting clears it without touching the voice's low end.
Third pass: the sibilance was always there, just masked by the louder background noise in the original recording. Now that the AC and hum are gone, it's the most obvious remaining issue. Add De-Esser, Target Frequency set with Listen to Ess Only enabled, Range on Narrow Band since the sibilance is fairly consistent across the interview, Amount raised until the harshness softens without making "s" sounds disappear entirely.
Fourth pass: room tone between the subject's answers is still faintly audible, more so now that everything else has been cleaned up around it. Add a Gate, Threshold set about 8dB above the measured noise floor during a quiet stretch, Hold around 500 milliseconds so natural pauses in speech don't get chopped, Release long enough that the gate doesn't chatter on trailing breath sounds.
Final check: play the full interview start to finish, not just the sections you were adjusting. The AC is gone, the hum is gone, the sibilance is controlled, and the gaps between answers are quiet without sounding unnaturally dead. Voice Isolation never got added to this clip at all, because four targeted tools, applied in the order the problems actually appeared, handled everything without it. That's the more common outcome than the guide's more dramatic Voice Isolation sections might suggest: most real-world noise problems are a stack of specific, fixable issues, not one overwhelming mess that needs an AI rebuild.
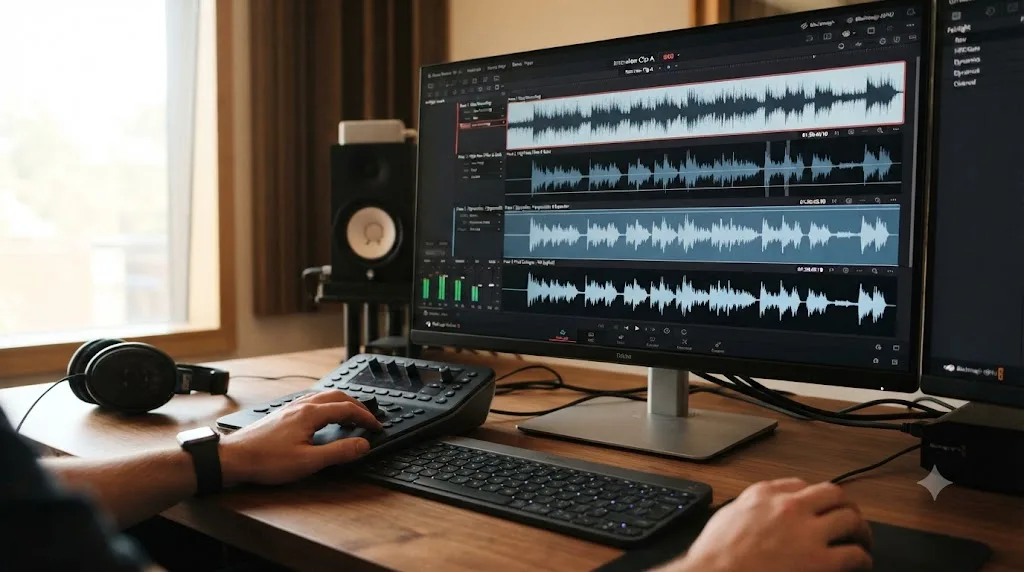
Should you use a third-party plugin like Clarity VX or iZotope RX instead?
For most clips, no. Resolve's own Noise Reduction, De-Hummer, De-Esser, Gate, and Voice Isolation, applied in the order this guide covers, resolve the large majority of location and home-recording noise problems without spending anything beyond the Studio license, which you may already own for reasons unrelated to audio.
Third-party tools earn their place on tougher jobs. Clarity VX, and its more advanced sibling Clarity VX Pro, are Waves VST plugins, not a Blackmagic product, and they're worth naming clearly here because it's an easy assumption to make otherwise: no plugin literally called "Clarity" ships inside Fairlight itself. It's added through Fairlight's Effects Library, filed under the VST restoration category once installed separately. iZotope RX is a dedicated audio restoration suite entirely outside Resolve, built around surgical repair tools like spectral de-noise, click removal, and de-reverb that go well beyond what a general-purpose editing app's built-in plugins are designed to do.
Larry Jordan, covering dialogue optimization workflows in Resolve, makes a related point about not overcomplicating routine work: "While you can add EQ as an effect, it is faster, easier and better to use the 'hidden' EQ section," in his article on optimizing dialog quality and levels. The same logic applies one level up: reach for a specialized external tool when the built-in one genuinely can't do the job, not by default because the external tool has a more impressive name.
Reasonable triggers for stepping outside Resolve entirely: archival footage with degraded, inconsistent noise character that shifts throughout the recording, dialogue that needs word-level surgical repair rather than a broad pass, or a production workflow where audio post already runs through a dedicated engineer with their own toolchain. For a single noisy interview or a run of YouTube uploads, the plugins already sitting on the Fairlight page are enough.
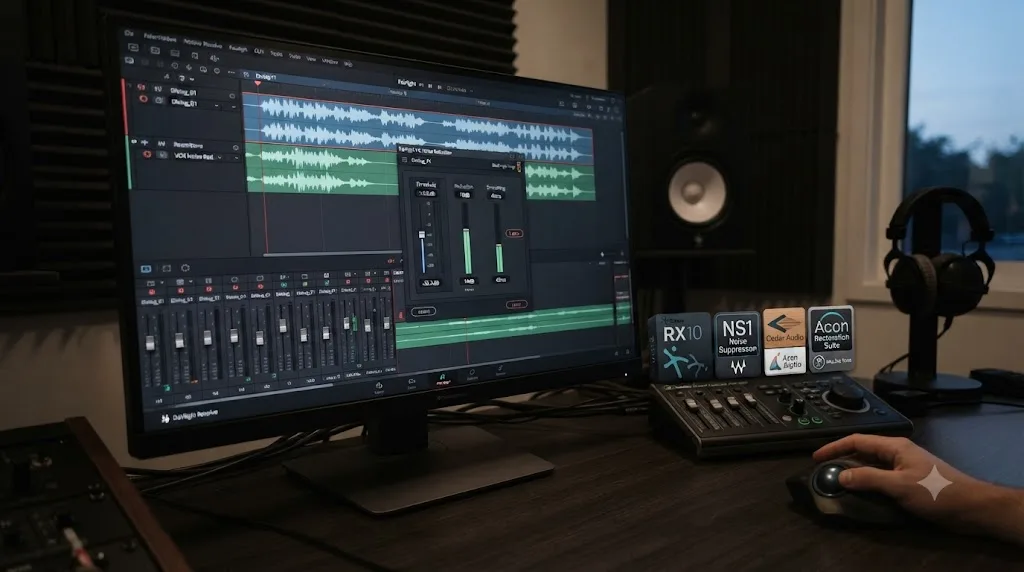
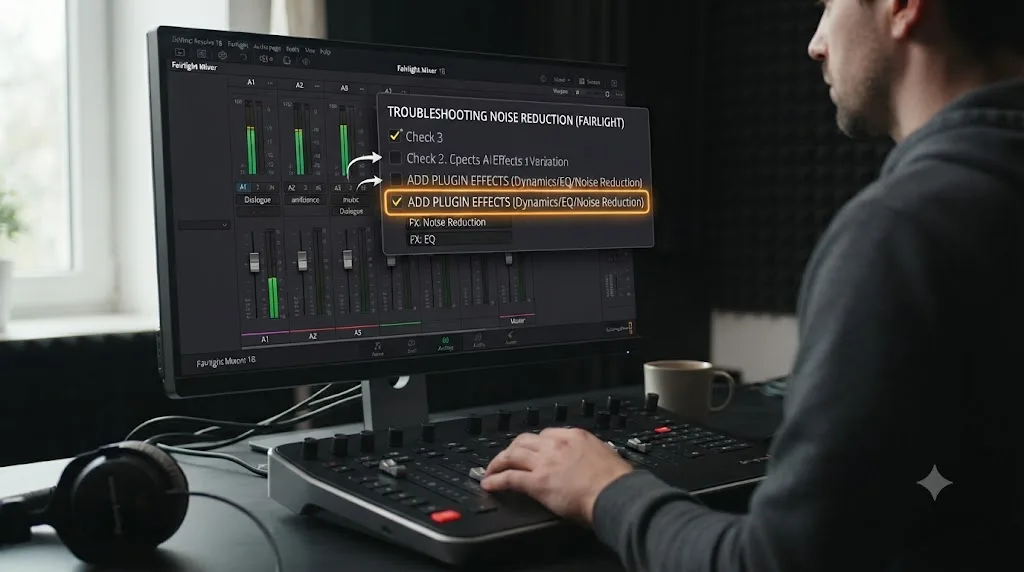
Why isn't Noise Reduction or Voice Isolation showing up in my Mixer?
A handful of specific causes account for most cases where a plugin you expect to see isn't there.
You're looking at the wrong panel. FairlightFX plugins live in the Effects slot of the channel strip in the Fairlight Mixer, not in the Inspector on the Edit page and not in the same menu as video effects on the Effects Library's video tab. Confirm you're on the Fairlight page, the Mixer is open, and you're clicking the Effects slot specifically, not a different control on the same strip.
You're on the free version and looking for Voice Isolation. As covered earlier, Voice Isolation is a Studio-exclusive AI tool. If it's genuinely missing from your Effects list and every other FairlightFX plugin shows up fine, license tier is the most likely explanation, not a bug.
You're mid-update or running a beta build. New feature availability has shifted between point releases before, and a plugin that was present in one build can temporarily behave inconsistently around an update. If a plugin was working and suddenly isn't after an update, restart the app completely rather than just closing the project, and confirm you're on a stable release rather than a beta build if you're chasing the newest features early.
The track itself isn't the one you think it is. Effects apply per track or per clip, and it's easy to add a plugin to the wrong track in a busy multi-track session, especially with several dialogue tracks stacked for different speakers. Confirm the Effects slot you're clicking belongs to the track actually playing the noisy audio, not a track above or below it in the Mixer.
If you're troubleshooting audio that's silent rather than just noisy, that's a different and more common problem with its own full set of causes, from a stuck solo button to an unchecked Export Audio setting. Our no audio troubleshooting guide covers every one of those causes in detail, separate from anything in this guide.
What's the fastest checklist to clean noisy dialogue before you export?
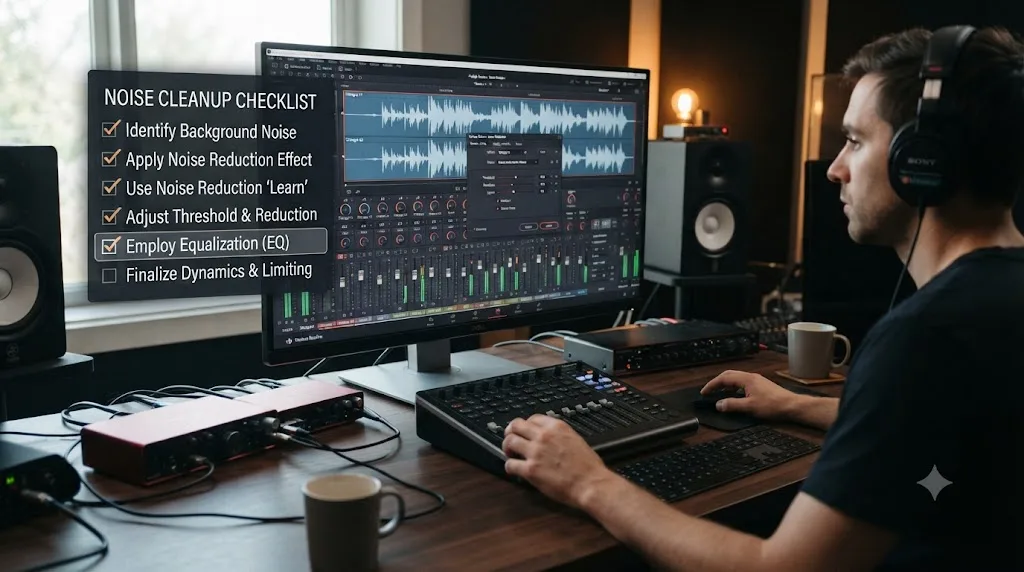
Six steps, worked in order, cover the large majority of noise problems editors bring to the Fairlight page.
- Solo and diagnose. Listen closely and identify whether the problem is steady noise, hum, sibilance, gaps between words, or heavy chaotic noise under the voice.
- Noise Reduction first, if the noise is steady. Capture a profile with Learn, or use Auto Speech Mode, then raise Sensitivity carefully while checking Listen to Noise Only.
- De-Hummer, if there's a low buzz. Isolate with Listen to Hum Only, dial in the Variable frequency, and watch Amount against the voice's own low end.
- De-Esser, if sibilance is harsh. Target Frequency in the 5 to 8kHz range, Narrow Band to start, Medium Reaction Time.
- Gate or Expander, if noise remains only between words. Threshold set a few dB above your measured noise floor, Hold and Release tuned so natural pauses survive.
- Voice Isolation last, only if noise remains under the voice itself. Start low, raise gradually, and stop the moment the voice starts to thin out.
Save whatever combination you land on as a Chain FX preset once you've dialed it in, so the next clip with the same problem takes one click instead of six panels.
If hunting through the Fairlight Mixer for the right plugin every time a new clip comes in is the part that eats your afternoon, that's the specific gap TryUncle is built for. It's an AI tutor that looks at your actual Resolve window and points at the exact control you're asking about, instead of sending you back through a guide like this one for a setting you needed twenty seconds ago.
What should you actually remember from all of this?
Diagnose before you open a single plugin. Steady noise gets Noise Reduction, hum gets De-Hummer, sibilance gets De-Esser, gaps between words get a Gate, and only genuinely chaotic noise under the voice itself justifies Voice Isolation. Stack the specific tools first, because they're free, more predictable, and gentler on the voice than a neural network guessing at what to keep.
Voice Isolation is powerful and it's the only tool on this page gated behind DaVinci Resolve Studio, but it's not the first move, it's the last one, reserved for whatever noise survives everything more targeted. Reach for it early on a clip that a Gate and Noise Reduction would have fixed in half the time, and you'll trade a clean recording for a thin, artificial-sounding one. Reach for it last, after the specific problems are handled, and it barely has to work at all.
Frequently asked questions
- What's the fastest way to remove background noise from audio in DaVinci Resolve?
- Add the Noise Reduction plugin to the noisy track on the Fairlight page, select a stretch of the clip that's noise only, click Learn, and let the plugin build a profile from it. Then lower Sensitivity until the hiss is gone but dialogue still sounds natural. That single plugin fixes steady hiss, room tone, and fan noise in a couple of minutes for most clips.
- Is Voice Isolation better than the Noise Reduction plugin?
- Not automatically. Voice Isolation uses AI to rebuild the voice and can knock out heavy, chaotic noise like traffic or a crowd that the Noise Reduction plugin can't touch, but it costs more in vocal naturalness at higher intensity. Try Noise Reduction, De-Hummer, and a Gate first, since they're more surgical, and reach for Voice Isolation only when noise sits directly under the voice and nothing else clears it.
- Does the free version of DaVinci Resolve remove background noise?
- Mostly, yes. The Noise Reduction plugin, De-Esser, De-Hummer, Gate, and Expander are standard FairlightFX plugins and ship in the free version along with the rest of the Fairlight page. Voice Isolation is the exception: it's an AI tool built on the DaVinci Neural Engine, and Blackmagic Design lists it as a DaVinci Resolve Studio feature, so the $295 license is the only thing standing between you and that specific tool.
- Why does Voice Isolation make dialogue sound robotic or underwater?
- Voice Isolation doesn't subtract noise from your recording, it uses a neural network to estimate and rebuild the voice, then discards everything it doesn't recognize as speech. Push the intensity high enough and the model starts discarding pieces of the voice too, which is what produces the thin, tinny, or underwater quality editors report at aggressive settings. Lower the intensity, or fix what you can with Noise Reduction and a Gate first so Voice Isolation has less work to do.
- How do I remove hum or buzz from a DaVinci Resolve clip?
- Add the De-Hummer plugin to the track, enable Listen to Hum Only, and turn the Variable knob until you hear the hum isolated cleanly, typically near 50Hz or 60Hz depending on your country's AC power frequency. Raise Amount to reduce it and use Slope to shift emphasis between the low fundamental (hum) and its higher harmonics (buzz), then disable Listen to Hum Only and check the result against the full mix.
- What's the difference between a Gate, an Expander, and the Noise Reduction plugin?
- A Gate and an Expander both work on silence, cutting or turning down the track's volume between words so room tone and fan noise disappear in the gaps, but they do nothing to noise happening under speech itself. The Noise Reduction plugin works continuously, subtracting a learned noise profile from the whole signal, including under dialogue. Most noisy clips need both: a Gate for the gaps, Noise Reduction for what's left during speech.
- Should I use a third-party plugin like Clarity VX or iZotope RX instead of Resolve's built-in tools?
- For occasional cleanup, Resolve's own Noise Reduction, De-Hummer, and Voice Isolation cover most cases without buying anything else. Clarity VX and iZotope RX specialize in noise removal the way Resolve's tools don't, with more granular control over what gets separated, and are worth it if you regularly work with location audio, archival recordings, or dialogue that needs surgical repair rather than a quick pass.
Sources
- DaVinci Resolve - Fairlight product page (Blackmagic Design)
- DaVinci Resolve Manual - Noise Reduction Plugin (Blackmagic Design)
- DaVinci Resolve Manual - De-Esser Plugin (Blackmagic Design)
- DaVinci Resolve Manual - Dialogue Leveler (Blackmagic Design)
- DaVinci Resolve Manual - Fairlight FX Plugin List (Blackmagic Design)
- Voice Isolation and Dialogue Leveler Audio Tools (dvresolve.com)
- Blackmagic Design Announces DaVinci Resolve 18.1 (HPA)
- Blackmagic Design DaVinci Resolve 19 Adds Major AI Tools (audioXpress)
- DaVinci Resolve Studio product page (Blackmagic Design)
- Larry Jordan: Optimizing Dialog for Quality and Levels in DaVinci Resolve
- Filmmakers Academy: Fixing Audio Hum or Buzz with Fairlight (Ross Papitto)
- Light Inside: AI Voice Isolation in DaVinci Resolve, Is It Finally Worth Using? (Luke Riether)
- Envato Tuts+: How to Use Noise Reduction on Audio in DaVinci Resolve (Andre Bluteau)
- Envato Tuts+: How to Use Expanders and Gates to Reduce Audio Background Noise (Andre Bluteau)
- Boris FX: How to Remove Background Noise in DaVinci Resolve (Marco Sebastiano Alessi)
- dvresolve.com: A Guide to Every Fairlight Audio Effect
- DaVinci Resolve - What's New (Blackmagic Design)
Put this guide to work with TryUncle.
Ask about the step you’re on. TryUncle sees your screen and points at the control you need, so you can keep learning in your own project.
Get TryUncle for Mac or WindowsKeep reading
Fixes · Jul 7, 2026 · 26 min
DaVinci Resolve No Audio: Every Cause and How to Fix It
Timeline plays video but no sound? Check the mute and solo buttons, the I/O Engine setting, sample rate, and Export Audio, in that order. Full fix list.
Guides · Jul 8, 2026 · 29 min
DaVinci Resolve Noise Reduction Settings: Temporal and Spatial
The exact Temporal and Spatial Noise Reduction settings in DaVinci Resolve: frame count, threshold values, motion range, and when to use each.

Comparisons · Jul 7, 2026 · 28 min
DaVinci Resolve Studio Price: Free vs. Studio Cost, Explained
DaVinci Resolve Studio costs $295, paid once, not monthly. Here's exactly what that buys, how it stacks up against Premiere Pro and Final Cut Pro, and who needs it.