Articles / Guidesupdated for DaVinci Resolve 21.0.2 (July 2026)
DaVinci Resolve Rode Wireless Go Audio Import Workflow
Quick answer
Export your Rode Wireless Go's WAV files with Rode Central, or plug the receiver into your computer over USB, then import them into DaVinci Resolve alongside your camera clips. Select both clips, right-click, choose Auto Sync Audio set to Waveform, and Resolve lines them up automatically, as long as your Rode recording matches your project's 48kHz sample rate.
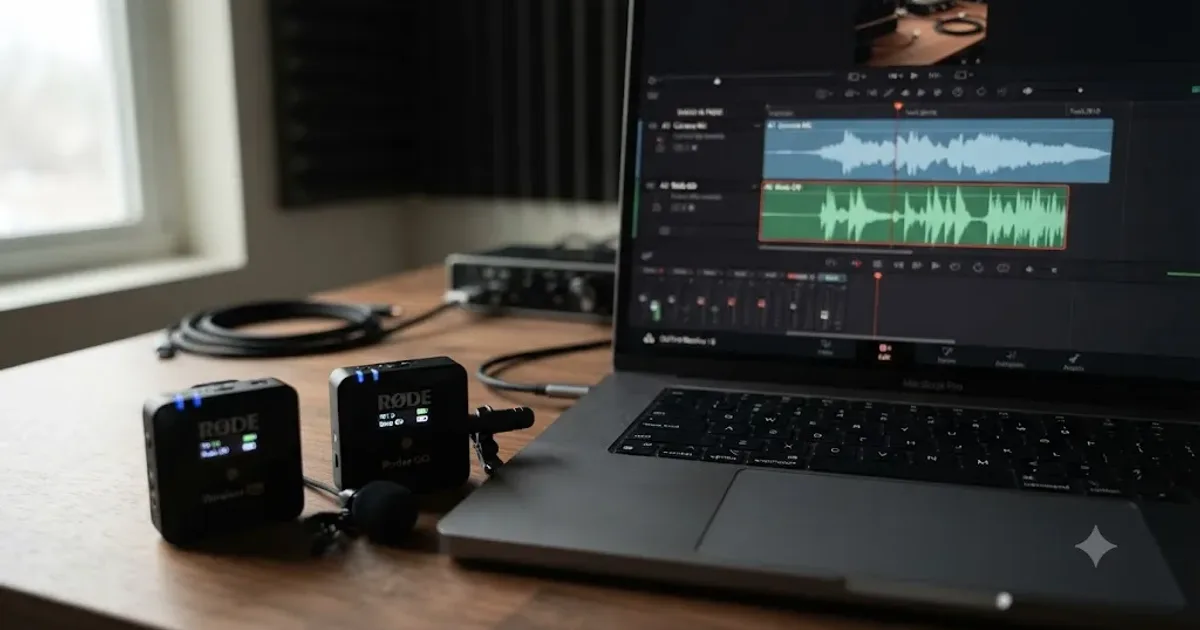
Your camera's built-in mic caught a room. Your Rode Wireless Go caught a voice. Now you have two files that need to become one, and DaVinci Resolve doesn't know they belong together until you tell it.
This is the single most common audio setup for solo creators right now: one camera, one lav or clip-on transmitter, and a receiver that either fed the camera live or recorded its own file that needs importing separately. None of it is complicated once you've done it twice. The first time, it's a lot of new nouns (transmitter, receiver, onboard recording, Auto Sync Audio) for what is, underneath, a five-minute job. Here's every step, every model difference that changes the steps, and every way this goes wrong.
Which Rode Wireless Go model do you actually have?
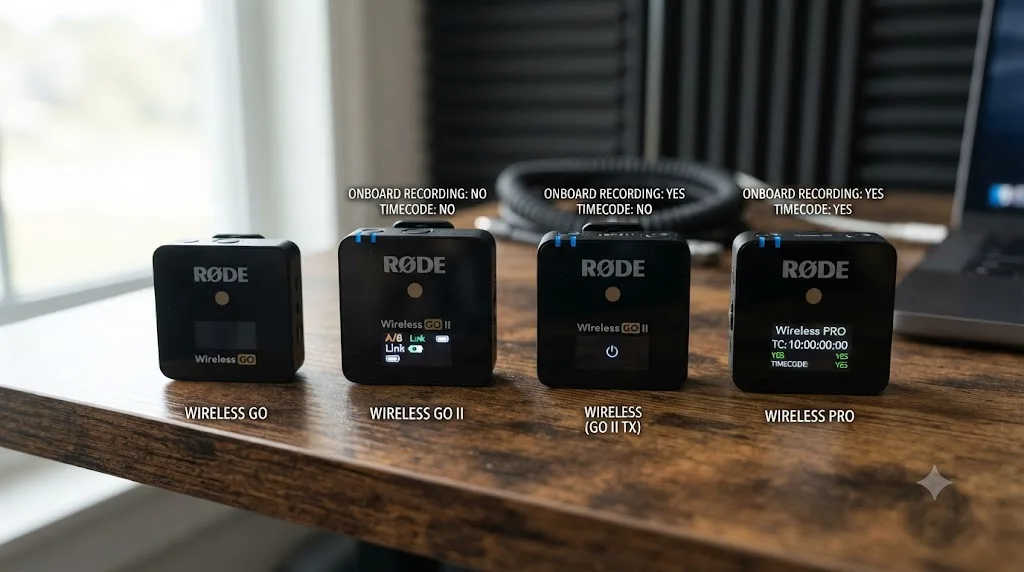
"Rode Wireless Go" gets used as a catch-all the way "Kleenex" covers every tissue, but Rode currently sells several genuinely different products under that family name, and the one you own changes what this whole workflow looks like.
The original Wireless GO has no onboard recording at all. It's a single-channel, mono transmission system with roughly 230 feet of range, and whatever it sends to your camera or receiver in real time is the only copy that exists, per Rode's own comparison of the two generations. If that's what you're holding, there's no offload step to worry about: your audio is already sitting on whatever device you recorded it into.
The Wireless GO II changed that. It added onboard recording, dual-channel transmission from two transmitters to one receiver, roughly 656 feet of range, and digital wireless latency in the 3.5 to 4 millisecond range, according to the same Rode comparison document. This is the model this guide focuses on, because it's the one that actually needs an import workflow: a file lives on the transmitter until you go get it.
Rode has since released a Wireless GO (Gen 3), a newer two-person system that adds 32-bit float onboard recording, per Rode's Gen 3 product page, and Rode still sells a step up from the whole GO line called Wireless Pro, which brings a genuinely different feature to the table: built-in timecode. We'll get to why that matters, and when it's actually worth paying for, later in this guide.
| Model | Onboard recording | Channels | Timecode | Who it's for |
|---|---|---|---|---|
| Wireless GO (original) | None, live transmission only | Single, mono | No | Simple one-transmitter setups, largely superseded now |
| Wireless GO II | Yes, WAV, 48kHz/24-bit | Dual (2 transmitters to 1 receiver) | No | Most solo and small-crew creators, the focus of this guide |
| Wireless GO (Gen 3) | Yes, 32-bit float | Dual | No | Creators who want extra headroom against clipped takes |
| Wireless Pro | Yes, 32-bit float, ~32GB (40+ hours) | Dual | Yes, SMPTE LTC | Multi-camera or multi-recorder productions |
| Wireless Micro | None, real-time transmission only | Single | No | Budget streaming and simple run-and-gun setups |
A Rode transmitter without onboard recording has nothing to import, because there's nothing stored on the device itself. If you're running the original GO or a Micro, everything in the sections below about offloading files doesn't apply to you; your workflow is whatever recorded the live feed, whether that's your camera's audio input or a separate recorder.
Should you record onboard, or plug the receiver straight into your camera?
The Wireless GO II gives you two genuinely different ways to capture audio, and picking the wrong one for your setup is where a lot of this workflow's confusion starts.
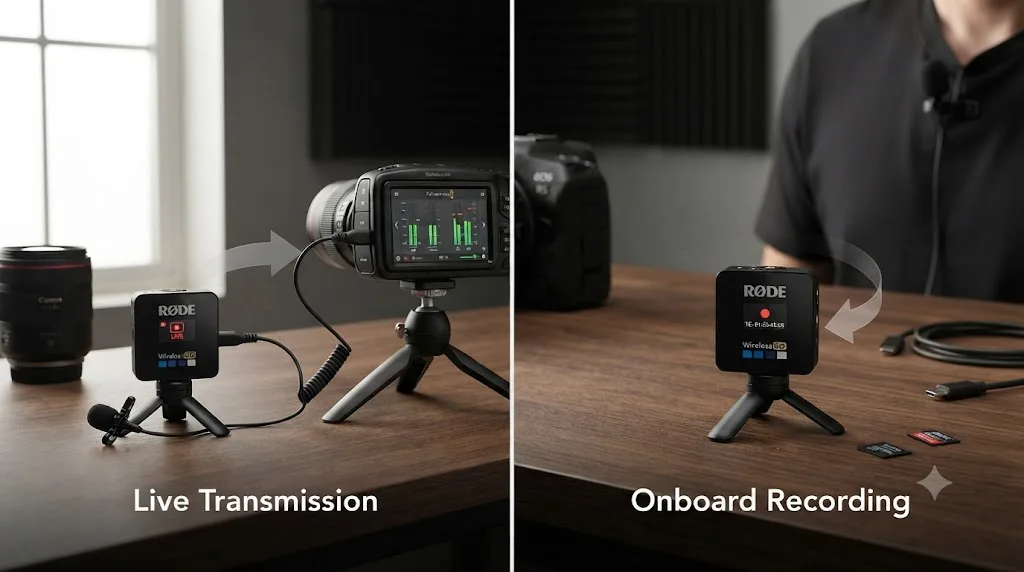
Onboard recording stores audio directly to the transmitter's own memory, independent of whatever your camera is doing. Rode's own documentation confirms uncompressed recordings run at 48kHz, 24-bit WAV, with roughly 7 hours of capacity before the oldest material starts getting overwritten, or up to 40-plus hours if you switch to compressed mode instead, per Rode's explainer on the GO II's on-board recording and export modes. This is the safety-first option: your audio exists even if the wireless link drops out mid-take, your camera's battery dies, or you simply forgot to plug the receiver in at all.
USB direct-connect treats the receiver as a class-compliant USB microphone. Connect it to a computer with the supplied cable, select "Wireless GO II RX" as your input device, and any recording app on that machine captures live audio straight through, per Rode's own guide to connecting the Wireless GO II to a computer or laptop. Rode specifically frames this as useful for lectures, presentations, and vlogging content where you need distance from the recording device but still want mic-close audio quality rather than a stationary desktop mic picking up room echo.
| Method | What you get | Best for | Import step needed |
|---|---|---|---|
| Onboard recording | A separate WAV file living on the transmitter | Backup safety, situations where the wireless link might drop | Yes, offload via Rode Central or USB drive mount |
| USB direct to computer | Live audio straight into your recording app | Standing-back-from-camera setups, screen recording, webinars | No, it's already a file on your machine |
| Direct into camera audio input | Live audio recorded as your camera's own audio track | Simple single-camera shoots where you don't want a second file to manage | No, but you lose the onboard backup entirely |
Most solo creators end up combining the first and third rows: feed the receiver into the camera live for convenience, and leave onboard recording running on the transmitter as insurance. If the camera audio ends up clean, you never touch the onboard file. If something goes wrong (a bad cable connection, a dropped wireless packet, a camera that recorded a channel muted), the onboard WAV is still there waiting.
The onboard recording on a Wireless GO II exists specifically so a bad cable, a dead camera battery, or a dropped wireless packet never costs you the take. Treat it as your insurance policy, not your only copy, and you'll rarely need this guide's troubleshooting sections at all.
How do you get the WAV files off your Rode transmitter and onto your computer?
If you recorded onboard, the audio is sitting on the transmitter until you retrieve it, and Rode gives you two ways to do that.
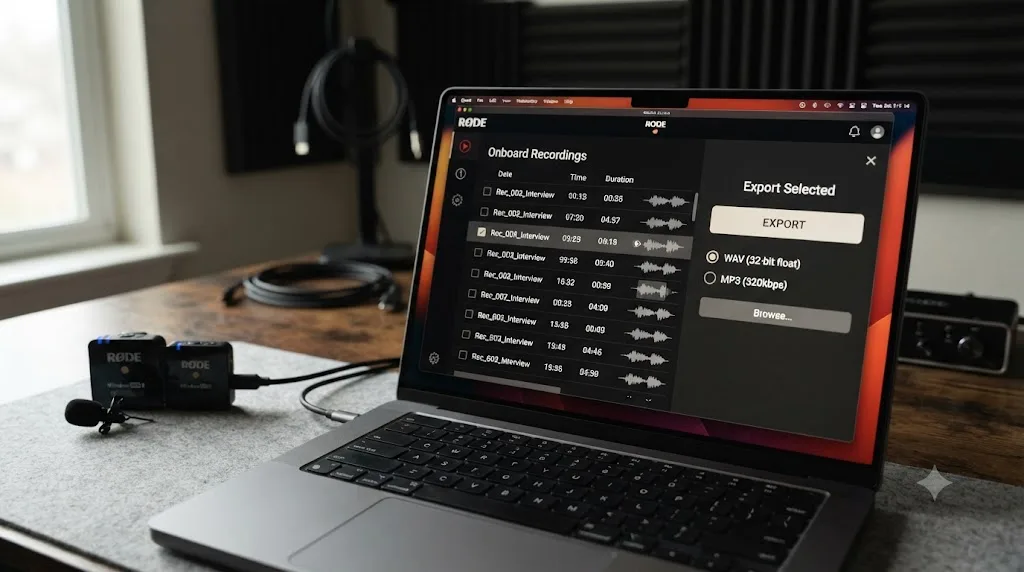
The intended path is Rode Central, Rode's free companion app for macOS and Windows. Connect the transmitter by USB-C, and Rode Central lists every recording newest to oldest in its left-hand column, splitting anything over an hour into separate blocks automatically, per Rode's own guide to using Rode Central with the Wireless GO II. Select a recording and click Export, and you can choose MP3, 24-bit PCM WAV, or 32-bit float WAV as your output format.
One detail worth knowing before you spend time organizing files: renaming a recording inside Rode Central only changes what you see inside that app, on that computer. A file renamed in Rode Central looks renamed only inside Rode Central itself, because the transmitter's own storage never learns the new name. Plug the same transmitter into a different machine and Rode Central there won't show your renamed version; it'll list the recording under whatever it was called originally. If you're handing off transmitters between shooters or computers, export and rename on the machine doing your actual edit, not earlier in the chain.
There's a second, faster path if you recorded in uncompressed mode: the transmitter mounts as an ordinary USB mass-storage drive when connected, letting you drag the WAV files off directly without opening Rode Central at all, confirmed in the same Rode Central user guide. This skips the export step entirely, useful if you're in a hurry and don't need the file renamed or converted.
- Connect the transmitter to your computer with a USB-C cable.
- Open Rode Central, or, for uncompressed recordings, open the transmitter as a mounted drive in Finder or File Explorer.
- In Rode Central, select the recording you want and click Export, choosing WAV (24-bit PCM is the safe default for editing) or MP3.
- If using the drive-mount method instead, copy the WAV file directly to your project's media folder.
- Repeat for both transmitters if you ran a two-person dual-channel setup.
What do you do if Rode Central won't detect your transmitter?
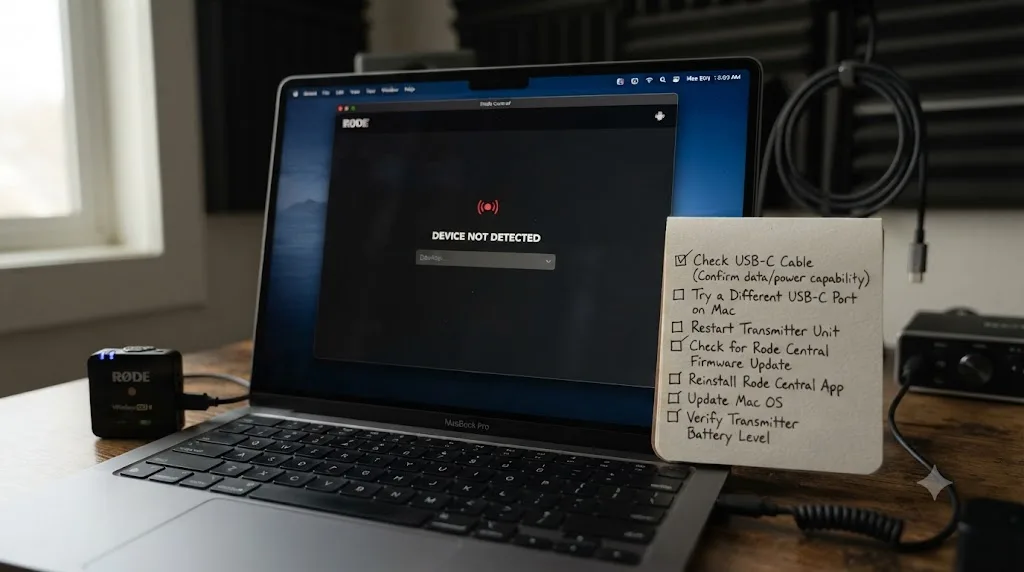
Sometimes you plug the transmitter in and Rode Central just sits there, empty, like nothing is connected at all. This happens often enough that Rode has a whole troubleshooting path built around it, and almost none of it involves anything actually being broken.
Start with the obvious. Use the USB-C cable that came in the box, not a random one from a drawer. Some third-party cables are charge-only and carry no data, which means the transmitter powers up fine but never actually talks to your computer. Try a different USB port too, ideally one connected straight to your computer rather than through a hub or dock, since some hubs don't pass through the data connection reliably.
One more wrinkle worth checking: the Wireless GO II's transmitters and receiver all share the same USB-C port for charging and data, so it's easy to grab the wrong cable off a charging hub that only delivers power. If your transmitter's light comes on and it clearly starts charging, but Rode Central's device list stays empty, that's usually the tell that you're on a charge-only cable rather than an actual hardware fault. Swap to the cable Rode included in the box, or a cable you know supports data transfer, before troubleshooting anything else.
If the cable and port check out, the next suspect is firmware. Rode Central needs the transmitter to run compatible firmware before it'll reliably show up in the app's device list, and an out-of-date transmitter can appear to just not connect, per Rode's own guide to performing a firmware update on the Wireless GO II. Update Rode Central itself first, since an old version of the desktop app can fail to recognize a transmitter running newer firmware, or vice versa.
A transmitter that won't show up in Rode Central is almost never a hardware failure. It's a cable, a port, or a firmware mismatch, in roughly that order of likelihood. Work through those three before you assume anything is actually broken.
If Rode Central's diagnostic tool throws a "Firmware Update Flag set" error specifically, Rode's documented fix is a factory reset on the affected unit, followed by running the diagnostic test again to confirm the flag has cleared, per Rode's help center article on the Firmware Update Flag set error. A factory reset clears your saved settings, channel pairing, and gain levels, so it's worth noting those down first if you've customized anything.
Occasionally a firmware update itself goes wrong and leaves the transmitter stuck in bootloader mode, showing no response at all. Rode's fix here is specific: press and hold the transmitter's power button for 15 to 20 seconds to force it back on, then retry the update once it boots normally. It looks like a dead unit until you know that one button hold fixes it.
None of this is unique to a Rode Wireless Go workflow specifically. It's the same category of problem you'd hit with any USB peripheral that needs a driver handshake before your computer trusts it. The difference is that a transmitter stuck in this state can quietly cost you your onboard recording too, since you can't export a file from a device Rode Central refuses to see. Sort out the connection before you assume a recording is lost.
Should you export your Rode recording as MP3 or WAV?
Rode Central offers three export formats when you pull a recording off the transmitter: MP3, 24-bit PCM WAV, or 32-bit float WAV, per Rode's own user guide to exporting recordings with Rode Central. For anything landing in a DaVinci Resolve timeline, the choice matters more than it looks.
WAV is uncompressed. Every sample the microphone captured is still there, which means Resolve's Fairlight tools, noise reduction, EQ, compression, loudness normalization, all have full-resolution audio to work with. MP3 throws information away permanently to shrink the file, and that lost information is exactly the kind of subtle detail noise reduction and de-essing plugins rely on to work cleanly.
Export as WAV by default. Reach for MP3 only when file size matters more than editing headroom, like sending a rough cut to a client over a slow connection. For anything that's actually going into a Resolve timeline for real editing, the smaller MP3 file isn't saving you time. It's costing you options you won't get back.
24-bit PCM WAV is the practical default for most solo creators: full editing quality, broadly compatible with every version of Resolve, and not so large that it becomes a storage headache. 32-bit float WAV goes a step further, capturing a wider dynamic range that gives you extra headroom if a take got louder than expected, similar in principle to how a camera's log profile protects highlight detail you'd otherwise clip. Unless you're specifically fighting unpredictable, loud subjects and want that extra ceiling, 24-bit PCM covers this workflow without the larger file size of 32-bit float.
| Format | File size | Editing quality | Best for |
|---|---|---|---|
| MP3 | Smallest | Lossy, permanently discards audio data | Quick rough cuts, sending files over a slow connection |
| 24-bit PCM WAV | Medium | Full quality, standard dynamic range | The default choice for most Resolve editing |
| 32-bit float WAV | Largest | Full quality, extended dynamic range | Loud, unpredictable subjects where clipping is a real risk |
There's also a longer-term reason to default to WAV: interview and documentary footage often gets revisited months or years later, for a different cut, a different platform, or a reason nobody expected at the time of the shoot. An MP3 exported once can't be un-compressed later. A WAV file sitting untouched in an archive folder keeps every future edit possible, at the cost of a few hundred extra megabytes per hour of audio, storage that's genuinely cheap compared to needing audio you no longer have in full quality.
Whatever format you pick, keep the sample rate consistent with the rest of this guide's advice: 48kHz, matching your camera and your Resolve project, regardless of whether you chose MP3, 24-bit WAV, or 32-bit float WAV as the file type.
What sample rate and bit depth should your Rode recording match?
This is the single detail most likely to cause a sync headache that looks like a Resolve problem but is actually a recording-settings problem.
The Wireless GO II's uncompressed onboard recording is 48kHz, 24-bit WAV by default, per Rode's own explainer on its recording and export modes. That matches the sample rate almost every modern camera and every DaVinci Resolve project defaults to. The risk isn't usually the Rode transmitter itself. It's an older camera, a phone, or a screen recording tool that's still capturing audio at 44.1kHz, the CD-audio-era standard, next to a Rode file at 48kHz.
Editor and trainer Larry Jordan lays out exactly why this matters for sync specifically, not just tone: a sample rate mismatch between two audio sources doesn't just risk a pitch or speed difference, it actively works against anything trying to keep them locked together over time, per his article on solving problems caused by mismatched audio sample rates. A thread on Blackmagic's own forum shows the practical version of this: an editor reporting that Resolve was forcing an unexpected sample rate on import, throwing off exactly the kind of multi-source project this guide describes, per the Blackmagic Design forum thread on Resolve forcing the wrong sample rate.
A Rode Wireless Go recording at 48kHz next to a camera clip recorded at 44.1kHz will drift out of sync the longer the clip runs, even if the very first frame looked perfectly matched. That's the same signature as a frame rate mismatch covered in our multicam sync troubleshooting guide: a fixed, fake sync that quietly falls apart, because the two clocks producing your audio were never actually running at the same speed. Two clocks that start together but tick at different rates always separate further the longer they run, whether the mismatch is a frame rate between cameras or a sample rate between an audio recorder and a camera's own audio track.
Check both settings before you shoot, not after. Confirm your Rode transmitter's recording rate in Rode Central's settings, confirm your camera's audio sample rate in its own audio menu, and confirm your Resolve project's setting under Project Settings, then Master Settings, then Video and Audio I/O. All three at 48kHz means nothing downstream in this guide will drift on you.
How do you bring Rode audio and camera footage into the same DaVinci Resolve project?
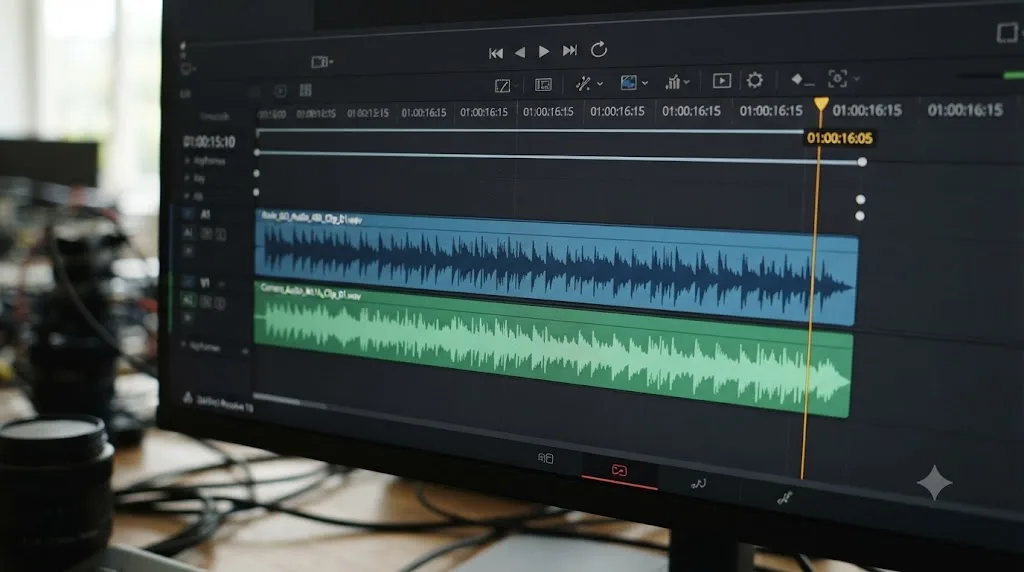
Once you've got a WAV file (either exported from Rode Central, dragged off the mounted transmitter, or already recorded live into your camera) the import itself is ordinary Resolve media handling, with one habit worth building early.
Open the Media page or the Media Pool on any page, and either drag your files in from Finder or File Explorer, or use the Media Storage browser to navigate to wherever you've stored them. Bring in your camera clip and its matching Rode audio file into the same bin. If you shot a multi-scene project, a folder-per-scene structure with both the video and its matching audio sitting together saves you from hunting across scattered bins later when you're trying to remember which lav track goes with which take.
Give both files a moment after import before you try to sync them. Resolve needs to generate a waveform for any newly imported audio clip, and syncing before that analysis finishes can produce a failed or nonsensical match, the same issue that shows up on multi-camera projects with large batches of fresh footage. If you're working off a spinning hard drive rather than an SSD, that analysis takes noticeably longer; give it an extra minute before assuming something's broken.
Name your files something you'll recognize once they're mixed into a bin with a dozen others. A Rode recording exported straight out of Rode Central without renaming can carry a generic, unhelpful filename, and since renaming inside Rode Central doesn't survive a transmitter swap, the actual rename-to-something-useful moment for most editors is right here, during import into Resolve, not earlier in the chain.
Renaming your Rode audio file at import time, not earlier, is the one moment in this entire workflow guaranteed to actually stick, since Rode Central's own renaming lives only inside that app and the transmitter's storage never learns it.
How do you use Auto Sync Audio to line up Rode audio with your footage?
This is the step that actually earns this guide's title, and it's shorter than everything leading up to it.
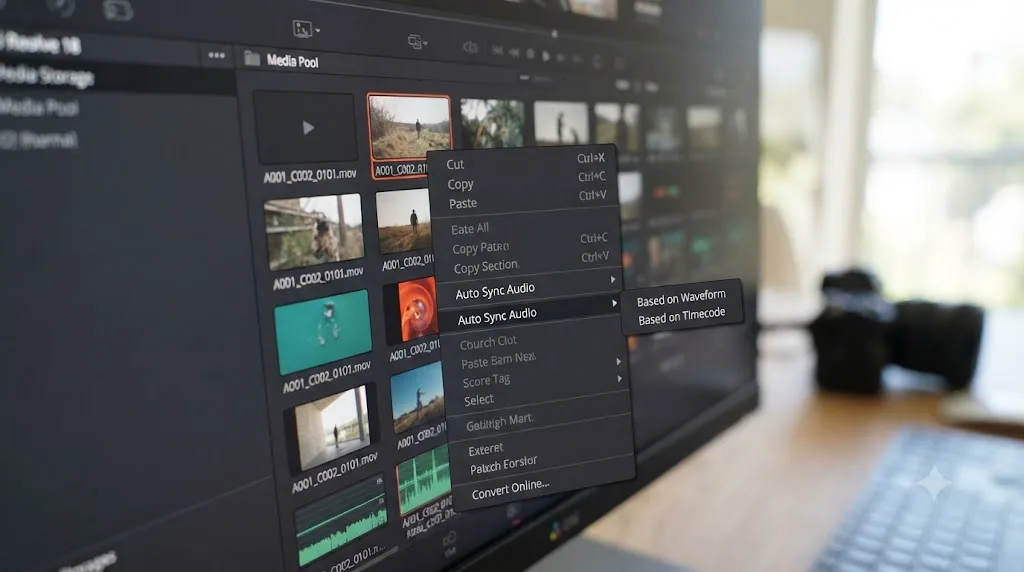
Select both the video clip and its matching Rode audio clip together, either in the Media Pool or on the Edit page's timeline. Right-click the selection and choose Auto Sync Audio. You'll be offered a choice between syncing by Waveform or by Timecode, along with options to either replace the clip's existing audio or append the synced track as an additional one, per a walkthrough of the feature from 2 POP Support, CalArts' post-production technical support resource.
For the setup this guide covers, one camera and one Rode transmitter with no shared timecode source, Waveform is almost always your answer. Timecode sync only works if both devices agree on the exact same running clock, which requires jam-syncing hardware neither the GO II nor a typical consumer camera has. Waveform sync instead compares the shape of the sound captured on both files, the actual pattern of peaks and valleys in the audio, and finds the point where they match.
Waveform sync compares the shape of two recordings, not how loud either one is, so a lav mic pressed against a shirt and a camera's built-in mic six feet away can still line up correctly even though the two sound completely different up close. That's the whole trick behind why this works even when your two audio sources sound nothing alike: a loud clap sounds like a loud clap whether it's captured an inch away or across a room, and the algorithm is matching the pattern, not the volume.
- Import your camera clip and Rode audio file into the same bin.
- Select both clips together, either in the Media Pool or on the timeline.
- Right-click the selection and choose Auto Sync Audio.
- Choose Based on Waveform (unless you have a genuine shared timecode source).
- Choose whether to replace the camera's original audio or append the Rode track as an additional one.
- Play back the result and confirm the two tracks line up on a shared reference point, a clap, a door, a hard consonant.
Appending rather than replacing is worth doing as a default habit, at least until you trust the sync. It costs nothing to keep the original camera audio muted underneath as a reference, and it means you're never one accidental deletion away from losing your only sync anchor.
How do you sync two Rode transmitters for a two-person interview?
Everything above assumes one transmitter and one voice. A sit-down interview usually means two of each, and the Wireless GO II's dual-channel design changes a couple of decisions before you ever open Resolve.
The first decision happens on the receiver itself, before you shoot: Merged mode or Split mode. In Merged mode, both transmitters get mixed together onto both the left and right channels of whatever the receiver feeds, camera or recorder. In Split mode, each transmitter's audio lands on its own channel instead, one speaker left, one speaker right, so you can adjust each person's level independently in post, per Rode's own explainer on the Wireless GO II's Merged and Split modes. You switch between them by pressing and holding both buttons on the bottom of the receiver at once, and the receiver's display shows one meter for Merged, two meters for Split, so you can confirm which mode you're actually in before you start rolling.
For a two-person interview you plan to edit, Split mode is almost always the right call, because a guest who talks over their host or trails off quietly becomes a five-second fader adjustment instead of a problem baked permanently into a single mixed file. Merged mode is the better choice when there's no editing step at all, a livestream or a direct upload where you need one balanced file and nothing more.
Syncing a Split-mode recording to camera works exactly like the single-transmitter workflow already covered, with one extra step. Both channels arrive as a single stereo WAV file if you recorded onboard, or as a two-channel feed if you ran the receiver straight into your camera. Import that file alongside your camera clip, select both together, and run Auto Sync Audio set to Waveform the same way. Resolve syncs the whole stereo file as one unit against the camera's picture; you don't need to sync each speaker separately, since they share the exact same clock and the exact same recording start point.
Once it's synced, split the stereo track into two mono tracks inside Fairlight if you want to treat each speaker's audio independently, adding separate EQ, compression, or noise reduction per person rather than one pass across a combined file. That's a mixing decision, not a sync one, and it's the entire reason Split mode exists in the first place.
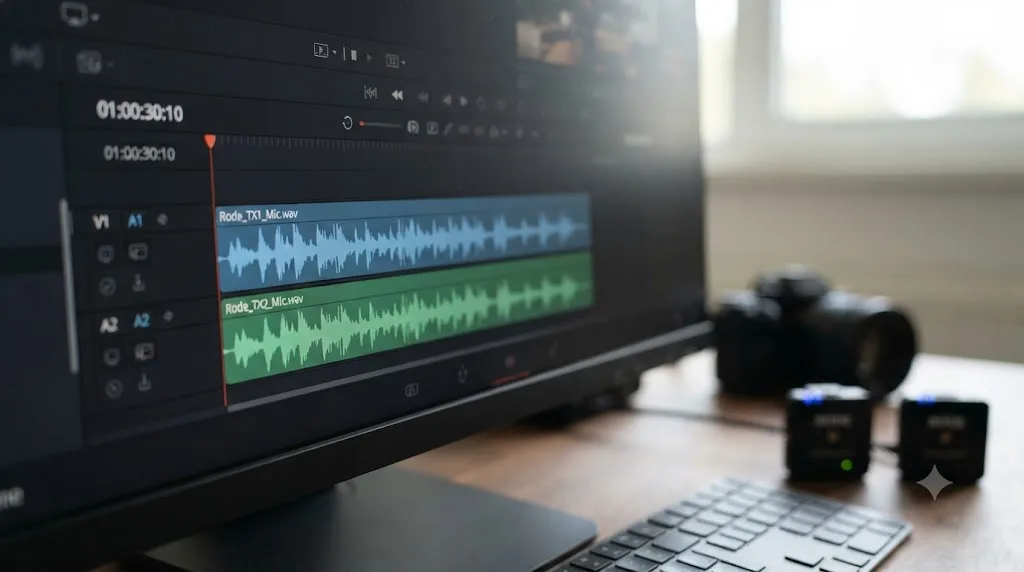
If you're running two separate transmitters recording onboard rather than feeding a shared receiver, you'll have two individual WAV files instead of one stereo file. Import both alongside your camera clip, select all three clips together, camera footage and both audio files, and Auto Sync Audio handles multi-clip selections the same way it handles a pair. Confirm each speaker's audio actually lines up against a shared reference point in the room, like a clap at the start, since two transmitters recording independently have no guarantee of starting at the exact same frame the way a shared receiver feed does.
Naming matters more here than in the single-transmitter workflow, since you're juggling two audio sources that both need to land in the right spot. A simple convention, HOST_lav.wav and GUEST_lav.wav, or the speaker's actual name, saves you from guessing which file belongs to which chair once you're three interviews into a shoot day and everything is sitting in one folder. If a Split-mode sync looks wrong, check that the receiver was actually in Split mode for the whole recording and not switched mid-take, since toggling modes partway through a take can produce a channel swap that looks identical to a bad sync at first listen.
What do you do when Auto Sync Audio fails or picks the wrong point?
Waveform sync is a pattern match, not a measurement, and every so often it either can't find a match at all or locks onto the wrong moment. Both failures have specific, fixable causes.
The most common cause of an outright failure is a camera track with too little usable sound to compare against anything. If your on-camera mic was picking up almost nothing, a distant subject, a muted setting, dead air in a quiet room, waveform sync has no real pattern on that side to match to your Rode recording. Play both clips' audio in the Source viewer before you assume the sync tool is broken. If the camera track is close to silent there, no setting inside Resolve fixes that; the problem is upstream of Resolve entirely.
A second common failure is a selection mistake. Auto Sync Audio needs both the video clip and its paired audio clip selected together. Selecting only the video, or only the Rode file, gives Resolve half the information it needs, and the result looks identical to a genuine sync failure even though the actual cause is what you clicked. This exact pattern shows up in editor discussions of multi-source audio and video syncing on Blackmagic's own forum, where posters troubleshooting exactly this kind of multi-mic setup traced their failures back to selection and file-pairing mistakes rather than a broken feature, per a Blackmagic Design forum thread on syncing audio and video with multiple sources.
A wrong match, rather than an outright failure, tends to show up when the audio on both tracks is too similar and too repetitive for the algorithm to find a distinct anchor point, a steady hum, ambient wind, or a long stretch of near-silence before anything distinctive happens. If your sync looks off by a consistent amount across the whole clip, scrub to a sharper, more distinct sound, a clap, a hard consonant, a door closing, and manually nudge the clip into place against that reference using the period and comma keys, the same frame-by-frame nudge tool used to fix multicam sync errors covered in our multicam sync guide.
| Symptom | Likely cause | Fix |
|---|---|---|
| Auto Sync Audio fails outright, no match found | Camera track has little to no usable audio | Play both clips in Source viewer; if camera audio is near-silent, sync manually instead |
| Sync looks off by the same amount throughout | Both tracks are too similar or repetitive for a clean match | Nudge with period/comma keys against a sharp shared reference like a clap |
| Menu option seems missing entirely | Only one clip selected, or wrong page | Select video and audio clips together in Media Pool or Edit page, then right-click |
| Sync starts fine but drifts worse over time | Sample rate or frame rate mismatch between sources | Confirm 48kHz on every source; resample the mismatched one, don't just relabel it |
| Waveform hasn't generated yet on a fresh import | Resolve hasn't finished analyzing the clip | Wait a minute or two after import, especially on hard drives, before syncing |
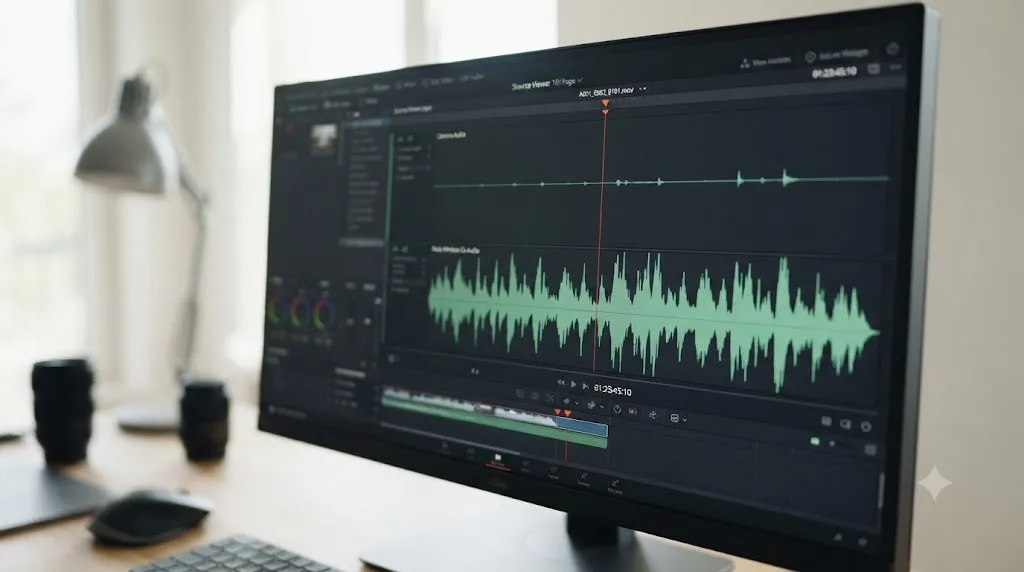
Should you sync on the Edit page, or use the Cut page's Sync Bin instead?
Resolve gives you more than one place to sync audio and video, and they're not quite the same tool wearing different names.
The Auto Sync Audio command described above lives in the Media Pool and Edit page's right-click menu, and it's a one-time operation: you select clips, run it, and the result is baked into a new synced clip or an appended track. The Cut page has a related but distinct feature, the Sync Bin, which groups clips carrying matching timecode automatically as they land in it, without you manually triggering a sync command at all. Editors on Blackmagic's own forum have specifically flagged confusion between the two, including at least one user who initially couldn't find an auto-sync option because they were looking on the wrong page for it, per a Blackmagic Design forum thread on auto sync audio in the free version of Resolve.
For a Rode Wireless Go workflow specifically, that distinction mostly resolves itself: the Sync Bin's automatic grouping depends on matching timecode metadata, which a GO II doesn't generate. The Sync Bin will happily do nothing useful with a Rode WAV file and a camera clip that share no timecode. Auto Sync Audio's Waveform option, run manually from the Media Pool or Edit page, is the tool built for exactly this situation instead.
If you later add a Wireless Pro to your kit and start jam-syncing real timecode across devices, the Sync Bin becomes genuinely useful, grouping angles and audio automatically as they're imported rather than requiring a manual sync command per clip. Until then, treat the Cut page's automatic grouping as a feature for a different setup than the one this guide covers, and do your syncing manually through Auto Sync Audio instead.
Auto Sync Audio and the Sync Bin are separate tools solving separate problems, one syncing on command by comparing sound, the other grouping automatically by reading matching timecode metadata that a Wireless GO II simply doesn't produce. Reach for whichever one your hardware actually supports, not whichever one happens to be easiest to find.
What is the safety channel, and does it belong in your Resolve project?
If you're recording in the Wireless GO II's Merged mode, you have access to a feature worth understanding before you need it: the safety channel.
It's not a second microphone or a different perspective on the sound. It's the exact same signal, recorded again at a level roughly 20dB quieter than your main track, existing purely so that if your subject suddenly shouts, laughs loudly, or gets closer to the mic than expected and the main channel clips into distortion, you have an unclipped backup sitting right alongside it, per Rode's own explanation of how the Wireless GO II's safety channel works. It's only available in Merged recording mode, and it's toggled on inside Rode Central before you record, not after.
The safety channel is not a second microphone capturing a different sound, it is the same signal recorded quieter, existing purely to catch the one moment your subject shouts and the main track clips. You will not need it on most takes. You will be extremely glad it exists on the one take where you didn't.
Bringing it into your Resolve project is optional busywork most of the time. Export the safety channel alongside your main track when you offload files, and drop it into your project bin unused, muted, sitting there as an unglamorous insurance file. If a specific clip's main audio clips audibly during playback, check the safety channel for that same section instead of trying to rescue distortion with EQ or compression after the fact; a clipped waveform has genuinely lost information no amount of processing gets back, while the safety channel simply never clipped in the first place.
You don't need to sync the safety channel separately. It was recorded on the exact same transmitter at the exact same moment as your main channel, so once your main Rode track is synced to picture, the safety channel shares that same timing automatically, as long as you keep both files' start points aligned when you import them.
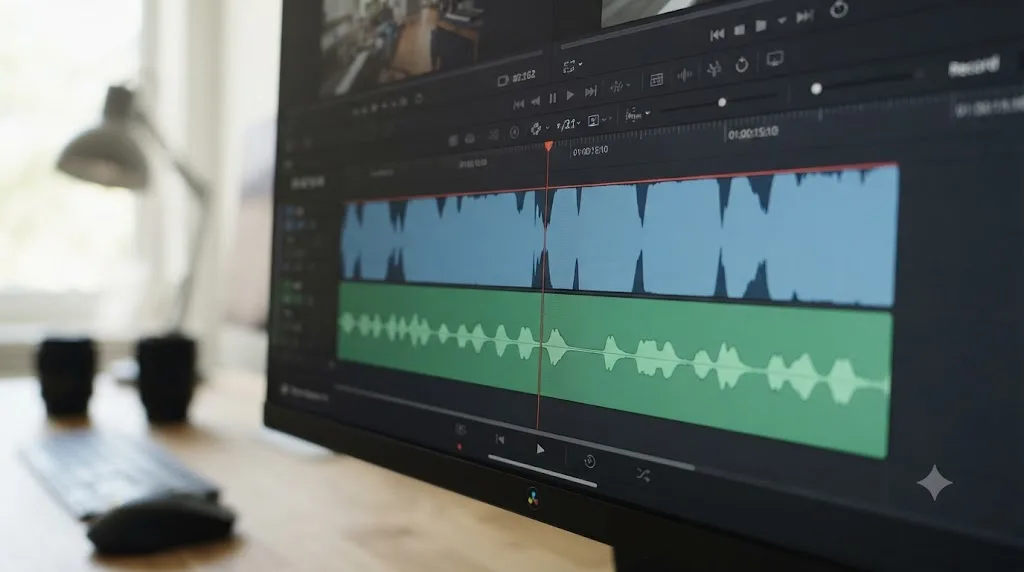
Do you need a Rode Wireless Pro's timecode, or is waveform sync enough?
Once you understand what timecode actually buys you, this becomes an easy decision instead of an anxious upgrade question.
Wireless Pro adds a built-in SMPTE LTC timecode generator, 32-bit float onboard recording, and roughly 32GB of storage per transmitter, good for 40-plus hours, and it retails at $399 including a charging case and two Lavalier II mics, per Rode's own Wireless PRO product page. Timecode turns sync from a pattern-matching guess into a direct number lookup: every device sharing the same jam-synced clock means Resolve doesn't need to compare waveforms at all, it just reads matching numbers off each file.
Reviewer Erik Naso, testing the Wireless Pro for Newsshooter, made a point specifically relevant to Resolve users:
"DaVinci Resolve supports LTC timecode natively, whereas Premiere Pro and Final Cut Pro do not."
That's from his full review of the Rode Wireless Pro's 32-bit float recording and timecode features, and it's a genuine advantage if you're already a Resolve editor working multi-camera: the software you're already using reads this format directly, no third-party plugin or workaround required.
But timecode solves a problem you may not actually have. Its real value shows up on multi-camera shoots, or any setup running a separate audio recorder alongside more than one camera, where every device needs to agree on a shared clock so an editor isn't stuck comparing waveforms across four or five sources with different acoustic characteristics. Timecode is a feature you buy for multi-camera and multi-recorder productions, not for a single camera paired with a single wireless mic. A solo creator with one camera and one Wireless GO II gets the exact same practical result, correctly synced audio, from a five-second waveform sync as a Wireless Pro owner gets from a jam-synced timecode match. The Pro's advantage is speed and certainty at scale, not a capability the GO II lacks for this specific one-camera setup.
Worth knowing if you do go the Wireless Pro route: its internal recordings split at one-hour boundaries the same way GO II recordings do, but at least one user on Blackmagic's own forum has reported that split not landing precisely on a timecode frame boundary, creating small gaps that complicate syncing a long recording, per a Blackmagic Design forum thread describing the issue. Even a hardware timecode generator isn't a complete guarantee against every possible sync headache; it's a meaningfully better starting point, not a magic one.
| Scenario | Recommended tool | Why |
|---|---|---|
| One camera, one wireless mic, solo creator | Wireless GO II + Auto Sync Audio (Waveform) | No shared clock to jam-sync anyway; waveform gets the same result |
| Two or more cameras, same audio source | Wireless Pro + timecode | A shared clock avoids comparing waveforms across multiple angles |
| Separate audio recorder plus multiple cameras | Wireless Pro + timecode | Timecode reads directly in Resolve without a plugin |
| Interview with two lav mics, single camera | Wireless GO II (dual channel) + Auto Sync Audio | Two channels sync as one operation against the single camera track |
Do you need any of this for a quick vertical video or social clip?
Not always. If you're recording a thirty-second talking-head clip for social media, alone, in a quiet room, with the receiver feeding your phone or camera live, the entire offload-and-sync workflow this guide describes might be more process than the footage needs.
The sync problem this guide solves exists specifically because you have two separate files that need to line up: a camera clip and a Rode recording captured independently. If your Rode receiver is feeding your camera or phone's audio input live, and that's the only audio you're using, there's no second file and nothing to sync. Import the one clip into Resolve, trim it, and you're done. Onboard recording only becomes worth retrieving if something about that live feed actually failed, a dropped connection, a muted channel, a level that clipped.
Where this changes is scale. A single thirty-second clip doesn't need this workflow. A week of daily vertical clips, recorded the same way every time, benefits from deciding your recording method once instead of re-deciding it every shoot. If you know you'll always feed the receiver live into your camera and never touch the onboard file, turning onboard recording off entirely simplifies your card management with nothing lost, since Merged mode's uncompressed recording quietly uses up the transmitter's roughly 7 hours of storage on files you'll never open, per Rode's own explainer on the Wireless GO II's recording and export modes.
Most creators land on "always record onboard, rarely retrieve it" somewhere around the first time a live feed actually failed and cost them a usable take. Before that happens, skipping onboard recording for quick, low-stakes clips feels like the efficient choice. After it happens once, the extra card space and the ninety seconds of Rode Central export start looking like cheap insurance instead of a wasted step.
The one habit worth keeping even for quick social clips: check your sample rate once, at the start of a shoot day, not per clip. A phone camera set to 44.1kHz next to a Rode transmitter at 48kHz creates the exact same drift problem on a fifteen-second reel as it does on a twenty-minute interview. The clip is just short enough that you might not notice the drift before you've already published it.
What do you do with the camera's built-in audio once Rode audio is synced?
Once your Rode track is synced and confirmed clean, the camera's original audio becomes a decision, not a requirement.
If you appended the synced Rode audio as a new track rather than replacing the camera's audio outright, you now have both sitting in your timeline. Mute the camera's original track rather than deleting it immediately. It's your sync reference if anything ever needs re-checking, and it's a backup if the Rode file turns out to have a problem you didn't catch on first listen, a dropout, an unexpected clip, a channel that wasn't actually recording what you thought.
Once you've confirmed the Rode track plays clean start to finish, across the whole take, not just the first few seconds, you can safely delete the camera's audio track from your final timeline, or leave it muted indefinitely if storage isn't a concern. There's no technical requirement to remove it; it's purely about keeping your timeline uncluttered once you trust the synced result.
From here, your synced Rode track is just audio in a DaVinci Resolve project, and the rest of the standard audio pipeline applies. If the recording has background noise you want cleaned up, our background noise removal guide covers the Fairlight Noise Reduction plugin and Voice Isolation. If you're building a fuller mix with music or multiple mic sources, our Fairlight mixing guide walks through buses, EQ, and compression from a clean starting point. And before you export, checking your final level against a real target, rather than eyeballing a meter, is covered in our loudness normalization and LUFS guide.
What do two real workflows look like, start to finish?
Here's the entire process applied to two realistic setups, one solo, one a two-person interview, so you can see how the same core steps flex depending on how many voices you're recording.
Scenario one: a solo product review. One camera on a tripod, one Rode Wireless GO II transmitter clipped to the creator's shirt, receiver mounted on the camera's cold shoe and also feeding the camera's audio input live as a backup reference.
Before shooting. The transmitter is set to Merged recording mode with the safety channel enabled, recording onboard at 48kHz, 24-bit. The camera's own audio input is confirmed to be recording at 48kHz too, matching the transmitter, and the Resolve project this footage will land in is already set to 48kHz under Master Settings.
During the shoot. The receiver feeds the camera's audio input live, so the camera file already has a scratch reference track. Onboard recording runs the whole time as backup. A twenty-minute take covers three different topics with a short pause between each.
After the shoot. The camera's memory card gets copied over first, as usual. The Rode transmitter connects to a laptop by USB-C, and Rode Central shows one twenty-minute recording, since it stayed under the one-hour split threshold. It gets exported as a 24-bit PCM WAV, alongside its matching safety channel file, and renamed to match the shoot's naming convention.
In Resolve. Both the camera clip and the exported Rode WAV land in the same project bin. They're selected together and run through Auto Sync Audio, set to Waveform, appending the Rode track rather than replacing the camera's audio outright. Playback confirms the sync lines up cleanly against several hard consonants scattered through the twenty minutes, not just the opening seconds.
Cleanup. The camera's original audio gets muted, kept as reference. A brief background hum, room tone from the HVAC system, gets handled with the Noise Reduction plugin on the Rode track. The safety channel sits untouched in the bin, since nothing in the take actually clipped. Final loudness gets checked against the creator's usual YouTube target before export.
Scenario two: a two-person interview. The setup is a host and a guest across a table, one camera, two Wireless GO II transmitters clipped to each speaker, receiver mounted on the camera in Split mode.
Before shooting. The receiver is switched to Split mode, confirmed by its two separate meters. Both transmitters are set to record onboard at 48kHz, 24-bit, matching the camera's own audio settings, in case anything goes wrong with the live Split-mode feed into the camera.
During the shoot. The receiver feeds both channels live into the camera's stereo audio input, host on the left channel, guest on the right. A thirty-minute conversation runs with a couple of pauses where the guest steps out of frame briefly.
After the shoot. Both transmitters connect to a laptop over USB-C. Rode Central shows one onboard recording per transmitter, each exported as 24-bit PCM WAV, since the live camera feed came through clean and the onboard files end up as unused backup.
In Resolve. The camera clip, already carrying both speakers on separate stereo channels from the live Split-mode feed, gets imported on its own, no second audio file needed since nothing failed during the shoot. The stereo track is split into two mono tracks in Fairlight, one per speaker, so each gets independent noise reduction and leveling before the mix.
Cleanup. The guest's channel needed a small EQ boost where they leaned back from their lav mid-conversation. The host's channel needed none. Split mode made that a two-minute fix instead of a re-record. Total active time in Resolve for this interview, from import to a mixed, split-channel timeline ready for a rough cut, was under ten minutes, most of it spent listening back to confirm both channels sounded right rather than fighting the software.
Nothing in either sequence required a purchase beyond the transmitters themselves, a jam-synced timecode source, or more than about ten minutes of active Resolve work once the files existed on the computer. That's the entire point of this guide existing: the workflow sounds like it has a lot of moving parts described in prose, and it takes barely any time at all once you've walked through it once.
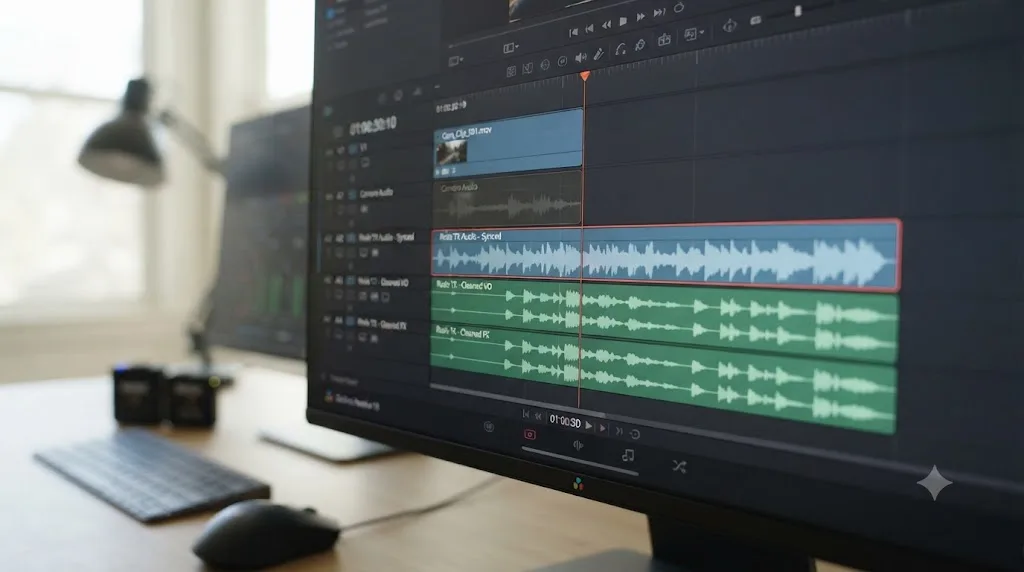
What are the most common Rode Wireless Go and Resolve problems, and how do you fix them?
A quick-reference table for the specific failures this setup produces most often, matched to their actual cause rather than a generic guess.
| Problem | Likely cause | Fix |
|---|---|---|
| Files won't show a waveform yet | Resolve hasn't finished analyzing a fresh import | Wait a minute or two, especially on a hard drive, before syncing |
| Auto Sync Audio fails with no match found | Camera audio has too little usable sound to compare | Check both clips' audio in Source viewer; sync manually if camera track is near-silent |
| Sync looks right at the start, worse by the end | Sample rate or frame rate mismatch between sources | Confirm every source is genuinely at 48kHz, resample the mismatched device rather than relabeling it |
| Renamed file shows its old name on a different computer | Rode Central renames live only inside that app's own database | Rename during import into Resolve instead, where it actually sticks |
| A long recording split into two separate files mid-take | Onboard memory automatically breaks recordings at roughly one hour | Import both parts and sync each to its matching section of camera footage |
| USB direct-connect audio sounds fine solo but the sync command finds no match | Two very different acoustic environments confuse waveform matching | Manually nudge to a sharp shared reference, a clap or hard consonant, instead |
| Main channel sounds distorted on a loud moment | The take clipped and there's no way to un-clip lost information | Check the safety channel for that same section instead of trying to repair it with EQ |
| Auto Sync Audio option seems to be missing from the menu | Only one clip selected, or looking on the Cut page instead of Media Pool/Edit page | Select both clips together in the Media Pool or Edit page, then right-click |
| Rode Central won't detect a connected transmitter | Charge-only cable, wrong USB port, or outdated firmware | Swap to a data-capable cable, try a direct port, update Rode Central and the transmitter's firmware |
| Two-person interview sync sounds wrong on one channel | Receiver switched between Merged and Split mode mid-recording | Confirm the receiver stayed in one mode for the whole take before assuming a bad sync |
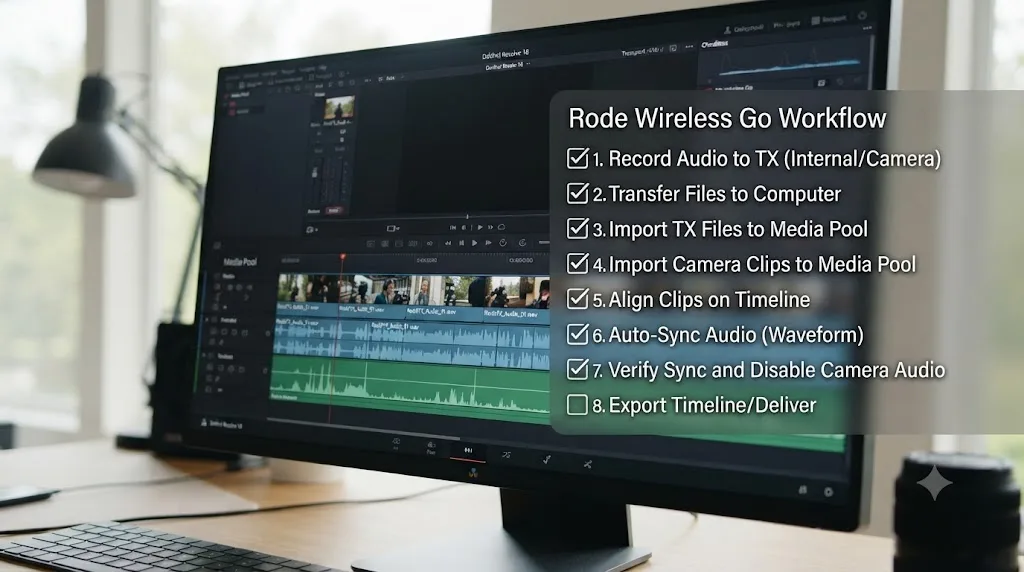
What's the fastest way to do this whole workflow, start to finish?
Work through these in order. Most shoots need nothing past step six.
- Before you shoot, set your Rode transmitter to 48kHz, 24-bit, matching your camera and your Resolve project's own settings.
- Choose your recording method: onboard for a self-contained backup, USB direct-connect if you want audio to land straight in your recording app with no separate file to manage.
- Offload the files through Rode Central, exporting as WAV, or drag them directly if you recorded uncompressed and the transmitter mounted as a drive.
- Import both clips into the same Media Pool bin: your camera footage and its matching Rode audio file.
- Select both together and right-click, choosing Auto Sync Audio, set to Waveform for a single-camera, no-shared-timecode setup.
- Confirm the sync against a sharp, distinct sound spread through the clip, not just the opening seconds, since a fixed offset and a growing drift look identical at frame one.
- If it fails, check both clips' audio in the Source viewer for a near-silent camera track, confirm both files were actually selected together, and manually nudge against a clap or hard consonant if waveform matching can't find a clean anchor.
- Clean up and mix the synced result: mute or delete the camera's original audio once you trust the sync, run noise reduction if needed, and check loudness before export.
If juggling Rode Central's export settings, Resolve's sample rate menus, and the Auto Sync Audio options is the part that actually eats your afternoon, that's a reasonable thing to want help with while you're still learning where everything lives. TryUncle is the on-screen assistant for DaVinci Resolve on macOS. Ask in plain words, and Uncle points at the exact control on your screen. If you're mid-import and can't remember whether Auto Sync Audio lives on the Edit page or the Cut page, TryUncle looks at your actual window and points at the control instead of sending you back to a guide like this one for a setting you needed twenty seconds ago.
Is this workflow overkill for a simple solo shoot?
No, and the reason is worth saying plainly: the extra file and the extra sync step buy you audio quality your camera's built-in mic was never going to deliver, regardless of how good the camera itself is.
A lav mic or clip-on transmitter sitting inches from a subject's mouth will always beat a camera mic several feet away, because distance is the enemy of clean audio in a way no amount of camera-body engineering fixes. A five-minute sync step is a small price for audio that would otherwise require re-recording, looping dialogue, or living with a mix that never quite sounds professional. That trade is almost always worth it, and it gets faster every time you do it, until eventually the whole workflow, transmitter to offload to import to synced timeline, takes less time than writing out these steps did to read them.
Where the extra gear stops paying for itself is timecode specifically, not the wireless mic itself. A Wireless GO II and DaVinci Resolve's free Auto Sync Audio tool solve the one-camera, one-mic problem completely, at no cost beyond the transmitter you likely already own. Save the Wireless Pro upgrade for the day you're actually running multiple cameras or a separate recorder that genuinely needs a shared clock, not as a reflexive upgrade for a workflow that was never the bottleneck in the first place.
Sync your Rode audio once, confirm it against a real reference point rather than just the first second of playback, and the rest of your edit gets to be about the cut, not the audio.
Frequently asked questions
- How do I get audio from my Rode Wireless Go into DaVinci Resolve?
- Two paths. If you recorded onboard, connect the transmitter to your computer and use Rode Central to export the WAV files (or drag them off directly, since an uncompressed recording also mounts the transmitter as a USB drive). If you recorded live straight into your camera or a separate recorder over the receiver's USB-C output, that audio is already a file on your card. Either way, import the resulting WAV alongside your camera clip into Resolve's Media Pool.
- What sample rate should I record on my Rode Wireless Go for DaVinci Resolve?
- Match your camera and your project: 48kHz, 24-bit. Rode's onboard recording on the Wireless GO II already records uncompressed audio at 48kHz/24-bit, so the risk isn't the transmitter, it's an older camera or a phone recording at 44.1kHz instead. A mismatch doesn't just sound wrong, it makes a fixed sync slowly drift the longer the clip runs.
- Why won't DaVinci Resolve's Auto Sync Audio line up my Rode Wireless Go recording with my footage?
- The most common cause is a camera track with too little usable sound for waveform matching, a muted or very distant on-camera mic, or extremely quiet room tone. Play both clips' audio in the Source viewer first. If your camera track is close to silent, waveform sync has nothing to compare against. Confirm both the video clip and its matching Rode audio file are selected together before you right-click, since selecting only one produces the same apparent failure.
- Does the free version of DaVinci Resolve support Auto Sync Audio?
- Yes, based on consistent reports from users running the free version on Blackmagic's own forum. Auto Sync Audio isn't listed as a Studio-exclusive feature anywhere in Blackmagic's Studio comparison materials, and free-version users routinely describe using it. If the option seems to be missing for you, check that you've selected clips together in the Media Pool or Edit page rather than looking for it in the wrong menu.
- What is the Rode Wireless Go II's safety channel, and should I bring it into Resolve?
- It's a second, quieter copy of the same signal, recorded roughly 20dB below the main track, that exists purely to save a take if your subject suddenly shouts and the main channel clips. It's only available in the transmitter's Merged recording mode. You don't need it in your timeline day to day, but it's worth exporting alongside your main track and keeping in your project bin as insurance on any take where levels got unpredictable.
- Should I use Split mode or Merged mode when recording a two-person interview with two Rode Wireless Go transmitters?
- Use Split mode if you plan to edit in post-production, since it puts each speaker on their own channel so you can adjust levels independently, per Rode's own explainer on the Wireless GO II's Merged and Split modes. Use Merged mode only for a direct upload or livestream with no editing step, since it combines both speakers into one balanced file with less flexibility afterward.
- Should I get a Rode Wireless Pro instead of a Wireless GO II for editing in DaVinci Resolve?
- Only if you're shooting multi-camera or running a separate audio recorder that needs to share an exact clock. Wireless Pro adds a built-in SMPTE timecode generator that the GO II doesn't have, which turns sync into a direct number match instead of a waveform guess. For one camera and one wireless mic, a single-person setup most solo creators actually run, DaVinci Resolve's waveform-based Auto Sync Audio gets you the same result without the extra cost.
- Why does my Rode Wireless Go audio drift out of sync only in the second half of a long clip?
- That pattern points to a frame rate or sample rate mismatch, not a bad sync match. A one-time wrong sync stays wrong by the same fixed amount for the whole clip. A gap that grows means two devices are running on clocks that disagree, most often a camera or phone recording at 44.1kHz or a slightly off frame rate against your Rode recording's 48kHz. Check every source's actual sample rate before you resync anything.
Sources
- RODE: Wireless GO II On-Board Recording and Audio Export Modes Explained
- RODE Help Center: Wireless GO II vs. Original Wireless GO: Key Differences
- RODE Help Center: How does the Wireless GO II's safety channel work?
- RODE: How to Connect the Wireless GO II to a Computer or Laptop
- RODE: Wireless GO II - Using RODE Central (User Guide)
- RODE: Wireless PRO product page
- RODE: Wireless GO (Gen 3) product page
- RODE Help Center: Does the Wireless Micro Transmitter have onboard recordings?
- Newsshooter (Erik Naso): Review of the RODE Wireless Pro 32-bit float recorder with timecode
- 2 POP Support (CalArts): Auto Syncing Audio and Picture in DaVinci Resolve
- DaVinci Resolve Manual: Syncing Audio to Video by Matching Waveforms (Blackmagic Design)
- Blackmagic Design Forum: Auto sync audio - Free version of Resolve
- Blackmagic Design Forum: (PSA) RODE Wireless Pro file split bug (internal rec)
- Blackmagic Design Forum: Workflow - audio and video syncing with multiple of each
- Larry Jordan: Solving Problems Caused by Audio Sample Rates that Don't Match
- Blackmagic Design Forum: Davinci Forces wrong Sample Rate
- RODE: Wireless GO II 'Merged' and 'Split' Modes: What They Are and When to Use Them
- RODE Help Center: How to Perform a Firmware Update with the Wireless GO II
- RODE Help Center: "Firmware Update Flag set" Error - RODE Central
Put this guide to work with TryUncle.
Ask about the step you’re on. TryUncle sees your screen and points at the control you need, so you can keep learning in your own project.
Get TryUncle for Mac or WindowsKeep reading
Guides · Jul 11, 2026 · 31 min
How to Mix Audio in DaVinci Resolve Using Fairlight
Mix audio in DaVinci Resolve's Fairlight page: build a dialogue/music/effects bus structure, gain-stage your clips, EQ and compress dialogue, then duck music under it.
Fixes · Jul 10, 2026 · 29 min
How to Remove Background Noise from Audio in DaVinci Resolve
Remove background noise from audio in DaVinci Resolve with the Fairlight Noise Reduction plugin, De-Hummer, Gate, or Voice Isolation. Exact settings, in order.
Fixes · Jul 8, 2026 · 26 min
DaVinci Resolve Multicam Sync Off by Frames: Every Fix
Multicam clip off by frames or drifting worse over time? Fix DaVinci Resolve's waveform mis-sync, frame rate drift, and timecode gaps, angle by angle.