Articles / Guidesupdated for DaVinci Resolve 21.0 (September 2026)
How to Blend Stock Footage Into a Documentary Edit
Quick answer
To blend stock footage into a documentary edit, use it as motivated B-roll, then match its framing, motion, exposure, color, texture, and ambient sound to the surrounding scene. Keep the interview or narration as the editorial anchor, cut stock on meaning, and test the sequence with sound before you finish.
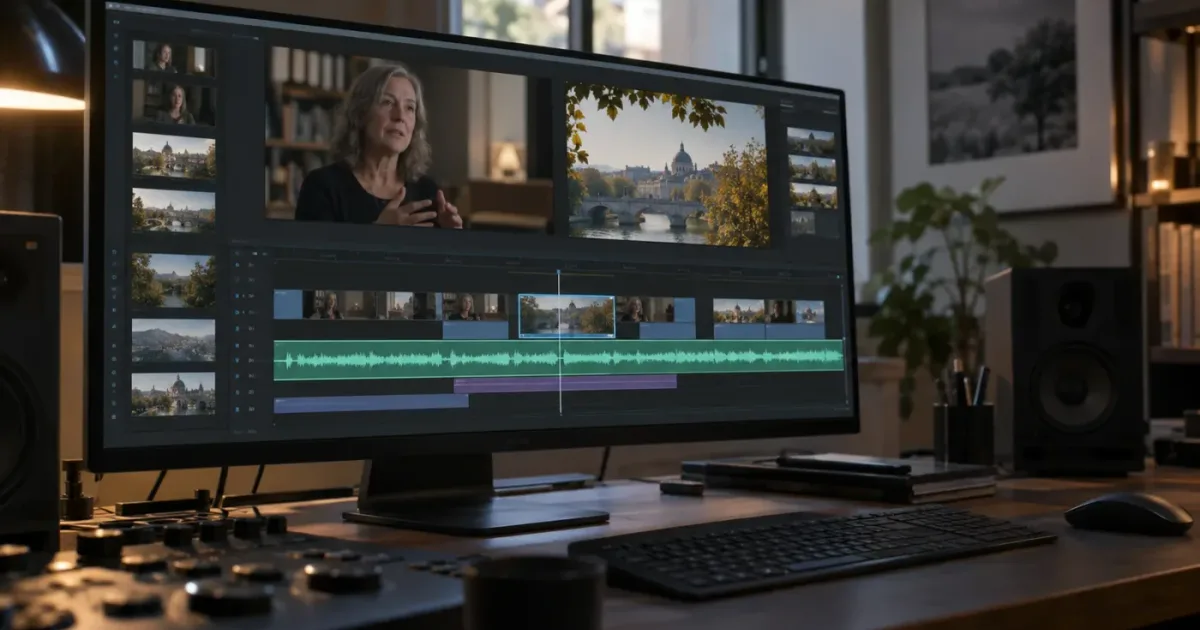
Stock footage can rescue a documentary scene. It can also expose a weak one. I use it when the picture can carry a real piece of the argument, not when the edit simply needs something pretty to fill a gap. The difference is visible in the cut and audible in the soundtrack.
As of September 2026, this workflow is written for DaVinci Resolve 21. Blackmagic Design lists the final Resolve 21 release in June 2026 and identifies Mac, Windows x86, Windows ARM, and Linux support on its support page. The method works in the free application unless a specific source, effect, or third-party asset says otherwise. Blackmagic's Resolve 21 support information is the place to check your exact build.
What does it mean to blend stock footage into a documentary edit?
Blending stock footage into a documentary edit means making a licensed, separately produced shot behave like a useful part of the film's argument. The shot must fit the story beat, the viewer's understanding of the scene, and the picture and sound around it.
That definition matters because "blend" doesn't mean "make every shot look identical." A documentary may move from a quiet interview to an old photograph, a licensed aerial view, a close-up of a machine, and back to the speaker. Those sources can stay visibly different. What must feel continuous is the editorial intention.
I divide the job into four questions:
| Question | What a successful answer sounds like | What to change when the answer is weak |
|---|---|---|
| Why is this shot here? | It proves, clarifies, locates, or contrasts with the spoken idea. | Replace it or remove it. |
| Does the shot belong to the scene? | Its direction, light, scale, and pace feel motivated. | Reframe, retime, grade, or move the edit point. |
| Does the sound belong? | Dialogue remains grounded and the cut has a believable acoustic bridge. | Add or repair ambience, then automate the transition. |
| Could the viewer misunderstand it? | The image doesn't imply a false event, person, date, or place. | Label it, qualify it, or choose another shot. |
The first question is the gate. If the answer is only "the clip looks cinematic," the stock footage hasn't earned its place. A visually impressive shot can still weaken a documentary by adding a claim the narration never made.
The best stock cutaways usually perform one of these jobs:
- They show a place the production couldn't reach.
- They show a process that would be unsafe, too expensive, too slow, or impossible to film during the interview.
- They compress time, such as a season changing, a city waking, or a long trip.
- They give the audience a visual pause while a voice continues.
- They create a deliberate contrast between what a person says and what the wider world looks like.
The fifth use needs care. Contrast is an editorial decision. It isn't permission to place a random disaster shot under a calm sentence and let the audience infer a connection.
Walter Murch describes the value of a meaningful transition this way: “As we make transitions from scene to scene, the transitions themselves are provoking us to question what we just saw.” Murch's point applies to stock footage because the viewer notices the change in source. Give that change a reason, and it becomes part of the documentary's thinking. Leave it unexplained, and it can feel like an interruption. The full Walter Murch interview is available here.
Stock footage belongs in a documentary when it carries a story function that the original camera material cannot carry by itself.
How do I decide whether stock footage belongs in a shot?
Decide whether stock footage belongs by writing the sentence it illustrates before you search for the image. If you can't finish that sentence without using vague words such as "vibe" or "energy," you probably need a clearer editorial reason.
Try this four-line test for every candidate:
The viewer hears __________________________________.
The viewer sees ___________________________________.
The relationship between them is __________________.
The shot should end when __________________________.
For example:
The viewer hears that the river floods every spring.
The viewer sees water moving through a residential street.
The relationship is a concrete image of the risk being described.
The shot should end when the interview turns to the family's response.
That test protects you from collecting a folder full of beautiful but interchangeable images. It also gives you a search brief. You aren't looking for "cinematic river." You're looking for water entering homes, with a camera position and time of day that can sit beside the speaker's account.
Choose evidence before atmosphere
Evidence footage shows the thing being discussed. Atmosphere footage establishes feeling or place. Both have a role, but they make different promises.
If a subject says, "The factory runs all night," a time-lapse of a city skyline is atmosphere. A close-up of a rotating machine, a lit loading bay, or workers changing shifts may be evidence. The right choice depends on what the sentence means. Don't let the most polished search result decide the meaning for you.
Use atmosphere when the narration needs breathing room, when a location must be introduced, or when you want to hold an emotion without adding new information. Use evidence when the picture should answer a question the audience has just heard.
Use a decision table before the search bar
| Editorial problem | Stock footage that can help | Stock footage that usually hurts |
|---|---|---|
| The viewer can't picture the location | A wide establishing shot with a clear geographic relationship | A generic skyline with no identifiable connection |
| The interview has a visual jump | A cutaway that shares the subject's action or eyeline | A random beauty shot that changes the subject |
| The narration compresses time | A sequence whose changes are easy to read | A speed-ramped clip that announces itself as an effect |
| The subject describes a process | A detail or wider view of that process | A staged action that looks like proof of this exact event |
| The film needs a pause | A quiet, observational shot with compatible sound | A loud, high-motion clip that resets the scene's energy |
The last column is not a ban. It is a warning. You can break the pattern when the break is the point, but you should know what the viewer will infer from it.
Ask what the shot says about a person
Documentaries often use stock footage near a real person. A person walking through a city can accidentally become a stand-in for the interview subject. A crowd can suggest the subject's community. A close-up of a worried face can turn a general statement into an emotional claim about one individual.
Before you keep the shot, ask whether a reasonable viewer could believe the person on screen is the person being discussed. If yes, either replace it, make the illustrative nature clear, or use a less identifying image. A shallow depth of field doesn't remove the implication. It can make the implication stronger.
How do I prepare stock footage before cutting?
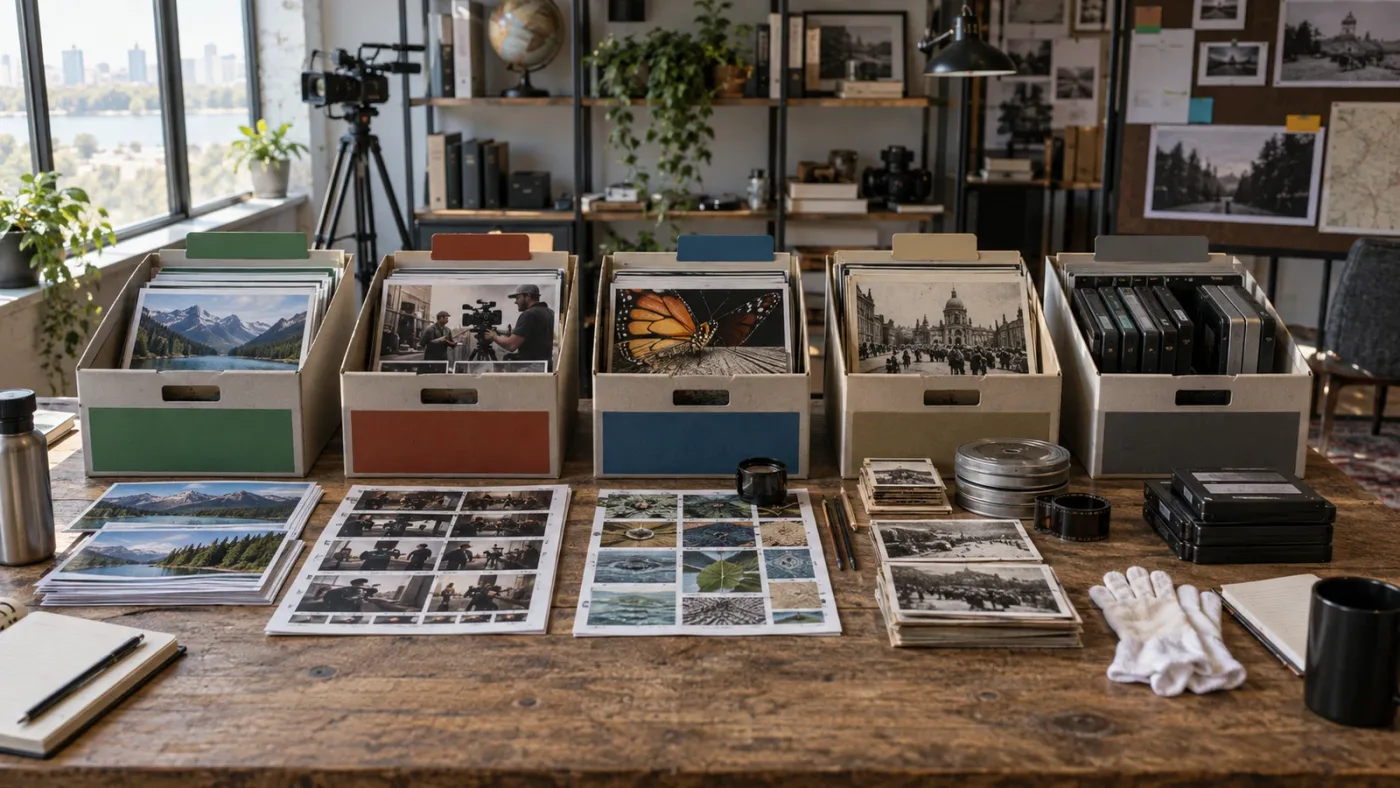
Prepare stock footage as editorial material, not as a pile of downloads. Separate it from original media, inspect the complete shot, and write down the source and intended use before the clip reaches the timeline.
The preparation pass is where you catch problems that are expensive to discover after a picture lock. You can still change a search result when it sits in a bin. You may not want to rebuild the scene when the producer has approved the cut around it.
Build a stock bin that answers questions
In the Media page, create a bin named for the documentary or sequence, then add sub-bins that describe the editorial job. A useful set might be:
STOCK
  01_LOCATION
  02_PROCESS
  03_PEOPLE_AS_ILLUSTRATION
  04_ARCHIVE_OR_TEXTURE
  05_MAYBE
  06_USED
The names are less important than the separation. "Used" is valuable because it keeps you from accidentally repeating the same hero shot in three scenes. "Maybe" protects a promising clip from contaminating your select reels before you've checked its license or implication.
Add a clip color or marker that shows its status. You can use one color for reviewed, one for selected, and one for cleared. Don't treat the color as proof of a license. It is only a reminder that sends you back to the actual record.
Review the whole clip
Don't judge a stock shot from its thumbnail or the first two seconds of a preview. Watch the shot from head to tail. Look for:
- A camera move that accelerates or stops before the part you want.
- A focus pull that makes the clip feel like an ad rather than observation.
- A hand, logo, sign, license plate, or screen that adds an unwanted claim.
- An actor's gesture that implies a specific event.
- A loop, repeated action, or digital sharpening that becomes obvious when held longer.
- Sound that belongs to the library preview rather than the actual scene.
Mark the usable range with an In and Out point in the source viewer. Then make a note of the part's job. "Blue factory light" is a look note. "Shows the loading process while the narrator explains the night shift" is an edit note. Edit notes are more useful.
Record technical facts without guessing
For each serious candidate, record the native resolution, frame rate, orientation, likely camera or color profile if supplied, and whether the preview contains a watermark. If the library doesn't state a technical detail, write "unknown" in your private notes and test the clip in a copy of the project.
Resolve 21 adds new media organization and search features. Blackmagic's official Resolve 21 What's New page describes IntelliSearch as a plain-language search tool for analyzed media. That can help you find material already in the Media Pool, but it doesn't replace human review of a downloaded stock shot. A search result can match an object while missing its editorial meaning.
Keep source records with the project
Use a text file, spreadsheet, or production database outside the timeline to record the provider, asset identifier, download date, license tier, project name, and any registration or attribution step. Keep the record with the project archive.
This is not busywork. A documentary may have a long life after the first upload. A festival, broadcaster, client, or platform may ask where a clip came from. You want to answer with a record, not a search history from a year ago.
For the general mechanics of bringing stock assets into Resolve, see our guide to using stock footage in DaVinci Resolve 21. This post starts after import and focuses on making the footage belong in the documentary's argument.
How do I match stock footage to documentary camera footage?
Match stock footage in this order: composition, movement, exposure, color, and texture. Color correction can't repair a stock shot whose camera direction or subject scale makes the cut impossible to believe.
Start with the cut, not the Color page
Place the candidate above the interview or original picture. Trim it to the exact moment that serves the sentence. Then watch the outgoing shot, the stock shot, and the incoming shot as a three-shot unit.
Check the following:
| Match point | Questions to ask | Possible fix |
|---|---|---|
| Screen direction | Does the subject travel or look in a direction that supports the next shot? | Flip only when text, logos, geography, and body mechanics remain honest. Otherwise choose another shot. |
| Camera height | Does the stock camera feel far above or below the subject material? | Crop, stabilize cautiously, or use it as a deliberate change of viewpoint. |
| Subject scale | Does a close-up suddenly become a huge wide shot without a reason? | Shorten the shot, add a bridge, or cut on a new idea. |
| Motion | Is the original handheld while stock is locked off, or vice versa? | Match the surrounding rhythm or make the change the transition. |
| Light direction | Does the key light come from the opposite side? | Reframe or choose a shot whose light supports the scene. |
| Lens character | Does one shot feel wide and near while the next feels compressed and distant? | Use the mismatch for geography or select a less distinctive shot. |
These are not demands for invisible continuity. They are prompts for deciding whether the difference is intentional. A documentary can use a formal aerial shot after rough handheld footage to widen the frame of reference. It should feel like the film has chosen a new viewpoint, not like the editor searched for "drone" and dropped in the first result.
Use the same working color pipeline
DaVinci Resolve's color page supports project color management and ACES, with controls for input, timeline, and output transformations. Blackmagic explains that the goal is more consistent decoding and display across different image formats and monitors in its official color overview.
That gives you a clean order of operations:
- Identify what the documentary camera clip expects as an input.
- Identify what the stock clip claims to be, if the provider supplies that information.
- Put both into the same working color space or transformation path.
- Balance the stock clip before applying the film's creative look.
- Compare the stock shot against the neighboring original shot at the cut, not in isolation.
If the stock clip's technical origin is unknown, don't invent a camera profile. Use a neutral transform only when you understand what it will do, then judge the result with the image and scopes. A wrong technical transform can make the footage look washed out, too contrasty, or strangely saturated, and a creative grade can hide the cause until later.
Build a repeatable node order
For a simple stock clip, use a small node structure with a clear purpose:
Node 1: input or technical transform, when needed
Node 2: exposure and white balance
Node 3: contrast and saturation balance
Node 4: local correction or window, when needed
Node 5: documentary look
Node 6: texture, when needed
You don't need six nodes for every shot. The value is knowing which node contains the decision. If the stock clip changes later, you can replace one stage instead of hunting through a single pile of corrections.
Resolve 21's New Features Guide says node stacks can now support up to eight layers, increased from four. That is a version-specific capability, not a reason to build an eight-layer tree for a two-second cutaway. Use the extra room when a real project needs it, and keep the visible structure readable for another editor. The Resolve 21 guide documents the node-stack change.
Balance with a reference frame
Pick a frame from the documentary camera material that represents the scene. It doesn't need to be the prettiest frame. It needs to show the skin, wall, sky, or practical light that the stock shot should sit beside.
Compare:
- The brightest important area.
- The darkest area where detail must remain.
- Skin or other familiar colors.
- The color of neutral surfaces.
- The relationship between warm and cool parts of the frame.
Do this at the cut. If you balance stock against a blank viewer, you'll make it correct in the wrong context. A clip can look slightly cool by itself and still be right beside a cool interview. The reverse is also true.
Decide when not to match
Don't force archival material, surveillance footage, old photographs, or an intentional flashback into the same finish as the principal photography. Give the source a clear treatment and make the transition deliberate.
The choice is not "match everything" versus "ignore the mismatch." It is "hide the source difference" versus "use the source difference as information." The audience should know which one you chose.
Our separate guide to color matching different cameras in DaVinci Resolve goes deeper on matching camera sources. For this workflow, remember the key order: story, cut, composition, color.
Why does stock footage look too clean, sharp, or digital?
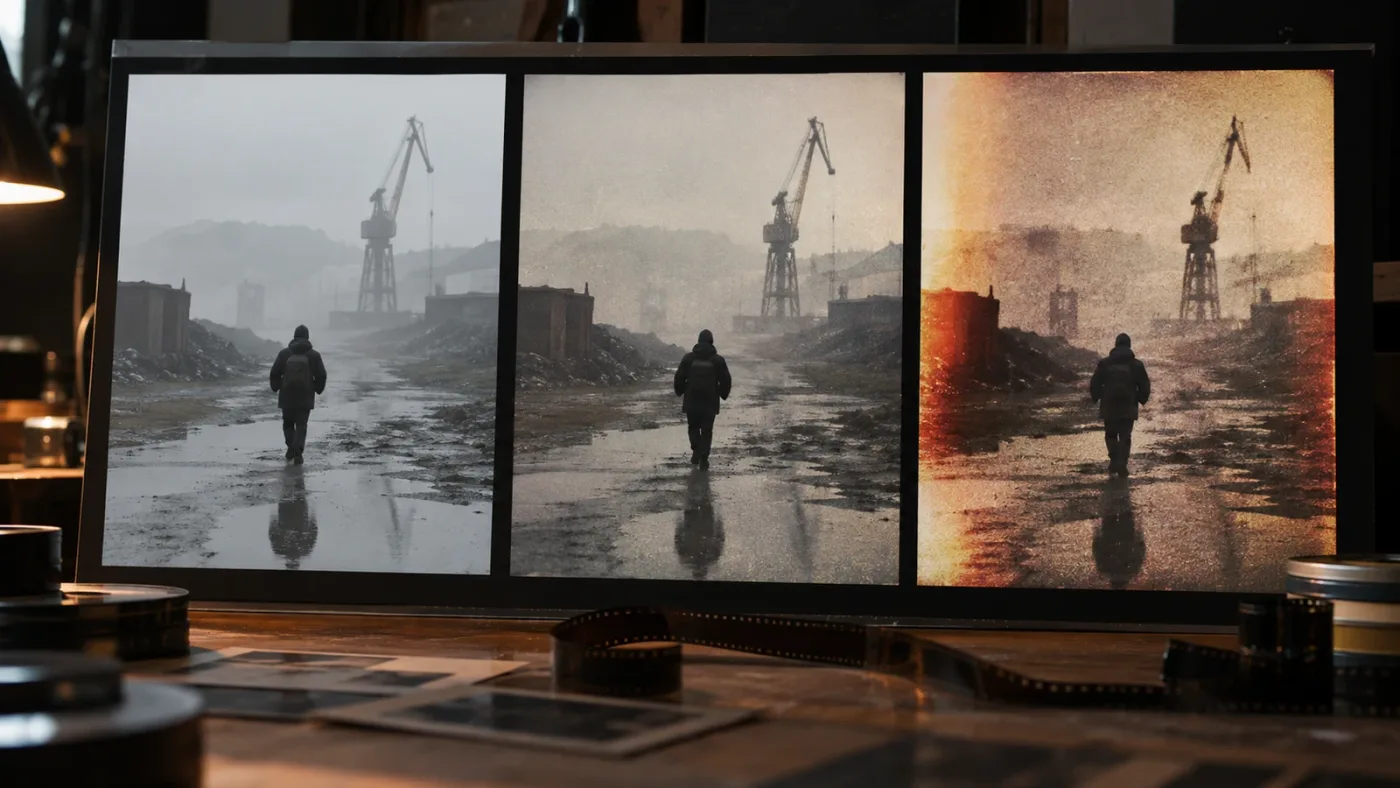
Stock footage looks too clean, sharp, or digital when its texture and motion make a different promise from the documentary footage around it. Treat sharpness, noise, grain, halation, contrast, and motion cadence as one texture problem, not as a single slider.
Find the most visible difference
Pause on the cut and ask what your eye notices first. Is it the stock clip's crisp foliage? Its perfect highlights? Its low-noise shadows? Its stabilized movement? Its heavy camera blur? Fix that difference first.
If you apply grain before solving a framing or exposure mismatch, the shot may still feel separate. Texture is a finishing layer. It can't create the camera behavior that wasn't recorded.
Use Resolve 21's film tools with restraint
The Resolve 21 New Features Guide describes Film Look Creator controls and presets that include parameters such as halation, grain, bloom, and vignetting. It also documents a default 35mm film preset and a grain pattern. Those are available tools, not a universal documentary recipe. Read the relevant section in Blackmagic's Resolve 21 guide before relying on a version-specific control.
Start with the smallest useful change. Add texture to the shot that needs it, then compare the shot at its actual duration. If the viewer notices "film grain" before they notice the content, you have made the effect the subject.
Match noise before adding grain
Noise and grain aren't the same problem. Noise follows exposure and the sensor or compression history. Grain is a designed texture. If the original documentary clips have visible digital noise, adding a stylized grain pattern over clean stock can make both shots feel processed without making them feel related.
You can test three versions:
- The stock clip with only color balance.
- The stock clip with a light texture adjustment.
- The stock clip with a stronger texture treatment that becomes part of the transition.
Watch all three in context and choose the least noticeable version that solves the problem. When the strongest version wins, make sure the scene has a reason for the change.
Treat stabilization as a creative decision
A locked-off stock shot can sit next to handheld footage if the edit wants a calm observation. It can also feel like an advertisement if the surrounding material has small, human camera movements.
Don't stabilize everything by reflex. A crop can remove the frame edge and introduce a different problem. Reframing can rescue a subject's scale, but it can also remove a useful geographic clue. If you need stabilization to make the shot usable, review the result for warped edges, unnatural float, and lost context.
Use blur carefully
A small reduction in apparent sharpness may help stock footage sit beside softer original material. Blur should not erase information the viewer needs, and it shouldn't become a disguise for a low-quality source. If the stock clip is much sharper because it was captured in a different format, a subtle softening may be reasonable. If the composition is wrong, softness won't save it.
Texture should make stock footage belong to the film, not announce that an effect was applied to it.
How do I cut stock footage over interviews and narration?
Cut stock footage over interviews and narration by protecting the spoken idea first. Let the voice establish the meaning, bring in the image when it adds information, and return to the subject before the stock shot starts speaking for them.
Put the interview on the timeline first
Build the dialogue or narration edit before searching for cutaways. Mark the lines where the audience needs a visual answer, a location, a pause, or a change in emotional pressure.
Then search for a picture that responds to those marks. This order keeps the documentary's argument in charge. If you search first, the best-looking clip can start dictating the narration you keep.
Use the first sentence as a bridge
Don't cut away in the middle of a thought just because the stock shot has a convenient start frame. Listen for the point where the speaker names a place, object, action, memory, or consequence. The stock clip can enter at that point and carry the image while the voice continues.
The cut can also happen before the sentence finishes. That works when the image creates a question and the remaining words answer it. If the image does neither, keep the subject on screen.
Protect the subject's ownership of the experience
An interview is evidence of a person speaking. Stock footage is illustration unless the production has established something else. The audience should not have to guess whether the stock image depicts the exact person, location, or event being described.
Use visual signals that preserve the distinction:
- Keep an illustrative shot shorter when the identity could be misunderstood.
- Avoid showing a recognizable actor while the subject describes a private experience.
- Use hands, tools, textures, places, or wide views when a literal person would add an unsupported claim.
- Return to the interview for the line's emotional consequence.
- Add a lower-third or end card only when the film's editorial language calls for it, not as a patch for every ambiguous image.
Build coverage with meaning, not a formula
You don't need a fixed number of cutaways per sentence. A useful coverage pass may include a wide view for place, a medium view for action, and a detail for consequence, but the sequence must follow the story rather than the pattern.
For a sentence about a worker arriving before dawn, a wide street may locate the time, a door opening may show the action, and a close detail of gloves may suggest preparation. If the sentence is about fear after an accident, the same three-shot pattern may feel false. The image might need to stay on the speaker, use an empty location, or cut to an object with a documented connection.
Keep the cutaway from becoming a commercial
Commercial stock often has clean light, centered subjects, purposeful smiles, and perfect gestures. That isn't automatically unusable. It does mean you should ask whether the shot sells an idea instead of observing one.
Crop out an unnecessary smile only when the crop preserves honest context. Cut earlier if the shot's performance becomes obvious. Choose a less polished angle when the interview is intimate. And if nothing makes the clip feel truthful, remove it.
For broader B-roll selection decisions, see how to choose B-roll for a video in Resolve 21. The documentary version of the rule is simple: every cutaway should change what the viewer understands, feels, or anticipates.
How should stock footage move at documentary pace?
Stock footage should move at the pace of the documentary's thought, not at the speed of its search-page preview. Test the same shot at several durations, then choose the point where the viewer has received its information and before the shot becomes a visual pause with no purpose.
Separate motion from energy
A slow camera move can feel intense if the subject matter is heavy. A fast time-lapse can feel calm if the narration is reflective. Don't use camera speed as a substitute for emotional judgment.
Watch the shot with the voice muted first. Then watch it with the voice restored. If the shot feels urgent without sound but confusing with the narration, the picture is competing with the words. If it feels empty without sound but useful with the narration, the voice is giving it a job. Both tests tell you something.
Run the two, four, and six second test
Use a simple timing exercise when you can't decide where to cut. Make three temporary versions of the same stock shot: one at about two seconds, one at about four seconds, and one at about six seconds. These are comparison points, not documentary rules.
In each version, note when the viewer understands:
- What the shot shows.
- Why it is connected to the spoken idea.
- What new information the next shot provides.
If the two-second version communicates everything and the six-second version adds only decoration, keep the shorter one. If the audience needs a moment to read a location or process, the longer version may be right. If none of the versions works, the shot may be wrong rather than too short or too long.
Cut on a change in thought
An edit point has more power when the story changes direction. Look for a new noun, verb, place, memory, consequence, or question in the audio. A cutaway can enter on the first word, hold through the explanation, and leave when the thought turns.
This doesn't mean cutting every time the speaker changes a word. It means using the structure of the sentence to choose the picture's entrance and exit. Let the rhythm breathe when the speaker is searching for a memory. Cut with purpose when the argument becomes precise.
Avoid fake speed
Speed ramps, artificial zooms, and aggressive retiming can make generic stock feel more active, but they also draw attention to the edit. Use them when the film has established that language. Don't use them to conceal a clip that doesn't fit.
If you retime a clip, watch the subject's body and any readable text. A motion that looks acceptable in a montage can look wrong when held under a sentence. The documentary's credibility lives in small movements.
Let a still image breathe differently
Stock may include photographs, maps, illustrations, or archival scans. A still image can enter with a move, but the move should point the viewer to a relevant detail. A slow push across a photograph that contains no meaningful change is just a timer.
Use the still to reveal a face, place, object, date, or relationship. Then leave before the move has finished showing off. If the source itself is important, hold longer and let the transition acknowledge it.
The cleanest stock edit ends the shot when the viewer has understood its purpose, not when the source clip ends.
How do I blend stock footage through sound?
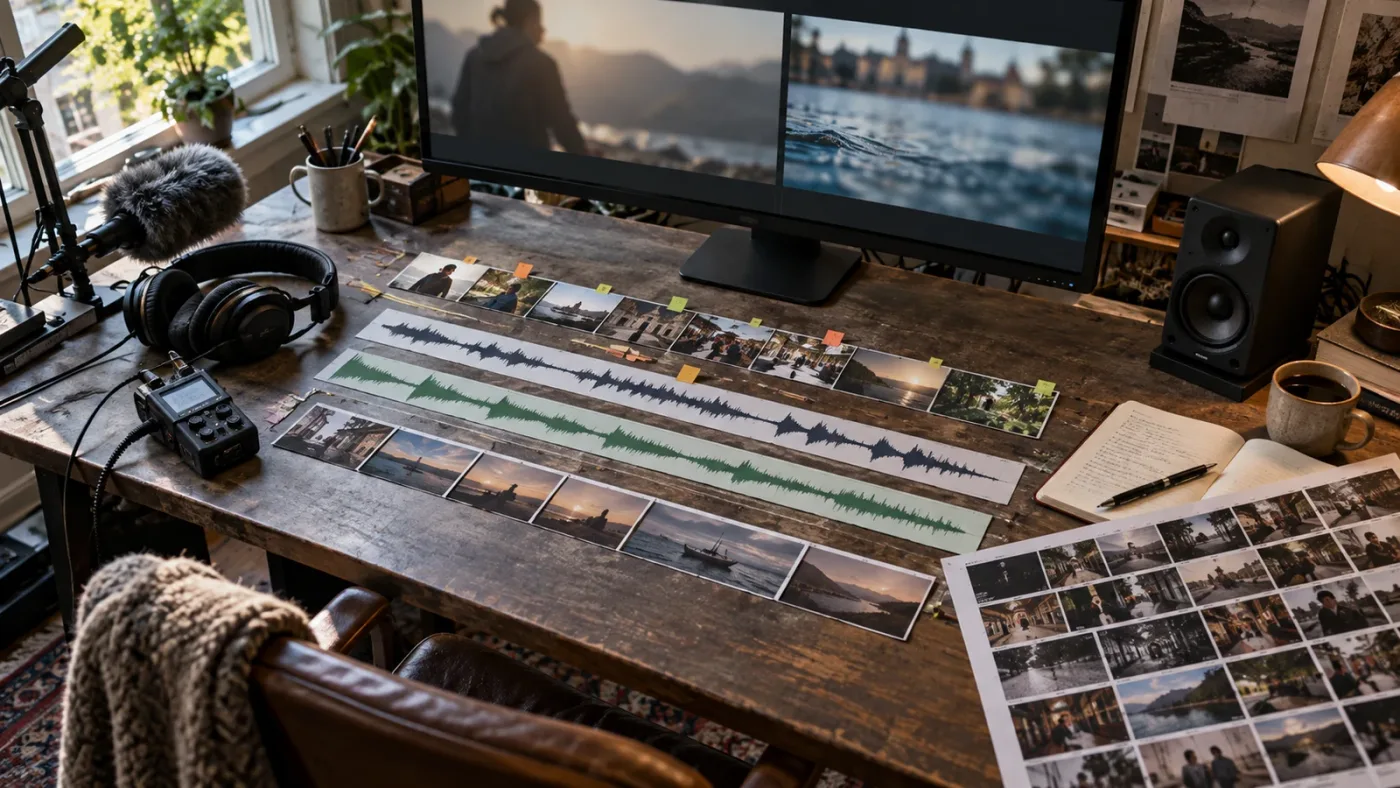
Blend stock footage through sound by carrying the documentary's acoustic world across the picture cut. Dialogue, room tone, location ambience, and meaningful effects can make a visible change in source feel intentional.
Keep the voice continuous when it carries the argument
Start with the dialogue or narration at a stable level. Place the stock picture above it and listen for the moment where the image changes while the voice stays anchored. If the voice remains believable, the viewer has a chance to accept the new source as illustration.
Then add or restore the sound that the stock image needs. A factory shot may need a low mechanical bed. A street may need traffic at a believable distance. A river may need air and water, not a dramatic cinematic boom. The sound should describe the picture without pretending that the production recorded that exact place on that exact day.
Use ambience as a bridge, not wallpaper
Ambience can span a picture cut, but a single loop under an entire scene often makes the world feel flat. Shape the bed around the scene's changes. Let it open slightly when the picture widens. Pull it back when the interview becomes intimate. Remove it when silence is the point.
DaVinci Resolve's Fairlight page supports clip and waveform editing, fades, level changes, and graphical automation. Blackmagic describes track and bus automation controls in its official Fairlight overview. Use those controls to make the sound change with intention instead of drawing one long level line and forgetting it.
Duck music before you reach for a louder voice
If music covers a stock transition, lower the music at the transition before raising the narration. A louder voice can make the mix tiring while leaving the masking problem in place.
In the timeline, use clip-level changes for a small local dip and track automation when the same relationship continues across a longer section. Listen after each change. The goal is not silence under every word. The goal is a clear hierarchy.
Cut source sound when it makes a false promise
Stock previews may include music or designed effects that were added to sell the clip. Remove them unless the license and the scene specifically call for them. Even natural sound from a stock file can imply that the documentary crew stood in that location.
You can keep a source effect when the film identifies it as archival or illustrative. Otherwise, rebuild the sound from the documentary's own acoustic language. Use room tone and simple effects that support the cut without claiming a recording you don't have.
Use J-cuts and L-cuts as editorial tools
An L-cut lets the previous audio continue while the picture moves to stock. An audio lead can introduce the new picture before the cut, creating anticipation. Both are useful, but they carry different meanings.
Use an L-cut when the subject's thought should dominate the new picture. Use an audio lead when the new location or action should pull the audience forward. If the audience can't tell where a sound comes from, either make that uncertainty intentional or shorten the overlap.
Check transitions on small speakers
After you build the bridge, listen on headphones and on small speakers. You aren't trying to predict every playback system. You're checking whether dialogue disappears, ambience becomes a distracting hiss, or a low sound makes the cut feel heavier than you intended.
The official Blackmagic training program separates editing, color, and Fairlight lessons, and its Editor's Guide description specifically includes documentary material, complex audio mixes, and delivery. That separation is a useful reminder: picture blending isn't finished when the stock clip looks right. Blackmagic's training page is the current reference for those learning materials.
How do I make stock footage feel specific to this documentary?
Make stock footage feel specific by adding the documentary's point of view around it. The strongest treatment usually comes from the cut, narration, sound, crop, or graphic context, not from piling on effects.
Give the shot a local relationship
A generic highway becomes more specific when the edit has already established the town, direction of travel, or person whose journey matters. A generic hand on a machine becomes more specific when the narration names the material, process, or consequence.
The stock shot hasn't changed. The surrounding information has changed what it means. This is why the search phrase alone can't solve the problem.
Use crops that protect the argument
Reframing can place a subject on the side that supports an interview's eyeline or make a detail legible. It can also erase the clue that tells the viewer what the image actually is.
Before you crop, identify the information you need to preserve. If the location matters, keep the landmark or spatial relationship. If the process matters, keep the hand and tool together. If the face is not evidence, crop to the action or use a wider view.
Add graphics only when they clarify
A map, label, date, or short caption can turn ambiguous stock into honest illustration. It can also make the image feel like a news package if the film has no other graphic language.
If you need a label to explain that the stock is illustrative, use the film's established convention. Don't create one oversized disclaimer for a single shot and leave every other source unmarked. Consistency is part of the reader's trust.
Use archival treatment as information
Old footage, scanned photos, and public records may deserve a distinct treatment. Keep their aspect ratio, frame edge, dust, or original contrast when those qualities tell the audience something about the source. Clean them only when the dirt is a distraction and the cleanup does not erase evidence.
If you add a border or a paper texture, do it because the film has a reason to present the source as an object. A random retro preset can make a real historical document look like decoration.
Return to the person
Stock footage can carry a voice for a few seconds. It shouldn't quietly become the main character of an interview scene. Return to the subject when the line reaches a personal consequence, a decision, or a contradiction.
That return is often more powerful than another cutaway. The audience has seen the wider idea. Now it needs the person who lived it.
What should I do when stock footage does not match the original scene?
When stock footage doesn't match the original scene, diagnose the mismatch before applying another effect. If the problem is story or composition, replace the clip. If it is technical, correct the pipeline. If it is texture or sound, treat those after the image has earned the cut.
Use this order of operations
| Symptom | Likely problem | First decision |
|---|---|---|
| The shot feels unrelated | Weak story function | Rewrite the reason for the shot or remove it. |
| The cut feels physically wrong | Screen direction, eyeline, scale, or camera height | Change the crop, cut point, or source. |
| The shot is too bright or flat | Exposure or color pipeline | Confirm the input and balance before the look. |
| The stock feels like an advertisement | Performance, lighting, or movement | Shorten it, use a detail, or select more observational material. |
| The scene suddenly sounds expensive | Preview music, designed effects, or a loud ambience bed | Remove the source sound and rebuild the bridge. |
| The image fits but the implication is false | Identity, time, place, or cause and effect | Label the illustration or choose another image. |
This order keeps you from polishing the wrong problem. Editors can spend a long time adding grain to a shot that should never have been in the scene.
When the color is wrong
First, look at the original and stock clip in the same color-managed path. Then balance exposure, contrast, and white balance. If the stock clip is a different source by design, create a clear separation rather than forcing an artificial match.
Don't judge the match from a still export alone. Motion reveals flicker, highlight behavior, noise, and stabilization. Play through the cut at normal speed, then step through the first and last frames of the transition.
When the movement is wrong
Try a shorter range of the same shot. Many stock clips contain a usable two-second moment inside a longer move that would be impossible to place. You can also use the clip as a visual punctuation mark rather than as continuous coverage.
If the movement still fights the scene, change the role. A sweeping aerial may work as a chapter transition even if it can't sit under an intimate sentence. An extreme close-up may work as a detail between two faces even if it can't establish a location.
When the stock feels too perfect
Select less obvious moments. Avoid the first image that represents the keyword. Look for partial actions, imperfect framing, neutral expressions, and light that could belong to the film's time and place.
This is not a demand that stock look ugly. It is a demand that the audience see the documentary's point of view before seeing the library's production style.
When the cut creates a false timeline
Season, weather, clothing, architecture, shadows, and technology can place a stock shot in a different time. If the narration names a date or event, check whether the picture supports that date. If it doesn't, use a label, a wider context, or a different clip.
The audience may never pause to inspect the problem. That doesn't make the implication harmless. A documentary's authority includes the things it lets an image suggest.
How do I use stock footage in DaVinci Resolve 21 without slowing the project?
Use a lightweight editorial path for stock footage first, then solve quality and finishing issues at the right stage. Keep the original asset available, but don't make every decision while playing back the heaviest version at full resolution.
Separate editorial speed from finishing quality
If a stock clip is difficult to play, use the project's proxy or optimized-media workflow according to your storage and source format. The creative decision is whether the shot belongs. You don't need final texture, noise reduction, or a complex Fusion treatment to decide that.
Resolve 21's New Features Guide documents global reduced-resolution preview behavior for its Photo page and several performance-related changes elsewhere in the application. Those details are version-specific. For timeline work, use the playback and cache controls you understand, and confirm the final image from the original media before delivery. The current Resolve 21 guide records the release's documented behavior.
Keep a clean source-to-output path
Don't replace the only copy of a stock clip with a graded render. Keep the downloaded original, the Resolve project, any proxies, and the license record in an archive structure that another editor can follow.
When you consolidate or move a project, make sure the stock media and its source notes move with it. A timeline that opens with missing stock is not a finished archive, even if the exported movie looks correct today.
Use markers to remember why the clip is there
Put a marker at the stock clip's start or at the scene's cut and write a short note such as "illustrates ferry route" or "shows tool named in narration." The note helps during revisions. If the narration changes, the marker tells you to recheck the image instead of assuming the old relationship still holds.
Markers are especially useful when a documentary has several editors or when the film will be translated. A visual that works with one sentence may become misleading after a voiceover rewrite.
Check the source before a final render
Before you export, review every stock shot at the final timeline settings. Check for watermarks, offline media, wrong frame interpretation, missing audio you meant to keep, and a crop that moved after a timeline change.
Then watch the scene from at least one cut before the stock shot to at least one cut after it. A shot can look fine when isolated and still break the pacing of the larger scene.
What are the legal and ethical checks before I publish?
Before publishing, confirm that the stock license covers the actual documentary, client, distribution, territory, and publication plan, then check that the image doesn't make a factual claim the film cannot support. Licensing and editorial truth are separate checks.
Write the use case before choosing a plan
The same downloaded clip may be used in a personal short, a client film, a paid advertisement, a broadcast documentary, a festival submission, or an internal presentation. Don't assume one license covers all of those uses. Read the current terms for the asset and plan you intend to use.
Keep the asset certificate or download record. Note the project name and the date the project is published. If a provider requires channel registration, clearlisting, attribution, or another step, complete it while the account and project information are available.
Treat illustrative footage as illustrative
Stock footage can show a plausible example without documenting the event under discussion. That difference should shape the edit. Avoid using a recognizable person, exact location, or highly specific action as if it were evidence when it is only an illustration.
When necessary, add a short on-screen clarification, a narration phrase such as "in one example," or a more neutral shot. The right choice depends on the documentary's editorial standards and the importance of the claim.
Check faces, logos, property, and screens
Look closely at the frame. A stock clip may include a logo, a device display, an address, a face, artwork, or a branded product that changes the rights or editorial meaning of the shot. A crop can remove one problem and create another by making the remaining face or object seem central.
Don't rely on a vague idea that stock footage is automatically safe for every use. The provider's terms and the specific clip information control what you can publish. When the project has high stakes, ask the producer or legal adviser to review the use.
Where can Artlist fit?
If you need a recurring source of footage rather than a one-off archival clip, Artlist is one option to evaluate after you define the scene's story job, color, texture, pacing, sound, and distribution needs. The useful reason to consider a stock library here is access to candidate footage. It is not a substitute for the blending work in this guide.
Disclosure: this is an affiliate link. If you subscribe through it, we may earn a commission at no extra cost to you. Read the current license terms for your use before you download or publish anything. Other honest options include commissioning a pickup shot, licensing a single clip from an archive, using material supplied by the subject, or removing the image and letting the interview carry the idea.
The verdict should stay conditional. Artlist may be convenient when you need a broad pool of footage for several scenes. A specialist archive can be better when historical accuracy matters. A local shoot can be better when the film needs evidence from one exact place. A single licensed clip can be better when you need only one shot.
How do I follow a complete Resolve 21 blending workflow?
Follow the workflow in nine passes: define the story job, organize the source, choose the edit, match the camera language, build the color match, add texture, reconnect sound, check truth and licensing, and review as a viewer. The order keeps expensive finishing work behind the editorial decision.
-
Define the story job. Write one sentence for what the stock shot must reveal, bridge, contrast, or compress. If the sentence is vague, keep searching for the idea before searching for footage.
-
Organize and inspect the footage. Put stock in a dedicated bin. Watch the entire candidate. Record its source, asset identifier, frame rate, resolution, orientation, and license note. Mark only the usable range.
-
Choose the edit point. Place the stock above the interview or narration. Cut it in at a change of meaning. Trim out when the shot has done its job. Don't let the source clip dictate the scene length.
-
Match composition and movement. Check screen direction, eyeline, camera height, subject scale, light direction, and motion. Reframe only when you preserve the information that makes the shot honest.
-
Build the technical color match. Put the stock and documentary media into the same working color path. Balance exposure and white balance. Use scopes and a reference frame. Apply the film's creative look after the balance.
-
Add restrained texture. Compare sharpness, noise, grain, halation, bloom, contrast, and stabilization. Make the smallest correction that lets the stock belong. If the mismatch is the point, make the transition clear instead of hiding it.
-
Reconnect the sound. Keep the dialogue or narration clear. Remove preview music unless it belongs. Add ambience that supports the picture without claiming a recording you don't have. Use fades and automation to shape the transition.
-
Check truth and licensing. Review faces, logos, geography, season, time, and cause and effect. Confirm the license covers the finished project and planned distribution. Keep the record with the project archive.
-
Watch as a viewer. Watch with full sound. Watch muted. Watch on a small display. Ask what the image adds, what the viewer may infer, and whether you would miss the shot if it were gone. Remove decorative stock that doesn't survive the test.
Blackmagic's current training material divides Resolve work into Edit, Color, Fairlight, and delivery lessons, and its Editor's Guide description includes documentary material. That structure mirrors this procedure: cut first, match the image second, finish the sound, then deliver. Use Blackmagic's official training page as the version-aware companion reference.
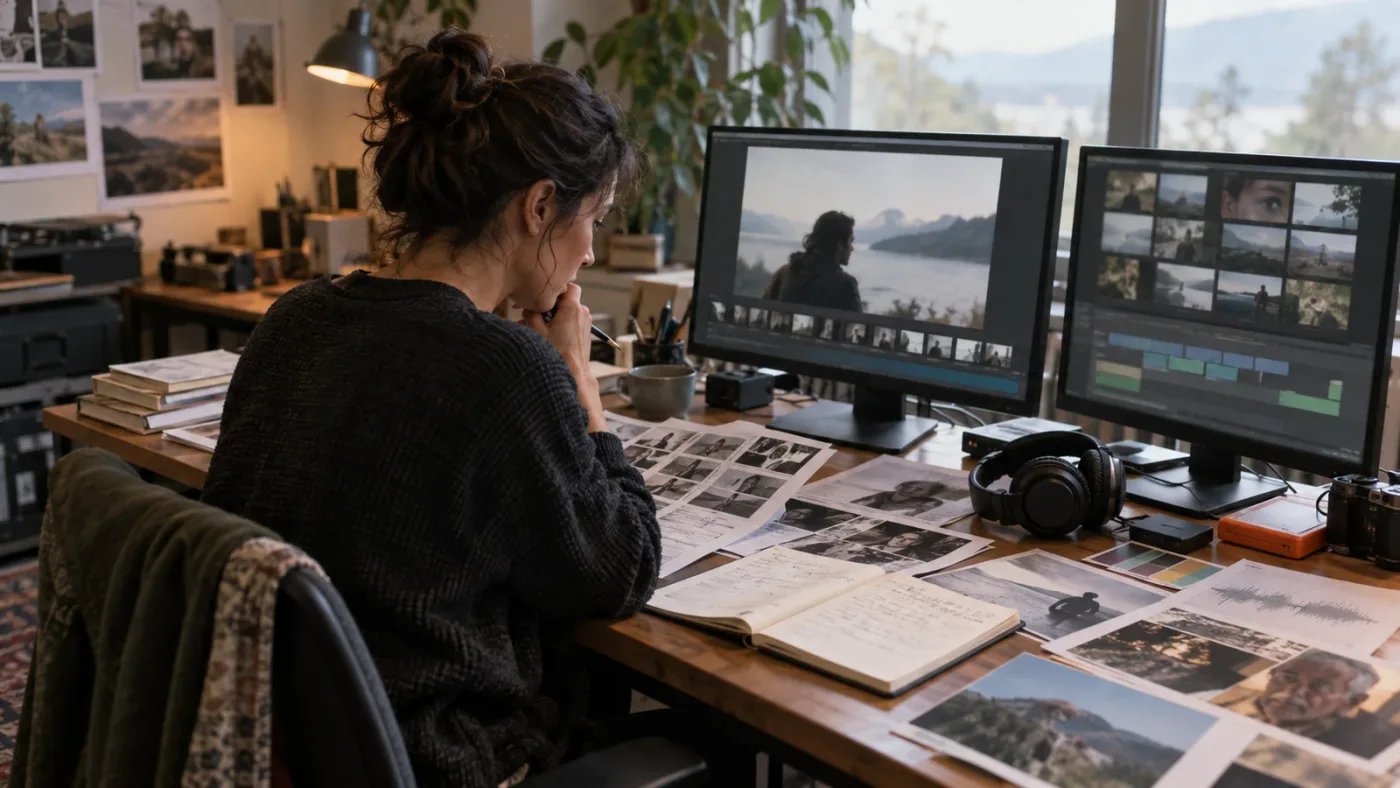
Which blend method should I use for my scene?
Choose the blend method from the scene's editorial need: evidence, location, passage of time, emotional pause, or contrast. The same stock clip can be right in one role and wrong in another.
| Scene need | Best starting method | Resolve 21 edit decision | Main risk |
|---|---|---|---|
| Explain a process | Cut detail or process footage over continuous narration | Enter on the named action and leave before the explanation turns | The shot looks like proof of this exact event |
| Establish a place | Use a wide view before or after the subject names the location | Let the cut open the scene's geography | A generic view suggests the wrong place |
| Compress time | Use a short sequence with readable changes | Cut on a new stage, not every beat of music | The montage becomes decorative |
| Cover an interview jump | Use an object, hand, location, or action connected to the speaker | Bridge the voice while protecting the subject's identity | The person on screen becomes a false stand-in |
| Create a pause | Use a quiet, low-information image with supporting ambience | Hold only while the film is thinking | The viewer waits for a point that never arrives |
| Create contrast | Make the new viewpoint obvious and motivated | Let the transition mark a turn in the argument | The cut exaggerates a claim the narration didn't make |
If the scene is evidence
Use the least interpretive shot that answers the question. A close-up of a tool can explain the tool. It cannot prove who used it, where it was used, or when it was used unless the film establishes those facts separately.
Keep the narration precise. Don't let a general voiceover become a specific claim because the stock image is specific. The more literal the picture, the more carefully you should test the relationship.
If the scene is geography
Start wide enough to orient the viewer, then move closer only when the story needs detail. Aerial footage can introduce a region, but it may also flatten the relationship between a person and a place. A street-level detail can feel more truthful for an intimate account.
Check signs, road markings, vegetation, weather, and architecture. The shot doesn't need to show a landmark to imply a location. Sometimes a road, skyline, or uniform does the work.
If the scene is time
A time-lapse or seasonal transition can carry a long passage quickly. Keep the narration clear about the time being compressed. If the stock shot is a generic representation, don't cut it under an exact date without a reason.
Use the transition as a shape in the film. A longer hold may let the audience feel time. A brief flash may make time feel fractured. The pacing choice should follow the narration and structure.
If the scene is emotion
Be careful with faces. Emotional stock is easy to read and easy to misuse. An anonymous person looking out a window can still become a false emotional witness to the subject's story.
Objects and spaces often carry emotion with less risk. An empty chair, a closed gate, a worn tool, or a quiet room can give the audience room to feel without assigning a reaction to an invented person.
If the scene is contrast
Make the contrast visible in the film's language. A sudden change in aspect ratio, texture, camera distance, or sound can tell the audience that the film is shifting from observation to context.
Use this mode sparingly. If every stock cut announces a new world, the documentary never establishes one. A contrast is powerful because the surrounding scene has earned continuity.
Why does my stock footage still feel like stock footage?
Stock footage still feels like stock footage when the viewer can see the library's intention more clearly than the documentary's intention. The fix is usually editorial: choose a more specific shot, shorten it, change its role, or remove it.
Run the five-question review
Watch the finished scene and answer these without pausing:
- What did the stock shot add that the interview or narration couldn't add?
- Did I understand why the picture changed at that exact moment?
- Did the stock shot make a claim about identity, place, time, or cause?
- Did its movement, texture, and sound belong to the scene?
- Would the scene be weaker if I removed it?
If you can't answer question one, remove the shot and watch again. If the scene improves, the stock was decoration. If the scene loses a necessary idea, bring it back with a clearer cut or a more honest source.
The shot is too generic
Search deeper by adding the action, context, and point of view. "City" is a subject. "Night bus arriving outside a neighborhood clinic" is an editorial brief. The more precise the search, the more likely the candidate will carry meaning instead of mood.
Don't search forever. If the film can shoot one local insert, ask whether that insert has more value than another hour of library browsing. Stock is a production choice, not a moral victory.
The shot is too polished
Try a different range, a less perfect angle, a practical light source, or a wider view. A neutral shot often blends better than the hero image from the same clip.
You can also make the polish part of a clear transition. Put the commercial-looking image in a chapter, title, or deliberate montage language. Don't bury it in an intimate interview and hope texture will erase the performance.
The shot repeats information
If the narration already explains what the viewer sees, the picture may be redundant. Look for a detail that adds consequence or context. If no such detail exists, keep the subject on screen and let the voice do its work.
The sound gives the stock away
Preview music, identical ambience loops, and sudden low-frequency impacts reveal the search process quickly. Remove them. Build the transition from the film's dialogue, room tone, and established sound palette.
The grade is fighting the image
A heavy look can make every stock shot feel like an effect. Return to the reference frame and reduce the correction until the picture supports the cut. Then watch the scene at normal speed. A technical match that looks plain in a still may be exactly right in motion.
A documentary edit earns stock footage by making the source difference useful, truthful, and easy for the viewer to understand.
The right stock clip supports the documentary's point of view before it shows off its production value.
Should I use stock footage at all?
Use stock footage when it gives the documentary a necessary image, a defensible transition, or a truthful compression of time. Don't use it because the timeline looks empty.
The best test is removal. Duplicate the sequence, disable the stock shot, and watch the scene. If the audience loses a location, process, contrast, or breath, the shot may belong. If the scene simply feels less glossy, keep it out and let the original material lead.
After seven years of professional commercial editing, our strongest lesson is that a cutaway is part of the argument, not a reward for finding a good clip. We also run a 100,000+ member professional video-editing community, and questions about B-roll often return to the same pressure point: the editor knows the picture looks good but can't explain what it means. That explanation is the work.
Resolve 21 gives you the Edit, Color, and Fairlight tools to make the decision visible and audible. Blackmagic's own training describes documentary editing, color management, sound editing, and delivery as connected parts of the workflow, while its Resolve 21 materials document the current version's color, edit, and Fairlight changes. Use the tools in that order.
Choose one scene. Write the story job. Try the shortest honest version of the shot. Match the cut before the look. Connect the sound. Check the implication. Then remove the shot if it still feels like an advertisement.
That is how stock footage stops being filler and starts being part of the documentary.
Frequently asked questions
- How do I blend stock footage into a documentary edit?
- Use stock footage to serve a clear story function, place it over motivated interview or narration beats, then match its color, movement, texture, and sound to the surrounding material. Review the cut for false implications before publishing.
- Why does stock footage look like stock footage?
- Stock footage usually feels separate because its light, camera movement, sharpness, grain, pacing, or sound does not belong to the scene around it. Match the most visible difference first, and cut away when the shot has done its job.
- How do I match stock footage color to documentary footage in DaVinci Resolve 21?
- Start by identifying the stock clip's likely color space and exposure, bring it into the same working pipeline as the documentary footage, balance it with scopes, and apply a restrained creative look only after the technical match.
- Can I use stock footage in a client documentary?
- You can use stock footage in a client documentary only when the license covers the client, distribution, territory, and intended use. Keep the asset record, follow any attribution or registration requirement, and avoid presenting illustrative footage as observed fact.
- What is the best way to use stock footage over an interview?
- The best method is to keep the interview audio continuous, choose stock that proves or clarifies the spoken idea, and cut back to the subject before the viewer forgets whose experience is being represented.
Sources
Keep reading
Guides · Sep 2, 2026 · 9 min
How to Use Stock Footage in DaVinci Resolve 21
Learn how to use stock footage in DaVinci Resolve 21, from licensed download and Media Pool organization to matching, proxies, and delivery.
Guides · Sep 2, 2026 · 8 min
How to Choose B Roll for a Video in Resolve 21
Learn how to choose B-roll for a video by matching every shot to the story, the edit, the format, and the footage source.
Guides · Jul 12, 2026 · 39 min
How to Color Match Different Cameras in DaVinci Resolve
Match footage shot on different cameras in DaVinci Resolve with Color Space Transform, Color Match, and Shot Match, plus settings by camera brand.