Articles / Guidesupdated for DaVinci Resolve 21.0.3 (July 2026)
Canon C400 DaVinci Resolve Import Settings
Quick answer
In DaVinci Resolve, set Color Space Transform Input Gamma to Canon Log 2 or Canon Log 3 and Input Color Space to Canon Cinema Gamut, the only color space the C400 locks both presets to. Output to DaVinci Wide Gamut, then a second node back to Rec.709. Shoot at ISO 800, 3200, or 12800, the camera's triple base ISO points.
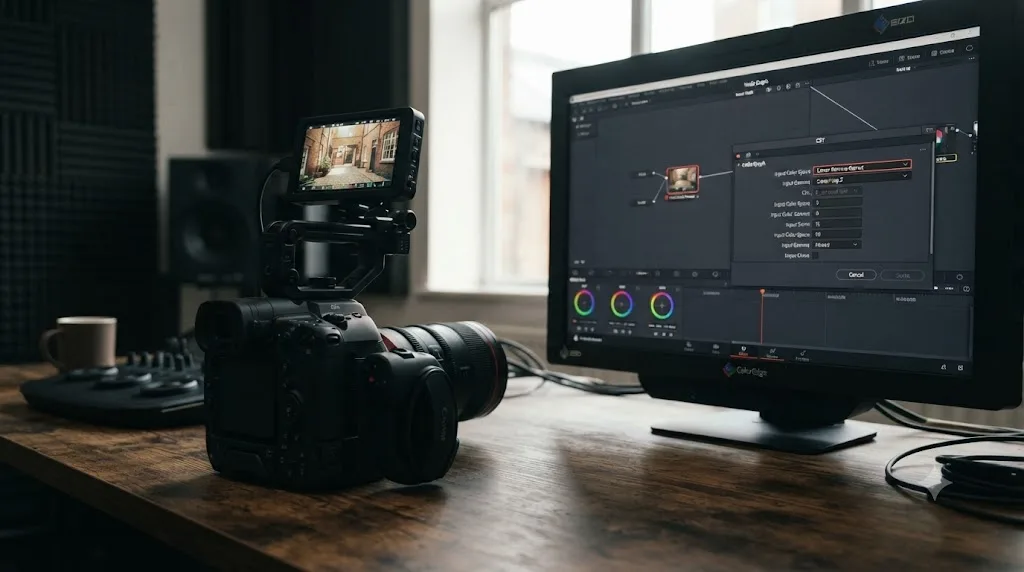
The Canon C400 shoots 6K full-frame RAW inside a body that costs less than half of what Canon's own C500 Mark II launched at, and most of the Color Space Transform guides written for it are really guides for a different camera, adapted after the fact. Search for C400-specific settings and you mostly find forum threads treating it like a C70 with a bigger sensor, or like an R5 Mark II with SDI ports bolted on. It's closer to neither.
Here's the exact Color Space Transform setup for Canon C400 C-Log2 and C-Log3 footage, why this camera locks its color space the same way Canon's flagship stills bodies do, what independent lab testing measured against Canon's own marketing claims, and how DaVinci Resolve handles the C400's Cinema RAW Light and new XF-AVC S codecs differently from a standard Log clip. As of July 2026, on DaVinci Resolve 21.0.3, this is the settings sheet I wish existed when the C400 first started showing up in project folders. After seven years of professional color and edit work, including projects for Fortune 500 clients, the pattern here is a familiar one: a genuinely capable sensor wrapped in a menu system that punishes guessing.
What does the Canon C400 actually record when you shoot Log?
The C400 is Canon's RF-mount, full-frame cinema camera built to sit under the C500 Mark II in price while beating it on sensor resolution, and nearly every downstream decision in Resolve starts from what that sensor and its two recording paths actually output.
Canon announced the EOS C400 on June 5, 2024, alongside a new RF-mount CINE-SERVO lens, describing it as built around a "6K Full-Frame back-illuminated stacked CMOS sensor," per Canon's own U.S.A. newsroom announcement. Brian Mahar, identified in that release as senior vice president, stated plainly: "Canon is proud to provide filmmakers and videographers with a variety of tools to capture high-quality and visually stunning images." The camera shipped in September 2024 at $7,999 body only.
Internally, the C400 records 6K full-frame Cinema RAW Light at up to 60p in 12-bit, with the sensor mode changing to unlock 4K RAW up to 120fps and 2K RAW up to 180fps for high-speed work. Separately, it records XF-AVC at 10-bit 4:2:2 with 6K oversampling up to 120p, and Canon introduced two brand-new codecs alongside the camera itself: XF-AVC S and XF-HEVC S, both MP4-wrapped formats built for "a simplified naming system and folder structure," per the same Canon newsroom release. CineD's Jeff Loch, covering the announcement, noted the camera runs on "a DIGIC DV7 image processor, which has started to age a bit but is still very competent," in his writeup of the launch, and described the C400 as a camera that "corrects/improves nearly everything you could have hoped for as an EOS C70 shooter."
| Setting | Canon C400 value |
|---|---|
| Sensor | 6K full-frame BSI stacked CMOS, 26.7MP total / 19MP effective |
| Processor | DIGIC DV7 |
| Log gamma options | Canon Log 2 and Canon Log 3 |
| In-camera color space for Log | Cinema Gamut only |
| Internal RAW | 6K Cinema RAW Light, up to 60p; 4K RAW up to 120fps; 2K RAW up to 180fps |
| Internal compressed | XF-AVC (10-bit 4:2:2, 6K oversampled, up to 120p); new XF-AVC S / XF-HEVC S (MP4) |
| Triple base ISO (Log, RAW) | 800, 3,200, 12,800 |
| Mount | Canon RF |
| Weight | 1.55 kg (3.41 lb) |
| Price (body only) | $7,999 |
| Ship date | September 2024 |
The Canon C400 records the same Canon Log 2 and Canon Log 3 gammas as Canon's hybrid mirrorless bodies, but it locks both of them to Cinema Gamut the way a flagship stills body does, not the way a mid-range Cinema EOS camera with an independent color space menu does. That single fact shapes almost everything in this guide's Color Space Transform section.
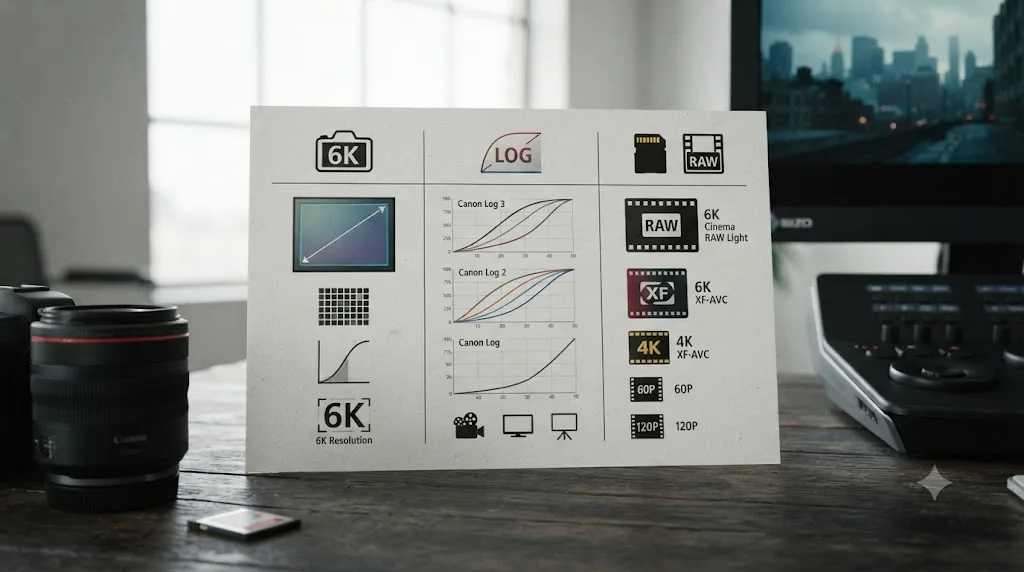
C-Log2 or C-Log3 on the C400, which one should you shoot?
Canon Log 2 trades faster grading for more dynamic range headroom; Canon Log 3 trades some of that headroom for footage that needs less correction to look normal, and on the C400 the gap between them is measurable, not just theoretical.
CineD's lab testing measured the C400's 6K Cinema RAW Light debayered to Canon Log 2 at ISO 800 and found 10.5 stops of dynamic range at a signal-to-noise ratio of 2, and 11.6 stops at SNR of 1, per CineD's dedicated lab test. The same test found the 4K XF-AVC mode measured slightly higher, at 13 stops (SNR 2) and 14.1 stops (SNR 1) at ISO 800, a common pattern where a compressed, oversampled mode reads marginally cleaner in a lab chart than a full-resolution RAW file at the same ISO. CineD's own conclusion was direct: "Canon's claim of 16 stops of dynamic range does not align with tested results," and it noted the C400 uses "an optimized triple base ISO system rather than true native ISO values, with each ISO tier showing approximately one stop of dynamic range loss."
Canon's own marketing, covered in CineD's announcement piece, claims the C400's sensor delivers "the most dynamic range of any Cinema EOS Full Frame sensor." That claim and CineD's measured 10.5 to 11.6 stops for RAW at base ISO aren't necessarily in conflict; lab-measured usable range at a strict SNR threshold and a manufacturer's marketed figure rarely use the same methodology. What matters for a working colorist is the comparative one: Log 2 measured meaningfully wider than Log 3 across every ISO tier CineD tested, which lines up with what Canon documents on every other camera in this lineup.
| Consideration | Canon Log 2 | Canon Log 3 |
|---|---|---|
| Measured dynamic range, RAW ISO 800 (SNR 2 / SNR 1) | 10.5 / 11.6 stops | Not separately isolated by CineD's RAW test |
| Grading effort | Heavier, more correction needed | Lighter, closer to Rec.709 before correction |
| Best for | Full grading pipelines, colorist-driven projects | Fast turnarounds, run-and-gun documentary and event work |
| Color Space Transform Input Gamma | Canon Log 2 | Canon Log 3 |
| In-camera color space | Cinema Gamut, fixed | Cinema Gamut, fixed |
Canon Log 2 measured 10.5 to 11.6 stops of usable dynamic range on the C400's 6K RAW at base ISO in CineD's independent lab test, short of Canon's own 16-stop marketing figure but still a competitive number for a full-frame cinema sensor at this price. Neither gamma choice changes the Input Color Space you'll set next; both lock to the same Cinema Gamut, which is where this guide's core mechanism lives.
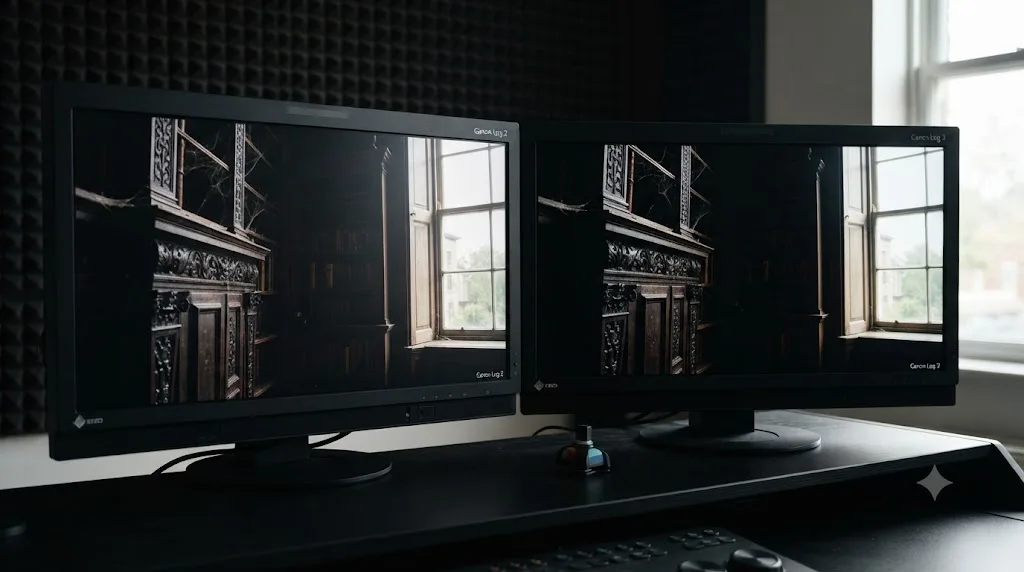
What Color Space Transform settings does C400 Log footage need in DaVinci Resolve?
This is the mechanism at the center of this whole guide, and on the C400 it's a short, fixed list, because the camera doesn't hand you a separate color space decision to get wrong.
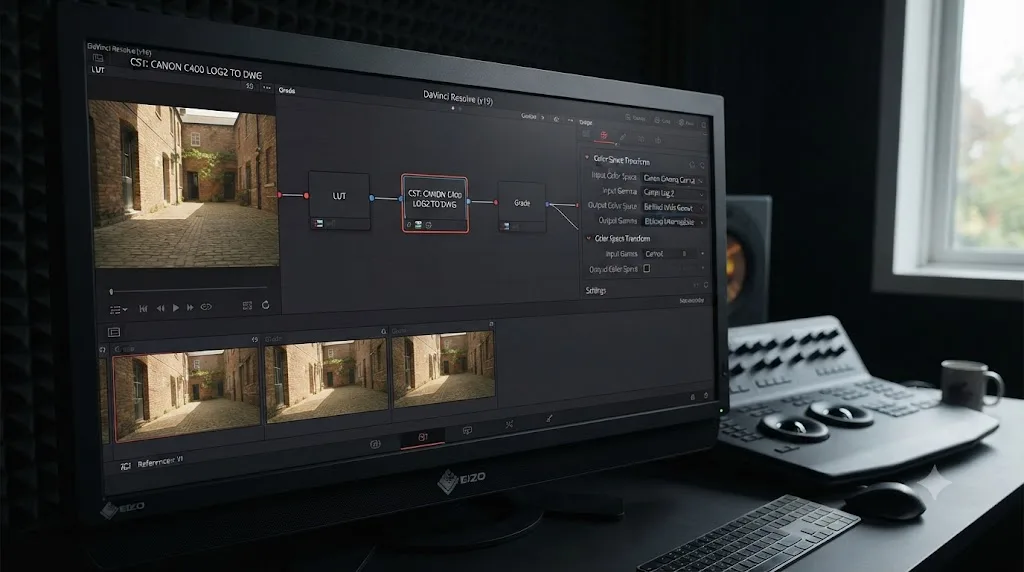
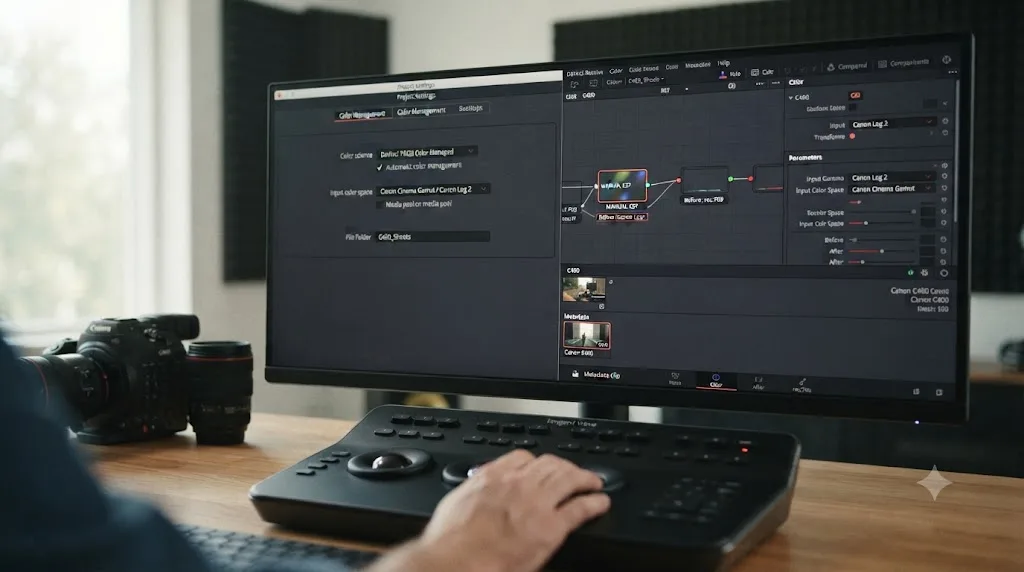
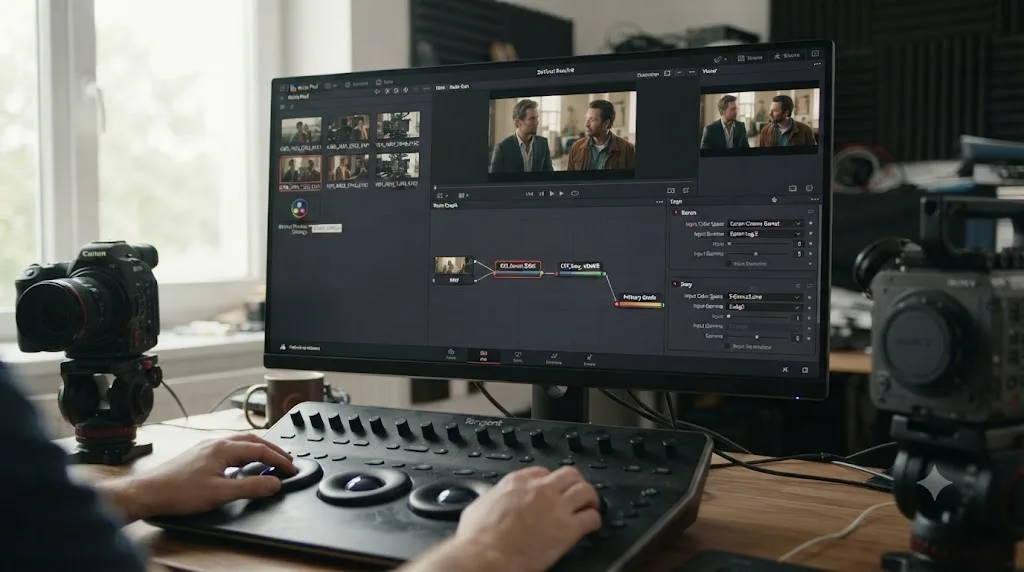
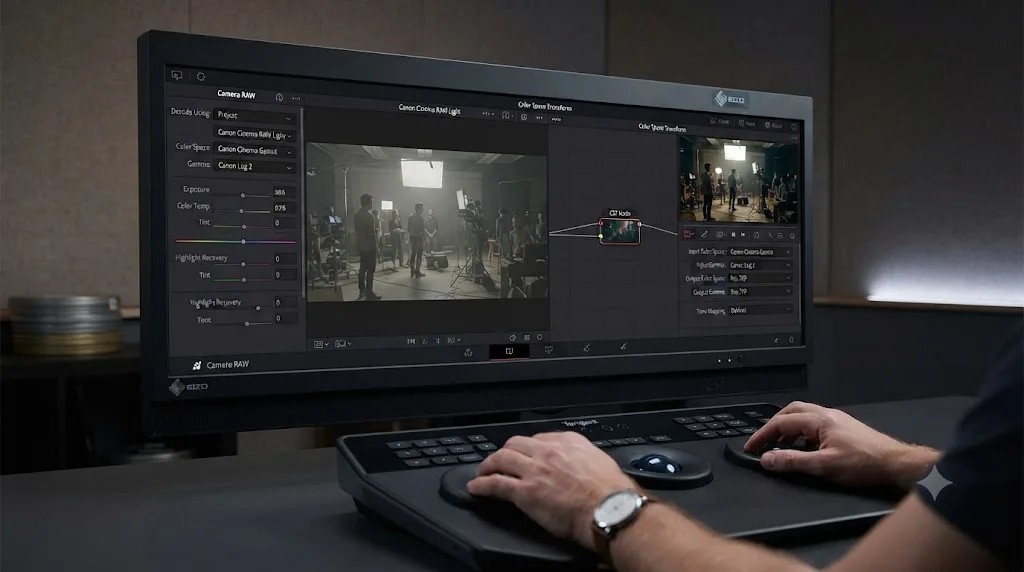
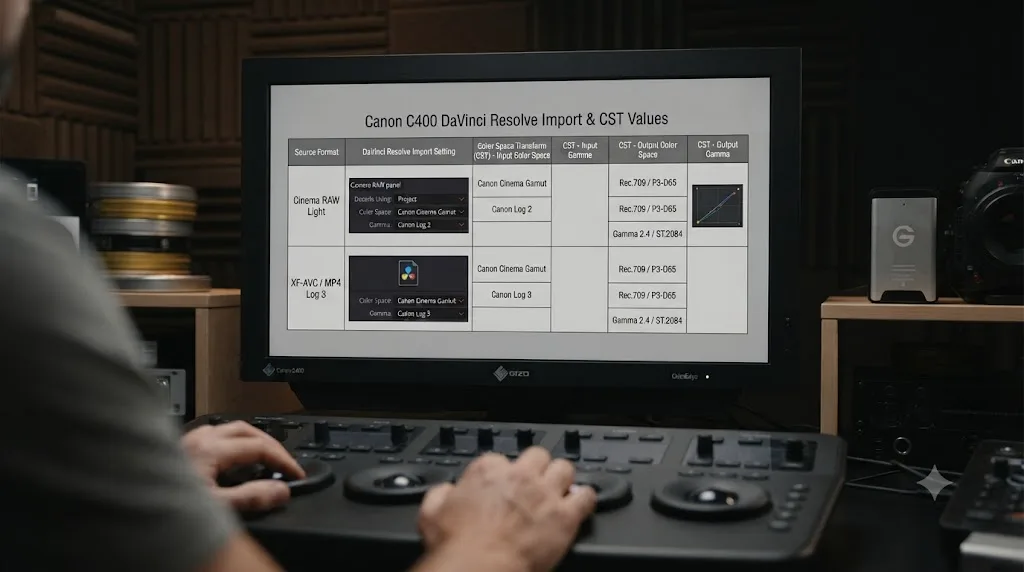
Add a Color Space Transform to your first node. Set Input Gamma to Canon Log 2 or Canon Log 3, matching whichever the clip was shot in. Set Input Color Space to Canon Cinema Gamut. There's no camera menu to double-check first, because both of the C400's Log presets, C2 (Canon Log 2) and C3 (Canon Log 3), pair with Cinema Gamut by default, per Canon's own EOS C400 Instruction Manual. Set Output Color Space to DaVinci Wide Gamut and Output Gamma to DaVinci Intermediate. That moves the flat Log source into Resolve's working space, where your actual correction happens.
On your last node, before final output, reverse it: Input Color Space DaVinci Wide Gamut, Input Gamma DaVinci Intermediate, Output Color Space Rec.709 (or Rec.2100 for an HDR delivery), Output Gamma Rec.709 (or ST 2084 / HLG for HDR).
If a clip was shot on C2 instead of C3, or the reverse, the only change is Input Gamma. Everything else in this two-node pattern, Input Color Space and both Output settings, stays identical, because both presets share the same fixed Cinema Gamut. This is the same "in, grade, out" structure that runs across nearly every recent Canon Log camera, with DaVinci Wide Gamut as the shared intermediate stop; what changes camera to camera is whether step one requires checking anything beyond which gamma preset was active.
Does the C400 let you choose BT.709, BT.2020, or Cinema Gamut independently?
No, and this is worth confirming directly from Canon's own manual rather than assuming it behaves like a mid-range Cinema EOS body, because the answer here is different from what some other Canon cameras do.
Canon's own EOS C400 Instruction Manual lays out a full Custom Picture preset table, and every preset pairs one specific gamma with one specific color space, not two independent menus. C1 is Canon 709, paired with BT.709. C2 is Canon Log 2, paired with C.Gamut (Cinema Gamut). C3 is Canon Log 3, also paired with C.Gamut. C4 is BT.709 Wide DR, paired with BT.709. C5 is BT.709 Standard, also BT.709. C6 is PQ, paired with BT.2020, for HDR work. C7 is HLG, also BT.2020. C8 and C9 reproduce Canon's EOS Standard and EOS Neutral picture styles, both under BT.709 Wide DR and BT.709. Slots C10 through C20 hold user-saved variations, defaulting to the Canon 709 / BT.709 template. The manual also states plainly that custom picture settings "don't affect RAW recordings," meaning Cinema RAW Light footage reaches its working color space through a separate mechanism, covered later in this guide.
This locked-pairing design is the same one Canon uses on its EOS R1 and R5 Mark II flagship stills bodies, where Canon Log 2 and Canon Log 3 both lock to Cinema Gamut with no alternative. It's different from the Canon R6 Mark II and R3, which let you pick BT.709, BT.2020, or Cinema Gamut independently of the Log gamma itself through a separate Canon Log settings menu. If you've built a workflow habit of checking a camera's color space menu before setting up a Color Space Transform, on the C400 that step simply doesn't apply.
| Camera | Log gamma options | In-camera color space |
|---|---|---|
| Canon EOS C400 | Canon Log 2, Canon Log 3 | Cinema Gamut only, fixed per preset |
| Canon EOS R1 | Canon Log 2, Canon Log 3 | Cinema Gamut only, fixed per preset |
| Canon EOS R5 Mark II | Canon Log 2, Canon Log 3 | Cinema Gamut only, fixed per preset |
| Canon EOS R6 Mark II | Canon Log 3 only | BT.709, BT.2020, or Cinema Gamut, selectable |
| Canon EOS R3 | Canon Log 3 only | BT.709, BT.2020, or Cinema Gamut, selectable |
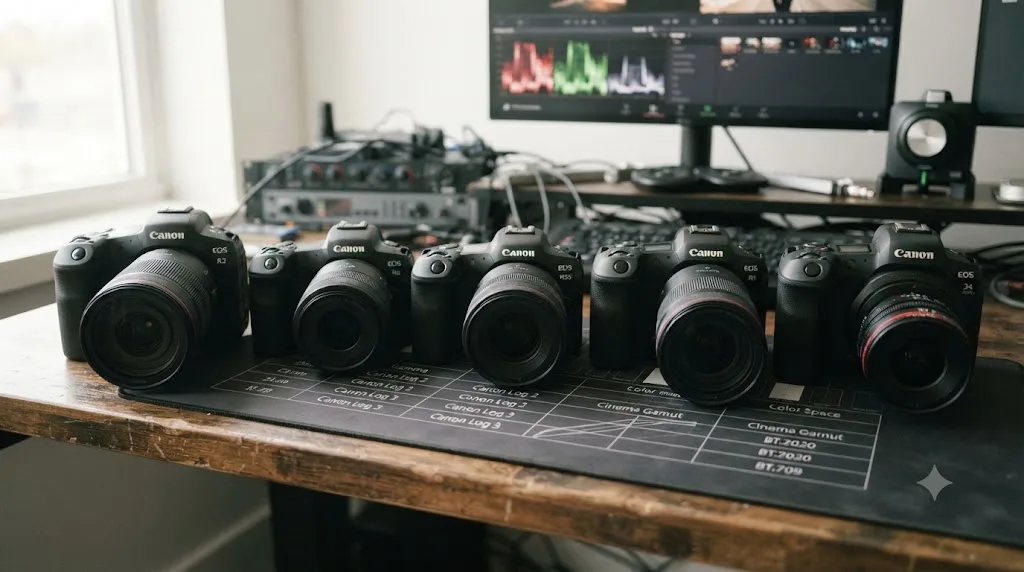
The C400 shares its fixed Cinema Gamut lock with the R1 and R5 Mark II, not with the selectable color space menu on the R6 Mark II or R3, which removes the single most common source of a wrong-looking grade on those cameras: a clip tagged with a color space nobody actually confirmed in-camera. Our Canon R1 C-Log3 import settings guide covers that same locked-preset pattern in more depth if you're mixing footage from both camera families on one project.
What ISO should you shoot Log at on the C400?
The C400's triple base ISO system means the usual "shoot at or above the Log floor" advice from hybrid Canon bodies doesn't map directly here, and picking the wrong one of the three points is the more relevant mistake to avoid.
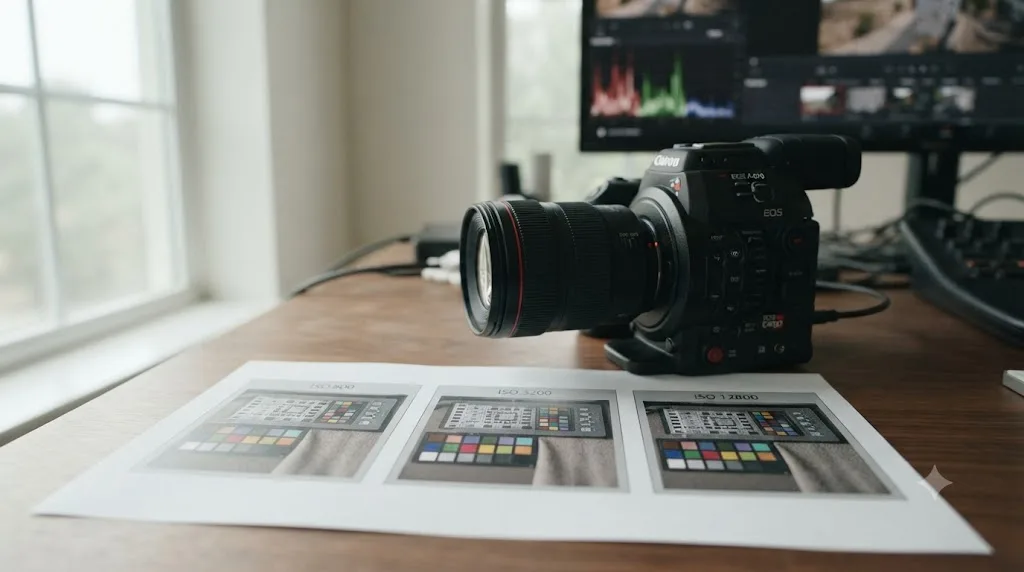
Canon built the C400 around three native ISO points for Log and RAW shooting, 800, 3200, and 12800, per Canon's own Instruction Manual and confirmed independently in CineD's announcement coverage. Unlike a conventional single-base-ISO sensor, where noise climbs steadily as you push gain above the floor, a triple base ISO design resets the noise floor at each of its three native points, so 3200 isn't simply "800 plus two stops of added noise." Alec C. Cohen, reviewing the camera hands-on for ProVideo Coalition, tested exactly this and reported: "I found the noise levels were extremely similar at each base ISO, and couldn't tell a real difference between the three when reviewing the footage," in his hands-on writeup.
CineD's lab measurements back that up numerically rather than just by ear: dynamic range at ISO 3200 (9.4 / 10.6 stops, SNR 2 / SNR 1, in 6K RAW) sits close behind ISO 800's 10.5 / 11.6 stops, and ISO 12800 (8.1 / 9.6 stops) still delivers usable range, not a cliff. That's roughly one stop of dynamic range lost per ISO tier, exactly the pattern CineD's own summary described, rather than the steep noise penalty a conventional sensor pays for the same three-stop ISO jump.
| ISO point | Use case | Measured dynamic range, 6K RAW (SNR 2 / SNR 1) |
|---|---|---|
| 800 | Controlled lighting, daylight exteriors, standard interviews | 10.5 / 11.6 stops |
| 3200 | Mixed or dimmer practical lighting | 9.4 / 10.6 stops |
| 12800 | Low-light, run-and-gun, documentary | 8.1 / 9.6 stops |
Choosing between the C400's three base ISO points is a lighting-conditions decision, not a noise-tolerance tradeoff, since Canon's triple base ISO design resets the noise floor at each point instead of accumulating it. Shoot at whichever of the three points actually matches your set's ambient light rather than defaulting to 800 out of habit; the noise cost of choosing 3200 or 12800 correctly is smaller than most Canon shooters expect coming from a single-base-ISO body.
Does noise get worse at the top ISO tier, and how do you fix it in Resolve?
Even with a reset noise floor at each base point, ISO 12800 is still the noisiest of the C400's three tiers once that flat Log image gets stretched into a normal-contrast grade, and a Color Space Transform does nothing on its own to clean it up.
DaVinci Resolve's Temporal and Spatial Noise Reduction tools, including the AI-driven UltraNR mode, are Studio-exclusive, listed among the Neural Engine features on Blackmagic's own Studio product page. Our full guide to DaVinci Resolve's noise reduction settings covers the specific Temporal frame counts, threshold values, and the tradeoff between denoising strength and softened detail in more depth than fits here.
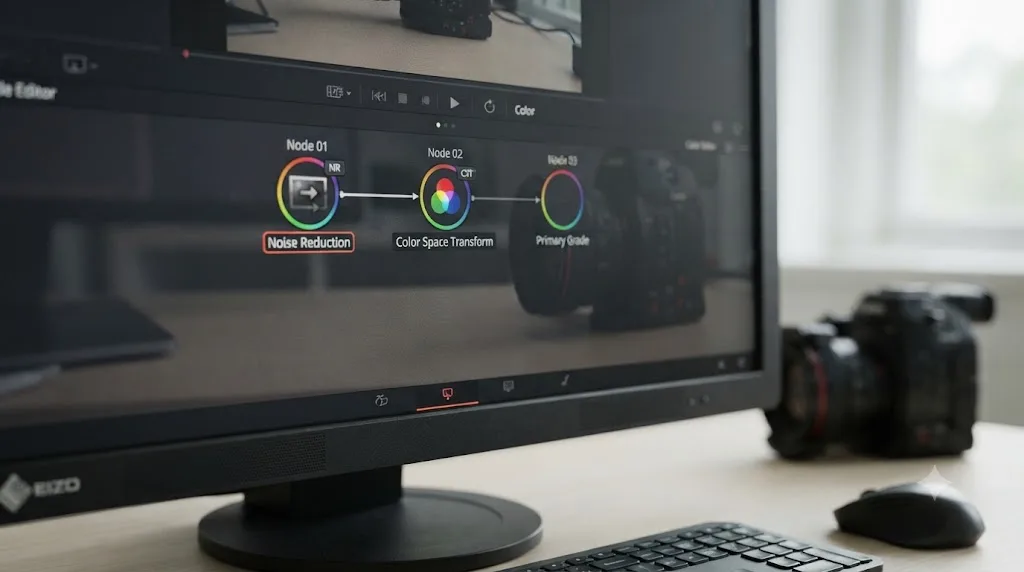
Node placement matters as much as the mode you pick. Apply Noise Reduction on a node before your Color Space Transform pushes the clip out of Log, while the image is still flat and closer to what the sensor actually captured, rather than after contrast and saturation have already amplified whatever noise the sensor recorded. Documentary, event, and low-light interview work shot at ISO 12800 is exactly where this matters most; a well-lit setup at ISO 800 rarely needs it at all.
Staying at ISO 800 whenever the shooting conditions allow it keeps most C400 footage out of the noise reduction workflow entirely, and that's a lighting and exposure decision made on set, not a Resolve setting fixed later. When the light genuinely forces 12800, place Noise Reduction before the Color Space Transform node, not after, so it works on the flatter, less-amplified signal.
Does DaVinci Resolve import the C400's Cinema RAW Light footage natively?
Yes, and it's a genuinely different import path from a standard Log clip, because Cinema RAW Light doesn't carry a fixed Input Color Space and Input Gamma the way a C-Log2 or C-Log3 clip shot in a Custom Picture preset does.
The C400's internal 6K RAW mode records Canon's Cinema RAW Light codec, the same format used across Canon's Cinema EOS line since the original C200. DaVinci Resolve has decoded Cinema RAW Light natively since Resolve 14, no plugin required, so a .CRM file drags and drops into the Media Pool the same as any other clip. By default, per ShareGrid's breakdown of the Cinema RAW Light workflow, "the footage is debayered into the gamma Canon Log 2 and Cinema Gamut," the same intermediate values this guide's Color Space Transform settings target for standard C400 Log footage, even though RAW footage arrives there through a different mechanism.
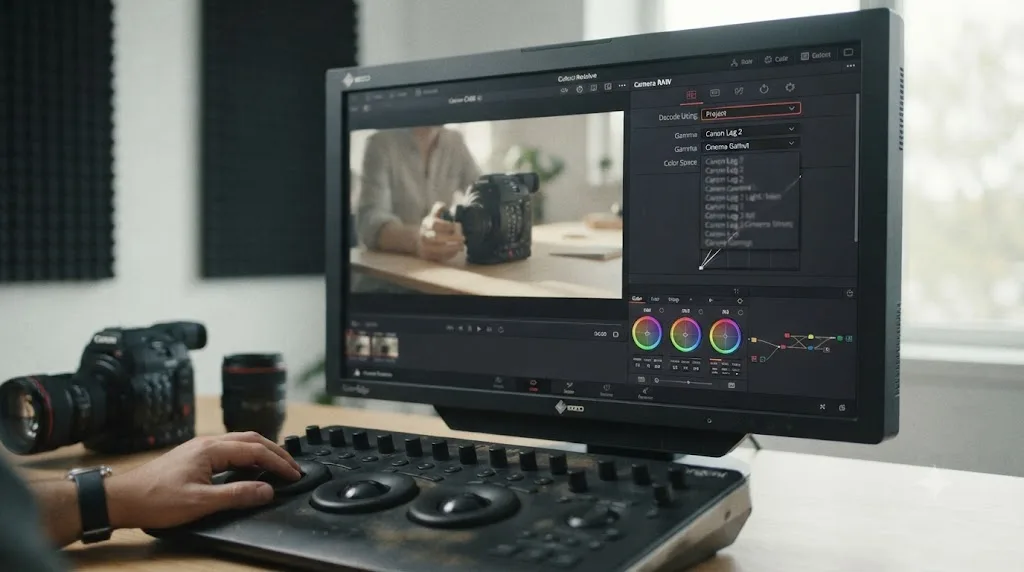
In the Media Pool, a Cinema RAW Light clip opens its own Camera RAW tab in the Clip Attributes or Color page inspector, rather than exposing Input Color Space and Input Gamma the way a standard Log clip does. Debayer resolution and decode settings live in that tab; a standard Color Space Transform node isn't the right tool for it, and stacking one on top of an already-decoded RAW clip double-converts the image, the same failure mode that shows up when a LUT gets stacked on top of a Color Space Transform on a normal Log clip.
The C400 also introduces one recording option older Cinema RAW Light cameras didn't have: dual recording, Cinema RAW Light to CFexpress alongside a proxy simultaneously to the SD card slot, per Canon's own announcement. That proxy track, when present, is a standard compressed codec Resolve reads the normal way, useful for editorial before the full-resolution RAW comes online.
A Canon C400 clip shot internally in Cinema RAW Light debayers into Canon Log 2 and Cinema Gamut by default in DaVinci Resolve, the same endpoint this guide's Color Space Transform settings target for standard Log footage, but it arrives there through a Camera RAW decode, not a Color Space Transform node. Confirm which import path a given C400 clip took, RAW versus standard Log, before applying either workflow to it.
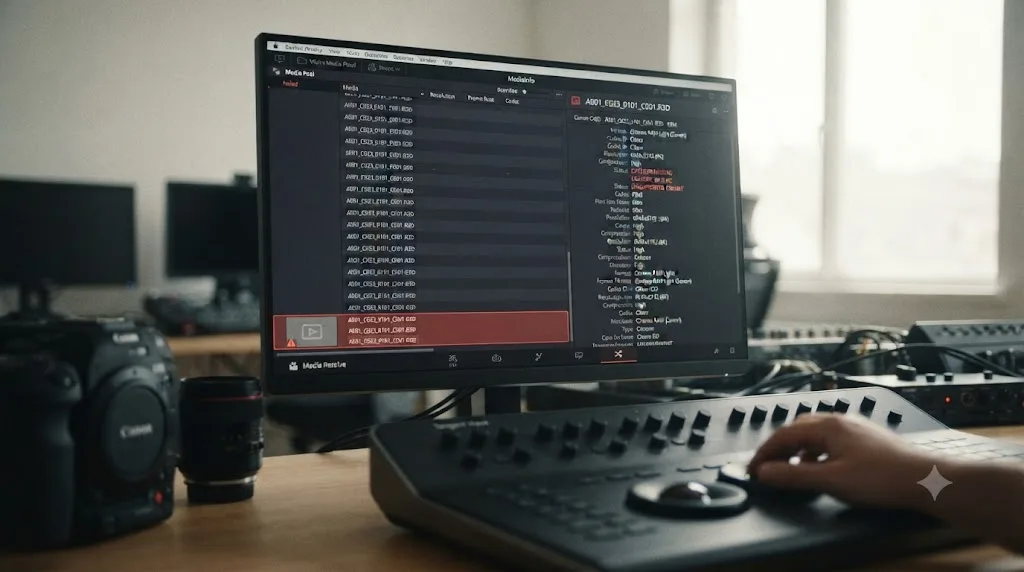
What about XF-AVC S and XF-HEVC S, the C400's new codecs?
If a C400 clip refuses to import and it isn't a .CRM RAW file, check which XF codec variant it actually is before assuming Resolve is broken, because Canon shipped two brand-new codecs with this camera specifically.
XF-AVC S and XF-HEVC S are MP4-wrapped formats Canon introduced alongside the C400, distinct from the older, MXF-wrapped XF-AVC format that's shipped on Cinema EOS bodies for years and that Resolve has long-standing support for. Per Canon's own announcement, the "S" variants exist for "an easier naming system and folder structure and metadata preservation," a workflow convenience aimed at editors who found the traditional Cinema EOS folder structure cumbersome, not a resolution or bitrate upgrade over standard XF-AVC.
Because these are new codec variants, free-version decode support for them can't be assumed to mirror Resolve's long-established XF-AVC support automatically, and real-world reports from users testing Canon XF-AVC-family files against the free version describe inconsistent results, including files that import with audio but no visible video. Blackmagic publishes an official Supported Codec List that's updated with each Resolve release; check it against your exact build before locking a delivery pipeline to XF-AVC S or XF-HEVC S specifically. If a clip won't import, our guide to DaVinci Resolve's Unsupported File Format error walks through the broader set of codec, OS, and license-tier causes that apply to any Canon MP4 or MXF file, not just the C400's new formats.
| Codec | Wrapper | Resolve support history |
|---|---|---|
| Cinema RAW Light | .CRM | Native since Resolve 14, free and Studio |
| XF-AVC | MXF | Long-standing native support |
| XF-AVC S | MP4 | New with the C400; verify against your Resolve build |
| XF-HEVC S | MP4 | New with the C400; verify against your Resolve build |
XF-AVC S and XF-HEVC S are new-in-2024 MP4 codecs, not the same long-supported XF-AVC format Resolve has decoded for years, so a C400 clip that won't import needs its exact codec confirmed before you assume the RAW-vs-Log troubleshooting in the rest of this guide applies to it. When in doubt, right-click the file and check its codec in a system inspector, or record proxy files in a format you've already confirmed Resolve reads cleanly on your specific machine.
What does independent lab testing show about the C400's rolling shutter?
Everything up to this point in this guide is about Resolve settings. Rolling shutter is a physical property of the sensor and readout, and no Color Space Transform, Resolve Color Management, or noise reduction node changes it after the fact.
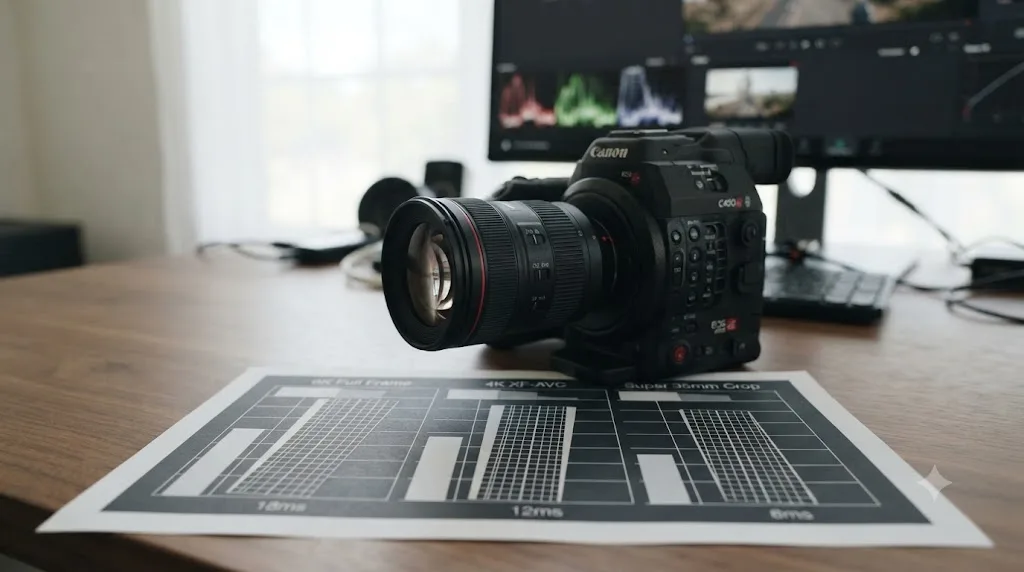
CineD's lab testing measured the C400's rolling shutter directly across its major recording modes. 6K CRAW at 25fps, in full-frame 17:9, measured 9.5 milliseconds. 4K XF-AVC at 120fps measured 7.4 milliseconds. The Super 35mm 4K crop mode measured 6.9 milliseconds, per CineD's lab test. For comparison, that same 9.5ms full-frame 6K figure is the exact number CineD's separate lab test of the Canon EOS R1 cited as its own reference point when describing the R1's faster 8.3ms readout as an improvement over "a comparable mode" on the C400.
| Measurement | Canon C400 result | Source |
|---|---|---|
| Rolling shutter, 6K CRAW 25fps, full frame | 9.5 ms | CineD lab test |
| Rolling shutter, 4K XF-AVC 120fps | 7.4 ms | CineD lab test |
| Rolling shutter, Super 35mm 4K crop | 6.9 ms | CineD lab test |
| Dynamic range, 6K RAW to CLog2, ISO 800 (SNR 2 / SNR 1) | 10.5 / 11.6 stops | CineD lab test |
| Dynamic range, 4K XF-AVC, ISO 800 (SNR 2 / SNR 1) | 13 / 14.1 stops | CineD lab test |
A 9.5-millisecond rolling shutter at 6K full frame, dropping to 6.9 milliseconds in the Super 35mm crop mode, is a fixed property of the C400's sensor readout, not a setting a Color Space Transform or Resolve preference can change. For handheld or fast-pan work, cropping to Super 35mm buys a meaningfully faster readout at the cost of the full-frame field of view, a tradeoff worth deciding on set rather than discovering as skew in the edit.
Do the Super 35mm and Super 16mm crop modes change the Color Space Transform settings?
No, but they change your field of view and your rolling shutter, and it's worth being explicit that the color pipeline doesn't move when the sensor crop does.
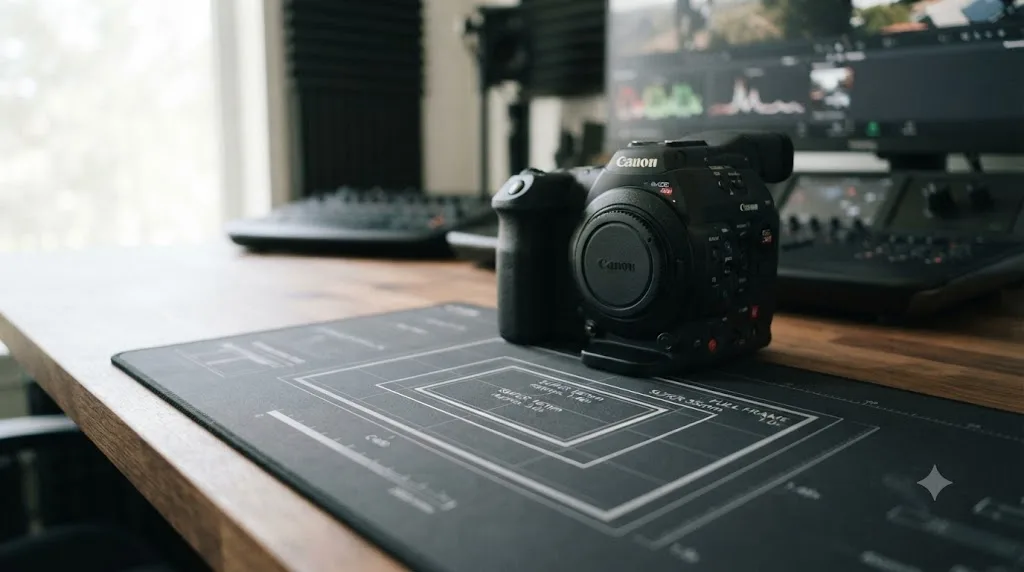
The C400's sensor operates in three modes: Full Frame, Super 35mm, and Super 16mm. Per Newsshooter's coverage of the announcement, 4K in Super 35mm carries a 1.46x crop factor, UHD in Super 35mm carries a 1.53x crop, 2K in Super 16mm carries a 2.92x crop, and HD in Super 16mm carries a 3.07x crop. Switching crop modes changes which portion of the sensor is being read and, as the rolling shutter section above shows, how fast that readout happens, but it doesn't change which Custom Picture preset is active or which color space that preset locks to. A Canon Log 2 clip shot in Super 35mm crop still needs Input Color Space set to Cinema Gamut, identical to the same gamma shot at full frame.
Where crop mode does matter for a project is lens coverage and matching multiple C400s or C400 footage against other cameras shot at different crop factors on the same shoot day; a full-frame C400 A-camera intercut with a Super 35mm crop C400 B-camera changes framing and depth of field, not color science.
| Mode | Resolution | Crop factor |
|---|---|---|
| Full Frame | Up to 6K | 1.0x |
| Super 35mm (4K) | 4K | 1.46x |
| Super 35mm (UHD) | UHD | 1.53x |
| Super 16mm (2K) | 2K | 2.92x |
| Super 16mm (HD) | HD | 3.07x |
Switching between the C400's Full Frame, Super 35mm, and Super 16mm sensor modes changes your field of view and rolling shutter, not your Color Space Transform settings, since the camera's Custom Picture presets and their fixed Cinema Gamut pairing apply identically across all three crop modes. Confirm crop mode when matching multiple C400 units or intercutting with other camera bodies, since it's a framing and depth-of-field variable that a color node won't reveal or fix.
Resolve Color Management or a manual Color Space Transform node, which one?
Both reach the same destination, and on the C400 specifically, the choice is simpler than it is on a camera with a selectable in-camera color space.
Resolve Color Management, set under Project Settings, Color Management, with Color Science set to DaVinci YRGB Color Managed, lets you tag a clip's Input Color Space and Input Gamma once through Clip Attributes, and Resolve applies the conversion automatically on every downstream node, no manual Color Space Transform effect required. Because the C400 has exactly one color space for its Log presets, Cinema Gamut, regardless of whether C2 or C3 was active, batch-tagging a bin of C400 clips carries little of the risk it does on a camera where the color space itself varies clip to clip.
The one variable RCM doesn't sort automatically is gamma: a bin mixing Canon Log 2 and Canon Log 3 clips, shot on different presets across a multi-day shoot, still needs each clip's Input Gamma confirmed individually, since that's the setting the C400's menu structure does let you vary freely. A manual Color Space Transform node forces that per-clip gamma check, which is marginally slower for a single-gamma shoot but catches a mixed C2/C3 bin that automatic color-space-only tagging wouldn't flag.
| Situation | Better fit |
|---|---|
| One gamma preset used for the whole shoot | Resolve Color Management |
| C2 and C3 clips mixed in the same bin or event | Manual Color Space Transform, checked per clip for Input Gamma |
| Mixing C400 footage with a second camera body or brand | Manual Color Space Transform per camera group |
| Fastest setup with the least manual work | Resolve Color Management |
Because the C400 locks every Log clip to Cinema Gamut, the color space half of Resolve Color Management's batch tagging is effectively risk-free on this camera; the gamma half, Canon Log 2 versus Canon Log 3, is still worth checking per clip if a shoot mixed both presets. That's a lower-risk setup than a camera with an independently selectable color space menu, even before accounting for gamma.
What happens when you intercut C400 footage with other cameras?
Cinema camera shoots run multi-body more often than not, and the C400 has already been tested in exactly that situation on a real production, against a camera in an entirely different color ecosystem.
Newsshooter's Ben Fogarty documented a direct camera test putting the C400 against a Sony VENICE, with the C400 configured to shoot 6K Cinema RAW Lite specifically to match the VENICE's full-frame RAW specifications, per his writeup. The colorist's approach built a custom color space transformation LUT as the foundational first node, applied before any creative adjustment, described in the piece as ensuring "your footage is normalized to the Venice space for further grading." That's the same normalize-first principle this guide's own two-node Color Space Transform pattern follows, just built with a custom LUT instead of Resolve's built-in CST tool. The result, per Fogarty's reporting: "the colorist was very happy and had no issue matching the cameras," and the C400 was approved as the production's B camera against the VENICE.
That same normalize-first, match-second sequence applies just as directly to a C400 intercut with a Canon R5 Mark II, an R1, or an older C300 Mark III. Every one of those bodies converts into DaVinci Wide Gamut through its own correctly configured Color Space Transform first; only after each source sits in that shared intermediate space does a creative look or Shot Match correction belong on top. Our full guide to color matching different cameras in DaVinci Resolve covers Color Match, Shot Match, and building that shared creative look once each source is individually normalized, the step this guide's two-node pattern exists to get every C400 clip through regardless of which camera it's being cut against.
A real production test matching the C400 against a Sony VENICE found the colorist had no trouble aligning the two once each camera's native color space was normalized first, which is direct field evidence that the C400's Cinema Gamut output behaves predictably in a mixed-camera pipeline. Normalize every source to DaVinci Wide Gamut before reaching for a creative grade, whether the second camera is another C400 or something from an entirely different manufacturer.
Does C400 footage change color space when output over HDMI or SDI?
This is worth flagging honestly rather than guessing, because the answer that's well-documented for Canon's hybrid mirrorless bodies isn't confirmed the same way for the C400's outputs.
Rodrigo Polo, who has tracked Canon Log-to-Rec.709 conversion behavior for years, documented that "the HDMI standard does not allow" Cinema Gamut, and that HDMI output on Canon's EOS R5 and R6 defaults to Rec.2020 instead of the Cinema Gamut those cameras record internally, in his writeup on the R5's HDMI behavior. That's a protocol-level limitation of HDMI itself, not a quirk of any one camera body, which is why it's reasonable to expect it applies broadly to Cinema Gamut sources over HDMI generally.
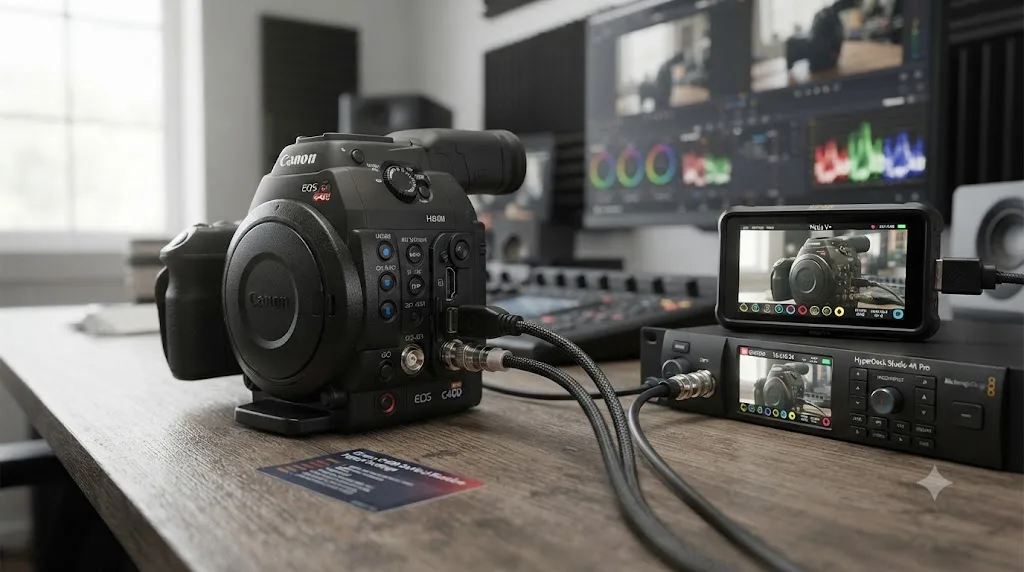
The C400 is different from the R5 and R6 in one important way: it carries both a full-size HDMI output and 12G-SDI and 3G-SDI outputs, per Canon's own newsroom announcement, where the R5 and R6 have HDMI only. Canon hasn't published C400-specific documentation confirming whether its SDI output preserves Cinema Gamut tagging where HDMI cannot, and this guide isn't going to assert a camera-specific confirmation that doesn't yet exist in Canon's own materials. What's verifiable is the protocol limitation itself: if you're pulling C400 footage from an external recorder over HDMI specifically, treat it as Rec.2020 rather than Cinema Gamut until you've confirmed against your own files, the same working assumption that applies to Canon's HDMI-only hybrid bodies.
| Output path | Working assumption for Input Color Space |
|---|---|
| Internal recording, Canon Log 2 or Canon Log 3 | Canon Cinema Gamut |
| External, standard HDMI video output | Rec.2020, by analogy to documented Canon HDMI behavior on other bodies |
| External, 12G-SDI or 3G-SDI | Not independently confirmed by Canon for the C400; test against your own files |
HDMI as a signal standard doesn't carry Cinema Gamut tagging on the Canon bodies where this has been directly documented, and the C400's SDI outputs haven't been independently confirmed to behave the same or differently, so an externally recorded C400 clip is worth verifying against your own footage rather than assuming either path automatically. If a clip pulled from an external recorder looks visibly off after applying this guide's standard Cinema Gamut settings, that mismatch is the first thing worth checking.
Do you need DaVinci Resolve Studio for any of this?
No, not for the core Log grading workflow this guide covers. The Color Space Transform effect, Resolve Color Management's automatic tagging, and native Cinema RAW Light decoding all work fully in the free version, with no functional restriction on the color math itself.
Per Blackmagic's own free version product page, the free tier includes professional color grading tools with no Studio license required. Where Studio genuinely enters the picture, per Blackmagic's Studio product page, is Temporal or Spatial Noise Reduction on ISO 12800 footage, Dolby Vision metadata authoring or HDR10+ analysis if you're grading the C400's PQ or HLG presets for an HDR delivery, or the 45 additional Resolve FX Blackmagic reserves for the Studio license.
Getting Canon C400 Log footage to grade correctly is a color management problem, and Blackmagic doesn't gate color management behind the Studio license. Don't let a general free-versus-Studio comparison talk you into a $295 upgrade just to make C400 footage look right, unless you've actually hit the noise reduction or HDR delivery walls above. Our full DaVinci Resolve Studio price breakdown covers exactly what the license changes if you're weighing it for other reasons.
A step-by-step example: taking one C-Log2 clip from flat to Rec.709
Here's the full sequence in order, from a fresh C400 clip in the Media Pool to a delivered Rec.709 grade.
- Confirm the source. Check whether the clip's Custom Picture file was C2 (Canon Log 2) or C3 (Canon Log 3), and whether it came from an internal card or an external recorder. Both Log presets lock to Cinema Gamut internally, so this step is about confirming gamma and recording path, not color space.
- Build optimized media if playback is stuttering. For 6K RAW or oversampled 4K footage, generate proxy media at Quarter or Automatic resolution before touching color.
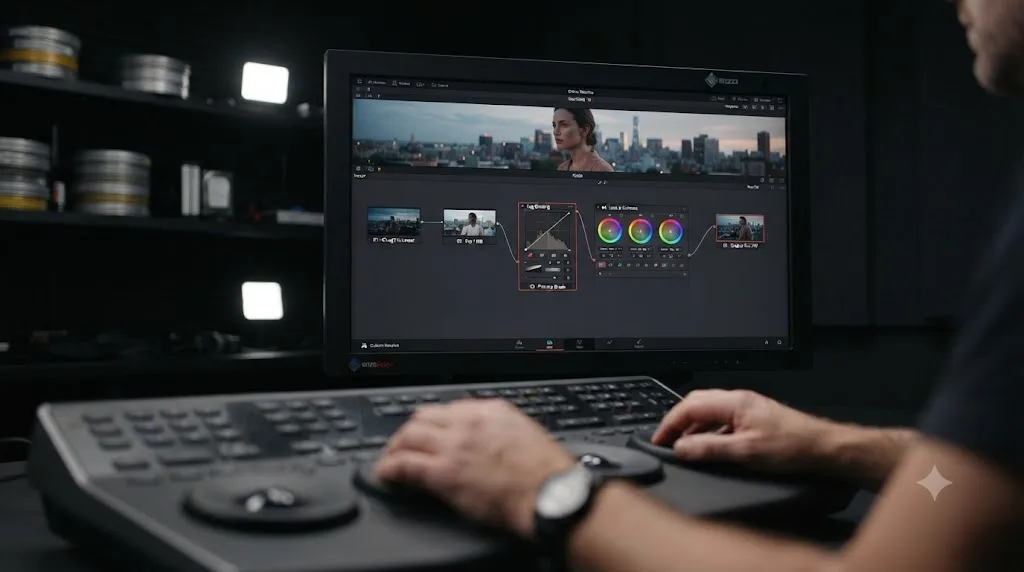
- Node 1, Color Space Transform in. Set Input Gamma to Canon Log 2 (or Canon Log 3, matching the source). Set Input Color Space to Canon Cinema Gamut for internal footage. Set Output Color Space to DaVinci Wide Gamut, Output Gamma to DaVinci Intermediate.
- Node 2, Noise Reduction, if the shot needs it. For footage shot at ISO 12800, add Temporal or Spatial Noise Reduction here, right after the Color Space Transform, before any contrast moves.
- Node 3, primary correction. With the clip in DaVinci Wide Gamut, set white balance from a neutral reference if available, then bring the black point and white point in using the Lift and Gain wheels, watching the scopes for clipping.
- Node 4, creative grade. Contrast shaping, color balance, secondary qualifiers, and power windows as the shot needs.
- Node 5, Color Space Transform out. Input Color Space DaVinci Wide Gamut, Input Gamma DaVinci Intermediate, Output Color Space Rec.709, Output Gamma Rec.709 or Rec.709-A.
- Check against a second C400 clip, or footage from another camera on the same shoot, before calling the grade final, especially on a multi-body shoot where a Super 35mm crop clip or an externally recorded clip might carry a different working assumption.
Five nodes handle the mechanism end to end, with Noise Reduction as the one optional insertion depending on ISO. Because the C400 doesn't require a color space check per clip, step one here is mainly about confirming which of two possible gammas a given clip carries, not which of three possible color spaces.
A second worked example: the C400's Cinema RAW Light workflow
The five-node sequence above is for standard Log footage. An internal Cinema RAW Light clip takes a different path from the first node onward, and it's worth walking through once so the two workflows don't get mixed on the same timeline.
- Confirm the file is actually RAW. In the Media Pool, a Cinema RAW Light .CRM clip opens its own Camera RAW tab in the Clip Attributes or Color page inspector, rather than exposing Input Color Space and Input Gamma the way a standard C-Log2 or C-Log3 clip does. If a C400 clip doesn't show that tab, it was recorded in a standard Log or non-Log mode instead, and belongs on the first worked example's path.
- Check the default decode. Cinema RAW Light debayers by default into Canon Log 2 and Cinema Gamut, per ShareGrid's documented workflow cited earlier in this guide. Confirm the Camera RAW panel reflects that, or adjust it if a different decode gamma serves the project better.
- Set the debayer resolution for editing. Choose a lower debayer quality, Half or Quarter Resolution, for smooth scrubbing while cutting, separately from the resolution used for final render, which can go to Full or Premium if the GPU can handle it.
- Grade from the decoded RAW, not through a second Color Space Transform. Once the Camera RAW panel has set the clip's working color space, stacking a Color Space Transform node on top double-converts the image.
- Match it back to any standard Log clips on the same timeline. With both sources sitting in the same DaVinci Wide Gamut working space, RAW decoded through Camera RAW, standard Log converted through a CST-in node, grade both against the same scopes target so a cut between a RAW shot and a standard Log shot from the same shoot doesn't show a visible seam.
An internal C400 RAW clip's color space is set through the Camera RAW panel at the point of debayer, not through a second Color Space Transform node stacked on top of it. Treating a RAW clip like a Log clip that needs its own CST-in node is the most common way this specific workflow goes wrong, producing a double-converted image that's hard to diagnose without knowing to check for it first.
Why won't some C400 clips import into DaVinci Resolve at all?
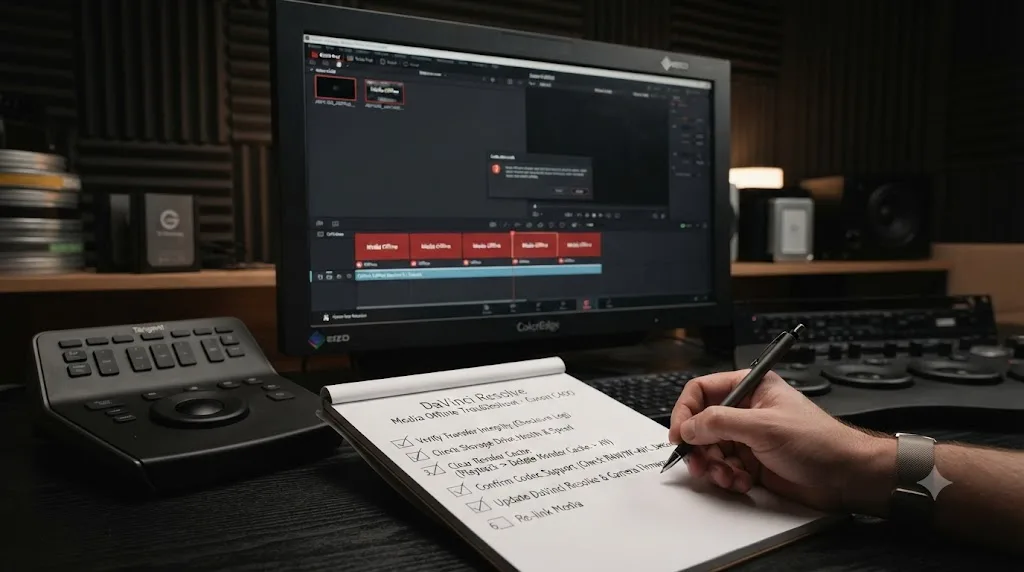
If a clip won't come online or won't generate a thumbnail, that's a different failure mode from a wrong-looking grade, and it's worth ruling out before assuming a color setting is to blame.
Cinema RAW Light footage decodes natively in both the free and Studio versions of Resolve, no plugin required, so a RAW clip failing to import is rarely a codec-support issue on Resolve's end. Standard XF-AVC, the older MXF-wrapped format, has long-standing Resolve support. The newer XF-AVC S and XF-HEVC S MP4 codecs, covered earlier in this guide, are the more likely culprit if a specific clip type refuses to import cleanly; confirm the exact codec against Blackmagic's current Supported Codec List before assuming your Resolve build is at fault.
Check these next, roughly in order: a corrupted or partial CFexpress-to-drive transfer, the most common cause of a clip that shows a thumbnail but won't play or won't come fully online; a project timeline resolution set for standard 4K trying to preview a 6K RAW clip before Resolve has generated the right proxy or cache; or, for footage pulled from an external recorder, confirming the file's actual format matches what you're assuming rather than a filename that only looks familiar. Our guide to DaVinci Resolve's Unsupported File Format error covers the broader set of causes, HEVC decode extensions, free-version Linux limitations, and variable frame rate footage, if none of the C400-specific checks above resolve it.
A Canon C400 clip that won't come online in Resolve is more often a corrupted transfer, a missing render cache, or an unfamiliar new codec variant than a fundamental decode limitation. Confirm the file itself copied correctly and that its actual format, Cinema RAW Light, standard XF-AVC, or one of the new XF-AVC S / XF-HEVC S variants, matches what you're assuming before troubleshooting further.
Do you need proxies to edit C400 6K footage smoothly?
Often, yes, for a different reason depending on whether you're cutting internal 6K Cinema RAW Light or the compressed XF-AVC modes.
Internal 6K RAW is real GPU and CPU work regardless of file size on disk, since every frame needs a debayer pass before Resolve can display it at all, the cost any RAW format carries on any camera. Standard XF-AVC, especially the 6K-oversampled 4K modes at higher frame rates, leans on H.264-family decoding, lighter than RAW but still meaningful load on a lower-powered laptop, and the newer XF-AVC S / XF-HEVC S variants carry the same practical weight even where import itself works cleanly.
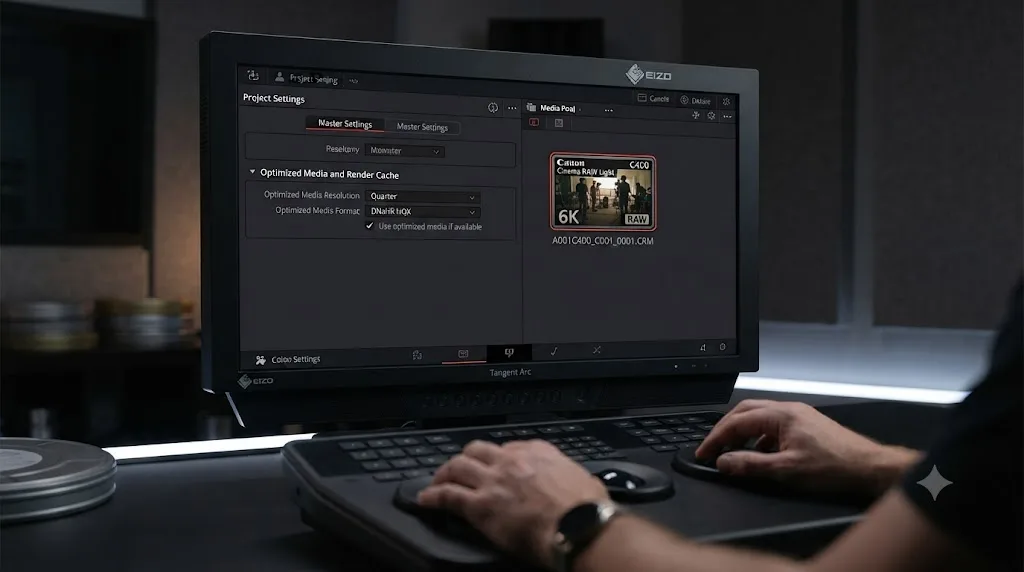
For RAW footage, the debayer resolution setting in the Camera RAW panel, covered in the second worked example above, is the first lever to pull, Half or Quarter Resolution for editing, full resolution reserved for final render. For standard XF-AVC clips, right-click a clip or bin in the Media Pool and choose Generate Optimized Media to transcode a local proxy copy in the background, at a resolution and codec set under Project Settings, Master Settings, Optimized Media and Render Cache. Our guide to setting up DaVinci Resolve proxy media on a slower laptop covers resolution and codec choices, ProRes on a Mac, DNxHR on Windows, in more depth than fits here.
Proxies and a lower debayer resolution fix playback performance, not color. Building optimized media or dropping the debayer setting from C400 footage doesn't change or skip the Color Space Transform or Camera RAW steps covered earlier in this guide; Resolve relinks to full-resolution originals for the final render regardless of what you cut with.
Is the Canon C400 actually worth buying, and who is it for?
This is worth answering honestly rather than assuming, since a reader landing on this page for Color Space Transform settings deserves a straight answer on whether the camera itself fits their job.
Canon's C400 earned Netflix's approval for its original productions on November 13, 2024, per Y.M.Cinema Magazine's coverage, joining eight other Canon Cinema EOS bodies on that list: the C80, C700 FF, C700, C500 Mark II, C300 Mark III, C300 Mark II, C70, and R5 C. Netflix requires an approved camera to have shot at least 90% of a production's final runtime, with more flexibility for non-fiction work, a real technical bar, not a marketing checkbox.
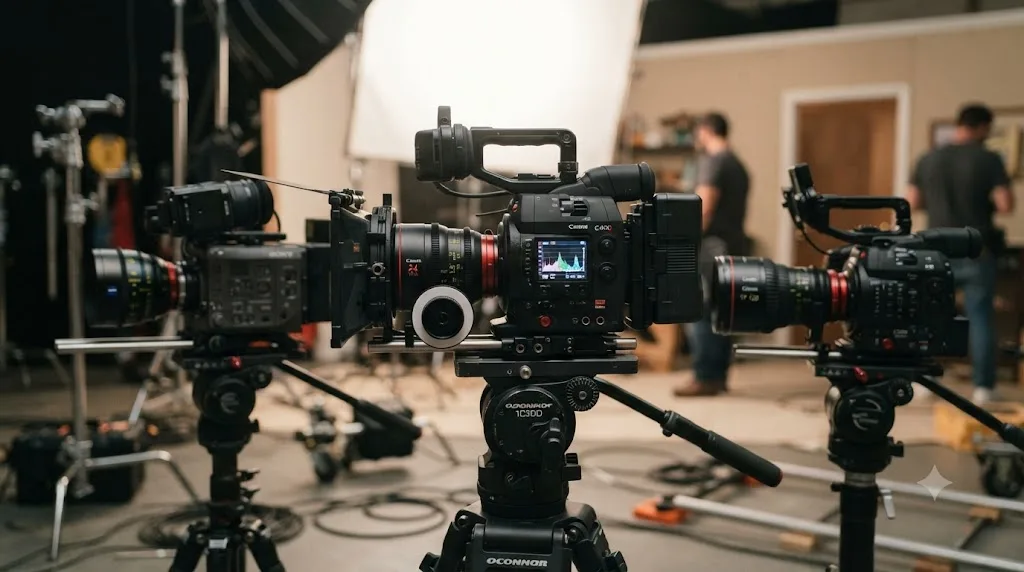
Matthew Allard, reviewing the announcement for Newsshooter, positioned the C400 candidly against its market: it's "late to the party" competing with Sony's FX6 and FX9, but he also called it "a re-birth in some ways of the original C300," a camera that reset expectations for what a mid-tier Cinema EOS body could do when it launched in 2011. That framing matters for a buyer weighing it against the C300 Mark III specifically: the C400 undercuts that camera's original launch price while adding full-frame 6K RAW the C300 Mark III never offered, at the cost of losing some of the C300 Mark III's more mature, battle-tested firmware.
One of the recurring questions in our 100,000+ member editing community is whether a camera's headline RAW resolution and dynamic range specs actually predict how well it fits a specific production, and the C400 is a useful test case. CineD's lab numbers measured real, usable dynamic range below Canon's own marketing claim, and yet the same camera passed Netflix's approval process and, per Fogarty's field test, matched cleanly against a Sony VENICE on an actual shoot. Both things are true: the marketing number oversold the sensor, and the camera still performs at a professional tier in practice.
For a buyer choosing specifically between the C400 and a Sony FX6 at a comparable price, the decision mostly comes down to existing lens investment and which color science your delivery pipeline already leans toward, not a clear technical winner either direction.
A camera's lab-measured dynamic range coming in under its own manufacturer's marketing claim doesn't disqualify it from professional work, and the C400's real Netflix approval and its documented VENICE camera match are stronger evidence of its actual capability than either number alone. If you already own a C400, everything in this guide gets its footage grading correctly. If you're still choosing between it and a C300 Mark III, an FX6, or an R5 Mark II specifically for a full-frame RAW workflow, weigh lens ecosystem and existing color pipeline more heavily than any single spec sheet figure.
What's the full settings cheat sheet at a glance?
Before the table, the one-line version. Input Gamma matches whichever Custom Picture preset was shot, Canon Log 2 or Canon Log 3. Input Color Space is Cinema Gamut for internal footage on every Log preset the C400 offers, no camera menu check required. Stay at whichever of the camera's three native ISO points, 800, 3200, or 12800, actually matches your available light. Internal Cinema RAW Light takes a different path entirely, through Camera RAW, not a Color Space Transform node. The new XF-AVC S and XF-HEVC S codecs are worth a quick import test before you build a delivery pipeline around them. And when a clip won't come online, check the file transfer and exact codec before assuming Resolve can't decode it.
If the menu hunting mid-session is the actual friction, not the settings themselves: TryUncle is the on-screen assistant for DaVinci Resolve on macOS, ask in plain words and Uncle points at the exact control on your screen.
| Setting | Value |
|---|---|
| Shooting ISO for Canon Log | 800, 3,200, or 12,800 (triple base ISO) |
| In-camera color space (both Log presets) | Cinema Gamut, fixed |
| Input Color Space, internal recording | Canon Cinema Gamut |
| Input Color Space, external HDMI | Rec.2020, by analogy; not C400-specific confirmed |
| Input Gamma | Canon Log 2, or Canon Log 3 |
| Intermediate Output Color Space | DaVinci Wide Gamut |
| Intermediate Output Gamma | DaVinci Intermediate |
| Final Output Color Space (SDR delivery) | Rec.709 |
| Final Output Gamma (SDR delivery) | Rec.709 (or Rec.709-A for Apple software) |
| Internal video codec | XF-AVC; new XF-AVC S / XF-HEVC S (MP4) |
| Internal RAW | 6K Cinema RAW Light, up to 60p |
| RAW default decode in Resolve | Canon Log 2 / Cinema Gamut |
| Rolling shutter, 6K full frame (CineD) | 9.5 ms |
| Rolling shutter, Super 35mm 4K crop (CineD) | 6.9 ms |
| Dynamic range, 6K RAW to CLog2, ISO 800 (CineD) | 10.5 / 11.6 stops |
| Studio required for basic Log grade | No |
| Studio required for Noise Reduction | Yes |
| Studio required for Dolby Vision/HDR10+ delivery | Yes |
The Canon C400's color setup turns out to be one of the more forgiving ones in Canon's current cinema lineup, for the same reason its lab-measured dynamic range falls short of the marketing sheet: it's a camera whose real behavior is more knowable than its press release suggests. Cinema Gamut is the only color space either Log preset records to, so the color-space guesswork that trips people up on cameras with an independent BT.709/BT.2020/Cinema Gamut menu doesn't apply here. What still needs checking, gamma preset, ISO tier, whether a clip is standard Log, Cinema RAW Light, or one of the two brand-new XF-AVC S and XF-HEVC S variants, matters more on this camera precisely because it's new enough that not every workflow question has a settled answer yet.
Frequently asked questions
- What Color Space Transform settings does Canon C400 footage need in DaVinci Resolve?
- Set Input Gamma to Canon Log 2 or Canon Log 3, whichever the clip was shot in. Set Input Color Space to Canon Cinema Gamut, the only color space either Log preset records to on this camera, per Canon's own EOS C400 Instruction Manual. Set Output Color Space to DaVinci Wide Gamut and Output Gamma to DaVinci Intermediate. On your last node, reverse it to Rec.709 for a standard SDR delivery.
- Does the Canon C400 let you choose BT.709, BT.2020, or Cinema Gamut independently, the way some other Canon bodies do?
- No. The C400's Custom Picture menu pairs each gamma with one fixed color space: Canon Log 2 and Canon Log 3 both lock to Cinema Gamut, PQ and HLG lock to BT.2020, and the non-Log presets lock to BT.709. There's no separate color space dropdown to check, unlike the Canon R6 Mark II or R3, which let you pick a color space independently of the Log gamma.
- Should I shoot Canon Log 2 or Canon Log 3 on the Canon C400?
- Canon Log 2 for maximum dynamic range and heavier grading budgets; Canon Log 3 for faster turnarounds. CineD's lab testing measured the C400's 6K Cinema RAW Light in Canon Log 2 at 10.5 to 11.6 stops of dynamic range at ISO 800, well under Canon's marketed 16-stop figure, though still competitive footage for a full-frame cinema sensor. Canon Log 3 needs less correction to reach a normal-contrast image but carries less highlight and shadow latitude to push in the grade.
- What ISO should I shoot Log at on the Canon C400?
- One of the camera's three native points: 800, 3200, or 12800, its triple base ISO system. Canon designed the sensor's noise floor to reset at each of those three points rather than climb steadily like a conventional single-base-ISO camera, so there's no meaningful noise penalty for choosing 3200 over 800 when the light demands it.
- Does DaVinci Resolve import the C400's Cinema RAW Light footage natively?
- Yes. Cinema RAW Light is a Canon RAW codec Resolve has decoded natively since Resolve 14, with no plugin required, and by default it debayers into Canon Log 2 and Cinema Gamut, the same intermediate values this guide's Color Space Transform settings target for standard Log footage. A C400 RAW clip opens its own Camera RAW tab in the Color page inspector rather than exposing Input Color Space and Input Gamma directly.
- Do XF-AVC S files from the C400 import cleanly in the free version of DaVinci Resolve?
- Test it against your specific build before committing a project to it. XF-AVC S and XF-HEVC S are new MP4-based codecs Canon introduced with the C400, distinct from the older MXF-based XF-AVC format Resolve has supported for years, and free-version decode support for newly introduced codec variants has historically lagged behind Studio and behind Mac versus Windows. If a clip won't import, check our full guide to DaVinci Resolve's Unsupported File Format error before assuming the file is bad.
- Do I need DaVinci Resolve Studio to grade Canon C400 footage?
- No, not for the core Log grading workflow. Color Space Transform, Resolve Color Management, and native Cinema RAW Light decoding all work in the free version. Studio matters for Temporal or Spatial Noise Reduction on footage pushed to ISO 12800, Dolby Vision or HDR10+ delivery if you're grading the PQ or HLG presets, and the 45 additional Resolve FX Blackmagic reserves for Studio.
- Is the Canon C400 worth buying compared to the C300 Mark III or Sony FX6?
- Depends on what you're replacing. The C400 is Netflix approved as of November 2024, alongside eight other Canon Cinema EOS bodies, and reviewer Matthew Allard called it, in some ways, a re-birth of the original C300 concept, at a full-frame 6K RAW spec the C300 Mark III never offered. Against the Sony FX6, at a similar price point, the choice mostly comes down to whether your existing lens and color pipeline already lean Canon or Sony.
Sources
- Canon U.S.A., Inc.: Canon Announces New EOS C400 6K Full-Frame RF Mount Cinema Camera and RF-Mount CINE-SERVO Lens
- CineD: Canon EOS C400 Cinema Camera Announced, 6K, Full Frame, RAW Internal Recording, Triple Base ISO, and More
- CineD: Canon EOS C400 Lab Test, Rolling Shutter, Dynamic Range and Exposure Latitude
- Canon EOS C400 Instruction Manual (ManualsLib)
- Newsshooter: Canon EOS C400 Announced
- Newsshooter: Camera Test, C400 vs Sony VENICE, XOCN ST, Canon RAW Cinema Lite ST (Ben Fogarty)
- ProVideo Coalition: Hands On With The Canon EOS C400 (Alec C. Cohen)
- Y.M.Cinema Magazine: Canon C400 is Netflix Approved
- ShareGrid: The Canon C200 RAW Light Workflow in 5 Steps
- Rodrigo Polo: No Cinema Gamut trough HDMI
- Blackmagic Design: DaVinci Resolve product page (free version)
- Blackmagic Design: DaVinci Resolve Studio product page
- Blackmagic Design: DaVinci Resolve Supported Codec List
Keep reading
Guides · Jul 29, 2026 · 36 min
DaVinci Resolve Canon R1 C-Log3 Import Settings
DaVinci Resolve Color Space Transform settings for Canon R1 C-Log3: why it's locked to Cinema Gamut, C-Log2 vs C-Log3, and the HDMI catch most guides skip.
Guides · Jul 12, 2026 · 39 min
How to Color Match Different Cameras in DaVinci Resolve
Match footage shot on different cameras in DaVinci Resolve with Color Space Transform, Color Match, and Shot Match, plus settings by camera brand.
Comparisons · Jul 7, 2026 · 28 min
DaVinci Resolve Studio Price: Free vs. Studio Cost, Explained
DaVinci Resolve Studio costs $295, paid once, not monthly. Here's exactly what that buys, how it stacks up against Premiere Pro and Final Cut Pro, and who needs it.