Articles / Comparisonsupdated for DaVinci Resolve 21.0.2 (July 2026)
DaVinci Resolve 8-Bit vs 10-Bit Export: Which to Choose?
Quick answer
Use 8-bit H.264 for standard SDR delivery to YouTube, social media, or client review; it's smaller and plays everywhere. Use 10-bit for HDR exports, gradient-heavy footage like skies or fog, or files headed back into grading. DaVinci Resolve's free version caps H.264 and H.265 at 8-bit; Studio unlocks 10-bit H.265, and ProRes/DNxHR already default to 10-bit.
I've watched editors agonize over this dropdown for longer than the decision deserves. Most of the time, the answer is obvious the second you know what you're actually delivering and to whom. The confusing part isn't the technology. It's that Resolve's own free version quietly changes the rules depending on which codec you pick, and nobody tells you that until your export looks wrong.
Here's the decision made plain, the free-version trap explained, and the handful of cases where 10-bit is not optional at all.
What's the quick answer: 8-bit or 10-bit for your export?
If you only read one section, read this one: match the bit depth to the destination, not to habit.
| Your export | Choose | Why |
|---|---|---|
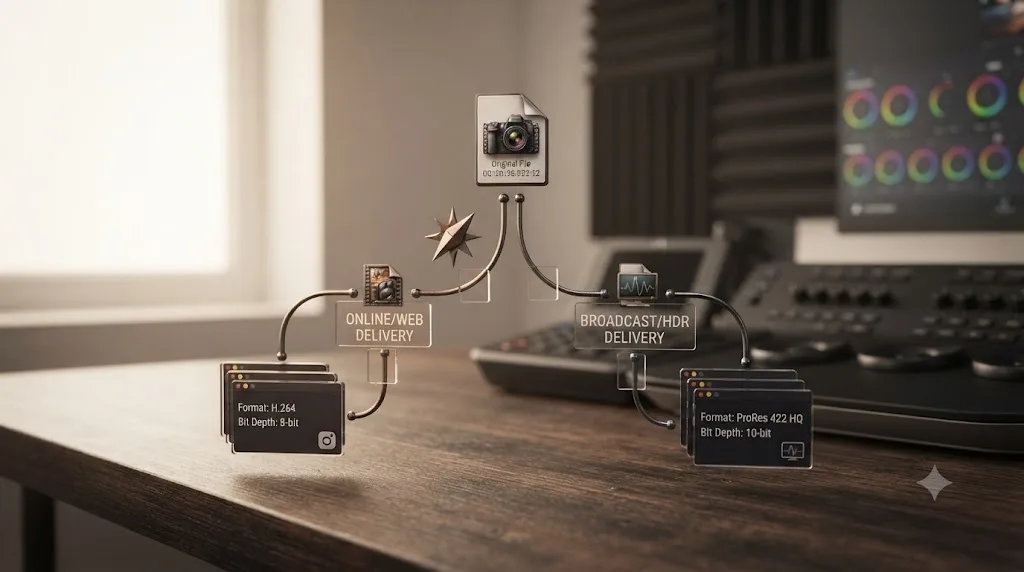
| Standard SDR upload to YouTube, Instagram, TikTok | 8-bit H.264 | Smaller, universally compatible, matches what the platform expects anyway |
| HDR delivery (PQ or HLG) | 10-bit minimum | HDR standards require 10-bit or 12-bit; 8-bit isn't a valid option |
| Footage with skies, fog, smoke, or dark gradients | 10-bit | 8-bit's 256 steps per channel band visibly in smooth gradients |
| File headed back into another edit or grade | 10-bit | Every re-encode from 8-bit compounds banding and rounding error |
| Quick client review cut, no further grading planned | 8-bit | Nobody downstream needs the extra precision for a disposable review file |
| Archiving a finished master for the long term | 10-bit, in ProRes or DNxHR | Cheap insurance against a future re-grade or reformat |
| Exporting H.264 or H.265 in DaVinci Resolve's free version | 8-bit, whether you want it or not | The free version caps both codecs at 8-bit regardless of your timeline |
Match your export's bit depth to what happens to the file next, not to what feels more premium. A disposable social clip doesn't need 10-bit any more than a Dolby Vision master can get away with 8-bit. Everything below explains the reasoning, the free-version restriction that catches people off guard, and the codecs that make the choice for you.
What's the actual difference between 8-bit and 10-bit color?
Bit depth is the number of brightness steps DaVinci Resolve can record per color channel, and it's a bigger number in 10-bit than most people expect.
An 8-bit file stores 256 possible values for red, green, and blue, which multiplies out to roughly 16.7 million displayable colors. A 10-bit file stores 1,024 values per channel instead, over a billion possible colors. Tobia Montanari, a Blackmagic Design Certified Trainer and Dolby Vision Certified Professional, lays out exactly where that extra headroom matters in his own writing on the subject: "Banding occurs when there are visible steps or abrupt changes in color, particularly in smooth gradients," and the entire reason 10-bit exists is to push that threshold somewhere the eye stops noticing it.
That's not a claim about human vision seeing more colors overall. Most estimates put the human eye's discernible color range around 10 million distinct colors, well under either bit depth's total palette. The difference isn't about the total count of colors available. It's about how finely spaced the steps are between two colors that are already close together, which is precisely what a gradient asks a codec to reproduce smoothly.
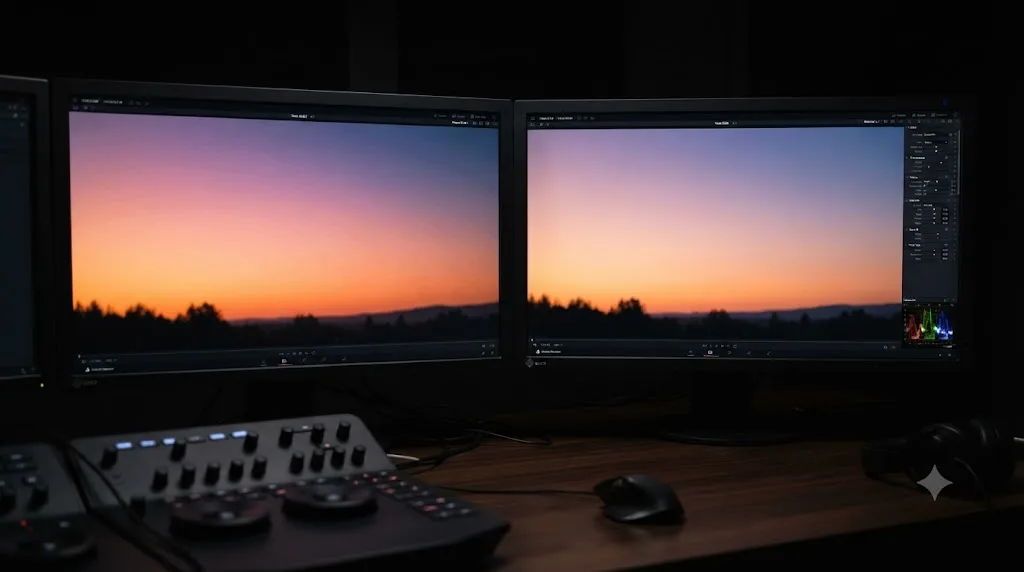
8-bit gives you 256 steps per channel. 10-bit gives you 1,024. That fourfold jump in precision is what separates a smooth sky from a banded one. A flat, evenly lit interview shot rarely reveals the gap. A sunset, a foggy exterior, or a dark vignette behind a subject reveals it immediately, because those are long, slow ramps between nearly identical values, exactly the case where running out of steps shows up as a visible stair-step instead of a smooth transition.
Does DaVinci Resolve's free version restrict you to 8-bit exports?
Yes, specifically for H.264 and H.265, and this is the single detail that surprises the most editors testing this comparison for the first time.
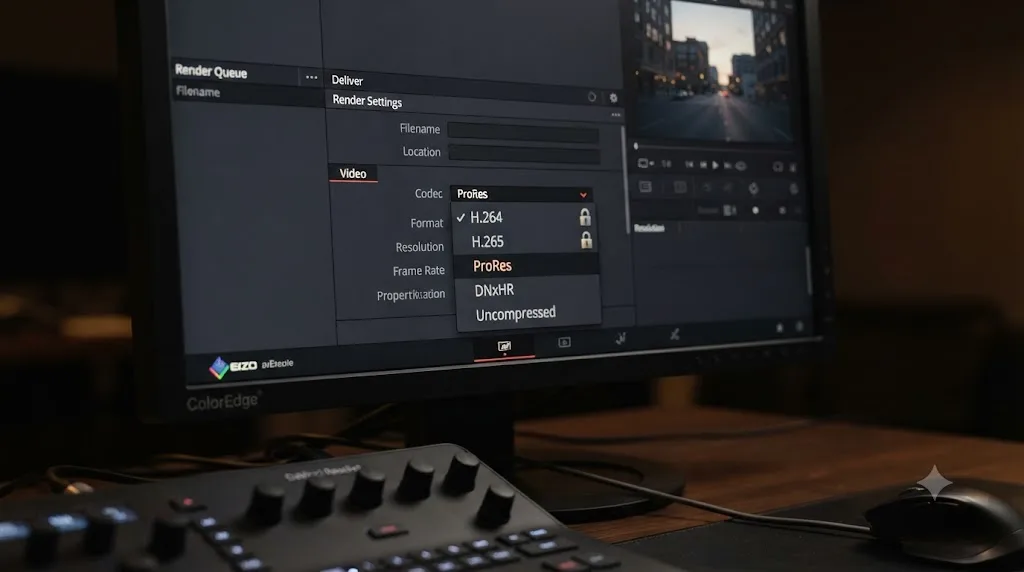
Blackmagic Design's own tech specs describe the free version's export ceiling in plain terms: it works with resolutions up to Ultra HD 3840x2160 at 60fps in 8-bit for those two delivery codecs. That restriction is entirely separate from the resolution and frame rate ceiling that Studio also lifts. You can be editing perfectly clean 10-bit camera footage, on a timeline set to 10-bit processing, and still get an 8-bit H.264 or H.265 file out the other end if you're running the free version and export to either of those two formats.
The theatre of noise blog, writing specifically about this trap, spells out the practical consequence: "When using 10-bit intermediate files in timelines, editing appears correct, but rendering produces visible banding in tonal and color gradations." Your grade looks fine in the viewer the entire time you're working. It's the final render, not the preview, where the ceiling actually bites.
The free version's 8-bit cap doesn't touch your timeline or your grading tools. It only clips the color precision at the very last step, when you render out to H.264 or H.265. That's a narrower, more specific limitation than "the free version can't do 10-bit," and it's why the fix isn't upgrading your whole workflow, just picking a different export codec.
| Codec | Free version bit depth | Studio bit depth |
|---|---|---|
| H.264 | 8-bit only | 8-bit only, no 10-bit option in DaVinci Resolve at all |
| H.265 (Main profile) | 8-bit | 8-bit |
| H.265 (Main10 profile) | Not available | Available, 10-bit |
| ProRes (any flavor) | Native bit depth per flavor, 10 or 12-bit | Same, plus hardware acceleration on Mac |
| DNxHR (any flavor) | Native bit depth per flavor, 8, 10, or 12-bit | Same |
The workaround, when H.265 Main10 isn't available to you, is exactly what theatre of noise recommends: export to a 10-bit-capable intermediate like ProRes or DNxHR first, then transcode to your final delivery format outside Resolve with a separate tool. That adds a step, but it preserves the precision your grade actually needs through to the finished file.
Does DaVinci Resolve's own timeline and cache settings affect your export's bit depth?
They can be confusing neighbors to the export bit depth question, and this is a layer most editors never open because it sits one level below the setting everyone already knows to check.
Project Settings, under Master Settings, holds two bit depth options that are not the export bit depth at all. The first is a monitoring bit depth for your video output, covering what your connected display or scopes actually show you. Blackmagic's own manual describes it plainly: choose the bit depth that corresponds to the capability of your display, between 8-bit and 10-bit, and monitoring in 10-bit is "more processor intensive, but preferable to avoid the appearance of banding" in the image you're grading against. That's a preview-quality setting. Change it and your rendered file doesn't move.
The second is the Optimized Media and Render Cache format, which controls the codec Resolve uses to write background cache files and pre-rendered proxies while you edit and grade, choices like DNxHR, ProRes, or Uncompressed at 8, 10, or 16-bit. This setting exists purely for playback performance. A 16-bit uncompressed render cache doesn't make your final H.264 export 16-bit; it just means Resolve isn't losing precision internally while it plays back cached timeline segments and effects for you in real time. Render always happens from your original source media and grade, never from the cache, so a lower-bit-depth cache format can't quietly downgrade your delivered file either.
Your timeline's internal color processing runs at 32-bit float the entire time you're working, well above either 8-bit or 10-bit, and neither the monitoring setting nor the render cache format changes what bit depth actually leaves the Deliver page. That's exactly why the viewer, the scopes, and the cached playback can all look flawless right up until a render squeezes that internal precision down to whatever the export codec you picked actually supports. The only setting in the entire application that controls your delivered file's bit depth is the codec and profile on the Deliver page, which is what the rest of this guide is about. If Resolve feels sluggish while you grade and you're tempted to change these settings purely for speed, our render cache guide covers Smart versus User cache modes in more depth, since performance is the actual problem those settings solve, not export quality.
When should you export 10-bit instead of 8-bit?
Reach for 10-bit whenever the file's next stop is more demanding than a phone screen or a social feed, and reach for it before you render, not after banding shows up.
The clearest trigger is content with smooth, sustained gradients: skies, fog, smoke, water reflections, a soft vignette behind an interview subject, a slow color transition in a music video. Those are the shots where 8-bit's 256 steps per channel run out of room first, and where a client or viewer is most likely to actually notice the difference on a real screen.
The second trigger is anything headed back into more work. A file that's going to another editor for a re-cut, a colorist for a second pass, a VFX artist for a composite, or an archive you might revisit in five years should leave your timeline at 10-bit, because every additional encode from an already-compressed 8-bit source compounds rounding error and banding that a 10-bit intermediate would have avoided.
The third trigger, covered in full below, is non-negotiable: HDR delivery. There's no 8-bit HDR option, full stop, because the standard itself doesn't define one.
If the file's next stop is a re-edit, a re-grade, an HDR display, or anything gradient-heavy, export 10-bit. If its next stop is a phone screen in a social feed, 8-bit is doing its job just fine. That single rule resolves most of this decision before you even open the Deliver page.
Does your camera's original footage bit depth limit what you should export?
Every choice covered so far assumes your source footage actually has the precision an export format could preserve, and that assumption doesn't always hold. A 10-bit export can't manufacture tonal steps a camera never recorded in the first place.
Blackmagic RAW, the format native to Blackmagic's own cameras, captures in what Blackmagic Design describes as a custom non-linear 12-bit space designed to preserve the maximum color data and dynamic range the sensor produced. Apple ProRes RAW carries the same 12-bit depth through recording and editing, per Apple's own ProRes RAW documentation, whether you're pulling it off an Atomos recorder or a camera that writes it natively. Footage shot in either format arrives in Resolve with more precision than an 8-bit export could ever hold, which is exactly the case where a 10-bit or 12-bit intermediate output earns its keep.
Most cinema and mirrorless cameras shooting a log profile, S-Log3, V-Log, C-Log, and similar, record internally at 10-bit, per each manufacturer's own spec sheet, specifically because a flat, low-contrast log image needs that extra headroom to survive a grade without banding. That's the footage the previous section keeps pointing back to: skies, fog, and gradients hold up because the source already had 1,024 steps per channel to work with before you ever touched a node.
Consumer cameras and older DSLRs shooting standard H.264 internally are a different story. Most of that hardware records 8-bit 4:2:0 straight out of the sensor, and no export setting downstream can add back precision the camera never captured. Exporting that footage at 10-bit isn't wrong, it still protects against extra rounding error from your own grade and any re-encodes, but it won't produce the same gradient smoothness a 10-bit or 12-bit original delivers, because the ceiling was set the moment the shutter opened, not the moment you opened the Deliver page.
| Source format | Typical native bit depth | What that means for export |
|---|---|---|
| Blackmagic RAW | 12-bit, non-linear | Full precision available; a 10-bit or 12-bit export keeps pace with the source |
| Apple ProRes RAW | 12-bit | Same as above; exporting at 8-bit throws away real captured detail |
| Log profile (S-Log3, V-Log, C-Log, and similar) | Typically 10-bit internally | A 10-bit export preserves what the camera captured; 8-bit adds unnecessary rounding on top of an already-flat image |
| Standard H.264 on consumer cameras and older DSLRs | Typically 8-bit 4:2:0 internally | A 10-bit export won't add missing precision back, though it still avoids extra rounding from your own grade |
A 10-bit export is a ceiling, not a floor. It preserves whatever precision your source already has; it can't restore precision a camera discarded at the moment of capture. If banding keeps showing up in your grades no matter what you export, the fix often starts before Resolve ever opens: a camera or recorder capable of a real 10-bit or 12-bit log or RAW capture solves the problem at its source, where a smarter export setting alone cannot.
Do you need 10-bit for HDR delivery in DaVinci Resolve?
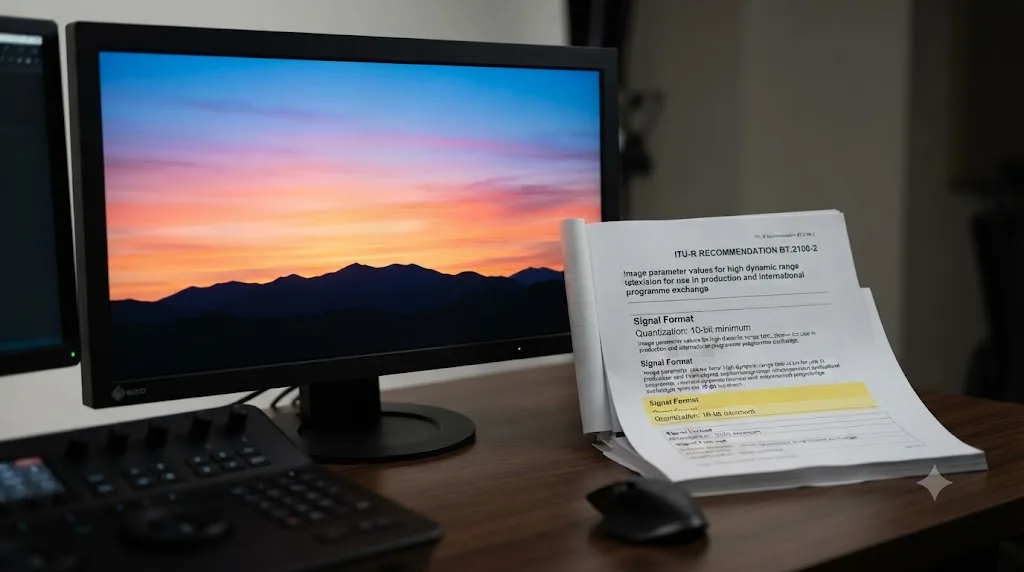
Yes, and this isn't a quality preference, it's a spec requirement. The ITU-R BT.2100 recommendation, which defines the PQ and HLG transfer functions behind every HDR format DaVinci Resolve supports, specifies a bit depth of 10 or 12 bits per sample. Eight-bit isn't listed as an option at any point in that document.
That requirement exists because HDR pushes a much wider brightness range through the same color pipeline an SDR image uses. Squeezing more stops of dynamic range into 256 steps per channel would make banding in highlights and shadow detail nearly unavoidable, especially in exactly the kind of skies and gradients HDR grading is meant to make look better, not worse. Ten-bit's 1,024 steps give that wider range enough room to stay smooth.
YouTube's own HDR upload documentation backs this up from the delivery side: it recommends codecs that support 10-bit encoding with HDR metadata specifically for HDR uploads, distinct from its general SDR upload guidance. Our HDR grading guide covers the Resolve Color Management side of setting up a PQ or HLG grade in full; the bit depth requirement covered here is the export-side half of that same workflow.
HDR video is not simply "SDR with brighter highlights." It's a wider brightness range that needs a 10-bit or 12-bit pipeline by specification, and trying to deliver it at 8-bit isn't a smaller file, it's outside the standard entirely. If your delivery brief says HDR anywhere in it, the bit depth question is already answered before you open the Deliver page.
Does YouTube, Vimeo, Instagram, or TikTok actually support 10-bit uploads?
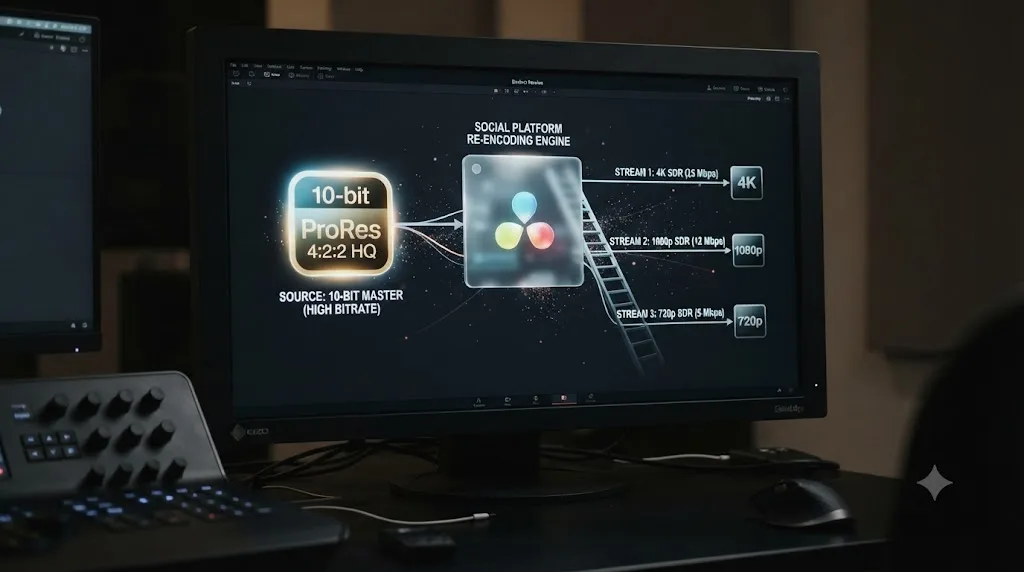
For HDR specifically, yes on YouTube and Vimeo. For ordinary SDR uploads across all four platforms, 10-bit buys you nothing, because the platform transcodes your upload into its own delivery ladder regardless of what you sent it.
YouTube's HDR upload documentation confirms 10-bit encoding with proper HDR metadata as the recommended path for HDR content specifically, and pairs that with H.265 as its recommended codec for HDR streaming. That's a real, functional reason to export 10-bit when your video actually is HDR. For a standard SDR upload, though, YouTube's own recommended settings, covered in full in our YouTube export settings guide, are built around 8-bit H.264 at specific bitrate targets per resolution, because that's what the platform's own transcoding pipeline expects and handles best.
Vimeo sits closer to YouTube than to Instagram or TikTok on this question. Vimeo's own help center states that to be considered HDR at all, a file must be tagged with the correct color transfer characteristics and carry a bit depth of 10 or greater, and its Dolby Vision path narrows further still: Vimeo requires delivery as HEVC 10-bit at Dolby Vision Profile 8.4, capped at 4K resolution. That's a real, functional reason to export 10-bit specifically when you're delivering HDR or Dolby Vision to Vimeo. For a standard SDR upload to Vimeo, the same logic as YouTube applies: the platform's own compression pipeline is what your viewers actually watch, and 10-bit precision spent on an ordinary SDR upload doesn't survive that pipeline in any way a viewer would notice.
Instagram and TikTok both compress uploads aggressively regardless of the file you send them, and neither platform publishes a 10-bit delivery spec the way YouTube and Vimeo do for HDR. Sending either platform a 10-bit master doesn't hurt anything, but it also doesn't survive the platform's own re-encode in any way you'd notice, since their compression pass flattens most of that extra precision back down before a viewer ever sees the file.
| Platform | 10-bit support | What it's for |
|---|---|---|
| YouTube | Yes, for HDR uploads with correct metadata | HDR delivery only; SDR uploads stay on YouTube's standard 8-bit pipeline |
| Vimeo | Yes, required for HDR (bit depth of 10 or greater) and Dolby Vision (HEVC 10-bit, Profile 8.4, 4K cap) | HDR and Dolby Vision delivery; SDR uploads use Vimeo's standard pipeline |
| No published 10-bit delivery spec | Aggressive compression regardless of source bit depth | |
| TikTok | No published 10-bit delivery spec | Aggressive compression regardless of source bit depth |
Uploading 10-bit to a platform that only supports SDR delivery doesn't preserve anything, because the platform's own transcode pass discards the extra precision anyway. Reserve 10-bit uploads for genuine HDR or Dolby Vision delivery, where the platform actually reads and respects the extra bit depth, and don't burn export time chasing 10-bit precision a social feed's compression will erase regardless.
What do professional broadcasters and streaming platforms require for delivery masters?
Stricter specs than anything covered so far, and they're worth knowing even if you never deliver to one of these platforms yourself, because they show what "10-bit is the safe default" looks like at the professional end of the industry.
Netflix publishes its delivery specifications for exactly this purpose. Its Non-Graded Archival Master requirements, part of the same family of specs that govern finished program delivery, set a floor of 10-bit DNxHR 444 or ProRes 444 for SDR content, and 12-bit DNxHR 444 or ProRes 4444 XQ for HDR content, when a compressed intermediate format is acceptable at all. Netflix reserves those compressed options for limited circumstances like animation workflows; its default expectation for primary archival masters is uncompressed or losslessly compressed formats such as 16-bit DPX or 16-bit half-float OpenEXR, depending on the color space in use. Even the "compressed exception" tier sits at 10-bit minimum, never 8-bit.
That's a useful data point specifically because it's public and specific. It tells you where the professional distribution and archival world actually draws its own line, and that line is nowhere near 8-bit even for its most permissive exceptions. If you're delivering to a broadcaster or streaming platform with its own written spec sheet, that document overrides everything in this article; always follow it exactly rather than assuming these numbers transfer. But if you're building a personal or client archival workflow and wondering how conservative to be, Netflix's own numbers are a reasonable anchor: 10-bit as the absolute floor for anything meant to survive a future re-grade, 12-bit once HDR enters the picture.
Professional archival and broadcast delivery specs treat 10-bit as the minimum acceptable floor, not an upgrade path, and reserve 12-bit specifically for HDR masters. That's the same rule this guide has been building toward from the consumer-export side; the broadcast world just writes it into a contract instead of leaving it to judgment.
Which export codecs are 8-bit only, and which default to 10-bit?
The codec you pick answers most of this question before you ever touch a bit-depth dropdown, because several of Resolve's export formats don't give you a choice at all.
| Codec | Bit depth in DaVinci Resolve |
|---|---|
| H.264 | 8-bit only, no 10-bit option exists |
| H.265 Main profile | 8-bit |
| H.265 Main10 profile | 10-bit, Studio-only in Resolve |
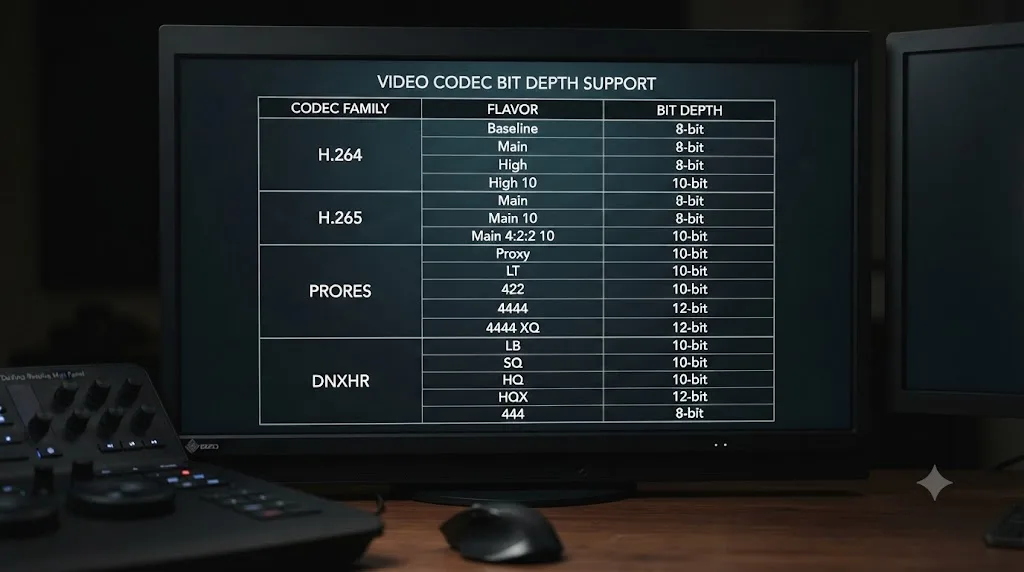
| ProRes 422 Proxy / LT / 422 / 422 HQ | 10-bit natively |
| ProRes 4444 / 4444 XQ | 12-bit, plus alpha channel |
| DNxHR LB / SQ | 8-bit |
| DNxHR HQX | 10-bit, with a 12-bit option |
| DNxHR 444 | 10 or 12-bit, plus alpha channel |
Apple's own ProRes documentation confirms the entire ProRes 422 family, from Proxy up through HQ, is 10-bit by design; there's no 8-bit ProRes flavor to accidentally pick. DNxHR splits differently, per Avid's own bandwidth specifications: the lighter LB and SQ tiers are 8-bit, built for offline editing rather than finishing, while HQX steps up to 10-bit specifically because that's the tier meant for grading handoffs and masters. Our ProRes vs DNxHR guide covers the rest of that comparison, including platform support and container formats, if the codec choice itself is still open.
Pick ProRes 422 HQ or DNxHR HQX and the 10-bit question is already answered, because neither format ships an 8-bit option at that tier. That's part of why intermediate codecs exist in the first place: they remove an entire category of export mistake by simply not offering the lower-precision option where it would actually cause a problem.
Does chroma subsampling matter as much as bit depth?
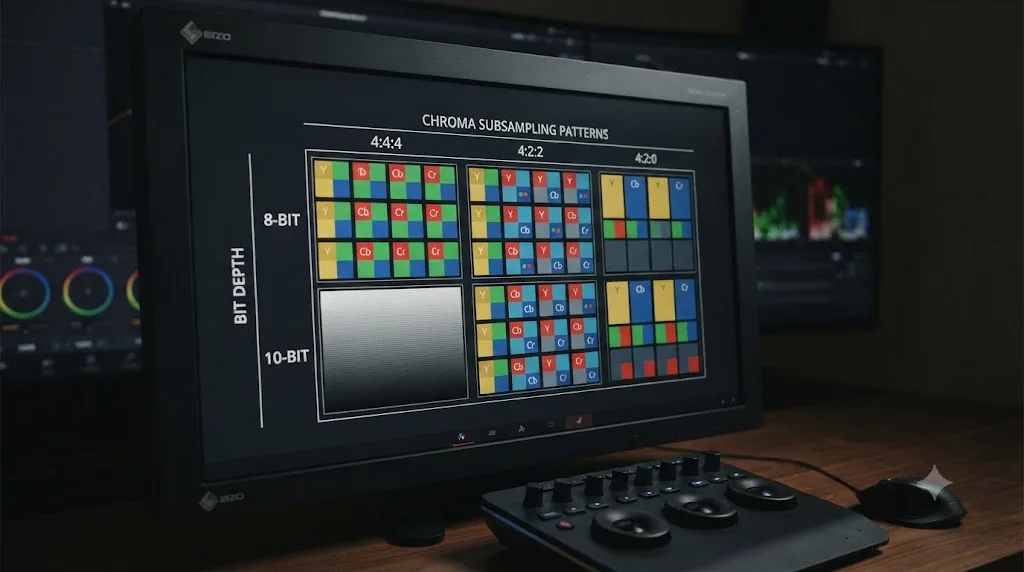
It's a separate dial entirely, and conflating the two is one of the quieter ways editors misjudge an export's actual color precision. Bit depth controls how many brightness steps exist per channel. Chroma subsampling controls how much color detail, as opposed to brightness detail, gets recorded at all, and DaVinci Resolve's codecs mix and match both independently.
The three subsampling ratios you'll see in codec names work like this. 4:4:4 records full color resolution matching the luma channel exactly, with no color data discarded; it's the format of choice for VFX and heavy grading work, at the cost of the largest files. 4:2:2 halves the horizontal color resolution compared to luma, a compromise long used in broadcast and professional production because the eye barely notices the loss while the file shrinks meaningfully. 4:2:0 subsamples color both horizontally and vertically, cutting color data to a quarter of luma's resolution; it's the industry default for streaming and consumer delivery, including nearly everything you upload to YouTube or Instagram, because that tradeoff is invisible at typical viewing distances on the kind of content those platforms carry.
Here's where the two axes intersect in Resolve's own codec list. H.265 Main10 is 10-bit but still 4:2:0, the same color subsampling as an 8-bit H.264 file, just with more brightness steps per channel. ProRes 422 HQ is 10-bit and 4:2:2, giving it both more brightness precision and more color resolution than H.265 Main10. ProRes 4444 and DNxHR 444 go further still, pairing 12-bit or 10-bit depth with full 4:4:4 color, which is exactly why those tiers are the ones broadcasters and archival specs reach for, not because of bit depth alone.
A 10-bit file can still be color-starved if it's paired with 4:2:0 subsampling, and a file with full 4:4:4 color can still band if it's only 8-bit; the two settings solve different problems and a codec's tier usually bundles a specific combination of both. If your work involves heavy chroma keying, skin tone isolation, or aggressive color qualifiers, the subsampling ratio can matter as much as the bit depth, which is exactly why finishing codecs like ProRes 4444 and DNxHR 444 stack the best of both rather than picking one.
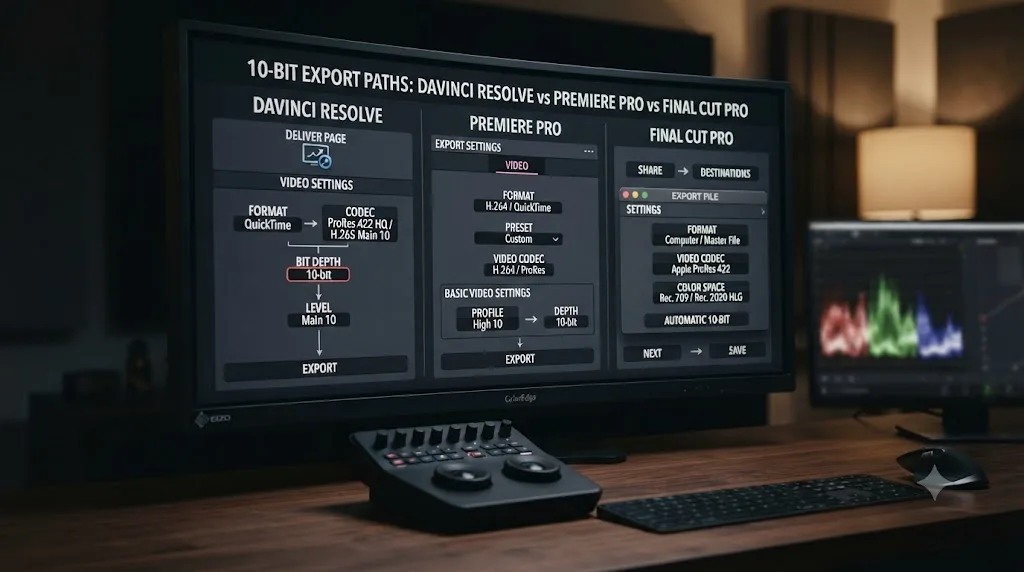
How does DaVinci Resolve's 10-bit export compare to Premiere Pro and Final Cut Pro?
Since this comparison is really about what "10-bit export" costs you in each tool, it's worth putting Resolve side by side with the two editors most people are choosing between it and.
Premiere Pro has no free-tier bit depth cap the way DaVinci Resolve does, because Premiere Pro has no free tier at all; every seat is a paid Creative Cloud subscription, and 10-bit HEVC export has been available to every one of those seats since Premiere Pro added it. Adobe's own release notes for the May 2022 update describe hardware-accelerated encoding for 10-bit 4:2:0 HEVC arriving on Mac systems, including Apple silicon, and on Windows systems with supported AMD, Intel, or NVIDIA GPUs, cutting export times dramatically compared to the software-only encode that preceded it. In Premiere Pro, you select HEVC as your export format, then set the Profile to Main10 in the Video tab's encoding settings, the same conceptual step as picking Main10 in Resolve, just without a free-version wall blocking it.
Final Cut Pro takes a different default path. Apple's own Final Cut Pro product page describes the Media Engine built into Apple silicon accelerating both ProRes and HEVC export, and because ProRes is Final Cut's native finishing codec, editors on Apple hardware often end up at 10-bit by default simply because that's what ProRes already is, without ever opening a bit-depth menu the way Resolve or Premiere Pro require. Final Cut Pro is Mac-only and a one-time purchase rather than a subscription, which removes the licensing-tier question entirely; there's no free version with a codec cap to work around in the first place.
| Editor | 10-bit export gated by license tier? | Native 10-bit path |
|---|---|---|
| DaVinci Resolve | Yes, H.264/H.265 locked to 8-bit on the free version | H.265 Main10 (Studio), or ProRes/DNxHR on any version |
| Premiere Pro | No free tier exists; every subscription gets 10-bit HEVC | HEVC Main10, hardware-accelerated on supported GPUs |
| Final Cut Pro | No; one-time purchase, no tiered cap | ProRes by default; HEVC available as an export option |
DaVinci Resolve is the only one of the three major NLEs where 10-bit export for a common delivery codec depends on which license tier you're running, because it's the only one of the three with a genuinely free tier to gate in the first place. That's not necessarily a knock against Resolve; the free version's overall feature set still outclasses free alternatives in nearly every other category. It's simply the tradeoff that comes with Resolve being the one editor on this list you can use professionally without paying anything at all.
Which GPUs and hardware encoders actually support 10-bit export?
Even once your Resolve edition and codec both support 10-bit, your hardware has the final say on whether that export happens quickly or crawls, and older graphics hardware can be a silent bottleneck editors never think to check.
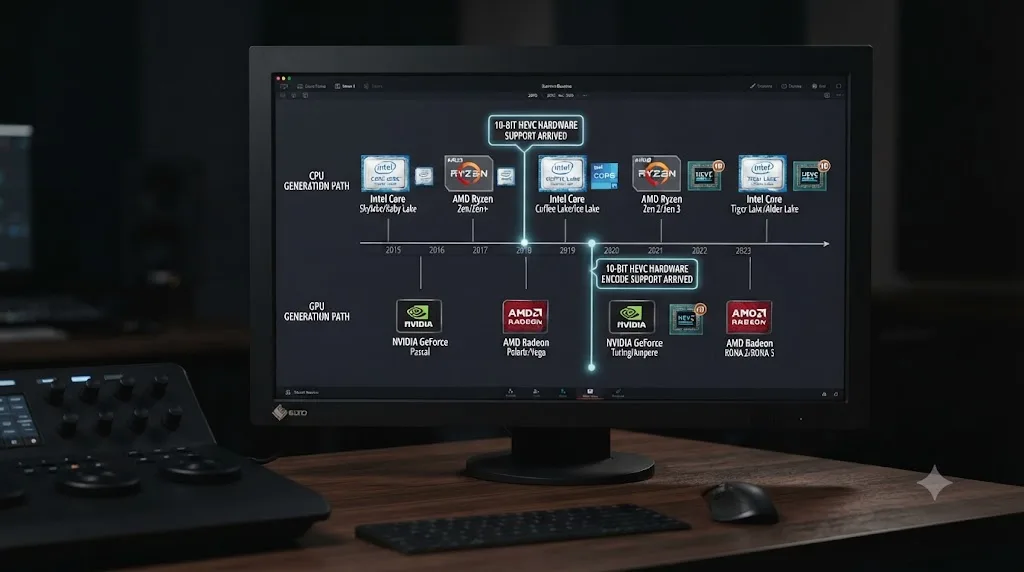
On NVIDIA GPUs, hardware-accelerated 10-bit HEVC encoding through NVENC requires Pascal architecture or newer, the generation that shipped starting with the GTX 10-series in 2016. NVIDIA's own NVENC documentation confirms Main10 profile support, meaning hardware encoding of 10-bit content, is marked unsupported on the Maxwell generation that preceded Pascal and supported from Pascal onward. A GTX 9-series card or older can still technically produce a 10-bit H.265 file in Resolve Studio, but it has to fall back to slower software encoding to do it, since the hardware path simply isn't there.
Intel's integrated graphics tell a similar generational story through Quick Sync Video. Intel's own support documentation confirms that 6th generation Skylake processors added hardware HEVC encoding, but only at 8-bit; hardware-accelerated 10-bit HEVC encoding didn't arrive until 7th generation Kaby Lake processors. If you're running Resolve on an older laptop with a pre-Kaby Lake Intel chip and no discrete GPU, a 10-bit H.265 export is leaning entirely on your CPU.
Apple Silicon sidesteps the generational patchwork almost entirely. Every Apple silicon Mac, from the original M1 forward, ships a Media Engine that Apple's own Final Cut Pro documentation describes as accelerating both ProRes and HEVC export, which is one reason ProRes performs so well as a 10-bit finishing codec specifically on Mac hardware, in DaVinci Resolve as much as in Apple's own apps.
| Hardware path | Minimum generation for 10-bit hardware encode |
|---|---|
| NVIDIA NVENC (HEVC Main10) | Pascal (GTX 10-series, 2016) or newer |
| Intel Quick Sync Video (HEVC 10-bit) | 7th Gen Kaby Lake or newer; 6th Gen Skylake tops out at 8-bit hardware encode |
| Apple Silicon Media Engine | Every Apple silicon Mac, M1 and later |
A 10-bit export that should take minutes can quietly turn into an hours-long software encode if your GPU predates that codec's hardware support, even when your Resolve edition and codec selection are both correct. If a 10-bit render is taking dramatically longer than an equivalent 8-bit one on the same machine, check your GPU generation against this table before assuming the bit depth itself is the cause; more often, it's the encoder falling back to software because the hardware path for that specific bit depth and codec combination doesn't exist on your card.
Does 10-bit actually make your export file bigger?
Not on its own, and this is one of the more persistent myths in this whole comparison. File size is driven mostly by bitrate and codec choice, not bit depth in isolation.
Take H.265 as the clearest example. Main and Main10 can both be encoded at the exact same target bitrate; Main10 simply spends those bits describing 1,024 tonal steps instead of 256, rather than requiring more bits overall to do it. A 10-bit H.265 file set to the same bitrate as an 8-bit H.265 file lands at roughly the same size on disk. The precision difference is in how the existing bits get distributed, not in how many of them the file uses.
Where bit depth and file size do move together is in the intermediate codec world, and that's a codec-tier effect, not a pure bit-depth effect. ProRes 422 HQ at roughly 220 Mbps and DNxHR HQX at roughly 208 Mbps, per Apple's and Avid's own published bandwidth figures, are both 10-bit and both dramatically larger than an 8-bit H.264 delivery file at a typical 8 to 12 Mbps web bitrate. But that gap exists because HQ-tier mezzanine codecs are built for finishing work at high bitrates by design, not because 10-bit itself demands four times the storage of 8-bit.
Bit depth changes how precisely a file describes color. Bitrate changes how big the file is. Conflating the two is how editors end up avoiding 10-bit for the wrong reason. If storage is genuinely the constraint, the bitrate slider is where that battle gets fought, not the bit depth dropdown.
Can you actually see the difference between 8-bit and 10-bit on a normal screen?
Rarely, on flat, well-lit footage, and this is worth saying plainly because it cuts against a lot of gear-shop marketing copy. The difference is real, but it's specific, not universal.
On a plain interview shot with even lighting and no long gradients, 8-bit and 10-bit exports at a matched bitrate look effectively identical to almost anyone, including trained eyes, because there's no smooth ramp in the image for banding to expose in the first place. The difference shows up specifically in gradient-heavy content: skies, fog, smoke, water, dark vignettes, slow color transitions. There, 8-bit's 256 steps per channel can visibly stair-step, and 10-bit's 1,024 steps stay smooth where 8-bit breaks down.
There's a second factor working against the difference showing up at all: most consumer monitors, TVs, and phone screens are themselves 8-bit panels, and they use a dithering technique to fake extra smoothness rather than a true 10-bit panel underneath. Watching a genuinely 10-bit file on an 8-bit display narrows the visible gap further, since the display itself is the bottleneck at that point, not the file.
Ten-bit's advantage is concentrated entirely in gradients and grading headroom, not in some general, all-purpose sharpness or richness that shows up on every shot. A flat product demo and a slow sunset time-lapse are not the same test, and treating them as if they are is how "I couldn't tell the difference" and "the banding was obvious" both end up being true statements about the same bit depth, describing two completely different kinds of footage.
What happens if you export 8-bit from a 10-bit graded timeline?
Your grade gets rounded down at the final step, and where that rounding shows up depends entirely on how hard you pushed the grade before you got there.
DaVinci Resolve processes internally at a much higher precision than either 8-bit or 10-bit while you're working, so your timeline and viewer will keep looking correct right up until the render. The compression happens at export, when Resolve has to fit your finished grade into whichever bit depth the output codec actually uses. A light, conservative grade on already-clean footage rarely shows any visible difference collapsed to 8-bit. A heavy secondary grade, an aggressive power window pushed hard on a gradient background, or any HDR-style highlight roll-off squeezed back into SDR range is exactly where that rounding turns into visible banding in the delivered file, even though the same shot looked perfectly smooth in the viewer the whole time you were grading it.
That's the same trap covered earlier with DaVinci Resolve's free version H.264 and H.265 cap, just from the grading side instead of the license side. The fix is identical either way: if the grade is heavy enough to worry about, export to a 10-bit-capable format and only step down to 8-bit at the very last stage of the pipeline, ideally after a separate, deliberate check for banding on the specific shots most likely to show it.
A heavy grade collapsed straight to 8-bit can reintroduce banding that never existed in your source footage, purely from the export step itself. That's a self-inflicted problem, and it's also one of the easiest to avoid, since the fix is just picking a different codec on the same Deliver page you were already using.
Why does your export still show banding even after switching to 10-bit?
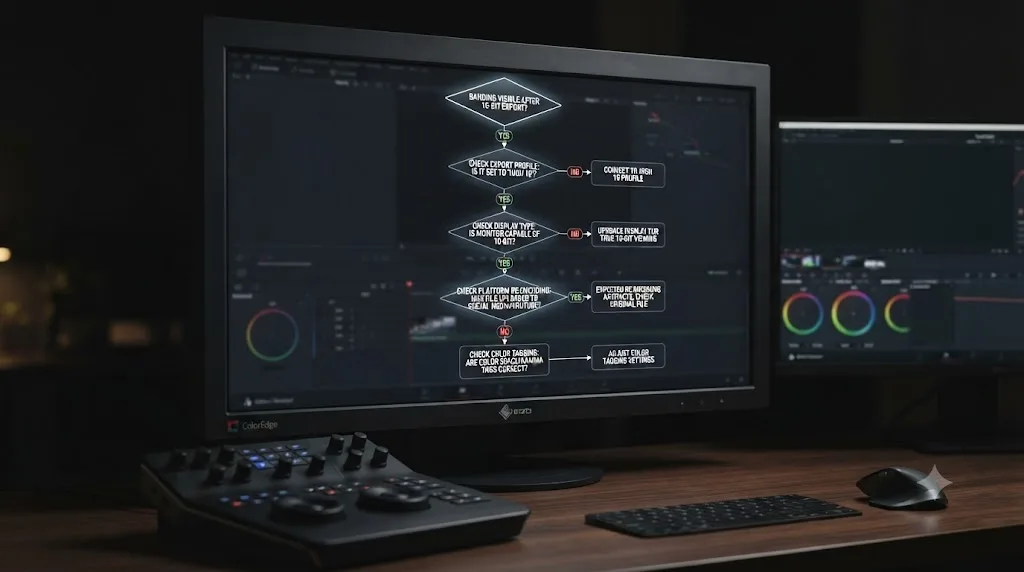
This is the troubleshooting question that comes right after someone follows every step in this guide and still sees the exact problem 10-bit was supposed to fix, and there are a handful of specific culprits worth checking in order rather than assuming the bit depth setting itself failed.
Check that Main10 is actually what got selected, not Main. It's an easy dropdown to misread, and H.265's Main and Main10 profiles sit right next to each other in Resolve's codec panel. Open the render job you already queued or already exported and confirm the profile in its settings, rather than trusting memory of what you clicked.
Check where you're actually viewing the file. A genuinely 10-bit export played back on an 8-bit consumer display, the majority of monitors and every phone screen, gets dithered by that display regardless of the file's real precision, which can make even a correctly exported 10-bit file look like it's banding when the banding is really happening in the display's own approximation, not the file.
Check whether the platform re-encoded it after you uploaded it. This is the most common false alarm. A 10-bit master uploaded to a platform that only supports SDR H.264 delivery, which includes Instagram, TikTok, and YouTube for anything not tagged HDR, gets transcoded by that platform's own pipeline into its standard delivery ladder. If that ladder's bitrate is aggressive enough, it can introduce new banding on re-encode even from a source file that had none, and the banding you're seeing lives in the platform's compressed copy, not in the 10-bit master you exported.
Check your color space and gamma tags, especially for HDR deliveries. A 10-bit file tagged with the wrong color space or transfer function can make downstream software misinterpret how to unpack that precision, which can visually resemble banding even though the underlying bit depth is correct. This is the same tagging issue covered earlier in the HDR delivery section, and it's worth a second look here specifically because a tagging mismatch is easy to mistake for a bit depth failure when the actual cause is metadata.
Check the footage itself for banding baked in at the source. If your camera captured 8-bit internally, no export setting downstream can add back precision that was never recorded. A 10-bit Resolve export from an 8-bit camera original preserves everything that's there; it doesn't invent detail the sensor didn't capture.
If a genuinely 10-bit file on a genuinely 10-bit display still bands, the compression settings, not the bit depth, are usually the real cause. An aggressively low bitrate can still band a 10-bit file, just at a higher threshold than an 8-bit one would; bit depth and bitrate solve related but different problems, and neither one is a substitute for the other.
How do you set your DaVinci Resolve export to 10-bit?
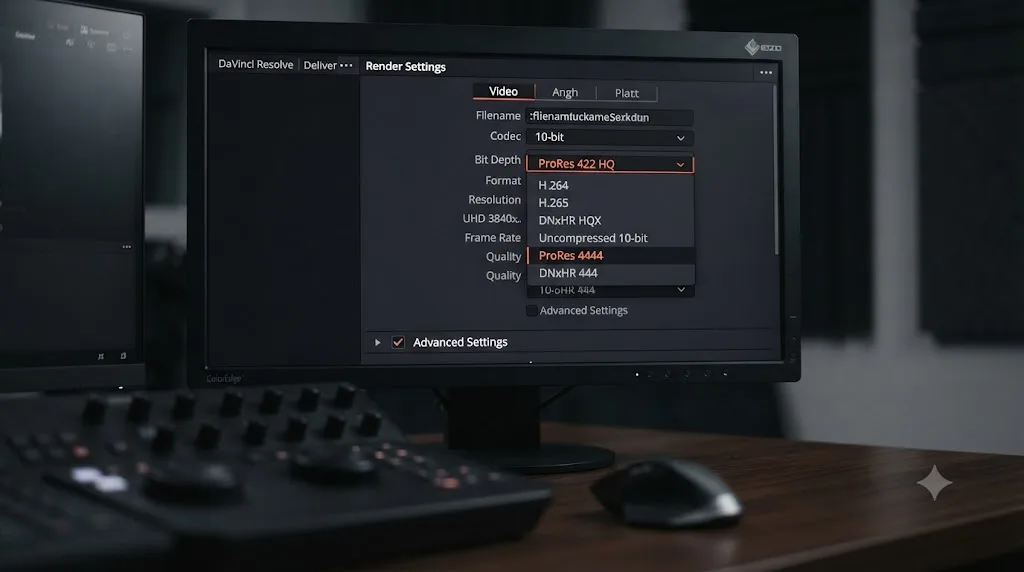
Open the Deliver page, pick a codec that actually supports it, and set the bit depth explicitly in the Video panel rather than trusting a default.
Start by choosing your format and codec. H.264 is off the table entirely for this, since DaVinci Resolve has no 10-bit H.264 option at all. H.265 offers Main10 specifically for 10-bit, though as covered above, that option only appears if you're running Studio. ProRes and DNxHR sidestep the whole question: pick any ProRes flavor from 422 up, or DNxHR HQX or higher, and you're already at 10-bit or better by default.
Once the codec's set, confirm the color space and gamma tags in the Video panel actually match your grade, especially for HDR work, since a mismatched tag can quietly undo the benefit of exporting 10-bit in the first place by telling downstream software to interpret your file incorrectly. Add the job to the render queue, double-check the codec and bit depth one more time in that queue panel before you commit, then render. The steps above in this post's howto panel walk through the same sequence in order.
If the 10-bit option for H.265 is grayed out or simply missing from your Codec dropdown, that's the free version's cap showing up, not a bug. Confirm your Resolve edition before you go looking for a setting that isn't there to find.
Does audio bit depth have anything to do with this?
No, and it's worth a short, direct answer because the shared term "bit depth" makes the two sound related when they're solving completely unrelated problems.
Audio bit depth, typically 16-bit or 24-bit in Resolve's Deliver page Audio tab, describes the dynamic range and noise floor of your sound, how quietly a signal can sit above the audio equivalent of banding, which is audible noise and quantization error rather than visible color steps. Video bit depth describes color precision per channel in the image. They live on separate tabs of the same Deliver page, they're set independently, and choosing 10-bit video has no effect on your audio, just as choosing 24-bit audio has no effect on whether your video bands in a gradient sky.
The one practical overlap is that both settings tend to travel together in professional delivery specs simply because both represent "don't throw away more than you need to" thinking applied to two different signals. A broadcast delivery spec asking for 10-bit video will very often also ask for 24-bit audio in the same document, not because one causes the other, but because both reflect the same conservative approach to a finishing master. If you're filling out a delivery spec sheet and see both numbers listed, treat them as two separate checkboxes to satisfy, not one setting that covers both.
What bit depth should you use when exporting a still frame from DaVinci Resolve?
This is a narrower question than the video export decision covered everywhere else in this guide, but it trips up colorists constantly because Resolve's still export defaults to a format most people don't expect.
Grab a still from the Color page's Gallery, right-click it, and choose Export, and Resolve offers a wider format list than its video Deliver page: DPX, Cineon, TIFF, JPEG, PNG, PPM, BMP, and XPM. The default is DPX, a lossless, uncompressed format built for film and VFX pipelines, and it's not the format most people actually want for a quick reference frame or a thumbnail; it's simply what Resolve reaches for first.
Bit depth follows the format you pick, not a single global setting. TIFF and DPX both support high bit-depth output, RGB 8-bit through higher options depending on the export panel you're in, which makes either one the right choice when the still is headed somewhere that cares about gradient precision: a VFX plate a compositor will manipulate further, a reference frame for matching color across a shoot, or a frame you plan to grade again later outside Resolve. JPEG and PNG, by contrast, are 8-bit formats by design, which is exactly fine for a still that's going into a deck, a thumbnail, a social post, or anywhere else the destination is a screen, not another editing pass.
There's a second path to the same decision: rendering your whole timeline out as a still-image sequence from the Deliver page, DPX or TIFF frame by frame, rather than a single grabbed still from the Gallery. VFX and color pipelines that need frame-accurate access to every image, rather than a compressed video stream, use this path specifically because a sequence of individually addressable 10-bit or higher stills survives round-tripping through other software better than any compressed codec would. If a compositor or a VFX house asks you for "a DPX sequence" instead of a ProRes file, this is what they mean, and the same source-bit-depth logic from earlier in this guide still applies: exporting a gradient-heavy shot as an 8-bit sequence defeats the purpose of using an image sequence in the first place.
Treat a still frame export exactly like a video export: match the bit depth to what happens to the image next. A gradient-heavy still headed into a compositor deserves the same 10-bit-or-higher thinking as a gradient-heavy video headed into a re-grade. A still headed straight into a slide deck doesn't need it, for the same reason an Instagram upload doesn't need a 10-bit video export: nothing downstream is positioned to use the extra precision.
What are the most common mistakes editors make choosing between 8-bit and 10-bit?
A handful of avoidable missteps account for most of the frustration around this choice, and nearly all of them trace back to one of the myths already covered above.
Assuming the free version can export 10-bit H.264 or H.265 with the right settings somewhere. It can't. That cap is a hard restriction in Resolve's free version specifically for those two codecs, per Blackmagic's own tech specs, not a setting hidden somewhere in a menu.
Defaulting to 10-bit for every export "to be safe." For a disposable social clip or a quick client review with no further grading planned, 10-bit buys nothing a viewer will ever notice, while adding render time and storage for precision nobody downstream needs.
Assuming a 10-bit upload survives a social platform's compression. Instagram and TikTok both re-encode uploads through their own pipeline regardless of what you send, flattening most of that extra precision back down before anyone sees the file, outside of YouTube's and Vimeo's specific HDR paths.
Grading hard, then exporting 8-bit without checking for banding. A heavy secondary grade or an aggressive gradient push can reintroduce banding at the export step alone, even when the graded footage looked perfectly smooth in the viewer the entire time you were working on it.
Confusing bit depth with file size. A 10-bit H.265 file at the same bitrate as an 8-bit one is roughly the same size; the size jump people associate with 10-bit usually comes from the intermediate codec's own higher bitrate, not the bit depth itself.
Confusing bit depth with chroma subsampling. A 10-bit file can still be color-starved at 4:2:0, and picking a "10-bit" codec doesn't automatically mean you also got 4:2:2 or 4:4:4 color resolution; check both specs on a finishing codec, not just the one everyone talks about.
Blaming the bit depth when an old GPU is actually the bottleneck. A 10-bit export crawling on hardware that predates that codec's hardware encoder isn't a sign the setting is wrong; it's a sign the render fell back to software encoding, which is a performance problem, not a quality one.
Assuming a 10-bit export can rescue footage a camera already captured at 8-bit. It can't restore precision that was never recorded; check the source before you assume the export setting is what's failing.
Trying to deliver HDR at 8-bit. It's not a smaller-file shortcut. The ITU-R BT.2100 standard behind PQ and HLG specifies 10 or 12-bit as the floor, and there's no 8-bit HDR option to fall back on.
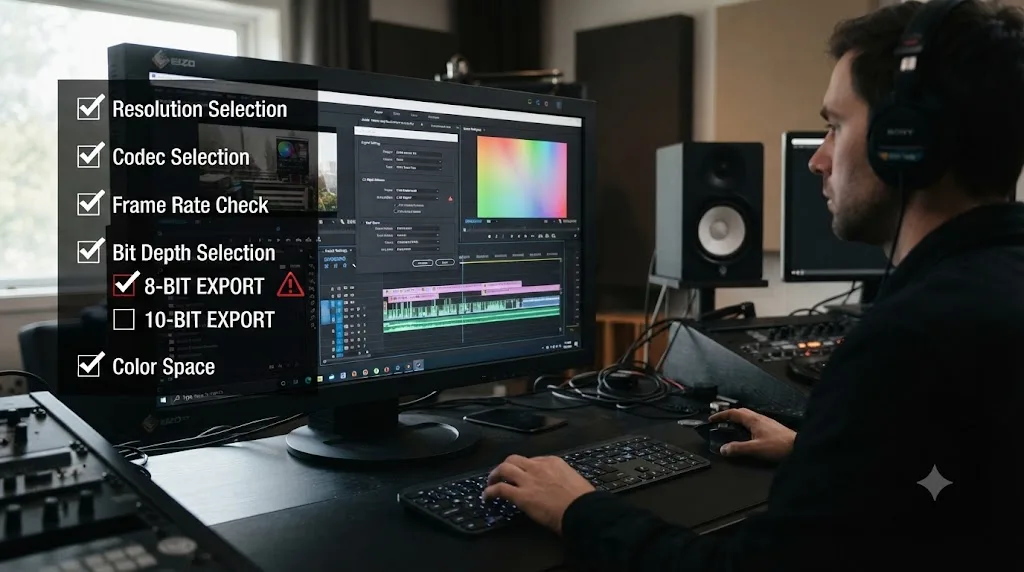
Four export scenarios, worked through
Rules are easier to apply once you've seen them run against an actual delivery brief. Here's how the decision plays out in four situations editors run into constantly.
A wedding videographer delivering a highlight reel and an archival master. The couple wants a shareable highlight video for Instagram and a full-length film they can keep forever. Those are two different exports from the same timeline, not one export used twice. The Instagram cut goes out as 8-bit H.264, matched to the platform's own compression pipeline, small and fast to upload. The archival film goes out as ProRes 422 HQ or DNxHR HQX, 10-bit by default, protecting the ceremony's low-light reception footage and any gradient-heavy shots like a sunset first look from banding that would only show up years later on a bigger screen than anyone was checking during the wedding week.
A YouTuber shooting log footage who wants both a standard upload and an HDR version. Shooting log or 10-bit internally on the camera doesn't decide the export's bit depth; the delivery target does. If the channel's standard uploads stay SDR, 8-bit H.264 remains correct even though the source footage carries far more precision than that, because YouTube's SDR pipeline is built around 8-bit and the extra headroom in the source was already spent during grading, not preserved into the final file. If the same creator also wants a genuine HDR version of the same edit for YouTube's HDR path, that's a second, separate export at 10-bit H.265 Main10 with the correct PQ or HLG tagging, requiring Studio if the H.265 route is used, or a 10-bit intermediate transcoded outside Resolve if it isn't.
A freelance editor handing an assembly back to a colorist for final grading. The delivery target here isn't a viewer at all, it's another piece of software further down the pipeline, which puts this squarely in the "file headed back into more work" category covered earlier. Even if the finished piece will eventually go out as an 8-bit H.264 for social media, the editor's handoff to the colorist should be a 10-bit intermediate, ProRes 422 HQ or DNxHR HQX, regardless of the eventual delivery format, because collapsing to 8-bit before the grade even happens would hand the colorist less precision to work with than the footage actually contains.
A documentary editor cutting archival 8-bit camcorder footage against modern 10-bit log footage. Mixed-era documentary projects put old and new source material on the same timeline constantly, and the bit depth question isn't which format to export, it's what to do about footage that was already capped at 8-bit years before this project existed. The fix isn't trying to force the archival footage into a 10-bit pipeline; that can't restore detail the original camera never recorded. Instead, grade and export the whole timeline at 10-bit or higher regardless, because the modern log footage still benefits from the extra headroom, and doing so costs nothing for the archival clips beyond a slightly larger file. A 10-bit export is a ceiling, not a floor, and a mixed-source timeline still deserves the higher ceiling for the shots that can actually use it.
The bit depth that matters is always the bit depth of the specific file changing hands at that specific step, not some single number that applies to the whole project. A project can correctly produce an 8-bit file, a 10-bit file, and a 12-bit file all from the same timeline, each one matched to what happens to it next, and none of those choices contradicts the others.
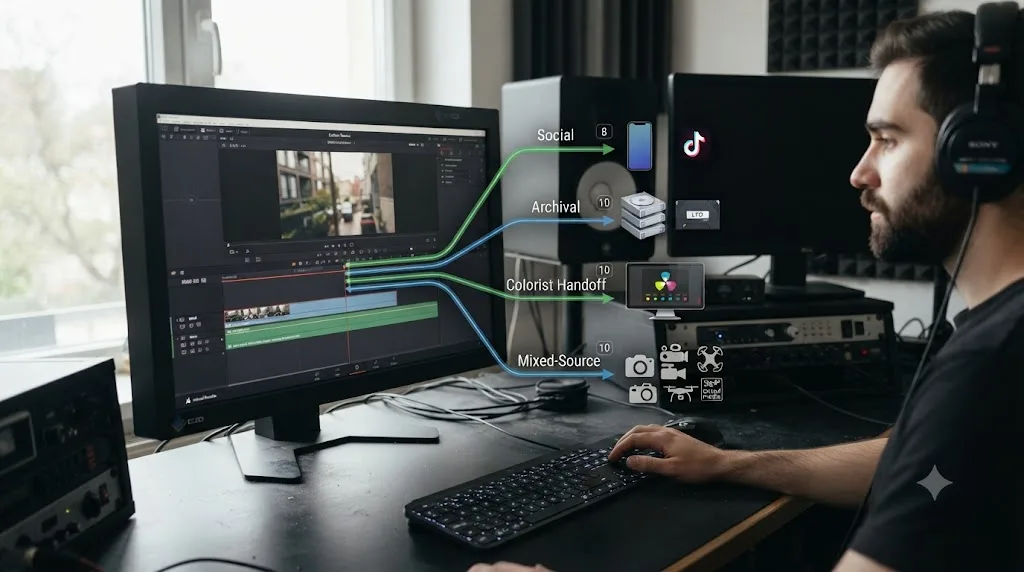
So which should you actually choose?
After 7+ years of professional commercial editing between us, the rule we actually use hasn't changed in years: match the bit depth to the file's next stop, not to a general sense that higher numbers are better.
If the destination is a standard SDR upload to YouTube, Instagram, TikTok, or a quick client review with nothing further planned, export 8-bit H.264 and don't second-guess it. It's smaller, it renders faster, and it matches exactly what those platforms already expect. If the destination is HDR, a re-grade, a VFX pass, a broadcast delivery, or footage carrying real gradients like skies, fog, or a dark vignette, export 10-bit, in H.265 Main10 if you're on Studio, or in ProRes or DNxHR if you're not, since neither of those intermediate formats gives you an 8-bit option to accidentally pick at their finishing tiers anyway.
In our 100,000+ member video-editing community, this exact question comes up constantly, usually framed as "why does my export look banded when the timeline looked fine," and the answer is almost always one of a small set of things covered in this guide: an 8-bit codec was never going to hold up under that particular gradient, the free version's H.264/H.265 cap clipped a grade that needed more room than 256 steps per channel could give it, a platform's own re-encode reintroduced banding after the fact, an aging GPU quietly fell back to software encoding, or the source footage itself never had the precision the export setting was being asked to preserve. Once you know which of those you're looking at, the fix is a codec dropdown, a hardware check, or a look at your original camera file, not a re-edit.
If you're staring at the Deliver page trying to figure out which specific dropdown controls bit depth for the codec you picked, that's a narrower problem than this whole comparison. TryUncle is the on-screen assistant for DaVinci Resolve on macOS: ask in plain words and Uncle points at the exact control on your screen, instead of you hunting through a menu for a setting a tutorial showed on a different Resolve version.
Frequently asked questions
- Should I export 8-bit or 10-bit from DaVinci Resolve?
- Export 8-bit if your delivery is standard SDR video for YouTube, social platforms, or a quick client review; it's smaller and every device plays it. Export 10-bit if you're delivering HDR, your footage has smooth gradients like skies or fog that band easily, or the file is headed back into another grading pass. When in doubt and storage isn't tight, 10-bit is the safer default.
- Does DaVinci Resolve's free version only export 8-bit?
- For H.264 and H.265 specifically, yes. Blackmagic's own tech specs describe the free version working in 8-bit for those two delivery codecs at up to Ultra HD 3840x2160, 60fps. That cap doesn't apply to ProRes or DNxHR, which the free version already exports at their native 10-bit (and higher) tiers. Studio adds 10-bit H.265 and hardware-accelerated encode/decode for both formats.
- Do I need 10-bit for a YouTube upload?
- No. YouTube transcodes everything you upload anyway, and for standard dynamic range video, 8-bit H.264 at YouTube's own recommended bitrates is the norm and looks fine. YouTube's own HDR upload documentation recommends 10-bit encoding specifically for HDR video with proper metadata, not for ordinary SDR uploads.
- Does Vimeo support 10-bit HDR uploads?
- Yes. Vimeo's own help center requires a bit depth of 10 or greater, tagged with the correct color transfer characteristics, for a file to count as HDR, and its Dolby Vision path narrows further to HEVC 10-bit at Dolby Vision Profile 8.4, capped at 4K resolution. For ordinary SDR uploads to Vimeo, the same logic as YouTube applies: the platform's own compression handles the file regardless of the bit depth you send it, so 10-bit only matters there when you're actually delivering HDR or Dolby Vision.
- Does 10-bit really make export files bigger?
- Not automatically. File size is driven mostly by bitrate and codec, not bit depth alone. A 10-bit H.265 file at the same target bitrate as an 8-bit H.265 file is roughly the same size; it just spends those bits more precisely. Where 10-bit genuinely costs more space is when it comes bundled with a codec designed for finishing, like ProRes 422 HQ or DNxHR HQX, which carry higher bitrates by design regardless of bit depth.
- Can I actually tell the difference between 8-bit and 10-bit on a normal monitor?
- Rarely, on a flat, evenly lit shot. The difference shows up specifically in smooth gradients: skies, fog, out-of-focus backgrounds, dark vignettes behind a subject. There, 8-bit's 256 steps per channel can visibly band while 10-bit's 1,024 steps stay smooth. Most consumer displays are also 8-bit panels using dithering to fake extra depth, which narrows the gap further for casual viewing.
- What bit depth do I need for HDR export in DaVinci Resolve?
- 10-bit at minimum. The ITU-R BT.2100 standard that defines HDR formats like PQ and HLG specifies a bit depth of 10 or 12 bits per sample, not 8. Trying to deliver HDR at 8-bit isn't a smaller-file option, it's outside the spec, and DaVinci Resolve's HDR-capable export presets are built around 10-bit and higher formats for exactly that reason.
- Is ProRes always 10-bit in DaVinci Resolve?
- Yes, for every flavor from ProRes 422 Proxy up through ProRes 422 HQ, per Apple's own ProRes documentation. Step up to ProRes 4444 or 4444 XQ and you get 12-bit plus an alpha channel. DNxHR works similarly but splits lower: DNxHR LB and SQ are 8-bit, while HQX and 444 move to 10-bit, with a 12-bit option in HQX and 444 as well.
Sources
- DaVinci Resolve - Tech Specs (Blackmagic Design)
- DaVinci Resolve Studio product page (Blackmagic Design)
- Codec limitations of DaVinci Resolve: HEVC, 10-bit, and RAW (theatre of noise)
- Understanding Bit Depth in Digital Color Grading, by Tobia Montanari (BMD Certified Trainer, Dolby Vision Certified Professional)
- What H.264 and H.265 Hardware Decoding is Supported in DaVinci Resolve Studio? (Puget Systems)
- Upload High Dynamic Range (HDR) videos (YouTube Help)
- Recommendation ITU-R BT.2100-3, Image parameter values for high dynamic range television (ITU)
- About Apple ProRes (Apple Support)
- DNxHR Codec Bandwidth Specifications (Avid Knowledge Base)
- DaVinci Resolve Supported Formats and Codecs, July 2025 (Blackmagic Design)
- Non-Graded Archival Master (NAM) Specifications (Netflix Partner Help Center)
- NVENC Application Note, Video Codec SDK 13.0 (NVIDIA)
- H.265/HEVC Hardware Encoding and Decoding Support (Intel)
- Feature summary, Premiere Pro May 2022 release (Adobe)
- Final Cut Pro product page (Apple)
- Chroma Subsampling (4:4:4, 4:2:2, 4:2:0) in Color Grading, by Tobia Montanari
- DaVinci Resolve 18 Manual, Optimized Media and Render Cache (Blackmagic Design, mirrored)
- Blackmagic RAW (Blackmagic Design)
- About Apple ProRes RAW (Apple Support)
- Upload HDR, HDR10+, and Dolby Vision videos (Vimeo Help Center)
- How to grab stills and export them in DaVinci Resolve (Evercast Blog)
Keep reading
Guides · Jul 7, 2026 · 23 min
DaVinci Resolve Export Settings: Numbers That Actually Work
The exact DaVinci Resolve export settings for YouTube, client handoffs, and ProRes archives, plus what changed with Resolve 21's H.265 encoder.
Comparisons · Jul 12, 2026 · 32 min
ProRes vs DNxHR in DaVinci Resolve: Which Should You Use?
ProRes vs DNxHR in DaVinci Resolve: real bitrates, the Windows export fix, HDR and alpha support, and a decisive pick for Mac, Windows, and mixed teams.
Guides · Jul 11, 2026 · 36 min
How to Grade HDR Video in DaVinci Resolve (PQ and HLG)
Set up Resolve Color Management for HDR, grade with the HDR palette, and export correct PQ or HLG settings for HDR10, Dolby Vision, and YouTube.