Articles / Guidesupdated for DaVinci Resolve 21.0.1 (June 2026)
How to Grade HDR Video in DaVinci Resolve (PQ and HLG)
Quick answer
In DaVinci Resolve, set Color Management to Resolve Color Management with an HDR output color space like Rec.2100 PQ or HLG, grade using the HDR palette and nit-based scopes instead of percent, then export from Deliver with matching PQ/HLG codec settings and, in Studio, embedded HDR10 or Dolby Vision metadata.
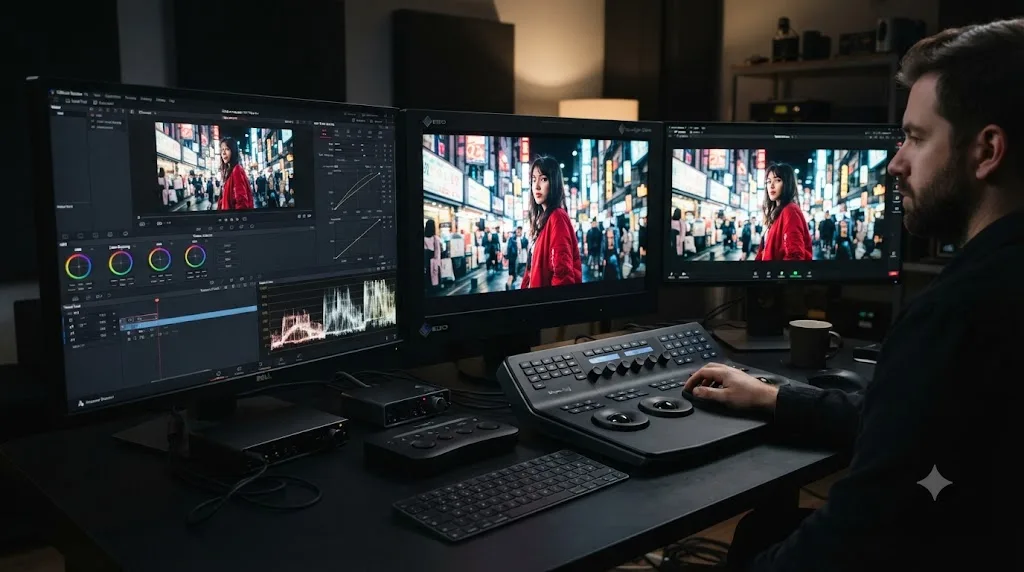
I have graded plenty of footage that looked perfect in Rec.709 and fell apart the moment I switched the output to Rec.2100 PQ. The image went muddy, the whites turned gray, and the waveform I'd trusted for years suddenly meant nothing. HDR grading in DaVinci Resolve isn't harder than SDR grading. It's different math, a different monitor, and a scope that reads in nits instead of percent, and once those three things click, the rest of the workflow is the same node-based grading you already know.
This guide covers the full path: setting up Resolve Color Management for HDR, understanding PQ versus HLG, reading nit-based scopes, using the HDR palette, exporting HDR10 and Dolby Vision masters, and generating an SDR trim from an HDR grade without starting over. I'll flag what's free and what needs DaVinci Resolve Studio along the way, because the split matters more here than almost anywhere else in Resolve.
What does it actually mean to grade HDR video?
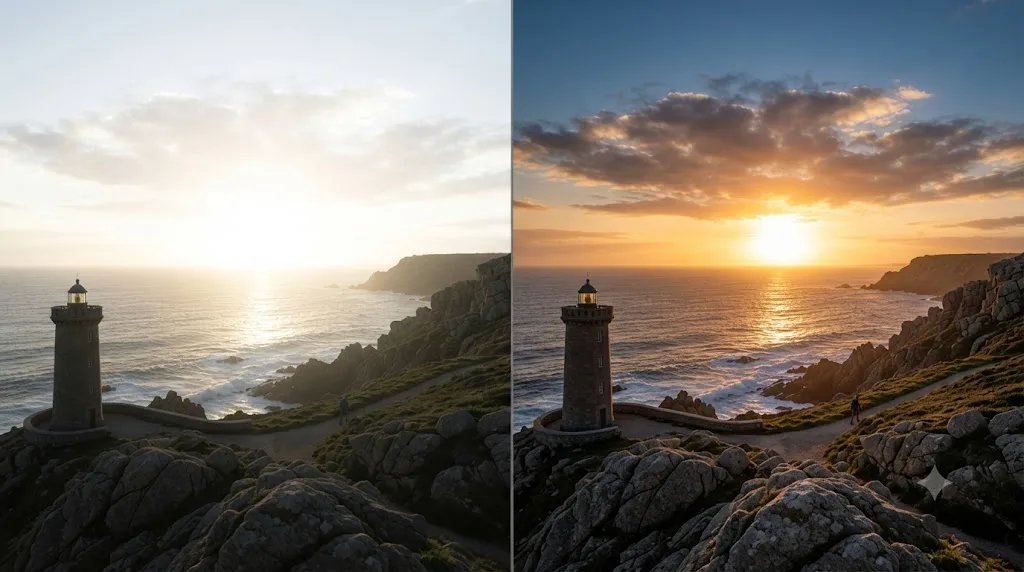
Standard dynamic range video, the kind every monitor since the 1990s has been built to show, tops out at roughly 100 nits of brightness and uses the Rec.709 color space. High dynamic range video extends both ends: brighter highlights, sometimes past 1,000 nits, and a wider color gamut, usually Rec.2020 or DCI-P3, that can hold colors Rec.709 simply can't represent.
Grading HDR in DaVinci Resolve means telling the software, explicitly, what dynamic range and color space your footage was shot in, what wide working space you want to grade inside, and what HDR standard you're mastering out to. Get any one of those three wrong and the image you're looking at on your monitor won't match what the file actually contains, which is the single most common source of "my HDR grade looks wrong" confusion.
HDR grading is not a filter or a look you apply on top of an SDR grade. It's a different target dynamic range that changes how every tool in the node graph behaves. A power window drawn to protect highlights in SDR might do almost nothing in HDR, where highlight detail that used to just clip now has hundreds of extra nits of headroom to live in. The tools are the same. What they're allowed to do to the image is not.
What's the difference between PQ and HLG, and which should you use?
This is the first real decision, and it shapes everything downstream, from your project settings to your export codec.
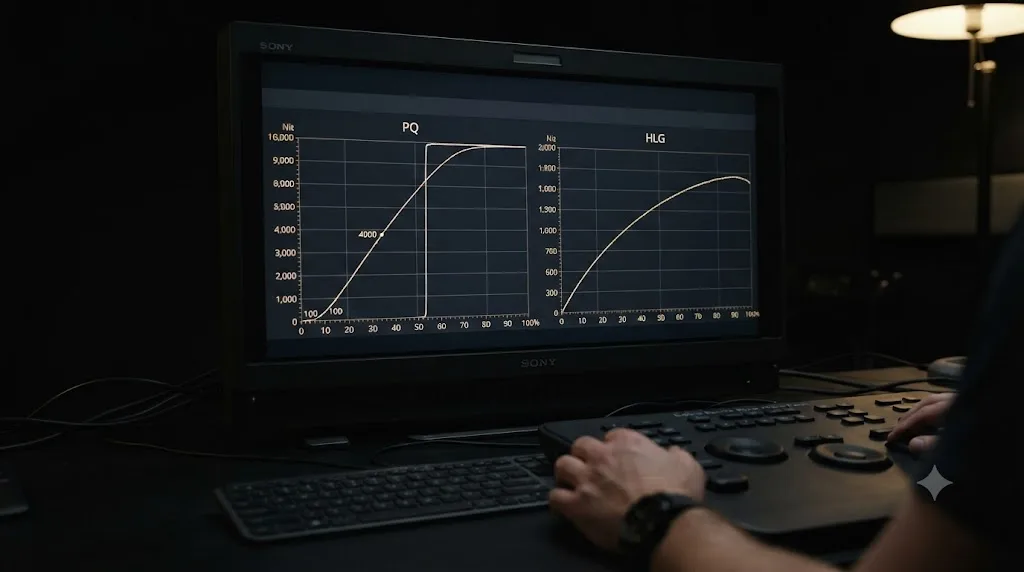
PQ (Perceptual Quantizer, standardized as SMPTE ST 2084) ties every code value in the signal to an exact, absolute brightness in nits. A given pixel value doesn't just mean "bright." It means a specific number of nits, full stop, regardless of what display eventually shows it. That precision is powerful for mastering, but it comes with a catch: a PQ signal needs a defined peak brightness, usually 1,000 or 4,000 nits, baked into your project settings before you grade a single frame, and it needs a real HDR reference monitor to judge accurately, because a normal SDR screen has no way to decode what those code values are supposed to mean.
HLG (Hybrid Log-Gamma), developed by the BBC and Japan's NHK, works differently. It's relative rather than absolute, and it's built to be backward-compatible: an ordinary SDR display, decoding an HLG signal with no metadata at all, shows a reasonably correct image, because everything below middle gray follows an ordinary gamma curve identical to standard video. Only the highlights, above that midpoint, get compressed logarithmically to hold the extra dynamic range. That's the trade Hybrid Log-Gamma makes: less absolute precision than PQ, in exchange for a single file that looks acceptable on both an HDR television and a decade-old laptop screen.
| PQ (SMPTE ST 2084) | HLG (ARIB STD-B67) | |
|---|---|---|
| Signal type | Absolute, code value maps directly to nits | Relative, backward-compatible with SDR displays |
| Needs metadata to look right | Often, for HDR10 static metadata or Dolby Vision dynamic metadata | No, decodes reasonably on SDR without any metadata |
| Typical use | Streaming HDR10, Dolby Vision, disc mastering, cinema | Broadcast television, YouTube uploads, live HDR |
| Peak brightness | Fixed target, commonly 1,000 or 4,000 nits | Scene-referred, adapts to the display's actual capability |
| Grading monitor requirement | Real HDR reference display, mandatory | More forgiving on SDR, but still needs HDR monitoring to grade accurately |
If your delivery is a streaming platform, a UHD Blu-ray, or anything asking for "HDR10" or "Dolby Vision" by name, you're grading in PQ. If your delivery is a YouTube upload or a broadcast HDR feed that also needs to degrade gracefully on non-HDR screens, HLG is usually the better starting point, and it's what YouTube's own HDR upload documentation accepts alongside PQ.
How do you set up Resolve Color Management for HDR grading?
Everything downstream depends on getting Project Settings right first, and it's a five-minute job once you know where the switches are.
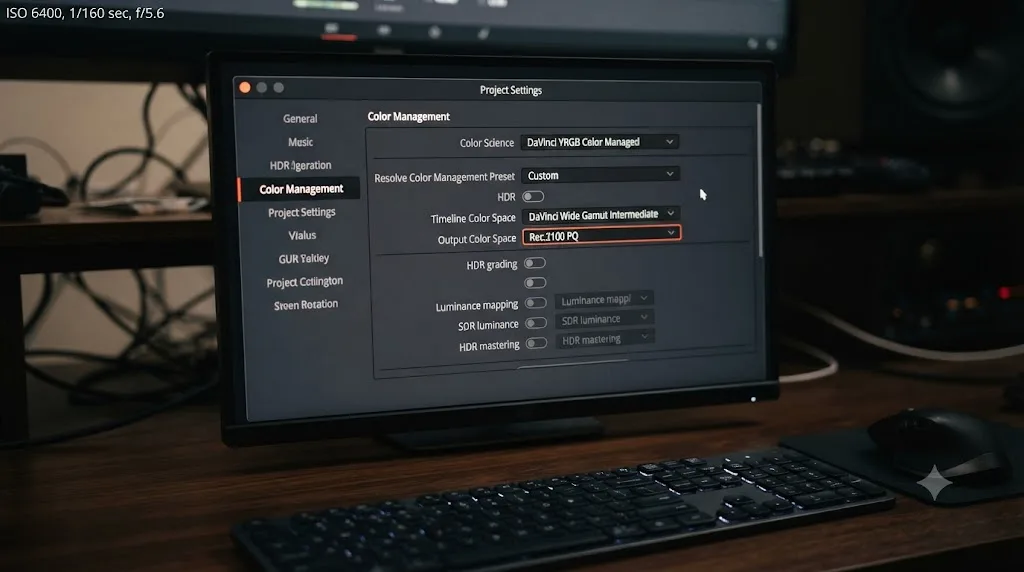
- Open Project Settings (the gear icon, bottom right of the interface) and go to the Color Management page.
- Set Color Science to Resolve Color Management (RCM). This is the setting that makes the rest of the HDR-specific dropdowns available, and it's what applies the correct mathematical transform between your footage's native color space and your chosen HDR output.
- Set Timeline Color Space to DaVinci Wide Gamut Intermediate. This is Resolve's own working color space, wide enough to hold the full range of most cameras without clipping, and it's the recommended intermediate for HDR work regardless of which camera shot your footage.
- Set Output Color Space to your HDR target: Rec.2100 ST2084 (PQ) at your chosen peak nits for HDR10 or Dolby Vision, or Rec.2100 HLG for broadcast and YouTube delivery.
- If you're mastering for a specific nit ceiling, look for the HDR mastering checkbox tied to your chosen peak (for example, "HDR mastering is for 1000 nits") and confirm it matches the display and delivery spec you're targeting.
- Tag your source clips with the correct Input Color Space, via right-click in the Media Pool, if Resolve hasn't detected it automatically from the camera metadata. RAW footage generally tags itself; flat log recordings from mirrorless and DSLR cameras often need a manual nudge.
Resolve Color Management handles the transform between your camera's native color space and your HDR output automatically, which is the entire reason to use it instead of grading unmanaged. Without RCM, you're responsible for every color space conversion by hand, node by node, clip by clip, which is exactly the kind of error-prone bookkeeping that produces mismatched grades across a multi-camera HDR project.
If you'd rather work unmanaged, DaVinci YRGB Color Managed mode still supports HDR, but you handle input and output transforms yourself with LUTs or Color Space Transform nodes rather than letting Resolve apply them project-wide. That approach gives more manual control at the cost of more manual bookkeeping, and it's the mode some colorists still prefer on complex, mixed-format HDR projects, per discussion on the Blackmagic forum's HDR color space thread.
What is DaVinci Wide Gamut, and why does it matter for HDR?
Blackmagic built two related things here, and it's worth keeping them straight: DaVinci Wide Gamut is the color space, the container that defines which colors and how much brightness range can exist in your image, and DaVinci Intermediate is the gamma curve, the log-style encoding that packs that wide range into a usable bit depth. Together they form the recommended working environment inside Resolve Color Management, per an explainer on Blackmagic's own color science choices.
The color space itself is deliberately oversized. DaVinci Wide Gamut covers more of the visible color spectrum than Rec.2020, wider than ARRI Wide Gamut, and wider than even ACES's working space in some regions, which means footage from essentially any camera, RAW or not, can sit inside it without losing color information before you've made a single grading decision. That headroom matters more in HDR than in SDR, because HDR delivery formats actually use more of that extended range. A highlight that would simply clip white in a Rec.709 delivery might carry real color and detail worth preserving when your output is Rec.2100 PQ at 1,000 nits.
Working in DaVinci Wide Gamut means an exposure adjustment behaves like adjusting exposure in-camera, holding highlight and shadow detail together instead of clipping abruptly the way a narrower working space would. That's the practical payoff: pull down an overexposed sky in this working space and you often recover gradation that a Rec.709-timeline grade would have already thrown away, because the data was never discarded in the first place, just compressed into log values waiting to be brought back into range.
You don't need to do anything special to use it beyond selecting it as your Timeline Color Space in Project Settings, covered in the setup steps above. It's not a look, a LUT, or a creative choice. It's the working space Resolve grades inside before applying your output transform, invisible during normal use except in how much more forgiving the image feels when you push it.
How do you read the video scopes when everything is measured in nits?
This is the part that trips up colorists moving from SDR to HDR for the first time, and it trips up people who've done it before but haven't touched an HDR project in a while.
In standard Rec.709 grading, the waveform monitor reads 0 to 100 percent, or 0 to 1023 in 10-bit code values, and white clips at the top of that scale, full stop, every time. Switch your Output Color Space to Rec.2100 ST2084 and that assumption breaks. The waveform's white clip point depends entirely on which nit ceiling you chose, not on a fixed code value, because the PQ curve is logarithmic and packs an enormous brightness range into the same bit depth. Choose 1,000 nits as your output and the clip point sits around code value 768, not 1023. Choose 300 nits instead and it sits closer to 640. Choose 4,000 nits and it climbs to roughly 920.
| PQ output nit ceiling | Approximate white clip code value (10-bit) |
|---|---|
| 300 nits | ~640 |
| 500 nits | ~695 |
| 800 nits | ~745 |
| 1,000 nits | ~768 |
| 2,000 nits | ~845 |
| 4,000 nits | ~920 |
That non-proportional scaling is the PQ curve doing exactly what it's designed to do. Colorist Robbie Carman, writing about reading HDR scopes in Resolve, put it plainly:
"Only about 7% of the full range is used to define 5,000–10,000 nit."
Source: HDR Essentials: Reading The Scopes In DaVinci Resolve, Mixing Light
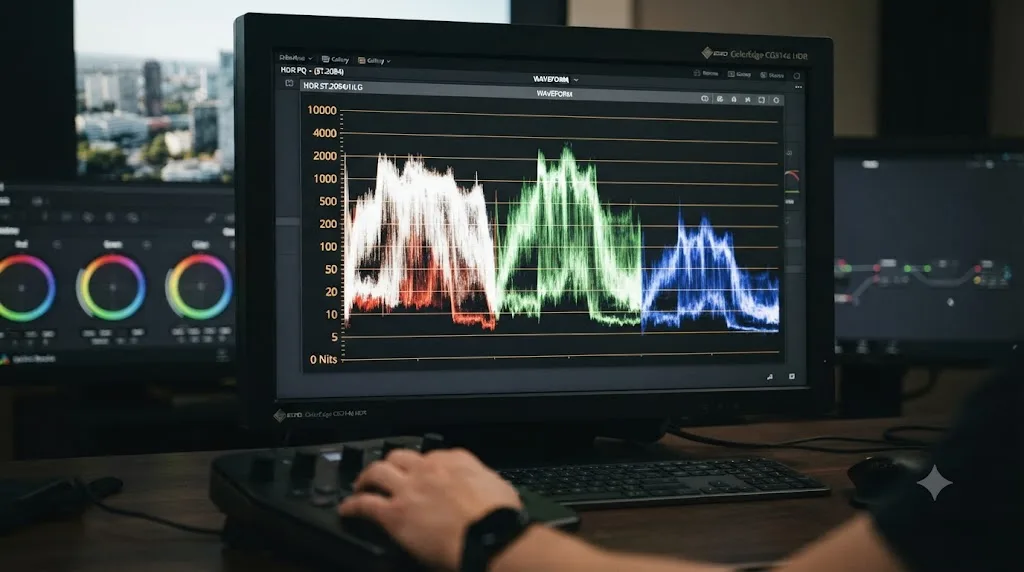
The fix is simple once you know it exists. Click the three horizontal dots above the video scopes panel and change Waveform Scale Style to HDR (ST.2084/HLG). This replaces the familiar 0-100 percent scale with one calibrated in actual nits, so a reading of 400 means 400 nits, not 40 percent of some abstract maximum. Grade with that scale active and you're making decisions based on absolute luminance, the same measurement a mastering engineer or a delivery spec sheet is actually asking you to hit, rather than a percentage that no longer means what it used to.
Switching your scopes to the HDR nit scale is not optional polish, it's the difference between grading against real target brightness values and guessing. A shot that reads "clipping" on an old-habit percentage reading might be sitting comfortably under your 1,000-nit ceiling once you're actually looking at nits, and a shot that looks fine on the percentage scale might be blowing straight past a delivery spec's peak brightness requirement without you noticing.
What does the HDR palette do, and how is it different from Lift, Gamma, and Gain?
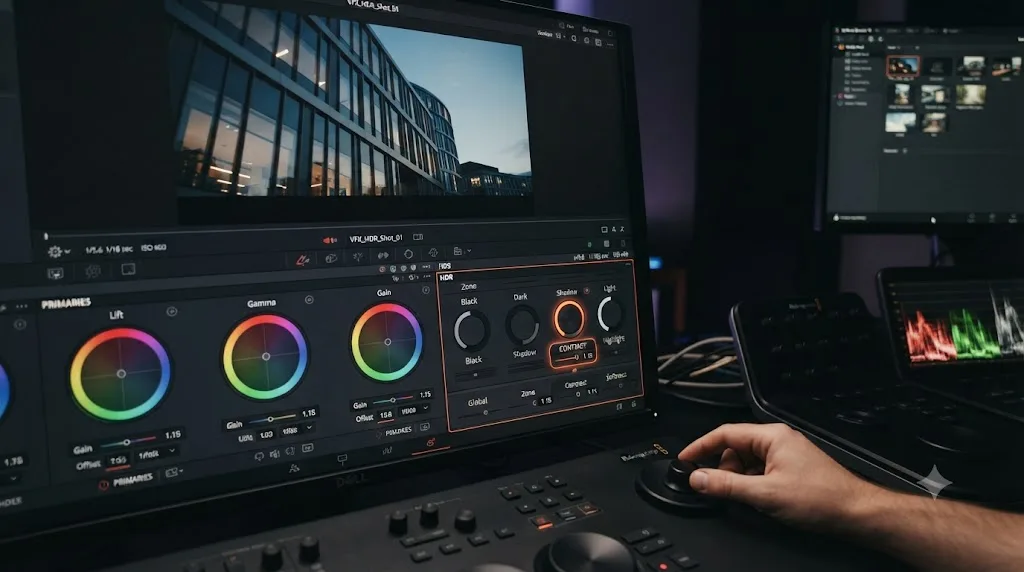
The HDR palette sits alongside the familiar Primaries wheels, Lift/Gamma/Gain, Log controls, and Offset in the Color page's toolbar, and at first glance it looks like just another way to push the same sliders. It isn't quite that simple.
The HDR palette includes a dedicated contrast control that behaves differently from the contrast slider buried inside the Primaries panel, built specifically for the way contrast decisions play out across a much wider brightness range. In an SDR grade, contrast is a relatively contained adjustment: you're working within roughly 100 nits of headroom, so a contrast push has a fairly predictable, limited effect on the image. In HDR, that same kind of push interacts with hundreds or thousands of extra nits of highlight range, and a contrast tool built for SDR math can produce results that clip or crush in ways that feel unpredictable if you're not watching the nit-scaled waveform closely.
How the HDR palette behaves also depends on your color management mode, according to Patrick Inhofer's breakdown of the HDR palette for Mixing Light: under Resolve Color Management, the palette's controls interact with the color-managed pipeline you set up in Project Settings, while under unmanaged DaVinci YRGB Color Managed grading, the same tools behave more like a direct, unmediated adjustment to the pixel values in front of you. Neither is wrong. They're built for different workflows, and picking the wrong one for your project setup is a common source of "this tool feels different than I remember" confusion among colorists who move between managed and unmanaged projects.
The HDR palette's contrast control exists because ordinary Primaries contrast, built for a roughly 100-nit SDR range, behaves unpredictably once you're pushing highlights across a range that might extend past 1,000 nits. That's the entire reason Blackmagic shipped a separate tool rather than expecting colorists to reuse the SDR one. Reach for it specifically when a contrast adjustment on an HDR shot feels like it's clipping or flattening in a way that doesn't match what the SDR-era muscle memory expects.
In practice, most of your grading day in HDR still happens in the same node graph, with the same qualifiers, power windows, and Lift/Gamma/Gain moves you'd use in SDR. The HDR palette is a specialized tool for a specific job: shaping contrast and highlight rolloff across a wide dynamic range, not a wholesale replacement for the rest of your toolkit.
Should you master in HDR first, or SDR first?
Nearly every real-world HDR project needs both an HDR deliverable and an SDR one, since not every viewer has an HDR display and not every platform accepts HDR-only masters. The question is which one you build from scratch, and which one you derive.
Grade HDR first. It's a much easier problem to go from wide to narrow than the reverse. An HDR master already contains the full highlight and shadow detail your footage captured, so compressing it down into Rec.709's narrower range is a matter of tone mapping, deciding how to fold that extra headroom into a smaller box, rather than inventing detail that was never there to begin with. Build the SDR grade first instead, and you've thrown away information the HDR version needs, information you generally cannot get back without returning to the original camera files and regrading from scratch.
An HDR master built first, and trimmed down to SDR afterward, keeps highlight and shadow intent consistent between both versions in a way that grading each deliverable independently rarely achieves. That consistency matters more than it sounds: a client or a network reviewing both an HDR and an SDR version side by side will notice if skin tones, sky color, or a key creative choice reads differently between the two, and reconciling that after the fact, working backward from two independently graded masters, is a slower, messier job than deriving one from the other in the first place.
This is also where DaVinci Resolve's MultiMaster trim workflow earns its keep. Rather than manually rebuilding an SDR grade node by node, MultiMaster lets you generate SDR, HDR10, and other output trims from a single HDR timeline, each one starting from an automated tone-mapped conversion that you then adjust shot by shot where it needs a human touch, per Blackmagic's description of the tool in Resolve's release notes. That's a fundamentally different amount of work than building two separate grades from the ground up.
How do you convert an HDR grade to SDR without starting over?
There are two practical paths here, depending on whether you have DaVinci Resolve Studio and a Dolby Vision license, or you're working in the free version.
The manual trim approach, available in the free version:
- Duplicate your finished HDR timeline so your HDR master stays untouched.
- In Project Settings' Color Management, change Output Color Space on the duplicated timeline to Rec.709 Gamma 2.4, keeping your Timeline Color Space unchanged.
- Watch the image transform automatically as Resolve applies its built-in HDR-to-SDR tone mapping. This is a starting point, not a finished grade.
- Go shot by shot and adjust exposure, contrast, and saturation on the SDR version specifically. Highlights that read fine at 1,000 nits will almost always need a deliberate creative decision about how they compress into Rec.709's much smaller headroom, since the automatic conversion is a reasonable guess, not a graded choice.
- Check skin tones especially closely. Tone mapping algorithms are tuned for general image content and frequently need a manual nudge on faces, where small shifts read as obviously wrong to viewers in a way they wouldn't in a landscape shot.
The Dolby Vision Content Mapping Unit approach, which needs Studio and a Dolby Vision license:
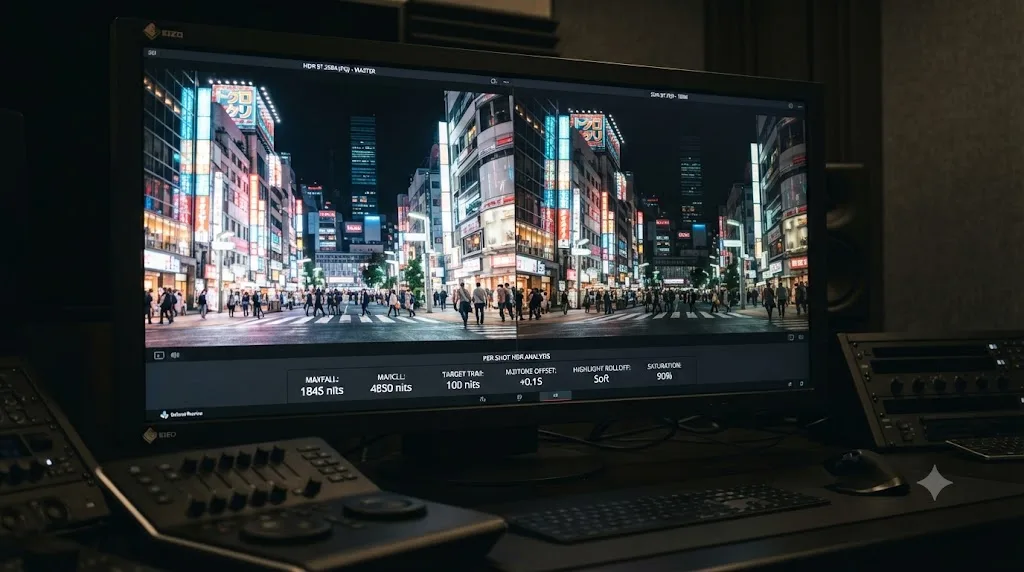
The CMU automates this same process with more precision, using per-shot analysis metadata rather than a single global tone-mapping curve. Per Dolby's own FAQ on Dolby Vision in DaVinci Resolve Studio, Resolve analyzes each shot's shadow, highlight, and average luminance values to build Layer 1 metadata automatically, which the CMU then uses to generate an SDR or lower-nit conversion tailored to that specific shot rather than the whole timeline uniformly. You can override that automatic conversion on a shot-by-shot basis, storing your manual adjustments as Layer 2 trim metadata, without touching the underlying HDR grade at all.
That per-shot precision is the entire value proposition of paying for the Dolby Vision license. A single global tone-mapping curve, the kind the free-version manual approach relies on, treats a dark interior scene and a bright exterior scene identically, which usually means one of them looks noticeably better than the other after conversion. The CMU's shot-by-shot analysis avoids that compromise.
You can export Dolby Vision XML metadata without a Dolby license, but a genuine creative Level 2 trim pass, the part where a colorist actually adjusts the CMU's automatic conversion, requires it, per the licensing structure Dolby documents. Free-version and unlicensed Studio users can still hand off automatically generated metadata to a facility with the appropriate license for a full trim pass, if that's the workflow a project calls for.
Do you need DaVinci Resolve Studio for HDR grading?
Partially, and where the line falls matters a lot depending on your delivery target.
The free version of DaVinci Resolve includes genuine HDR grading capability: Resolve Color Management with Rec.2100 PQ and HLG output color spaces, the HDR palette, DaVinci Wide Gamut Intermediate, and nit-scaled scopes are all available with no license required. You can grade a real HDR image, judge it on a proper reference monitor, and export a plain HDR10 or HLG file entirely inside the free version.
What's locked behind Studio is the professional metadata and delivery layer built on top of that grading capability. Per Blackmagic's own Studio product page, Studio adds Dolby Vision support with a GPU-accelerated Content Mapping Unit and free Dolby Vision grading controls, HDR10+ dynamic metadata grading and rendering, HDR Vivid support for the Chinese market, and professional HDR scopes described as "capable of measuring and providing detailed information about ST.2084 and HLG images" with a level of precision the free scopes don't match.
| Capability | Free version | Studio |
|---|---|---|
| Resolve Color Management with HDR output spaces (PQ, HLG) | Yes | Yes |
| HDR palette | Yes | Yes |
| DaVinci Wide Gamut Intermediate | Yes | Yes |
| Basic nit-scaled waveform | Yes | Yes |
| Professional HDR scopes (full ST.2084/HLG precision) | No | Yes |
| Dolby Vision metadata authoring and CMU trim pass | No | Yes |
| HDR10+ dynamic metadata analysis and export | No | Yes |
| HDR Vivid (CUVA/China standard) | No | Yes |
| Plain HDR10 or HLG export with static metadata | Yes | Yes |
If your delivery target is a straightforward HDR10 or HLG master with static metadata and no dynamic per-shot trim, the free version can grade and export it end to end. Where Studio becomes necessary is the moment a client, a network, or a streaming platform specifically asks for Dolby Vision, HDR10+, or HDR Vivid, since generating and embedding those particular metadata formats is Studio-exclusive.
What are HDR10, HDR10+, and Dolby Vision, and how does grading differ between them?
All three of these share the same underlying PQ curve, which is worth knowing before you assume they're wildly different workflows. The differences live almost entirely in the metadata layered on top.
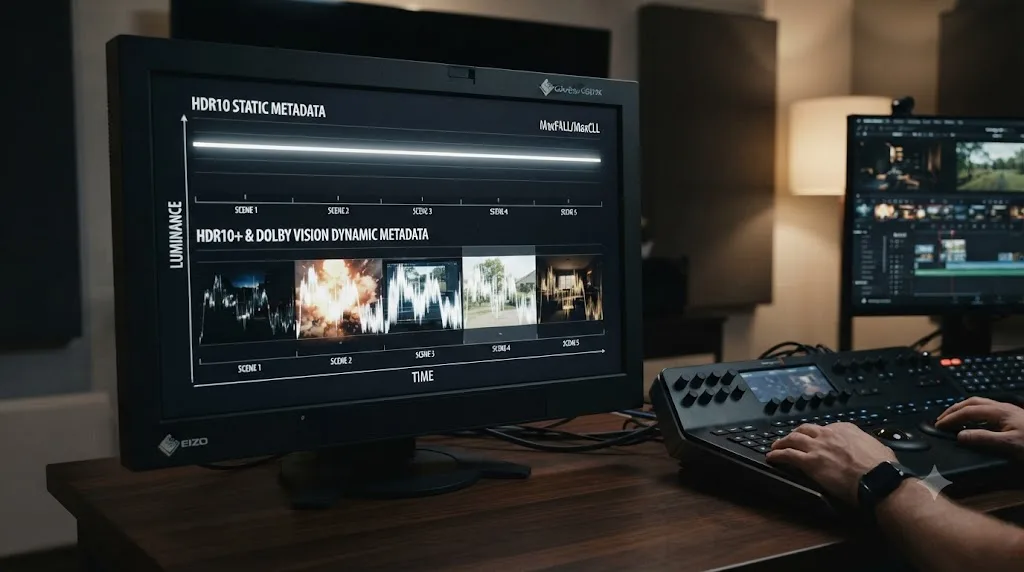
HDR10 is the baseline, royalty-free HDR format almost every HDR television and streaming platform supports. It carries static metadata, meaning one set of values, MaxCLL (the brightest single pixel in the whole program, in nits) and MaxFALL (the highest average frame brightness anywhere in the program), applied uniformly across the entire timeline regardless of how bright or dark any individual scene actually is. Generating that metadata in Resolve and checking Embed HDR10 Metadata on the Deliver page, per a walkthrough of the process, is the entire technical requirement, and it works in the free version.
HDR10+ builds on the same HDR10 foundation but adds dynamic, per-scene or per-frame metadata, letting a compatible display adjust its tone mapping shot by shot instead of applying one static conversion across the whole program. Generating that dynamic metadata requires enabling HDR10+ in Project Settings' Color Management, analyzing every shot on the Color page, and exporting both the render and a separate HDR10+ JSON sidecar file via right-click on the timeline in the Media Pool, per the reference manual's HDR10+ delivery documentation. Note that the manual itself flags this workflow as still evolving, and that the final HDR10+ mezzanine file has to be assembled by a facility equipped for it. Resolve generates the analysis and metadata; it doesn't produce the finished mezzanine file on its own.
Dolby Vision goes further still, pairing dynamic per-shot metadata with Dolby's proprietary Content Mapping Unit, which doesn't just carry metadata for a display to interpret but actively generates tone-mapped trims for lower-capability displays and SDR as part of the mastering process itself. That extra capability, and Dolby's certification and licensing requirements around it, is why Dolby Vision mastering needs both Resolve Studio and, for anything beyond automatic metadata generation, a Dolby Vision license.
| Format | Metadata type | License needed | Studio required |
|---|---|---|---|
| HDR10 | Static (one MaxCLL/MaxFALL value for the whole program) | No, royalty-free | No, works in free version |
| HDR10+ | Dynamic, per-scene or per-frame | Samsung/Amazon HDR10+ program for full pipeline | Yes, for analysis and export |
| Dolby Vision | Dynamic, plus CMU-generated trims | Yes, Dolby Vision license for creative trim | Yes, plus license for full workflow |
| HDR Vivid | Dynamic, CUVA (China UHD Video Industry Alliance) standard | Region-specific certification | Yes |
Every one of these HDR formats relies on the same PQ curve underneath, so the actual color grading work barely changes between them. What changes is the metadata layer and the licensing you need to generate and embed it correctly. That's genuinely good news for the grading side of your workflow: master the image once, in PQ, and the format-specific work happens mostly in Project Settings checkboxes and Deliver page metadata options, not in a fundamentally different approach to the node graph.
What is HDR Vivid, and when do you need it?
HDR Vivid is a less familiar name to most editors outside China, but it's worth knowing if any part of your delivery chain touches the Chinese market. It's a standard released by the China UHD Video Industry Alliance (CUVA), built to ensure consistent HDR playback across Chinese televisions, phones, and computers, per the reference manual's HDR Vivid entry.
From a grading standpoint, HDR Vivid doesn't ask you to learn a new workflow. Setting up Resolve Color Management to grade for HDR Vivid output is functionally identical to setting up for Dolby Vision or plain HDR10, since all three rely on the same underlying ST.2084 PQ curve. The difference is entirely in which metadata standard and delivery format the platform on the other end expects, which is a Studio-exclusive feature and, like Dolby Vision and HDR10+, needs the appropriate regional certification for a full commercial delivery pipeline.
Unless a client or platform specifically requests HDR Vivid, you won't run into it. If one does, budget for Studio and factor in that your ST.2084-compatible reference monitor needs to be connected through supported hardware, specifically a DeckLink 8K, DeckLink 4K Extreme 12G, or UltraStudio 4K Extreme, per the same manual entry, rather than assuming any HDR monitor and any capture card combination will work.
How do you export HDR video from the Deliver page?
Grading correctly is half the job. Exporting with settings that actually preserve and correctly flag your HDR grade is the other half, and it's a step where a single wrong checkbox undoes the color work you just spent hours on.
- On the Deliver page, choose a codec that supports 10-bit or higher color depth. H.265/HEVC, ProRes 4444 or 4444 XQ, and DNxHR HQX are common choices for HDR masters; an 8-bit codec cannot hold PQ or HLG data correctly and will introduce visible banding in gradients and skies.
- Match your export's color space and gamma settings to your project's Output Color Space. If you graded to Rec.2100 ST2084 at 1,000 nits, your render settings need to say exactly that, not a generic "Same as Project" assumption you haven't verified.
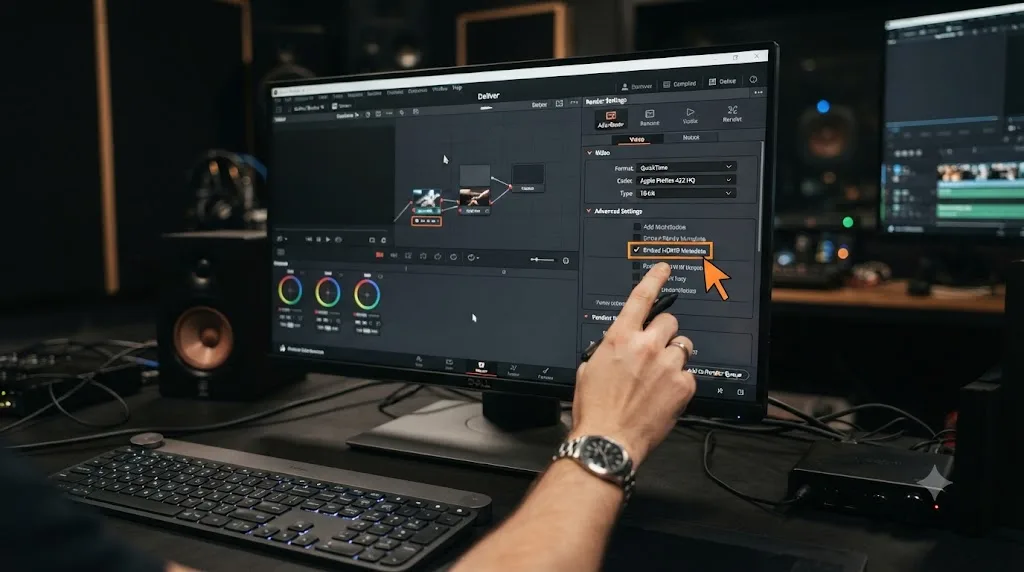
- For HDR10 delivery, in Studio, check Embed HDR10 Metadata in the render settings so MaxCLL and MaxFALL travel with the file automatically, generated from your actual graded content rather than typed in by hand.
- For Dolby Vision, export the render alongside the Dolby Vision XML metadata sidecar file, keeping both together for whichever facility or platform ingests them next.
- For HDR10+, right-click your timeline in the Media Pool and choose Timelines > Export > HDR10+ JSON to generate the dynamic metadata sidecar file alongside your video render.
- Double-check your audio, frame rate, and resolution settings exactly as you would for any export. HDR mistakes get all the attention, but a mismatched frame rate fails a delivery just as thoroughly.
- Before sending a master anywhere, play it back on the actual HDR-capable display you graded on, from the exported file itself, not from the Resolve timeline. Confirm the exported result matches what you approved in the grade, since a codec or metadata mismatch can silently shift the image between the timeline and the final file.
An HDR export with the wrong metadata, or the wrong color space tag, plays back looking like a different grade entirely, even though the pixel data itself might be identical to what you graded. That's the most frustrating kind of HDR mistake, because nothing about your actual color work was wrong. A downstream player reading incorrect metadata, or a receiving platform expecting a different PQ nit ceiling than what your file declares, will tone-map or clip your image in ways you never intended and never saw during grading.
What HDR delivery specs do YouTube and other platforms actually require?
Every platform's technical delivery spec is its own document, and you should always check the current one directly before a real delivery, but a few concrete requirements are worth knowing before you sit down to grade.
YouTube's own upload documentation is explicit and worth quoting directly: "If you're grading your video, grade in Rec. 2020 with PQ or HLG. Using a different configuration, including DCI P3, will produce incorrect results." That's a direct, specific instruction from YouTube's HDR upload help page, and it rules out a color space some HDR productions default to for other deliverables. Alongside that color space requirement, YouTube asks for 10-bit or 12-bit color depth, HDR metadata embedded in the codec or container, and recommends HEVC/H.265, VP9 Profile 2, or AV1 as codecs that deliver good quality at reasonable bitrates, per YouTube's recommended upload encoding settings. H.264 in 10-bit, along with ProRes and DNxHR variants, is technically supported but needs much higher bitrates to hold up.
Streaming platforms like Netflix, Apple TV+, and Disney+ each maintain their own technical delivery specifications, typically requiring HDR10 as a baseline with Dolby Vision as an additional or preferred track depending on the platform and title, delivered through an IMF (Interoperable Master Format) package rather than a single flat file. Broadcast HDR delivery, meanwhile, leans toward HLG specifically, because a single HLG signal can serve both HDR and legacy SDR broadcast chains without a separate encode. None of these platform specifics change how you grade inside Resolve; they change which output color space, codec, and metadata checkboxes you choose on the Deliver page for that specific delivery.
Treat a platform's technical delivery spec as a firm requirement, not a suggestion, because HDR metadata errors are exactly the kind of problem that passes casual review on your own monitor and then fails automated ingest on the platform's end. A file that looks perfect on your properly calibrated HDR reference display can still get rejected at ingest if its declared color primaries, transfer function, or metadata don't match what the receiving platform's spec sheet demands, and that rejection often comes back as a cryptic error code rather than a helpful explanation of what's actually wrong.
Once your HDR master is locked, our guide to DaVinci Resolve's YouTube export settings covers the equivalent SDR delivery path in detail, worth reading side by side with this guide if you're delivering both versions from the same project.
A worked example: grading one log clip for HDR10 and an SDR trim
Theory is easier to apply with a concrete case in front of you. Say you've shot a short interview on a mirrorless camera in a flat log profile, and you need both an HDR10 master and a Rec.709 SDR version for a client who hasn't decided which one they're actually using yet.
- Set up Project Settings before touching a single node. Color Management to Resolve Color Management, Timeline Color Space to DaVinci Wide Gamut Intermediate, Output Color Space to Rec.2100 ST2084 at 1,000 nits, since that's a safe, widely supported peak brightness for a first HDR delivery.
- Tag your source clip's Input Color Space correctly. If Resolve didn't detect your camera's specific log profile automatically, right-click the clip in the Media Pool and set it manually. An untagged or mistagged log clip breaks every transform downstream of it.
- Switch your waveform to the HDR nit scale. Three-dot menu above the scopes, Waveform Scale Style to HDR (ST.2084/HLG), before you make a single grading decision you'll need to judge by that scale.
- Build your primary correction with Lift, Gamma, and Gain as usual, watching the nit-scaled waveform rather than a percentage readout. Bring your subject's skin tone into a comfortable, natural range and check that your highlights, the window behind your subject or a practical light in frame, sit meaningfully under your 768 clip point for 1,000 nits, not jammed right up against it.
- Reach for the HDR palette's contrast control if a standard contrast push feels unpredictable. This is usually the moment it becomes clear why Blackmagic shipped a separate tool for it, since the same slider that behaved predictably in SDR now interacts with hundreds of extra nits of highlight range.
- Confirm the grade on a real HDR reference monitor, not the Resolve viewer on a standard display. If you don't have one connected, everything you're judging by eye at this stage is unreliable.
- Duplicate the timeline once the HDR grade is approved. Name it clearly, something like "Interview_SDR_Trim," so there's no ambiguity later about which timeline is the master and which is derived.
- Change Output Color Space on the duplicate to Rec.709 Gamma 2.4. Watch the automatic tone-mapped conversion Resolve applies, then go through the timeline checking exposure and contrast shot by shot, since the automatic conversion is a starting point, not a finished SDR grade.
- Pay specific attention to your subject's face in the SDR version. Skin tones are the single most common place an automatic HDR-to-SDR conversion needs a manual nudge, since viewers notice a face reading slightly wrong far faster than they'd notice a background element shifted by the same amount.
- Export both masters from the Deliver page with matching, correct metadata. HDR10 timeline: 10-bit or higher codec, Rec.2100 PQ tagged correctly, Embed HDR10 Metadata checked if you have Studio. SDR timeline: standard Rec.709 export settings, no HDR metadata involved at all.
Ten steps, one grade built once in HDR, one derived SDR trim adjusted where it actually needed a human decision, and two deliverables that read as consistent creative choices rather than two independently graded, slightly mismatched versions of the same interview.
A worked example: a multi-camera HDR short film with a YouTube HLG upload
Here's a messier, more realistic case: a short film shot on two different camera bodies, needing an HDR10 festival master and a YouTube upload that has to look right on ordinary phone screens too.
- Normalize both cameras to the same working space first. Confirm both cameras' footage is correctly tagged with its actual Input Color Space in the Media Pool, then let Resolve Color Management transform both into the same DaVinci Wide Gamut Intermediate timeline space, so a shot from Camera B doesn't read warmer or cooler than an adjacent shot from Camera A before you've made a single creative decision.
- Grade a base normalization pass first, evening out each camera's specific color response, before layering the film's creative look on top. If the two cameras handle highlight rolloff differently even under identical lighting, which is common even between bodies from the same manufacturer, that's the moment to catch and correct it.
- Build the HDR10 master at Rec.2100 PQ, 1,000 nits, grading scene by scene with the nit-scaled waveform, keeping the festival master's peak brightness consistent with what most festival HDR projectors and reference monitors actually support.
- Generate HDR10 static metadata by letting Resolve analyze the finished timeline's actual peak and average brightness for MaxCLL and MaxFALL, rather than guessing or copying values from a different project.
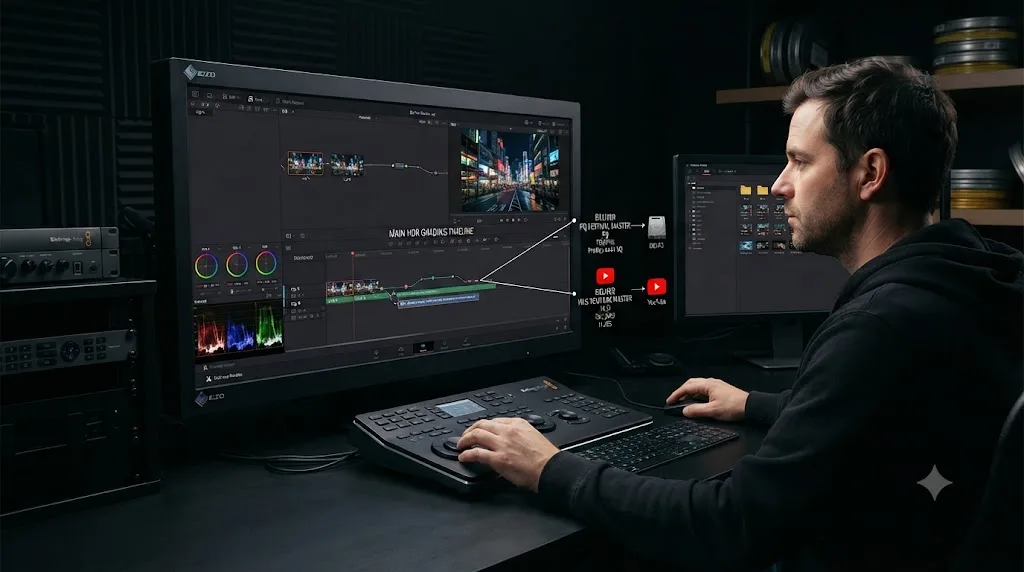
- Duplicate the timeline for the YouTube version and switch Output Color Space to Rec.2100 HLG. HLG's backward compatibility is exactly what a YouTube upload benefits from, since viewers on non-HDR phones and older SDR displays will still see a reasonable image without needing HDR-aware playback at all.
- Check the HLG version specifically on a standard SDR display, not just an HDR one, since the entire point of choosing HLG here is how it degrades gracefully. If a shot looks badly crushed or blown out on an ordinary monitor, that's worth a targeted fix before upload, since a meaningful fraction of your YouTube audience will only ever see the SDR-decoded version.
- Export the HLG master in a 10-bit codec Rec.2020 color primaries matching what YouTube's HDR documentation specifies exactly, HEVC or AV1 if your hardware supports efficient encoding at that setting, avoiding DCI-P3 or any other color space YouTube's own guidance explicitly warns against.
- Keep the HDR10 festival master and the YouTube HLG master as clearly separate deliverables, not the same file relabeled, since they were graded to different peak brightness targets and different transfer functions, and treating them as interchangeable is how a festival projection ends up looking wrong or a YouTube upload gets flagged for incorrect metadata.
The shape of this example differs from the single-clip worked example above in one important way: two source cameras need reconciling before any HDR decision gets made, and two HDR deliverables, PQ for a controlled festival environment and HLG for an uncontrolled public upload, need independent verification rather than one deriving cleanly from the other the way an SDR trim derives from an HDR master.
What goes wrong when grading HDR, and how do you fix it?
These account for nearly every "my HDR grade looks wrong" report, roughly in the order they actually come up.
The image looks flat, dark, or oddly contrasted on your monitor. Almost always a monitoring problem, not a grading problem. A standard SDR display cannot decode a PQ signal correctly, since PQ code values map directly to nits your monitor was never built to reproduce. Confirm you're viewing through a real HDR-capable reference display, connected via a supported Blackmagic I/O device, before assuming anything about the grade itself is wrong.
The waveform readings don't match what you expect from years of SDR habit. You're likely still reading the scope on its default percentage scale. Switch Waveform Scale Style to HDR (ST.2084/HLG) so you're reading absolute nits, and remember the white clip point moves depending on your chosen peak nits, it's not a fixed code value the way SDR's is.
Highlights clip unexpectedly even though you thought you had headroom. Check your actual Output Color Space nit ceiling against what you're assuming. A project set to 500 nits clips much earlier, in code value terms, than one set to 1,000 or 4,000 nits, and it's easy to lose track of which ceiling you configured, especially on a project that's had its settings adjusted more than once.
The SDR trim looks noticeably worse than the HDR master, not just different. This usually means you built the SDR grade independently rather than deriving it from the HDR master through a tone-mapped conversion. Start from the automatic HDR-to-SDR conversion described earlier in this guide and adjust it, rather than regrading Rec.709 from the raw footage as though the HDR grade never happened.
A YouTube or platform upload gets flagged for incorrect HDR metadata, or plays back looking wrong. Confirm your export actually used Rec.2020 color primaries with a PQ or HLG transfer function, exactly as your target platform's documentation specifies, and that HDR metadata is genuinely embedded in the file. Grading correctly and exporting with mismatched or missing metadata produces a file that looks fine on your own reference monitor and wrong everywhere else.
Colors look wrong specifically on Dolby Vision or HDR10+ playback, even though the underlying HDR10 base layer looks correct. This points to a dynamic metadata problem rather than a grading problem, since Dolby Vision and HDR10+ both layer dynamic per-shot metadata on top of the same PQ base. Re-check your Layer 1 analysis metadata and, if you did a manual Layer 2 trim, confirm it was actually applied to the shots you think it was.
A client asks for a peak brightness you didn't originally grade for. Rather than reopening the original grade, treat it as a new trim pass: duplicate the timeline, adjust Output Color Space to the new nit ceiling, and use the same shot-by-shot review process described in the worked examples above, since a 1,000-nit grade and a 4,000-nit grade of the same footage genuinely need different highlight decisions, not just a global brightness scale.
A grade that looked correct in Resolve looks different once played back from the exported file. Play the actual delivered file, not the timeline, on your HDR reference display before sending it anywhere. A codec, bit depth, or metadata mismatch between your project settings and your render settings can shift the image between what you approved and what you actually shipped, and catching that before delivery costs a few minutes; catching it after delivery costs a client relationship.
If your Color page itself won't show footage at all rather than showing a mis-graded image, that's a different and more basic problem. Our guide to a blank Color page timeline covers filters, disabled tracks, and a stuck render cache, the most common causes of that specific failure mode.
Does HDR grading work differently on Windows, Mac, Linux, or between hardware setups?
The Resolve interface, menu names, and workflow described throughout this guide are identical across every platform Resolve runs on. Ctrl becomes Cmd and Alt becomes Option on Mac, the same substitution that applies to every command in Resolve, HDR-related or not.
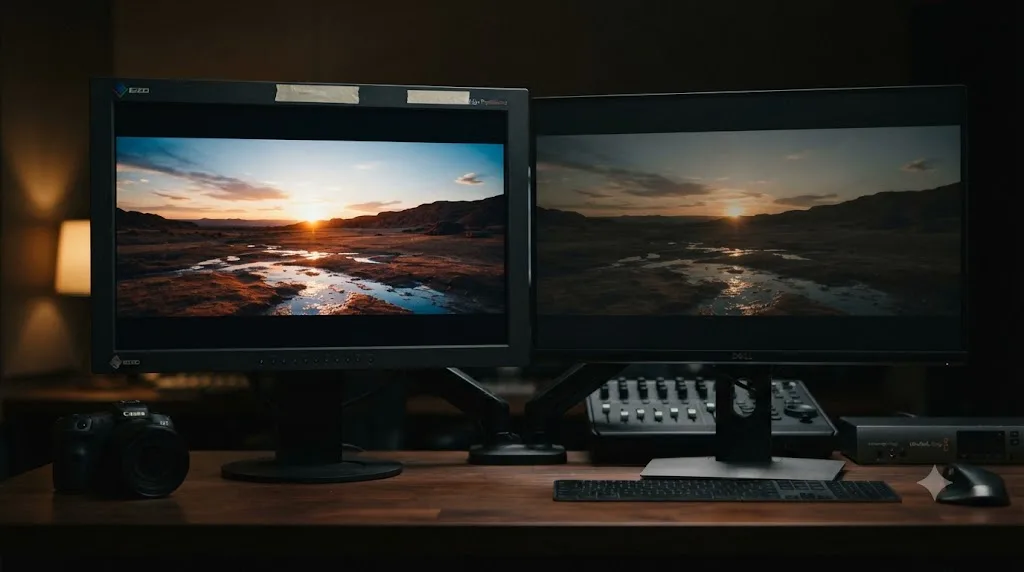
The real platform difference in HDR work isn't the operating system. It's the monitoring and I/O hardware, and that's true regardless of whether your computer runs Windows, macOS, or Linux. Grading HDR accurately requires an actual HDR-capable reference display connected through a supported capture and playback device, typically a Blackmagic DeckLink or UltraStudio product, feeding a monitor that can decode and display PQ or HLG signals correctly. A laptop's built-in screen, even a genuinely bright and wide-gamut one, is not a substitute for calibrated HDR reference monitoring on any professional delivery, because a laptop panel's own tone mapping and calibration are entirely outside Resolve's control.
No monitor connected through a standard HDMI or DisplayPort output from your GPU, without a supported capture card in between, gives you a properly calibrated HDR grading signal, regardless of how capable that monitor's marketing claims it is. Resolve needs to be sending signal through hardware it can control precisely for the metadata, transfer function, and bit depth to be trustworthy, which is why professional HDR grading setups nearly universally include a dedicated Blackmagic I/O device rather than relying on a GPU's direct display output.
None of the HDR grading tools, color management settings, or the HDR palette itself require specific hardware to use, only to monitor accurately. You can build an entire HDR grade on a laptop with no HDR display attached at all, and the software will let you, but you're grading blind in exactly the way judging an SDR grade on an uncalibrated consumer monitor would be blind, just with a much larger gap between what you're seeing and what the signal actually contains.
Which DaVinci Resolve version added which HDR tools?
HDR support in Resolve has grown substantially over the years, which matters if you're following an older tutorial or working on a machine that hasn't been updated recently.
| Tool or feature | Introduced | Source |
|---|---|---|
| Basic HDR grading, Resolve Color Management, ST.2084 support | Resolve 12.1 and earlier, expanded steadily since | HDR Essentials: Getting Setup In DaVinci Resolve, Mixing Light |
| HLG support | Added after Resolve 12.1, absent at that tutorial's original publication | HDR Essentials: Getting Setup In DaVinci Resolve, Mixing Light |
| DaVinci Wide Gamut and DaVinci Intermediate | Resolve 17 | DaVinci Wide Gamut and DaVinci Intermediate workflow explainer, cinapex |
| Resolve Color Management 2.0, HDR palette contrast control | Resolve 17 | HDR Palette 101, Mixing Light |
| HDR Vivid support | Resolve Studio 18 (April 2022) | DaVinci Resolve 18.6 Reference Manual: HDR Vivid |
| MultiMaster trim workflow | Present in recent Resolve releases including 21 | DaVinci Resolve - What's New, Blackmagic Design |
If you're working from a tutorial that mentions no HLG option in Resolve, it predates the version that added it, and every current release supports both PQ and HLG. If a tutorial or forum post assumes DaVinci Wide Gamut Intermediate doesn't exist yet, it's describing Resolve 16 or earlier, before Blackmagic introduced its own working color space. HDR Vivid, MultiMaster trims, and the more recent metadata refinements are newer additions still, worth double-checking against your specific installed version if a workflow described online doesn't match what you're seeing on screen.
Where do you go from here?
Grade in PQ if your delivery target names a specific HDR10, Dolby Vision, or disc format. Grade in HLG if your delivery target is broadcast or a platform like YouTube that needs to hold up on both HDR and ordinary SDR screens without separate files. Either way, set Resolve Color Management up correctly before you touch a single node, watch your scopes in nits instead of percent, and confirm every judgment call on a real HDR reference display, not a laptop screen you're hoping is close enough.
Build the HDR master first, derive the SDR trim from it, and you'll spend your time on the creative decisions that actually matter instead of re-solving the same shot twice from scratch. That single ordering choice, HDR first, SDR derived, is the difference between an afternoon of shot-by-shot trim adjustments and a second full grade competing with the first one for consistency.
The free version of DaVinci Resolve gets you a genuinely capable HDR grading setup. Studio is the upgrade the moment a client or platform asks for Dolby Vision, HDR10+, or HDR Vivid by name, since those specific metadata formats simply aren't available anywhere else. Match the tool to what your delivery spec actually requires, not to what sounds more professional, and the HDR master you build today will still make sense the next time someone asks you to trim it down for a format you haven't delivered yet.
If you're mid-grade and can't remember which menu holds a specific HDR setting, TryUncle is an AI tutor built to look at your actual Resolve window and point straight at the control you're hunting for, faster than scrolling back through a guide like this one for the one checkbox you half-remember. And once your grade is locked, our guide to copying a color grade across multiple clips covers the fastest ways to push a finished HDR look across the rest of your timeline without rebuilding it shot by shot.
Frequently asked questions
- What settings do I need to grade HDR video in DaVinci Resolve?
- Open Project Settings, go to Color Management, and set Color Science to Resolve Color Management. Choose a Timeline Color Space of DaVinci Wide Gamut Intermediate, then set your Output Color Space to an HDR target such as Rec.2100 PQ (for HDR10 or Dolby Vision) or Rec.2100 HLG (for broadcast and YouTube). Grade on an HDR-capable monitor with the video scopes set to the HDR (ST.2084/HLG) scale so you're reading nits instead of a 0-100 percent scale.
- What's the difference between PQ and HLG for HDR grading?
- PQ (Perceptual Quantizer, SMPTE ST 2084) ties exact code values to exact nit levels, so a PQ master needs a fixed peak brightness, typically 1,000 or 4,000 nits, and looks wrong without accompanying metadata or a display that can decode it. HLG (Hybrid Log-Gamma) is relative and backward-compatible: an SDR display shows an HLG signal reasonably well with no metadata at all, because only the highlights above middle gray get logarithmically compressed. PQ suits Dolby Vision, HDR10, and disc masters. HLG suits broadcast and YouTube uploads where a single file needs to look acceptable on both HDR and SDR screens.
- Do I need DaVinci Resolve Studio to grade HDR video?
- No, not for basic HDR grading. The free version includes HDR-capable color management, the HDR palette, and Rec.2100 PQ and HLG output color spaces. What Studio adds is Dolby Vision metadata authoring and its Content Mapping Unit, HDR10+ dynamic metadata analysis and export, HDR Vivid support, and the professional HDR scopes that read ST.2084 and HLG values with full precision. If your delivery target is a plain HDR10 or HLG file with no dynamic metadata, the free version can grade and export it.
- Why does my HDR grade look wrong on a normal monitor?
- Because a standard SDR monitor cannot decode a PQ signal correctly. PQ maps code values directly to nits, so on a display that tops out around 100 to 300 nits, a PQ image looks flat, dark, or oddly contrasted, not because the grade is wrong but because the display physically can't show what the signal is describing. You need an HDR-capable reference monitor, connected through a supported I/O device, to judge a PQ grade accurately. HLG is more forgiving on non-HDR screens, but it still isn't a substitute for real HDR monitoring.
- How do I convert my HDR grade to an SDR version for platforms that need it?
- Duplicate your HDR timeline, then either add a Rec.709 output transform inside Resolve Color Management and manually trim the highlights, or use Dolby Vision's Content Mapping Unit in Studio to generate an automated tone-mapped SDR pass you can adjust shot by shot. Grade HDR first, since it's easier to compress a wide dynamic range down to Rec.709 than to invent highlight detail that a native SDR grade never captured.
- What export settings do YouTube and other platforms need for HDR video from Resolve?
- YouTube requires Rec.2020 color primaries with a PQ (SMPTE ST 2084) or HLG (ARIB STD-B67) transfer function, 10-bit or higher color depth, and HDR metadata embedded in the file, delivered as H.265/HEVC, VP9 Profile 2, or AV1. Grading in DCI-P3 or another color space and expecting YouTube's HDR pipeline to correct it produces wrong colors, per YouTube's own upload documentation. For Dolby Vision or HDR10+ delivery to a streaming platform, check that platform's technical delivery spec directly, since the accepted formats and metadata versions vary by service.
- Can I grade in HDR and still deliver a good SDR version without regrading from scratch?
- Yes, that's the entire point of DaVinci Resolve's MultiMaster trim workflow. Grade one HDR master, then generate SDR, HDR10, and other trims from it as separate output color space passes rather than separate manual grades. Each trim starts from an automated tone-mapped conversion that you can then adjust per shot, which is far faster than building an independent SDR grade from the same footage.
Sources
- DaVinci Resolve - Studio (Blackmagic Design)
- DaVinci Resolve - HDR (Blackmagic Design)
- DaVinci Resolve - What's New (Blackmagic Design)
- DaVinci Resolve - Color (Blackmagic Design)
- YouTube Help: Upload High Dynamic Range (HDR) videos
- YouTube Help: Recommended upload encoding settings
- HDR Essentials: Getting Setup In DaVinci Resolve, by Robbie Carman (Mixing Light)
- HDR Essentials: Reading The Scopes In DaVinci Resolve, by Robbie Carman (Mixing Light)
- HDR Palette 101: Resolve Color Management 2.0 + Contrast Controls, by Patrick Inhofer (Mixing Light)
- DaVinci Resolve 18.6 Reference Manual: Delivering HDR10+ (Blackmagic Design, mirrored)
- DaVinci Resolve 18.6 Reference Manual: HDR Vivid (Blackmagic Design, mirrored)
- Dolby Vision in DaVinci Resolve Studio: FAQs (Dolby Professional Support)
- Generate MaxCLL and MaxFALL HDR10 Metadata in DaVinci Resolve (The Daejeon Chronicles)
- DaVinci Wide Gamut and DaVinci Intermediate: Why Blackmagic Built Its Own Color Space (cinapex)
- Blackmagic Forum: Color Space Settings for creating a 4K HDR master
Put this guide to work with TryUncle.
Ask about the step you’re on. TryUncle sees your screen and points at the control you need, so you can keep learning in your own project.
Get TryUncle for Mac or WindowsKeep reading
Guides · Oct 9, 2026 · 34 min
DaVinci Resolve 21: Combine Selected Fusion Tools
Use DaVinci Resolve 21's Combine Selected Tools control to adjust shared Fusion node settings, handle mismatched values, and know when to use a macro instead.

Fixes · Oct 6, 2026 · 39 min
DaVinci Resolve 21 Fusion Controls Missing for Keyframes
DaVinci Resolve 21 Fusion controls missing for keyframes? Identify the selected object, expose the right parameters, and fix the editor mismatch.
Fixes · Oct 6, 2026 · 31 min
DaVinci Resolve 21 Loading Color Page Stuck? Fix It
DaVinci Resolve 21 stuck on Loading Color Page? Follow this decision-based fix for GPU, cache, plug-in, project, UI, and version problems.