Articles / Guidesupdated for DaVinci Resolve 21.0.4 (August 2026)
DaVinci Resolve Burn In Timecode: Complete 21 Guide
Quick answer
For DaVinci Resolve burn in timecode, open Workspace > Data Burn-In, choose Project, add Record TC or Source TC, style the overlay, save it, then select that burn-in in the Deliver page and render. Use Record TC for timeline reference and Source TC for camera-reference dailies.
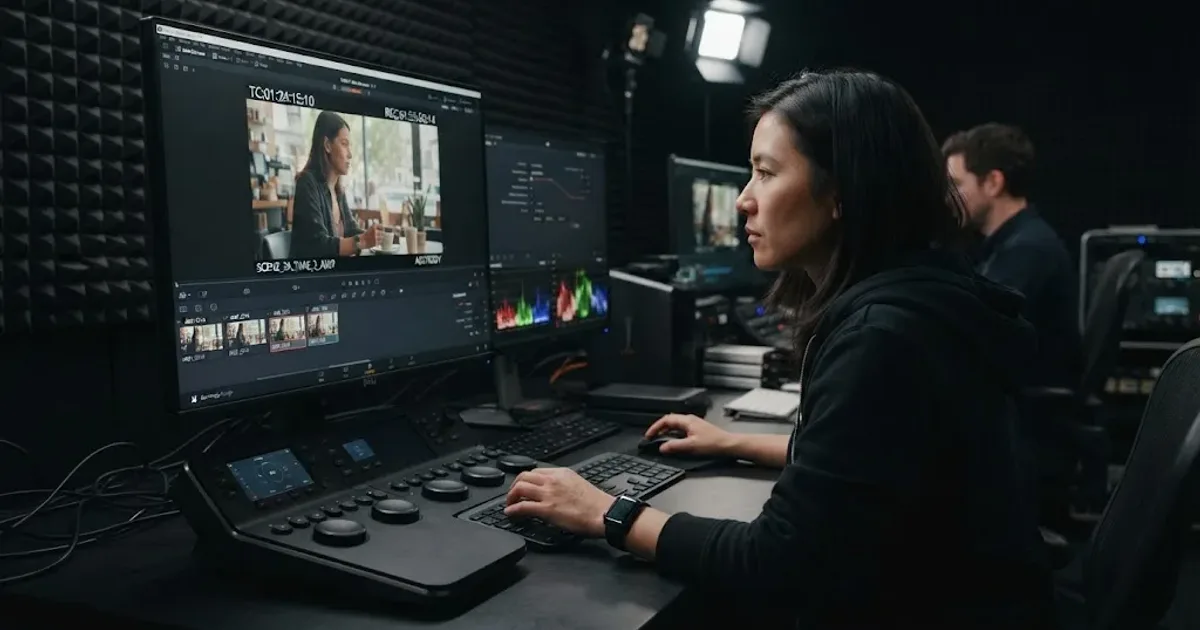
I use burned-in timecode when a review file needs to answer a simple question without opening the project: where is that frame? The control is called Data Burn-In in DaVinci Resolve 21, and 21.0.4 is the version I’m covering here as of August 2026. Our 100,000+ member editing community keeps bringing up this workflow because a clean review export can save a lot of back-and-forth.
The short answer is simple. Open Workspace > Data Burn-In, choose the scope you need, add a timecode field, style it, save it, and enable that burn-in in the Deliver page before rendering. The part that causes mistakes is choosing the right timecode: Record TC follows the timeline, while Source TC follows the camera clip.
What does burn in timecode mean in DaVinci Resolve 21?
Burning in timecode means rendering text into the visible video frames so the timecode travels with the exported file. It is not the same as leaving timecode in a file's metadata, showing the timecode only inside Resolve, or adding a subtitle track. Blackmagic's guide describes Data Burn-In as an overlay that can be shown in the viewer and written into rendered files, which is why it works for review movies, dailies, offline references, and handoffs.
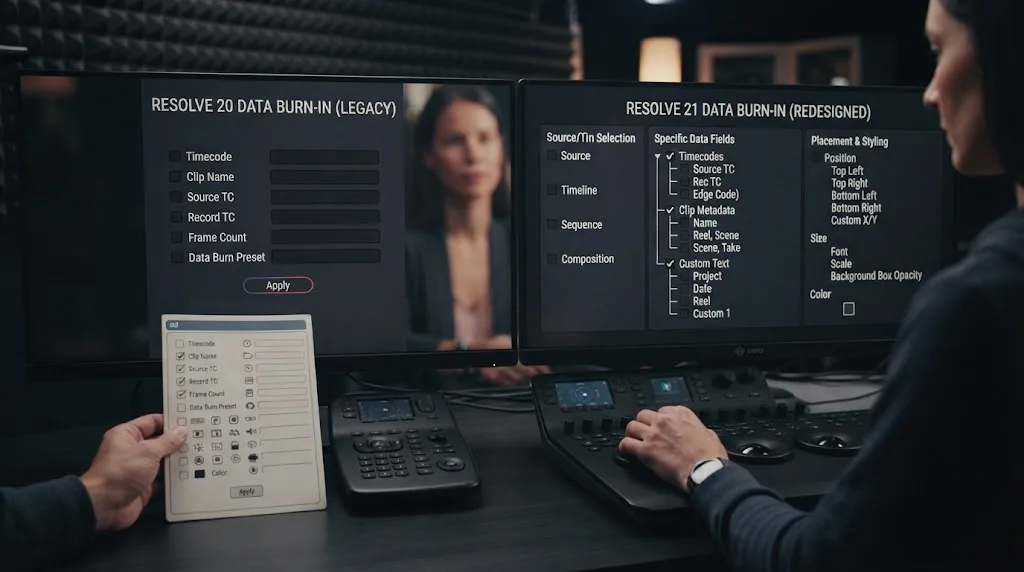
In DaVinci Resolve 21, the feature lives at Workspace > Data Burn-In. The redesigned window has a metadata column, a Burn-In Fields column, and an Overlay Controls column. The Project tab applies the setup to all clips in the timeline. The Clip tab applies it to the selected clip. Those two scopes are the first decision to make, because a perfect overlay can still be wrong if it is attached to the wrong scope. Blackmagic's Resolve 21 New Features Guide documents the new layout and the Project-versus-Clip behavior.
DaVinci Resolve 21 burns timecode into rendered frames through Data Burn-In, not through a title placed on the timeline.
That distinction matters in a dailies workflow. A title clip is an editorial object that you can trim, animate, or turn off. Data Burn-In is a render overlay driven by timecode and metadata. If you are delivering a clean master, leave Data Burn-In disabled. If you are delivering a reference copy, enable it on that render job and keep the clean master separate.
Timecode is normally shown as hours, minutes, seconds, and frames. A value such as 01:12:08:17 means hour 1, minute 12, second 8, frame 17 within the frame-rate system used by the timeline. Do not treat the last pair as a decimal fraction. It counts frames, so the valid frame range depends on the timeline frame rate and timecode rules.
Resolve 21 also changes the Edit page timecode display so you can view frames, subframes, or audio samples from the timeline timecode display. That viewer display choice does not turn those values into a Data Burn-In automatically. It only changes what you see in the Edit page. Blackmagic documents the display options in the Resolve 21 New Features Guide.
Which timecode should I burn in: Record TC or Source TC?
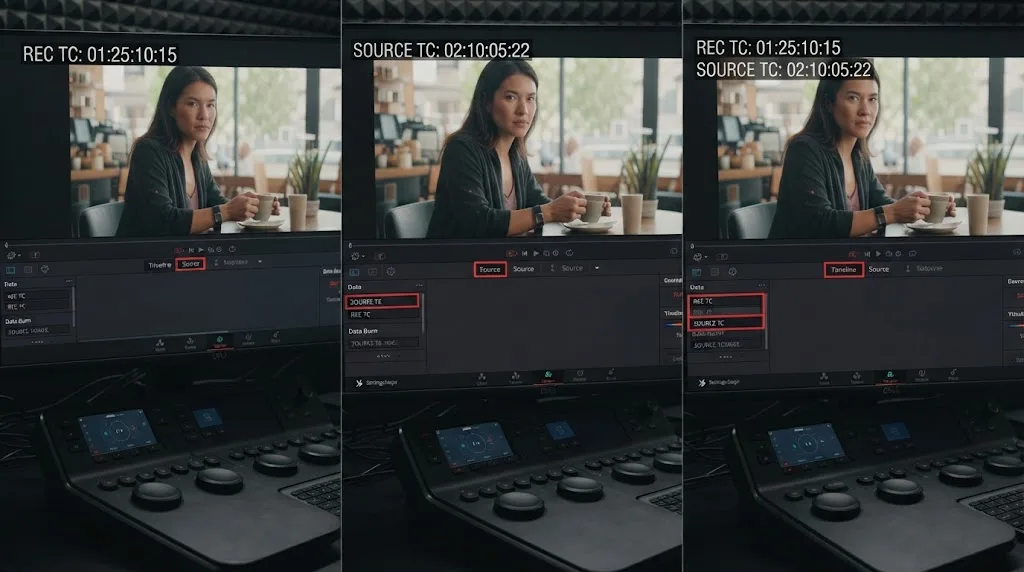
Choose Record TC when the person receiving the file needs to refer to the edited timeline. Choose Source TC when the person needs to find the frame in the original camera file. DaVinci Resolve 21 exposes both fields in Data Burn-In, and the names are more useful than trying to infer the answer from the numbers on screen.
| Data Burn-In field | What it follows | Best use | Main risk |
|---|---|---|---|
| Record TC | The record position in the timeline | Locked-cut notes, sound reference, editorial review, broadcast checks | It may not identify the original camera file by itself |
| Source TC | The source clip's original timecode | Dailies, camera reports, VFX pulls, conform checks | It can be ambiguous when clips overlap or metadata is missing |
| Record TC & Frame Num | Timeline timecode plus record frame count | Technical review where both references matter | More text can cover the image |
| Source TC & Frame Num | Source timecode plus source frame count | Camera and VFX reference | It still needs a clip identifier for multi-camera work |
| Source & Record TC | Both timeline and source timecode | Editorial handoff and troubleshooting | Two clocks can confuse a viewer who was promised one reference |
| Audio Timecode | Audio timecode metadata where available | Dual-system or audio-post troubleshooting | It may not match the picture source clock |
The older DaVinci Resolve Editor's Guide describes Record Timecode as the timeline's timecode and Source Timecode as the individual clip's timecode. The interface has changed in Resolve 21, but that decision remains the foundation of the workflow.
Record TC is the right default for client notes tied to an edited timeline.
Use Record TC for a locked-cut review
A director watching a review file usually wants to say, “The title is late at 01:04:12:08.” If the review file is a render of the edited timeline, Record TC gives the note a stable address in that edit. It keeps the reviewer aligned with the sequence rather than with a camera card that the reviewer may never see.
Record TC is also the clearer choice when the review goes to a sound editor, online editor, or producer who is looking at the cut as a finished timeline. Add the clip name as a second field if someone will need to trace the note back to media. A practical lower-third stack is:
REC TC: 01:04:12:08SOURCE: A001_C003_0715ABVERSION: CUT_07_REVIEW
The exact labels are yours. The principle is not. Tell the recipient which clock they are reading.
Use Source TC for dailies and camera reference
A dailies viewer may ask for “the take that starts around 09:18:24:06 on A-camera.” That is a source-reference question. Source TC points toward the original media, provided the source metadata was preserved and the clip in the timeline is the clip the viewer thinks it is.
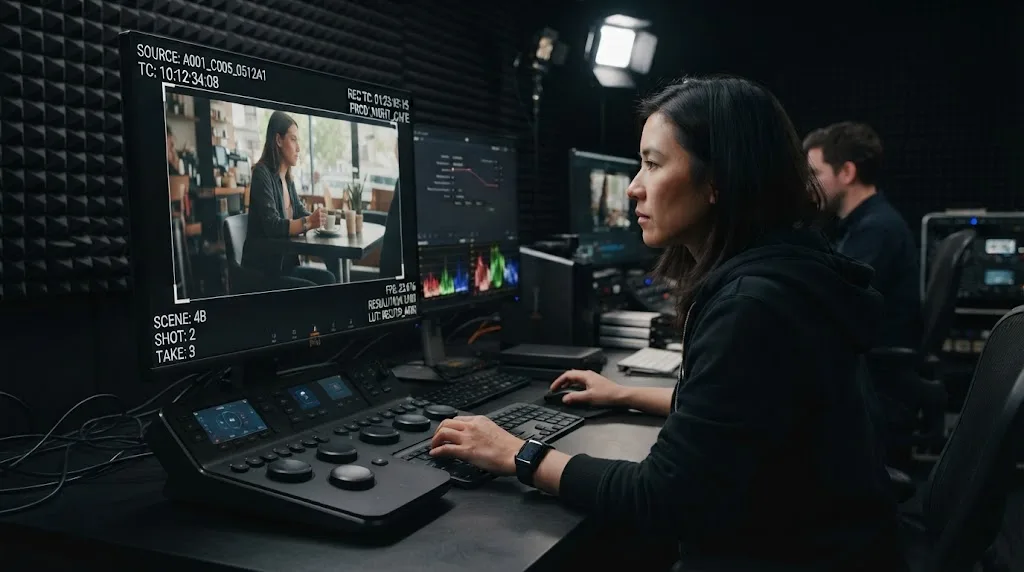
Source TC is especially helpful when one timeline contains many short selects from long camera files. It lets a camera department, assistant editor, or VFX artist find the source range without watching the entire original recording. Add Source Clip Name, Reel Name, Scene, Shot, or Take when that information is present and meaningful.
Source TC is the right default for dailies that point back to camera media.
Use both when the handoff has two different clocks
Use Source & Record TC when the same file must serve both editorial review and source-media troubleshooting. That is common in a turnover where an editor wants to note the cut position and a colorist or VFX artist wants to identify the camera frame.
The trade-off is visual density. Two timecodes plus a long filename can become unreadable at small delivery sizes. If the export is 1920 x 1080, a two-line overlay is easier to read than four tightly packed lines. If the export is a vertical social crop, place the fields inside a safe area that will survive the crop, or make a separate review export for technical use.
How do I burn in timecode in DaVinci Resolve 21 step by step?
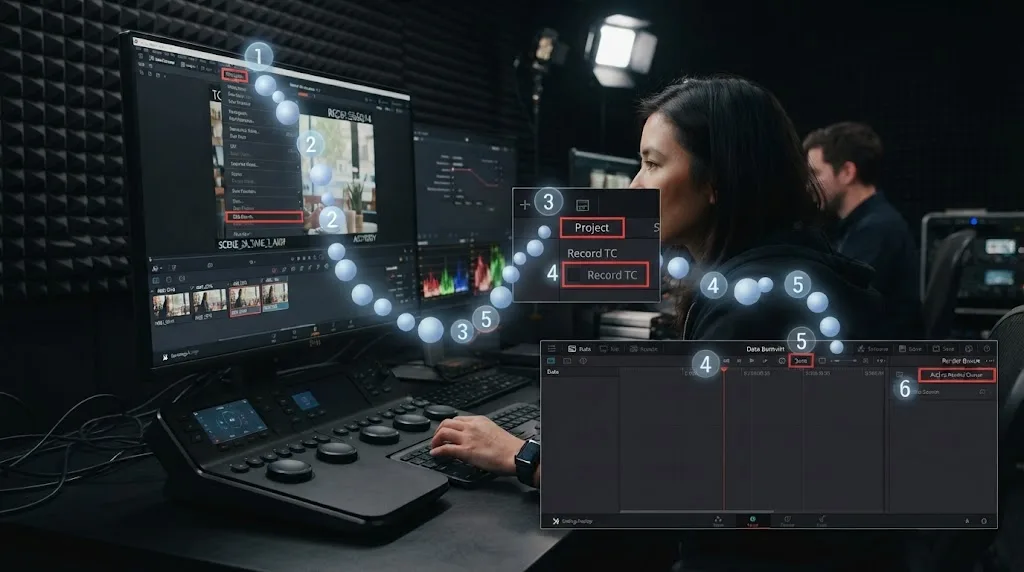
To burn in timecode in DaVinci Resolve 21, open Data Burn-In, select Project or Clip, add the correct timecode metadata, format the field, save it, and enable the result on the Deliver page. The following sequence mirrors the current Resolve 21 window.
1. Open the Data Burn-In window
Open a project with a timeline, then choose Workspace > Data Burn-In. If the menu item is hard to find, use Resolve's Workspace menu rather than searching the Effects Library. Data Burn-In is a workspace tool, not a title preset.
Resolve 21's redesigned window is divided into three functional areas. The left column selects metadata. The middle column builds the field. The right column controls the overlay. The Resolve 21 New Features Guide specifies that the window is still opened from Workspace > Data Burn-In and that the Project and Clip tabs control scope.
2. Choose Project or Clip
Choose Project when every clip in the timeline should use the same burn-in design. Choose Clip when you need a burn-in on only the selected clip or when a clip-specific metadata field should appear.
For a normal review export, start with Project. It is easier to audit one project-level preset than a timeline where individual clips carry unexpected overrides. For a camera test, a single problem shot, or a selected diagnostic clip, Clip can be the cleaner choice.
| Your situation | Choose | Why |
|---|---|---|
| Full edit review | Project | Every shot carries the same reference layout |
| Camera test | Clip | You can isolate one clip without changing the whole timeline |
| Metadata check | Clip | A selected shot can expose one source field for inspection |
| Dailies from a timeline | Project | The entire stringout can share the same labels |
| Mixed technical notes | Project first, Clip only when needed | Keeps the default predictable while allowing exceptions |
3. Add the timecode metadata field
In the metadata list, find Record TC, Source TC, or a combined field such as Source & Record TC. In Resolve 21, the metadata list includes a search box, so type TC or timecode if you do not want to scroll. Click the plus icon to add the field to the middle Burn-In Fields column.
Use the field name exactly as the workflow requires. Record TC is not a synonym for Source TC. A label such as REC TC can make that distinction obvious to the person reading the file.
If you need a frame count as well, add Record Frame Number or Source Frame Number. If you need the current clip identifier, add Source Clip Name or Source File Name, but be careful with full paths. A long file path can dominate the image and reveal storage details that do not belong in a client review.
4. Build a readable field
The middle column lets you arrange the exact data returned in the field. Resolve 21 can combine typed text, metadata fields, and custom metadata tags in a field. The New Features Guide says custom metadata tags can be inserted by typing % and then searching for the field name.
A compact field might read:
REC TC: %RecordTimecode
The exact token offered by your Resolve 21 installation is authoritative. Use the dropdown suggestion rather than manually guessing a metadata tag. If the tag is wrong, the burn-in can render a blank token or literal text instead of a value.
For two lines, create separate fields when you want independent positioning. Use one field when you want the label and its value to stay together. The right choice depends on the image. Separate fields give you more control. One combined field is faster to audit.
5. Turn the field on
Resolve 21 gives each Burn-In Field its own on and off control, plus a master toggle for the whole group. Check the field you want, then confirm the master toggle is enabled. A common failure is building a field correctly and leaving either the field or the master switch disabled.
6. Set the display length
Set Display Length to Entire Clip when the timecode should remain visible throughout the render. Choose Frames when the overlay should appear only at the beginning, end, or both.
A short first-frame slate can identify a file without covering the image for the whole review. A full-timecode dailies export needs Entire Clip. A watermark or copyright line may be useful for the first and last few seconds instead of the entire program.
When you choose Frames, Resolve 21 exposes controls for the first and last frames. Think in frames, not seconds. At 24 fps, 48 frames is two seconds. At 25 fps, 50 frames is two seconds. At 30 fps, 60 frames is two seconds. If you change the timeline frame rate, the same frame count represents a different duration.
7. Set font, opacity, background, and placement
The Overlay Controls column handles font format, size, alignment, text color, text opacity, background color, background opacity, placement, and X/Y position. The Resolve 21 New Features Guide lists these controls and describes the placement controls as part of the expanded window.
Start with high contrast. White text over a black background is easy to read, but a fully opaque box can hide faces, subtitles, or action. Lower the background opacity only after you have confirmed the text remains readable on bright and dark frames. A translucent box that disappears over a white wall has failed its job.
For a client review, place the timecode where it does not fight captions. For a VFX reference, choose a location that stays visible in the plate. For a color review, avoid covering skin, gray cards, charts, or other material the recipient needs to inspect.
8. Save the setup
Click Save after the overlay looks correct. A saved burn-in is only useful if the Deliver page can select it for the current render job, so treat saving and enabling as two separate actions.
9. Verify it in the viewer and on a short render
Move the playhead across different clips and verify that the expected timecode changes. Then render a short range that includes a clip boundary, a bright frame, a dark frame, and any subtitles. Open the resulting file in a player outside Resolve.
Viewer confirmation is not enough. The viewer can show a project burn-in while the Deliver page is set to None. The final file is the authority.
A burn-in visible in Resolve is not proof that the Deliver job will render it.
10. Enable the burn-in on the Deliver page
Open the Deliver page and select the render preset or custom settings you need. In the Video settings, find the Data Burn-In control. Set it to the project setup or the saved preset instead of None. Then add the job to the render queue and render.
The older Blackmagic Editor's Guide explicitly separates configuring Data Burn-In from rendering the output movie. Resolve 21 has a redesigned configuration window, but the important operational rule is unchanged: the render job must have burn-in enabled.
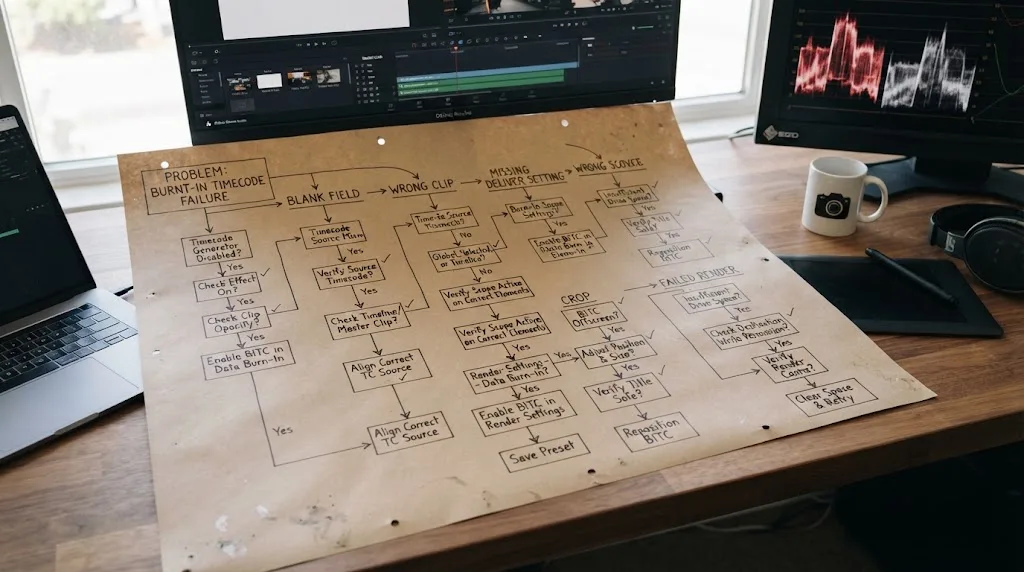
Why is my timecode visible in the viewer but missing from the export?
The usual cause is that Data Burn-In is enabled for the viewer setup but disabled for the Deliver page render job. Set the Deliver page's Data Burn-In option to the project or saved preset, then render a short range and inspect the file outside Resolve.
Check the Deliver page first
On the Deliver page, open the Video settings and inspect the Data Burn-In menu. If it says None, the current render will not include the overlay. Choose the project-level burn-in or the saved preset you configured.
Do not assume that selecting a burn-in in the Workspace window automatically changes every future render preset. Render presets can carry their own settings. Check the active job, not only the workspace panel.
Check the render range
If you rendered only a portion of the timeline, the file may not include the clip where you expected to see a source field. Set a short in and out range over a known clip, render it, and check that the overlay appears there.
Check whether you enabled the field and the master switch
Resolve 21 lets individual fields be toggled and also provides a master toggle. If the field exists but is disabled, it will not appear. If the field is on but the master toggle is off, the whole burn-in is hidden.
Check the output viewer, not just the source viewer
A render can contain the overlay even when a viewer mode or output display hides it, and the reverse can also happen. Open the exported file in a separate player. A media player is not interpreting Resolve's workspace state. It is showing the rendered pixels.
Check for a saved preset mismatch
A preset saved before you changed the field may not contain the new layout. Save the updated setup with a distinct name, select that name in Deliver, and run another short test. This creates a simple audit trail when several review versions are queued.
Check color and opacity
The field may technically be present but invisible because text opacity, background opacity, or color makes it blend into the frame. Test with a solid black background and bright text first. Once it works, reduce the background opacity gradually.
If the render still fails, the broader DaVinci Resolve not exporting troubleshooting guide can help separate a Data Burn-In setting problem from a failed or incomplete render.
Why is Source TC wrong when clips overlap on the timeline?
Source TC follows the source clip Resolve treats as visible at the playhead, so overlapping video layers can produce a different source timecode than the clip you intended to reference. This is a metadata-selection problem, not a calculation problem.
Suppose V1 contains a camera shot and V2 contains a title, adjustment clip, or alternate shot. At a given playhead position, the visible clip may be the item whose source metadata feeds the burn-in. If V2 is transparent or has no obvious picture, it can still complicate the result depending on how the timeline is built.
The safest diagnostic is to isolate the layer you want to inspect. Disable or hide other video tracks, move the playhead across the target clip, and compare the displayed Source TC with the source clip's metadata. Restore the tracks before the final render.
What if the timeline uses a flattened file?
A flattened render contains one source identity. It cannot reveal the original camera clip names and source timecodes that existed before flattening unless that information was preserved in metadata or the burn-in was rendered into the flattened file at an earlier stage.
This is why a technical review export should be made from a timeline that still contains the original clips when source-level reference matters. A flattened review can still carry Record TC, because Record TC belongs to the timeline, but Source TC will describe the flattened source rather than every historical camera file.
What if the clip is a compound clip?
A compound clip can make a source-reference request harder because the visible timeline item may not be the camera file the reviewer expects. If the recipient needs camera timecode, inspect the compound clip contents or create a reference timeline from the original media. If the recipient only needs the edit position, use Record TC.
What if the source metadata is missing?
Source TC cannot recover a camera clock that was never imported, was overwritten, or is not present in the linked media. Use Record TC for a stable timeline address, or add a custom metadata field if your production has a separate slate or reel identifier.
DaVinci Resolve 21 expands custom metadata support in Data Burn-In. The official New Features Guide says user-created custom metadata can be used in Data Burn-Ins, Smart Bins, Clip Filters, and naming tags. That gives a production a path for adding a useful identifier, but it does not recreate missing source timecode.
How do I burn in source timecode, clip name, reel, scene, and take together?
Add each required metadata field to the Burn-In Fields column, then give each field a clear position and label. For a dailies or VFX reference, the most useful compact combination is usually Source TC, Source Clip Name, Reel Name, and Scene, Shot, or Take when those values are populated.
A practical dailies layout
Use one corner for source identity and another for timecode. For example:
TOP LEFT
A-CAM  A001_C003_0715AB

BOTTOM LEFT
SRC TC: 09:18:24:06

BOTTOM RIGHT
SCENE 24  SHOT 3A  TAKE 2
The labels are deliberately explicit. TC alone does not tell the viewer which clock they are reading. SRC TC and REC TC do.
Avoid a full file path unless a specific technical team needs it. Paths can expose local drive letters, server names, or folder structures. Source Clip Name is usually easier to read and less revealing.
A practical editorial review layout
For a locked-cut review, use:
REC TC: 01:04:12:08
CUT_07_REVIEW
If the file will be discussed in a review session, add the version as custom text. Version labels are not timecode, so keep them visually separate. A reviewer should be able to read the frame address without confusing it with the export version.
A practical VFX layout
VFX artists often need a source identifier and a frame address. Use Source TC, Source Clip Name, Reel Name, and Record TC if the shot has been placed in an editorial timeline. If you also use frame numbers, test the layout on a shot with a long filename.
The frame number is useful when a tool or script uses absolute frame counts, but it can be redundant when the source timecode already provides an unambiguous address. Add it when the recipient asks for it, not because more metadata always improves a review file.
What if metadata fields are blank?
Blank fields usually mean the selected clip does not contain that metadata, the field is not populated for that shot, or the active clip scope differs from the intended project scope. Move to a clip with known metadata and compare it. If only some fields are blank, keep the fields that matter and remove the ones that create empty labels.
You can also use a custom text field for a fixed label such as OFFLINE REVIEW or DO NOT DISTRIBUTE. That text will not change per clip. Use metadata fields for values that should follow the media.
How do I add custom text to a DaVinci Resolve timecode burn-in?
Add a Custom Text field in Data Burn-In for fixed labels, review versions, warnings, or production notes. Use metadata tags inside a field when the text must change with each clip.
Fixed text versus changing metadata
Fixed text is appropriate for:
INTERNAL REVIEWDO NOT DISTRIBUTECUT 07PROXY REFERENCE
Changing metadata is appropriate for:
- record timecode
- source timecode
- clip name
- scene and take
- camera or roll/card
- date or shoot day when the metadata is populated
Do not use fixed text as a substitute for a changing value. Writing REC TC: 01:00:00:00 into Custom Text will put the same number on every frame. It looks like timecode, but it cannot answer a frame-specific question.
How custom metadata tags work in Resolve 21
The Resolve 21 New Features Guide says you can type % in a field and begin entering the name of a metadata field. Resolve presents a dropdown selection. Choose the exact field from that list.
This is useful for custom production metadata. A production might have a field such as Dailies Colorist, Data Wrangler, Shoot Day, or a camera-specific note. The tag can be combined with typed text to produce a readable label.
For example:
DAY: %ShootDay
CAMERA: %Camera
Treat the token picker as the source of truth. Metadata field names can differ from the words people use in a production meeting.
How to make a review warning readable
A large warning in the middle of the frame is effective for a private review copy, but it can make image evaluation difficult. A small corner label is better for a normal client review. If the file is truly sensitive, a watermark can be useful, but a burn-in is not a complete content-security system. It can discourage accidental sharing and help identify a file, but it cannot prevent copying.
The Colorist Guide to DaVinci Resolve 20 demonstrates using Custom Text as a distribution warning and adjusting text size, text opacity, background opacity, and position. The guide also demonstrates using a custom metadata token for codec information. The Resolve 21 interface is newer, but those two patterns remain useful.
Can I show timecode only at the beginning or end of a clip?
Yes. Set the field's Display Length to Frames, then choose whether it appears during the first frames, the last frames, or both. Use this when you need an identifying slate without covering the entire image.
When a first-frame burn-in makes sense
A first-frame label works for:
- a camera test
- a short file-identification slate
- a review version label
- a proxy or transcode check
- an ingest verification file
It is less useful when reviewers need to reference a frame in the middle of a shot. For that, display the timecode over the entire clip.
When a last-frame burn-in makes sense
A last-frame label can mark the end of a file or provide a final version identifier without covering the program. It is also useful for a short technical tail when you do not want to place a slate before the content.
How many frames should I use?
Choose the number based on how long a person needs to read the label and what frame rate the timeline uses. Resolve's control is expressed in frames, so calculate the duration from the actual timeline frame rate. For a two-second label, 48 frames equals two seconds at 24 fps, 50 frames equals two seconds at 25 fps, and 60 frames equals two seconds at 30 fps.
Those are frame-count conversions, not Resolve performance claims. If the recipient watches at a different speed or the file is variable frame rate, verify the result in the exported file.
What if a frame-only label does not appear?
Check the field's Display Length, the First and Last controls, and the render range. A short render that starts after the first frames will not include a first-frame-only field. Render from the start of the clip when testing that behavior.
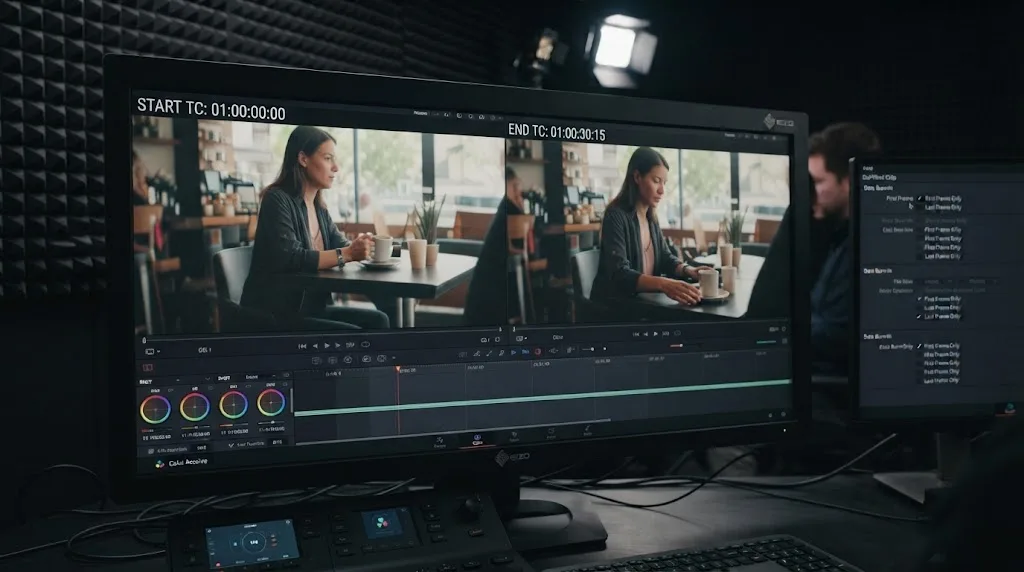
How do I make burned-in timecode readable without covering the image?
Use a clear label, enough contrast, a restrained background, and a position that respects captions and important picture detail. Readability matters more than making the overlay small.
Start with a solid test style
Before fine-tuning, use:
| Control | Starting point | Why |
|---|---|---|
| Text color | White | Easy to check against dark areas |
| Background color | Black | Establishes a known contrast baseline |
| Background opacity | High enough to read | Prevents the field from disappearing during the test |
| Alignment | Left for labels, center for a single clock | Makes the hierarchy obvious |
| Placement | A lower corner or top corner | Keeps the center open for the image |
| Field count | One or two first | Prevents a layout problem from becoming a metadata problem |
These are starting recommendations, not fixed Resolve specifications. Once the text is visible on a bright frame and a dark frame, reduce the box or opacity only if the recipient can still read the timecode.
Keep labels short
SRC TC is shorter than SOURCE TIMECODE. REC TC is shorter than RECORD TIMECODE. Short labels leave room for the value, especially when the export is vertical or has burned-in captions.
Avoid the middle of the frame
The center often contains a face, a product, a title, or the subject being reviewed. Put technical reference information near an edge unless the file is specifically a diagnostic image where covering the frame is acceptable.
Respect captions and subtitles
If the review has captions, inspect the caption-safe area. A lower-left burn-in can cover subtitles. Move the timecode to the upper-left or upper-right, or create a separate technical review file. Do not make the recipient choose between reading dialogue and reading the frame address.
Check vertical and cropped deliveries
A burn-in designed for a 16:9 master can fall outside a 9:16 crop. If the same footage is being delivered in multiple aspect ratios, make a layout for each output rather than assuming one X/Y position will survive every crop.
Use placement controls before manual coordinates
Resolve 21 adds placement controls alongside Position X and Position Y. Start with a corner placement, then use coordinates only for fine adjustment. A placement preset gives you a more repeatable starting point when you rebuild the same review layout in another project.
Should I use Data Burn-In or a title on the timeline?
Use Data Burn-In for render-time metadata that should follow the clip or timeline. Use a title or Text+ clip when you need an editorial graphic that you want to animate, keyframe, trim, or include in the creative timeline.
| Need | Better choice | Reason |
|---|---|---|
| Record or source timecode on a review export | Data Burn-In | The value changes with the playhead and clip metadata |
| Animated version card | Title or Text+ | Animation and timing belong to the creative timeline |
| Fixed warning on a private review | Data Burn-In Custom Text or title | Data Burn-In is quick; a title gives more design control |
| Burn-in that changes per source clip | Data Burn-In | Metadata follows the source clip |
| Design that must be handed off as an editable graphic | Title or Text+ | The graphic remains an editable timeline object |
| Technical overlay that should not alter the edit | Data Burn-In | It stays in the render configuration |
The main practical difference is reversibility. A Data Burn-In can be left off for a clean render. A title placed on the timeline must be hidden, disabled, or removed from the timeline version. Keep a clean master and a technical review render as separate jobs when both are needed.
Why is my DaVinci Resolve burn-in showing the wrong timecode format?
The displayed value follows the timeline's timecode and frame-rate context, not a decimal stopwatch. Check the timeline start timecode, frame rate, drop-frame rules where applicable, and whether you selected record or source timecode.
Check the timeline start timecode
Many editorial timelines start at a nonzero timecode such as 01:00:00:00. That is not automatically an error. The starting value is part of the timeline's editorial context. If the review must start at 00:00:00:00, change the timeline setting before rendering, but confirm that the new start does not break an established handoff.
Check the frame rate
The final pair in a timecode display counts frames according to the timeline frame rate. A 24 fps timeline and a 30 fps timeline do not interpret the last pair in the same way. If the source and timeline frame rates differ, the source and record clocks can look different even when the media is placed correctly.
Check drop-frame expectations
Some broadcast and editorial workflows use drop-frame timecode to keep a nominal clock aligned with elapsed wall-clock time. Do not change the setting simply because the punctuation looks unfamiliar. Ask the receiving department which timecode convention it expects, then test an exported frame against that convention.
Check whether you picked Source TC
Source TC may start at a camera-assigned value, while Record TC starts at the timeline's chosen record position. A source clip at 09:18:24:06 can appear in a timeline at 01:03:10:12. Neither value is necessarily wrong. They answer different questions.
DaVinci Resolve 21's Edit page can display frames, subframes, or audio samples from the timeline timecode display, but that does not change the semantics of the Record TC or Source TC fields you add to Data Burn-In. Use the field that matches the handoff.
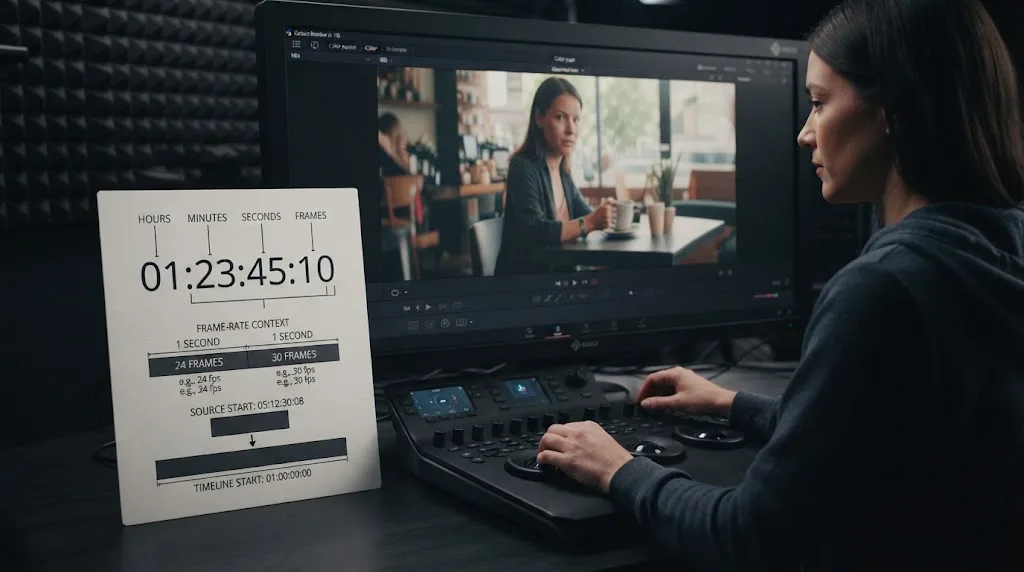
How do I burn timecode into a dailies workflow?
Build a dailies burn-in around source identification, readable timecode, and a repeatable render preset. A good dailies file should tell the viewer what clip they are watching and where to find it again.
Decide what the dailies viewer needs
Before opening Data Burn-In, write down the fields the receiving team actually uses. A camera department may need Source TC, camera, roll/card, scene, shot, and take. An editor may need Record TC, source clip name, and version. A colorist may need Source TC, Record TC, reel, and a clean reference of the image.
Do not copy every available metadata field into the frame. A crowded burn-in slows down the person who needs to read it.
Create a source-first layout
For dailies, a sensible hierarchy is:
- Source TC as the largest technical field.
- Source Clip Name or Reel Name directly above or below it.
- Scene, Shot, and Take in a smaller supporting field.
- Record TC only if the file also serves editorial review.
- A version or date label as fixed text if production requires it.
This layout makes the camera clock the primary reference. If your production uses Record TC as its daily reference, reverse the hierarchy and label it clearly.
Keep the camera identity with the clock
Source TC without a source identifier can be ambiguous. Two cameras can share a timecode range. Add a camera, roll, reel, or clip-name field when it is populated and approved for the workflow.
If the source name is unwieldy, use Reel Name or a production-approved custom metadata field. A concise identifier is more useful than a long path that nobody can read.
Render one technical sample before a batch
Render one representative clip, then check:
- a clip with known source timecode
- a clip from another camera or reel
- a clip boundary
- a bright and dark image
- subtitles if they are included
- audio sync at the beginning and end
- the file in the actual delivery player
Only after that sample passes should you add the full dailies batch to the render queue.
DIT and colorist Justin Paul Warren described the speed requirement behind his dailies workflow this way: “I needed to do all this as quickly as possible, so I needed the fastest workflow I could think of.” The quote comes from Pomfort's interview with Justin Paul Warren. His comment is about the wider on-set workflow, but it captures why a saved, tested burn-in preset is more useful than rebuilding the overlay for every delivery.
Keep dailies and masters separate
Use a dedicated review or dailies render preset. Do not toggle burn-in on a master job and hope you remember to turn it off later. Give the jobs clear names such as:
MASTER_CLEAN
REVIEW_REC_TC
DAILIES_SOURCE_TC
VFX_SOURCE_AND_RECORD_TC
The names are a production habit, not Resolve requirements. They make the render queue easier to inspect.
How do I prepare a timecode burn-in for client review?
Use Record TC for the client-facing cut unless the client has asked for source-camera reference, keep the overlay readable, and include a version label that cannot be confused with the timecode. Our guide to using markers for client review covers the complementary workflow for leaving notes inside the Resolve project.
Use a client-friendly hierarchy
The client usually needs a frame address and a version. They may not need a camera file path, codec, reel, or frame number. A useful review layout is:
REC TC: 01:04:12:08
CUT 07 REVIEW
If the client is collaborating with an editor, add the source clip name in a smaller field. If the client is only approving picture, keep the frame clean enough that the overlay does not become the subject of the review.
Label the version in plain language
Use CUT 07 REVIEW, V3 CLIENT REVIEW, or your production's approved naming scheme. Do not use a date alone if the team has several versions per day. Do not use a number that looks like a timecode.
Use a review watermark only when it serves a purpose
A small INTERNAL REVIEW label can reduce confusion between a review file and a master. A huge watermark can make color, composition, and typography harder to judge. If the review is confidential, use the distribution controls and access method appropriate to the production as well. Burn-in is a visible label, not a security boundary.
Make notes actionable
Ask reviewers to include the burned-in timecode in their notes. “The music feels late at 01:04:12:08” is actionable. “The music feels late near the middle” is not. A burn-in only helps if the team agrees which clock it represents.
What changed in DaVinci Resolve 21's Data Burn-In window?
DaVinci Resolve 21 overhauled the Data Burn-In window instead of merely renaming the old controls. The important changes are searchable metadata, a three-column layout, Project and Clip tabs, custom metadata tags, field-level toggles, display-length controls, and expanded overlay positioning.
Project and Clip tabs are explicit
Resolve 21 makes the scope choice visible at the top of the window. Project applies the burn-in to all clips in the timeline. Clip applies it to the selected clip. That is a meaningful change for workflows that need both a standard project overlay and a one-shot diagnostic overlay.
Searchable metadata reduces scrolling
The left column includes a search box and a sort control. Search for TC, Source, Record, Name, Reel, or the custom metadata label you need. The value of this change is practical: a large metadata list no longer requires visual scanning from top to bottom.
Custom metadata is more usable
The middle column can combine typed text, metadata fields, and custom metadata tags. Type % and begin searching for the field name. This can pull production metadata into the burn-in without copying the value into fixed text for every clip.
Overlay controls are grouped together
The right column puts Display Length, font, size, alignment, color, opacity, background, placement, and X/Y positioning in one place. That makes the workflow easier to audit because content and appearance are separate columns.
Data Burn-In presets became more scriptable in 21.0.3
The published DaVinci Resolve 21.0.3 update notes list scripting API support for listing and deleting Data Burn-In presets. That is useful for teams that manage repeatable presets, but it does not make a bad preset safe. Keep a human-readable naming convention and test the rendered pixels.
The Blackmagic Design Support Center lists DaVinci Resolve 21.0.4 as the current point update available in August 2026. Resolve 21.0.4 matters here because point releases can change bugs and preset behavior even when the overall Data Burn-In workflow remains the same.
What did not change?
The core decision did not change. You still need to choose the correct reference clock, configure the overlay, and enable it for the render job. A redesigned window does not remove the need to check the final file.
Does DaVinci Resolve Free include the timecode burn-in workflow?
Blackmagic's product page lists DaVinci Resolve 21 as a free version and lists Studio as the paid version with additional features. The public Resolve 21 Data Burn-In instructions describe the workflow without marking Data Burn-In as a Studio-only control, but export codec, resolution, frame-rate, and format limits still depend on the edition and platform.
Blackmagic's product page says the free version works with virtually all 8-bit video formats up to 60 fps at Ultra HD 3840 x 2160, while Studio adds support for 10-bit video up to 120 frames per second and resolutions beyond 4K. Those are product-level format claims, not a promise that every codec or operating-system combination behaves identically.
For a normal 1080p or Ultra HD review file, start by checking whether your chosen export format is available in the edition you have. If the render is blocked, the problem may be a codec or format restriction rather than Data Burn-In.
How to separate a burn-in problem from an edition problem
Use this order:
- Render a short test with a simple supported format.
- Confirm the timecode appears in that file.
- Change only the codec or resolution.
- Render again.
- Compare the two files.
If the overlay works in the simple test and disappears only after changing the output format, investigate the format or edition. If it never appears, inspect the Data Burn-In scope and Deliver page setting.
What about macOS, Windows, and Linux?
DaVinci Resolve 21 is listed by Blackmagic for macOS, Windows, and Linux. The Data Burn-In controls are documented as application features rather than as separate operating-system workflows. The practical differences are more likely to come from the installed Resolve point version, render codec availability, GPU or hardware decoding, font availability, and where the exported file is opened.
Do not copy a codec recommendation from another operating system without checking your own Resolve 21 installation. The burn-in is rendered into frames, but the render pipeline still has to produce those frames successfully.
What if the font changes on another machine?
Use a font available on the render machine and test the output there. A shared project can contain a burn-in layout that looks different if the chosen font is missing or substituted. For a production handoff, document the font name or choose a common font and render a sample before the batch.
Why is the burn-in cropped or outside the frame?
The overlay is positioned inside the render frame, so an X/Y position that worked for one resolution or aspect ratio can be wrong for another. Recheck placement after changing timeline resolution, output resolution, crop, or aspect ratio.
Check the actual output dimensions
Do not judge only from the large viewer. Read the rendered file's dimensions and compare them with the layout you designed. A burn-in at the far right of a 3840-pixel frame will not have the same visual margin when the output is 1920 pixels wide.
Use corner placement as a reset
If the field has drifted outside the frame, choose a corner placement control first. Then make small X/Y changes. Resetting to a known placement is faster than trying to guess which coordinate moved the field off-screen.
Watch safe areas and crops
A technical overlay that is safe for a 16:9 review may be cut off by a vertical crop. If the review team needs timecode on every version, create one overlay layout per aspect ratio. A separate technical reference file is often cleaner than forcing one layout to survive every social crop.
Check text size at delivery resolution
Large text can be readable in the viewer and clipped in the export if its bounding area is too close to an edge. Move the field inward, reduce size slightly, and check the rendered file at its actual viewing size.
How do I save and reuse a DaVinci Resolve timecode burn-in preset?
Save a named burn-in after testing it, then select that preset explicitly in each Deliver job that needs it. Use names that describe the clock, scope, and purpose.
Use a naming convention
Examples:
PROJECT_REC_TC_REVIEW
PROJECT_SOURCE_TC_DAILIES
PROJECT_SOURCE_RECORD_VFX
PROJECT_FIRST_LAST_SLATE
The name should answer three questions: which project, which clock, and which delivery. Avoid Preset 1, New Burn-In, or Final Final.
Keep separate presets for separate audiences
A client review and a VFX turnover have different information needs. A preset with source clip name, reel, source timecode, and record timecode may be useful for VFX but distracting for a client. Separate presets make the choice deliberate.
Test after a point update
Resolve 21.0.3 introduced scripting support for listing and deleting burn-in presets, and 21.0.4 is the current point update covered here. When a point update changes the manual, scripting, or metadata behavior, render a known sample with every production preset before a long batch.
Do not rely on a preset alone
A preset is a configuration. It does not prove that the active Deliver job selected it. Add a file-name suffix or queue label that makes the intended output obvious, then verify the final pixels.
What should I check before delivering a burned-in review file?
Check the clock, metadata, readability, render setting, audio, and file identity in that order. A short technical checklist catches more problems than adding extra fields to the overlay.
Timecode checks
- Is the field Record TC or Source TC?
- Does the starting timecode match the intended editorial context?
- Does the last pair behave correctly for the timeline frame rate?
- Does the value change at clip and edit boundaries?
- If both clocks are visible, are they labeled clearly?
Metadata checks
- Is the source clip name populated?
- Is the reel or roll/card value present?
- Are scene, shot, and take values accurate?
- Are custom metadata tags returning values rather than blank text?
- Does an overlapping layer change the source field?
Visual checks
- Can a person read the timecode at the file's actual size?
- Does the background disappear on a bright shot?
- Does the overlay cover subtitles or important picture detail?
- Does the layout survive the selected aspect ratio?
- Is the version label separate from the timecode?
Render checks
- Is the Deliver page Data Burn-In set to the intended project or preset?
- Is the render range long enough to include the test cases?
- Does the selected format work in your Resolve edition?
- Did the render complete without a failed or partial output?
- Did you open the exported file outside Resolve?
The DaVinci Resolve export settings guide covers the separate question of choosing an output format and delivery profile. Keep that decision separate from the timecode decision so a change to the codec does not silently change the burn-in requirement.
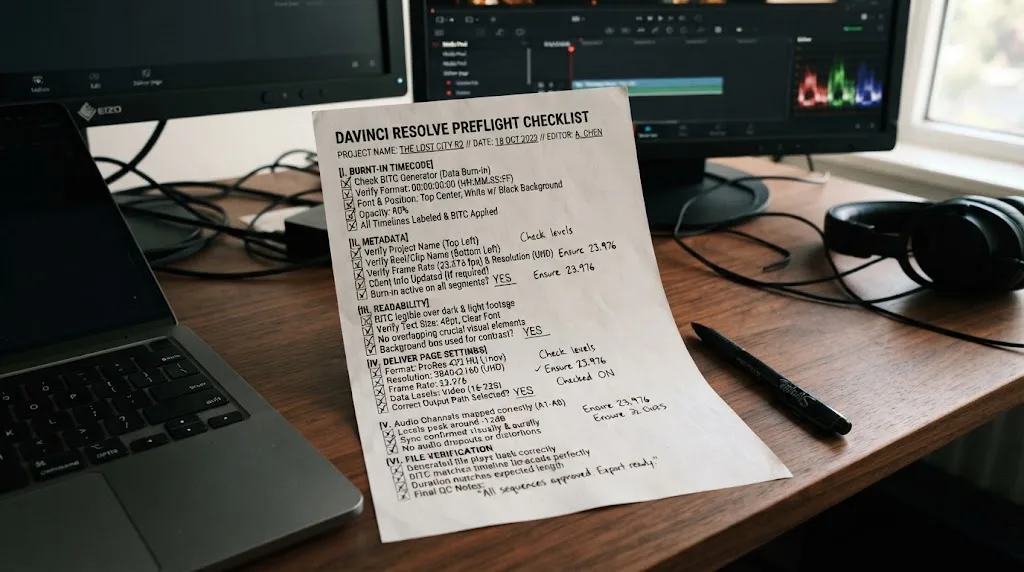
What if I need timecode on a clean master and a burned-in review?
Create two render jobs from the same timeline: one with Data Burn-In set to None and one with the required Project or preset burn-in enabled. Never use the burned-in review as a substitute for the clean master.
Queue the clean master first
Name the clean job clearly, confirm Data Burn-In is off, and render or queue it. Then configure the review job and check that the burn-in is enabled. If the two jobs sit next to each other in the queue, their names should make the difference obvious.
Use the same timeline range
Unless the delivery requires different handles or a different in and out range, use the same range for both files. That makes a visual comparison straightforward and prevents a timing difference from being mistaken for an overlay difference.
Compare the first, middle, and last portions
Check the two files at the beginning, a cut boundary, a bright shot, a dark shot, a subtitle, and the end. The clean master should contain no burn-in pixels. The review should contain the intended fields and no accidental old layout.
Preserve the project state
Save the project after configuring the review preset, but do not leave the Deliver page in a confusing state for the next editor. A note in the project or a queue label can state which job is the technical reference. Your goal is that another person can reopen the project and understand which output is clean.
How do I troubleshoot a blank, frozen, or inconsistent timecode field?
Start by separating three possibilities: the field has no metadata, the wrong clip is feeding it, or the render job is not using the configuration you think it is. Each symptom points to a different check.
The field is completely blank
Select a clip with known metadata and inspect it in the Media Pool or Metadata panel. If Source TC is blank there, Data Burn-In has no source value to display. Try Record TC to see whether the timeline clock is available.
If a custom token is blank, type % again in a new field and select the metadata entry from the dropdown. Do not assume that the visible display name is the exact tag name.
The value is frozen across several clips
Check the field you selected. A fixed Custom Text value will not change per clip. A source field can also appear unchanged if the timeline contains repeated uses of the same source range or a flattened file.
Move to a clearly different source clip and compare. If the value changes only when you switch to Record TC, you may have been reading a source field from a repeated or flattened source.
The timecode jumps unexpectedly at a cut
Record TC should follow the timeline position. Source TC can jump at every source clip boundary because each clip can begin at a different camera timecode. That jump is expected when Source TC is the chosen field.
If the jump is not expected, inspect the clip under the playhead, overlapping layers, compound clips, and any speed changes. Then confirm the expected clock with the receiving department.
The field shows a literal token
The metadata token was likely entered as plain text or does not match a field recognized by the project. Delete the token, type %, select the dropdown result, and render a short test. The current Resolve 21 guide specifically describes the percent-sign workflow for custom metadata tags.
The field appears in the viewer but not in one output
Compare Deliver jobs. One may have Data Burn-In set to a preset while another is set to None. Render jobs retain their own settings, so the active job is the one to inspect.
The render fails after adding Data Burn-In
Data Burn-In itself may not be the cause. Test a short range, simplify the field, and render with a known supported output format. Then use the render-stuck troubleshooting guide to investigate the broader render failure.
What is the best DaVinci Resolve burn-in setup for common deliveries?
The best setup depends on who will read the file and which clock they need. Use the smallest field set that answers the recipient's next question.
| Delivery | Primary field | Supporting fields | Suggested layout | Keep off |
|---|---|---|---|---|
| Client picture review | Record TC | Version, optional source clip name | Small lower or upper corner | Full file path, codec, camera metadata |
| Editorial offline reference | Record TC | Source Clip Name, version | Two-line corner label | Large center watermark |
| Camera dailies | Source TC | Camera, reel, scene, shot, take | Source identity plus clock | Unlabeled second clock |
| VFX pull reference | Source TC | Source Clip Name, Reel Name, Record TC | Technical corner stack | Decorative title treatment |
| Sound review | Record TC | Version, optional scene and shot | Clear record clock | Source-only clock unless requested |
| Internal watermark review | Record TC or Source TC | Custom warning, version | Readable corner label | Assuming watermark equals security |
| Conform troubleshooting | Source TC and Record TC | Source Clip Name, Reel Name | Two clearly labeled clocks | Ambiguous TC label |
For client review
Choose Record TC and one version label. Keep the frame attractive enough to judge. Link the notes to the timecode.
For dailies
Choose Source TC and an identifier such as clip name, camera, reel, or roll/card. Add scene, shot, and take when the metadata is reliable. Render a sample from more than one source.
For VFX
Choose Source TC, Source Clip Name, and Reel Name, then add Record TC if the shot is being discussed in the context of an edit. Use a layout that stays visible on the plate.
For sound
Choose Record TC unless the sound team requests a different clock. The sound note normally refers to the edit's position, not the camera card's original start.
For a private technical review
Choose the clock that matches the problem being investigated. Add a custom warning only if it clarifies the file's status. A technical overlay should help the recipient work, not advertise that you found every available metadata field.
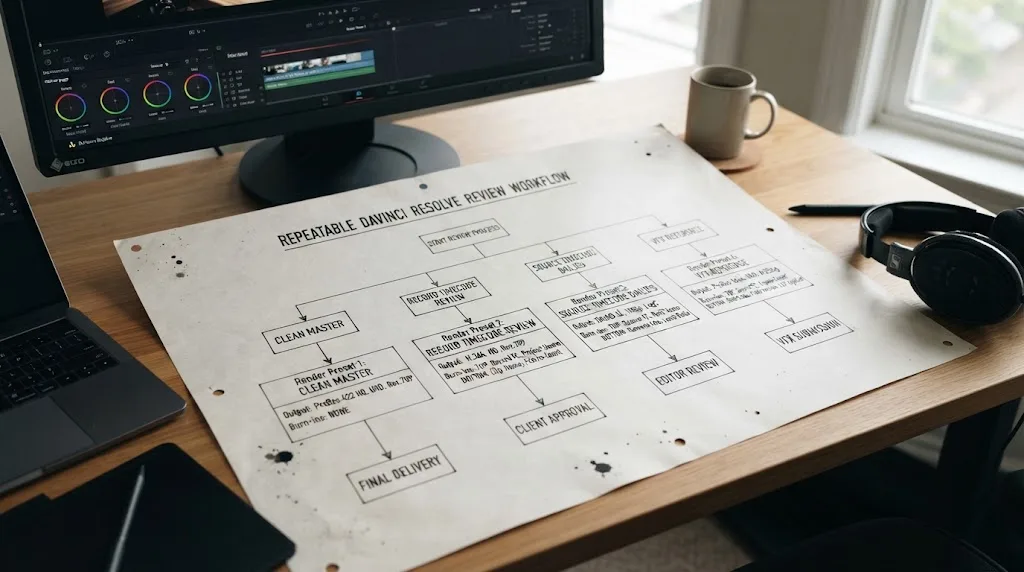
How do I make a repeatable Resolve 21 review workflow?
Create a small set of named presets, define the meaning of each clock, test one clip from each source class, and keep clean and burned-in jobs separate. Repeatability comes from decisions written down before the render queue fills up.
Write the delivery contract first
Before you build the preset, record:
- recipient
- purpose
- primary clock
- supporting identifiers
- expected frame rate
- output aspect ratio
- version-label format
- whether the file must be clean
This takes less time than rebuilding a review export after a note arrives saying the timecode was unusable.
Create only the presets you can explain
Start with three:
MASTER_CLEANREVIEW_REC_TCDAILIES_SOURCE_TC
Add a VFX preset only when the workflow needs it. Fewer clear presets are easier to select than a long list of near-duplicates.
Test the edge cases deliberately
Use a timeline that includes a cut, a long clip, a repeated source clip, a compound clip if the production uses them, a subtitle, a bright shot, and a dark shot. A preset that works on one centered talking-head clip has not been fully checked.
Record the version
As of August 2026, this guide targets Resolve 21.0.4. Resolve 21 introduced the expanded Data Burn-In window, and 21.0.3 added scripting support for listing and deleting burn-in presets. If the project moves to a later point release, render a known sample before a large dailies run.
Keep the final decision simple
When in doubt, ask: “Does the recipient need the timeline clock or the source clock?” That one question resolves most timecode burn-in decisions. Then add only the metadata needed to identify the answer.
Should I burn in Record TC, Source TC, or both?
Use Record TC for an edited-timeline conversation, Source TC for a camera-media conversation, and both only when the handoff genuinely crosses those two systems. My default for a client review is Record TC. My default for dailies is Source TC.
The safest next step is to open a duplicate review render job, choose the field that matches the recipient, render a short sample, and watch that sample outside Resolve. If the viewer can answer “which frame?” and “which clip?” without opening the project, the burn-in is doing its job.
A timecode burn-in is useful only when the label tells the viewer which clock they are reading.
The clean master stays clean. The review file carries the reference. The queue names make the distinction obvious. That is the whole workflow, and it scales better than adding every metadata field you can find.
Clean masters and technical review files should be separate render jobs.
Frequently asked questions
- How do I burn in timecode in DaVinci Resolve 21?
- Open Workspace > Data Burn-In, choose Project, add Record TC for timeline timecode or Source TC for clip timecode, set the overlay style, click Save, then choose the saved burn-in in the Deliver page's Video settings before rendering.
- Why is my DaVinci Resolve timecode burn-in not showing in the export?
- The burn-in can be visible in the viewer but disabled for the render job. On the Deliver page, open Video settings, set Data Burn-In to the project or saved preset instead of None, then render a short test range.
- What is the difference between Record TC and Source TC in DaVinci Resolve?
- Record TC follows the timeline's record timecode, while Source TC follows the original timecode of the clip under the playhead. Choose Record TC for edit and mix references, and Source TC for camera-original dailies or conform checks.
- Can I burn in timecode on only one clip in DaVinci Resolve 21?
- Yes. Select the clip, open Workspace > Data Burn-In, choose the Clip tab, add the required timecode field, and save. The Project tab applies the burn-in to all clips in the timeline.
- Why does Source TC show the wrong clip in a DaVinci Resolve timeline?
- Source TC is drawn from the clip Resolve treats as visible at the playhead, so overlapping video layers, compound clips, and flattened media can change which source metadata appears. Test the top visible layer and use Record TC when the timeline reference is the real requirement.
Sources
- DaVinci Resolve 21 New Features Guide, Expanded Data Burn-In Window
- DaVinci Resolve 21 Reference Manual
- Blackmagic Design Support Center, DaVinci Resolve 21.0.4 Update
- Blackmagic Design DaVinci Resolve Product Page
- The Editor's Guide to DaVinci Resolve 18, Data Burn-In
- The Colorist Guide to DaVinci Resolve 20, Data Burn-In Watermark
- Pomfort Interview With DIT and Colorist Justin Paul Warren
- DaVinci Resolve 21.0.3 Update Notes
Put this guide to work with TryUncle.
Ask about the step you’re on. TryUncle sees your screen and points at the control you need, so you can keep learning in your own project.
Get TryUncle for Mac or WindowsKeep reading
Guides · Jul 7, 2026 · 23 min
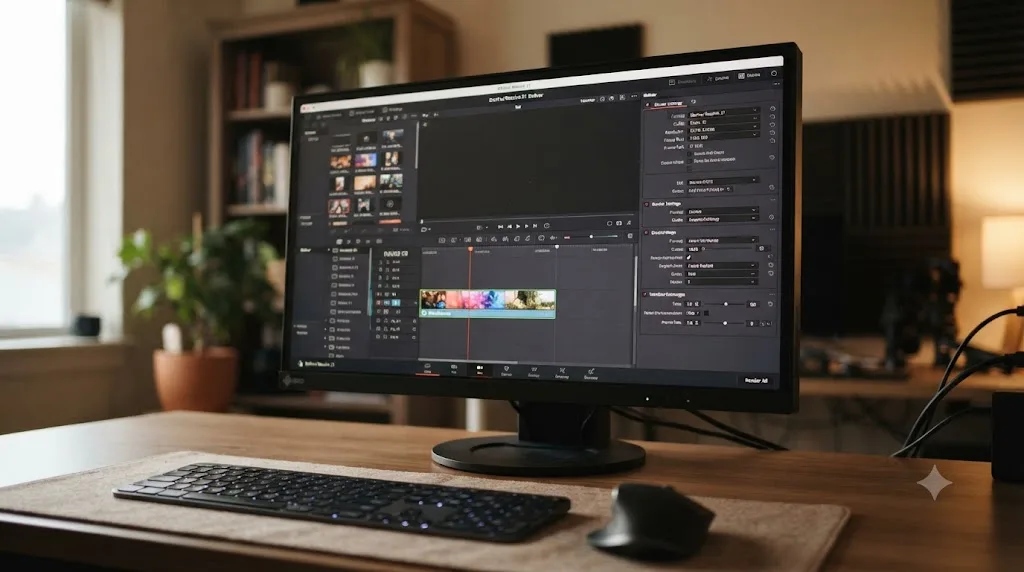
DaVinci Resolve Export Settings: Numbers That Actually Work
The exact DaVinci Resolve export settings for YouTube, client handoffs, and ProRes archives, plus what changed with Resolve 21's H.265 encoder.
Fixes · Jul 7, 2026 · 24 min
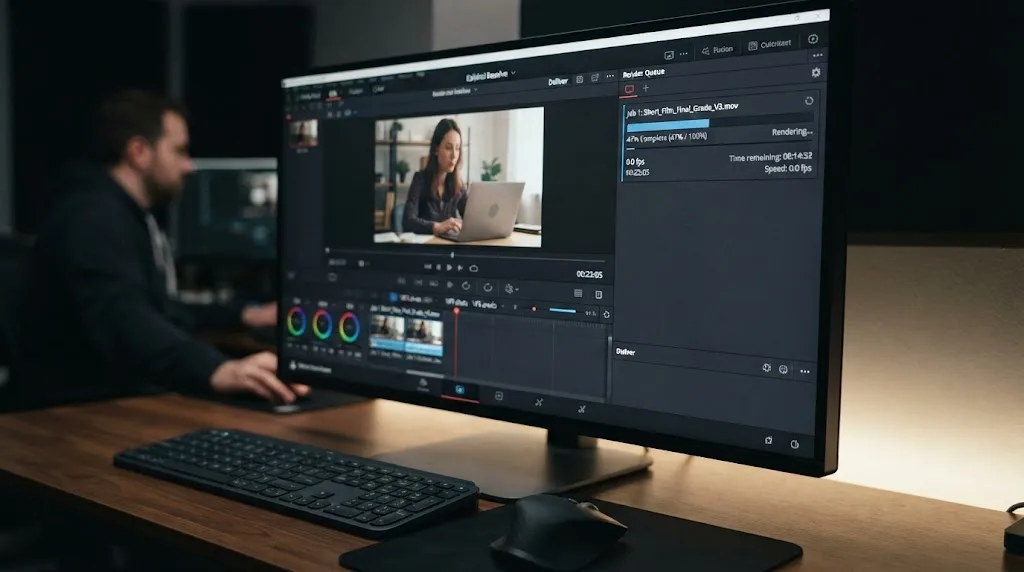
DaVinci Resolve Not Exporting? Fix a Stuck or Failed Render
Why DaVinci Resolve renders get stuck at 0% or 99%, or fail with no error, and the exact checks that get a stalled export moving again.
Guides · Jul 24, 2026 · 41 min
How to Use Markers in DaVinci Resolve for Client Review
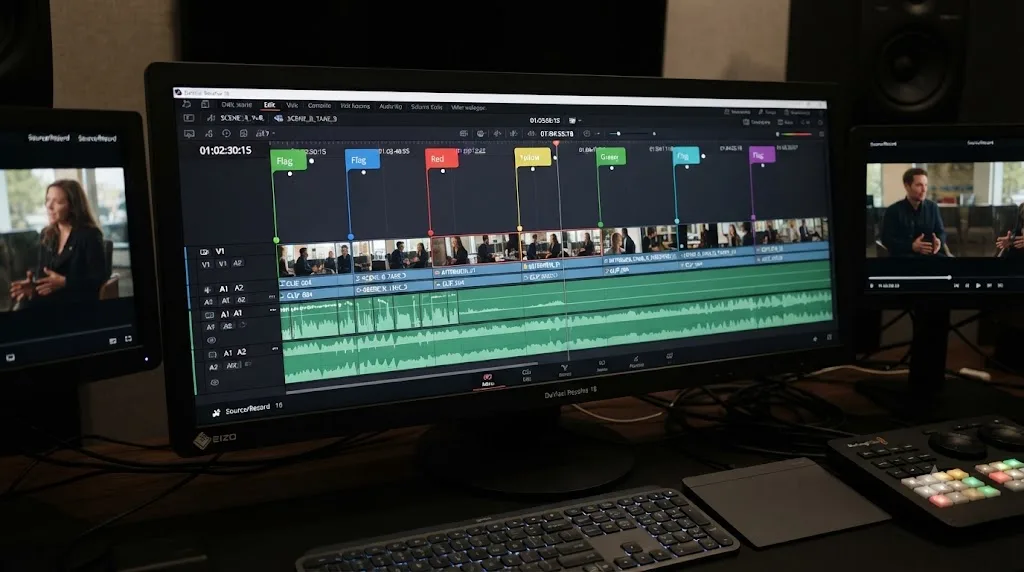
Add, color-code, and export DaVinci Resolve markers for client review: the M key, marker colors, EDL export, and Blackmagic Cloud sync explained.