Articles / Guidesupdated for DaVinci Resolve 21.1 (September 2026)
DaVinci Resolve Delivery Page Presets Explained
Quick answer
DaVinci Resolve delivery page presets explained: a preset fills in a set of render settings for a delivery goal, such as an online upload, an H.264 file, or a ProRes master. Choose the closest preset, then verify the codec, resolution, frame rate, audio, file location, and render range against the recipient’s requirements.
I used to think the preset name was the answer. YouTube, H.264, ProRes: pick one and render. But those labels only tell part of the story. The useful question is what the preset changes, what it leaves alone, and what you still need to verify.
As of October 2026, this guide uses DaVinci Resolve 21.1’s terminology and reference manual. A preset is a starting configuration for a delivery job. It does not replace the delivery specification, check the final file for you, or guarantee that your timeline is framed for the destination.
What does a DaVinci Resolve delivery page preset do?
A DaVinci Resolve Deliver page preset fills in a group of render settings intended for a common type of output. It helps you start a render job, but it does not remove the need to check the settings or confirm what the recipient needs.
The Deliver page separates the setup of a render from the decision to render it. You choose settings, define what part of the timeline to export, add that setup to the Render Queue, and then start the queued job. Blackmagic Design’s Resolve 21.1 Reference Manual documents the render controls and preset workflow.
That distinction matters. A preset is not an export button that knows your project’s purpose. It is a saved group of settings. You remain responsible for choosing a suitable output format and codec, checking the resolution and frame rate, reviewing audio and file options, and selecting the correct timeline range.
A Deliver page preset is a render-settings starting point, not a delivery-specification checker.
Think of a delivery as a package with several parts:
| Delivery question | Render setting to check | What you are deciding |
|---|---|---|
| What kind of file does the recipient expect? | Format and codec | The file container and the way its video is encoded |
| How large should the picture be? | Resolution | The output frame dimensions |
| How should motion play? | Frame rate | The number of frames per second in the output |
| What should happen to sound? | Audio export and audio options | Whether audio is included and how it is encoded |
| Where should the finished file go? | File name and location | How you will identify and retrieve the render |
| Which part of the edit should render? | Render range | Whether you export the timeline or a selected range |
| Is this the version you meant to send? | Timeline and queue review | Whether the queued job corresponds to the intended project and output |
A preset may set several of these fields. It cannot know whether a client has specified a different codec, whether the timeline contains the intended edit, or whether the file should be a review copy or a master. Treat its label as a clue, then inspect the actual values.
Presets versus timelines
A render preset configures a render job. A timeline defines the edited sequence, including its timing and image composition. The two relate to the same deliverable, but one does not automatically stand in for the other.
This difference becomes especially visible when one project needs more than one aspect ratio. A vertical social version may need a reframed edit, not simply a landscape timeline sent through a preset with a different output dimension. Resolve 21 adds separate timeline settings for deliverables, according to the Resolve team’s explanation of the feature in a TechRadar interview. That is a timeline and finishing workflow decision, not just a preset choice.
What this guide means by “preset”
In this guide, “preset” means a render preset in the Deliver page unless the text says Quick Export preset. The terms are related, but the controls and path you use can differ.
A render preset is selected in the Deliver page’s Render Settings. Resolve also offers Quick Export, which gives you a shorter route to an output. The Blackmagic Design training page describes its Delivering Content lesson as covering Deliver page presets and the Render Queue. For a reference workflow, use the Deliver page when you want to inspect the settings and queue a job deliberately.
Which Deliver page preset should I choose?
Choose the preset whose intended output most closely matches the delivery goal, then confirm that its settings meet the actual specification. If you cannot verify that match, use Custom Export and set the required fields yourself.
“Best preset” is not a universal category. A preset that makes sense for an online review file may be the wrong choice for a high-quality master, a handoff to another editor, or a file that must pass a client’s specific technical requirements. Start with the recipient’s request, not with whichever preset name sounds most familiar.
| If your goal is… | Start by considering… | Confirm before rendering |
|---|---|---|
| A quick upload-ready version | The relevant online or social preset | Resolution, frame rate, compression, audio, and whether any upload option is involved |
| A broadly compatible compressed file | An H.264-oriented preset or Custom Export | Container, H.264 codec, output dimensions, frame rate, and audio |
| A compressed file where the recipient requests HEVC | An H.265-oriented preset or Custom Export | Codec support on the recipient’s device or platform, plus the exact requested settings |
| A high-quality master or finishing file | A ProRes or other specified mastering workflow | Required codec variant, resolution, frame rate, audio, and destination |
| A project handoff or round trip | A preset designed for that workflow, or Custom Export | Whether you need a single file, individual clips, handles, and any companion project or interchange data |
| A file with a client’s exact technical spec | Custom Export if a named preset does not match | Every required field in the written delivery specification |
The table is a decision aid, not a codec recommendation for every project. Preset names and available controls can vary by Resolve version, operating system, and the particular workflow. A preset that appears in one installation may not appear in another. Always check the settings displayed in your own Resolve 21 installation.
If you need an online upload
An online preset can reduce setup work by filling in common render choices. It does not certify that those choices meet a platform’s current upload requirements, nor does it guarantee that the video looks or sounds right after upload.
For any online destination, check the resolution and frame rate first. Then review the selected codec and format, audio inclusion, file name, and range. If the project is vertical, confirm that the timeline itself has the intended framing. A landscape timeline rendered to different pixel dimensions can still have the wrong composition.
The existing DaVinci Resolve export settings for YouTube guide covers the destination-specific question of what to export for YouTube. This reference page has a narrower job: explain what presets are and how to judge their fields. Use a platform-specific guide when you need a delivery recipe for one named service.
If you need a master file
A master is a deliverable defined by the recipient or the production workflow, not by a reassuring preset label. Ask for the required format, codec, codec variant, resolution, frame rate, audio configuration, and any color or metadata requirements.
A ProRes or other mastering preset can be a sensible starting point when it matches the request. Still, verify the exact variant and output options. A master may be intended for further editing, archiving, broadcast, review, or another finishing step. Those purposes can call for different properties.
Do not assume that “higher quality” means “appropriate.” A large file in an unrequested format may be less useful than a smaller one that meets the delivery specification precisely.
If you need to hand work to another editor
A handoff is not the same thing as a finished-viewing file. Depending on the workflow, you may need individual clips rather than one flattened timeline render, handles around edits, and an interchange file or project information.
Paul Handley, a colorist writing about export workflows, notes: “This works for returning clips to both DaVinci Resolve and Premiere Pro timelines.” The quote refers to using the Premiere Pro XML preset for returning individual graded clips, as described in his format, codec, and professional delivery guide. The useful lesson is not to copy that preset for every handoff. It is to match the render mode and companion files to the receiving editor’s workflow.
A rendered single clip will not, by itself, preserve an editable timeline. If a recipient asks for a project or interchange handoff, clarify which files they expect before you choose a preset.
What do the main preset labels mean?
Preset labels describe a starting workflow or output class, not every technical property of the resulting file. Read the name, then inspect the settings that Resolve shows beneath it.
The exact options visible in the preset strip can change. Blackmagic Design’s Resolve 20 Colorist Guide illustrates common categories including Custom Export, ProRes, H.264, H.265, and a YouTube option; the current Resolve 21.1 manual is the better place to confirm your installed version’s controls.
Custom Export
Custom Export exposes the conventional render settings so you can choose the fields rather than starting from a destination-specific configuration. It is useful when a client provides exact requirements, when no named preset matches the target, or when you need to understand and control each available option.
Custom does not mean “best” or “highest quality.” It means you are responsible for selecting the settings. You can make a poor configuration in Custom just as easily as you can choose a mismatched named preset.
Use it when the question is, “What exact output do I need?” rather than “Which preset sounds close?”
H.264 and H.265
H.264 and H.265 are codec labels, not complete delivery specifications. They describe how video is encoded, but they do not tell you all the other output properties.
A codec-oriented preset can be a starting point for a compressed deliverable. Check the file format, resolution, frame rate, quality or bitrate controls where available, and audio settings. Then confirm that the receiving software or platform can use the chosen codec.
Resolve’s menus and available encoding controls can vary by platform and version. Do not copy a setting you saw in a tutorial without checking that your own installation offers the same control and that the receiving side needs it.
ProRes and other mastering options
A ProRes label points toward a family of codecs, not a single universal output. The exact variant matters. So do the container, dimensions, frame rate, audio, and recipient’s requirements.
Blackmagic Design’s Resolve 20 Colorist Guide identifies its ProRes Master preset as macOS-only in the version described by that guide. That is a version-specific documentation detail, not a promise that every Resolve 21 system displays an identical preset list. Check the official manual and the actual options on your operating system.
For delivery, “ProRes” alone is not a complete instruction. If the person receiving the file asked for ProRes, ask which variant and what other specifications they need.
Platform or social presets
A destination-branded preset is intended to make a common output workflow easier. It does not necessarily represent a current certification from that platform or a guaranteed fit for every account, content type, region, or upload method.
Use the preset as a shortcut when the goal is a standard upload file. Verify that its settings match your current requirements, and remember that a platform’s upload recommendations may change independently of Resolve’s preset menu.
If a preset includes an upload-related option, distinguish that from the render itself. The deliverable might be a local file, an upload workflow, or both depending on the controls and workflow selected. Check the current manual and inspect the dialog before relying on it.
XML or editing handoff presets
A preset associated with another editor or an interchange format may serve a workflow beyond creating a single finished movie. It can be designed around individual clips, a timeline handoff, or a round trip between applications.
Before using one, confirm what gets rendered and what companion files are created. Check whether you need clip-level media, handles, a timeline exchange file, or all of them. The recipient’s software version and workflow can affect whether the handoff works as intended.
What do the Video, Audio, and File fields change?
The Video, Audio, and File sections control different parts of a rendered deliverable. A preset may populate fields in these sections, so inspect them separately instead of treating the preset name as a complete description.
The Resolve 21.1 Reference Manual is the primary reference for menu names and render controls. The practical check is simple: ask what every field affects, then compare the value shown in Resolve with the recipient’s requirement.
Video settings
Video settings determine the visual stream’s output properties. Depending on the selected format and codec, relevant controls can include the codec, resolution, frame rate, quality or bitrate, and other codec-specific choices.
| Field or group | What to ask | Common mistake |
|---|---|---|
| Format | What kind of media file does the destination expect? | Reading a codec name as though it identifies the entire file |
| Codec | What encoding does the recipient or platform request? | Choosing a codec because it appears in a familiar preset without checking compatibility |
| Resolution | What pixel dimensions are required? | Assuming a changed output size also reframes the edit |
| Frame rate | What playback rate does the delivery specification call for? | Letting a preset value silently differ from the intended sequence or requirement |
| Quality or bitrate control | What trade-off is acceptable for this output? | Treating one numeric value as ideal for every codec, content type, and platform |
| Other codec options | Does the recipient specify a profile, bit depth, or other constraint? | Assuming every option is available in every format or operating system |
The options shown depend on the format and codec selected. A setting may disappear, become unavailable, or change meaning when you switch codecs. If a tutorial’s control is missing, first check whether the current format and codec expose that control in your Resolve version.
Audio settings
Audio settings determine whether sound is included and how it is represented in the output. Check whether export audio is enabled, then review the format’s available audio options and any delivery requirements.
Ask the recipient whether they expect a stereo mix, separate tracks, stems, or another audio layout. Those are different deliverables. A standard video preset should not be assumed to create a stem package or a mix with a specific channel mapping.
For a one-file online delivery, the key check is whether the intended audio is present and whether the output configuration matches the request. If the job is audio-only, use the relevant workflow and verify the resulting file type rather than assuming the video preset can be repurposed without review.
File settings
File settings affect the name, save location, and other file-level choices available to the selected workflow. They matter because a technically valid render can still be difficult to deliver if it is saved to the wrong folder or named ambiguously.
Before queuing, confirm the destination folder and file name. If you are rendering several versions, use names that distinguish the deliverables without relying on memory. For example, a project may produce a “review” file and a “master” file. Those are labels in a worked example, not universal naming rules.
Check whether the file path points to a drive that is mounted and has room for the expected output. Resolve can render successfully to a location that is inconvenient to find later, or fail to write if the destination is unavailable. The current Blackmagic manual documents the relevant file controls; the exact file-system outcome depends on your computer and storage.
What do Single Clip and Individual Clips mean?
Single Clip renders the selected timeline range as one movie file. Individual Clips renders separate output files for source clips in the selected range, which can be useful for workflows that need clip-level media rather than a flattened sequence.
Choose the render mode based on what the receiving person needs to do with the output. If they want to watch the finished edit, a single file is usually the relevant shape of delivery. If they need separate graded shots or an editorial handoff, individual clips may be appropriate, but ask about handles, naming, and companion files.
| Render mode | Output shape | Consider it when… | Verify |
|---|---|---|---|
| Single Clip | One file for the selected timeline range | You need a finished movie or a single master file | Range, file type, audio, and any required specifications |
| Individual Clips | Separate files for clips in the range | A workflow needs clip-level renders or a round trip | Whether handles, naming, and an interchange file are required |
Do not choose Individual Clips just because your timeline has many clips. That mode changes what you deliver. If you need one continuous viewing copy, check that Single Clip is selected.
For a handoff, also confirm whether the receiving editor expects individual rendered media, original media, a project file, or an interchange format. Those packages are not interchangeable. A preset can help with one part of the job without providing the entire handoff.
How do I save, import, or update a custom preset?
To save a custom render preset in Resolve 21, configure the required Video, Audio, and File settings, open the Render Settings options menu, and choose the command to save a new preset. Give it a name that describes its purpose, then confirm the saved preset appears where you expect.
The Resolve 21.1 manual describes custom preset management, including importing and exporting presets as XML. Blackmagic Design’s Resolve 20 New Features Guide also documents adding a custom preset to Quick Export. Because menu labels and behavior can shift between versions, use the current 21.1 manual to match your installed build.

A careful setup looks like this:
- Open the Deliver page and choose Custom Export.
- Set the Video, Audio, and File options that define the output you need.
- Open the Render Settings options menu and select the save-as-new-preset command.
- Give the preset a clear name that describes the job, not just a vague quality label.
- Select the saved preset again and check that the expected settings appear.
- If sharing it, export the preset using Resolve’s preset-management command and send the resulting file to the other workstation.
- On the receiving workstation, import it through the Render Settings options menu.
- Select the imported preset and verify its settings on that installation before using it.
This is a workflow recommendation, not a claim that two machines will display identical menus or support identical codecs. Different operating systems, hardware, installed components, and Resolve versions can affect available render choices. A saved preset cannot make an unsupported codec appear on another system.
How should I name a preset?
Name the preset for the delivery it serves and include a distinguishing detail when that helps prevent confusion. For example, “Client review, H.264” is more informative than “Good quality.” The example is a naming suggestion, not a standard imposed by Resolve.
Avoid encoding a temporary project-specific value in a reusable preset name unless the preset is meant only for that project. A name like “Client X final” can become misleading when reused elsewhere. Prefer a workflow label that reminds you what to check, then verify the current project’s file name and destination separately.
How do I update a preset safely?
After changing settings, use the preset-management controls to update the intended saved preset, if that is what you mean to do. Do not assume that changing a field automatically updates the saved version. Re-select the preset or otherwise check the saved values after the update.
If the preset is used by a team, tell collaborators that its settings changed and replace the shared XML where necessary. Keep a copy of the previous version if the old configuration still serves active jobs. This is a workflow safeguard, not a built-in version history guarantee.
Why might an imported preset behave differently?
A preset stores settings, but the receiving installation may not offer every option in the same way. If a field is missing or the output differs, compare the Resolve version, operating system, selected render mode, format, codec, and available hardware encoding options.
Resolve can only expose options supported by the chosen format and the current system. An XML file should not be treated as a portable guarantee that all settings and output behavior will match across workstations.
How do I check the render range and queue?
Before adding a render job, confirm the timeline range, render mode, settings, file name, and destination. Then inspect the queued job before starting the render.
A correctly configured preset can still produce the wrong deliverable if you render the wrong section. If you have set timeline In and Out points, check whether the chosen range is intentional. If no custom range is set, verify whether you intend to render the entire timeline.

Use this check before adding a job:
- Confirm the correct project and timeline are active.
- Confirm the render range covers the intended content.
- Confirm Single Clip or Individual Clips matches the output you need.
- Confirm the selected preset and inspect its Video, Audio, and File fields.
- Confirm the file name and destination.
- Add the job to the Render Queue.
- Read the queued job’s settings summary and confirm it is the version you intend to render.
- Start the render only after that final check.
The Render Queue is a list of render jobs, not a live guarantee that every setting still matches your intention. The job summary gives you another chance to catch a mistaken preset, an old file path, or an unintended range. If you queue multiple versions, review each job individually rather than assuming later jobs inherited the correct settings.
After rendering, check the finished file. Confirm it exists in the expected location, opens in a player or receiving application, includes the intended picture and sound, and has a sensible duration. For a client delivery, compare it with the written requirements. A completed progress bar says that Resolve finished its render task; it does not prove that the file meets an external specification.
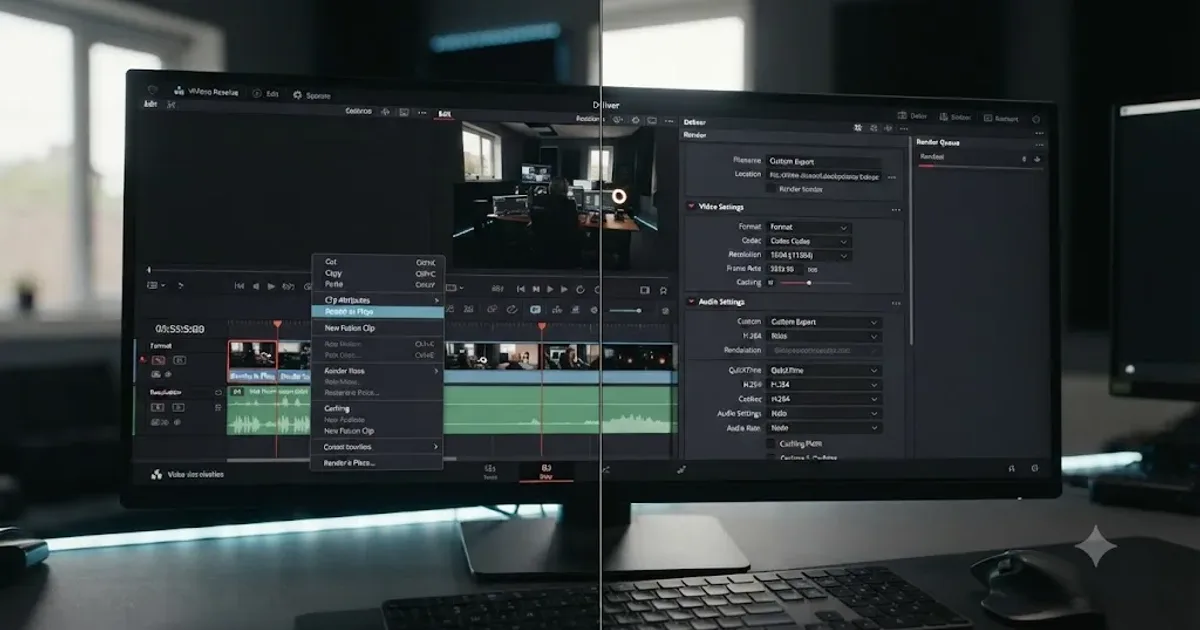
For a separate walkthrough of one specific Deliver page control, see what Render in Place does in DaVinci Resolve. That function is not a substitute for choosing a delivery preset, but it can be confused with other render actions.
Why is a Deliver page setting locked or missing?
A setting can be unavailable because the selected preset, render mode, format, codec, or system does not support it in that context. Select Custom Export to expose more conventional settings, then check whether the option appears under the format and codec you need.
A locked control is not automatically a Resolve fault. Presets are designed around certain workflows, and the interface may limit options that do not apply. Instead of trying to override a control blindly, identify which selection is governing it.
Follow this diagnostic order:
- Check the selected preset. If it is a specialized preset, some controls may be fixed or unavailable.
- Select Custom Export. See whether the control becomes available in the broader settings view.
- Check the render mode. Single Clip and Individual Clips do not always expose the same workflow choices.
- Check the format and codec. Some settings only apply to particular encoding choices.
- Check your installed Resolve version and operating system. A tutorial may show a different build or platform.
- Consult the current manual. Search the Resolve 21.1 Reference Manual for the control’s exact name.
- If the setting still does not appear, confirm the recipient’s requirement. They may have specified an option your selected format cannot provide.
If the task is not a delivery render but a timeline or clip operation, switching presets will not solve it. Identify whether you are trying to create a finished file, process media inside the project, or create a handoff package. Those are different outcomes.
Resolve 21.1 was listed on Blackmagic Design’s support page with a manual dated September 8, 2026. If a guide’s screenshots or menu labels differ, first compare the software version named by the guide with the version installed on your system. Do not assume a missing button means your project is broken.
Do presets change the timeline, frame the video, or fix color?
A delivery preset should not be treated as a replacement for timeline setup, reframing, color management, or a visual quality check. A render choice determines output settings; your timeline and project configuration still shape what the picture looks and sounds like.
If a vertical output needs a new composition, review the actual framing and any timeline-specific settings. Resolve 21’s separate timeline settings for deliverables can help organize multiple outputs within a project, but you still need to check each version. The Resolve team described copying timelines for separate deliverables and using the MultiMaster Trim Manager for output trims in the Resolve 21 interview.
If the exported file looks different from the viewer, a preset name alone will not diagnose why. Review the project’s color management and output settings, the render settings, and the playback environment. Do not change color-space tags or data levels by guesswork. Compare the file against the project’s intended output and the recipient’s specification.
A color-managed project may depend on output choices beyond the codec. Resolve’s manual explains the color and render controls in detail. When the delivery is for a client or broadcaster, ask for the specific color space, transfer characteristics, and level requirements rather than inferring them from “web” or “master.”
Changing a render preset does not automatically re-edit or reframe the timeline.
TryUncle is the on-screen assistant for DaVinci Resolve on Mac and Windows — ask in plain words and Uncle points at the exact control on your screen. If you are stuck matching a tutorial to the controls in your Resolve window, TryUncle can provide on-screen guidance while you make the setting choices yourself.
What is a practical preset-check example?
A practical preset check starts with a specific delivery request, then compares each requested property with what Resolve shows. The following is a worked example of the checking method, not a tested export result or a recommendation for a universal codec.
Suppose a client asks for a single review movie and gives you a written specification. Before rendering, write down the requested format, codec, resolution, frame rate, audio requirement, file name, location, and whether the deliverable covers the full timeline. Then open the closest preset and compare each field.
| Worked-example step | Question to ask | What to do if it does not match |
|---|---|---|
| Choose the initial preset | Does its stated purpose resemble the requested deliverable? | Use Custom Export if the preset’s purpose is not a fit |
| Check file format | Does the file type match the client’s request? | Select the requested format if Resolve supports it |
| Check codec | Is the requested codec shown? | Change the codec or ask whether an alternative is acceptable |
| Check dimensions | Do the output dimensions match the specification? | Set the requested dimensions and confirm framing separately |
| Check frame rate | Does the output rate match the brief? | Set the specified rate and consider whether the timeline also needs review |
| Check audio | Is the requested audio included and configured correctly? | Adjust the audio controls or clarify the required track layout |
| Check file and range | Is the job named, saved, and ranged correctly? | Correct the name, destination, or render range |
| Review the queued job | Does the queued summary describe the intended output? | Remove or correct a mistaken job before rendering |
The point is not to change every field. It is to compare each relevant field. If the selected preset already matches the request, keep it. If a field differs, decide whether the preset can be adjusted or whether Custom Export is a clearer starting point.
This checklist also protects against an easy-to-miss mistake: configuring a preset correctly, then queuing the wrong range or saving to the wrong folder. A delivery is both a technical configuration and a file-handling task.
What should I do when a preset still feels confusing?
Start with the output you need, not the interface label. The preset strip is easier to read once you can answer three questions: what file must be delivered, what part of the project should be in it, and what must the receiving person be able to do with it?
Keep this compact decision path beside your next export:
| Your requirement | First decision |
|---|---|
| “I need one finished video file.” | Choose Single Clip, then match output settings to the destination |
| “I need separate clips for another editor.” | Check Individual Clips and ask about handles and interchange files |
| “The client gave me exact codec and frame-rate values.” | Compare every named requirement with the preset; use Custom Export if needed |
| “I need a vertical version.” | Verify the timeline and framing, then choose render settings for the output |
| “A tutorial’s control is missing.” | Compare version, operating system, preset, render mode, format, and codec |
| “I want to reuse settings later.” | Save a custom preset, then verify it after saving or importing |
Blackmagic Design’s Delivering Content training lesson is a useful official companion for learning the page’s presets and queue. For Resolve 21.1-specific labels and behavior, use the current reference manual, not an older tutorial alone.
The safest preset is the one whose visible settings match the delivery request you actually have.
Before your next render, read the destination request, choose the closest preset, and check the fields one by one. If the request does not specify an important value, ask the recipient instead of treating a preset label as an answer.
Frequently asked questions
- What do presets do on the DaVinci Resolve Deliver page?
- A Deliver page preset fills in a group of render settings for a common delivery goal. It is a starting configuration, not proof that the finished file meets every recipient’s requirements. Check the format, codec, resolution, frame rate, audio, file name, location, and render range before adding the job to the queue.
- Should I use Custom Export or a DaVinci Resolve preset?
- Use a named preset when its output type matches the delivery you need, then inspect the settings it controls. Use Custom Export when you need to choose the settings yourself, when a client supplies exact specifications, or when a preset locks a field you need to change.
- Does a Deliver page preset change my timeline?
- A render preset configures the output job; it does not by itself mean your timeline has been rebuilt or reframed for another aspect ratio. Resolve 21 supports separate timeline settings for deliverables, so check the timeline and framing as well as the render preset when producing different formats.
- Can I save my own render preset in DaVinci Resolve 21?
- Yes. Set up a Custom Export, choose the required Video, Audio, and File options, then use the Render Settings options menu to save it as a new preset. Resolve 21’s reference manual also documents exporting and importing custom presets as XML files.
- Why is a Deliver page setting locked?
- A preset can lock settings that do not apply to its particular output workflow. Select Custom Export if you need to expose the broader set of render controls, then set and verify the values required by the delivery specification.
Sources
- DaVinci Resolve 21.1 Reference Manual
- DaVinci Resolve 21 New Features Guide
- DaVinci Resolve 20 Colorist Guide
- DaVinci Resolve Support Center
- DaVinci Resolve Training
- DaVinci Resolve 21: What's New
- How to Export in DaVinci Resolve: Format, Codec and Professional Delivery
- Resolve 21 and the new Photo page: interview with the Resolve team
Put this guide to work with TryUncle.
Ask about the step you’re on. TryUncle sees your screen and points at the control you need, so you can keep learning in your own project.
Get TryUncle for Mac or WindowsKeep reading
Guides · Jul 7, 2026 · 23 min
DaVinci Resolve Export Settings: Numbers That Actually Work
The exact DaVinci Resolve export settings for YouTube, client handoffs, and ProRes archives, plus what changed with Resolve 21's H.265 encoder.
Guides · Jul 24, 2026 · 41 min
DaVinci Resolve Deliver Page Render in Place Setting Explained
DaVinci Resolve has no Render in Place setting on the Deliver page. Here's where it lives and how it relates to Use Render Cached Images.

Fixes · Nov 2, 2026 · 37 min
DaVinci Resolve Photo Page JPEG Export Soft? Fix It in 21.1
Fix a soft JPEG export from the DaVinci Resolve 21 Photo page. Check preview resolution, output size, JPEG compression, RAW settings, focus, and color.