Articles / Fixesupdated for DaVinci Resolve 21.1 (October 2026)
DaVinci Resolve Photo Page JPEG Export Soft? Fix It in 21.1
Quick answer
If your DaVinci Resolve Photo page JPEG export looks soft, check the exported pixel dimensions first, then set Deliver > Photo > Size to Original if you need the source dimensions. Resolve 21’s preview-resolution setting affects the viewer, not final output. If the saved JPEG is still soft at 100% view, check the source, focus, resize settings, RAW processing, and sharpening.
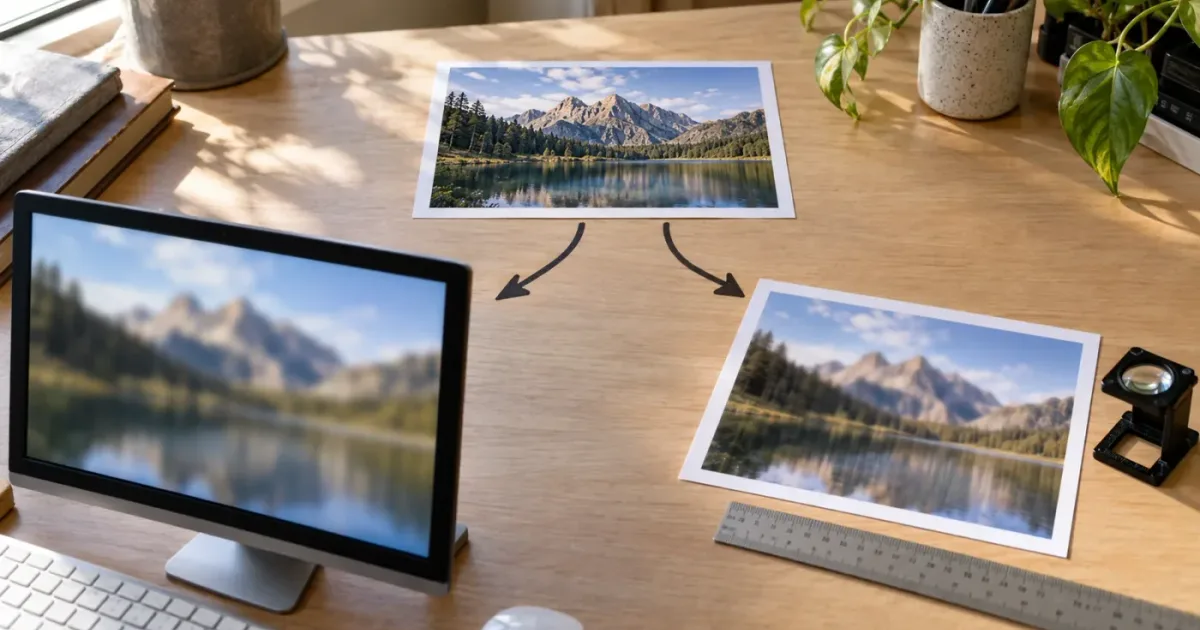
I’d separate a soft viewer preview from a soft JPEG file before changing the grade. In DaVinci Resolve 21.1, the Photo page can show a reduced-resolution preview while exporting from the original image. As of October 2026, that distinction is the fastest way to avoid sharpening a photo that was already sharp.
Why is my DaVinci Resolve Photo page JPEG export soft?
A soft-looking Photo page JPEG export has two broad causes: the exported file contains less detail than expected, or the file is being viewed at a scale or in a viewer that makes its detail look different. Check the file’s pixel dimensions before changing the image grade. Blackmagic’s Resolve 21 guide says the Photo page preview setting does not reduce the final export, which uses the original full-sized image. Blackmagic Design’s guide is the primary reference for that distinction.
Start with a question that sounds almost too basic: are you looking at the exported JPEG, or at the Photo page viewer? The answer changes what to troubleshoot. A viewer that looks soft at a reduced preview setting is not proof that the export is soft. A file that has fewer pixels than the original, on the other hand, may simply have been resized for delivery.
Use this order:
- Find the exported JPEG in Finder, File Explorer, or your preferred file manager.
- Check its pixel width and height in the file’s properties or metadata.
- Compare those numbers with the source image’s dimensions and with the output size you intended.
- Open the JPEG in an image viewer and inspect it at 100% zoom.
- Only then decide whether the issue is resolution, focus, processing, compression, or display.
If the saved JPEG has the expected dimensions and looks detailed at 100%, the export may be working as intended even if a fit-to-window view looks softer. Fit-to-window displays many image pixels using fewer screen pixels, so the viewer has to scale the image. That display scaling is not the same as changing the file’s pixel dimensions. A browser, operating-system preview, or chat app may also show a resized preview instead of the original file.
If the JPEG has the right dimensions but lacks detail at 100%, continue through the image-processing checks below. Don’t begin by pushing several sharpening controls. Sharpening can increase edge contrast, but it can’t put real detail back into an out-of-focus or motion-blurred photo.
A soft preview and a soft exported JPEG are different problems, so diagnose the file before grading the viewer.
A useful comparison is to export one test photo and check it on the same screen at the same zoom as the source. This isn’t a controlled test of Resolve against another editor. It’s a diagnostic comparison of your source and your own output, using the same display path. If the source already looks soft at 100%, the export is unlikely to restore its missing detail.
How do I tell whether the viewer preview or the JPEG file is soft?
The quickest reliable check is to compare the exported file’s pixel dimensions and inspect it at 100% zoom. In Resolve 21, the Photo Album Preview Resolution control is for the working image in the viewer. Blackmagic lists Auto, Full, Half, and Quarter as preview options and states that export uses the original full-sized image. The Resolve 21 guide documents both the options and their purpose.
In the Photo page, choose Playback > Photo Album Preview Resolution > Full when you need to inspect the full-sized preview. Full may make the interface less responsive on a computer working with large photos; it is an inspection choice, not a required export setting. Auto, the default in the guide, reduces photos larger than 4K to a 4K preview. Half and Quarter reduce preview size further. The guide describes those reductions as preview behavior, not output scaling.
A practical comparison should answer three questions:
| Check | What to look for | What the result suggests |
|---|---|---|
| Viewer preview at a reduced setting | The image looks soft in the Photo page | Check the preview setting before changing sharpening |
| Exported pixel dimensions | The JPEG is smaller than intended | Check Deliver page sizing or any later resize |
| JPEG at 100% zoom | Fine detail is absent or edges look smeared | Check source focus, processing, resizing, and compression |
| JPEG at fit-to-window zoom | The image looks softer than expected | Check display scaling and compare at 100% |
| Same JPEG in a second color-managed application | Detail or contrast changes between apps | Investigate display and color-management differences before re-exporting |
The test at 100% is useful because it lets you inspect the image without the viewer fitting the whole photo into a smaller area. It doesn’t guarantee that every monitor shows every detail correctly. It does make the comparison more meaningful than judging the Photo page viewer at one zoom and a desktop thumbnail at another.
Use the same screen, similar zoom, and the same image crop when comparing. Avoid comparing an image in Resolve’s viewer with a tiny thumbnail in a file browser. Avoid comparing a locally stored full-size JPEG with a copy that has been sent through a service that may create a preview or compressed derivative. If you do not know whether the copy is the original export, return to the file saved directly by Resolve.
If changing the preview from Auto to Full makes the Photo page look sharper but the exported JPEG’s dimensions and 100% appearance are unchanged, you have identified a preview issue. Put the preview setting back to a performance level that suits your workstation. If the export itself is soft, leave the preview control alone and move on to size, source quality, RAW settings, and processing.
That distinction also prevents an unhelpful fix: raising sharpening to compensate for a preview that Resolve has intentionally reduced. The new setting might make the reduced preview look more defined while creating harsh edges in the actual output. A preview control is not a substitute for export diagnosis.
Which Photo Album Preview Resolution setting should I use?
Choose Full when you need to judge the full-size working image in the Photo page; choose Auto, Half, or Quarter when you prefer a lighter preview. Blackmagic documents the four choices in Resolve 21 and says the preview-resolution setting does not reduce the final exported image. It is therefore not a JPEG-quality control. See the official New Features Guide.
The options have different purposes:
| Setting | What Blackmagic documents | When it helps |
|---|---|---|
| Auto | Default; reduces an image over 4K to a 4K preview | A reasonable starting point when full-size previews affect responsiveness |
| Full | Uses the full-sized resolution of the preview | Inspecting fine detail in the viewer |
| Half | Reduces the preview resolution by half | Keeping a smaller working preview |
| Quarter | Reduces the preview resolution to one quarter | Prioritizing a lighter preview over detailed viewer inspection |
“Full” here means full-sized preview resolution. It does not mean “maximum JPEG quality,” “full JPEG size,” or “export at original dimensions.” Those are separate decisions. In the same way, choosing Auto does not command Resolve to export a 4K JPEG. The output dimensions are set in the export controls, not by choosing how the viewer displays the working preview.
A useful workflow is to use Auto while organizing or making broad adjustments, then switch to Full temporarily when you need to inspect fine detail. If your photo is larger than 4K, Auto can reduce the viewer preview to 4K according to the guide. That may be appropriate for editing responsiveness, but it could make fine texture less convincing in the viewer than in the full-resolution output. The final check still belongs on the exported JPEG.
If Full makes the interface sluggish, don’t assume something is wrong with the file. Large stills require more work to display at their full size, and the guide specifically presents reduced preview resolution as a way to keep the Photo page responsive. Switch to a lower preview setting for general work and return to Full only when the detail inspection matters. Then export and evaluate the saved file separately.
The most important point is that this setting cannot repair a soft image. It can only change the preview resolution used while working. If the source is blurred, the selected export size is too small, or the grade has softened detail, Full will help you inspect the issue but won’t restore lost information.
Resolve 21’s Photo Album Preview Resolution setting changes the viewer preview, not the final export dimensions.
How do I check whether Deliver exported my JPEG at the wrong size?
Check the JPEG’s actual pixel dimensions, then compare them with the Photo page Deliver settings and the output specification you meant to meet. In DaVinci Resolve 21, the Deliver page offers photo sizing methods including Original and specified dimensions; the Quick Export dialog is simpler and offers original resolution or a percentage reduction. Blackmagic describes these controls in its Resolve 21 guide.
The Deliver page is the better place to investigate when you need precise control. Blackmagic says still photos can be exported there with more control than in Quick Export. The guide documents image formats including HEIF, JPEG, PNG, and TIFF, as well as sizing choices such as Original, Width and Height, Short Side, Long Side, Percentage, and Megapixels. Not every file format shows every parameter. Confirm what the dialog actually presents for your chosen format and Resolve build rather than assuming every option applies to JPEG.
For a direct test of whether resizing caused softness:
- Select the intended image in the Photo Album.
- Open the Deliver page.
- In the photo settings, choose JPEG.
- Set Size to Original if the delivery requires the source image’s dimensions.
- Confirm the output location and file naming.
- Add the photo to the render queue and render the test.
- Check the resulting JPEG’s pixel dimensions.
If your delivery requires an exact size rather than the source dimensions, choose the appropriate sizing control and enter the specified pixels. Don’t enlarge a smaller source file simply to satisfy a large number in a brief unless that brief explicitly requires an enlarged output. Upscaling creates more output pixels, but it doesn’t guarantee that the new pixels contain additional captured detail.
Quick Export is useful for a straightforward export. In Blackmagic’s guide, you can choose whether to export the whole album or just selected photos, add a filename prefix, choose original resolution or a reduced percentage scale, and include metadata. If those choices don’t give you the sizing or batch setup you need, use Deliver. Don’t use a convenient Quick Export option and then assume it fulfilled a precise pixel-dimension request without checking the output.
A file name can also mislead you. The name may suggest “full size,” “web,” or “print,” but the file’s pixel dimensions tell you what was actually written. Likewise, file size in megabytes is not a dependable substitute for pixel dimensions. A complex detailed image and a smooth, mostly solid-color image can compress to different file sizes at the same dimensions. A larger JPEG file is not automatically a sharper JPEG.
There are two separate goals that often get confused:
- Pixel dimensions: how many pixels are in the exported image.
- Print resolution metadata: how those pixels are assigned to a physical print size.
If a client requests a particular pixel width and height, enter those pixel dimensions. If the request specifies a physical print size and PPI, work out the pixel dimensions required for that combination, then verify the exported file. A PPI number in the export dialog does not add sensor detail or restore a reduced image.
Does 300 ppi make a DaVinci Resolve JPEG sharper?
No. PPI describes pixel density for a print-size relationship; it does not create more pixels or sharpen the image. When a JPEG looks soft on screen, check its pixel dimensions and detail at 100% before changing a PPI value. In Resolve 21’s Deliver settings, Blackmagic lists Resolution as a value entered in pixels per inch or pixels per centimeter, separately from Size and Compression in the official guide.
The distinction is straightforward:
- Pixel dimensions describe how many pixels make up the image.
- PPI describes how densely those pixels are assigned when calculating a physical print size.
- Sharpness describes the visible definition of detail and edges.
- JPEG compression describes how the image is encoded into a compressed file.
Those terms are related to image delivery, but they are not interchangeable. If an image’s pixel dimensions stay the same, changing a PPI value alone does not create extra captured detail. It also won’t correct missed focus, motion blur, an overly strong softening effect, or a resized export.
Imagine a worked example, not an observed Resolve test: a print shop asks for a particular pixel width and a PPI value. The editor should confirm the requested pixel width and the print density requirement, then set the output to meet those specifications. The editor should not change PPI alone and assume that the file has become sharper. The number of pixels and the quality of the captured detail remain central.
If a print specification gives only a physical size and density, calculate the pixel dimensions needed from those two inputs, then verify the exported JPEG. If the client supplies pixel dimensions directly, those dimensions are the deliverable. If the client says “300 dpi” without identifying print size or pixel dimensions, ask what physical size and intended use they mean before guessing.
For screen delivery, pixel dimensions and display size matter more to the visible result than a PPI label in the file. A JPEG viewed at a scaled fit may look different from the same JPEG at 100%. A platform may also make its own resized version. Keep the original export available so you can tell whether softness is already in the file or was introduced later.
Don’t use PPI as a workaround for a small file. If the exported JPEG is smaller than the required pixel dimensions, change the sizing controls or revisit the correct source. A higher PPI value will not turn a reduced output into a sharper original.
How do I set JPEG compression without making the image look soft?
Use the JPEG quality or compression control to meet the delivery’s file-size and quality needs, then inspect a test export at 100%. Blackmagic lists Compression among the photo export settings when the selected format supports it, but a particular quality scale or universal best value should not be assumed across settings or versions. The Resolve 21 guide describes the available control without prescribing one number for every image.
JPEG is a compressed image format, so a JPEG’s file size and visible appearance can change with compression. But softness is not diagnosed reliably from the file size alone. A JPEG can be relatively small while retaining the detail needed for a particular delivery, or it can look poor because it was resized, softened, repeatedly recompressed, or viewed through a scaled preview. Inspect the image, not just the megabyte count.
When the Deliver controls present a compression or quality setting:
- Confirm the pixel size first.
- Export a test using the least-compressed or highest-quality setting the dialog offers, if that matches the delivery needs.
- Compare the result with the source at 100%.
- If the file must be smaller, test a lower quality setting in a separate export.
- Keep the version that satisfies both the file-size limit and visible quality requirement.
That is a practical decision process, not a guaranteed numeric recipe. Different subjects expose compression problems differently. Fine foliage, hair, textured fabric, distant architecture, and smooth gradients can reveal artifacts in different ways. A photo dominated by broad, smooth areas may not show the same issues as a highly detailed landscape at the same file size.
Watch for blocky texture, ringing around high-contrast edges, smeared fine detail, or banding in gradual tones. Those visual clues can point toward compression or resizing, but they don’t prove a specific cause by themselves. Compare the source and the exported JPEG in the same viewer and at the same zoom. If both look similarly soft, go back to the source and processing steps. If the source looks detailed and the output does not, repeat the export test with the size and JPEG settings checked.
Avoid repeatedly opening and resaving JPEGs in different applications while troubleshooting. Each extra save may introduce another compression step depending on the software and settings. Keep the original Resolve export intact. Make a copy for any downstream test so you can return to the exact output that Resolve created.
If a client or platform sets a maximum upload size, treat that as a constraint to meet, not as evidence that the smallest possible file is best. First establish the required pixel dimensions. Then lower file size only as far as the delivery allows while keeping detail acceptable. If the recipient accepts PNG or TIFF and needs those formats, check whether they suit the task better; don’t switch formats simply because the JPEG looked soft before you verified its dimensions and compression.
Why is my JPEG still soft when the pixel dimensions are correct?
Correct pixel dimensions rule out one common resize mistake, but they do not prove that the source contains sharp detail. If the JPEG is soft at 100%, inspect the original image, then check processing that can reduce local detail, such as noise reduction or a softening effect. Exporting at Original size preserves the source dimensions; it cannot reverse blur already present in the source.
Look at the original source before inspecting the grade. If the original is a JPEG, compare it with the exported version. If the source is RAW, compare the output with a suitable reference rendering of that RAW file, while remembering that different applications can apply different default processing. The comparison should focus on visible detail, not on whether the colors or contrast match perfectly.
Check focus and motion before applying a sharper-looking grade. A missed focus plane can make the subject soft even when the file is large. Camera or subject movement can smear detail. Shallow depth of field can leave some areas sharp and others naturally out of focus. Those are capture characteristics, not export settings. Resolve cannot reliably recover the original fine detail if it was never recorded clearly.
Then consider the processing chain:
- Has noise reduction removed fine texture?
- Has a blur or soft-focus effect been applied?
- Is a mask or window applying different processing to the subject?
- Has a crop or transform made you judge a smaller region?
- Is the chosen version actually the version with the intended grade?
- Is there a later resize after Resolve’s export?
- Are you looking at a thumbnail, preview, or screen-scaled copy rather than the original file?
Some softening is subtle. Noise reduction can reduce visible grain and fine texture together, especially if pushed hard. A blur effect can soften a whole image or a selected region. A crop can make the image feel less detailed because fewer original pixels remain in the framed subject, particularly if the cropped composition is then enlarged. These checks are diagnostic possibilities, not claims that any one setting is active in your project.
If you need a more controlled comparison, export the same selected version once with the current grade and once with the relevant softening effect disabled. Label the files clearly and inspect them side by side at 100%. That comparison can show whether a specific effect is contributing. It doesn’t mean the no-effect file is the correct final image. The intended appearance still matters, and removing noise reduction may reintroduce unwanted noise.
Keep your original source untouched. Work in Resolve’s non-destructive workflow and save a separate version before making a major change. Blackmagic documents the Photo page’s version feature and notes that only the currently selected version is exported. That makes version selection a real delivery check, not just an organizational detail. See the Resolve 21 guide for version behavior.
Could I be exporting the wrong photo version?
Yes. Resolve exports the currently selected version, so a JPEG can have the expected dimensions and format yet contain an earlier, softer version of the grade. Before exporting, check the version selector in the Photo Viewer and confirm that it names the version you intend to deliver. Blackmagic’s Resolve 21 guide says other versions are ignored during Quick Export and Deliver.
A version mismatch is easy to miss when the album thumbnail, Viewer, and export dialog do not all draw attention to the selected version in the same way. Don’t rely on memory about which edit is active. Read the version name, view the selected photo, and confirm the image you expect is displayed before adding it to the render queue.
A safe sequence is:
- Select the photo in the album.
- Select the intended version in the Photo Viewer’s version dropdown.
- Inspect the image in the Viewer.
- Open Deliver and confirm the selected image and export range.
- Render one test.
- Open the saved file and verify that it contains the intended look.
If you create alternate versions, use names that describe the difference instead of vague names like “new” or “final 2.” Examples might be “neutral,” “warm print,” or “web crop,” provided those names accurately describe the work. Clear names make it easier to spot an accidental selection before export.
A version mistake can look like an export-quality problem because the selected version may have less sharpening, stronger noise reduction, a different crop, or an unfinished grade. Re-exporting with a higher JPEG setting won’t change which version Resolve sends. Confirm the selected version before changing compression.
The same check matters when exporting several photos. Blackmagic’s guide describes exporting selected photos or the entire album. If the render includes a batch, confirm both what is selected and what the export setting is set to include. A correct setting for one selected photo is not necessarily the right setting for a full album, and an image that looks soft may not be the image currently shown in the Viewer.
Should I export from Quick Export or the Deliver page?
Use Quick Export for a simple still-image export when its available choices meet the job; use Deliver when you need more control over size, naming, location, format options, or multiple queued outputs. Blackmagic explicitly describes Deliver as the place to go for greater control. Its Resolve 21 guide documents both workflows.
Quick Export is designed for a short path from Photo page to image file. According to Blackmagic, it can export the entire album or selected photos, add a filename prefix, choose original resolution or a reduced percentage, and include metadata. That is enough for a straightforward JPEG when the output requirements are simple.
Deliver gives you additional controls. The guide describes selecting the file name, location, and image format, choosing the entire album or selected photos, and adding render jobs to the queue. It says you can change settings and add another render job to make multiple output formats. For the specific Photo page settings, the guide lists JPEG among the available formats and includes sizing choices such as Original, Width and Height, Short Side, Long Side, Percentage, and Megapixels. Confirm which choices appear for the format you select.
| Need | Start here | Why |
|---|---|---|
| One basic JPEG at original resolution | Quick Export | Fewer choices if its controls meet the brief |
| Exact output dimensions | Deliver | More explicit photo size controls are documented |
| A defined folder and file naming plan | Deliver | The guide describes location and naming controls |
| Export several formats from one photo | Deliver | You can add separate render jobs with different settings |
| Export only chosen photos | Either, after checking selection | Both workflows provide ways to choose selected photos |
| Investigate a soft export | Deliver for a controlled test | It exposes the size and format controls you need to verify |
Switching pages alone won’t make a JPEG sharper. Deliver is useful here because it lets you inspect the output size and create a deliberate test. Quick Export is not inherently a low-quality export path, and a Deliver-page export is not automatically sharp. The source, selected version, chosen size, processing, and final viewing all still matter.
When you test, avoid changing multiple variables at once. Keep the selected image and version constant. Change only the sizing or JPEG setting you are testing, then render a second file with an unambiguous name. That makes the comparison interpretable. If you change the version, preview resolution, compression, and crop all together, you won’t know which change affected the appearance.
Why does the JPEG look softer outside DaVinci Resolve?
A JPEG can appear different outside Resolve because a second application may display a scaled preview or handle color and display settings differently. First verify you opened the full exported file, not a thumbnail or a service-generated preview. Then compare the image at 100% and check its dimensions. Blackmagic documents Resolve’s export controls, but the behavior of every third-party viewer or upload service is outside the Photo page’s export settings.
Separate detail from color and contrast. A photo can seem less crisp if its contrast or edge definition appears lower in another viewer, even when its pixel dimensions are identical. Color shifts can also affect the impression of sharpness: a lower-contrast display may make edges seem less distinct. That does not establish that the JPEG lost pixels. Check the detail and dimensions independently from the color appearance.
Use a simple comparison:
- Open the actual JPEG saved by Resolve.
- Confirm its file location and dimensions.
- View it at 100% in one application.
- Open the same file, not an uploaded copy, in another application.
- Compare matching crops and zoom levels.
- Note whether the difference is in detail, color, contrast, or all three.
If a social platform or messaging app is part of the path, keep an untouched local copy for comparison. A remote preview may be resized or recompressed; don’t assume that preview is byte-for-byte identical to your export. Download the actual delivered file if the platform offers that option and inspect that file separately.
For color-sensitive delivery, check that the recipient has stated a color-space requirement and that your export matches the intended workflow. Don’t use a color-space change as a sharpening fix. If the image looks different but retains the expected pixel dimensions and fine detail, you may be dealing with a display or color-management discrepancy rather than softness caused by JPEG compression.
Resolve’s Photo page and Deliver settings are only one part of the journey. After export, other applications and services can affect how an image is displayed. The diagnostic question is not simply “Does it look different?” It is “Did the file lose detail, did the dimensions change, or is the viewing pipeline showing it differently?”
If the original saved export looks right locally but a shared preview looks soft, regenerate the preview or review the platform’s upload requirements before changing your master export. Otherwise you may reduce quality in the local file to compensate for a preview that isn’t the final delivered image.
Should I add more sharpening to fix a soft JPEG?
Add sharpening only after you have ruled out a reduced preview, an unintended resize, the wrong version, and a soft source. Sharpening changes the appearance of edges; it is not a substitute for correct output dimensions or focus. Blackmagic describes the Photo page as working with image adjustments and effects, but the Resolve 21 guide does not prescribe one universal sharpening value for all JPEG exports.
Sharpening too early makes diagnosis harder. If the viewer is only showing a reduced preview, you may over-sharpen the original just to make that preview look crisp. If the output is too small, sharpening cannot replace the pixels removed during resizing. If the source is out of focus, sharpening can make high-contrast edges more pronounced without recovering the lost structure of a finely focused image.
A careful sharpening decision begins with the intended viewing size. A file intended for a small web display may need a different visual treatment from a photo intended for a large print. But don’t guess at a setting before you know the output dimensions and requirements. Create a separate version or save a reversible change, then compare it with the unsharpened version at the relevant output size.
Look for warning signs such as bright or dark outlines around edges, harsh texture, amplified noise, or a brittle appearance. If those appear, reduce the effect or compare against the previous version. More visible edge contrast is not the same thing as more accurate detail. Some photographic texture is naturally low contrast, and an aggressive sharpening pass can make it look artificial.
For a RAW photo, inspect the available camera RAW controls in the version of Resolve you are using. Blackmagic’s guide explains that Resolve has controls for RAW and debayered photo parameters in the Photo page Inspector. Availability and behavior can depend on the source format and controls presented in the interface. Don’t assume that a RAW-only adjustment applies identically to a JPEG, or that a control labeled sharpness has the same meaning across every processing stage.
A sensible sequence is:
- Correct the output size.
- Check the source detail.
- Confirm the intended version.
- Review noise reduction and effects.
- Apply a restrained sharpening adjustment only if the image needs it.
- Export a test and inspect the actual file.
If a specific effect or processing control is unfamiliar, the Resolve Photo page guide gives broader page context, while the basic color grading guide covers a separate grading workflow. Those are related references, not substitutes for checking the exported file’s dimensions and detail.
What if my source image is RAW, HEIC, or already a JPEG?
The right diagnosis depends partly on what kind of source you imported. A RAW file, HEIC image, and JPEG do not necessarily expose the same processing controls or start from the same rendered appearance. Resolve’s Photo page supports multiple still-image workflows, and the export format is a separate choice from the source format. Blackmagic lists JPEG, HEIF, PNG, and TIFF among Deliver’s photo formats in the Resolve 21 guide.
For a RAW file, confirm that the image is being decoded as expected and inspect the RAW controls available for that particular file. RAW processing can affect the starting appearance before the grade and final JPEG export. If a RAW photo looks softer in Resolve than expected, do not immediately assume JPEG compression caused it. Compare the rendered detail and check the source processing. Blackmagic’s guide describes the Photo page Inspector as a place to edit RAW and debayered photo parameters.
For a HEIC source, compare the original and Resolve output using the same viewer where possible. A viewer may render the source differently from the exported JPEG, so a perceived difference in crispness can include differences in rendering and not only export size. Check actual output dimensions and inspect the saved file directly. If the source itself is not sharp at 100%, changing the JPEG export settings won’t add real detail.
For a JPEG source, remember that the source is already a rendered and compressed image. Resolve can adjust it and export another JPEG, but repeated JPEG saving can create additional lossy compression depending on the workflow. Keep the source file intact and avoid cycles of exporting and reimporting JPEGs as if each were a lossless master. If you need an editable master or another format for a specific recipient, choose a format that matches their requirements and verify it.
A useful file-format decision is based on delivery:
| Situation | Possible direction | What to verify |
|---|---|---|
| Recipient specifically requests JPEG | Export JPEG | Pixel size, compression, color-space request, and file-size limit |
| Need a format that supports transparency | Check a suitable format such as PNG or TIFF | Whether the selected format and settings support the intended alpha channel |
| Need a larger working or archival image | Check TIFF or another requested format | Bit depth, file size, recipient compatibility, and storage needs |
| Source is RAW and final delivery is JPEG | Process the RAW, then export JPEG | Correct RAW decode, grade, size, and selected version |
| Source is already a JPEG | Keep the original and export once for delivery | Avoid unnecessary repeated JPEG generations |
This table is a decision aid, not a promise that every format option appears for every source or on every machine. Blackmagic notes that photo settings vary by chosen format. Check the controls available in your Resolve 21.1 dialog and the recipient’s specification.
How do I export one JPEG and verify the result?
For a controlled test, choose one photo, verify the selected version, set the intended size and JPEG options in Deliver, render it, then inspect the saved file’s dimensions and detail at 100%. Blackmagic documents this workflow in the Resolve 21 guide, including selecting photos, setting file details, adding a render job, and rendering the queue.
Use the following steps when the export looks soft:
- Choose one representative photo. Pick an image with detail you can inspect, such as hair, fabric, foliage, or lettering. This is only a diagnostic choice; it is not a claim that one kind of subject always reveals every export issue.
- Select the intended version. Confirm the version name and what appears in the Viewer. Resolve exports the currently selected version.
- Set a useful preview for inspection. If you are judging the Photo page viewer, choose Playback > Photo Album Preview Resolution > Full. If that slows the interface, return to a lower preview setting after inspection.
- Open Deliver. Choose the photo format JPEG and inspect the available Photo settings.
- Set output size deliberately. Choose Original when you want the source dimensions, or specify the pixel dimensions required by the brief.
- Choose a location and clear file name. Use a name that makes this test distinguishable from other exports.
- Add the job and render. Confirm the render queue contains the photo and settings you intended.
- Inspect the file that was written. Check pixel dimensions, open the JPEG itself, and view it at 100%.
- If it remains soft, change one relevant variable at a time. Check source focus, RAW controls, noise reduction, effects, and compression in separate tests.
Resolve 21’s Deliver page can add different jobs to the render queue with different settings, according to Blackmagic. That is helpful if you need to compare formats or sizes without replacing your original test. Name each output so you can tell which settings produced it. Keep the settings comparison simple enough that the result answers one question.
If you are checking JPEG compression, keep the version and pixel dimensions fixed. If you are checking output size, keep the version and JPEG settings fixed. If you are checking an effect, keep the export settings fixed and change only that effect. This is not a lab benchmark. It is a practical troubleshooting method that prevents one change from being mistaken for the effect of another.
A successful diagnostic export has a visible, verifiable result: the saved file exists in the intended folder, its dimensions match the chosen output, and the selected grade appears in the rendered image. If any of those checks fail, troubleshoot that specific failure rather than raising sharpening.
How do I troubleshoot a soft JPEG export by symptom?
Match the symptom to the likely control: a soft viewer points first to preview resolution, an undersized file points to Deliver sizing, and a correctly sized but soft file points back to source detail or processing. Resolve’s own guide separates Photo Album Preview Resolution from final export and describes the distinct sizing controls in Deliver. Use those documented distinctions to choose the next test, not a one-size-fits-all sharpening preset.
| What you see | Check first | Next useful action |
|---|---|---|
| Photo page viewer looks soft, export is detailed | Preview resolution and Viewer zoom | Use Full to inspect; leave the export settings alone if the file is correct |
| JPEG pixel dimensions are smaller than intended | Deliver Size setting or Quick Export scale | Re-export at Original or the specified pixel dimensions |
| JPEG dimensions match but source is also soft | Capture focus, motion, depth of field | Avoid treating export settings as a recovery tool |
| JPEG dimensions match, source looks sharp, export does not | Selected version, effects, noise reduction, compression | Render a one-variable test from Deliver |
| JPEG appears soft only in a chat or website preview | Whether the displayed item is a resized preview | Compare the original local export or download the delivered file |
| One image in a batch looks different | Selected image, selected version, batch range | Export that photo by itself and confirm its version |
| The export looks soft after cropping | Crop and output dimensions | Check how many source pixels remain in the crop and export at the intended size |
| File size is unexpectedly small | Pixel dimensions and compression settings | Verify dimensions first; don’t infer sharpness from megabytes alone |
These are starting points, not guarantees. A soft image can have more than one cause. A crop, for example, may be intentional and still leave enough pixels for the delivery. A reduced-size export may look perfectly good at its intended display size but soft when enlarged beyond that size. The question is whether the output meets the specification, not whether it has the largest possible dimensions.
When one image in a batch is the outlier, export it alone before changing settings for the whole album. If the single-image export looks correct, inspect album selection and batch scope. If it remains soft, compare the source and selected version. This isolates the image-specific issue from album-wide export settings.
For a crop-related complaint, compare the uncropped and cropped versions at the intended output size. A crop excludes part of the source image; enlarging the remaining area to fill a larger output can reveal limitations that were less noticeable in the full frame. That does not mean the crop is wrong. It means the crop, source detail, and delivery size need to be considered together.
For a file-size complaint, do not decide that a JPEG is soft because it is smaller than expected. The contents of the image affect compression outcomes. Check the pixel dimensions and view the file at 100%. Only then decide whether to adjust the export settings.
For a softness complaint that appears only after upload, compare the downloaded delivered image with the original local export. That comparison tells you whether to troubleshoot Resolve’s export or the later delivery path. Avoid lowering quality in the master file merely to match a generated preview.
When should I use another format instead of JPEG?
Use JPEG when the recipient or platform calls for JPEG and the image’s size and quality meet the delivery requirements. Use another format only when its properties fit the task better, such as a stated need for transparency or a different production handoff. Resolve 21’s Deliver page lists HEIF, JPEG, PNG, and TIFF, but Blackmagic notes that not every photo format exposes every setting. See the official guide.
A format change is not a general sharpness fix. If JPEG export is soft because the output is too small, exporting a TIFF at the same small dimensions won’t restore the missing detail. If the source is out of focus, changing file format won’t refocus it. If a viewer is displaying a scaled preview, the new format may still look soft in that preview.
Choose the format based on the handoff:
- If the client specifies JPEG, deliver JPEG and meet the requested dimensions and file-size constraints.
- If transparency is required, confirm which supported format and alpha options are available for the export.
- If a post-production or print workflow specifies TIFF, match that requirement and confirm bit depth and dimensions.
- If a web service asks for a particular format, follow its current specification rather than guessing.
- If no format is specified, ask whether compatibility, file size, editability, or transparency matters most.
Resolve can make multiple Deliver jobs with different settings. That lets you create a JPEG for a web handoff and another supported format for a separate workflow, if both are genuinely needed. Keep the file names distinct, and check each rendered file separately. Don’t assume that the second job inherited the same format, size, or metadata options you intended.
Metadata is another independent delivery choice. The guide describes an Include Metadata option for photo exports. Whether to include it depends on the recipient and the privacy and workflow requirements. Metadata can contain details that a recipient does not need. Confirm what the file will include rather than treating the checkbox as a sharpness setting.
Use the file format that meets the job. Then verify the result. A format label alone does not guarantee a correct color appearance, correct dimensions, or sharp detail.
What should I check before exporting a batch of photos?
Before exporting a batch, confirm the album selection, selected versions, size, naming, destination, and format. A batch can contain correctly processed images and still produce an unexpected result if the export includes the wrong photos or uses a reduced size. Blackmagic’s Resolve 21 guide describes exporting selected photos or an entire album from the Photo page.
A useful preflight is:
- Select the intended album or photos.
- Check the active filters in the album so you know which images are visible or selected.
- Confirm the selected version for photos where you created alternatives.
- Choose the required JPEG size or exact pixel dimensions.
- Confirm file naming and output location.
- Decide whether to include metadata.
- Render one representative test before committing to a large batch.
- Inspect the resulting file and its dimensions.
The Resolve Photo page has albums and organization controls. Blackmagic’s guide says grades and effects for still images within albums are applied at the source level, so still-image grades are shared across albums within a project. That behavior makes it important to know whether you are changing the shared source image or simply choosing an export setting. If you want a substantially different look for a particular delivery, use a deliberate versioning workflow and make sure the intended version is selected before export.
A test image should represent the most demanding cases in the batch. If one photo is a large RAW file, one has a tight crop, and another has delicate texture, the first image you export may not reveal every issue. A useful batch check includes at least the kinds of image that matter most to the final delivery. This is a workflow suggestion, not a benchmark or a required number of test files.
Naming matters for troubleshooting. If the exported files all use similar names, it can be difficult to identify which one came from which setting. Use a clear test suffix such as a size or version label, then remove that label only when you settle on the final file-naming scheme. Don’t overwrite the original images as part of a diagnostic test.
For a large delivery, a single representative export can catch a wrong size, destination, or format before the full batch runs. It cannot prove that every photo in the batch is sharp. Review the images that matter, especially those with different sources, crops, versions, or processing.
Is the Photo page JPEG export soft because of Resolve 21.1?
Do not assume Resolve 21.1 is the cause just because the issue appeared after an update. First establish whether the viewer, exported pixel dimensions, selected version, or source image explains the symptom. Blackmagic’s current support area provides the Resolve 21 manual and software information; use its official support page to confirm the build and consult the manual that matches your installed version.
Version-specific behavior matters when a setting, control, or file-format option changes. If a menu in your Resolve 21.1 interface differs from an older guide, follow the current interface and the applicable manual. Do not transpose instructions from an older Resolve release without checking whether the control is still named or located the same way. The official support page lists DaVinci Resolve 21 materials, while the New Features Guide documents features introduced in version 21.
Before reporting a possible software bug, record the exact Resolve version and edition, operating system, source format, exported format, selected size, and whether the softness appears in the viewer, in the saved file, or only after another application displays it. Include the pixel dimensions of the source and export. Those details help separate a reproducible export issue from a preview, sizing, source, or display issue.
A clean, reversible test can help:
- Use one source photo and a clearly named version.
- Keep the grade and effects fixed.
- Export at Original size as JPEG.
- Check the saved file directly at 100%.
- Repeat with only one export variable changed.
- Compare the two files and record which setting changed.
This is a way to isolate variables, not proof that Resolve has a defect. If the test reproduces an unexpected result, consult the current Blackmagic manual and support channels with the details. Avoid claiming a software bug based only on a difference between the Resolve viewer and an unrelated preview application.
The official manual is also a better authority than an old forum post for identifying current control names and documented behavior. Community posts can point to symptoms worth investigating, but user reports may involve different source files, builds, hardware, settings, or viewing applications. Treat them as clues rather than universal rules.
What is the fastest order for fixing a soft Resolve JPEG?
The fastest order is to verify the saved file, check pixel dimensions, confirm the selected version, and then investigate source detail and processing. Only after those checks should you adjust JPEG compression or sharpening. That sequence follows the distinctions Blackmagic documents for Resolve 21’s preview resolution, export sizing, and selected-version behavior in its New Features Guide.
Use this short decision path:
- Soft only in the Photo page viewer? Set the preview to Full and inspect the actual export separately.
- Export smaller than expected? Correct Deliver size or Quick Export scale.
- Wrong appearance, but correct dimensions? Confirm the selected photo version.
- Source is also soft? Investigate focus, motion, depth of field, and original detail.
- Source is sharp but output is soft? Check crop, noise reduction, effects, compression, and any later resize.
- Looks soft only after upload? Compare the local original export with the delivered or downloaded file.
- Still unexplained? Make a one-variable test and check the Resolve manual for your version.
This order avoids making the image harsher while the real issue remains a small output, a reduced preview, or a mistaken version. It also gives you a result you can explain: the exported file has the intended dimensions, contains the intended version, and looks acceptable at its intended viewing size.
If you need a walkthrough while locating the controls, TryUncle is the on-screen assistant for DaVinci Resolve on Mac and Windows - ask in plain words and Uncle points at the exact control on your screen.
What should I do next if the JPEG export still looks soft?
If the JPEG is the expected size, the intended version is selected, and the source looks sharper than the saved file at 100%, make one controlled export test and change one setting at a time. Keep the original file and current version intact. If the test still behaves unexpectedly, compare it with the current Resolve 21.1 manual and provide Blackmagic support with the source format, export size, exact build, and a description of where the softness appears.
Don’t keep increasing sharpening without knowing what you are correcting. Check the output dimensions. Confirm the selected version. Inspect the source. Test the actual exported JPEG rather than relying on a reduced viewer preview or upload thumbnail. Those checks tell you whether the right next step is an export adjustment, an image-processing change, or a closer look at the source.
For the final delivery, save the JPEG that meets the requested dimensions and format, then inspect that exact file once more. If its detail is good at the intended display or print size, stop editing. If not, return to the first check that failed and change only that part of the workflow.
Frequently asked questions
- Why is my DaVinci Resolve Photo page JPEG export soft?
- First check the saved JPEG’s pixel dimensions and view it at 100%. If it is smaller than the original, correct the Deliver page size setting. If its dimensions are right, check the source focus, RAW processing, noise reduction, and sharpening. Resolve 21’s Photo Album Preview Resolution changes the viewer preview, not the final export.
- Does Photo Album Preview Resolution make the exported JPEG soft?
- No. Blackmagic says Auto, Full, Half, and Quarter affect the working preview. Resolve uses the original full-sized image for final output. A soft viewer preview can therefore coexist with a sharp full-resolution export.
- Does 300 ppi make a DaVinci Resolve JPEG sharper?
- No. PPI is print-density metadata, not extra image detail. Pixel dimensions determine how many pixels the file contains. For a print-size requirement, set the desired pixel dimensions and PPI; do not treat a higher PPI value as a sharpening control.
- Should I export JPEG or TIFF from the Resolve Photo page?
- Use JPEG for a broadly compatible, compressed delivery when the recipient expects JPEG. Choose TIFF or PNG when the delivery specification calls for those formats or when you need their supported properties. Confirm the receiving workflow’s color-space, bit-depth, and file-size requirements before exporting.
Sources
Put this guide to work with TryUncle.
Ask about the step you’re on. TryUncle sees your screen and points at the control you need, so you can keep learning in your own project.
Get TryUncle for Mac or WindowsKeep reading
Guides · Sep 29, 2026 · 24 min
How to Use DaVinci Resolve 21 Photo Page
Learn how to use DaVinci Resolve 21 Photo page to import, organize, grade, compare, and export still photos in Resolve 21.1.

Guides · Jul 7, 2026 · 35 min
How to Color Grade in DaVinci Resolve: The Basics
Learn how to color grade in DaVinci Resolve: build a node chain, balance shadows and highlights with Lift, Gamma, and Gain, and read the scopes.
Guides · Oct 23, 2026 · 38 min
DaVinci Resolve Color Grading Workflow Order: The Right Sequence
A practical DaVinci Resolve color grading workflow order, from color management and shot balance to matching, look development, checks, and delivery.