Articles / Guidesupdated for DaVinci Resolve 21.0.2 (July 2026)
DJI Air 3 D-Log M Grading Settings for DaVinci Resolve
Quick answer
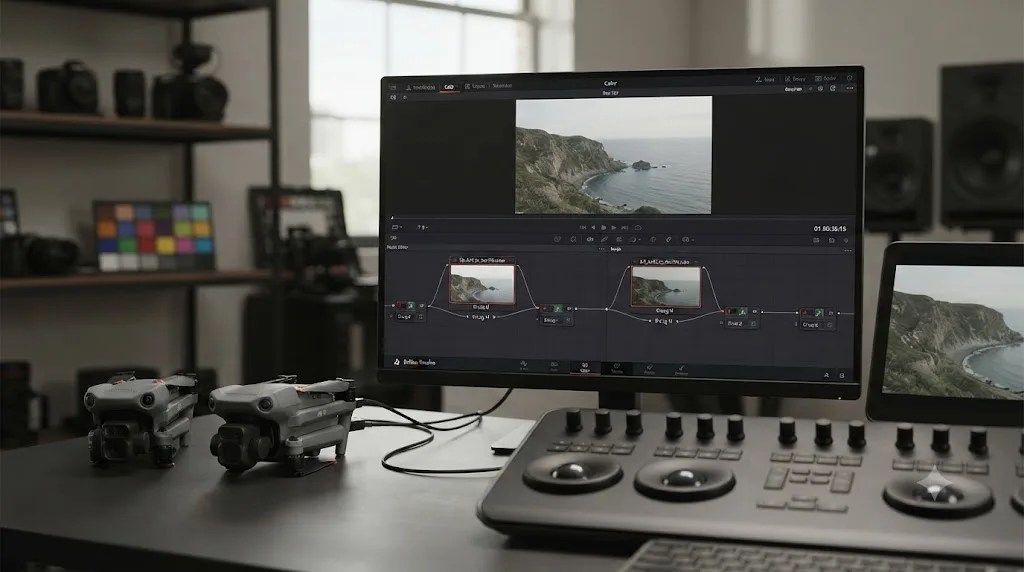
Grade DJI Air 3 D-Log M footage in DaVinci Resolve with DJI's official D-Log M to Rec.709 LUT, not the built-in DJI D-Log Color Space Transform preset, which is tuned for older D-Gamut/D-Log drones and turns Air 3 footage oversaturated. Shoot ISO 100-1600, apply the LUT to a node, then grade normally in Rec.709.
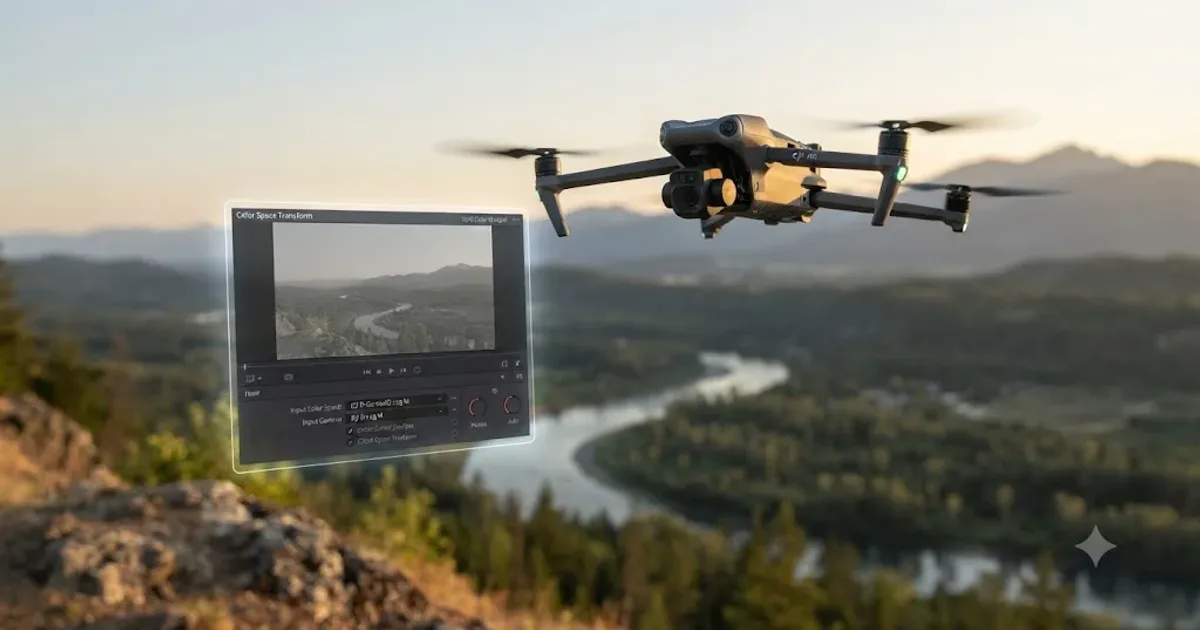
Your DJI Air 3 shoots D-Log M for a reason. You want the dynamic range. You bring the files into DaVinci Resolve, apply the DJI preset sitting right there in the Color Space Transform dropdown, and the sky turns a shade of blue that never existed at your shoot location.
That's not a bad LUT. It's the wrong tool for a job Resolve doesn't actually have a dedicated tool for. D-Log M is a genuinely different animal from the D-Log used on older DJI drones, and the menu that looks like it's built for your footage is built for someone else's.
What is D-Log M on the DJI Air 3, and why does it need special grading settings in DaVinci Resolve?
D-Log M is a flat, low-contrast color profile the Air 3 records to preserve highlight and shadow detail for grading later, and it needs a color conversion before it looks like a normal image. The Air 3's two cameras, a 24mm-equivalent wide lens and a 70mm-equivalent medium tele lens, both shoot D-Log M at 10-bit 4:2:0 in H.265, according to DJI's own specs page for the Air 3. Both cameras use identical 1/1.3-inch, 48-megapixel sensors, so the underlying image data is consistent between the two lenses even though the field of view isn't.
Normal color mode on the Air 3 covers 4K at 24, 25, 30, 48, 50, and 60fps, and the same two cameras add a 4K 100fps or Full HD 200fps slow-motion option on top of that, per CineD's coverage of the drone's release. DJI's own materials don't spell out whether that slow-motion mode stays available once you switch to D-Log M, a gap worth checking before you plan a shoot that needs both, and one this guide comes back to later.
That flat, grey look on import isn't a mistake. It's D-Log M doing exactly what a log-style profile is supposed to do: compress contrast, hold onto more of the sensor's dynamic range, and hand you a file with room to push before you commit to a final look. The same underlying idea drives Sony's S-Log, Apple Log, and Panasonic's V-Log. What's specific to the Air 3, and to DJI's D-Log M implementation more broadly, is what happens next in Resolve, because the obvious next step in the interface doesn't do what it looks like it should.
A flat grey clip fresh off an Air 3 card isn't broken footage. It's an unfinished one. The camera did its job. The conversion step is still waiting on you, and picking the wrong tool for that step is where nearly every D-Log M grading problem on this drone actually starts.
Why does DaVinci Resolve's built-in DJI D-Log preset produce oversaturated color on Air 3 footage?
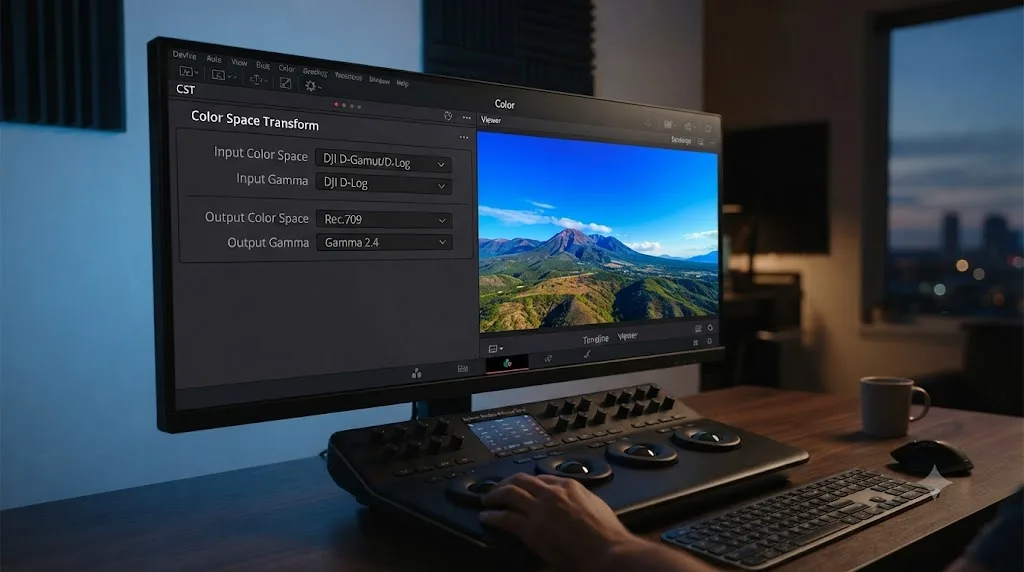
Resolve's Color Space Transform effect ships a preset literally labeled D-Log under a DJI D-Gamut input color space, and applying it to Air 3 D-Log M footage is the single most common cause of oversaturated, overly contrasty grades on this drone. That preset exists for the original D-Log profile used on older DJI aircraft, a different color characteristic from D-Log M despite sitting one dropdown click away in the same menu, under the same brand name.
Editors running into this exact wall have been comparing notes on Blackmagic's own community forums. A discussion titled directly Color correcting D-Log M with CST problem describes clips that look "weird and very saturated" the moment the DJI D-Gamut and D-Log Color Space Transform is applied to D-Log M source, with the underlying explanation coming down to D-Log M using a genuinely different, customized tonal curve than D-Log rather than a minor variant of it. A separate thread on the same forum, Color Space Transform Support for DJI DLog-M and D-Cinelike, documents the same confusion spreading across multiple DJI camera lines that share the D-Log M name, not just the Air 3.
Resolve's DJI D-Log preset was built for a different, older DJI color profile, and pointing it at D-Log M footage is exactly what turns a normal sky into an oversaturated one. This isn't a bug you can report and expect fixed with an update. It's a naming collision between two profiles DJI itself treats as distinct, sitting in a menu that doesn't make that distinction obvious until you've already graded a scene wrong.
Is D-Log M the same as D-Cinelike?
No. D-Cinelike is a third, separate flat color profile DJI ships on some of its other cameras, and if you've flown an older or cheaper DJI drone alongside your Air 3, it's worth knowing the two aren't interchangeable either.
Per DJI's own support documentation on which models support D-Log and which have official LUT files, DJI's lineup splits into three distinct color science tiers, not two:
| Profile | Example DJI models | Official conversion LUT |
|---|---|---|
| D-Log | Phantom 4 series, Mavic Pro, Inspire 3, Mavic 3 Pro | Yes, but tuned for D-Log, not D-Log M |
| D-Log M | Air 3, Air 3S, Mini 4 Pro, Mini 5 Pro, Avata 2, Osmo Pocket 3/4, Osmo Action 4/5 Pro | Yes, model-specific |
| D-Cinelike | Air 2, Mini 3 Pro, Osmo Pocket, Osmo Pocket 2, Action 2, Action 3 | Generally none |
DJI's documentation states that, broadly, only products supporting D-Log mode ship with a LUT file at all, and every D-Log M model on that list gets one specific to it. D-Cinelike sits outside that guarantee. If you've got footage from an older Air 2 or Mini 3 Pro sitting in the same project as your Air 3 clips, don't go hunting for a D-Cinelike LUT the way you would for D-Log M. There typically isn't one, and D-Cinelike behaves closer to a mild picture style than a true grading-focused log curve: it's meant to look reasonably watchable straight off the card, which is part of why DJI hasn't built the same official LUT infrastructure around it that D-Log M gets.
This is also why the confusion shows up in the same corner of Resolve as the D-Log-versus-D-Log-M problem covered above. The Blackmagic forum thread on Color Space Transform support for D-Log M and D-Cinelike, linked in the previous section, documents editors running into both naming collisions in the same discussion, because Resolve's Color Space Transform menu doesn't clearly separate any of DJI's three flat profiles from each other.
D-Log, D-Log M, and D-Cinelike are three separate DJI color profiles, and only D-Log and D-Log M ship with an official conversion LUT at all. If your project mixes footage from an Air 3 with an older DJI camera, confirm which of the three profiles that older clip actually used in Clip Attributes before you go looking for a matching LUT that might not exist.
What's the correct way to grade DJI Air 3 D-Log M footage in DaVinci Resolve?
The correct path is DJI's own D-Log M to Rec.709 LUT applied to a node, not a manual Color Space Transform built around the D-Log preset covered above. DJI publishes this LUT specifically for the Air 3's D-Log M output through its Download Center, free to download as a .cube file. That single conversion is the entire mechanism behind getting a flat D-Log M clip to a normal-looking Rec.709 image, ready for a creative grade on top.
We've walked plenty of editors through this exact drone-log confusion in our community work, and the pattern repeats almost identically every time: someone finds the DJI-labeled preset in Resolve's dropdown, assumes DJI-branded log footage matches a DJI-branded preset, and grades an entire project before noticing the color drifted. Checking DJI's own conversion first, before touching a manual Color Space Transform, avoids that entire detour.
- Confirm the clip actually recorded in D-Log M, not Normal or HLG, by checking Clip Attributes.
- Download DJI's official Air 3 D-Log M to Rec.709 LUT from its Download Center.
- Drop the .cube file into Resolve's LUT folder and refresh the LUT list.
- Apply it as a 1D/3D LUT on your first node, ahead of any creative correction.
- Grade from there the same way you would grade any Rec.709 source.
If you're mixing Air 3 footage with a different camera in the same timeline and want everything normalized into a shared working space before you grade, a manual Color Space Transform still has a role, just not through the mislabeled DJI D-Log preset. Our full guide to color matching different cameras in DaVinci Resolve covers Color Match and Shot Match for the fine-tuning pass once your Air 3 clips are already sitting in a corrected space via the official LUT.
DJI's official LUT is free, it's built for this exact profile, and it beats guessing at a Color Space Transform that was never designed for D-Log M in the first place. Once that base conversion is in place, an Air 3 clip stops looking flat or oversaturated and becomes an ordinary starting point for wheels, curves, and whatever creative look you're building toward.
How do you install and apply DJI's official Air 3 D-Log M to Rec.709 LUT in DaVinci Resolve?
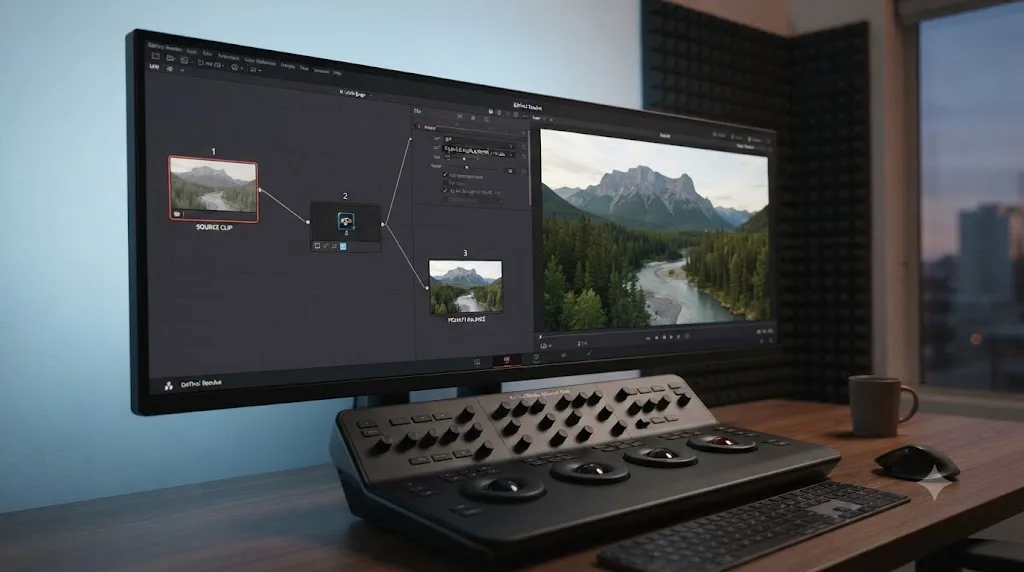
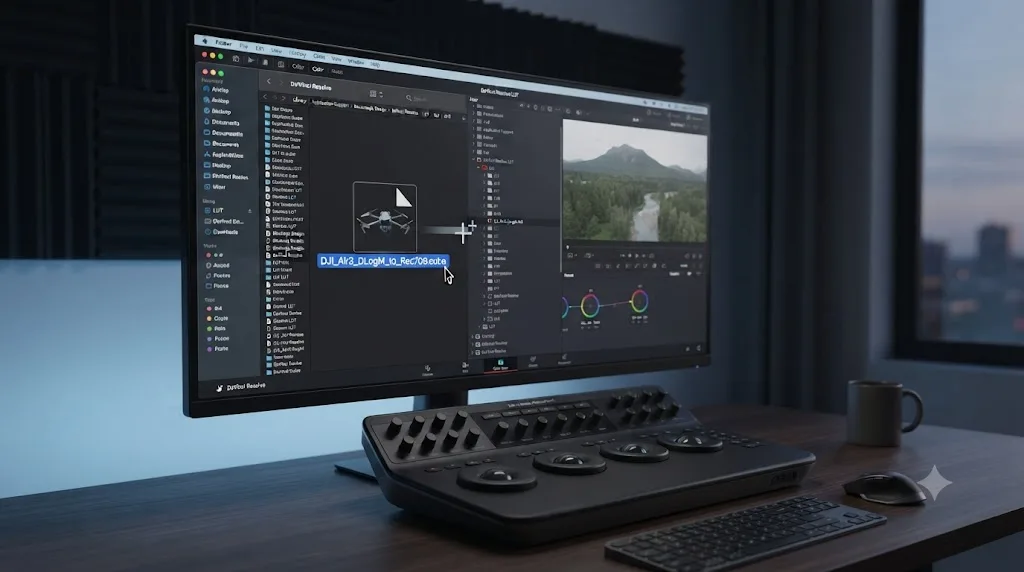
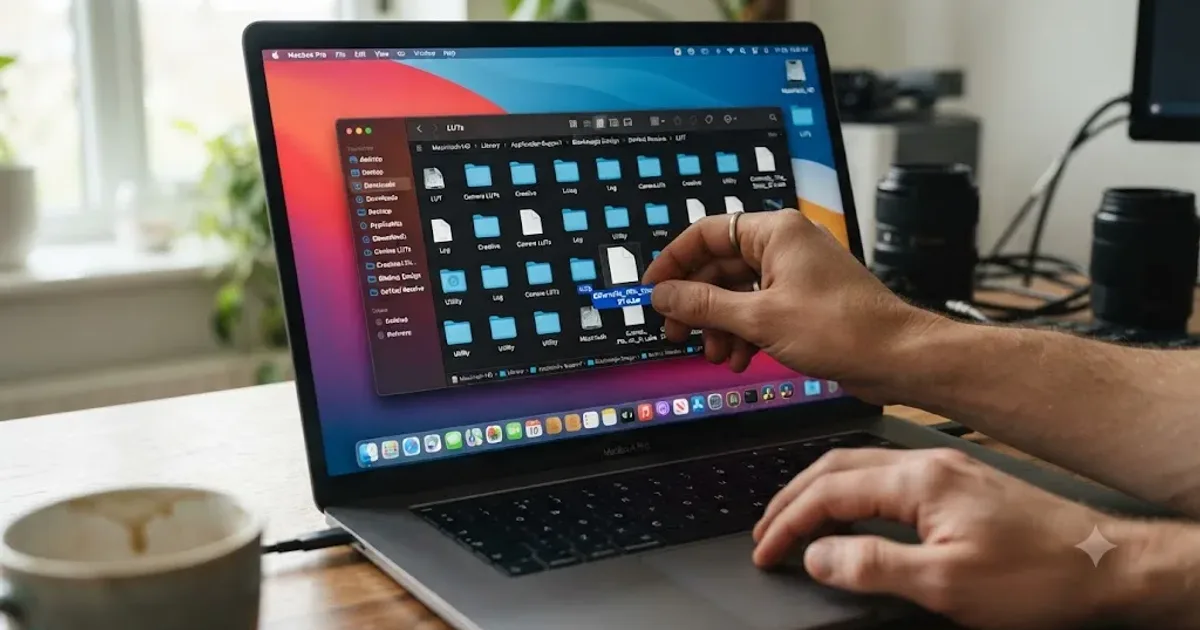
Installing the LUT is a two-minute task: drop the .cube file into Resolve's LUT folder, refresh the LUT list, and apply it to a node rather than to the clip directly. Open Project Settings, go to Color Management, and click Open LUT Folder to find the exact directory Resolve watches. Copy the downloaded Air 3 LUT into that folder, then right-click inside Resolve's LUT panel and choose Update Lists so the new file actually appears. Our full guide to installing LUTs in DaVinci Resolve covers this mechanism step by step if you've never added a custom LUT before, including the refresh bug that trips up first-timers when a freshly copied LUT doesn't show up right away.
Apply the LUT to a node, not directly to the clip through the Color Space Transform effect's own LUT-in-transform option. A node keeps the conversion visible and editable in your node tree, sitting cleanly before any creative correction you stack on top, and it's the same approach that works for camera-specific LUTs from any manufacturer, not just DJI.
It's worth knowing this exact LUT didn't exist when the Air 3 launched. Jakub Han, reviewing the drone for CineD shortly after release, described exactly this gap in practice: "I used the old D-Log M to REC.709 LUT from DJI, which was created for the Mavic 2 Pro as I could not find any newer version of the LUT. I found this LUT to be too heavy on the saturation, so I invariably had to tune it down a bit," he wrote. DJI has since published the Air 3-specific LUT linked above. If a LUT sitting in your project folder from around the Air 3's 2023 launch still carries a Mavic 2 Pro filename, replace it. Sensor and processing differences between drones mean a LUT built for one camera's D-Log M output is not a guaranteed match for another's, even when both are labeled the same way.
A LUT built for a different drone's D-Log M output can still get you close, but "close" is exactly the gap between a professional grade and a review copy someone had to manually desaturate. Use the file DJI built for your specific camera, and skip the tuning-down step Han needed on launch-week footage.
Should you bake DJI's D-Log M LUT into the clip, or keep it live on a node?
Keep it live on a node, not baked in, for as long as you're still editing and grading. A node-based LUT stays visible and editable in your color page node tree, sitting cleanly before any creative correction on top, and you can swap it, disable it, or copy it across an entire timeline of Air 3 clips in seconds if you later find a better-tuned LUT, whether that's an updated file from DJI or one of the third-party alternatives covered further down this guide.
Baking a LUT in, rendering it permanently into new media files before you edit, only makes sense in narrow situations: handing footage to an editor working in software without native LUT support, or locking in a look before archiving proxies you never intend to re-grade. Even then, keep an unbaked copy of the original D-Log M source. Once a LUT is burned into a file, getting back to the flat log image to try a different conversion means reshooting or starting over from your camera originals, not adjusting a node.
There's a performance argument for baking too, though it rarely matters on a single-drone project: pre-converting the LUT can shave a small amount of playback overhead compared to Resolve applying it live during scrub, since a baked file has already done that math once. On modern hardware editing Air 3 footage, this difference is usually too small to notice, and it's not worth trading away the flexibility a live node gives you for it. If you're already generating Optimized Media or ProRes/DNxHR proxies to fix a playback stutter, covered later in this guide, that proxy pass gets you most of the same performance benefit without permanently committing to one LUT.
A live LUT on a node costs you nothing in a typical Air 3 edit and keeps every option open; baking one in trades that flexibility for a performance gain you'll rarely actually need. Default to the node. Only bake in when you have a specific, narrow reason to.
Why doesn't DaVinci Resolve have a dedicated Color Space Transform preset for D-Log M?
Resolve has no dedicated D-Log M preset because DJI has never published the technical documentation needed to build one, unlike some other manufacturers' log formats. Zeb Gardner, a colorist who built and published a custom power grade for D-Log M after running into this exact wall, laid out the mechanism plainly: "For files from a Canon camera encoded with Clog, Canon has provided documentation on the math behind this color space and how to convert it to others. With this documentation Black Magic was able to build a Color Space Transform (CST) inside Davinchi Resolve to allow basically 1 click conversion to the Rec 709 color space we commonly want to export to," Gardner wrote. He continued with the DJI side of that comparison directly: "DJI has refused to provide any documentation for D-Log-M, so it is basically black box."
That's the entire root cause in one sentence. A manufacturer publishes its log math, and Blackmagic can build a one-click, mathematically accurate Color Space Transform preset around it. A manufacturer doesn't, and Resolve has nothing to build that preset from, regardless of how popular the camera is or how many editors are asking for one. DJI's own D-Log, the older profile Resolve's built-in DJI D-Log preset is actually tuned for, apparently cleared whatever bar the newer D-Log M has not, which is exactly why that older preset exists in the dropdown while nothing equivalent exists for D-Log M specifically.
That gap is also why a small market of third-party D-Log M LUTs and power grades exists at all, Gardner's own release among them, alongside packs like gamut.io's DJI BaseLUTs, built specifically for D-Log/D-Log M on the Air 3 and Mavic 3 lines. Those exist to fill a gap DJI's own official LUT, imperfect as any single fixed conversion is, at least closes reliably enough for most projects. Gardner's own pitch for his alternative makes the tradeoff explicit: "The significant difference between my power grade and the DJI lut is the shadows, you will see significant more detail retained," he wrote, a genuine claim worth testing against your own footage before you commit a whole project to either option.
Gardner built that power grade around the DJI Mini 4 Pro rather than the Air 3 specifically, reverse-engineering D-Log M's tone curve through systematic exposure and color-chart testing since DJI wouldn't hand over the math. The result, a free Resolve DPX power grade plus two .cube LUT versions, is worth trying on Air 3 footage too, since both cameras share the same D-Log M profile covered in the table earlier in this guide. It won't always beat DJI's own LUT: Gardner's own pitch is a shadow-detail improvement, not a universal upgrade, and any fixed conversion, official or third-party, is a starting point for a grade, not the finished look. Treat a third-party LUT the way you'd treat any preset: pull it up, compare it against DJI's official file on the same clip, and keep whichever one gets you closer to your intended look with less correction on top.
D-Log M has no dedicated Color Space Transform preset in Resolve because DJI has never published the math behind it, not because Blackmagic overlooked a popular camera. DJI's official LUT and a small handful of third-party alternatives exist specifically to cover a documentation gap that, as of July 2026, DJI hasn't closed.
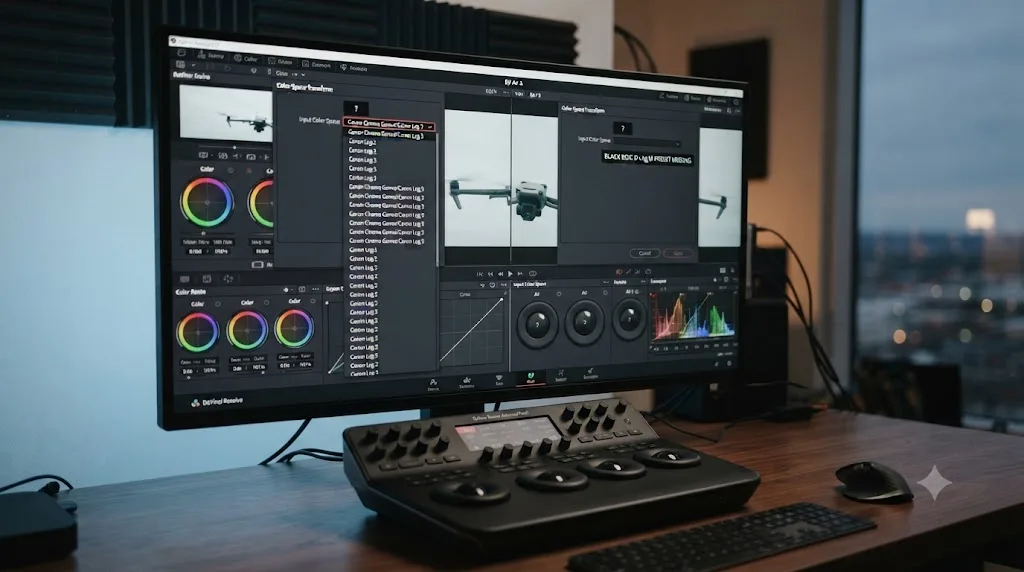
What ISO should you shoot D-Log M at on the DJI Air 3?
Stay within ISO 100 to 1600, the documented range for D-Log M on the Air 3. According to specs referenced from DJI's own product pages and confirmed in DC Rainmaker's detailed review of the camera, Normal color mode extends to ISO 6400 and Night mode reaches ISO 12800, but D-Log M and HLG both cap at 1600. That's not an arbitrary software limit. D-Log M's tonal curve is built around the sensor behavior across that specific range, and pushing past it by forcing a workaround trades a brighter preview for noise and color response the curve was never tuned to handle cleanly.
| Color mode | ISO range | Bit depth / codec |
|---|---|---|
| Normal | 100-6400 | 8-bit 4:2:0, H.264/H.265 |
| D-Log M | 100-1600 | 10-bit 4:2:0, H.265 |
| HLG | 100-1600 | 10-bit 4:2:0, H.265 |
| Night | Up to 12800 | Normal color only |
This matters most in low light, exactly the situation where a wider ISO range would otherwise tempt you. If a shot needs more sensitivity than D-Log M's ceiling offers, Night mode is DJI's own answer, not a manual ISO override on top of D-Log M, and Night mode records in Normal color rather than D-Log M, so you lose the grading latitude in exchange for the extra stops of sensitivity.
D-Log M's ISO range is narrower than Normal color's on purpose, and the ceiling exists because that's the range the profile's tonal curve was actually designed around. Shoot inside it, and the LUT conversion covered above does the job it was built to do. Push past it, and you're asking a fixed conversion to handle sensor data it was never calibrated against.
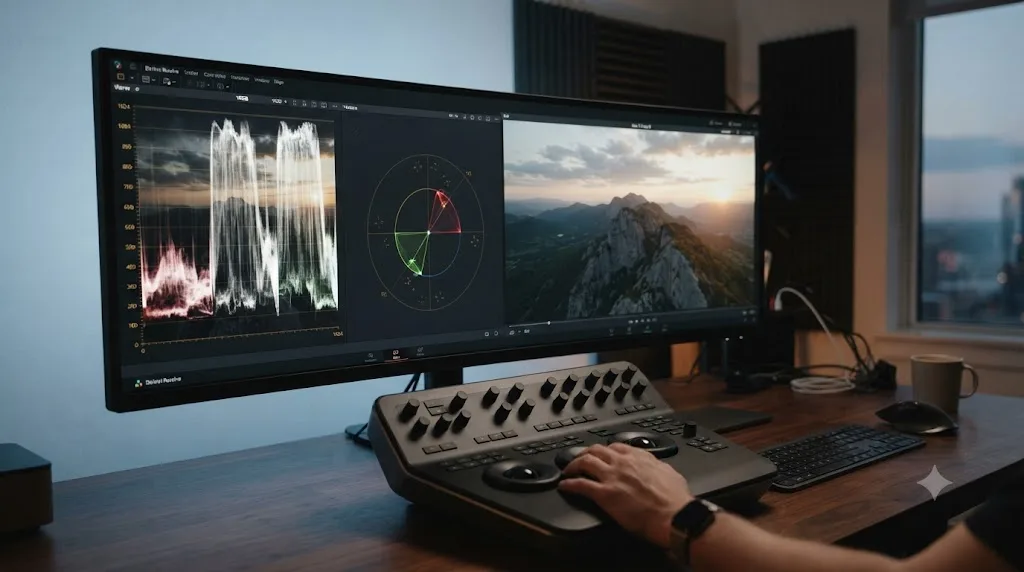
Should you lock white balance before a D-Log M flight?
Yes. Leave white balance on Auto through a flight and D-Log M's flat curve will show you every shift the camera makes as the light changes, the sky angle changes, or you fly between sun and shade, all of which becomes visible the moment you push contrast back into the image during the grade.
The Air 3 lets you set white balance manually in Kelvin through the DJI Fly app rather than leaving it on Auto, and the app's Advanced Settings panel includes a Histogram and an Overexposure Warning specifically because D-Log M's flat, low-contrast preview makes it hard to judge exposure by eye alone, per DJI's own Air 3 downloads and manual resources. Lock a Kelvin value that matches your lighting conditions for the flight, check exposure against the histogram rather than the on-screen preview, and you'll spend less time in Resolve correcting a color or exposure drift that a locked setting would have prevented at the source.
This matters more on longer flights than short ones. A three-minute establishing shot rarely drifts enough to notice. A twenty-minute real estate flight that starts in direct sun and ends under a cloud bank is a different story, and Auto white balance will happily follow that change clip by clip, handing you a sequence that needs per-clip correction instead of one shared LUT pass. It's exactly the kind of drift the real estate example later in this guide sidesteps, since that flight stays short enough, and the light stable enough, to avoid it.
A locked, manual white balance on the Air 3 turns D-Log M's grading latitude into time saved rather than time spent, since a stable source needs one correction, not one per clip. If you're already this deep into getting D-Log M's color right in Resolve, the cheapest fix is still the one you make before you take off.
Should you shoot Normal, HLG, or D-Log M on the Air 3?
This decision happens before you ever open Resolve, and it sets how much correction work is waiting for you once you do.
| Mode | Best for | Tradeoff |
|---|---|---|
| Normal | Same-day delivery, no grading time budgeted | Least dynamic range and correction latitude; 8-bit limits how far you can push exposure or white balance |
| HLG | HDR delivery without a heavy manual grade | Needs an HDR-aware delivery pipeline; looks flat on SDR displays without conversion |
| D-Log M | Anything getting a real color grade, matching with other log sources | Requires the LUT conversion covered above before it looks like a finished image |
Both HLG and D-Log M share the same ISO 100-1600 ceiling and the same 10-bit 4:2:0 H.265 encoding on the Air 3, so the choice between them isn't about dynamic range capture, it's about how much of the finishing work you want to do yourself versus how much you want the drone's own processing to handle. HLG is designed to look reasonably close to a finished image on an HDR-capable display straight off the card. D-Log M is designed to look wrong until you've applied a conversion, in exchange for more room to correct exposure, white balance, and contrast after the fact.
Normal color is built to look acceptable with zero post-production time, and D-Log M is built to look wrong until you fix it, and confusing the two wastes the reason you picked either mode in the first place. If you shot a flight in D-Log M expecting a delivery-ready file, or shot Normal color expecting D-Log M's correction latitude, that mismatch is a shooting decision, not a Resolve problem, and no color setting in this guide fixes footage captured in the wrong mode.
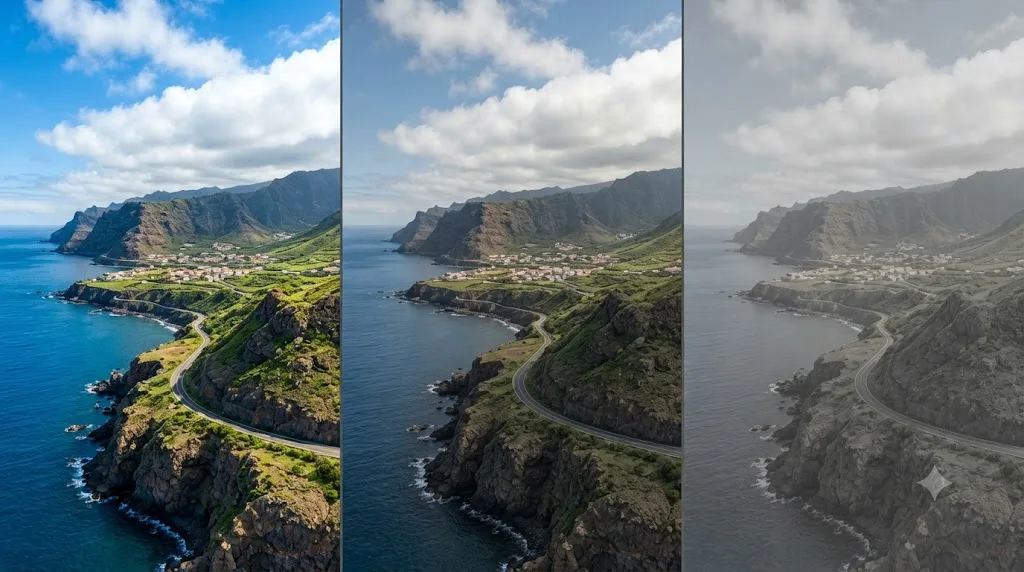
Does D-Log M support the Air 3's slow-motion modes?
Probably not, though DJI's own published specs don't spell this out clearly enough to say for certain. The Air 3 offers 4K at up to 100fps and Full HD at up to 200fps in a dedicated slow-motion mode, per CineD's coverage of the drone's release, separate from the standard frame rates, 24 through 60fps at 4K, that Normal, HLG, and D-Log M all share.
Here's the honest answer: DJI's specs pages and FAQ don't explicitly confirm whether D-Log M stays selectable once you switch into the Air 3's slow-motion recording mode, and this guide isn't going to invent a firm yes or no on a detail neither DJI's documentation nor the reviews cited throughout this guide pin down clearly. What's consistent across drones in this class, and worth checking directly in the DJI Fly app before you plan a shoot around it, is that high frame rate slow-motion modes often force a simpler, lower-bit-depth color pipeline, because the extra frames alone already push the encoder and storage bandwidth hard at up to 150Mbps.
If your shoot genuinely needs both D-Log M's grading latitude and 100fps slow motion in the same clip, the safest plan is to test it before the shoot that matters. Open the DJI Fly app, switch to slow-motion mode, and check whether D-Log M is still an option in the Color menu or whether it silently reverts to Normal. That two-minute check on a driveway test flight beats discovering the answer during a client edit.
If D-Log M isn't available in slow-motion on your firmware, your slow-motion shots will come in as Normal color instead, and grading them means treating them the same way this guide treats Night mode footage further down: no LUT, direct correction, matched to the rest of your sequence by eye and by scopes rather than through a shared conversion.
Whether D-Log M survives a switch to the Air 3's 100fps slow-motion mode isn't something DJI's own documentation confirms clearly, so test it on your own drone before you plan a shoot around it. A quick check in the DJI Fly app costs you two minutes. Finding out mid-edit costs you a re-grade.
How do you grade footage from the Air 3's two cameras so it matches?
Grade both cameras through the same D-Log M to Rec.709 LUT first, then cross-check on scopes, since identical sensors don't guarantee identical color once different lenses and apertures are involved. The Air 3's wide camera runs a 24mm-equivalent f/1.7 lens and its medium tele camera runs a 70mm-equivalent f/2.8 lens, both on matching 1/1.3-inch, 48-megapixel sensors, per DJI's specs page. Same sensor generation, same color science, same D-Log M profile on both, which is why most editors find the two cameras track closely after the LUT conversion.
"Closely" isn't "identically." Different apertures pass light differently, different focal lengths compress a scene's exposure gradient differently, and DJI's own image processing pipeline can still apply subtle per-lens tuning even on a shared sensor platform. Digital Camera World's review of the Air 3 noted the practical upshot directly: "video doesn't seem to have consistency issues when switching cameras," the review found, a reasonably strong endorsement, though "doesn't seem to have issues" and "requires zero verification" aren't the same claim. Cross-check a shared reference point, sky, a consistent ground element, skin tone if people are in frame, on your parade and waveform scopes after applying the LUT to both cameras, before you commit to a cut that intercuts wide and tele shots from the same flight.
One structural limitation is worth planning around before you shoot rather than discovering it in the edit: the same Digital Camera World review flagged that you "can't switch cameras while shooting," meaning a single continuous take is locked to one lens for its full duration. If you need both the wide establishing shot and the tele detail shot from the same moment, that's two separate clips from two separate passes, not one clip you can crop or reframe your way out of after the fact.
Two identical sensors under two different lenses will grade close, not automatically identical, and the fix is a thirty-second scope check, not a full re-grade. Treat the Air 3's dual-camera system the way you'd treat any two-camera shoot: normalize first with the shared LUT, then verify, rather than assuming a shared sensor generation means a shared result without looking.
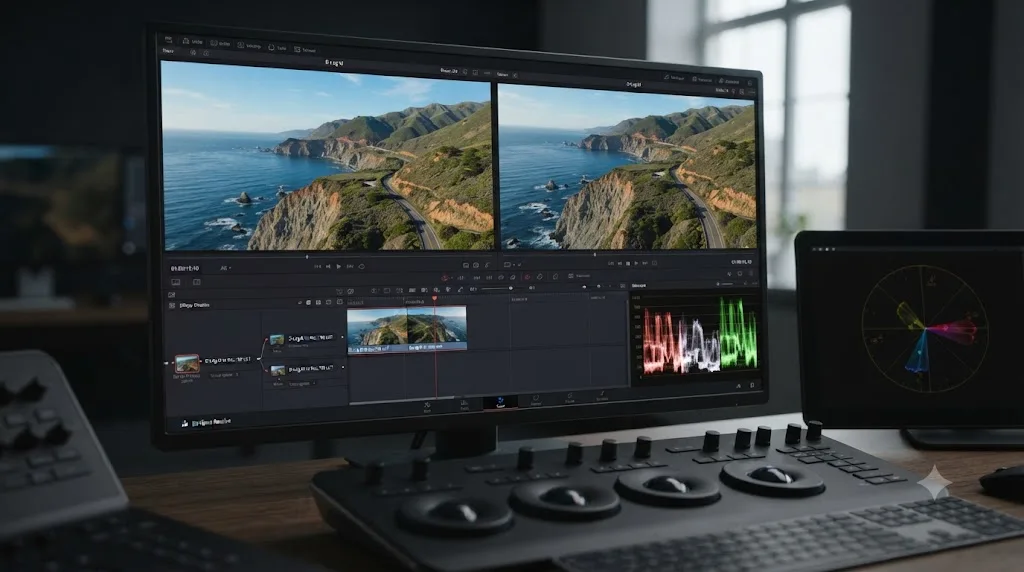
What if the two cameras still don't match after the LUT and a scope check?
Reach for Resolve's Color Warper or RGB Mixer before you reach for a second LUT. A shared D-Log M to Rec.709 LUT handles the bulk of the conversion identically on both the wide and tele cameras, but a persistent, consistent shift, a tele camera that reads slightly warmer or a wide camera that holds a touch more saturation in greens, is a job for a small, targeted secondary correction, not a different base conversion.
Add a second node after the LUT, specifically on the camera that's drifting, and use Color Warper's hue-vs-hue and hue-vs-sat controls to nudge the specific color range that's off, sky blues, foliage greens, skin tones, without touching the rest of the image. RGB Mixer works for a more global channel-level shift if the drift reads as an overall warm or cool cast rather than a specific hue problem. Either tool keeps the correction isolated to one camera's clips through a power grade or adjustment clip you can apply across every shot from that lens in one pass, rather than hand-correcting each clip individually.
Keep this correction small. If you find yourself pushing wheels or curves hard to make two cameras match, stop and check whether the real problem is exposure or white balance drift within a single camera's clips rather than a genuine sensor-to-sensor difference, since that's a far more common cause of a stubborn mismatch than the cameras themselves.
A secondary Color Warper or RGB Mixer pass on the drifting camera fixes a persistent two-camera mismatch far more reliably than reaching for a different base LUT. Most Air 3 footage never needs this step. When it does, it's a small, isolated fix, not a sign the shared LUT conversion failed.
How do you grade an Air 3 project alongside footage from a different camera's log profile?
Convert every source to the same working space before you start matching looks, not after. If you're cutting Air 3 D-Log M drone shots into a project built mostly from a Sony S-Log3, Canon C-Log, or Panasonic V-Log main camera, apply each source's own correct conversion first: DJI's D-Log M LUT on the drone clips, and whatever your main camera vendor provides or Resolve's own Color Space Transform supports for the main camera's log profile. Only once everything is sitting in the same Rec.709 (or wider) working space does a shot-to-shot color match actually mean anything.
Resolve's Color Space Transform already ships built-in input color spaces for the main log formats you're likely mixing an Air 3 with, which is part of what makes DJI's own documentation gap, covered earlier in this guide, so noticeable by comparison:
| Camera / log profile | Resolve's CST input color space |
|---|---|
| Sony S-Log3 | S-Gamut3.Cine / S-Log3 (or S-Gamut3 / S-Log3) |
| Canon C-Log2 / C-Log3 | Canon Cinema Gamut / Canon Log 2 or 3 |
| Panasonic V-Log | Panasonic V-Gamut / V-Log |
| DJI D-Log M | No dedicated preset; use DJI's official LUT instead |
This order matters because log curves aren't interchangeable shortcuts. Applying an S-Log3-to-Rec.709 conversion to a D-Log M clip, or vice versa, produces the same kind of wrong result covered in the troubleshooting table further down this guide: color that looks approximately plausible but is built on math the clip was never encoded against. Convert first, per source, then match.
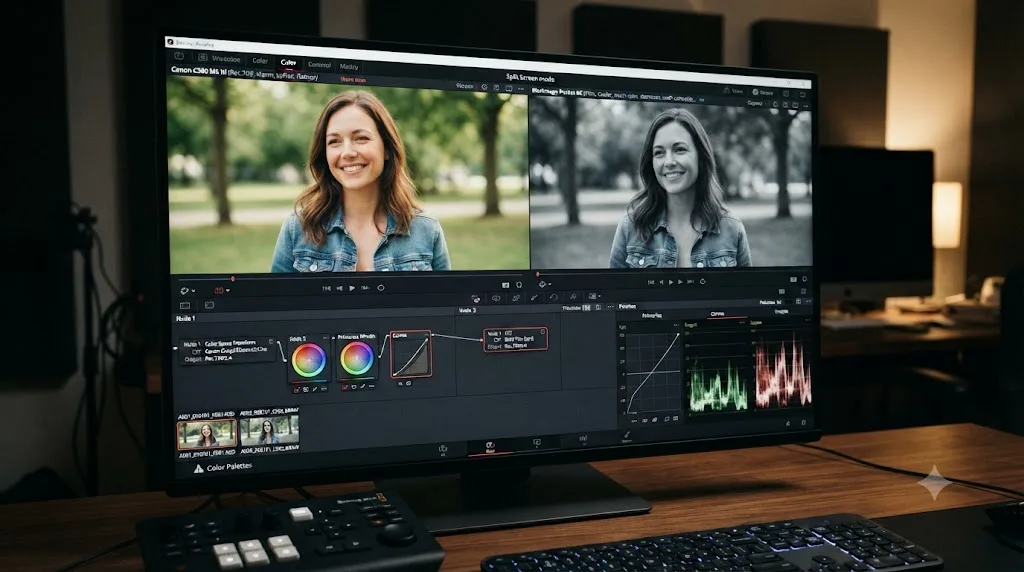
Once both sources are converted, Resolve's Color Match tool on the Color page gives you a fast first pass: sample a reference frame from your main camera and a corresponding frame from the drone shot, and let Resolve propose a correction. Treat that proposal as a starting point, not a finished grade. Our full guide to color matching different cameras in DaVinci Resolve covers Color Match and Shot Match in more depth, including when to trust the automated match and when to override it by hand.
Drone footage has one structural quirk worth planning around here: an Air 3 shot is almost always a wide establishing or moving shot, rarely a close, matched composition to a ground-camera shot in the same scene. That makes exact frame-for-frame matching less critical than it would be for two ground cameras covering the same close-up. Aim for the drone shot to sit comfortably in the same overall color world as the rest of the sequence rather than pixel-matching a shot type that was never meant to intercut tightly with the rest of your footage.
Convert each camera's log footage to the same working space with its own correct tool before you try to match them, since matching two clips that are still sitting in two different log curves compares nothing meaningful. An Air 3 shot dropped into a multi-camera project is a color-matching problem like any other, once, and only once, its own D-Log M conversion is already done.
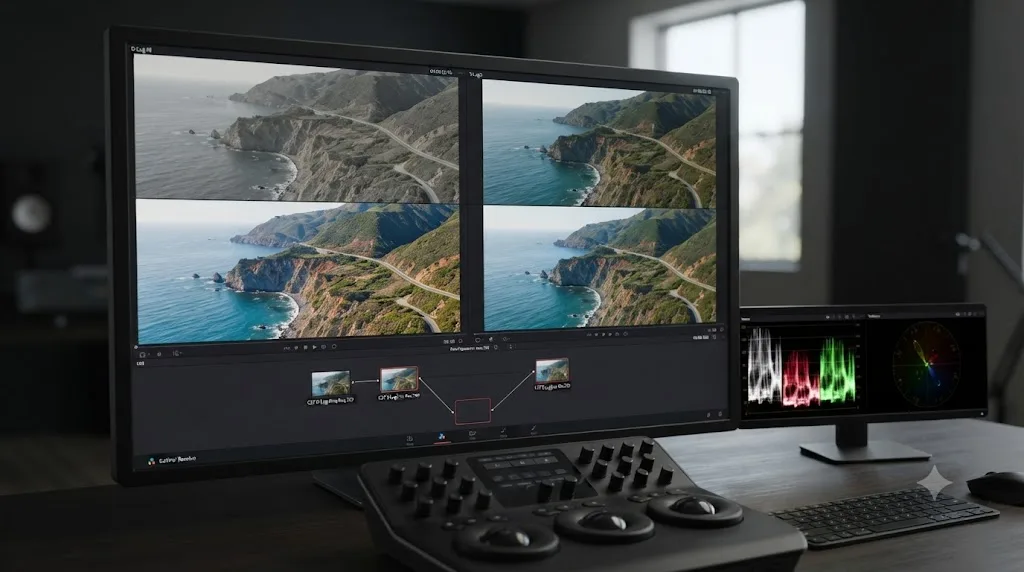
Why does D-Log M footage still look wrong after you've applied a LUT or Color Space Transform?
Work through these in order before assuming the footage itself is the problem.
First, the wrong preset. Confirm you're using DJI's official D-Log M to Rec.709 LUT, not Resolve's built-in DJI D-Log Color Space Transform preset, covered in detail earlier in this guide. They sit close together in the interface and share a brand name, but they're built for different profiles entirely.
Second, a mismatched LUT source. If you're using a LUT downloaded before DJI published the Air 3-specific file, or one built for a different DJI drone, that older or borrowed LUT can produce the same oversaturated look Jakub Han described when reviewing launch-week Air 3 footage. Download the current file linked in DJI's Download Center for the Air 3 specifically.
Third, log-on-log. If a clip looks crushed, oversaturated, or hue-shifted in a way that doesn't respond normally to your color wheels, check whether a LUT and a Color Space Transform are both applied to the same clip, doubling the conversion. This is an easy mistake to make while experimenting with the DJI D-Log preset before realizing it's wrong, then forgetting to remove it once you switch to the correct LUT.
Fourth, check the clip's actual color mode. The Air 3 offers Normal, HLG, and D-Log M, and a clip shot in HLG can look flat enough at a glance to get mistaken for D-Log M, especially deep into a long shoot day. Applying a D-Log M LUT to HLG footage, or vice versa, produces a specific kind of wrong that looks like an incomplete conversion because it is one, just applied to the wrong source.
Fifth, exposure outside the ISO 100-1600 range covered above. Footage pushed past that ceiling through a manual override can grade oddly no matter which conversion method you use, since the LUT's math assumes exposure behavior inside that documented range.
Sixth, cutting D-Log M next to Night mode or another camera's log footage without converting each source correctly first. A Night mode clip run through the D-Log M LUT, or a main camera's S-Log3 clip run through DJI's LUT by mistake, produces a specific, recognizable kind of wrong: color that looks like an incomplete or doubled conversion because it is one. Sort every clip by its actual source and color mode before you build your node graph, not after you notice something looks off.
| Symptom | Likely cause | Fix |
|---|---|---|
| Oversaturated, overly contrasty color, blues especially | Resolve's built-in DJI D-Log Color Space Transform applied to D-Log M footage | Switch to DJI's official Air 3 D-Log M to Rec.709 LUT |
| Color close but noticeably too saturated | Using an older or borrowed D-Log M LUT built for a different DJI drone | Download the current Air 3-specific LUT from DJI's Download Center |
| Crushed color that won't respond to normal grading | A LUT and Color Space Transform both applied to the same clip | Remove one; don't convert the same clip twice |
| Washed out and low-contrast no matter what you adjust | Clip was shot in HLG or Normal, not actually D-Log M | Check Clip Attributes for the real color mode before reapplying the LUT |
| Noisy, muddy shadows after grading | Footage exposed past ISO 1600 via a manual override | Re-expose within the documented ISO 100-1600 range, or shoot Night mode instead |
| Two Air 3 cameras don't quite match in a cut | Different lens and aperture between wide and tele, even on matching sensors | Cross-check both on scopes after the shared LUT conversion |
| Night mode or a different camera's log clip looks broken after the Air 3 LUT | DJI's D-Log M LUT applied to footage that was never D-Log M | Grade or convert each source with its own correct tool, covered earlier in this guide |
| Older DJI drone's D-Cinelike footage won't take a LUT at all | D-Cinelike ships with no official conversion LUT on most models | Grade it directly, or build a manual Color Space Transform approximation, since no fixed conversion exists |
Most D-Log M color problems on the Air 3 trace back to one of two things: the wrong conversion tool, or a clip that wasn't actually shot in D-Log M to begin with. Work through this table top to bottom before you assume your footage is somehow bad or your machine is misbehaving.
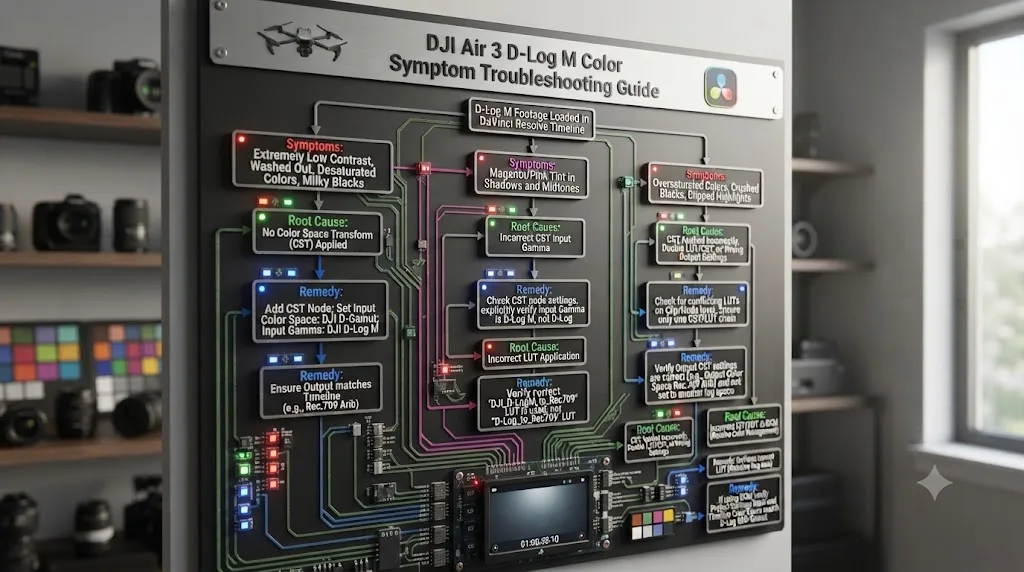
Do you need DaVinci Resolve Studio to grade DJI Air 3 footage?
Not for the color correction workflow this guide covers. Applying DJI's D-Log M to Rec.709 LUT on a node, and grading in Rec.709 from there, works identically in the free version of Resolve, with no functional restriction tied to a Studio license.
Where Studio actually earns its keep with Air 3 footage is decode performance and, less commonly, noise reduction. Blackmagic's own free version product page caps its stated support at, in the company's words, "virtually all 8-bit video formats," per the free product page, and Air 3 D-Log M footage is 10-bit by design. In practice, plenty of 10-bit H.265 footage decodes fine in the free version on modern hardware, but if you're on an older machine, or specifically on Windows without hardware-accelerated H.265 decode, Studio's broader decode support closes a real gap the free version leaves open. Puget Systems' breakdown of hardware H.264/H.265 decoding in Resolve documents this specifically for Windows, where compatible Nvidia and AMD GPUs can offload H.265 decode work under Studio that the free version otherwise leaves to the CPU alone.
The second, smaller reason is noise reduction. Footage shot near D-Log M's ISO 1600 ceiling shows more visible grain once it's pulled out of the flat log curve and into a normal-contrast grade, and Resolve's Temporal and AI-assisted Spatial noise reduction tools are Studio-only, per Blackmagic's Studio product page. Most Air 3 footage shot well within its documented ISO range won't need this, but a dusk or dim-interior flight pushed toward ISO 1600 might.
Getting DJI Air 3 D-Log M footage to grade correctly is a color management problem, and color management is not a feature Blackmagic gates behind the Studio license. Don't let a general free-versus-Studio comparison talk you into a $295 purchase just to fix color that's actually one LUT away from correct. Reach for Studio only if you've hit a genuine decode wall or specifically need noise reduction on a high-ISO shot.
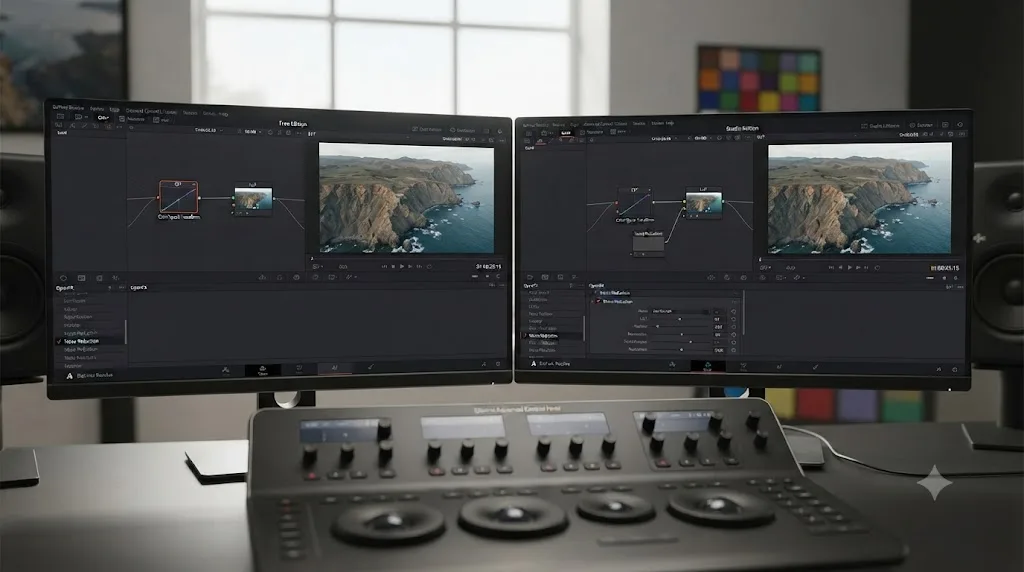
Why won't DaVinci Resolve import or play DJI Air 3 D-Log M footage smoothly?
If your problem isn't color at all, and clips stutter, refuse to decode, or crash Resolve outright, that's a codec decode issue separate from everything covered above. D-Log M on the Air 3 records at up to 150 Mbps in 10-bit H.265, per DJI's own newsroom announcement of the drone, a codec that compresses efficiently for storage but is expensive to decode in real time without hardware acceleration.
On Windows specifically, Microsoft doesn't ship native HEVC decoding, and free Resolve doesn't implement its own HEVC decoder there either. That combination can mean a Windows machine running free Resolve genuinely fails to play, or fails to import at all, footage that decodes without complaint on a Mac, where macOS provides HEVC decoding at the operating system level that free Resolve can lean on. Richard Lackey, writing a detailed technical breakdown of AVC and HEVC handling in Resolve, put the underlying risk plainly: "Just because Resolve will read your AVC or HEVC encoded camera files, doesn't mean it will play them back at full resolution in real-time," he wrote, recommending exactly the fix that applies here: transcode to an intermediate codec before editing rather than fighting the original camera codec through an entire project.
The practical fix on Windows is straightforward: install "HEVC Video Extensions" from the Microsoft Store, a small paid add-on typically under a dollar, and restart Resolve before importing again. If playback still stutters once files decode at all, that's a separate, more common issue on longer 4K60 or 4K100 D-Log M clips: build lighter proxies instead of fighting the original codec on every scrub.
- Right-click a clip or bin in the Media Pool and choose Generate Optimized Media.
- Set your proxy resolution under Project Settings, Master Settings, Optimized Media and Render Cache, typically Quarter Resolution for 4K Air 3 footage on a mid-range machine.
- Choose ProRes on Mac or DNxHR on Windows as your proxy codec.
- Edit against the lighter proxy, then let Resolve relink to full-resolution originals automatically for your final render.
Our full guide to proxy media setup for a slow laptop walks through the exact Project Settings panel and a decision tree for which resolution tier fits your specific hardware, if the quick version above doesn't fully resolve your case.
A stuttering or unplayable Air 3 clip is almost never a color problem, and no LUT or Color Space Transform setting fixes a decode limitation. Confirm which platform and version of Resolve you're running before you spend an editing session troubleshooting color on a file that hasn't actually decoded smoothly in the first place.
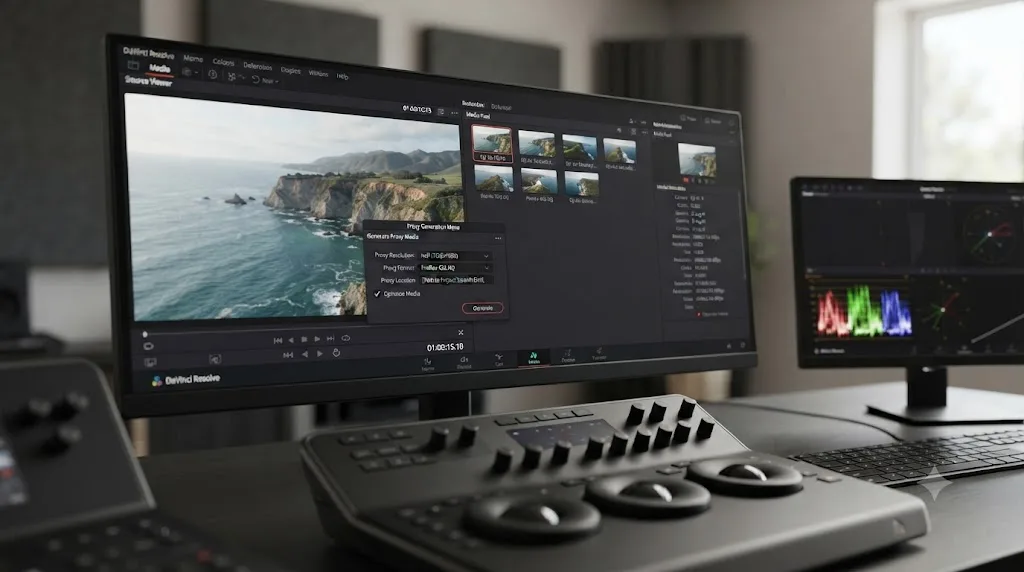
Does this D-Log M grading workflow change on the newer DJI Air 3S?
The core problem and fix stay the same, but two specs shift enough to matter. DJI released the Air 3S with an upgraded 1-inch primary sensor alongside a 1/1.3-inch medium tele camera, a step up from the Air 3's matching 1/1.3-inch sensors on both lenses, per the DJI Store's own Air 3S versus Air 3 comparison page. DJI rates the Air 3S's primary camera for roughly 14 stops of dynamic range against the Air 3's smaller-sensor figures, and the Air 3S extends D-Log M's ISO ceiling to 3200, double the Air 3's 1600 cap.
None of that changes the underlying Color Space Transform problem covered throughout this guide. Resolve still has no dedicated D-Log M preset, for the same documentation reason Zeb Gardner laid out earlier, and Resolve's built-in DJI D-Log preset still targets the older, unrelated D-Log profile rather than either drone's D-Log M output. What does change is which official LUT you need. DJI publishes a separate D-Log M to Rec.709 LUT specifically for the Air 3S, tuned for that camera's larger primary sensor, distinct from the Air 3's own file linked earlier in this guide.
| Spec | DJI Air 3 | DJI Air 3S |
|---|---|---|
| Primary camera sensor | 1/1.3-inch, both lenses | 1-inch primary, 1/1.3-inch medium tele |
| D-Log M ISO ceiling | 1600 | 3200 |
| Approximate dynamic range | Not officially quoted in stops | Up to 14 stops, per DJI |
| D-Log M to Rec.709 LUT | Air 3-specific file | Air 3S-specific file |
| Resolve CST preset for D-Log M | None | None |
Same missing preset, same fix, different sensor, different LUT file. If you're grading a mixed project with footage from both drones, treat them as two separate D-Log M sources needing their own matching LUT, then normalize the result the same way you'd match any two different cameras.
What changes if you're cutting D-Log M next to Night mode footage?
Night mode footage never went through D-Log M in the first place, so it needs a completely different approach in the grade, not a LUT. As covered in the ISO section earlier in this guide, the Air 3's Night mode records in Normal color, not D-Log M, and reaches up to ISO 12800 specifically because it's built for situations where D-Log M's ISO 1600 ceiling isn't enough light to work with.
That means DJI's D-Log M to Rec.709 LUT has nothing to do on a Night mode clip. Applying it anyway does nothing useful and can shift color in ways that look like a broken conversion, because it is one: a LUT built for D-Log M's specific tonal curve applied to footage that was never encoded with that curve. Leave Night mode clips out of the LUT node entirely and grade them the way you'd grade any Normal color source, correcting exposure, white balance, and contrast directly rather than through a log-to-Rec.709 conversion step.
The harder part is matching a Night mode clip to the D-Log M clips around it in the same sequence. Night mode footage arrives already fairly close to a finished look, since Normal color is designed to look reasonably acceptable straight off the card, while your D-Log M clips are starting from a flat, corrected-then-graded image. Match them the same way you'd match any two different sources in the same project: get both into a similar overall contrast and color temperature range first, then fine-tune with a shared creative look, rather than expecting them to align automatically because they came off the same drone.
A Night mode clip on the Air 3 skips D-Log M entirely, so it needs direct correction, not a LUT built for a profile it was never recorded in. If a dusk-to-dark flight mixes both modes, sort clips by color mode in Clip Attributes before you start grading, so a Night mode clip doesn't end up under a LUT node meant only for D-Log M.
What does the full grading workflow look like on a real clip, start to finish?
Here's the whole process applied to a scenario that comes up constantly: a real estate videographer flies an Air 3 over a property at golden hour, mixing wide establishing shots with tele detail shots of the roofline and landscaping, all in D-Log M, then imports everything into Resolve that evening.
First, the import itself goes cleanly. Both cameras recorded 10-bit H.265 D-Log M, and this particular machine, a recent Mac, decodes it without issue. No codec troubleshooting needed before color even starts.
Second, every clip in the Media Pool looks flat and grey, exactly as expected. Nothing gets mistaken for a broken transfer, since that's the correct, unfixed appearance of D-Log M straight off the drone.
Third, the color fix goes on. DJI's official Air 3 D-Log M to Rec.709 LUT, already downloaded and sitting in Resolve's LUT folder from a previous project, gets applied to a node on every clip from both cameras. The footage stops looking flat and starts looking like a normal, gradeable image.
Fourth, a quick scope check compares a wide shot and a tele shot of the same roofline, confirming the two cameras track closely enough after the LUT conversion that no per-camera adjustment is needed beyond the shared conversion already applied.
Fifth, the creative grade goes on top: a slight warmth pushed into the golden-hour highlights, a touch more contrast in the midtones, consistent across every clip since they're all starting from the same corrected base.
Sixth, and last, one long tele shot of the property's full exterior stutters on scrub despite the color already being correct. Optimized Media gets generated for that specific clip at Quarter Resolution, playback smooths out, and the full-resolution original swaps back in automatically for the final render.
That workflow covers a single-camera, single-mode flight. Here's how it changes for a wedding videographer flying the Air 3 alongside a Sony a7 IV shooting S-Log3, cutting between drone shots, ceremony coverage, and a couple of dusk reception shots that needed Night mode.
First, each source gets its own conversion before anything else. The Sony clips get graded through Resolve's Color Space Transform set to S-Gamut3.Cine/S-Log3, while the Air 3's D-Log M clips get DJI's official LUT on a node, same as the real estate example above. The Night mode reception clips get neither treatment, since they never left Normal color, and go straight into direct correction instead.
Second, matching happens only after that first step, not before. A frame from the S-Log3 ceremony footage and a frame from the drone's aerial establishing shot, both already converted, go through Resolve's Color Match on the Color page for a first pass, then get manually refined against scopes the same way the real estate example matched its two Air 3 cameras.
Third, the Night mode reception shots get graded on their own terms: correcting exposure and white balance directly, then nudging their look toward the same warm, slightly lifted-shadow feel established across the rest of the edit, not through a shared LUT, since none applies, but through matching contrast and color temperature by eye and by scopes.
Fourth, the finished sequence cuts between three different sources, none of them treated identically in the node graph, all of them landing in the same visual neighborhood by the time the audience sees them.
When the menus alone don't get you there fast enough
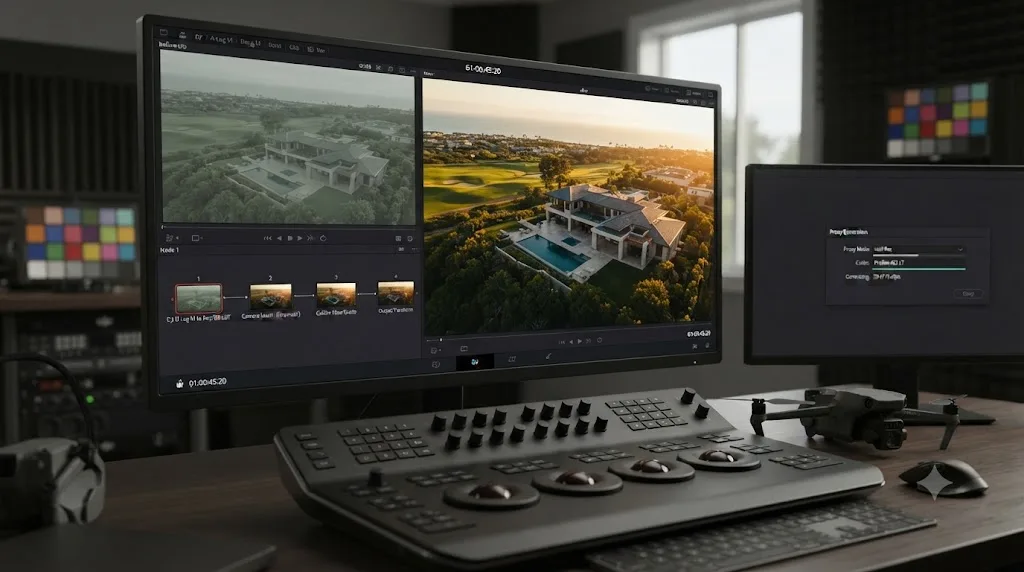
Everything in this guide is a settings problem with a settings answer, but finding the right one under a deadline, especially the first time you're bouncing between the LUT panel, the node graph, and Clip Attributes trying to confirm exactly what a clip actually is, is its own kind of friction.
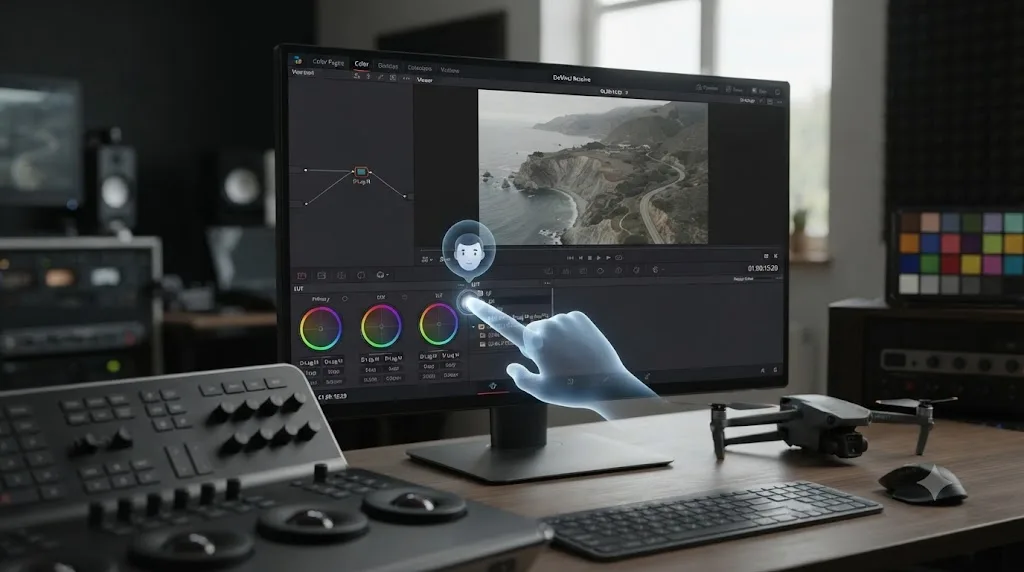
TryUncle is the on-screen assistant for DaVinci Resolve on macOS. Ask in plain words and Uncle points at the exact control on your screen, rather than sending you back to a forum thread about a different DJI drone with different settings than yours. It's a paid app, currently in founder pricing at $29.99 a month for the first 100 seats, and it's macOS only, so it won't help a Windows editor working through the HEVC decode issue covered earlier. The category has other tools built on a different premise: Sottocut, PremiereCopilot, heyeddie.ai, and cutagent.ai mostly automate parts of an edit or answer chat questions about your footage, rather than watching your live screen and pointing at the actual control you need. If your goal is finding the right LUT panel or node setting faster while you're still the one making the decisions, on-screen guidance solves a more specific problem than a chat-based automation tool does.
Guided help inside Resolve beats pausing a tutorial video shot on a different drone's color profile to compare against your own footage. Check TryUncle for current founder pricing if that sounds like the faster path through your next drone edit.
What's the full settings cheat sheet at a glance?
Before the table, here's the one-line version of everything above. Use DJI's official Air 3 D-Log M to Rec.709 LUT applied to a node, never Resolve's built-in DJI D-Log Color Space Transform preset, since that targets a different, undocumented-versus-documented profile entirely. Shoot inside ISO 100-1600 with white balance locked manually. Cross-check the wide and tele cameras on scopes after the shared LUT, don't assume matching sensors mean matching color automatically, and convert any other camera's log footage, or an older DJI drone's D-Cinelike clips, with its own correct tool before you try to match it to your Air 3 shots. Reach for Studio only if you've hit a genuine 10-bit decode wall or need noise reduction near the ISO ceiling. And if a clip won't play smoothly at all, that's a codec problem belonging in the import section above, not a color setting anywhere in this table.
| Setting | Value |
|---|---|
| Correct D-Log M conversion | DJI's official Air 3 D-Log M to Rec.709 LUT, applied to a node |
| Resolve's built-in DJI D-Log CST preset | Wrong tool; built for a different, older DJI profile |
| Why no dedicated D-Log M CST exists | DJI has not published documentation for D-Log M's color math |
| D-Log M ISO range | 100-1600 |
| D-Log M bit depth / codec | 10-bit 4:2:0, H.265, up to 150 Mbps |
| Normal color ISO range | 100-6400 |
| Normal color bit depth | 8-bit 4:2:0 |
| HLG ISO range | 100-1600 |
| Night mode color profile | Normal color, not D-Log M; no LUT applies |
| D-Cinelike LUT availability | Generally none on most models |
| Wide camera | 24mm-equivalent, f/1.7, 1/1.3-inch 48MP sensor |
| Medium tele camera | 70mm-equivalent, f/2.8, 1/1.3-inch 48MP sensor |
| Camera switching mid-clip | Not possible; one lens per continuous take |
| Studio required for basic D-Log M grade | No |
| Studio required for reliable 10-bit decode on older hardware | Often, especially Windows |
| Studio required for noise reduction | Yes |
| Air 3S D-Log M ISO ceiling | 3200 |
| Air 3S LUT | Separate file from the Air 3's; not interchangeable |
| Proxy codec | ProRes on Mac, DNxHR on Windows |
Apply DJI's own LUT to a node, stay inside the documented ISO range with white balance locked, and verify your two cameras against scopes before trusting a match by eye. Most Air 3 D-Log M footage that looks wrong in Resolve isn't broken and Resolve isn't malfunctioning. It's one mislabeled preset, one outdated LUT file, one unconverted second camera, or one missing codec extension away from correct, and now you know exactly which one to check first.
Frequently asked questions
- What DaVinci Resolve Color Space Transform settings are correct for DJI Air 3 D-Log M footage?
- There isn't a correct Color Space Transform setting for D-Log M on the Air 3, because Resolve ships no dedicated preset for it. The Input Gamma option labeled D-Log in Resolve's DJI menu is built for the older, unrelated D-Log profile used on drones like the Mavic 2 Pro, and applying it to D-Log M footage produces oversaturated, overly contrasty color. Use DJI's official D-Log M to Rec.709 LUT applied to a node instead.
- Why does my DJI Air 3 D-Log M footage look oversaturated or too contrasty after grading in Resolve?
- You almost certainly applied Resolve's built-in DJI D-Log Color Space Transform preset to D-Log M footage. That preset targets a different, older DJI color profile, and pointing it at D-Log M produces exactly this symptom: color that looks approximately right but is pushed too hard in saturation and contrast. Switch to DJI's official D-Log M to Rec.709 LUT and the problem clears.
- Does the DJI Air 3 come with a D-Log M to Rec.709 LUT?
- Yes. DJI publishes a free D-Log M to Rec.709 LUT for the Air 3 on its Download Center, a small .cube file built specifically for this drone's D-Log M output. It did not exist at the Air 3's July 2023 launch, when early reviewers had to borrow an older LUT built for the Mavic 2 Pro, so if you downloaded a D-Log M LUT for your Air 3 before DJI published the dedicated one, check you're using the current file.
- What ISO should I shoot D-Log M at on the DJI Air 3?
- Stay inside ISO 100 to 1600, the Air 3's documented D-Log M range. Normal color mode extends to ISO 6400, and Night mode reaches ISO 12800, but neither of those ranges is what D-Log M's tonal curve was tuned against, so pushing D-Log M past ISO 1600 by forcing a manual override trades color accuracy for a brighter preview you'll fight in the grade.
- Do I need DaVinci Resolve Studio to grade DJI Air 3 footage?
- No, not for the color correction itself. Applying DJI's D-Log M LUT and grading in Rec.709 both work identically in the free version. Studio matters more if your machine struggles to decode the Air 3's 10-bit H.265 files smoothly, especially on Windows, or if you need Studio-only tools like temporal noise reduction on footage pushed toward ISO 1600.
- Should I shoot D-Log M or HLG on the DJI Air 3?
- D-Log M if you're grading in Resolve and want maximum correction latitude, since it's built for exactly that. HLG if you're delivering HDR without a heavy manual grade, since it's designed to look reasonably close to finished straight off the drone on an HDR-capable display. Both cap at ISO 1600, so the choice is about how much post-production time you have, not dynamic range.
- Why won't my DJI Air 3 footage play smoothly in DaVinci Resolve?
- D-Log M on the Air 3 records 10-bit H.265 at up to 150 Mbps, a codec that's efficient to store but expensive to decode without hardware acceleration. On free Resolve on Windows especially, that can mean stutter or an outright failure to play. Generate Optimized Media or transcode to ProRes or DNxHR proxies before a heavy edit, and confirm Windows has Microsoft's HEVC Video Extensions installed if clips won't decode at all.
- Does this D-Log M grading workflow apply to the newer DJI Air 3S too?
- The Color Space Transform and LUT-versus-preset problem is identical, since the Air 3S shoots the same D-Log M profile and Resolve still has no dedicated CST preset for it. What changes is the ISO ceiling, 3200 instead of 1600, and the primary camera's larger 1-inch sensor, which DJI rates for roughly 14 stops of dynamic range against the Air 3's smaller sensor. Use the Air 3S's own D-Log M to Rec.709 LUT, not the Air 3's file, since they're tuned for different sensors.
Sources
- DJI: Air 3 Specs
- DJI: Air 3 FAQ
- DJI: Air 3 Downloads
- DJI Download Center: Air 3 D-Log M to Rec.709 LUT
- DJI: Air 3S Specs
- DJI Download Center: Air 3S D-Log M to Rec.709 LUT
- DJI Store: DJI Air 3S vs DJI Air 3, Upgrade Guide and Key Differences
- DJI Newsroom: Double Your Aerial Imaging Skills With DJI's New Air 3 Drone
- DJI Support: What models support D-Log mode? What models have the official LUT files?
- CineD: DJI Air 3 Review, The King of Versatility with Two Usable Focal Lengths (Jakub Han)
- CineD: DJI Air 3 Released, 24mm and 70mm Cameras with 4K 100FPS in D-Log M (Jakub Han)
- DC Rainmaker: DJI Air 3 In-Depth Review (with Sports Tracking!)
- Digital Camera World: DJI Air 3 review
- Zeb Gardner: DJI D-Log-M Color Grading
- Blackmagic Forum: Color correcting D-Log M with CST problem
- Blackmagic Forum: Color Space Transform Support for DJI DLog-M and D-Cinelike
- DroneDJ: DJI drones with 10-bit D-Log M, a complete guide (Ishveena Singh)
- gamut.io: DJI BaseLUTs for D-Log/DLog-M, Air 3 and Mavic 3 Drones+
- Blackmagic Design: DaVinci Resolve product page (free version specs)
- Blackmagic Design: DaVinci Resolve Studio product page
- Puget Systems: What H.264 and H.265 Hardware Decoding is Supported in DaVinci Resolve Studio?
- Richard Lackey: AVC / H.264 / HEVC and DaVinci Resolve, Why You Need to Transcode
Keep reading
Fixes · Jul 20, 2026 · 23 min
DaVinci Resolve DJI Osmo Pocket 3 Log Footage Import: Every Fix
DJI Osmo Pocket 3 D-Log M footage imports into DaVinci Resolve looking flat, wrong-colored, sideways, or refuses to play at all. Match your symptom to the cause.
Guides · Jul 10, 2026 · 26 min
How to Install LUTs in DaVinci Resolve: Folders and Fixes
Install LUTs in DaVinci Resolve: find the real LUT folder, apply them to a node instead of a clip, and fix the LUT-not-showing-up refresh bug for good.
Guides · Jul 12, 2026 · 39 min
How to Color Match Different Cameras in DaVinci Resolve
Match footage shot on different cameras in DaVinci Resolve with Color Space Transform, Color Match, and Shot Match, plus settings by camera brand.