Articles / Guidesupdated for DaVinci Resolve 21 (August 2026)
DaVinci Resolve Export DCP: Resolve 21 Guide
Quick answer
For a DaVinci Resolve export DCP, open the Deliver page, choose Single Clip, select DCP, then choose the 2K or 4K Flat or Scope codec that matches the venue specification. Set the approved frame rate, color transform, audio layout, and subtitle mode. Render the package, then verify it in a DCP player before delivery.
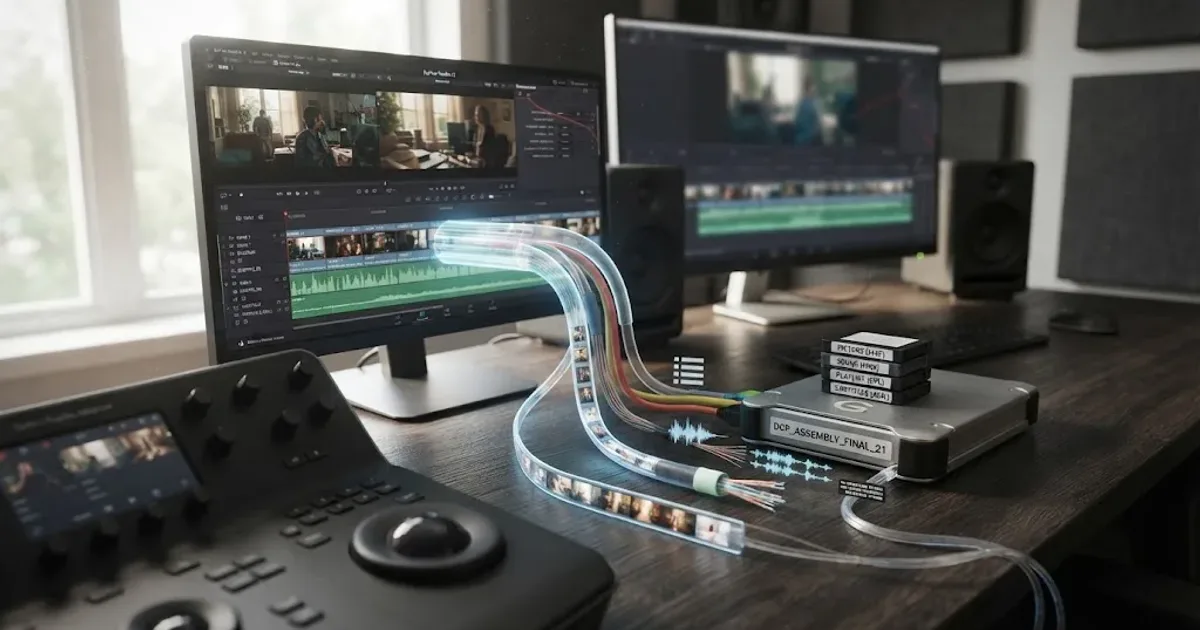
Most DCP problems are specification problems, not button problems. The festival needs one container, one frame rate, one audio map, and one subtitle decision, while Resolve gives you several plausible choices.
We have spent 7+ years on professional commercial editing, run a 100,000+ member video-editing community, taught 100,000+ students on Udemy, and worked with Fortune 500 companies. This guide comes from the delivery questions that keep showing up in that community, with the exact requirements checked against DCI, ISDCF, Blackmagic Design, Fraunhofer, and DCP-o-matic documentation.
As of August 2026, DaVinci Resolve 21 is the current final release. The path below uses Resolve 21 language where it matters, but the cinema standards come from the DCP specifications rather than from a Resolve version number. Blackmagic Design lists the final DaVinci Resolve 21 release in its support center.
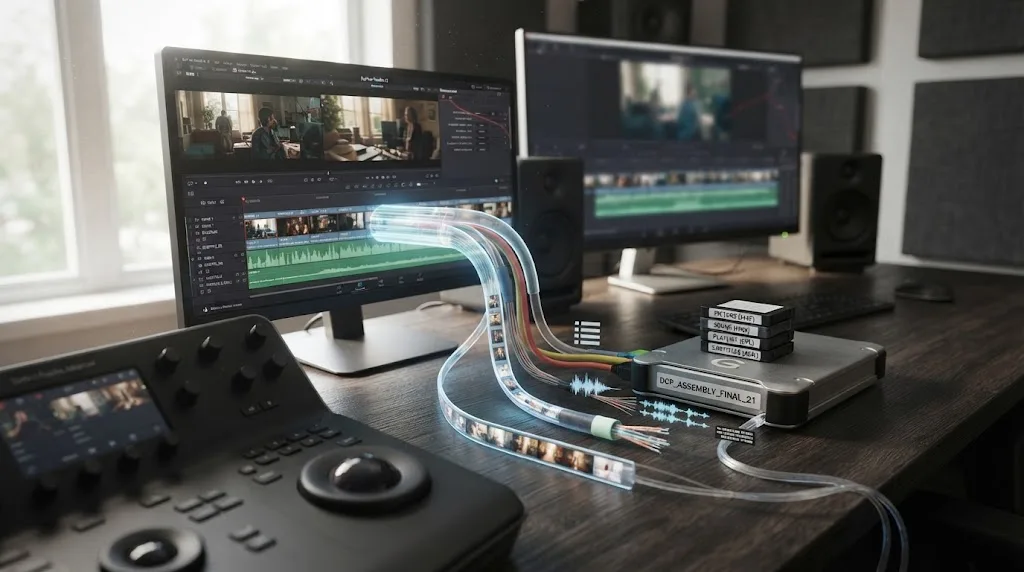
What is a DCP and why isn't a ProRes file enough?
A Digital Cinema Package is a folder of cinema assets and metadata that a digital cinema system can ingest and play. A ProRes or DNxHR master can be a useful source, but it is not itself the DCP a cinema server expects. Fraunhofer describes DCPs as carrying encoded video and audio data plus subtitles, while the DCI specification defines the system constraints around the package.
The practical difference is easy to miss. A normal video export gives you a media file. A DCP gives the venue a composition playlist, track files, packing metadata, hashes, and optional timed text or encryption assets. The folder may contain one or more MXF files for picture and sound, XML metadata, and subtitle assets. The server reads those relationships instead of treating the delivery as a single movie file. The DCI specification describes the DCP as the output of the mastering process, and DCP-o-matic documents the package, verification, subtitle, and version-file workflows.
A DCP is a cinema package, not a single video file.
The word package matters when you copy or upload the result. Do not extract a picture MXF and send that alone. Do not rename one file and assume the DCP is still complete. Preserve the generated folder and every companion file unless the venue specifically asks for a different transfer method.
Cinema picture is normally JPEG 2000, stored in the DCI XYZ color space, with 12-bit component decoding in the DCI compliance requirements. DCI also places a maximum of 250 Mbit/s on the relevant 24 fps distribution case. Those are not settings to invent from a YouTube preset. They are reasons the DCP render is slower and larger than a web export. DCI publishes the image, color, bit-depth, frame-rate, and codestream constraints in its specification and compliance material.
The package can also carry multiple compositions. That is how an original version and a subtitle or language version can share assets in a Version File workflow. A version file is useful when the receiving cinema understands the relationship between the original version and the supplemental package. It is not a safe assumption for every festival, so ask before creating one. DCP-o-matic explains Version Files as small packages that refer to an existing original version, and easyDCP documents supplemental DCP generation for changed subtitles or audio.
What is the difference between OV, VF, CPL, PKL, and MXF?
The OV is the original version, and a VF is a version file that references assets from an existing package. A CPL is the composition playlist that describes what plays and in what order. A PKL is the packing list that records assets and their hashes. MXF files carry the picture or sound essence. The names are useful because a delivery conversation often uses them as shorthand. DCP-o-matic's manual describes VF handling and its verifier's hash checks, while the DCI specification defines the package architecture.
You do not need to edit those XML files by hand for a standard Resolve export. You do need to recognize them when you inspect the output. If the folder contains only a movie file, you have exported a movie, not a DCP.
Should you use DaVinci Resolve 21's built-in easyDCP output?
Use the integrated easyDCP path when you want Resolve to create the DCP directly from the graded timeline and the venue accepts that workflow. Use an external packager or a specialist facility when you need a different subtitle, version, encryption, Atmos, or validation workflow than your Resolve installation can safely provide. easyDCP says its Resolve integration can create encrypted and unencrypted Interop and SMPTE DCPs, with 2K and 4K support and playback inside Resolve.
Resolve 21 is an appropriate authoring environment because it can carry the edit, grade, and Fairlight mix through one timeline. The important caveat is licensing. The easyDCP Resolve plugin is integrated in Resolve as a demo, but the demo has a visible watermark on each DCP frame, reduces playback quality after 15 seconds, and stops sound playback after 15 seconds. It also limits KDM validity to 2 days and cannot load KDMs. Those limitations come from the current easyDCP FAQ.
The demo is useful for checking whether the controls appear and for learning the workflow. It is not a clean festival master. If the output has an easyDCP watermark, stop there. Do not send it to a programmer and hope that the watermark is only in your local preview.
| Path | Choose it when | What it gives you | Main limitation to check |
|---|---|---|---|
| Resolve 21 with licensed easyDCP | You need a direct timeline-to-DCP workflow, standard 2K or 4K packaging, or encryption and KDM support | Integrated picture, sound, packaging, playback, and DCP options | License, server certificate, venue standard, and current plugin support must be confirmed |
| Resolve 21 demo easyDCP | You are learning the controls or testing a short section | A way to inspect the workflow before purchase | Visible watermark, playback degradation after 15 seconds, no normal delivery master |
| Resolve JPEG 2000 DCP option | Your installation exposes an unencrypted DCP option and the venue accepts it | A direct unencrypted package path | Confirm what the installed codec actually creates and validate it with another tool |
| DCP-o-matic | You want a separate package, audio, subtitle, VF, or verification workflow | DCP creation, playback, verification, KDM, and version-file tools | It is a separate application and still needs careful specification and QC |
| Specialist DCP facility | The delivery is encrypted, immersive, multi-version, or contractually critical | A dedicated mastering and QC process | Cost, schedule, and the need to supply a clean approved master |
The Resolve path and the external path are not rivals in every project. A common professional workflow is to finish the grade and mix in Resolve, create a high-quality intermediate or image sequence, then package and verify elsewhere. That adds another handoff, so it needs a reference movie, matching timecode, and an agreed color transform. DCP-o-matic identifies itself as a tool for creating, playing, verifying, and manipulating DCPs, while easyDCP offers direct Resolve integration. DCP-o-matic documents its toolset in its manual.
Fraunhofer's Heiko Sparenberg described the quality-control goal plainly: “We’ve tested easyDCP-created cinema packages on any number of playback devices and continuously improved the software,” explains Heiko Sparenberg, head of the Digital Cinema group at Fraunhofer IIS. The quote appears in a Fraunhofer magazine feature about easyDCP and digital cinema.
That quote is about easyDCP's testing history, not a promise that every setting in your project is correct. Your DCP still needs to match the receiving venue's specification and pass your own playback checks.
What should you confirm before you export a DCP?
Confirm the venue specification before touching the Deliver page. The venue decides whether it wants 2K or 4K, Flat or Scope, a particular frame rate, Interop or SMPTE, a stereo or surround mix, open or separate subtitles, encryption, and a particular package name. DCI defines the system constraints, while ISDCF publishes cinema vocabulary and audio configuration guidance.
Ask the festival or cinema these questions in writing:
- Do you want 2K or 4K?
- Do you want Flat, Scope, or Full container?
- What frame rate should the DCP use?
- Do you accept SMPTE, Interop, or both?
- Do you want stereo, 5.1, 7.1, or another approved configuration?
- Should subtitles be open subtitles, separate timed text, or a Version File?
- Is the package encrypted? If yes, who supplies the target server certificate and KDM window?
- Does the venue want a normal original version, a VF, a supplemental package, or a complete standalone DCP?
- What should the DCP content type and package name say?
- How should the package be delivered, and how will the venue confirm receipt?
The question about frame rate deserves a real answer, not a default. DCI compliance material lists 2K at 24 or 48 fps and 4K at 24 fps for the core tests, while digital cinema also has additional frame-rate profiles. A festival may still require 24 fps for a particular program. DCI's compliance plan lists the 2K and 4K test rates, and the DCI specification index identifies the current specification family.
The venue's DCP specification beats any generic Resolve preset.
Write the answer into the project notes before the render. A useful note might read: 2K Flat, 24 fps, SMPTE, 5.1, English open subtitles, unencrypted, FTR. That is not a universal template. It is a compact record of one approved request.
Do not infer the DCP content type from the runtime. DCP naming and metadata use content-type codes such as feature, trailer, and test. The receiving venue or festival may have its own naming sheet. Ask for the exact value instead of copying a code from another film.
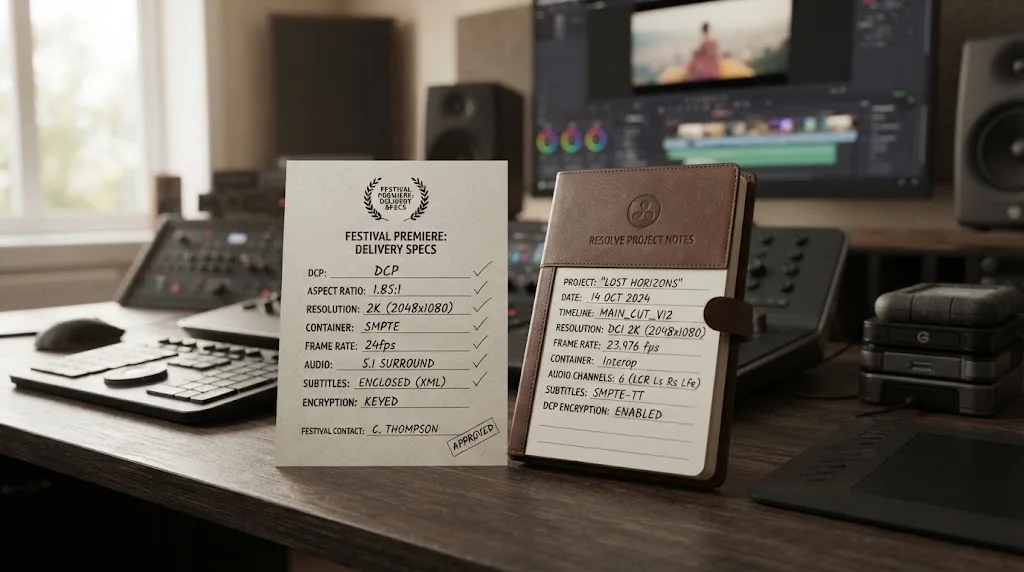
How should you prepare the Resolve 21 timeline for a DCP?
Prepare the timeline as a locked cinema master before you build the DCP render. Set the final frame rate before the edit is locked, check the first and last frame, confirm the active image shape, and make a separate audio and subtitle decision before rendering.
How do you lock frame rate and timing?
Set the timeline frame rate to the approved DCP frame rate before final picture lock. If the cut was made at 23.976 fps and the venue asks for 24 fps, do not casually change the project setting at the end and assume the duration and sync will remain the same. Create a controlled conversion plan, confirm the resulting duration, and get approval if the venue specification is unclear.
The reason is simple. A DCP is frame based, and the picture and sound assets must stay aligned across the composition. A small timing change can move a subtitle cue, change a reel boundary, or put a pop or sync marker in the wrong frame. DCP-o-matic's manual exposes frame-rate controls as part of DCP creation, and DCI's compliance tests define frame-rate-specific image requirements. See the DCP-o-matic creation settings and DCI compliance plan.
Check these points in Resolve:
- The timeline frame rate matches the approved delivery frame rate.
- The timeline starts at the requested timecode or the venue's required first frame.
- There is no accidental black frame before the first image.
- The final frame is present and the duration is understood in frames.
- Audio starts at the same approved point as picture.
- Subtitle cues use the same timing base as the final picture.
- Any leader, countdown, black, or sync pop is intentional and documented.
Do not add a leader because another festival asked for one. Do not remove a leader because a tutorial did. Treat it as a deliverable requirement.
How do you check the active image shape?
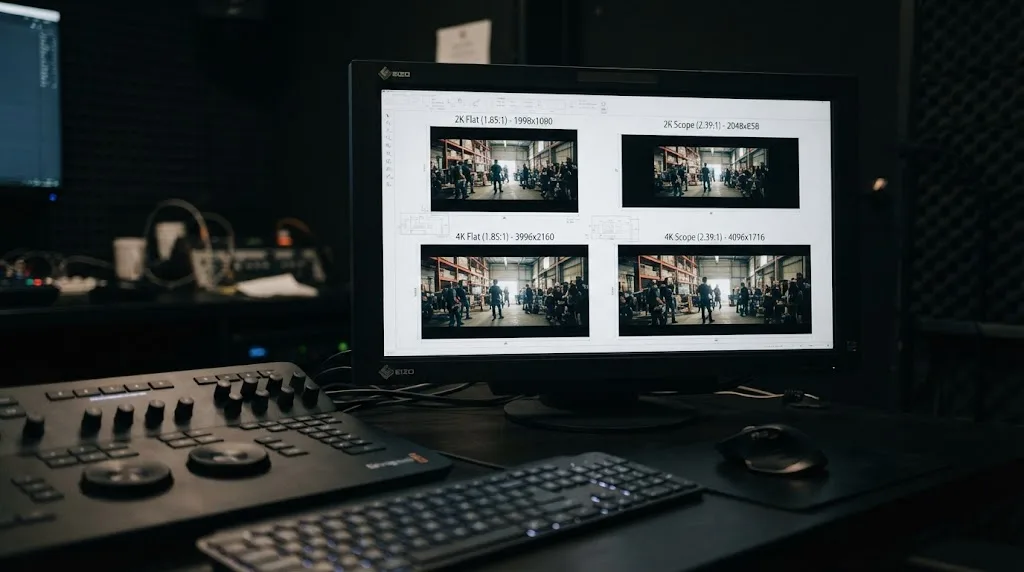
Use the DCP container as a delivery choice, not as a crop button you discover after grading. A 2K Flat container is 1998 x 1080, a 2K Scope container is 2048 x 858, and a 2K Full container is 2048 x 1080. The 4K equivalents documented by easyDCP are 3996 x 2160 for Flat, 4096 x 1716 for Scope, and 4096 x 2160 for Full. easyDCP lists these common 2K and 4K container dimensions.
Your source may have a different shape. That is fine if you decide where the image goes. A widescreen image in a Flat container may need letterboxing. A less wide image in Scope may need pillarboxing or a crop. The technical setting cannot decide the creative intent for you.
Make a short reference movie with guides before you export. Check faces, lower thirds, credits, logos, and subtitles against the chosen container. A web master that looked correctly framed at 1920 x 1080 can look surprisingly different once it sits in a 2048 x 858 Scope frame.
Should you deliver 2K or 4K?
Deliver the resolution the venue requests, not the largest number your source can produce. DCI defines 2K as 2048 x 1080 and 4K as 4096 x 2160 for the core image structures, but the useful choice depends on the venue, source, grade, render time, and approved mastering path. DCI lists those 2K and 4K image structures in its compliance documentation.
Upscaling a 2K master to 4K does not create missing detail. It creates a 4K package. That may still be what the venue requires, but describe it accurately in your delivery notes.
For a festival that accepts both, 2K can be the sensible choice when the source and final grade are 2K, the delivery deadline is tight, or the festival's server specification favors it. 4K is sensible when the project was finished as 4K and the venue has requested it. The verdict belongs to the approved spec.
How should you set color for a DCP?
Set the DCP color transform from the color space in which the program was graded to the DCI XYZ output expected by the cinema package. Do not add a random LUT because the DCP preview looks different from a web export. easyDCP documents DCP picture as XYZ with a gamma of 2.6 and describes its source-to-XYZ color processing.
This is where a DCP can surprise an editor. A Resolve viewer, a computer display, a calibrated grading monitor, a DCP player, and a cinema projector do not represent the same signal in exactly the same way. The DCP is not simply a Rec.709 file with a different extension.
What should you do in a color-managed Resolve project?
Use the project's color-management settings and the DCP output option that matches the approved mastering path. Then inspect a DCP test render, not just the timeline viewer. If the project uses a custom ACES or Resolve Color Management transform, document the input, timeline, and output color spaces and verify that the DCP path applies the intended conversion only once.
The phrase “only once” matters. A double transform can produce a dull, strange, or overly saturated image. A missing transform can send RGB values into a package that expects XYZ. The safe response is to inspect the actual DCP through a player and compare it with a reference made under the same viewing conditions.
easyDCP's documentation describes an ITU 709 to XYZ transform as a DCI-compliant default path for RGB images with a 709 or sRGB gamut. That is useful when your source really is in that space. It is not permission to label a log, wide-gamut, ACES, or already-converted XYZ source as 709. See the documented easyDCP color transform behavior and source characteristics.
Why does my DCP look too dark, washed out, or over-saturated?
A DCP that looks too dark, washed out, or over-saturated usually has a color-space, gamma, range, or viewing-path mismatch. First compare the DCP player image with the approved reference, then inspect the Resolve project color settings and the DCP transform before changing the grade.
Use this troubleshooting order:
- Confirm the source and timeline color space.
- Confirm the display transform used for the Resolve viewer.
- Confirm the DCP output transform and whether it is applied by Resolve, easyDCP, or a downstream packager.
- Check full-range versus legal-range assumptions.
- Open the DCP in a second player or validation tool.
- If possible, view a short test on the intended cinema system.
- Only then change the grade.
Do not correct a bad preview by pushing the whole grade brighter. That can make the cinema image wrong while making the desktop preview look better.
How do you map stereo or 5.1 audio for a DCP?
Export DCP audio as uncompressed PCM at the approved sample rate and confirm the channel order before rendering. easyDCP documents 24-bit uncompressed audio at 48 kHz or 96 kHz, with up to 16 channels; ISDCF identifies 5.1 as left, right, center, LFE, left surround, and right surround. See the easyDCP track requirements and ISDCF terminology and the ISDCF audio recommendations.
What is the normal 5.1 channel order?
The standard 5.1 order for this guide is:
| DCP channel | Label | Content |
|---|---|---|
| 1 | L | Left screen channel |
| 2 | R | Right screen channel |
| 3 | C | Center screen channel, normally dialogue |
| 4 | LFE | Low-frequency effects channel |
| 5 | Ls | Left surround |
| 6 | Rs | Right surround |
For a normal 5.1 DCP, channel order is L, R, C, LFE, Ls, Rs.
The exact labels and metadata matter. A six-channel file with the wrong order can still render successfully. The failure appears in the cinema as dialogue in the wrong speaker, bass in a surround channel, or surrounds swapped left to right.
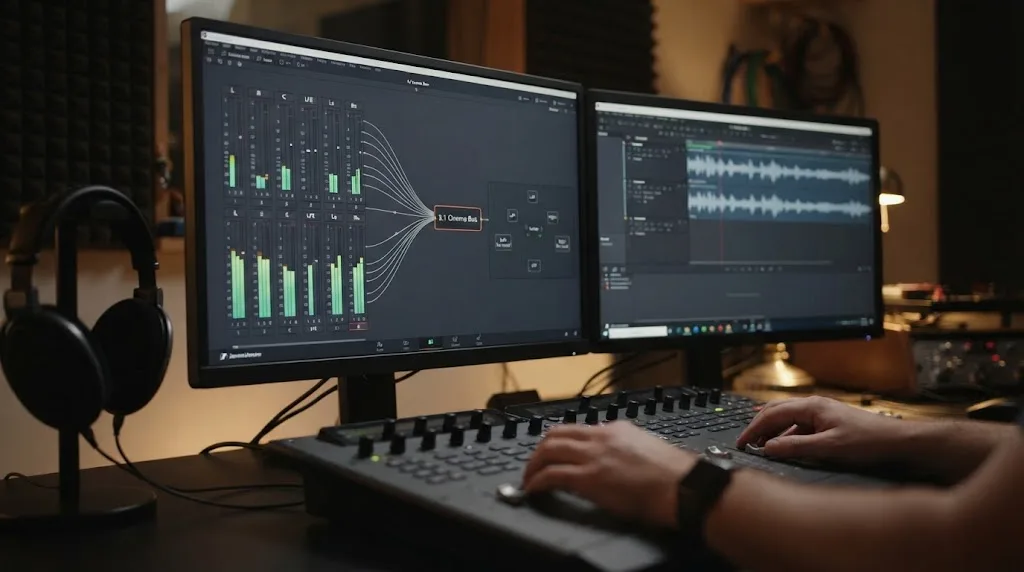
How should you build the 5.1 bus in Fairlight?
Start with six discrete mono sources or six clearly labeled channels. Route them to a 5.1 main bus in the order expected by your approved DCP layout. Confirm the bus format, then verify each channel with a test tone or an isolated channel check before you render.
If you receive a multichannel mix, do not assume the file's embedded order matches the DCP's metadata. Inspect the source channel labels and map them explicitly. A filename such as film-L.wav, film-R.wav, film-C.wav, film-Lfe.wav, film-Ls.wav, and film-Rs.wav follows the naming convention documented by DCP-o-matic, but filenames are not a substitute for listening and mapping. DCP-o-matic documents these audio tags and their channel meanings.
For a stereo DCP, keep the left and right channels as left and right. Do not place a stereo mix in the center channel because it seems like a way to make dialogue audible. If the festival requests both stereo and 5.1, render two clearly named compositions or two complete packages and check both.
Should you use a 5.1 bus or discrete audio tracks?
Use the audio mode that matches the DCP encoder's documented mapping and the venue specification. In Resolve, the key is not whether the timeline looks tidy. The key is whether the rendered track metadata and channel order describe what the cinema expects.
If a specific venue asks for a “wild track” or a particular 16-channel configuration, follow that document. If it gives no instruction, ask before choosing a custom layout. DCI systems were designed around channel-based sound essence, and easyDCP supports up to 16 channels with a defined audio track. The DCI material and easyDCP documentation explain the channel-based package model.
For more general Resolve audio routing, the sibling guide How to Export Separate Audio Stems for Mixing in DaVinci Resolve covers a different handoff problem. Use it when the recipient wants stems rather than a cinema-ready DCP.
How should you handle subtitles and captions?
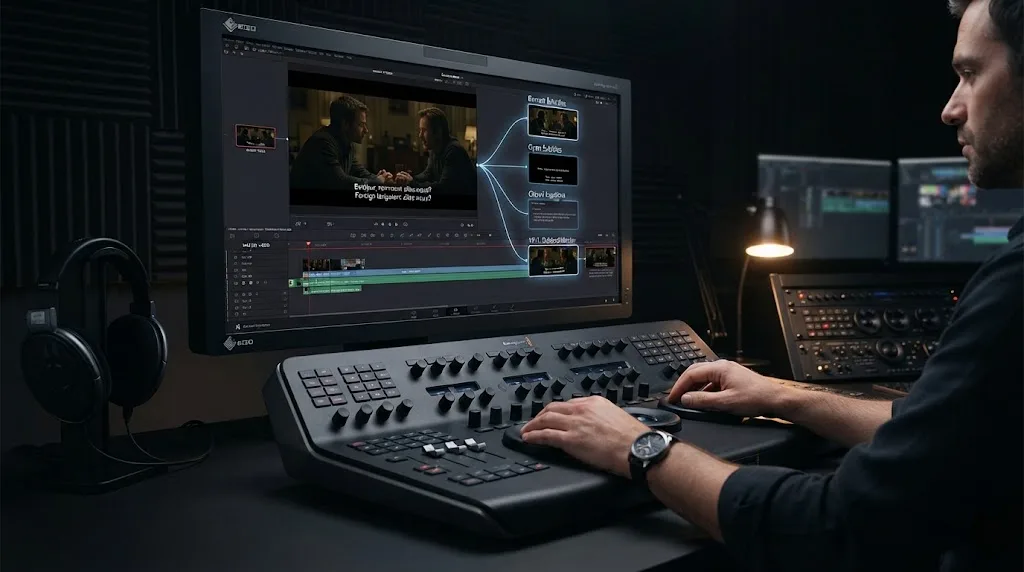
Decide whether subtitles are burned into the picture, carried as separate timed text, or delivered as a Version File before you render. A burned subtitle is part of every picture frame, while a separate subtitle asset is rendered or overlaid by the cinema system and can support multiple language versions. DCP-o-matic documents both approaches and their trade-offs.
Should subtitles be burned in or separate?
Burn subtitles into the image when the venue explicitly wants a self-contained picture and you have approved their position, size, and appearance. Use a separate subtitle asset when the venue supports it and you need several languages or a version that shares the same picture and sound. Separate timed text avoids re-encoding the entire picture for each language, but it introduces a playback and format dependency.
The decision table is straightforward:
| Subtitle choice | Best fit | What to check |
|---|---|---|
| Burned into picture | The festival wants one standalone image version or has no reliable timed-text path | Position, safe area, font, line breaks, spelling, and every subtitle frame |
| Separate open subtitle asset | The venue supports projector-rendered open subtitles | XML format, language metadata, font handling, timing, and position on the target system |
| Closed caption asset | The program uses a dedicated caption display system | The venue's caption device, track label, language, and accessibility workflow |
| Version File | An existing OV will be ingested with a language or subtitle variation | OV and VF relationship, asset references, and venue ingest procedure |
Interop and SMPTE do not treat every subtitle format the same way. easyDCP documents Interop subtitles as Texas Instruments CineCanvas XML and SMPTE subtitles as the SMPTE 428-7 XML-based format. A subtitle file that opens in a text editor is not automatically a valid subtitle asset for the selected DCP standard. See easyDCP's subtitle-track requirements.
What subtitle checks catch real failures?
Read the subtitles aloud while watching the rendered DCP. Check the first and last cue, line breaks, punctuation, accented characters, italics, speaker changes, and cues that cross a reel boundary. Look for cues that appear a frame late or disappear early.
For separate subtitles, verify that the DCP player renders them in the correct language and position. For burned subtitles, compare the picture with the clean version and confirm that no title, credit, or lower-third is covered.
DCP-o-matic accepts SubRip, SubStation Alpha, and DCP XML input, but that does not mean Resolve's subtitle export and every receiving server share one universal route. DCP-o-matic lists the timed-text inputs and its open, closed, and burned subtitle choices.
How do you export a DCP from DaVinci Resolve 21?
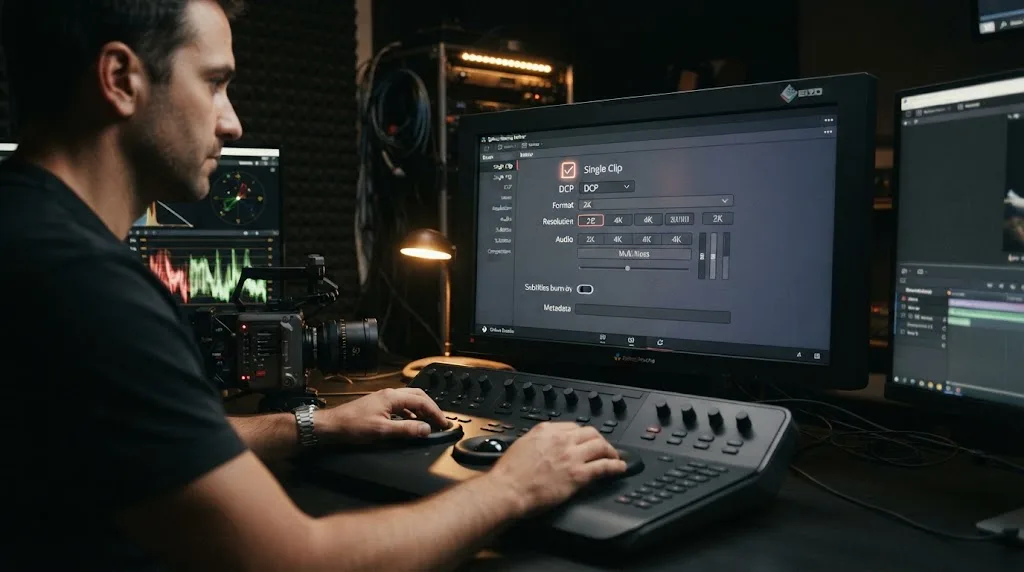
To export a DCP from DaVinci Resolve 21, prepare the approved timeline, open Deliver, choose Single Clip, select DCP, choose the matching 2K or 4K Flat or Scope codec, configure the composition, audio, and subtitle settings, then render and validate the complete package.
The labels can vary slightly between the built-in codec path and the easyDCP integration, so treat the venue specification as the source of truth. The sequence is stable:
1. Duplicate or protect the final timeline
Make a dedicated delivery timeline or duplicate the locked timeline before you change DCP-specific settings. Name it with the project, version, resolution, container, frame rate, audio, and subtitle state. For example: FilmName_FTR_2K_Flat_24_SMPTE_51_EN-OV.
The name is a human control, not the official DCP naming string. It keeps you from rendering a 4K Scope version into a 2K Flat folder by mistake.
2. Open the Deliver page and choose Single Clip
Go to the Deliver page and create a Custom render job. Choose Single Clip. A DCP is a composition, so an Individual Clips render is the wrong starting point for a normal feature or short-film package. Blackmagic's DCP workflow documentation describes Single Clip for DCP output, and the easyDCP integration is designed to package the Resolve project as a DCP rather than a folder of editorial clips. See Blackmagic's DCP rendering guidance.
3. Set Format to DCP
In the Video settings, enable Export Video and choose DCP as the format if your Resolve 21 installation exposes that option. The codec list may include easyDCP 2K or 4K DCI options and JPEG 2000 options. Choose the option that matches the venue's container and the approved encryption or packaging choice.
If the DCP option is missing, check the render mode, installed Resolve edition, selected timeline, and easyDCP integration state. Do not silently switch to H.264, ProRes, or DNxHR and call it a DCP. Those can be valid review or mastering files for a specialist, but they are different deliverables.
4. Choose 2K or 4K and Flat or Scope
Choose a codec that matches the approved container. The easyDCP picture dimensions documented for common containers are:
| Delivery choice | Container dimensions |
|---|---|
| 2K Full | 2048 x 1080 |
| 2K Flat | 1998 x 1080 |
| 2K Scope | 2048 x 858 |
| 4K Full | 4096 x 2160 |
| 4K Flat | 3996 x 2160 |
| 4K Scope | 4096 x 1716 |
These are container choices, not a claim about the number of detail pixels in your source. Check the output resolution in the render panel and in the completed package.
5. Set composition metadata
Enter the composition name, content title, issuer or creator fields, language, and content type where Resolve exposes them. Use the approved name from the festival or distributor. Keep punctuation and capitalization consistent across the folder, composition, and delivery note.
Do not use a vague name such as final_final_2. The projectionist may see the composition name separately from the folder name, and a festival may have several versions of the same title.
6. Set the frame rate
Set the frame rate required by the venue. If the DCP codec offers additional frame-rate choices, do not select one because it is available. DCI's core compliance material includes 24 fps for 4K and 24 or 48 fps for 2K, but the program specification controls what you should deliver. DCI's compliance test plan lists those rates and image combinations.
7. Configure color and picture scaling
Choose the color-management or easyDCP setting that converts the graded source into the DCP's XYZ output. Choose scaling or cropping that preserves the approved framing. If the source does not match Flat or Scope, decide whether to add black, crop, or use a different container before you render.
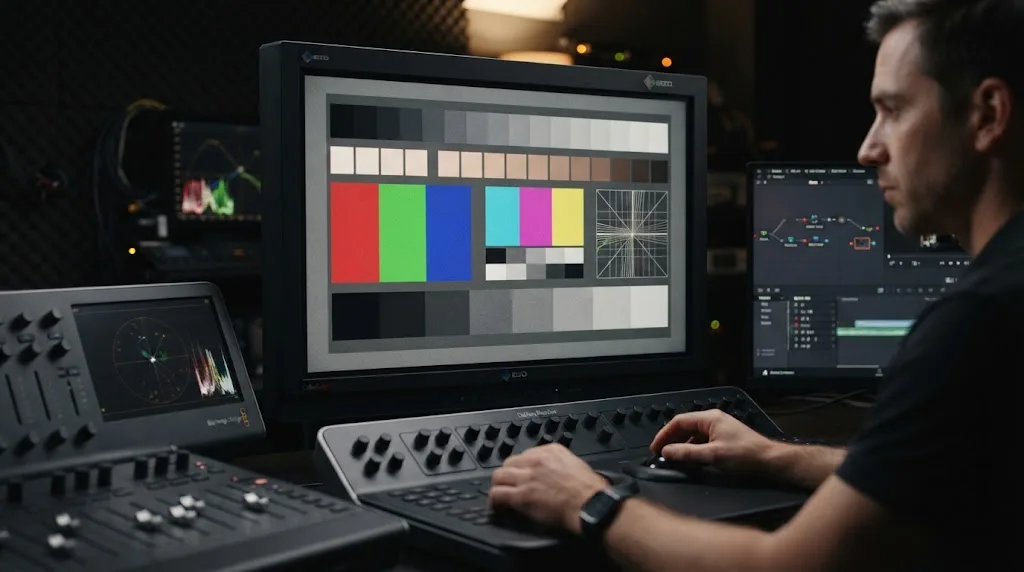
Use a short test render for a difficult grade. Include a gray scale, skin tones, saturated colors, shadow detail, and a shot with fine texture. Inspect the test DCP in a player before committing to a long JPEG 2000 render.
8. Configure audio
Enable Export Audio. Choose Linear PCM or the DCP audio option exposed by the selected codec. Set the approved sample rate, normally 48 kHz or, when requested, 96 kHz. Confirm the bus or discrete channel layout and listen to each channel in a test pass. easyDCP lists uncompressed 24-bit audio at 48 kHz or 96 kHz as the DCP audio format.
For a standard 5.1 delivery, verify L, R, C, LFE, Ls, Rs. For stereo, verify L and R. If you are delivering a custom or immersive layout, use the venue's channel map and do not substitute the 5.1 order.
9. Configure subtitles
If subtitles are burned into the picture, check them in the Video preview and in the DCP player. If they are separate, confirm the selected standard, XML format, language, font, position, and relationship to the OV. Never assume that a Resolve subtitle track will become a valid, correctly positioned cinema subtitle without inspecting the package.
10. Decide whether to encrypt
Leave the DCP unencrypted unless the distributor or venue requests encryption. An encrypted DCP needs the target server certificate and a KDM that is valid for the approved playback window. easyDCP explains that KDMs deliver decryption keys for specified playback systems and that an expired KDM no longer grants access. See easyDCP's encryption and KDM documentation.
Encryption does not make a DCP more professional by itself. It adds a delivery dependency. A KDM made for the wrong server, wrong certificate, wrong timezone, or wrong date can make a healthy package unplayable.
11. Choose the output folder carefully
Render to a drive with enough free space for the DCP and a second copy or checksum workflow. DCP-o-matic's manual warns that a feature-length DCP can exceed 100 GB, so a nearly full system drive is a poor render target. See its storage note in the DCP creation chapter.
Use a local fast drive for the render if possible, then copy the completed package to the delivery medium. Do not render directly to a flaky network volume when a failed transfer would force you to start again.
12. Add the render job and render
Review every setting against the written specification. Add the job, render it, and leave the original project untouched while the render runs. A long render is not proof of a correct render.
When it finishes, check that Resolve reports completion, the package folder exists, the expected XML and MXF assets are present, and the file sizes are plausible. Then move to QC.
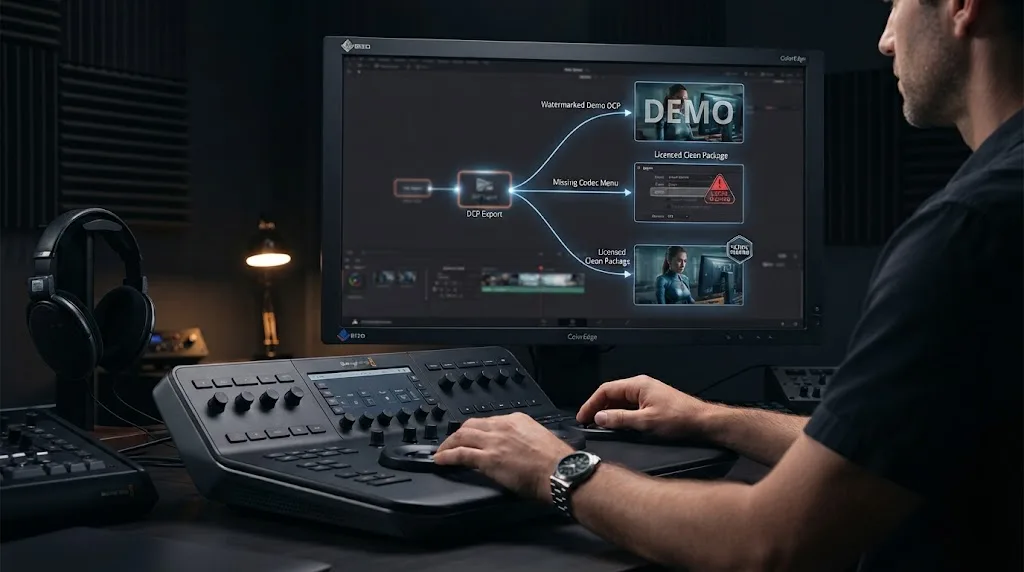
Why is my DaVinci Resolve DCP export watermarked or unavailable?
A watermarked export means the easyDCP integration is still in demo mode, while an unavailable DCP option usually points to the selected render mode, codec exposure, installation, or license state. Treat both as setup issues and diagnose them before you render a delivery master.
Why is my DCP export watermarked?
The integrated easyDCP demo writes a visible watermark into every DCP frame. The current easyDCP FAQ also says that playback quality is drastically reduced after 15 seconds and sound playback stops after 15 seconds. That behavior is intentional demo licensing, not a render corruption. easyDCP documents the demo limitations here.
The fix is to activate the appropriate easyDCP license and certificate for the Resolve system, or use a different approved packaging route. Do not crop or blur the watermark. It is part of the demo output.
Why can't I find DCP in the Deliver page?
Check these branches in order:
- Confirm that Render Settings is set to Custom and Render as is Single Clip.
- Confirm that Export Video is enabled.
- Search the Format and Codec menus for DCP, easyDCP, or JPEG 2000.
- Check that the Resolve installation is current and the project opens normally.
- Check the easyDCP integration or decoder setting if you are using its playback path.
- Restart Resolve after a license or plugin change.
- If the option is still absent, use a documented external packager or ask Blackmagic or easyDCP support.
The exact menu state can differ by platform, installation, and license. Blackmagic's support center lists Resolve 21 for macOS, Windows, and Linux, while easyDCP lists its Resolve integration for Windows 64-bit, macOS, and Linux. Platform support does not guarantee identical license or codec behavior. See Blackmagic support and easyDCP's current integration page and the easyDCP platform description.
Why does playback stop after 15 seconds?
Playback stopping after 15 seconds is a documented demo limitation of the easyDCP Resolve plugin. It is not a timing error in your film. Use a licensed player or an independent DCP player for meaningful QC. The easyDCP FAQ specifies the 15-second playback limit.
For more general failed or stuck Resolve renders, use the sibling troubleshooting guide DaVinci Resolve Not Exporting? Fix a Stuck or Failed Render. A render that completes with the wrong DCP metadata needs a DCP-specific check, not only a general render restart.
How do you validate a DCP before delivery?
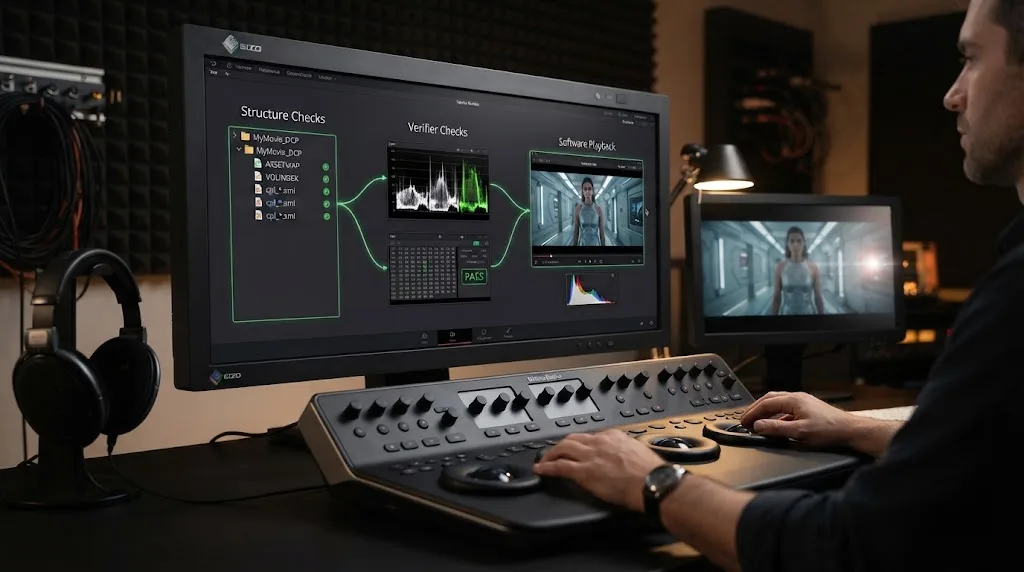
Validate the package in three passes: structure, playback, and specification. A successful Resolve render proves that Resolve wrote files. It does not prove that the cinema can ingest the package, that audio is mapped correctly, or that subtitles and KDMs work on the target system.
Pass one: inspect the package structure
Open the DCP folder and confirm that it contains the generated package assets, not only a review movie. Check the composition playlist, packing list, asset map, picture track, sound track, and any subtitle or encryption assets that the approved delivery requires.
Do not rename XML files or move assets into subfolders after the render. The packing list contains hashes, and the package relationships are deliberate.
Pass two: run a DCP verifier
Use a DCP verifier to check hashes, asset readability, JPEG 2000 codestreams, duration, frame rate, package metadata, and standard-specific errors. DCP-o-matic's verifier reports errors, Bv2.1 errors, warnings, and positive checks. It specifically checks whether the hashes in the PKL agree with the referenced CPL, picture, and sound assets. See the DCP-o-matic verification chapter.
Read the report instead of treating a green-looking interface as enough. A warning may be acceptable for a particular venue, but you should know what it means. A hash error means the package changed after the manifest was created or the package is damaged. Re-render or restore the original complete folder.
Pass three: play the actual DCP
Open the DCP in a player that can decode the selected standard. Watch the first frame, the last frame, each reel transition, every subtitle, the credits, and any section with rapid movement or heavy texture. Listen to dialogue, music, effects, LFE, and surrounds separately.
Check the following against the approved reference movie:
- Runtime and frame count.
- First and last frame.
- Reel count and reel boundaries.
- Aspect ratio and black-bar placement.
- Color and overall brightness.
- Fine detail, gradients, noise, and banding.
- Stereo or surround channel assignment.
- Subtitle spelling, timing, language, and position.
- Package title and version.
- Encryption and KDM playback if encryption is enabled.
A DCP is not ready to deliver until both its structure and its playback have been checked.
Should you test on a cinema projector?
If the screening is important and access is available, test a short approved DCP on the intended cinema system. A software player can catch package and playback problems, but it cannot perfectly reproduce every projector, screen, auditorium, sound processor, or server configuration.
Do not present a home monitor check as a cinema calibration. Describe it as a software QC pass or a reference comparison. That distinction protects the recipient and keeps your delivery notes honest.
What should you do when the DCP plays incorrectly?
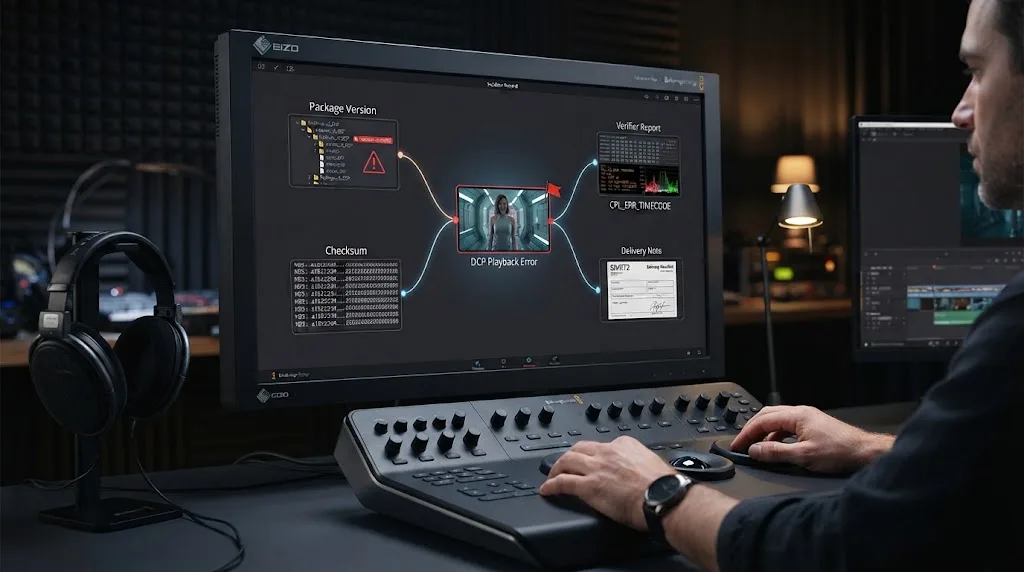
Match the symptom to the asset or setting that controls it. DCP failures become faster to solve when you separate picture, sound, subtitle, metadata, and encryption problems rather than changing several settings at once.
| Symptom | First suspect | Correct next check |
|---|---|---|
| Watermark in every frame | easyDCP demo mode | Activate the licensed path or repackage with an approved tool |
| Picture is too dark or washed out | Color transform or viewing path | Confirm source, timeline, output, and DCP XYZ handling |
| Image is stretched or cropped | Wrong Flat, Scope, or Full choice | Compare active dimensions and approved framing |
| Dialogue comes from the wrong speaker | 5.1 channel order | Test L, R, C, LFE, Ls, and Rs separately |
| No sound after a reel change | Duration or reel mapping | Inspect the sound track and reel boundaries in a player |
| Subtitles missing | Wrong asset standard or missing relationship | Check XML format, language, CPL, and player support |
| Subtitle position changes | Separate timed-text rendering | Check font, position, and venue server behavior |
| Player rejects the package | Hash, XML, or standard error | Run a verifier and inspect the report |
| Encrypted package will not play | Wrong certificate or KDM window | Confirm target server, certificate, dates, timezone, and KDM |
| Package is too large for transfer | 2K or 4K choice, bitrate, and runtime | Confirm venue resolution and use a transfer method with enough space |
What if the DCP is black?
A black DCP can come from a failed color transform, an empty or disabled video track, a timeline range issue, a missing asset, a decode problem, or a player that cannot handle the package. Open the package in a second player and inspect a single frame if the tool supports it. Then compare the DCP's picture asset with the source and render settings.
Do not immediately re-grade the movie. If the same black frame appears in an image extract, it is an encoding or source problem. If the image is visible in one player but black in another, investigate decoder and standard support.
What if the audio is silent or out of sync?
Confirm that Export Audio is enabled, the sample rate is approved, the sound track duration matches picture, and the audio bus contains actual signal. Then inspect the channel assignment in a DCP player. A file can contain six channels and still sound wrong if the channel labels or order are wrong.
If the timeline has mixed sample rates, let the approved DCP path perform its documented conversion or create a controlled mix at the target rate before packaging. Do not use an undocumented sample-rate conversion as a sync fix.
What if subtitles are present but wrong?
Check whether you burned the subtitles into picture or created a separate asset. A burned subtitle cannot be changed without a new picture render. A separate subtitle can be replaced or versioned, but its XML format, font, language, timing, and CPL relationship must still be correct.
If the same subtitle looks right in Resolve and wrong in the DCP player, trust the DCP player for the package-specific investigation. The cinema server will not necessarily use Resolve's subtitle renderer.
What if the package fails only at the cinema?
Ask the venue for the server model, software version, exact error message, CPL name, and whether the package was copied intact. Ask whether the venue ingested an OV and VF together, whether the KDM matches that server, and whether the playback window is open.
Do not send a second, differently named package without recording what changed. That makes the diagnosis harder. Keep the original package, verifier report, checksum, render settings, and delivery note together.
Should you use DCP-o-matic or a specialist facility instead?
Use DCP-o-matic when you need a separate, documented packaging and verification workflow and your delivery is within its supported formats. Use a specialist facility when the package is encrypted, immersive, multi-version, legally or financially critical, or when the venue requires a mastering house. DCP-o-matic documents creation, playback, verification, subtitles, Version Files, and encryption workflows.
When is DCP-o-matic a good choice?
DCP-o-matic is useful when Resolve has produced a clean master but you need an external packager for subtitles, multiple language versions, audio assets, or verification. Its manual says it can create DCPs from movie, sound, still-image, and subtitle files, play and verify packages, and create KDMs. It is also free and open source according to its manual. See the DCP-o-matic manual and project documentation.
The trade-off is another application and another color or audio handoff. Export a source that preserves the final grade and mix, document the transform, and verify the resulting DCP. DCP-o-matic should not be treated as a magic wrapper around an unapproved web export.
When should you pay a mastering facility?
Use a facility when the delivery must be encrypted to a cinema server, when the project includes Dolby Atmos or other immersive assets, when there are many language or subtitle versions, when the festival has strict technical acceptance, or when you cannot view the result in a trustworthy player.
That choice is about risk, not status. A specialist can provide a validation report, a controlled color workflow, version management, and a delivery record. You still need to supply the correct approved master and review the proof.
Can you export a DCP for a festival from Resolve alone?
You can create a DCP from Resolve alone when the installed path, license, venue specification, subtitle workflow, audio layout, and QC tools all line up. You should not claim that a Resolve render is festival-ready just because the progress bar reached 100 percent.
For a first delivery, build a short test, check the package, and ask the festival whether it accepts the exact DCP variant you plan to send. If the answer is unclear, a specialist or an external validator is cheaper than discovering a format error after the screening schedule is published.
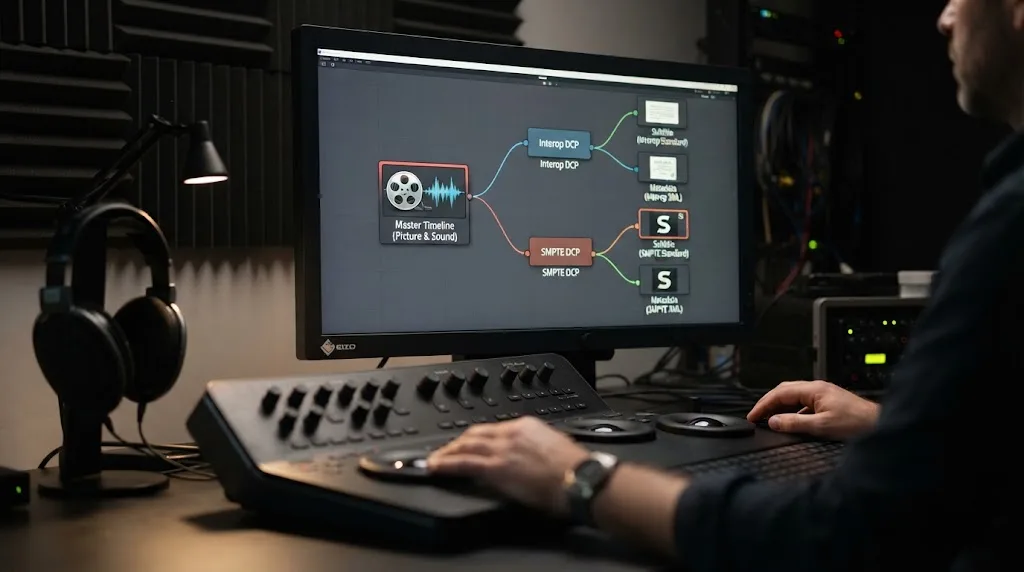
How do Interop and SMPTE DCPs differ?
Choose Interop or SMPTE from the venue's specification because they describe different package and timed-text expectations. Neither label is a quality setting by itself, and neither should be selected simply because it appears first in a menu. DCP-o-matic exposes both standards in its DCP settings, and easyDCP documents different subtitle requirements for each.
Interop is the older compatibility path that many festival workflows still accept. SMPTE is the newer standards family used by many current workflows and is required for some newer features. The practical question is not which name sounds more modern. The question is which standard the target server and festival have approved for this title.
Why does the choice matter for subtitles?
The subtitle difference is easy to state. easyDCP documents Interop subtitles as Texas Instruments CineCanvas XML and says Interop supports open subtitles, while SMPTE uses the SMPTE 428-7 XML-based format and supports the open and closed combinations defined by that standard. A subtitle file made for one path should not be dropped into the other without conversion or re-authoring. See easyDCP's subtitle-track documentation.
If subtitles are burned into the picture, the standard difference becomes less visible in the image, but the package and metadata still need to match the selected DCP mode. If they are separate, the difference matters immediately. Ask the festival whether it wants an open subtitle asset, a closed caption asset, or a complete package with the text already burned in.
Why does the choice matter for encryption and KDMs?
Both approved DCP paths can involve encryption, but the certificate and KDM workflow still belongs to the receiving system. easyDCP describes encryption at the track level and explains that a KDM targets a playback system's public certificate. That means the package standard, server certificate, and playback window must agree. See easyDCP's encryption explanation.
Do not create an encrypted test package before you know who owns the certificate. You can spend hours investigating a playback failure that is really a missing or mismatched KDM. For a normal unencrypted festival delivery, leaving encryption off removes that dependency and keeps QC simpler.
Which standard should you choose when the venue says both are accepted?
Choose the standard that best matches the requested subtitle, caption, version, and playback workflow. If the venue has no preference and your package contains only a normal picture and sound composition, use the current supported path in your licensed tool and validate it with a DCP verifier. Record the choice in the delivery note.
Do not create both Interop and SMPTE packages as a reflex. Two packages double the QC and transfer work. Create both only when a distributor, venue, or technical supervisor asks for both, or when the target playback systems have genuinely different requirements.
How should you handle reels and long timelines?
Treat reels as composition boundaries that must preserve picture, sound, subtitles, and duration together. A long feature can be one composition or several reels depending on the mastering tool and venue workflow, but every boundary should be intentional and checked in playback. DCP-o-matic documents reel settings, Version Files, and package verification as separate parts of its workflow.
Should a short film use multiple reels?
Usually, a short film can stay as one continuous composition if the venue accepts that structure. A longer title may be split into reels by the authoring tool or by the requested delivery specification. The decision belongs to the package workflow, not to a desire to make the folder look more professional.
If the venue gives a reel length or boundary requirement, follow it exactly. If it gives no instruction, let the approved authoring tool use its documented default and verify the complete composition. Do not manually cut the timeline into separate video files unless you know how those files will be joined into the final DCP.
What should you check at every reel boundary?
Check the last picture frame before the boundary, the first picture frame after it, the sound transition, subtitle timing, and any metadata that changes between reels. Watch for a one-frame flash, a missing audio sample, a subtitle cue that is clipped, or a reel that starts on the wrong image.
If you use a leader or a sync pop, decide whether it belongs before the first reel, inside the first reel, or nowhere in the package. A pop that is present in the reference movie but removed from the DCP can make a mix appear out of sync when the real problem is that the two references do not start at the same frame.
Why do reel boundaries matter to Version Files?
A VF can reference picture or sound assets from an OV. That saves transfer size when only subtitles or another language changes, but the references must line up with the original composition. DCP-o-matic explains that a VF needs its OV to play and that the OV and VF are ingested together. See the documented Version File workflow.
If a festival asks for a standalone package, do not send only a VF. A small VF folder may be technically valid while being useless to a venue that received no OV. Put the relationship in your delivery note and ask the recipient to confirm that its ingest system supports the requested version.
How large can a feature DCP become?
DCP size depends on runtime, resolution, frame rate, JPEG 2000 bitrate, audio, subtitles, and the number of compositions. DCP-o-matic warns that a feature-length DCP can exceed 100 GB, so free space and transfer time need to be planned before the render begins. That storage warning appears in the DCP-o-matic manual.
Do not promise a fixed file size from the runtime alone. A 90-minute 2K package with one audio track and a 4K package with several versions are different transfer problems. Use the completed package size for the final transfer plan.
What changes when you export a DCP on macOS, Windows, or Linux?
The DCP decisions stay the same across macOS, Windows, and Linux, but codec visibility, licensing, certificates, file paths, GPU behavior, and external player support can differ. Resolve 21 and easyDCP both publish support across these platforms, yet a supported platform is not proof that every plugin build or driver combination behaves identically. Blackmagic lists Resolve 21 platform downloads, and easyDCP lists its Resolve integration for Windows 64-bit, macOS, and Linux and easyDCP's platform description.
What should macOS users check?
Check the Resolve build source, easyDCP activation, certificate files, external volume format, and the permissions available to the output folder. If you installed a plugin or license while Resolve was open, restart Resolve before diagnosing a missing codec. If the project and DCP are stored on an external drive, confirm that the drive remains mounted for the entire render and playback pass.
Do not assume that an Apple Silicon system and an Intel system expose the same codec behavior just because both run macOS. Resolve's decoding and encoding paths can depend on the application build and hardware. Record the machine, Resolve version, plugin version, and OS version with the render settings when the project is time-critical.
What should Windows users check?
Check whether Resolve is running on Windows x86 or Windows ARM, whether the required plugin or codec supports that architecture, and whether the output drive has the correct permissions. Keep the DCP output path short and simple while troubleshooting. A path or permission error is easier to isolate in a local project folder than inside a deep network share.
Do not treat a completed progress bar as proof that a background security tool did not alter the package during transfer. Run the verifier after the copy, not only before it.
What should Linux users check?
Check the exact Resolve build, GPU driver, easyDCP license and certificate state, filesystem permissions, and the player you will use for QC. A Linux workstation may be excellent for render throughput while your chosen player is installed on another machine. That is workable, but document the handoff and verify the copied package there.
What should every platform record?
Keep these values with the DCP:
| Record | Why it matters |
|---|---|
| Resolve version | A point release can change codec behavior or UI options |
| Operating system and architecture | The same project can expose different codec or plugin paths |
| GPU and driver | Hardware decoding and encoding can affect behavior |
| easyDCP or packager version | Package, validation, and licensing behavior belongs to the authoring tool |
| Project name and timeline name | Prevents a correct package being sent for the wrong cut |
| Render settings | Rebuilds and comparisons need the exact container, frame rate, audio, and subtitle choices |
| Verifier version and report | The recipient can understand what was checked and when |
The record does not need to be elaborate. A text file beside the delivery copy is enough if it names the package and contains the values that would otherwise be lost in a screenshot.
How should you run a short DCP test before a full render?
Run a short test DCP before a full render whenever the project has a difficult color transform, surround mix, separate subtitles, unusual frame rate, or an encryption requirement. A test is not a substitute for final QC, but it catches expensive setup mistakes while the render is small.
What should the short test contain?
Choose a representative section rather than the first random minute. Include:
- A dark shot with shadow detail.
- A bright shot with highlights and a clean white surface.
- Skin tones or another neutral subject.
- Saturated colors and fine texture.
- A shot with motion or optical effects.
- Dialogue and music.
- At least one surround or LFE event if the mix uses them.
- A subtitle cue, title, or credit if the package includes text.
- A frame near a planned reel boundary.
The test should carry the same resolution, container, frame rate, color path, audio layout, subtitle mode, and encryption mode as the full package. If the short test uses different settings, it answers a different question.
What should you compare against the source?
Compare the DCP to the approved reference movie by matching the first frame and duration of the test section. Check image placement, not only image content. Look at black bars, subtitles, logos, credits, and the relationship of faces to the active frame.
For audio, listen to isolated channels and then the full mix. Use a spoken line to confirm center placement, a left-to-right movement to confirm screen order, an ambience passage to confirm surrounds, and a known low-frequency event to confirm LFE. The goal is to confirm routing, not to judge the mix again.
For subtitles, inspect a cue with one line, a cue with two lines, punctuation, an accented character, and a cue near a cut. Separate timed text needs a player check because the projection path may render it differently from Resolve.
What should make you stop the full render?
Stop and correct the workflow when you see a watermark, unexpected crop, color cast, missing sound, wrong channel, missing subtitle, unexpected frame-rate conversion, or a package verifier error. Do not hope that the full render will fix a short-test failure.
Also stop when the test passes technically but the venue changes the specification. A 2K Flat test does not validate a later 4K Scope delivery. A stereo test does not validate a later 5.1 package. Keep the test name specific so nobody mistakes it for the final master.
How should you label test packages?
Use a label that makes accidental delivery difficult, such as FilmName_TEST_2K_Flat_24_SMPTE_51_EN-OV. Keep test packages in a separate folder from the final delivery. Include the word TEST in the composition name if the tool permits it, and delete or archive the test only after the final QC record is complete.
How do you transfer a DCP without damaging it?
Transfer the complete package folder, preserve its contents, and verify the copy after transfer. A DCP's XML metadata and hashes describe the package assets, so changing the folder contents after the render can make the package fail validation. DCP-o-matic's verifier specifically checks asset hashes against package metadata.
What should you never do to a finished DCP?
Do not open the MXF in an editor and save it again. Do not rename files inside the package. Do not move XML or MXF assets into a different folder. Do not remove a file because it looks like a duplicate. Do not compress the folder into a ZIP unless the recipient explicitly asks for that transfer format and knows how to unpack it without changing the contents.
The outer transfer method can change. The inner DCP package should remain intact. If a portal requires a single upload, ask whether it accepts a folder, a disk image, or an archive and whether the recipient will restore the package exactly before ingest.
How should you compare the source and destination copy?
Compare the destination folder's file count and total size with the source, then run the verifier on the destination copy. A byte-for-byte checksum is stronger when the delivery system supports it. If the verifier produces a different result after copying, do not deliver the copy until the cause is understood.
Keep the source package read-only once QC is complete. Create a clearly named delivery copy and record the transfer date, destination, package name, and checksum or verification result. That record helps when a festival asks whether the package changed after approval.
What if the DCP is too large for the requested upload?
Ask the recipient for its preferred transfer route. A DCP can be copied to physical media, transferred through a cinema delivery system, or uploaded through a service that understands large folders. The right route depends on the recipient's ingest process and deadline.
Do not reduce the JPEG 2000 bitrate or downscale the package just to make an upload fit. Those changes create a new deliverable and may violate the approved specification. If the venue wants a smaller package, ask whether it wants 2K, a different audio version, or a different transfer method.
What should you send with the DCP?
Send the complete approved DCP plus a short delivery note that tells the recipient what it is, how it was made, and what was checked. The note should remove questions without turning into a second technical manual.
Include:
- Title and version.
- DCP content type.
- 2K or 4K and Flat, Scope, or Full.
- Frame rate.
- Interop or SMPTE.
- Audio configuration and sample rate.
- Subtitle language and open, closed, burned, or Version File status.
- Encryption status and KDM details if applicable.
- Render tool and version.
- Verifier tool and result.
- Runtime and package size.
- Contact for technical questions.
If the package is a VF, name the required OV clearly and send the relationship instructions. If the package is encrypted, name the target server or certificate reference without exposing secret keys. easyDCP warns that the DCP digest contains the keys needed to decrypt an encrypted DCP and should not be delivered to an exhibition. See the easyDCP encryption warning.
The delivery note should say what you know and what you did not test. For example, write software playback verified, cinema projection not tested when that is true. A clear limit is more useful than a vague claim that the DCP is universally compatible.
What is the final DaVinci Resolve export DCP checklist?
Use this checklist immediately before delivery. Every checked item should correspond to the approved venue specification or to a documented QC result.
Project and timeline
- Resolve 21 project opens without missing media.
- Delivery timeline is the approved locked version.
- Frame rate is confirmed in writing.
- First frame and last frame are correct.
- Runtime and frame count are recorded.
- Leader, countdown, black, and sync pop choices are intentional.
- Image framing matches Flat, Scope, or Full delivery.
- Credits and titles fit the approved frame.
Picture
- 2K or 4K is approved.
- Container dimensions match the selected codec.
- Color-management path is documented.
- XYZ conversion happens once.
- Short test render has been checked.
- Full render has no demo watermark.
- Full render has been opened in a DCP player.
Audio
- Stereo or surround format is approved.
- Sample rate is approved, normally 48 kHz or 96 kHz.
- Audio is uncompressed PCM at the required bit depth.
- 5.1 order is confirmed as L, R, C, LFE, Ls, Rs when applicable.
- Dialogue is in the intended center channel.
- LFE and surround channels have been tested.
- Audio duration matches picture.
Subtitles and versions
- Subtitle language is correct.
- Open, closed, burned, or separate mode is approved.
- Subtitle format matches Interop or SMPTE packaging.
- Every cue has been checked in the DCP player.
- OV and VF relationships are documented if used.
- A complete standalone package is available if the venue cannot ingest a VF.
Package and delivery
- Composition name and content type are correct.
- Package includes all XML, MXF, subtitle, and encryption assets.
- Verifier reports no blocking errors.
- Hashes match the package contents.
- Encrypted package has the correct certificate and KDM window.
- Delivery copy has been copied without renaming or editing the package.
- A checksum or other transfer record is saved.
- Festival or cinema has confirmed receipt.
For a broader export-setting reference, see DaVinci Resolve Export Settings: Numbers That Actually Work. It covers general delivery decisions, while this guide owns the cinema package path.
The correct next step is not another render. It is to compare the completed package against the written venue specification, run the verifier, play the DCP, and keep the QC record with the delivery copy. If every result agrees, send the complete folder and the exact version the venue approved.
Frequently asked questions
- How do I export a DCP from DaVinci Resolve 21?
- On the Deliver page, choose Single Clip, select DCP as the format, choose the approved easyDCP or JPEG 2000 2K or 4K Flat or Scope codec, configure audio and subtitles, and render. Check the resulting package in a DCP player before delivery.
- Can DaVinci Resolve export a DCP without easyDCP?
- Resolve may expose unencrypted JPEG 2000 DCP options, but the easyDCP Resolve integration is the direct path for encrypted or unencrypted Interop and SMPTE DCPs. A separate packager such as DCP-o-matic can also build and verify a DCP.
- What resolution and frame rate should I use for a DCP?
- Use the festival or cinema specification first. Common DCI choices are 2K at 2048 x 1080 or 4K at 4096 x 2160, with 24 fps as the usual feature delivery rate. Flat and Scope use different active image dimensions.
- Why is my DaVinci Resolve DCP export watermarked?
- The integrated easyDCP Resolve plugin is operating in demo mode. Its current FAQ lists a visible watermark on every DCP frame, reduced playback quality after 15 seconds, and audio playback stopping after 15 seconds.
- How do I export 5.1 audio for a DCP?
- Prepare six discrete channels in the cinema order L, R, C, LFE, Ls, Rs, route them to a 5.1 bus, and export uncompressed PCM at 48 kHz or 96 kHz with the DCP channel layout confirmed.
Sources
- Blackmagic Design DaVinci Resolve 21 support and final release
- Blackmagic Design DaVinci Resolve 21 manual
- easyDCP Resolve integration and supported DCP modes
- easyDCP Resolve demo limitations
- easyDCP Creator track, picture, color, and audio requirements
- Digital Cinema Initiatives specification index
- DCI Digital Cinema System Specification image constraints
- ISDCF digital cinema terms and audio configurations
- ISDCF audio channel recommendations
- Fraunhofer magazine interview with Heiko Sparenberg
- DCP-o-matic users' manual and package capabilities
- DCP-o-matic DCP verification checks
- DCP-o-matic timed text and subtitle handling
- DCP-o-matic common subtitle and version-file workflows
- DCP-o-matic content and channel mapping
- DCP-o-matic DCP creation settings
- DCI digital cinema compliance test plan
- DCI image compliance test details
- easyDCP encryption and KDM documentation
- Blackmagic Design DCP rendering guidance
- DCP-o-matic project manual source
Put this guide to work with TryUncle.
Ask about the step you’re on. TryUncle sees your screen and points at the control you need, so you can keep learning in your own project.
Get TryUncle for Mac or WindowsKeep reading
Fixes · Jul 7, 2026 · 24 min
DaVinci Resolve Not Exporting? Fix a Stuck or Failed Render
Why DaVinci Resolve renders get stuck at 0% or 99%, or fail with no error, and the exact checks that get a stalled export moving again.
Guides · Aug 2, 2026 · 39 min
How to Export Separate Audio Stems for Mixing in DaVinci Resolve
Export separate audio stems for mixing in DaVinci Resolve: build Fairlight buses, set Deliver page Output Track per stem, and render 24-bit WAV files.
Guides · Jul 7, 2026 · 23 min
DaVinci Resolve Export Settings: Numbers That Actually Work
The exact DaVinci Resolve export settings for YouTube, client handoffs, and ProRes archives, plus what changed with Resolve 21's H.265 encoder.