Articles / Guidesupdated for DaVinci Resolve 21.0.2 (July 2026)
How to Consolidate Media in DaVinci Resolve Before Archiving
Quick answer
Open File > Media Management, set Operation to Copy, choose Used Media (add frame handles if you might still trim), then browse to a destination and run it. Once the consolidated media pool is clean, right-click the project in Project Manager and choose Export Project Archive to build the final .dra archive.
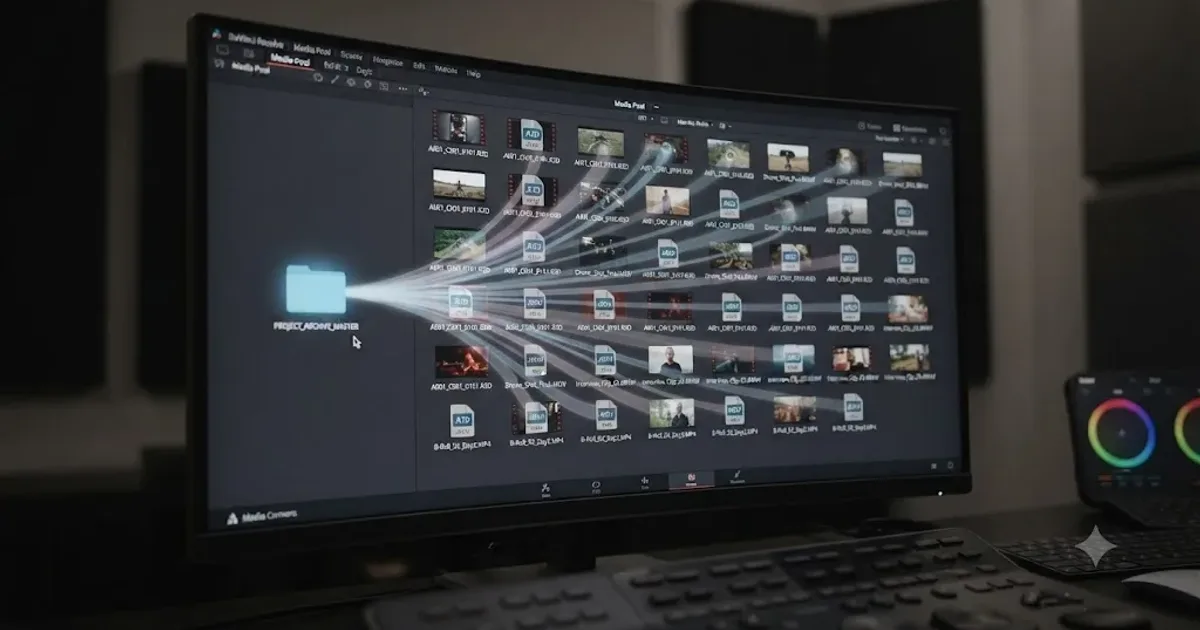
You're closing out a project. The timeline is locked, the client signed off, and now you're staring at a Media Pool that still has every take, every safety angle, and every clip you imported but never touched. Archive all of that as-is and you're burning drive space, cloud storage, or tape on footage nobody will ever open again.
After seven-plus years of cutting commercial work in DaVinci Resolve, and running a 100,000+ member video-editing community where "how do I clean this project up before I archive it" is one of the recurring questions freelancers bring us, the fix is almost always the same two-step move: consolidate the media first, then archive. Here's exactly how to do both, in the right order, without losing anything you'll need later.
What does "consolidate media" mean in DaVinci Resolve?
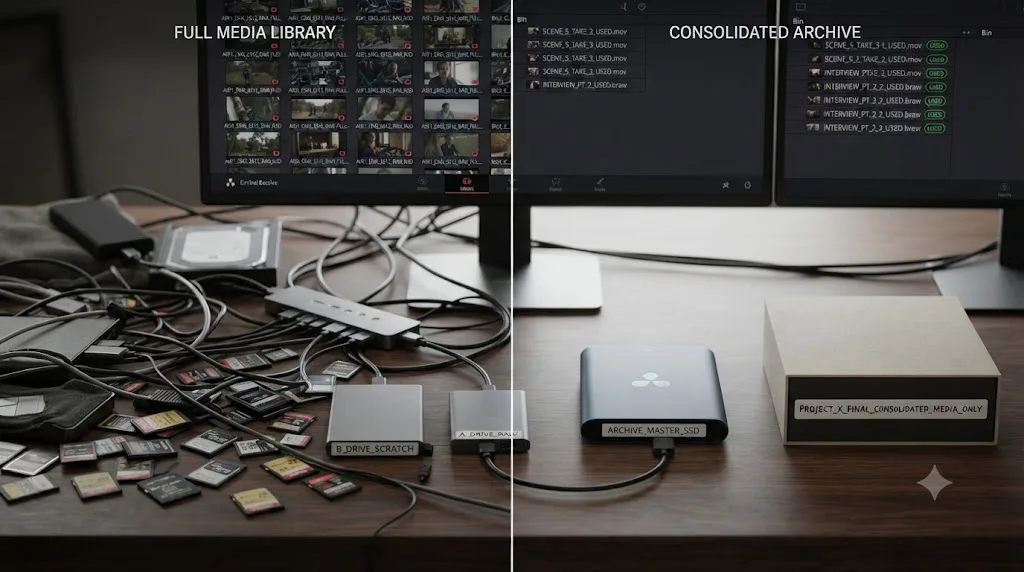
Consolidating media means copying or trimming only the clips your timeline actually uses into one clean location, instead of archiving your entire, unsorted camera-original library.
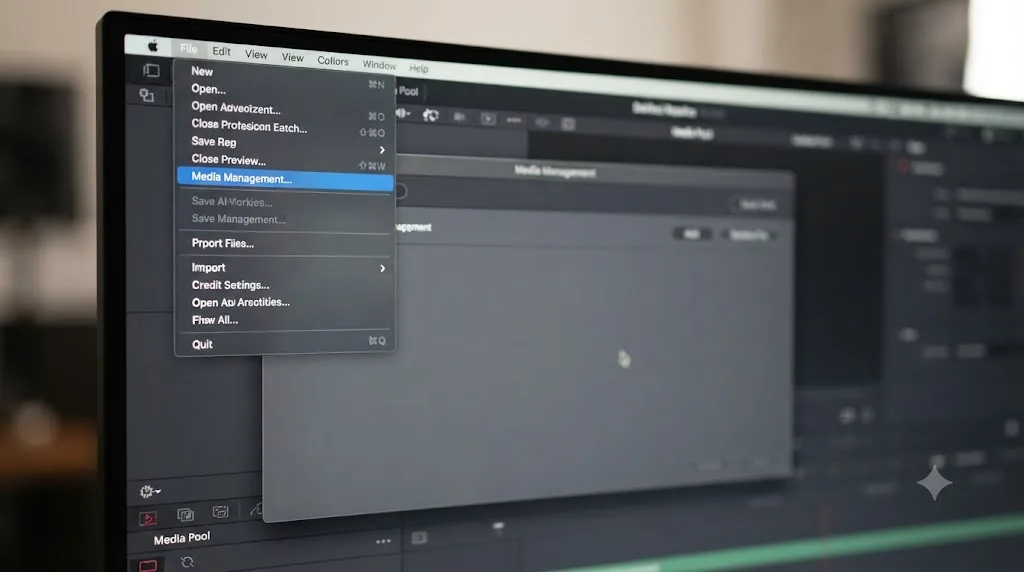
DaVinci Resolve doesn't have a single button labeled "Consolidate." The feature that does this job is called Media Management, found under the File menu on the Media or Edit page. Per the reference manual, Media Management exists to create "a duplicate of your project's clips that eliminates unused media in preparation for handing the media off to another facility," and it works just as well when the destination is long-term storage instead of another editor's machine, per DaVinci Resolve's reference manual.
That distinction matters more than it sounds. A typical shoot brings in far more footage than ends up on the timeline: alternate takes, safety angles, room tone, a card full of B-roll that never made the cut. All of it sits in your Media Pool, and all of it gets swept into an archive if you skip straight to File > Project Manager > Export Project Archive without consolidating first. Consolidating media is not the same step as archiving a project, and skipping it is what turns a 40 gigabyte edit into a multi-terabyte archive. The two are related, but they solve different problems, and this guide covers both, in the order they actually belong.
How do I consolidate media in DaVinci Resolve before archiving?
Open File > Media Management, choose Copy as the operation, select Used Media as the scope, and point the destination at a clean folder before you run it.
Here's the full sequence, step by step:
- Back up the project first. Duplicate it in Project Manager, or export a
.drpproject file, before you run any Media Management operation. Colorist Kirill Volgin puts this plainly in his own walkthrough of the feature: "Please make a backup of your project before you start," per Volgin's guide. Copy is non-destructive to your originals, but Move and the Relink option that often follows it are not, and a backup costs you nothing. - Clean the Media Pool of unused clips first, covered in detail further down. It makes every following step faster and shrinks what Media Management has to sort through.
- Open File > Media Management. You'll find it on the Media page or the Edit page, under the File menu.
- Choose your scope: Entire Project or a specific Timeline. Entire Project pulls media from every timeline in the project. If you're archiving one finished cut and don't need the others, pick that timeline specifically.
- Set Operation to Copy. Resolve's Media Management window offers three operations: Copy, Move, and Transcode. Copy duplicates the files you select into a new destination and leaves your originals untouched, which is the right choice ahead of an archive.
- Choose Used Media, or Used Media and trim keeping a set number of frame handles, instead of All Media. This is the actual consolidation step, the part that strips out every clip your timeline never touches.
- Browse to a destination folder with enough free space, and consider enabling Use Project Name Subfolder so the output lands in a clearly labeled folder rather than loose at the root of a drive.
- Run the operation. Resolve copies (or trims and copies) only the media you selected, and if you're consolidating a timeline specifically, it also writes a
.drttimeline file into the destination bin, which you can reimport later if needed, per the manual's page on Media Management of Timelines.
An archive that includes every frame you ever imported is not more complete, it's just bigger. Consolidating first is what separates an archive that's actually usable years from now from a pile of drives nobody wants to dig through.
What's the difference between Media Management and Export Project Archive?
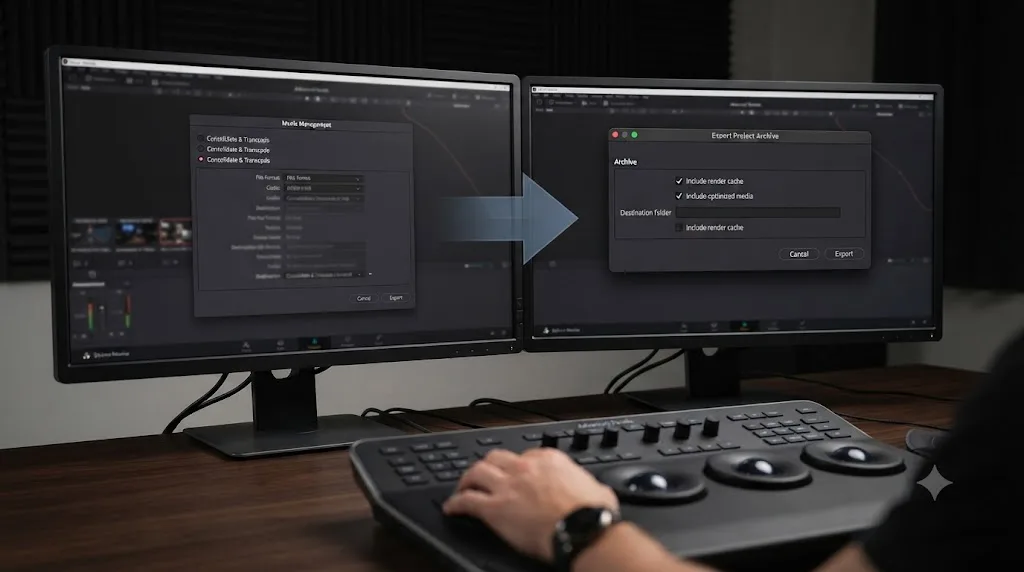
Media Management consolidates your source media into a smaller, cleaner set of files. Export Project Archive bundles the project database and a copy of its media into one self-contained folder for long-term storage or handoff.
They're not competing features, they're sequential ones, and mixing up what each does is the single most common source of a bloated archive. Media Management, accessed from the File menu, changes what media exists and where, without touching your saved project file. Export Project Archive, accessed by right-clicking a project inside Project Manager, packages your project plus a copy of its referenced media into a .dra folder that Resolve can restore as a complete, working project later.
| Feature | What it does | Where to find it | Changes the project file? |
|---|---|---|---|
| Media Management | Copies, moves, or transcodes selected media, with options to trim unused footage | File menu, on the Media or Edit page | No, it works on media files only |
| Export Project Archive | Bundles the project database plus a copy of its media into one .dra folder | Right-click a project in Project Manager | Creates a new archive package, doesn't alter the source project |
| Remove Unused Clips | Deletes references to unused clips from the Media Pool | Media Pool Options menu (three dots) | Yes, changes the project's Media Pool, not the files on disk |
Running Export Project Archive without first consolidating still works. Resolve will still find and copy every clip your project references, used or not, into the archive folder, and if your Media Pool is full of untouched B-roll and alternate takes, that unused footage rides along for the full trip. A project archive is only as small as the media it's told to include, and by default it includes everything the project ever touched, not just what the final cut kept. Consolidate first with Media Management, or clean the Media Pool with Remove Unused Clips, and the archive that follows shrinks accordingly.
Copy, Move, or Transcode: which operation should you use to consolidate?
Copy, for almost every pre-archive consolidation, because it duplicates the media you select without touching or removing your originals.
Media Management's Operation dropdown offers three choices, and each behaves differently. Per the reference manual, Copy "creates duplicates of all media associated with clips or timelines at the destination," while Transcode "creates duplicates of all media associated with clips or timelines in a new format that you specify," per the manual's page on Using Media Management. Move relocates the files to the new destination instead of duplicating them, which removes them from wherever they currently sit.
| Operation | What happens to your source files | Best for |
|---|---|---|
| Copy | Untouched. New duplicates are written to the destination | Pre-archive consolidation, project handoffs, anything where you want a safety net |
| Move | Relocated, no longer present at the original path | Freeing up space on a specific drive when you're confident you won't need the originals there |
| Transcode | Untouched originals, new files written in a different codec | Standardizing mixed camera formats, or converting to a smaller archive-friendly codec |
Copy is the safer default before an archive specifically because it's reversible. If something goes wrong with the consolidation, your original camera files are exactly where they were, untouched, and you can start over. Move saves a step by skipping the duplication, but it also means a mistake in your destination or filter settings can leave you scrambling to figure out where your only copy of a clip went. Transcode is worth reaching for only when your footage arrives in a format you don't want living in long-term storage, like a proprietary raw codec you'd rather not depend on a specific piece of hardware to decode a decade from now.
Copy is the operation that lets you undo a mistake, and an archive is exactly the kind of task where you want that option available. Reserve Move for situations where drive space is the emergency, not the archive workflow itself.
All media, used media, or used media with handles: which scope is right?
Used media, or used media with a modest handle of extra frames, is right for almost any archive. All media defeats the entire purpose of consolidating.
Inside Media Management, the scope selector determines which clips actually get copied, moved, or transcoded. Per the manual's breakdown of the window's options, you can choose to copy or transcode "all media," "used media," or "used media and trim keeping x frame handles," per the manual's page on Media Management window options. Only the last two options actually consolidate anything. All Media copies your entire selected library, used or not, which is the same outcome as not consolidating at all, just with an extra step in between.
The real decision is between Used Media, which copies full-length source clips for anything on the timeline, and Used Media with trim, which additionally cuts each clip down to only the portion the timeline uses, plus a margin of extra frames on either side. Full-length Used Media is larger but leaves you the entire original clip if you ever need to extend a cut back toward its full length. Trimmed Used Media is smaller and faster to work with, but it permanently discards everything outside your handle range from the copies you're keeping, though never from your original camera files if you used Copy rather than Move.
This is also where consolidating H.264 and similar temporally-compressed footage got meaningfully better in recent Resolve versions. The trim option's handling of GOP-based codecs like H.264, XAVC, and AVC-Intra now "eliminates unused content without recompressing or transcoding," per a discussion of the feature on Blackmagic's own forum, per the forum thread. That thread also notes an important caveat: trimming isn't always frame-accurate on GOP formats, since "GOP formats will be extended to the next I-frame," meaning your trimmed copy might carry a handful of extra frames beyond what you specified, not fewer. That's a safe direction to be imprecise in.
A trimmed, used-media archive that discards footage outside the timeline is not a smaller version of your project, it's the version of your project that actually matches what you delivered. Full camera originals belong in your primary media archive if you keep one separately; a project-specific archive exists to reproduce the edit, not to preserve raw footage you already have backed up elsewhere.
How many frame handles should you keep?
12 frames is the reference manual's own example, though colorists doing heavier finishing work often keep more, closer to 25 frames, for extra room to adjust a cut later.
Frame handles exist because a locked timeline isn't always as locked as it looks. A client asks for a shot to hold two seconds longer. A trim you made in the rough cut turns out to have been a little tight. Without handles, a trimmed archive gives you exactly the frames you used and nothing else, which means any of those requests sends you back to your original, unconsolidated camera footage, if you still have it. With handles, you've got a small buffer of extra frames on either side of every cut, enough to absorb a modest adjustment without touching the originals at all.
Volgin's own walkthrough describes the tradeoff directly: choosing "used media and trim keeping 25 frame handles" means Media Management "will automatically copy and trim each clip that was used in the project, excluding unused ones, while leaving a margin of 'left' and 'right' of 25 frames on each individual clip," specifically so an editor "can make changes and 'move' one of the clips forward or backward for a couple of seconds," per Volgin's guide to Media Management. More handle frames mean more insurance and a larger archive; fewer mean a leaner archive with less room to maneuver if the project ever reopens.
| Handle length | Archive size impact | Best for |
|---|---|---|
| 0 frames (no handles) | Smallest | A truly final, delivered project you're confident won't be revisited |
| 12 frames | Small, DaVinci Resolve's own documented example | General-purpose archiving with a small safety margin |
| 25 frames | Moderate | Color-heavy finishing work, per Volgin's recommended workflow |
| 50+ frames | Larger, closer to full-length clips | Projects likely to need retiming or extended cuts later |
Frame handles are insurance against your own future edits, not a formality to skip. Choosing zero handles on a project you're even slightly unsure about is the kind of shortcut that looks harmless right up until a client calls back six months later asking for one more second of a shot you trimmed to the frame.
Should you enable "Consolidate multiple edit segments into one media file"?
Yes, if you don't mind slightly larger files and want the relationship between your cuts and their source clips to stay simple for future grading work.
This option only appears once you've selected the trim scope, and it changes how Resolve handles a source clip that appears more than once on your timeline, say, three separate cuts from the same interview take. Without it, trimming produces three separate short clips, one per instance the timeline actually uses. With it enabled, Resolve instead keeps those three segments together inside one media file that spans from the earliest cut to the latest, even if there's untouched footage between them.
The tradeoff is straightforward. Multiple small trimmed files are individually smaller and contain less unused footage overall. One combined file per source clip is larger, since it has to span the full range between your first and last use of that clip, but it preserves a cleaner one-to-one relationship between a source clip and its file on disk, which the reference manual notes "can make grading simpler later on," per DaVinci Resolve's reference manual.
For an archive specifically, either choice works. If your priority is the smallest possible archive, leave it off. If you expect to reopen this project for a regrade, a director's cut, or a re-edit down the line, and you'd rather not hunt through a dozen fragments of the same interview to find continuity, turning it on trades a little extra disk space for a Media Pool that still makes sense when you open it two years from now.
Should you remove unused clips from the Media Pool first?
Yes, as a cleanup step before Media Management, since it shrinks what you're consolidating and prevents orphaned clips from surviving into the archive at all.
Resolve gives you a second, simpler tool for this that predates the need for a full Media Management pass: open the Media Pool's Options menu, the three-dot icon in its toolbar, and choose Remove Unused Clips. This removes any clip that isn't referenced by any timeline in the project from the Media Pool entirely. It's a project-level change, not a file-level one, so it doesn't touch anything on disk, it just cleans up what your project itself is tracking.
Running this before Media Management matters for a practical reason: it means Used Media scope has less to sort through, since clips that were never on the timeline in the first place won't even be candidates. It also matters for anyone who inherits the project later, colorist, assistant editor, or future you. A Media Pool full of clips that were never cut into anything is a maze for whoever opens the project next, wondering whether that stray take was deliberately kept for a reason or just never cleaned up.
One caution before you run it: this operation is a straightforward removal from the project, and like most operations in this guide, back up first. If you're mid-edit and might still pull in an alternate take you set aside, Remove Unused Clips isn't the move yet. Save it for the point where the cut is genuinely locked and you're preparing specifically to archive or hand off.
A Media Pool cluttered with clips nobody cut into anything isn't neutral, it's a tax on every future person who has to figure out whether that clip mattered. Removing unused clips before consolidating is a small step that pays off entirely in other people's time, including your own six months from now.
Should render cache and proxy media go into the archive?
Generally no, since both can be excluded from Export Project Archive and regenerated automatically the next time the restored project reopens.
When you get to Export Project Archive, described in full in the next section, the dialog gives you separate checkboxes for Media Files, Render Cache, and Proxy Media. Media Files is the one you actually need, your consolidated source media. Render Cache and Proxy Media are both derived data, built by Resolve from your source footage and your edit, and neither carries information that doesn't already exist somewhere else in the archive.
Our cache files guide covers just how much space render cache alone can consume during active editing, and the same math applies here. A project carrying months of accumulated Smart Cache in a high-fidelity format like DNxHR 444 can easily rival or exceed the size of the source media it's caching. Our render cache guide covers the mechanics of how that cache gets generated in the first place, and none of that mechanism changes based on whether you're mid-edit or archiving. Including it in an archive means paying to store, transport, and eventually restore data that Resolve will happily rebuild from scratch, at the cost of a short wait, the next time the project actually opens.
Proxy Media follows the same logic. It exists to make editing smoother on underpowered hardware, and once the project is locked and archived, nobody's scrubbing proxies anymore. If the archive ever gets restored specifically to resume active editing on a slow machine, regenerating proxies from the consolidated source media takes time but no manual effort.
There's one narrow exception worth naming: if you're archiving specifically because you expect to hand the archive to someone on a slower machine who'll need proxies immediately and can't wait for them to regenerate, including proxy media saves that person real time on day one. That's a deliberate handoff decision, not a default.
Render cache and proxy media do not belong in a long-term archive, because DaVinci Resolve can rebuild both from the media you kept. Uncheck them in Export Project Archive's options, and the space you save is often larger than the difference consolidating the source media itself made.
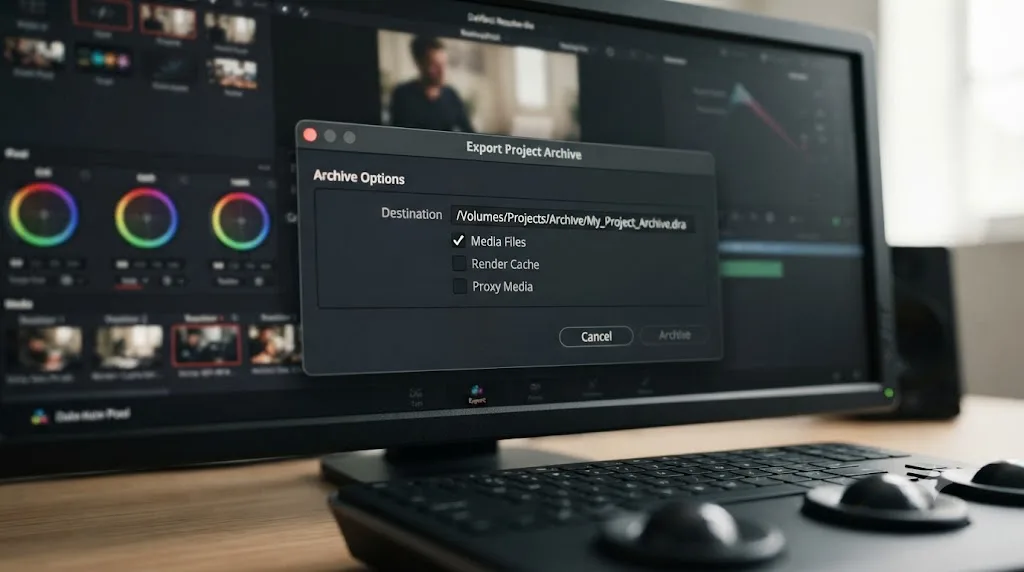
How do you actually archive the project after consolidating?
Right-click the project inside Project Manager and choose Export Project Archive, then pick a destination with enough free space and confirm which of Media Files, Render Cache, and Proxy Media to include.
Once your media is consolidated, either through Media Management, Remove Unused Clips, or both, the archive step itself is short:
- Open Project Manager. If the page navigation bar is hidden, choose File > Project Manager to bring it up.
- Right-click the project you want to archive, not a bin or a timeline inside it, the project entry itself in the Project Manager's grid or list view.
- Choose Export Project Archive from the context menu.
- Browse to a destination with enough free space for the full media set you're about to include. Resolve will show you the current size and warn you if the destination doesn't have room.
- Check or uncheck Media Files, Render Cache, and Proxy Media based on what you decided in the previous section. Media Files stays checked; Render Cache and Proxy Media are usually safe to leave unchecked.
- Confirm and let it run. Depending on your consolidated media size and destination drive speed, this can take anywhere from a couple of minutes to close to an hour for a very large project. Larry Jordan documented one real example where archiving a 1.2 TB project took about ten minutes, with Resolve writing data at roughly 2.3 gigabytes per second to a fast destination drive, per Jordan's article on managing projects in DaVinci Resolve.
The output is a .dra folder, not a single file, containing the project's own export plus a media subfolder with everything you chose to include. If your original media lived scattered across several drives, the archive folder consolidates all of it into that one subfolder automatically, regardless of where each piece originally sat, which is part of why an archive is genuinely different from a plain backup copy of your project file.
Worth knowing before you commit to this step: the project database file itself is tiny compared to the archive it produces. In the same documented example, the project export sat at roughly 434 kilobytes while the full archive it belonged to reached 1.04 terabytes, per Jordan's article. Almost everything in a project archive's size comes from the media, which is exactly why consolidating that media first, before this step, is the single biggest lever you have over how large the finished archive ends up.
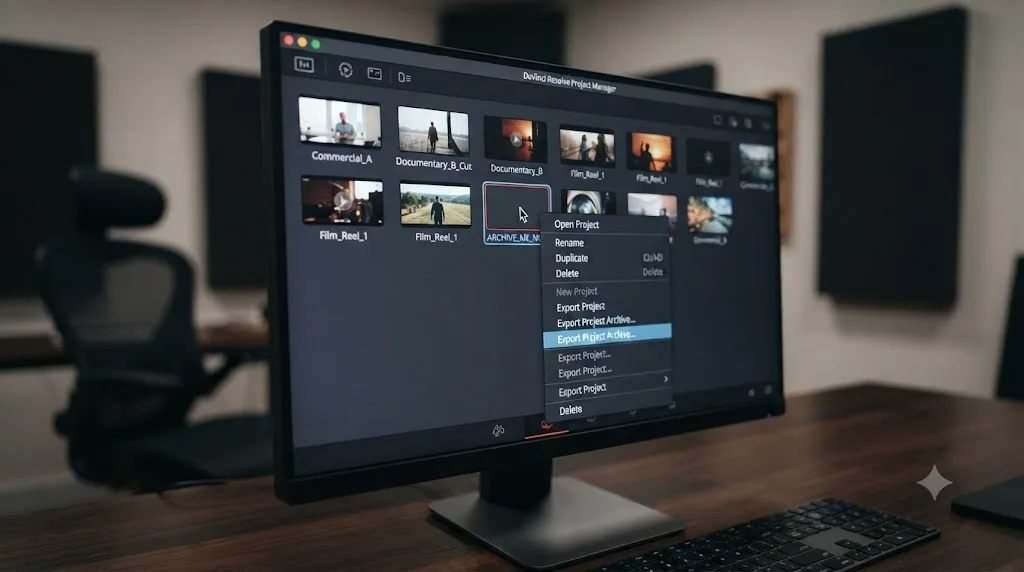
How do you confirm a restored archive is actually complete before you let go of the originals?
Copy the finished .dra archive to a separate drive, run Restore Project Archive under a throwaway project name, and scrub a handful of timeline cut points before you touch the original camera files again.
An archive that finishes without an error message isn't automatically a good archive. It's a folder that Resolve believes it wrote correctly, and the only way to know for sure is to actually put it back together somewhere else and look at it. Skipping this step and going straight from "archive complete" to "wipe the original drive" is how a corrupted file, a partial copy, or a media path that didn't resolve the way you expected turns into a real loss instead of a five-minute fix.
The check itself is short:
- Copy the entire
.drafolder, not just part of it, to a drive other than the one holding your original camera files. - Open Project Manager, right-click an empty area, and choose Restore Project Archive.
- Give the restored copy a throwaway name, something like "ARCHIVE-TEST," so it's obviously not your working project.
- Open the restored project and check that every timeline plays without an offline media warning.
- Scrub a few cut points by hand, especially any clip you trimmed with frame handles, to confirm the footage on either side of the cut is actually there.
- Delete the test project entry from Project Manager once you're satisfied. This doesn't touch the archive folder itself, only the temporary import.
Only after that check passes is it safe to treat the archive as the sole copy of anything and repurpose the drive the originals were sitting on. This check matters even more if you used Move instead of Copy earlier in the process, covered in the Copy, Move, or Transcode section above. Move already relocated your source files by the time you reach Export Project Archive, so there's no separate camera-original library sitting untouched as a fallback. If the archive turns out to have a gap, Move already removed your only safety net before you had the chance to notice.
Size is a useful gut check too, not a substitute for scrubbing playback, but a fast first pass. If you consolidated with Used Media and a modest frame handle, and the restored archive somehow shows a media folder close to the size of your original, unconsolidated library, something didn't apply the way you intended, the scope reverted to All Media, a filter didn't catch every timeline, or an earlier step got skipped. Catching that while the original drive still exists costs you nothing. Catching it three months later, after that drive went back into rotation for the next job, can cost you the entire project.
Colorist and consultant Larry Jordan learned this lesson the hard way on his own machine, describing how he came close to losing every project he'd ever worked on and had to rebuild his library from Resolve's own automatic backups rather than a deliberate archive, warning other editors that "it is these archives that need to be backed up," per Jordan's account of the incident. An archive is not exempt from the rules that apply to every other copy of your work. It can still be incomplete, still be on a drive that fails, and still be worth verifying before you treat it as a safe substitute for the files it replaced.
An archive you haven't restored is a hypothesis, not a guarantee, and a five-minute test restore is the only way to turn it into one before the original footage is gone. The cost of skipping this check is invisible right up until the moment you actually need the archive and discover it wasn't what you thought it was.
Where should you store the finished archive?
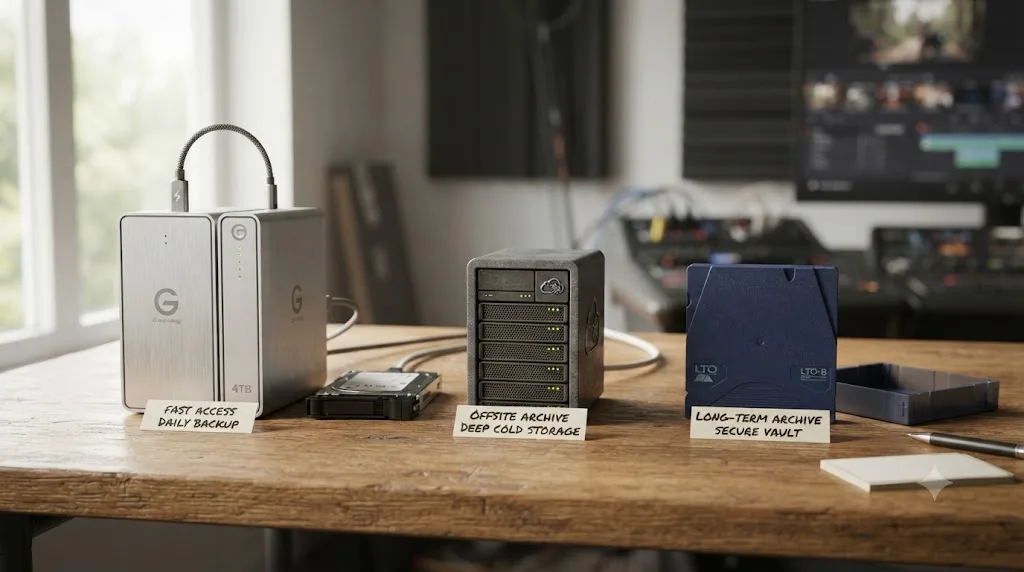
External drives suit most freelance and small-team archives under roughly 50 terabytes total, cloud cold storage suits projects you truly expect to never reopen, and LTO tape starts paying for itself once total archive volume climbs past roughly 100 terabytes.
Consolidating media controls how big any single archive is. Where you put that archive once it's built is a separate decision, and it's one that scales very differently depending on how much total archived material you're actually managing across every project you've ever finished.
| Storage option | Typical restore time | Rough cost pattern | Best fit |
|---|---|---|---|
| External drives (pair for redundancy) | Minutes | Higher upfront cost per drive, no recurring fee | Freelancers and small teams, total archives under roughly 50 TB |
| Cloud cold storage (deep archive tiers) | Hours to a day or two | Very low monthly storage cost, real cost to restore | Projects you're confident you'll rarely if ever reopen |
| Cloud warm storage | Near-instant | Higher monthly storage cost than cold tiers, low or no restore fee | Projects with a realistic chance of needing a fast pull |
| LTO tape | Minutes once loaded, plus drive access time | Very low per-terabyte media cost, high upfront deck cost | Studios and teams with 100+ TB of total archived material |
A widely cited baseline worth building any of these around is the 3-2-1 rule: three copies of anything you care about, on two different types of media, with at least one of those copies kept offsite, a principle that predates DaVinci Resolve entirely but applies directly to project archives, per a 2026 breakdown of archiving strategies for editors. A single archive on a single drive sitting on the same shelf as your working machine isn't really an archive, it's a copy that hasn't failed yet.
LTO specifically deserves a closer look if your archive volume is genuinely large, since the economics look nothing like drives or cloud storage. An LTO-9 cartridge holds 18 terabytes natively, up to 45 terabytes with compression, and carries a documented shelf life around 30 years under proper storage conditions, per LTO-9's final published specifications. The catch is the hardware: a tape deck capable of reading and writing LTO-9 costs thousands of dollars upfront, which is exactly why it only makes financial sense once you're spreading that cost across a large enough total archive, per the same 2026 archiving breakdown referenced above. Below that volume, the math favors drives or cloud storage instead.
The smallest safe archive is the one that still contains everything the timeline actually touches and nothing it doesn't, and that principle applies as much to choosing where you store it as it does to what you put inside it. A perfectly consolidated archive sitting on one uncopied drive is still one drive failure away from being gone.
How do you restore a consolidated archive later without media going offline?
Right-click inside Project Manager, choose Restore Project Archive, point it at the .dra folder, and Resolve relinks its own consolidated media automatically, since the project and the media traveled together.
This is one of the real advantages a proper .dra archive has over just zipping up a project export and a footage folder separately: the archive knows exactly where its own media lives, because Resolve wrote both pieces into the same package at the same time. To restore:
- Copy the entire
.draarchive folder to a working drive with enough space, not just the project file inside it. The media subfolder has to come along. - Open Project Manager, right-click in an empty area, and choose Restore Project Archive.
- Navigate to the
.drafolder and select it, then click Open. - Give the restored project a name. Resolve will prompt for one, since it's importing this as a new project entry rather than overwriting anything.
- Let it import. The project, its bins, and its media relink automatically, matching the state you left it in when you archived it.
If media still shows offline after a restore, the cause is almost always that the archive folder got moved or partially copied, with the media subfolder left behind or still transferring. Our media offline guide covers relinking in depth for any case where a clip's link breaks after the fact, including the specific steps for Relink Selected Clips if a handful of files need manual reconnecting rather than the whole project.
One more scenario worth knowing: if you only ran Media Management without ever creating an Export Project Archive, restoring is different, because there's no .dra package to restore from. In that case, your project file still points at the old, original media paths, not the new consolidated copies, and you'd need to manually relink the timeline to the consolidated destination folder yourself. That's a real reason to prefer running Export Project Archive as your final step even after consolidating with Media Management, rather than treating the consolidated folder alone as your finished archive.
What if your project spans multiple drives or a network share?
Media Management and Export Project Archive both handle this the same way: everything gets pulled into one destination, regardless of how scattered the sources were beforehand.
A common real-world case looks like this: A-camera footage on one external drive, B-camera on another, audio recorded separately and imported from a third location, and a folder of client-supplied graphics sitting on a network share. None of that scattered layout is unusual, and none of it prevents consolidation from working correctly. Media Management copies from wherever each clip currently lives, based on the path Resolve already has for it, into the single destination folder you specify, flattening that whole scattered structure into one place.
The practical wrinkle is speed, not correctness. Consolidating from a network share pulls every used clip over that network connection during the copy, which is slower than consolidating from a local or directly attached drive, sometimes considerably so on a congested or wireless connection. If any of your source drives are disconnected or unreachable when you run Media Management, Resolve simply can't copy what it can't currently see, and those specific clips will fail or be skipped rather than silently substituted with something else.
Before running a multi-drive consolidation, it's worth doing a quick pass through Preferences, Media Storage, confirming every drive your project actually references shows as connected. Our folder and bin naming guide covers keeping a consistent, traceable structure across multiple footage drives in more depth, and that same organization pays off directly here: a project where every bin cleanly maps to a known drive and folder is much easier to audit for missing connections before you start a consolidation that might take an hour to run.
Consolidating from scattered storage doesn't require reorganizing your drives first, it just requires every drive to actually be connected when you press go. Check that before you start, not after a partial copy leaves you sorting out which clips made it and which didn't.
What if you're on a shared, multi-user project on Project Server or Blackmagic Cloud?
Media Management and Export Project Archive both work the same way regardless of whether your project lives in a local database or a shared one, but you should coordinate with collaborators first, since both operations work from whatever your local session currently sees.
DaVinci Resolve's collaboration workflow, whether that's a PostgreSQL database on a local network or the hosted Blackmagic Cloud, lets multiple editors open the same project at once, with bin and timeline locking to keep them from overwriting each other's work. Blackmagic's own collaboration page describes DaVinci Resolve Project Server as free specifically so teams can "share the same project or timeline with people simultaneously around the world," per Blackmagic Design's collaboration overview. Neither Media Management nor Export Project Archive cares which kind of database the project uses. Both operate on the project as your machine currently has it loaded, the same way they would on a single-user local project.
What changes is the etiquette around running them. If a teammate has a bin checked out and is mid-change to a clip's in and out points when you run Media Management, your consolidation reflects the project as it stood before their edit saved, not after. Run Export Project Archive at that same moment, and the archive captures the same incomplete state. Neither operation will warn you that someone else's work is missing, because from Resolve's perspective, nothing went wrong. It simply exported what your session could see at that moment.
The safer sequence on a shared project is to pick a moment when nobody has bins or timelines actively checked out, confirm with your collaborators that they've saved and closed out of anything they were touching, and only then run Media Management or Export Project Archive. If timing a quiet moment across a whole team isn't realistic, duplicate the project into a local, non-shared copy first, and consolidate or archive that duplicate instead. It leaves the live shared project completely untouched while you build an archive from a snapshot that won't change out from under you mid-operation.
A short pre-flight makes this easy to get right every time. Post in your team's chat, or whatever channel you already use to coordinate, that you're about to run Media Management or Export Project Archive. Wait for everyone with the project open to save and close any bin or timeline they have checked out. Confirm nobody's actively rendering from that project on another machine, since a render in progress is reading from the same media the consolidation is about to touch.
One more wrinkle worth planning for: Media Management's Copy operation writes to whatever destination folder you point it at, and that folder isn't automatically visible to your collaborators just because the project itself is shared. If the goal is a team-wide consolidated media set rather than a personal archive, put the destination somewhere every collaborator's machine can already reach, the same shared storage the project's media already lives on, so the paths Resolve writes into the project stay valid for everyone, not just the machine that ran the consolidation.
Media Management doesn't know or care whether a project lives in a local database or a shared one, it just copies whatever your local session currently sees, which is exactly why a quick check-in with your team matters more than any setting inside the Media Management window itself. The tool behaves identically either way. The risk lives entirely in the timing.
What if you're handing the project to another editor instead of archiving it?
Consolidate the same way, but lean toward including proxy media and being more generous with frame handles, since a handoff means someone else needs to keep working, not just store the result.
Archiving and handing off share the same first step, consolidating media with Media Management, but the decisions after that point diverge a little. An archive optimizes for the smallest safe footprint, since nobody's actively editing it. A handoff optimizes for the next editor being able to open the project and keep cutting without hitting walls.
That changes a few of the calls covered earlier in this guide. Frame handles matter more in a handoff, since the person picking up your cut is far more likely to need to extend or adjust something than an archive sitting untouched on a shelf. Proxy media is worth including if you know the receiving editor is on a slower machine or a laptop, so they're not waiting for Resolve to regenerate it before they can start working smoothly. And Used Media with trim, rather than a full archive, is still usually the right call, since a receiving editor rarely needs your entire camera-original library, just what's actually in the cut they're inheriting.
The mechanics stay identical: File > Media Management, Copy, Used Media with the handle length appropriate for how much revision the next editor might realistically need, then a destination folder you hand off directly, whether that's a shared drive, a physical drive shipped to them, or an upload to shared cloud storage. If the receiving editor is also on DaVinci Resolve, following the consolidation with an Export Project Archive still makes sense, since it packages everything, project and media together, into one folder that relinks itself the moment they restore it, rather than leaving them to manually relink a bare folder of media to a project file that still points at your old paths.
A worked example: consolidating and archiving a freelance client project
Put the whole sequence together on a realistic case: a freelance editor wraps a 20-minute corporate brand video, shot over three days with two cameras, a lav mic, and a drone, then needs to archive it before moving on to the next contract.
The Media Pool holds roughly 400 clips by the time the shoot wraps: two camera angles across three days, drone establishing shots, room tone, and several alternate takes of every interview segment. The final cut uses maybe 60 of those clips. Everything else, the safety takes that weren't needed, the drone passes that didn't make the edit, the extra room tone, sits in the project unused.
The editor works through the sequence in order. First, a project backup, duplicated in Project Manager under a clearly dated name, in case anything downstream needs undoing. Second, Media Pool Options, Remove Unused Clips, which clears out roughly 340 clips that were never cut into the timeline, leaving the Media Pool matching what actually made the final video. Third, File > Media Management, Entire Project, Copy, Used Media and trim keeping 25 frame handles, since the client has asked for minor revisions before on past projects and 25 frames gives real room to nudge a cut without going back to the original camera cards. The destination is a fresh folder on an external SSD, with Use Project Name Subfolder enabled.
The consolidation runs, and what comes out the other side is a folder holding only the 60 used clips, trimmed to their working range plus handles, a fraction of the size of the original 400-clip library. Fourth, before archiving, the editor clears render cache through Playback, Delete Render Cache, All, since the grade is locked and there's no reason to carry pre-rendered files into long-term storage. Fifth, right-click the project in Project Manager, Export Project Archive, Media Files checked, Render Cache and Proxy Media both unchecked, destination set to the same external SSD.
The finished .dra archive holds the project database and the consolidated media together in one self-contained folder. That folder gets copied to a second drive kept off the editor's desk, satisfying the offsite half of a basic backup strategy, and the working drive with the original 400-clip library goes back into general storage, not deleted, just no longer part of the active project.
Six months later, the client calls asking for a 30-second cutdown of the same video for a different platform. The editor restores the archive, Resolve relinks the consolidated media automatically, and the 25-frame handles from the original consolidation give just enough room to adjust a couple of cut points for the new pacing, without touching the original 400-clip library at all.
Consolidating before archiving isn't a step you take because a guide told you to, it's the difference between a six-month-later revision taking twenty minutes and it taking an afternoon of hunting through camera cards you half-remember labeling. That's the entire payoff, and it shows up exactly when you're least prepared to spend the extra time.
What technical edge cases can break a consolidation?
RAW formats can occasionally place frame handles somewhere other than where you asked, and GOP-based codecs always round trims up to the next keyframe rather than down, so any timeline mixing camera formats deserves a quick scrub after consolidating, before you trust the result.
Media Management's trim behavior isn't identical across every codec family, because how a clip stores its frames determines how precisely Resolve can cut it.
| Footage type | How trimming behaves | What to check afterward |
|---|---|---|
| RAW (R3D, Blackmagic RAW, ProRes RAW) | Usually frame-accurate, but handle placement has been reported to land incorrectly in some workflows | Scrub the head and tail of each trimmed clip against the original before trusting the handle length |
| GOP-based (H.264, XAVC, AVC-Intra) | Trims extend to the next I-frame, so a trimmed copy can run slightly longer than requested, never shorter | Confirm the extra frames don't overlap into an adjacent edit on a tightly cut timeline |
| Intra-frame (ProRes, DNxHR) | Trims cleanly at the exact frame specified, since every frame decodes independently | Lowest risk of the three, still worth a spot check on a mixed-format timeline |
The RAW case is worth taking seriously specifically because it's silent. One editor working with RED R3D footage described setting Media Management's trim handles to a few seconds and consolidating a project, only to find the timeline out of sync afterward, writing that "the trim handles were not correct" and that there was "no handle left on the end of the shot" where he expected one, per a reader account on DVResolve's Media Management guide. Resolve didn't throw an error. The consolidation completed normally. The problem only showed up once he went looking for it.
That's the pattern worth planning around. A trimmed archive that plays back without an obvious glitch isn't automatically a trimmed archive that matches your original cut frame for frame, especially once a timeline mixes RAW footage with GOP-based footage from a second camera, since the two formats can round their trims in different directions on the same edit. The fix is the same low-effort habit as the restore check earlier in this guide: after consolidating, scrub a handful of cut points, particularly any built on RAW footage, before you let the original camera cards get reformatted or handed back to production.
There's a practical mitigation short of manually verifying every trimmed clip. If a project mixes RAW footage with GOP-based footage from a second camera and the cut is one you might realistically need to revise later, lean toward the more generous end of the frame handle range covered earlier in this guide, 25 frames or more, specifically on the RAW sources. A slightly larger handle gives you a buffer even if the trim doesn't land exactly where the dialog said it would, which turns a silent one-frame drift into a non-issue instead of a scramble.
Frame handles are supposed to be free insurance against a future revision, but on RAW and GOP-based footage they're also where a consolidation is most likely to drift from what you actually cut, so the two minutes it takes to scrub a trimmed timeline is far cheaper than discovering a sync problem after the original card is gone. Formats that decode every frame independently, like ProRes and DNxHR, carry the least risk here, which is one more reason they remain a common archive-friendly choice for mixed-camera timelines.
What are the most common mistakes when consolidating media before archiving?
Running Move instead of Copy without a backup, choosing All Media instead of Used Media, and skipping the archive step entirely to just zip a folder together are the three that cause the most real damage.
Work through these before you consolidate anything, since each one is easy to avoid and expensive to undo:
- Choosing Move without a backup. Move relocates your original files rather than duplicating them, and if the operation gets interrupted, fails partway through, or writes to the wrong destination, you don't have a clean fallback. Copy exists specifically to prevent this failure mode.
- Leaving the scope on All Media. This copies your entire selected media set, used or not, which produces an archive no smaller than skipping consolidation altogether. Used Media is the setting that actually does the job this guide is about.
- Zero frame handles on a project that might still change. It's the smallest possible archive, and it's also the one most likely to send you back to original camera footage for even a minor revision, if that footage is still findable months or years later.
- Skipping Export Project Archive and just copying the consolidated media folder manually. A manually copied folder doesn't relink itself. The project file inside it still points at old paths, and restoring it later means manual relinking work that a proper
.draarchive handles automatically. - Including Render Cache and Proxy Media out of habit. Both are the largest, least necessary things you can carry into an archive, and both regenerate on their own the moment the project actually needs them again.
- Archiving to a single, uncopied drive. A perfectly consolidated archive is still just one drive failure away from being permanently gone if it only exists in one place. This is the 3-2-1 principle showing up again: at least one additional copy, on a different type of media, ideally kept somewhere other than right next to the first one.
- Consolidating while source drives are disconnected. Media Management can only copy what it can currently see. A missing drive doesn't pause the operation and wait, it fails or skips the clips it can't reach, and that's easy to miss until you open the "finished" archive and find gaps.
- Deleting the original media the moment the archive finishes, without a test restore. A completed archive isn't the same as a verified one, and the five-minute restore check covered earlier in this guide is what actually confirms the archive holds what you think it does.
- Running Media Management or Export Project Archive on a shared project while a collaborator still has a bin checked out. The result reflects whatever your session could see at that moment, not whatever they hadn't saved yet, and neither tool will warn you that anything's missing.
Every mistake in this list has the same shape: skipping a safety step to save a few minutes, and paying for it later with hours. None of them are hard to avoid. They're just easy to skip when the deadline pressure that led to archiving in the first place is still fresh.
Quick checklist: consolidate and archive in order
Work through these in sequence for a clean, minimal archive:
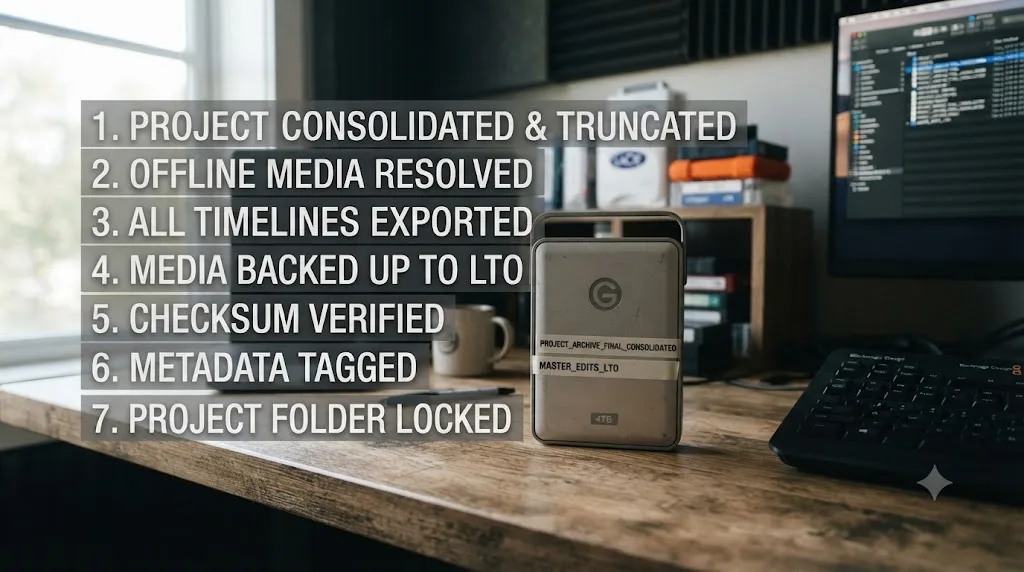
- Back up the project in Project Manager before touching Media Management.
- If the project lives on a shared database or Blackmagic Cloud library, confirm with your team that nobody has a bin or timeline checked out before you continue.
- Clean the Media Pool with Options, Remove Unused Clips.
- Open File > Media Management, choose Entire Project or a specific Timeline.
- Set Operation to Copy, not Move, unless you're confident and already backed up.
- Select Used Media, or Used Media and trim with frame handles, never All Media.
- Decide on frame handle length, 12 frames as a documented baseline, 25 or more if further revisions are plausible, especially on RAW or mixed-format footage.
- Choose whether to consolidate multiple edit segments into one file per source clip, based on whether future grading simplicity matters more than a slightly smaller archive.
- Confirm every source drive is connected before running the operation, especially on multi-drive or networked projects.
- Run the consolidation to a clean destination folder, then scrub a few trimmed cut points before moving on to the archive step.
- Clear Render Cache through Playback, Delete Render Cache, All, since a locked project doesn't need it preserved.
- Right-click the project in Project Manager and choose Export Project Archive.
- Uncheck Render Cache and Proxy Media, keep Media Files checked, and pick a destination with enough space.
- Copy the finished
.draarchive to a second location, ideally a different type of storage, so a single drive failure can't take the only copy with it. - Restore the archive under a throwaway name and confirm every timeline plays clean before you touch the original media again.
The verdict
Consolidating media before you archive a DaVinci Resolve project isn't an optional polish step, it's what determines whether the archive you build today is something you'll actually want to open again years from now. The smallest safe archive is the one that still contains everything the timeline actually touches and nothing it doesn't, and getting there takes exactly two tools working in sequence: Media Management to strip a bloated Media Pool down to what your cut actually uses, and Export Project Archive to package that consolidated media with the project itself into one self-contained folder that relinks on its own when you need it again.
Skip consolidation and Export Project Archive will still work, faithfully copying every unused take and safety angle right along with everything you actually need, which is exactly how a freelancer ends up with a 4 terabyte archive for a video that used 40 gigabytes of footage. Do the consolidation first, and that same archive comes out lean, traceable, and ready to restore months or years later without a single offline clip.
If keeping track of where Media Management lives, or which Export Project Archive checkbox actually matters, is the part slowing you down mid-deadline, that's exactly the kind of moment worth knowing about a different kind of help. TryUncle is a paid macOS app built around an on-screen AI tutor called Uncle. Ask it a question in plain words, and it points at the exact control on your screen instead of you digging back through menus while a client is waiting on a delivery. It won't consolidate your media for you, but the next time you can't remember whether that checkbox lives in Media Management or Export Project Archive, that's worth having open.
Frequently asked questions
- How do I consolidate media in DaVinci Resolve before archiving?
- Open File > Media Management, pick Entire Project or a specific Timeline, set Operation to Copy, and choose Used Media (or Used Media and trim, keeping frame handles) instead of All Media. Browse to a destination folder, run the operation, and Resolve copies only the clips your timeline actually references into one clean folder, ready to archive.
- What's the difference between Media Management and Export Project Archive in DaVinci Resolve?
- Media Management copies or trims your source media into a smaller, cleaner set of files without touching the project itself. Export Project Archive, found by right-clicking a project in the Project Manager, bundles the project database plus a copy of its media into one self-contained .dra folder. Consolidate with Media Management first, then archive with Export Project Archive, and the archive comes out far smaller.
- Should I include render cache and proxy media when I archive a DaVinci Resolve project?
- Generally no. Both can be excluded from Export Project Archive's checkboxes and rebuilt automatically the next time you open the restored project, since neither one is source material. Skipping them can cut an archive's size dramatically, and the only cost is a short wait while Resolve regenerates them on first reopen.
- How many frame handles should I keep when consolidating media?
- 12 frames is DaVinci Resolve's own example default in the reference manual, enough margin for a small trim or transition adjustment later. Colorists doing heavier finishing work often keep more, 25 frames or higher, to leave room for retiming or extending a cut without going back to full camera originals.
- Does consolidating media delete my original camera files?
- No, not if you use Copy. Media Management's Copy operation duplicates the media you select into a new destination and leaves your original camera-original files exactly where they were. Move relocates files instead of duplicating them, which does remove them from the original location, so Copy is the safer default before an archive.
- Can I still relink a consolidated DaVinci Resolve archive later?
- Yes. A restored Export Project Archive relinks its own consolidated media automatically, since Resolve wrote both the project database and the media into the same self-contained folder. If you only ran Media Management without an archive, you may need to relink the timeline to the new consolidated files with Relink Selected Clips first.
- What's the best place to store a DaVinci Resolve project archive: drive, cloud, or LTO tape?
- External drives work well under roughly 50 TB of total archives and give you minutes-long restore times. Cloud cold storage suits projects you truly never expect to reopen, at the cost of hours-long restores. LTO tape becomes cost-effective once a studio's total archive volume climbs into the 100+ TB range, thanks to its low per-terabyte media cost and roughly 30-year shelf life.
- How much smaller does a project get after consolidating media before archiving?
- It depends entirely on your shooting ratio, but it's common for a consolidated, used-media-only archive to run a fraction of the size of the full camera-original library, since Media Management strips out every take, angle, and B-roll clip your timeline never touches. A documentary with a high shoot-to-cut ratio sees the biggest reduction; a tightly scripted commercial sees the least.
Sources
- DaVinci Resolve Reference Manual: What Is Media Management? (VFXPedia mirror)
- DaVinci Resolve Reference Manual: Using Media Management (VFXPedia mirror)
- DaVinci Resolve Reference Manual: Options in the Media Management Window (VFXPedia mirror)
- DaVinci Resolve Reference Manual: Moving Proxies Using a DaVinci Resolve Archive (VFXPedia mirror)
- Blackmagic Forum: How to consolidate media and export entire project (Sascha Haber)
- Blackmagic Forum: Does trimming in "Media management" transcode or just copy?
- Blackmagic Forum: How do you prefer to backup/archive your finished projects?
- Kirill Volgin (colorist): Media Management in DaVinci Resolve
- Larry Jordan: Managing Projects in DaVinci Resolve - Backups, Exports and Archives
- Larry Jordan: How I Lost All My DaVinci Resolve Projects, and How You Can Save Yours
- Blackmagic Design: DaVinci Resolve Collaboration
- DVResolve.com: Guide to the Media Management Tool For Saving Space in DaVinci Resolve
- The Post Flow: Archiving Video Projects - Drives vs Cloud vs LTO (2026)
- Backup Works: LTO-9 Final Specifications Released, 18TB Native / 45TB Compressed
- No Film School: DaVinci Resolve Update 21.0.2 Adds Faster Image Bypass Switching, Improved H.265 Playback, and More
- DaVinci Resolve - Tech Specs (Blackmagic Design)
Keep reading
Fixes · Jul 19, 2026 · 23 min
DaVinci Resolve Cache Files Filling Up Your Hard Drive? Do This
Why DaVinci Resolve's cache fills up your hard drive: which folders are responsible, how to clear each one safely, and how to relocate cache to stop it recurring.
Guides · Jul 16, 2026 · 36 min
Folder and Bin Naming Conventions for DaVinci Resolve Projects
A practical naming system for DaVinci Resolve folders and bins: project structure, camera bins, Power Bins, Smart Bins, and what breaks relinking.
Fixes · Jul 7, 2026 · 26 min
DaVinci Resolve Media Offline: Every Cause and the Fix
Every reason DaVinci Resolve marks a clip media offline, and the exact relink, cache, and codec fixes for each cause, in order of how often they happen.