Articles / Comparisonsupdated for DaVinci Resolve 21.1 (October 2026)
DaVinci Resolve Photo Page vs Lightroom: Which Should You Use?
Quick answer
DaVinci Resolve 21’s Photo page is the better fit if you want node-based grading, Resolve effects, and stills alongside video work. Lightroom is the stronger choice for a dedicated photography workflow, especially if you rely on its catalog, mobile and cloud ecosystem, or print and book tools. You can also use both.
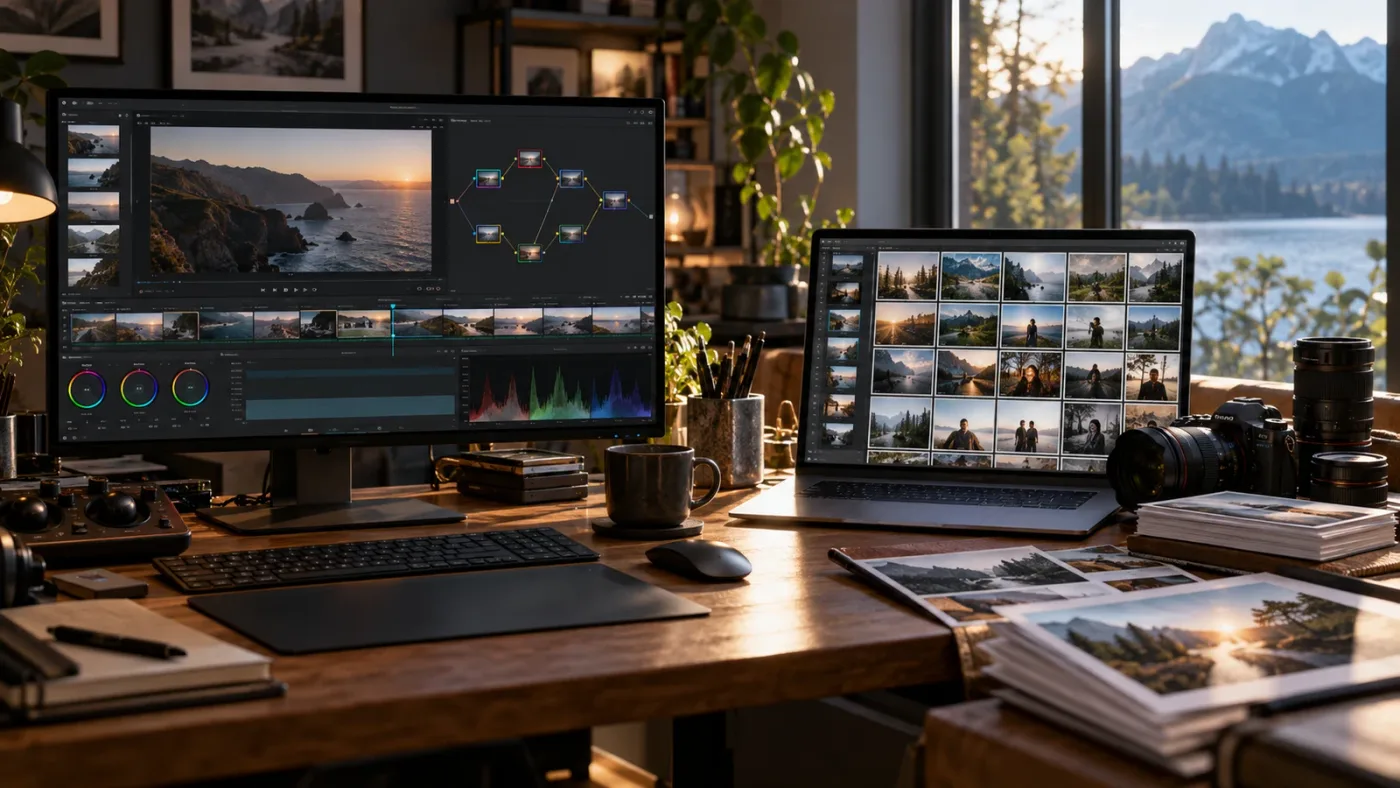
I’d treat DaVinci Resolve’s Photo page and Lightroom as two different kinds of photo tool, not as identical editors with different buttons. The Photo page brings still photographs into Resolve’s node-based color and effects workflow; Lightroom is built around organizing, developing, and sharing photographs. As of October 2026, DaVinci Resolve 21.1 is the current version discussed here. Check the Blackmagic Design support page for the current manual and release information.
What is the difference between the DaVinci Resolve Photo page and Lightroom?
The DaVinci Resolve Photo page is a still-image workspace inside Resolve, designed to connect photo organization and grading with the software’s editing, color, effects, and finishing pages. Lightroom is Adobe’s photography application family, with Lightroom Classic focused on a desktop catalog workflow and Lightroom connected to Adobe’s desktop, mobile, and web ecosystem.
That difference matters more than a checklist of sliders. Both applications can adjust the look of a photograph. The more useful question is where you need those photographs to live and what you need to do with them next.
Resolve 21 introduced the Photo page. Blackmagic describes it as a workspace for importing, organizing, and grading still images, with albums that can connect those images to other Resolve pages. In the Resolve 21 New Features Guide, Blackmagic explains that grades and effects applied to stills in albums work at the source level. The same guide says the Photo page’s Media Pool contains still images and albums, rather than displaying video, audio, and effects clips in that page’s view.
Lightroom needs one qualification in any comparison: people may mean Lightroom Classic or the Lightroom ecosystem. Classic stores originals locally and supports multiple catalogs. The ecosystem includes Lightroom applications for desktop, mobile, and web, with a different storage and syncing model. Adobe’s feature comparison lays out differences between Classic and the ecosystem. A claim about “Lightroom” may not describe every version equally.
| Decision | DaVinci Resolve 21 Photo page | Lightroom Classic | Lightroom ecosystem |
|---|---|---|---|
| Main strength | Node-based grading and Resolve effects for stills, with a route into video work | Desktop photo catalog, organizing, editing, and sharing | Photo editing and organization across desktop, mobile, and web |
| Best fit | You already use Resolve or want stills and video in the same project environment | You want local files, catalog control, and established photography tools | You want access to photos and edits across supported devices |
| Photo organization | Albums, tags, ratings, favorites, keywords, bins, and metadata workflows described in the Resolve 21 guide | Catalog, collections, keywords, and metadata tools | Albums and synced features, with differences from Classic |
| Grading model | Nodes, including serial and parallel corrections and shared looks | Develop controls and presets | Lightroom edit controls and presets |
| Moving to another Resolve page | Albums can connect stills to Resolve’s Cut, Edit, Color, and Fusion pages | Separate application workflow, with Adobe integration options | Separate app ecosystem, with cloud-oriented syncing |
| Output | Photo Page Quick Export supports image delivery; Resolve’s Deliver page offers further controls | Export dialog, presets, metadata and sizing controls, plus print and book workflows | Export and share options with ecosystem-specific features |
| Tethered capture | Blackmagic documents direct tethering for Sony and Canon cameras | Adobe documents tethering support and camera-specific compatibility | The ecosystem’s feature set differs from Classic |
| Cost model | Resolve has a free edition and a paid Studio edition; check current feature availability | Subscription plan | Subscription plan |
| Biggest trade-off | It is part of a broad post-production app, not a dedicated Lightroom-style library in every respect | Paid membership and a desktop-first catalog model | Cloud and device convenience depends on Adobe’s plan and sync setup |
That table is a starting point, not a claim that one application wins every row. Blackmagic’s Photo page overview says it supports image management with tags, ratings, favorites, and keywords. Adobe documents Lightroom Classic’s catalog as a database that tracks photo locations and information such as edits, ratings, keywords, and collections, while the original image files remain untouched in the normal catalog workflow. Those are different organizational models, not simply two names for the same thing.
Resolve Photo is strongest when the photograph is part of a grading or post-production workflow.
Lightroom is strongest when the photo library itself is the center of the job.
A useful comparison separates three kinds of work:
- Choose and manage pictures. You need to ingest files, find keepers, compare similar frames, apply metadata, and maintain a usable archive.
- Develop and refine pictures. You need to set tone and color, control local areas, retouch, and apply a coherent look.
- Deliver pictures. You need files with the right dimensions, format, metadata, color treatment, and destination.
A tool can be excellent at one of those jobs without being the best complete system for all three. Resolve’s standout is the bridge from still-photo grading into its established post-production environment. Lightroom’s advantage is the mature photo-library workflow and its tools for maintaining and delivering photographic work.
This is why “Is Resolve a Lightroom replacement?” has no single yes-or-no answer. If you make a limited selection of stills for a video project, the Photo page may cover much of what you need. If you manage an extensive photo archive, publish across devices, and depend on Lightroom Classic’s catalog, replacing it requires more than confirming that Resolve can open your files.
The safest comparison is task-by-task. Keep the originals safe, pick a representative set of images, and test the specific tasks you perform every week. A RAW file opening successfully does not prove that the rest of your archive, metadata, export presets, or cloud process will transfer as you expect.
Is DaVinci Resolve 21 better than Lightroom for color grading?
Resolve is the better fit when your grading decisions depend on node-based corrections, shared looks, and Resolve FX. Lightroom is often the more direct fit when you want a photography-centered develop workflow that stays inside Lightroom’s library and export system.
Resolve’s central difference is its node graph. Blackmagic says the Photo page brings Resolve’s node-based grading workflow to still images, including primary color correction, curves, qualifiers, power windows, serial and parallel nodes, and shared nodes. Its official Resolve 21 announcement describes applying different corrections to different parts of an image and reusing shared nodes across an album.
That is useful when you think in layers of image operations. One node might establish a base correction, another might shape contrast, and a later node could handle a local selection or finishing look. You can separate the jobs and inspect how the grade is built. For stills that need to relate to a Resolve video timeline, the shared color language can be valuable.
Lightroom’s editing model is different. Adobe describes Lightroom Classic as nondestructive: edits are stored as instructions in the catalog rather than changing the original image file. You can revisit or revise those instructions later. That is also a nondestructive workflow, even though the controls and project structure differ from Resolve’s node graph. The Adobe Lightroom Classic FAQ explains the catalog-based editing model.
Neither approach makes the image inherently better. A node graph gives you a way to build and reuse a chain of corrections. Lightroom’s develop workflow keeps common photo adjustments and library operations within a dedicated photography application. Your preferred way to work matters.
When Resolve’s node graph is a real advantage
Use the Photo page when you need to:
- Separate a base correction from look development and finishing.
- Build parallel correction paths for different image regions or color relationships.
- Reuse a grade across a project or album with shared nodes.
- Apply Resolve effects within a photo grade.
- Keep still images close to Resolve footage that will appear in the same edit.
- Bring a selected still into another Resolve page for an additional treatment.
Blackmagic’s Photo page overview also advertises more than 100 GPU- and CPU-accelerated Resolve FX and specialty AI tools for still-image work. That is a vendor feature claim, not an independent speed or quality benchmark. Tool availability and performance can depend on your Resolve edition, computer, source files, and the specific effect.
A wedding filmmaker, for example, might grade a handful of portraits and venue images to match a film’s overall color treatment, then use those images in a Resolve edit. In that case, the value is not that Resolve replaces every Lightroom function. It is that the stills are already close to the video project and can share a related visual language.
A different example: a photographer making several distinct editorial looks from one portrait can benefit from keeping alternative grades connected to a single source. The Resolve 21 New Features Guide describes multiple grade versions for an image and source-level behavior for grades and effects in albums. Before building a complex archive around that feature, test how your project and album organization behave in the version you use.
When Lightroom’s editing model is a better fit
Lightroom is a more natural choice when your editing decisions are closely tied to culling, library search, metadata, and export. Adobe documents a range of export controls in the Lightroom Classic export reference, including file format, image sizing, metadata handling, output sharpening, and export presets. It is useful to have those options close to the photo catalog when you make versions for different destinations.
A portrait photographer who selects a few hundred frames, edits a subset, then exports client proofs and final files may prefer a photography-first application that connects those stages. A landscape photographer who returns to images years later and searches by keyword, camera information, collection, and rating may value the catalog just as much as the develop controls.
That does not mean Resolve lacks organization tools. It has albums, tags, ratings, favorites, keywords, bins, and metadata features documented in its version 21 materials. Rather, the practical question is how those tools fit your existing habits and how well the library supports your particular archive.
How to compare a grade fairly
Do not judge the two applications by comparing a Resolve node setup with a Lightroom preset on unrelated pictures. Use the same original file and define what “better” means before you start.
A simple worked example:
- Choose one RAW portrait with skin, a neutral reference, and a bright background.
- Make a neutral correction in each application, aiming for plausible exposure and neutral color rather than a stylized look.
- Create one restrained editorial look in both applications.
- Make a local adjustment to the face or background in each.
- Export both versions to the same file format, pixel dimensions, and color-space target where each application allows it.
- Compare the exports on a display you trust, then inspect the files’ dimensions and metadata.
This is a worked comparison method, not a test result. I haven’t measured output quality, rendering speed, or color accuracy across the two products. The point is to control the variables: same original, same goal, and comparable output settings.
If one version looks better, ask why. Did one workflow preserve highlight detail more effectively for your intent? Did one take fewer steps? Was the difference caused by different export color spaces or sharpening? A fair test identifies the cause instead of awarding a vague win to the application.
If you want a step-by-step introduction to the still-image workflow, see how to use the DaVinci Resolve 21 Photo page. For the broader grading fundamentals that apply to Resolve footage as well as stills, see how to color grade in DaVinci Resolve.

Which app is better for organizing a large photo library?
Lightroom Classic is the safer choice if your working system depends on its established catalog and archive habits. Resolve 21 has photo-management tools, but its Photo page organizes images inside Resolve projects and albums, so you should test the fit before moving a large library.
This is not a contest of which program has a search box. Library management is a system: how originals are stored, how metadata is indexed, how collections are built, what happens when a drive moves, and how you retrieve an image later.
How Lightroom Classic’s catalog works
Adobe defines a Lightroom Classic catalog as a database that records photo locations and information about your photographs. Edits, ratings, keywords, and collection membership are among the information stored there. The catalog does not replace the original files. Adobe explains this model in its Lightroom Classic catalog FAQ.
That separation has two consequences.
First, a catalog is not itself a backup of your original photographs. You need to protect the catalog and the source files. A catalog backup without the corresponding image files cannot restore the actual photo data. Conversely, having original files without the catalog may leave you without some of the organization and edit history you relied on.
Second, you should understand where your images live. Lightroom Classic is designed around local originals, while Adobe’s Lightroom ecosystem offers an option to store originals in the cloud. Adobe’s Classic versus ecosystem comparison distinguishes those storage models and notes that Classic supports multiple catalogs while the ecosystem does not.
This matters if you work from external drives or a desktop and laptop. A local catalog can fit a deliberate file-management system, but it does not automatically make every original available on every device. Cloud-oriented Lightroom changes that trade-off, subject to your plan, connection, storage, and sync choices.
How Resolve organizes photos
Resolve’s Photo page is organized around a project’s media pool and photo albums. Blackmagic’s Resolve 21 New Features Guide says the Photo page media pool is dedicated to still images in the current project and its albums. It describes bins and Smart Bins, with Smart Bins using rules based on metadata to filter media.
Resolve’s album design is especially relevant if you want a collection of images to travel with a video project. Blackmagic says photo albums can pass full-resolution stills to the Cut, Edit, Color, and Fusion pages. That is a different organizing principle from an archive-first catalog: group images into the Resolve project and albums you need, then use them in the surrounding post-production workflow.
For a short project, this can be tidy. One project contains the shoot’s selected stills, album organization, video timeline, and related grades. For a large, long-running archive spread across years and multiple drives, consider whether project-based organization matches how you retrieve and maintain your entire library.
Do not infer unsupported limits from those descriptions. “Large library” does not come with a published numeric threshold in the sources cited here, and I have not benchmarked Resolve against Lightroom with a controlled archive. The honest move is to test representative folders and the exact metadata you rely on.
A practical library test
Before moving a catalog, choose a test set that reflects your real collection. Include more than a few finished JPEGs.
Use a set that includes:
- RAW originals from cameras you actually own.
- JPEG or TIFF files, if those are part of your normal work.
- A folder or shoot with multiple similar frames.
- Images with ratings, keywords, captions, and copyright information.
- At least one image with a saved crop or alternate look.
- A folder stored on an external or network drive, if that is part of your setup.
Then check specific results:
- Can the new application find the original file?
- Do the image’s relevant metadata and keywords appear?
- Can you group it in a way that makes sense for your project?
- Can you find it again using the searches and filters you actually use?
- Does the edit remain reversible without altering the original?
- Can you export a useful file and preserve the metadata you need?
That list turns “Will the library transfer?” into several answerable questions. It also makes migration less risky. If one step fails, you can identify whether the issue is file access, metadata transfer, organization, edit interpretation, or export.
Smart collections, albums, and search are not interchangeable
Lightroom Classic supports collections and keywords, and Adobe documents keyword hierarchies and keyword sets in its keywording guide. Keyword sets can contain up to nine keywords, according to Adobe’s guide. Keywords can also be set to export with the image or omitted from exported files. That kind of detail matters to photographers who use keywords for retrieval, delivery, or licensing records.
Resolve offers albums, metadata-based Smart Bins, ratings, flags, and its IntelliSearch feature. Blackmagic describes IntelliSearch as a way to find people and objects in images, but search behavior is version- and setup-dependent. A natural-language object search is not the same thing as a carefully maintained set of client, location, rights, or project keywords.
For example, “find photographs of a dog” and “find the approved dog portrait from the client’s 2024 campaign, with the signed release” are different retrieval needs. The first may be a content search. The second may require durable metadata and a known organizational scheme.
Keep those distinctions in mind when evaluating AI search. It can help with visual discovery, but it does not replace accurate file naming, controlled keywords, copyright records, or backups.
Is Resolve enough for a photo archive?
It can be enough for a focused, project-based collection, especially if the same stills feed a video workflow. It may not be enough for your particular archive if you rely on Lightroom’s multi-catalog approach, existing collection structure, catalog history, or Adobe cloud workflow.
Here is a sensible dividing line:
- Project library: a set of images associated with one film, campaign, shoot, or delivery. Resolve’s project and album model may fit.
- Personal archive: a growing collection you expect to search and revisit for years, perhaps across many jobs. Evaluate whether Resolve’s project organization and metadata structure match your needs.
- Shared client library: a collection that must be reviewed, tagged, approved, and kept available to different people. Compare the actual collaboration and storage requirements, not just each app’s album label.
- Mobile-first library: a workflow where edits and originals must move among phone, tablet, desktop, and browser. Check Adobe’s current ecosystem details and your plan before deciding that a desktop-only workflow is equivalent.
Do not make a full archive migration because one test image opens. Import a small catalog or folder first, validate the metadata and images, and compare the resulting organization with your original. Keep a known-good copy of the source catalog and media until you are confident the new workflow covers what you need.
Can Resolve replace Lightroom for RAW files and camera support?
Resolve can work with still images and Blackmagic says the Photo page supports standard RAW files and image types, but support for a particular camera model and RAW variant should be verified before you build a workflow around it. Lightroom Classic supports most native camera RAW formats, but Adobe directs users to its camera support information for the exact make and model.
A RAW extension alone is not enough to prove compatibility. Camera manufacturers can use different formats, profiles, and compression options across models. The fact that one file from a camera opens does not establish that every mode or firmware-era variant will behave identically.
Blackmagic’s product overview says the Photo page supports standard RAW files and image types. Adobe’s FAQ says Lightroom Classic supports most native camera RAW formats as well as PNG, DNG, TIFF, JPEG, and PSD. Those are broad vendor descriptions, not a guarantee for every individual camera. For Lightroom, check Adobe’s Camera Raw support page before deciding a specific camera file is supported. For Resolve, consult the current manual and test a file from your camera in the version you plan to use.
What to test before relying on a RAW workflow
Use several files from your actual camera, not a sample downloaded from a different model. Include an ordinary exposure and a file that exposes the parts of your workflow most likely to matter, such as a high-ISO frame or an image with a large bright area.
Check the following:
- Import: Does the file open without an error, and does the application show the expected orientation?
- RAW controls: Are the RAW-specific controls available for that source file? Does changing them produce the type of adjustment you expect?
- Color interpretation: Does the initial rendering look reasonable for your camera and profile? A first preview can differ between applications before you make any edits.
- Crop and transform: Can you make the required crop, rotation, and perspective or reframing adjustments?
- Local work: Can you make the selective corrections you need without awkward workarounds?
- Export: Can you produce your target output format at the required size and color space?
- Reopen: After closing and reopening the project or catalog, are the edits and file links still available?
These are not performance benchmarks. They are workflow checks. A camera support list tells you whether a format is recognized; it does not prove that the entire job suits your editing preferences.
What if Lightroom already manages the originals?
Keep Lightroom as the reference system while you test Resolve. Do not delete files or discard the catalog just because Resolve can import a Lightroom catalog. Blackmagic documents an import option for Adobe Lightroom catalogs in the Resolve 21 Photo page guide. The guide explains that Resolve can import a Lightroom catalog, but that alone does not establish that every Lightroom-specific feature, synced edit, album, or cloud state carries over one-for-one.
Make a copy of the catalog and test the copy. Preserve the original photo files and the folder structure they depend on. Then compare a representative sample:
- Are originals found at their expected paths?
- Are the selected images easy to identify?
- Did the metadata you care about arrive?
- Can you distinguish edited and unedited frames?
- Do your keywords and descriptions remain useful?
- Do you understand which grade belongs to which image?
- Can you export a file that meets the delivery brief?
If the test is good, you can expand it carefully. If it is not, you have learned something without putting the working catalog at risk.
When Lightroom remains the practical choice
Keep Lightroom if its camera support, catalog, or integration with Adobe’s other photography tools is a requirement of your work. Keep it if clients expect a particular Lightroom handoff or if your established archive relies on its organization and metadata. A tool’s installed base and workflow compatibility can matter more than a new feature set.
Resolve is a compelling alternative when your main reason for editing is the grade itself, especially if you already finish video in Resolve. But RAW development is only one stage of a photographer’s workflow. If your process depends on Lightroom’s library, cloud syncing, mobile access, or print design, check those tasks explicitly before cancelling a subscription.
A compatible RAW file is only the first step in a safe migration.
Is Resolve or Lightroom better for batch edits and matching a set of photos?
Resolve is a strong option when you want to reuse a node-based look across an album, while Lightroom is a strong option when batch adjustments are part of a catalog-centered photography workflow. For both, the useful test is how well the look survives different lighting and subjects, not whether one button applies the same setting to many files.
A batch process saves time only if it preserves the differences that matter. Copying exposure and color decisions from one frame to another can help with a consistent set, but it can also carry an unsuitable correction into a different scene.
Applying a shared look in Resolve
Blackmagic describes shared nodes as a way to apply the same correction across multiple images. Its Resolve 21 announcement also says grades can be copied across photos in an album. These features make Resolve useful when you want a repeatable visual treatment across a related group of stills.
A practical approach:
- Choose a representative image from the set.
- Build a base look that expresses the intended tone and color.
- Apply or share the relevant grade across the album.
- Review images individually for exposure, white balance, skin tone, and local contrast.
- Split out exceptions instead of forcing every image through identical corrections.
- Compare the album view with full-size views of the images that matter most.
- Export a small proof set before delivering the full batch.
That last review step is important. A shared look is a starting point, not a promise that every frame needs exactly the same correction. A golden-hour portrait and an indoor reception photo may need different exposure and white-balance treatment even if they belong in the same final gallery.
Applying batch settings in Lightroom
Lightroom’s workflow centers on the photo library and develop settings. Lightroom Classic offers copy-and-paste and synchronization workflows for applying edits across selected images, alongside its catalog and export tools. Consult Adobe’s current documentation for the exact controls available in your version. The key editorial point is not that one app can batch and the other cannot. It is that the two applications organize those batch decisions differently.
If you rely on Lightroom presets, saved settings, or a long-standing client workflow, test how those practices map to Resolve’s nodes and albums. A preset is not necessarily a direct replacement for a node tree, and copying a node grade is not necessarily a direct replacement for a Lightroom preset. Both may produce useful results, but they are not guaranteed to translate as matching editable structures.
A studio with an established Lightroom catalog might keep its ingest, selection, metadata, and client proof workflow in Lightroom, then send only selected images into Resolve when a still needs a detailed grade or must match a video sequence. That mixed workflow preserves the strengths of each tool, though it introduces a handoff and means you must track which application owns the current edit.
A worked batch example: a 20-image event set
Imagine a set of 20 photographs from one event. Ten are outside in daylight, six are in a dim reception room, and four are close portraits under mixed light. The numbers here are an illustrative worked example, not a claim about a software limit or observed benchmark.
A poor batch workflow would apply one unreviewed grade to all 20 frames and assume consistency means identical settings. The result might make the daylight group look coherent while pushing the indoor set too far or leaving portrait skin inconsistent.
A better process is to divide the images by lighting and intent. Apply a shared look within each group, then make image-specific corrections. In Resolve, consider whether shared nodes and separate node adjustments give you the control you need. In Lightroom, consider whether your existing catalog and batch tools make those groups easier to manage. In either app, inspect the outliers and preserve the untouched originals.
Use an export proof to check that the batch behaves as expected. If this is a client gallery, verify file naming, dimensions, color space, metadata, and sharpening requirements before exporting everything.
What about multiple versions of the same image?
Resolve 21’s documentation describes multiple grade versions for an image, with the grades and effects applying at the source level in albums. Lightroom Classic has its own nondestructive edit history and catalog-based structure. Do not assume that one application’s versions map exactly onto the other’s virtual copies, snapshots, or saved states.
Before moving work, write down what you mean by a “version.” It could be:
- A different crop for a social post.
- A color treatment for a client proof.
- A black-and-white interpretation.
- A high-resolution master and a smaller web copy.
- An alternate edit that must remain independently revisable.
Then check how the application stores that version and how you can export it without overwriting the original. The answer can influence whether you keep an image in a single project, duplicate a grade, create an additional output, or retain Lightroom as the source of truth.
Which app is better for tethered photography and collaboration?
Resolve’s Photo page may suit a tethered shoot where the team wants stills to enter a Resolve-centered color workflow. Lightroom Classic may suit photographers who already use its tethering and catalog tools. For either application, confirm camera compatibility and the exact collaboration process before relying on it on a live shoot.
Blackmagic says the Resolve Photo page can tether Sony and Canon cameras, control camera settings such as ISO, exposure, and white balance, and capture images directly into albums. That description appears on the official Photo page overview. Treat camera and feature compatibility as something to verify against your actual body, operating system, and Resolve release.
Adobe maintains a Lightroom Classic tethered-camera support list, which is the right place to confirm specific camera compatibility. “Lightroom supports tethering” is too broad to establish that your camera, capture mode, and setup are supported.
A tethered shoot has more than one success condition
A live preview is useful, but it is not the whole test. Before a paid shoot, check:
- The camera model and connection method.
- Whether the camera’s supported settings can be adjusted from the application.
- Where captured files are stored.
- How the destination album or catalog is organized.
- Whether the photographer and reviewer can see images at the required time.
- Whether the capture workflow remains stable for the duration of the session.
- How images are backed up during and after capture.
Resolve’s ability to capture stills into albums may be attractive if the next step is grading selected images alongside video. But that advantage only matters if the tether connection and album flow work reliably for your setup. Run a rehearsal with your actual camera and cable or network arrangement.
Likewise, Lightroom Classic’s tethering may be the safer choice if your camera is explicitly supported and your team already has a proven process there. A familiar, validated workflow is often worth more than theoretical integration.
Where Resolve collaboration may help
Blackmagic describes Photo page albums, metadata, tags, grades, and effects as part of its Blackmagic Cloud collaboration workflow. It says collaborators can sync image-library information and remote reviewers can approve grades. See the Blackmagic Resolve Photo page for the vendor’s current description.
That is appealing for a remote grading workflow, such as a photographer capturing images while a colorist reviews grades. But before treating it as a replacement for a broader asset-management or client-delivery system, list the actual collaboration requirements:
- Who can view the originals?
- Who can change metadata or grades?
- How are approvals recorded?
- What happens when the network is unavailable?
- How are revisions named and retained?
- Where are final exports delivered?
- What are the storage and subscription costs for the whole team?
The product page describes capability, not the outcome of your particular organization’s collaboration setup. Confirm the current Blackmagic Cloud account, storage, and permissions details for your intended use.
Where Adobe’s device ecosystem may help
Adobe distinguishes Lightroom Classic from the cloud-oriented Lightroom ecosystem. Its comparison page describes features that differ between those products, including original storage and syncing. Adobe’s FAQ says Lightroom Classic is available on Mac and PC, while Lightroom mobile apps are available for mobile devices through the relevant plan.
That distinction changes the comparison. If you need edits and images available across a desktop, phone, tablet, and web browser, compare Resolve’s collaboration setup with the specific Lightroom apps and sync options in your Adobe plan. Don’t compare Resolve Desktop with “Lightroom everywhere” without accounting for subscription features and cloud storage.
Do not test collaboration for the first time on deadline
Use a small test project. Have one person create or import a few images, another review them, and a third person check the export. Confirm that each person sees the expected grade, metadata, and file version. If the test only verifies that a project opens, it hasn’t tested the handoff.
For a photo-to-video team, check that the stills you want to use in the edit are accessible in the relevant Resolve project and album. For an Adobe-centered team, check that the intended Lightroom sharing or sync method keeps originals and edits available to each participant. In both cases, decide which application is authoritative before people start making parallel edits.

Which app gives you better exports for print, web, and clients?
Lightroom Classic has a detailed, photography-focused export and print workflow, including controls for file format, metadata, dimensions, and output sharpening. Resolve’s Photo page offers a still-image Quick Export workflow and additional delivery options, but you should validate the exact settings required by your destination.
An export is not just a file extension. It is the combination of format, bit depth, pixel dimensions, color profile, metadata, sharpening, naming, and destination. A workflow that makes a beautiful preview can still create the wrong delivery file.
Lightroom Classic export controls
Adobe’s Lightroom Classic export guide documents export options for file format, quality, color space, bit depth where supported, metadata, and image sizing. The guide also describes output sharpening choices for screen, matte paper, or glossy paper. Adobe’s newer export workflow guide explains that export presets can save settings for reuse and that the exported file includes adjustments made in the Develop module.
For print, Lightroom Classic includes a Print module. Adobe documents print-job settings such as print resolution and print sharpening in its print options reference. Its Book module can build photo books and export them as PDF or JPEG files, as described in Adobe’s photo-book guide.
These are meaningful advantages if printing and book layout are regular parts of your work. They do not prove Lightroom is the right editor for every image, but they make it the more complete choice when the deliverable includes those specific tasks.
Resolve Photo Page export
Resolve’s Photo page includes Quick Export for still images. The Resolve 21 New Features Guide documents format choices including HEIF, JPEG, PNG, and TIFF, plus sizing controls such as original size, width and height, short side, and long side. It also describes including metadata. For more control, the guide points to the Deliver page.
That means you should not assume Resolve can only deliver a video timeline. It has a photo-export path. But check your delivery requirements against the precise settings exposed in the version and page you use. If a client asks for a specific embedded profile, metadata treatment, naming convention, or print-ready file, make a test export and inspect it before you promise a match.
Use a delivery checklist
Before exporting a set from either application, confirm:
| Requirement | What to check |
|---|---|
| File type | Does the recipient want JPEG, TIFF, PNG, HEIF, or a camera original? |
| Pixel size | Are the requested dimensions exact, maximum edge, or original dimensions? |
| Color space | Is the file intended for a web service, a print lab, or continued editing? |
| Metadata | Should copyright, contact details, keywords, and location data be included or removed? |
| Sharpening | Is output sharpening needed for the viewing or print size? |
| File names | Do names need client, project, or sequence information? |
| Transparency | Is an alpha channel required, and does the chosen format support it? |
| Proofing | Has at least one exported file been opened and checked outside the editor? |
This is especially important for privacy. Location metadata can reveal where a photograph was taken. Adobe documents options for controlling metadata and removing location data during export. Resolve’s available metadata options should be checked in the manual for your release. Do not assume a file is stripped just because it is a JPEG.
Print versus screen
A file for a website and one for a print lab may need different dimensions, color handling, and sharpening. A generic “best quality” preset cannot infer the print provider’s requirements. Ask the lab for its specifications, or use the client’s exact brief.
Lightroom Classic’s print module is a practical advantage when you want to lay out and print images within the same application. If your main deliverable is a finished still that will be incorporated into a video, Resolve’s export workflow may be enough. If the work requires multiple print formats, a book, or a repeatable photo delivery process, Lightroom’s dedicated photography modules may save you from building a separate workaround.
Proof the export, not just the preview
A simple workflow protects against common mistakes:
- Export one representative image.
- Open the exported file in a separate viewer or inspect its file information.
- Confirm dimensions, file type, and profile or metadata as required.
- Compare the export with the application preview on a calibrated or otherwise trusted display.
- Confirm that the file opens in the recipient’s expected workflow.
- Only then export the full batch.
This is not overkill. It catches mistakes before they multiply across a full gallery. If a client says “print-ready,” ask what that means for their printer, size, and color requirements instead of guessing.

Is DaVinci Resolve cheaper than Lightroom?
Resolve can be less expensive if its free edition covers the features you need and you do not need a Lightroom subscription. Blackmagic lists Resolve as a free download and Resolve Studio at $295 on its current DaVinci Resolve What's New page. Adobe sells Lightroom through subscription plans, and the current plan and regional price should be checked directly with Adobe.
Do not reduce the decision to “free versus paid.” The relevant comparison is the total cost of the workflow you need.
Resolve’s free edition can make it an appealing way to explore the Photo page. However, a feature or effect you want may depend on Studio, and the exact edition requirement should be confirmed in Blackmagic’s current documentation. A free download also does not cover the time needed to learn a new workflow, migrate a library, or maintain a second application.
Lightroom’s subscription cost buys access under Adobe’s current plan terms. Those terms can change, and plan contents differ. Adobe’s Lightroom Classic FAQ says Lightroom Classic is included with Creative Cloud Photography plans and explains what happens to some Classic functionality after membership ends. Check Adobe’s current plans and pricing page before deciding what a subscription costs or includes in your region.
A fair cost comparison includes:
- Whether you already pay for Adobe Creative Cloud.
- Whether you need Photoshop or other included applications.
- Whether you need Lightroom’s cloud storage and mobile access.
- Whether the Resolve free edition includes your required Photo page features.
- Whether Studio-only effects or tools are part of your intended workflow.
- How much time a library migration or split workflow would take.
- Whether client handoffs require a particular application or file format.
- The cost of storage, backups, and any collaboration service you choose.
A one-time software price and a subscription are different purchase models. Neither tells you whether the whole workflow is affordable for your situation. If you already own Resolve Studio for video work, using its Photo page may have little additional software cost. If you already depend on Adobe for Lightroom and Photoshop, cancelling one part of that plan could affect more than the photo editor.
Avoid making a cost decision from a temporary sale or old plan screenshot. Check each vendor’s current offer and terms on the day you buy.
How do I move from Lightroom to DaVinci Resolve without risking my photos?
Treat a Lightroom-to-Resolve move as a controlled test first, not as a one-click replacement. Back up your catalog and originals, import a small representative sample, then validate image access, metadata, organization, edits, and exports before expanding the move.
Blackmagic documents importing from Lightroom in the Resolve Photo page workflow. That is useful, but the presence of an import command does not guarantee identical behavior for every catalog feature or Adobe cloud state. Keep the original Lightroom catalog and the original image files until you have confirmed the parts of your workflow that matter.
Step 1: Make a safe copy
Back up the Lightroom catalog and confirm that the original photos are also backed up. Store the copy separately from the working catalog if possible. The catalog records locations and information about images, but it is not a substitute for the image files themselves. Adobe explains the distinction in its catalog FAQ.
Do not reorganize folders at the same time as the test migration. Changing the catalog, moving originals, and importing into another application all at once makes it harder to diagnose a broken link or missing piece of metadata.
Step 2: Pick a representative sample
Choose images that cover your workflow. Include supported RAW files from your camera, edited and unedited images, multiple ratings or keywords, and at least one folder on an external drive if you use one. Include an image with a crop or alternate treatment and any type of metadata you need in the final delivery.
A sample of only finished JPEGs will not tell you whether your RAW workflow, archive organization, and edit history transfer well. Test what you actually rely on.
Step 3: Import a copy or a limited catalog
Use the Resolve import route described in the current Photo page manual. Work with a copy or a small catalog subset. Note what Resolve brings into the project and what still depends on the original media path.
If your Lightroom workflow includes cloud-synced images, verify their local availability and the state of the originals before attempting a catalog handoff. A synced library and a Lightroom Classic catalog are related but not identical products, as Adobe’s feature comparison makes clear.
Step 4: Inspect metadata and organization
Pick several images and check ratings, keywords, captions, and other fields you care about. Look for missing or renamed information. Confirm that the resulting albums, bins, or other organization make sense to you.
Do not treat an image’s presence in the Media Pool as proof that the complete catalog migrated. Search for images using the methods you expect to use later. Test metadata filters or Smart Bins if those matter.
Step 5: Check the grade and export
Open representative images. Confirm that the image is interpreted as expected, then make a small correction and export a test. Compare the output with a Lightroom export made to the same target specifications. This is not a claim that the two will look identical; it is a way to discover whether the differences are acceptable for your work.
Check the output dimensions and file type. Verify metadata and color handling to the extent your deliverable requires. If your process depends on a particular print or client output, validate that exact output.
Step 6: Decide what should remain in Lightroom
A migration does not have to be all or nothing. You might use Resolve for images tied to video projects, while Lightroom remains the home of your broader catalog. Or you might find that a smaller, project-centered library in Resolve is enough for new work while old projects remain in Lightroom.
Write down which application owns the original, which owns the current edit, and where final exports are stored. That small decision prevents confusion if the same file appears in both programs.
Step 7: Expand only after a successful test
If the sample works, proceed in batches and keep the source backup. If it fails, identify the specific problem before trying a different route. Missing metadata, unsupported RAW files, and cloud-sync confusion are different problems and need different solutions.
Do not delete the original catalog, images, or backup until you have opened the migrated projects and confirmed the required exports. A migration is complete only when you can retrieve the images and produce the deliverables you need.
If you’re stuck because the Photo page’s controls differ from a tutorial, TryUncle is the on-screen assistant for DaVinci Resolve on Mac and Windows - ask in plain words and Uncle points at the exact control on your screen.
Why is DaVinci Resolve not showing the Photo page?
If Resolve does not show the Photo page, first confirm that you are running DaVinci Resolve 21 or later and that the application is installed and launching as expected. Then consult the current manual and release notes for your edition and version; the Photo page was introduced in Resolve 21, so Resolve 20 instructions will not describe it.
The Photo page is version-specific. Blackmagic announced the feature as part of DaVinci Resolve 21, and the Resolve 21.1 support listing now provides the current manual. A tutorial made for Resolve 20 cannot be expected to show a page introduced in Resolve 21.
Use this troubleshooting order:
- Check the version shown in Resolve’s About dialog.
- Confirm you are opening Resolve 21 or later, not an older installation.
- Restart the application after installing or updating.
- Check the page-navigation area and any menu options that may show or hide interface pages.
- Confirm that you are not viewing a different application or project window.
- Compare your screen with the current Resolve 21.1 manual, not a pre-21 video.
- If the page remains unavailable, check Blackmagic’s current support and release notes for your operating system and edition.
Do not assume a missing page means your project is damaged or that the feature requires Studio. Check Blackmagic’s current product page and edition documentation for the exact feature requirements. Interface differences can also come from workspace layout, display scaling, or a different Resolve version.
If an older tutorial says to find a control that is not where it appears on your screen, use the tutorial’s goal rather than copying every click. Resolve 21 added a photo workflow to an application whose older versions centered on video post-production. The page layout and labels may therefore differ from older training material.
Why are Lightroom catalog edits or folders missing in Resolve?
A Lightroom catalog import does not guarantee that every Lightroom edit, cloud asset, folder location, or organizational feature will appear identically in Resolve. Check whether the source files are accessible, whether you imported the catalog you intended, and which metadata and edit details Resolve actually brought across.
Start with file access. Lightroom Classic’s catalog records the location of photos, while the image files remain separate. If the originals are on a disconnected drive or in a location Resolve cannot access, an imported catalog may not be enough to make them available. Adobe’s catalog FAQ describes how catalog records and original files relate.
Then check the scope of your import. Did you choose the catalog that contains the images? Were the relevant photos stored locally or only available through a cloud workflow? Did the import complete? Are you looking at the correct Resolve project and album?
Use a small diagnostic set:
- Open the original files outside Lightroom and confirm they are present.
- Verify the file path in Lightroom Classic.
- Confirm that the drive is mounted and available to Resolve.
- Reopen the Resolve project and check the imported media pool.
- Compare a source photo’s metadata in both applications.
- Confirm that the Lightroom edit was represented in the Resolve workflow, rather than assuming it transferred as an editable Lightroom adjustment.
A rendered preview and a fully editable RAW workflow are not the same thing. If an edit arrives as a rendered image or does not preserve the controls you need, decide whether that is acceptable for the handoff. Keep Lightroom as the editable source if you need its catalog instructions and continue in Resolve only for the stills that benefit from its grading tools.
Avoid changing folder names or moving a large set of originals during troubleshooting. First identify whether the problem is a missing file, an incomplete import, a metadata difference, or an expectation that a Lightroom-specific edit structure will translate directly.
Which should I choose: DaVinci Resolve Photo or Lightroom?
Choose the Resolve Photo page if node-based grading, Resolve FX, and connection to video projects matter more than a dedicated Lightroom-centered archive. Choose Lightroom if you depend on its catalog, photo delivery, mobile and cloud workflow, or print and book features. Choose both if you need Lightroom’s library and Resolve’s grading in different parts of the same job.
A short decision matrix makes the choice clearer:
| Choose DaVinci Resolve Photo if… | Choose Lightroom if… |
|---|---|
| You already use Resolve for video and want selected stills in the same post-production environment | Your photo library and catalog are the center of your workflow |
| You want a node-based grade and Resolve FX on stills | You rely on Lightroom Classic’s catalog, collections, and keyword organization |
| You need to move stills into Resolve’s Edit, Color, Cut, or Fusion workflows | You use Lightroom across desktop, mobile, and web |
| You want to try a free Resolve workflow before paying for Lightroom, and its available features meet your needs | You need the dedicated Lightroom Classic export, Print, or Book workflow |
| Your project is a contained set of images rather than a long-running cross-project archive | You want to keep an established Lightroom archive and its familiar processes |
Choose Resolve if the task is stills plus video
Resolve makes sense when photographs are part of a broader audiovisual project. You may be grading stills to match footage, creating stills for a video edit, or using Resolve effects on photographs. Its node graph and integration with other pages give it a distinctive advantage for that work.
It is also a sensible choice when you want to assess the new Photo page without committing to a Lightroom subscription, provided the Resolve edition and features you need are available to you. Confirm the current edition details before you depend on a particular tool.
Choose Lightroom if the task is a photo library first
Lightroom makes sense when you need an established photography workflow from selection through archive, edit, export, and print. Its Classic catalog and ecosystem options meet different needs, so choose the right Lightroom product for your storage and device habits.
If you rely on Lightroom Classic, do not assume the cloud-oriented Lightroom app behaves the same way. Adobe’s feature comparison explicitly distinguishes local originals, cloud uploads, multiple catalogs, and mobile features across the products.
Choose both when the handoff has value
A mixed workflow can be reasonable. Keep the photo library and its long-term organization in Lightroom, then use Resolve for images that need node-based work or need to sit beside a Resolve video project. This approach avoids an all-at-once migration, but it does require clear decisions about versions, source files, and delivery.
For example, Lightroom can remain the home of a wedding archive while a small selection of portraits and venue images moves into a Resolve project for grading alongside the film. Keep a record of which application contains the source edit, and name exports so the finished files are easy to identify.
The verdict
DaVinci Resolve 21’s Photo page is not simply Lightroom with a different interface. It is the better fit for photo grading that benefits from Resolve’s node system and connection to video post-production. Lightroom remains the safer default for many established photo-library, cross-device, print, and catalog workflows.
Test the Photo page on a small set of images that reflects your real work. If it handles your RAW files, metadata, organization, and export requirements, start using it for the jobs where its strengths matter. Keep Lightroom where its catalog and photography tools still earn their place.
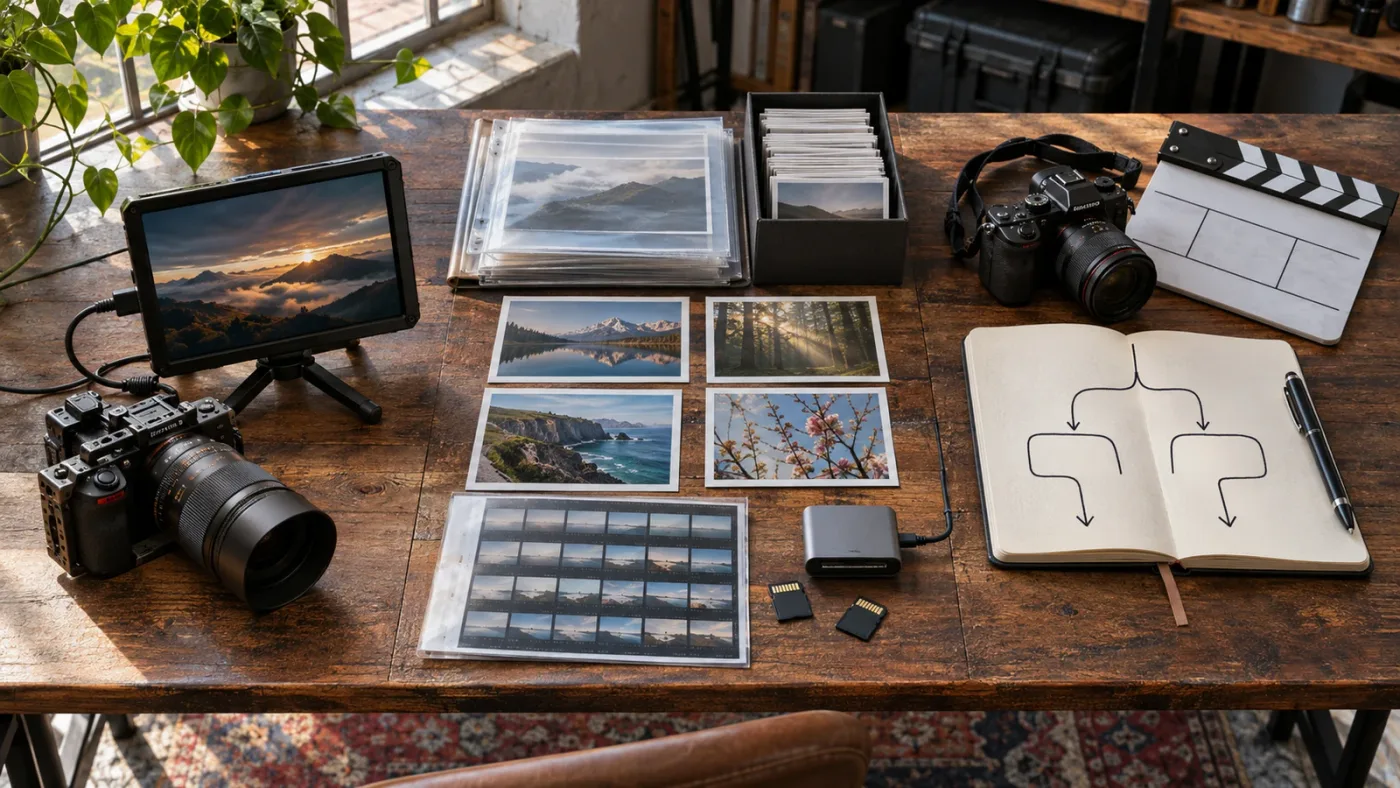
What does Blackmagic say about Resolve 21’s Photo page?
Blackmagic presents the Photo page as an expansion of Resolve’s post-production workflow into still photography. That positioning explains why the page is compelling for video colorists and why Lightroom users should compare the whole photography workflow, not just the grading controls.
In the Resolve 21 New Features Guide, Blackmagic CEO Grant Petty describes the broader product this way: “DaVinci Resolve has the features professional editors, colorists, audio engineers and VFX artists and photo editors need, and is built on completely modern technology with advanced audio, color and image processing that goes far beyond what any other system can do.” The sentence is promotional language from Blackmagic, not an independent comparison with Adobe. It signals the company’s ambition to bring photo work into Resolve, but it does not establish that Resolve replaces Lightroom for every photographer.
For the practical feature comparison, Blackmagic’s official Photo page documentation is more useful than any broad promise. Check its current descriptions against the tasks you perform: image management, albums, RAW settings, node-based grading, tethering, Resolve FX, collaboration, and export.
Sources and version notes
This comparison is based on vendor documentation available as of October 24, 2026. Resolve-specific references are for DaVinci Resolve 21 or 21.1 where indicated. Adobe’s Lightroom documentation covers Lightroom Classic and the Lightroom ecosystem separately because their features and storage models differ.
I have not run a controlled image-quality, speed, or library-migration test between the products. Any example above is a worked example, not an observed result. Verify your own camera support, subscription terms, export requirements, and Resolve edition before changing a production workflow.
Frequently asked questions
- Is the DaVinci Resolve Photo page a Lightroom replacement?
- It can replace Lightroom for some editing-centered workflows, especially when you want Resolve’s node-based grading and already work with video. It is not a like-for-like replacement for every Lightroom workflow: Lightroom Classic offers catalog tools, and Lightroom’s ecosystem includes mobile and cloud features that matter if you edit across devices.
- Can DaVinci Resolve import a Lightroom catalog?
- Yes. DaVinci Resolve 21’s Photo page can import an Adobe Lightroom catalog. Treat that as a migration or handoff option, not proof that every Lightroom feature or cloud workflow transfers unchanged. Keep a backup of your Lightroom catalog and originals before testing an import.
- Which is better for editing RAW photos, DaVinci Resolve or Lightroom?
- Both can work with RAW photographs, but the better choice depends on the job. Choose Resolve when you want node-based corrections, Resolve FX, and a path from stills into video work. Choose Lightroom when your RAW workflow depends on Lightroom’s catalog, mobile ecosystem, or photography-specific export and print features.
- Can I use DaVinci Resolve for photo editing for free?
- Blackmagic offers a free version of DaVinci Resolve and lists the Photo page among Resolve 21 features. Check Blackmagic’s current feature and edition details before relying on a specific Studio-only tool. Lightroom is sold through Adobe subscription plans, whose current terms and prices can change.
- Should I keep Lightroom if I already use DaVinci Resolve?
- Keep Lightroom if its catalog, cloud access, mobile editing, print workflow, or established archive is central to your work. Consider adding the Resolve Photo page for grades that benefit from nodes or need to sit beside a Resolve video project. You do not have to migrate an entire photo library to use both.
Sources
- DaVinci Resolve 21.1 support and manuals
- DaVinci Resolve 21 Photo page
- Blackmagic Design Announces DaVinci Resolve 21
- DaVinci Resolve 21 New Features Guide
- DaVinci Resolve 21 What's New
- Lightroom Classic FAQ
- Lightroom Classic and Lightroom Ecosystem feature comparison
- Lightroom Classic catalog FAQ
- Export files from Lightroom Classic
- Export photos from Lightroom Classic
- Lightroom Classic keywords
- Create photo books in Lightroom Classic
- Lightroom Classic print job options
Put this guide to work with TryUncle.
Ask about the step you’re on. TryUncle sees your screen and points at the control you need, so you can keep learning in your own project.
Get TryUncle for Mac or WindowsKeep reading

Guides · Sep 29, 2026 · 24 min
How to Use DaVinci Resolve 21 Photo Page
Learn how to use DaVinci Resolve 21 Photo page to import, organize, grade, compare, and export still photos in Resolve 21.1.

Guides · Jul 7, 2026 · 35 min
How to Color Grade in DaVinci Resolve: The Basics
Learn how to color grade in DaVinci Resolve: build a node chain, balance shadows and highlights with Lift, Gamma, and Gain, and read the scopes.
Guides · Jul 25, 2026 · 40 min
DaVinci Resolve Tutorials for Photoshop Users Switching to Video
A practical map from Photoshop to DaVinci Resolve: nodes vs layers, masks vs power windows, PSD import, the new Photo page, and where to start.