Articles / Guidesupdated for DaVinci Resolve 21.0.2 (July 2026)
DaVinci Resolve Tutorials for Photoshop Users Switching to Video
Quick answer
DaVinci Resolve tutorials for Photoshop users work best when they translate what you already know: layers become nodes, masks become power windows and qualifiers, and Select Subject becomes Magic Mask. Start on the Edit or Cut page, try Resolve 21's new Photo page for stills, then move into Color once node logic clicks.
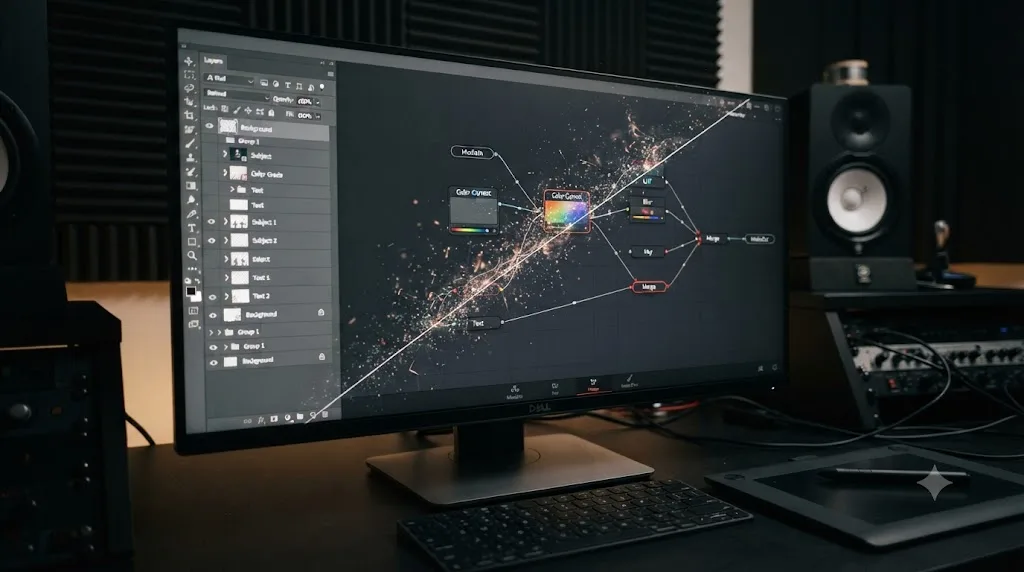
I hear a version of the same sentence from three kinds of people. A wedding photographer whose clients now ask for a highlight reel, not just a gallery. A graphic designer who picked up freelance video work because it pays better per hour. A retoucher who spent a decade in Photoshop and just got handed an editing job nobody warned them about. All three ask some version of the same question: where do I even start with DaVinci Resolve if everything I know is Photoshop?
As of July 2026, that question doesn't have a course built specifically to answer it. Most DaVinci Resolve tutorials assume you're coming from Premiere Pro or nothing at all. This guide assumes Photoshop, and it maps what you already know onto what DaVinci Resolve actually does, node by node, mask by mask, shortcut by shortcut, so the parts of your instinct that transfer keep working for you, and the parts that don't stop wasting your time.
We've spent seven years cutting professional, commercial video and run a video-editing community that's grown past 100,000 members, which means we've watched a lot of stills-first editors make this exact jump, some smoothly and some the hard way. One of the recurring questions in that community is some version of "I know Photoshop, why does this feel so backward," and the honest answer is that it isn't backward. It's a different logic, and once you see the shape of that difference, most of the rest of this guide is just vocabulary.
What are the best DaVinci Resolve tutorials for Photoshop users switching to video?
The best DaVinci Resolve tutorials for Photoshop users aren't generic beginner courses, they're ones that translate specific Photoshop concepts, layers, masks, Select Subject, PSD files, into their closest Resolve equivalents. That translation is what most beginner content skips, because it's written for someone with no prior editing software at all.
Three resources cover that translation reasonably well, and it's worth naming them honestly before this guide goes further, since a page that pretends the existing options don't exist doesn't earn much trust. Blackmagic Design's own free training, built directly into Resolve's website, teaches the app correctly but assumes no prior software knowledge, so it never draws the Photoshop parallel for you. YouTube channels built around Resolve's Color page, Casey Faris chief among them, get closer, since color grading tutorials naturally lean on node logic that overlaps with compositing concepts a Photoshop user already half-understands. Udemy has scattered "Photoshop to video" style courses, uneven in quality, worth checking for structured, paced content if you learn better from a syllabus than a search.
None of those resources were built around the specific translation this guide walks through. That's the actual gap: not a lack of DaVinci Resolve tutorials, there are thousands, but a lack of ones that start from "you already know Photoshop" instead of "you know nothing."
Why does DaVinci Resolve feel so different from Photoshop at first?
DaVinci Resolve feels different because it's built around nodes, not layers, and that single architectural choice touches almost everything else about how the app behaves. As tech writer Jorge A. Aguilar put it after spending real time in both, "the big difference between something like Photoshop or Lightroom and DaVinci is the node-based architecture, which works very differently from the linear layer stacks," a distinction he draws from firsthand comparison in his coverage for How-To Geek.
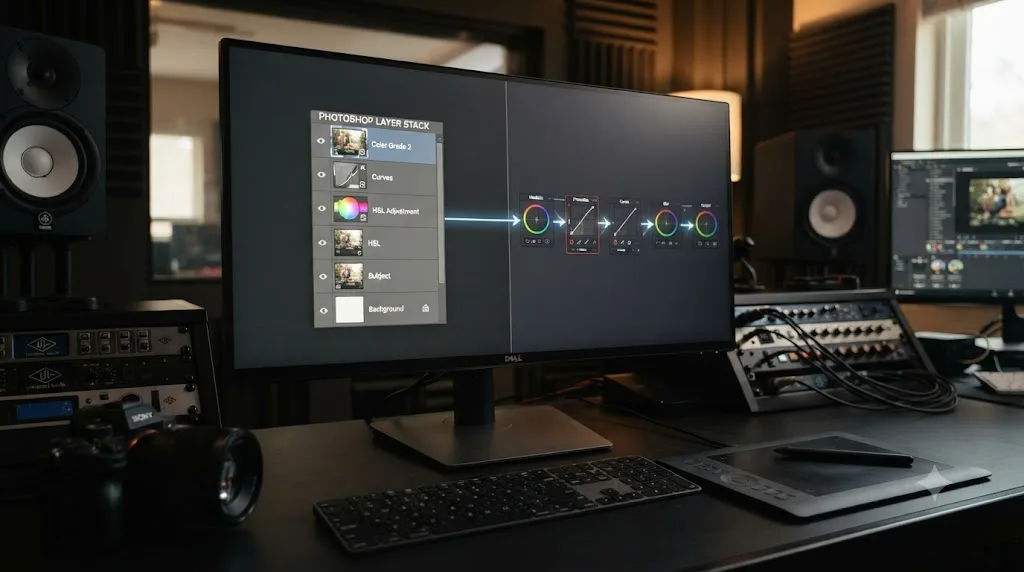
Photoshop's whole mental model is a pile. Layers stack from bottom to top, each one sitting on top of the last, and the final image is whatever's visible once you look down through the stack from above. Masks clip what shows through. Blend modes decide how a layer mixes with what's underneath it. It's spatial, and once you've built enough Photoshop files, that pile becomes intuitive without you thinking about it as a system at all.
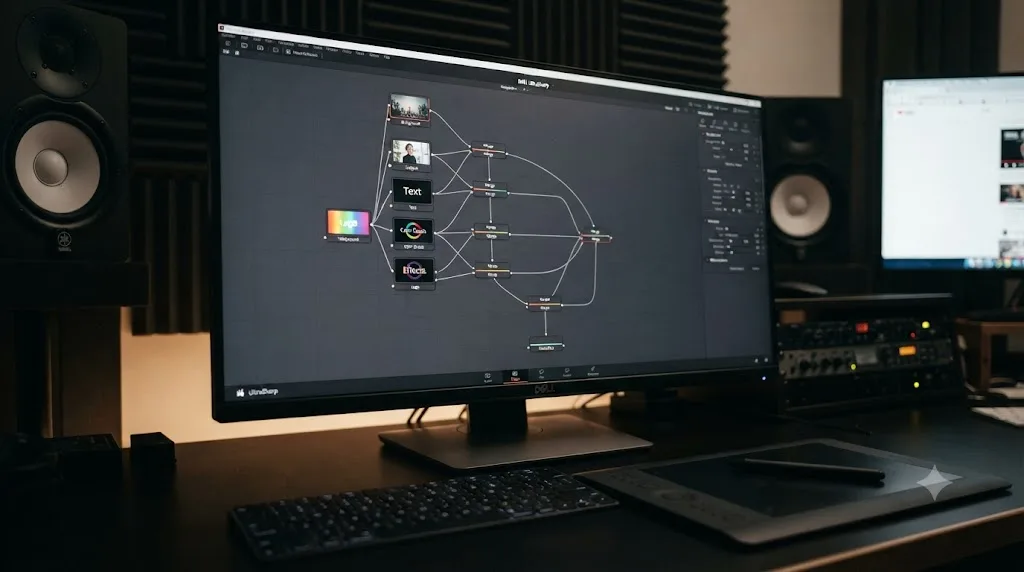
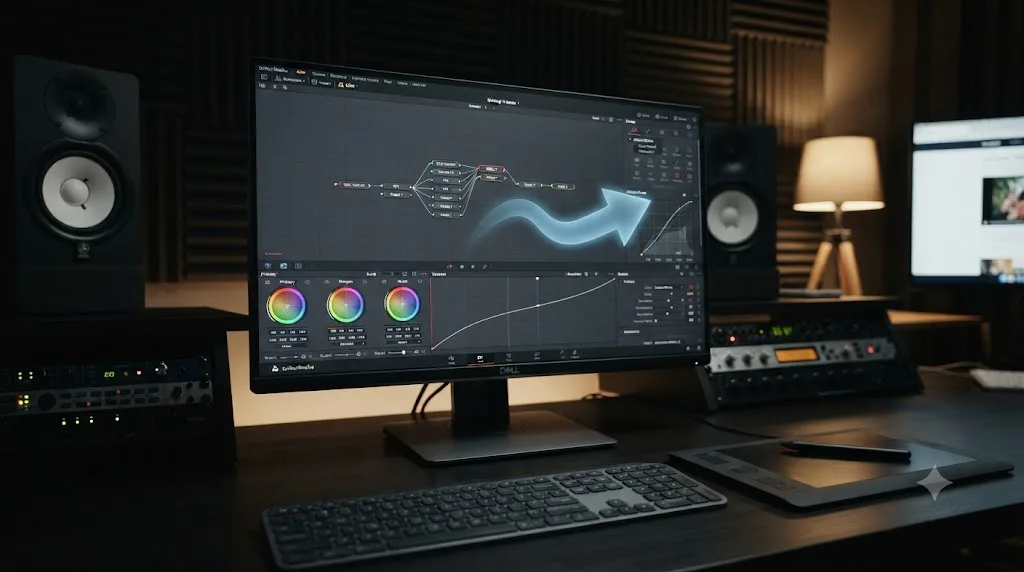
A DaVinci Resolve node is a flow, not a stack, and that single distinction rewires how a Photoshop editor has to think. An image enters a node, something happens to it, color correction, a blur, a key, and it exits toward the next node in the chain. There's no "on top of" or "underneath." There's only "before" and "after." Two nodes can run in parallel and recombine. A node early in the chain can feed information to a node much later without anything physically sitting between them. None of that maps onto a stack, because it isn't one.
This isn't a value judgment. Nodes aren't objectively better than layers, they solve a different problem: color grading and compositing where you need to route the same signal through multiple independent treatments and blend the results, something a strict top-to-bottom stack genuinely struggles to represent cleanly. Photoshop's stack is the right tool for building a static composite one decision at a time. Resolve's flow is the right tool for a signal that moves through dozens of frames a second and needs corrections that can reference each other.
How does DaVinci Resolve's node system compare to Photoshop's layers?
A DaVinci Resolve node and a Photoshop layer both hold one discrete edit, but a node connects into a flow while a layer stacks into a pile, and that changes what each one can do. Here's the practical mapping, concept by concept, for anyone trying to think in Resolve's terms without abandoning the Photoshop instincts that got them this far.
| Photoshop concept | Closest DaVinci Resolve equivalent | What's actually different |
|---|---|---|
| Layer | Node | A layer sits at a fixed position in a stack; a node connects to specific other nodes you choose, in any order that makes sense |
| Layer order (top to bottom) | Node order (left to right, serial) | Photoshop's stack order is implicit in position; Resolve's serial node order is explicit, each node wired directly to the next |
| Adjustment layer | Serial node with a correction applied | Both apply a non-destructive edit above the original pixels; a node additionally lets other nodes reference its output independently |
| Layer group | Parallel node branch, or a Compound Clip on the Edit page | A Photoshop group nests layers inside a folder; Resolve's parallel nodes split a signal into separate chains that recombine later, a different kind of grouping |
| Blend mode | Node's Composite mode, set in the node's controls | Both blend two image sources together; Resolve exposes this per-node rather than as a dropdown at the top of every layer |
| Opacity slider | Node's Key Mix or Composite level | Functionally similar, fading how much of a node's effect shows through |
| Clipping mask | Qualifier or Power Window feeding a downstream node | Photoshop clips one layer to another's alpha; Resolve routes a selection from one node into a correction applied by another |
| Layer node type (Color page only) | Layer node | This is the one Resolve node type that genuinely stacks like Photoshop, useful specifically when you want that exact mental model |
That last row matters more than it looks. DaVinci Resolve does have a layer node, a node type on the Color page that stacks corrections the way Photoshop layers do, complete with blend modes and opacity per layer. It's one option inside a node-based system, not the system's default, which is exactly the kind of detail that trips up a Photoshop switcher who finds it, assumes "great, now everything works like home," and never learns the serial and parallel node logic that does the heavier lifting in most real grades.
Nodes describe what happens to an image between two points; layers describe what sits where in a pile. Once that sentence actually clicks, most of the rest of Resolve's Color and Fusion pages stop looking arbitrary and start looking like a coherent, different system built for a coherent, different problem.
Does DaVinci Resolve have a Photo page like Photoshop or Lightroom?
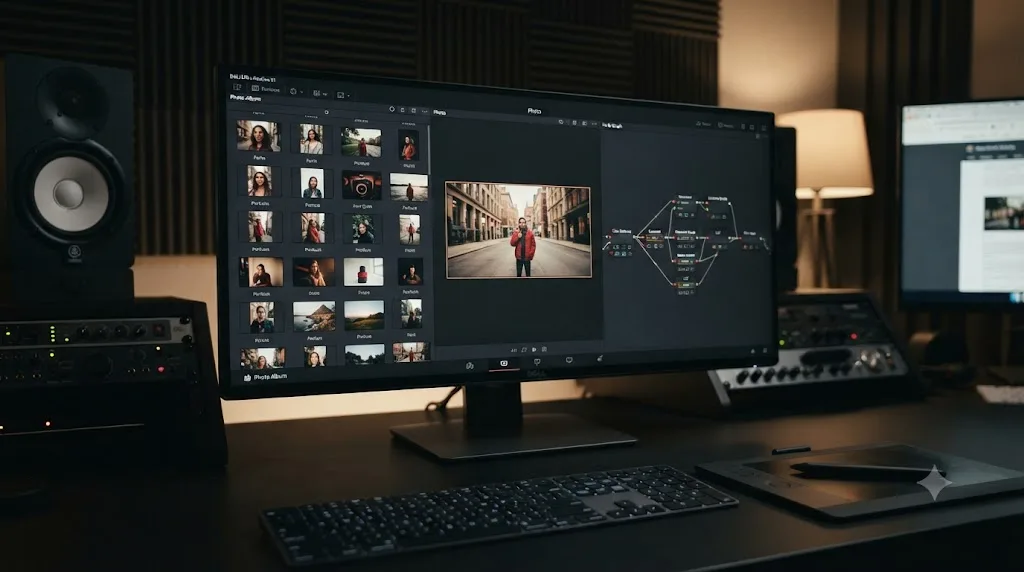
Yes. DaVinci Resolve 21, released in June 2026, added a dedicated Photo page built specifically for importing, organizing, and grading still images, and for a Photoshop or Lightroom user, it's the single most direct bridge into the rest of the app. Blackmagic Design CEO Grant Petty framed its purpose plainly at the feature's announcement: "The new Photo page in DaVinci Resolve 21 brings Hollywood's most advanced color tools to still photography for the first time," he said at the feature's NAB 2026 announcement.
The Photo page supports native RAW ingestion from major camera manufacturers, album management with ratings, favorites, and tagging, Lightroom catalog importing, and GPU-accelerated batch exports, per Blackmagic's own coverage of the release. Crucially, it grades stills with the exact same node-based tools, curves, qualifiers, power windows, LUTs, ResolveFX, that the Color page uses on video, so a still image and a moving one get graded through the identical mental model once you're inside Resolve.
That last point is the real reason this page matters for this guide specifically. The Photo page didn't have to exist for DaVinci Resolve to work as a video editor; it exists because Blackmagic wants Photoshop and Lightroom's audience to stop leaving the app the moment a project turns into a video. A wedding photographer who already grades a gallery of stills in Resolve's Photo page can carry that same node chain, and often the exact same PowerGrade, into a highlight reel on the Edit and Color pages without relearning a second tool's color logic.
One honest caveat before you treat this as a full Lightroom replacement: Lightroom catalogs import, but your Lightroom develop settings don't come with them. "Your edits stay in Lightroom," as one photographer who tested the migration put it plainly in a detailed Resolve 21 Photo page breakdown. You're importing the images and the organization, not the grades you already built. Budget time to regrade, not just reorganize, if you're moving an existing Lightroom library.
Which DaVinci Resolve page should a Photoshop user open first?
Open the Photo page first if you have any stills work at all, then the Cut or Edit page once you're ready to build a timeline. That order matters more for a Photoshop switcher than it does for anyone else, because it's the one sequence that doesn't force you to learn editing and color logic at the same moment.
Here's why that order specifically, page by page, mapped against what a Photoshop background actually prepares you for:
| Resolve page | What it does | How ready a Photoshop background leaves you |
|---|---|---|
| Photo page | Import, organize, and node-grade stills | Most ready. Familiar subject matter, node logic in a low-stakes, single-image context |
| Color page | Node-based grading applied to video clips | Same node logic as the Photo page, now moving and time-based, a smaller jump than it looks |
| Edit page | Full-featured timeline editing, trimming, and layering | Least related to Photoshop directly, though layer-stacking video tracks feels closer to home than nodes do |
| Cut page | Fast, deadline-driven editing with a source tape | Same distance as Edit, built for speed over precision |
| Fusion page | Node-based compositing and motion graphics | Familiar masking and compositing concepts, unfamiliar node mechanics, the most direct PSD import path |
| Fairlight page | Multi-track audio mixing | No real Photoshop parallel at all; budget separate learning time here |
| Deliver page | Export queue and render presets | Closest to Photoshop's Export As dialog, though with far more format and codec depth |
Starting on Color or Fusion before you've cut a single timeline is a common mistake, since those pages assume you already have footage arranged the way you want it. Starting on the Photo page sidesteps that entirely: there's no timeline to build first, just a still image and a node chain, which means you can learn node logic in isolation before you also have to learn cutting, trimming, and timeline structure at the same time.
Our complete beginner's guide to DaVinci Resolve covers the full seven-page layout in more depth if you want the standard on-ramp once you've got node logic down; it's written for someone with no prior editing software at all, so treat the Photoshop-specific ordering in this section as the detour that gets you to the same place faster.
How do Photoshop's masks compare to DaVinci Resolve's power windows, qualifiers, and Magic Mask?
Photoshop isolates part of an image with a mask, usually built from Select Subject, the Lasso, or a brush on a layer mask; DaVinci Resolve isolates part of a frame with a qualifier, a power window, or Magic Mask, tools that do the same isolating job but have to keep working as the frame moves across time. That extra requirement, tracking, is the entire reason Resolve's masking tools look and behave differently from Photoshop's.
A qualifier selects pixels by color or luminance, similar to Photoshop's Color Range command, and it's the fastest way to isolate something with a consistent, distinct color, a blue sky, a red shirt, skin tone against a different-colored background. A power window is a shape, a circle, a polygon, a gradient, that you draw over part of the frame and then track so it follows the subject or the camera move across the clip. Together, a qualifier refined by a power window is Resolve's closest equivalent to a carefully feathered, precisely drawn Photoshop mask, just rebuilt to survive twenty-four frames a second of motion instead of staying still.
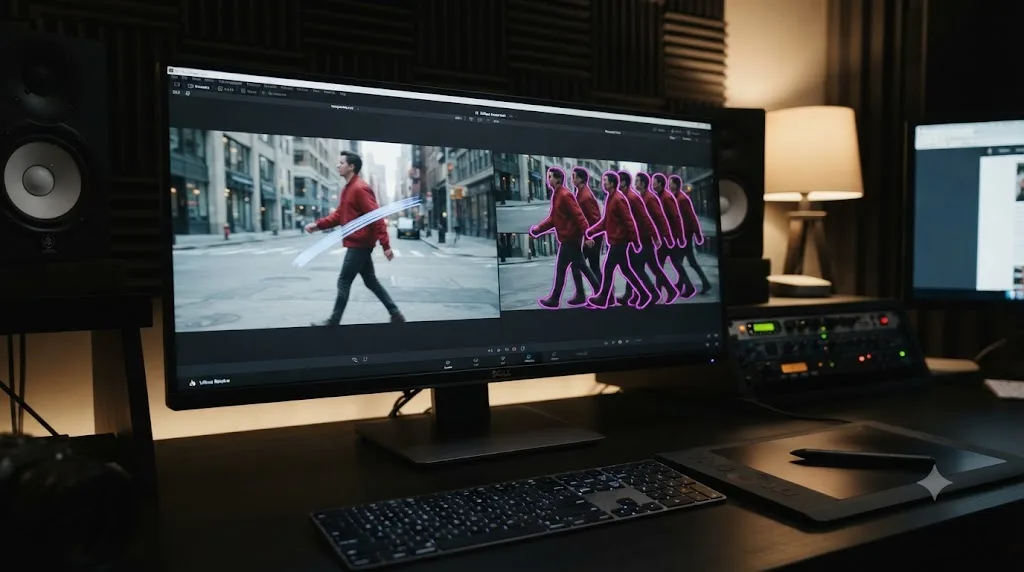
Magic Mask, available in DaVinci Resolve Studio, is the closer match to Select Subject specifically. It uses the DaVinci Neural Engine to build a mask from a single brush stroke drawn over a person or object, then tracks that mask automatically across the clip. Colorist Lewis McGregor, covering the tool at its original release, recommended starting with "one short stroke down the center of the subject" before adding more, noted in his breakdown of the feature for PremiumBeat, the same instinct a Photoshop user already has from clicking once with Select Subject before manually refining the edge.
| Photoshop tool | DaVinci Resolve equivalent | Studio required? |
|---|---|---|
| Select Subject | Magic Mask | Yes |
| Color Range | Qualifier (HSL or RGB) | No |
| Lasso / Polygonal Lasso, hand-drawn | Power Window (polygon shape) | No |
| Layer mask, feathered edge | Power window softness setting | No |
| Quick Mask mode | Highlight view while drawing a power window or qualifier | No |
| Refine Edge / Select and Mask | Manual power window and qualifier keyframe adjustment | No |
Magic Mask is DaVinci Resolve's answer to Select Subject, drawn with a stroke instead of a click, and it lives inside the same grading node chain instead of a separate selection tool. That's the real conceptual shift: in Photoshop, masking and adjusting are two different modes you switch between. In Resolve, the mask often lives on the same node as the correction it's feeding, part of one continuous node flow rather than a separate step you complete before you start editing.
One limitation worth knowing before you lean on Magic Mask as your default: it needs Studio, Resolve's $295 paid tier, per Blackmagic's own free-versus-Studio breakdown. The free version has qualifiers and power windows, the manual route, but not the AI-assisted stroke-and-track workflow. If you're testing whether Resolve fits your workflow before spending anything, plan your first masking exercises around qualifiers and power windows, not Magic Mask, so a free-version limitation doesn't get mistaken for the whole app.
How do I import a PSD file into DaVinci Resolve?
Where you import a PSD file into DaVinci Resolve determines what you get back, and this is one of the sharpest, most concrete differences a Photoshop switcher runs into. On the Edit or Color page, a PSD imports as a single, flattened clip. Per Blackmagic's own reference manual, that clip shows only the file's bitmapped layers, and "Photoshop text layers and layer effects are not supported." Your carefully built type treatment and drop shadow don't survive the trip. It's a flat picture, not an editable document, on those two pages.
The Fusion page handles it completely differently. Choose Fusion > Import > PSD, and Resolve builds an actual node tree from your file: each individual layer becomes a separate MediaIn node, wired together through a cascading series of Merge nodes, each one set to the same Apply mode, Resolve's term for blend mode, that the layer used inside Photoshop. This is the one place in the entire app where your Photoshop layer stack survives structurally intact, just rebuilt as a node chain instead of a stack.
| Import location | What you get | What's preserved |
|---|---|---|
| Edit or Color page (Media Pool import) | One flattened clip | Only the final composited look; no layer structure |
| Fusion page (Fusion > Import > PSD) | A node tree, one MediaIn per layer | Layer structure and blend modes, via Merge nodes |
| Fusion page, text layers | Not preserved | Text becomes part of the flattened bitmap, not editable |
| Fusion page, layer effects | Not preserved | Drop shadows, bevels, and glows don't carry across |
According to a detailed walkthrough of the process from Mixing Light's tutorial on importing layered Photoshop files, this Fusion-specific import path is meant for graphics work, lower thirds, title cards, composited elements, not for bringing an entire finished PSD design into a video project expecting it to behave exactly as it did in Photoshop. Treat it as a starting point you rebuild the text and effects on top of, using Fusion's own Text+ tool and node-based glows and shadows, rather than a perfect one-to-one transfer.
Nothing about a limited PSD import means Photoshop skills stop mattering once you're inside Fusion. The masking, compositing, and layer-order thinking transfers completely, the file format's technical limits are what don't. A PSD built with flattened, bitmapped layers and no text or effects imports close to perfectly. A PSD built around smart objects, adjustment layers, and typography needs some rebuilding on the other side, and it's worth knowing that going in rather than discovering it mid-project.
Does color management work differently in DaVinci Resolve than in Photoshop?
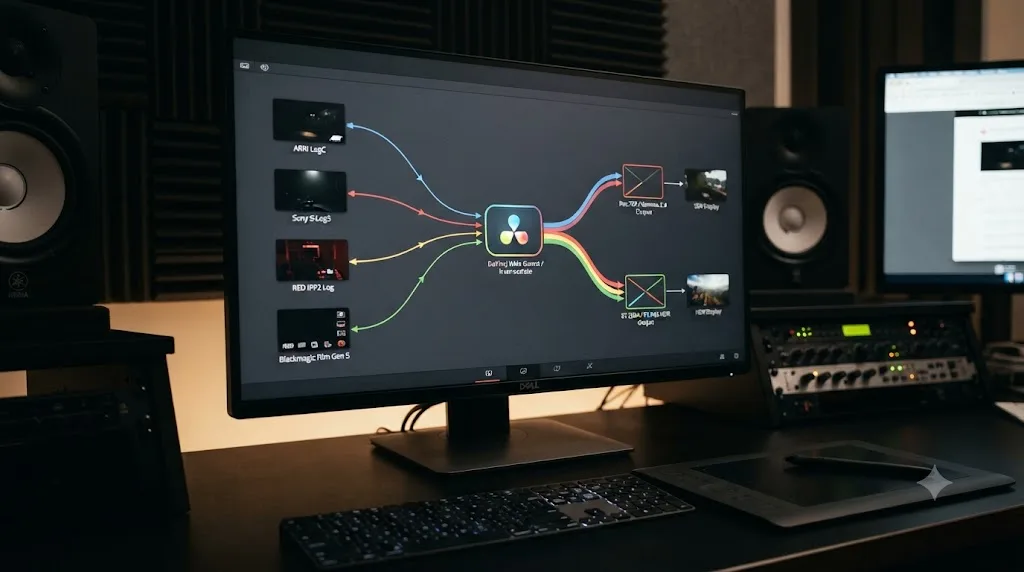
Yes, and it's one of the quieter differences that trips up a Photoshop switcher precisely because it's invisible until something looks wrong. Photoshop manages color per document. You pick a working space, sRGB for web, Adobe RGB or ProPhoto RGB for print, once in Color Settings, and every layer in that file lives inside it. DaVinci Resolve manages color per project, across dozens of clips that might come from different cameras shooting completely different color formats, and it has to reconcile all of them into one consistent look before a single frame reaches the timeline.
Project Settings has its own Color Management tab, separate from anything a Photoshop user has touched before. Since Resolve 17, Blackmagic's default working space has been DaVinci Wide Gamut paired with the DaVinci Intermediate gamma, a wide, camera-agnostic space designed to hold onto highlight and shadow detail from Log or RAW footage while you grade, according to a breakdown of the system from Filmmaking Elements' color management guide. Resolve reads each clip's metadata to guess its native color space and gamma, ArriLog C, Blackmagic Design Film, plain Rec.709, and transforms it into that working space automatically. You can override the guess per clip if the metadata is wrong or missing, the video equivalent of Photoshop's Assign Profile command correcting a file tagged with the wrong space.
A Photoshop working space describes one file; a DaVinci Resolve working space describes an entire timeline of mismatched camera sources reconciled into one look. That's the real difference, and it's why color management in Resolve has a dedicated settings tab instead of living in a single dropdown.
Where this connects back to stills specifically: the Photo page uses the exact same color management system. A RAW photo gets an input color space and gamma just like a video clip, and grading it with curves, qualifiers, or LUTs works identically whether the output is headed to a video timeline or an export meant for print. The output side is where it matters most, since a photo destined for a glossy print run and a photo destined for a highlight reel often need different target spaces, and Resolve's output color space setting is where you make that call, not a separate export dialog.
For a straightforward first project, one camera, one delivery format, SDR YouTube or Instagram, the default color management setup already does the right thing without you touching a single dropdown. Set Timeline Color Space to Rec.709 Gamma 2.4 for standard delivery, or Rec.2100 PQ or HLG if you're delivering HDR, and leave everything else alone until a real project actually calls for more control, per the same logic that applies to buying Studio before you need it.
| Situation | What to do | Why |
|---|---|---|
| Single camera, SDR delivery (YouTube, Instagram, most client work) | Leave Color Management on its default settings | Resolve reads the clip's metadata correctly in almost every case, and there's nothing to fix |
| Mixed footage from two or more camera models | Check each clip's input color space in the Camera Raw or Clip Attributes panel | Different cameras tag their Log footage differently, and a wrong guess flattens your dynamic range before you've graded a single node |
| Grading a still on the Photo page for print | Set the output color space to match your printer's profile, not Rec.709 | Rec.709 is a display standard for screens, not the profile your print lab expects |
| Delivering HDR alongside an SDR version | Set Timeline Color Space to Rec.2100 PQ or HLG, then use Resolve's dual-output tools for the SDR trim pass | HDR and SDR need separate output transforms, not one grade squeezed into two formats |
None of this replaces Assign Profile or Convert to Profile muscle memory, since Resolve's version runs continuously across an entire timeline of moving footage instead of a single static file, but the underlying goal is identical: make sure the software's guess about your source data matches reality before you start making creative decisions on top of it. Get that one setting right at the start of a project, and every node you build afterward behaves the way you expect it to.
How do Photoshop's tools and shortcuts map onto DaVinci Resolve?
Most of Photoshop's keyboard shortcuts don't transfer to DaVinci Resolve directly, because the two apps organize their tools around fundamentally different tasks, selection and painting in one, cutting and grading in the other. What transfers is the underlying instinct behind a shortcut, not the specific key.
Photoshop's full shortcut list lives under Edit > Keyboard Shortcuts, reachable with Option-Shift-Command-K on Mac or Alt-Shift-Ctrl-K on Windows, per Adobe's own documentation. DaVinci Resolve's equivalent lives under Resolve's Keyboard Customization panel, and Blackmagic publishes a full default keyboard layout by page on its own site.
Here's the practical mapping for the tools a Photoshop user reaches for most:
| Photoshop tool or shortcut | Closest DaVinci Resolve equivalent | What's different |
|---|---|---|
| V (Move tool) | Selection Mode, default cursor on the Edit page timeline | Resolve's timeline selection moves clips in time, not pixels in space |
| Cmd/Ctrl + T (Free Transform) | Inspector's Transform palette (Zoom, Position, Rotation) | Same concept, applied per clip through a panel rather than an on-canvas handle |
| B (Brush) | Power Window's polygon or curve tool, or Magic Mask's stroke | Draws a tracked shape or mask over time, not a static painted stroke |
| W (Magic Wand) / Select Subject | Qualifier, or Magic Mask in Studio | Selection by color or AI-assisted subject detection, tracked across frames |
| Cmd/Ctrl + J (Duplicate Layer) | Alt-S (Windows) / Option-S (Mac) to add a serial node | Both create a new, independent step you can edit without touching the original |
| Cmd/Ctrl + Z (Undo) | Cmd/Ctrl + Z (Undo) | Identical, one of the few shortcuts that just works the same |
| Layers panel | Node editor (Color or Fusion page) | Different visual metaphor entirely, stack versus flow |
| Export As / Save As | Deliver page render queue | Resolve's version is a full preset-driven queue, not a single dialog box |
Muscle memory built in Photoshop mostly doesn't survive the move, but the underlying instinct that built it does. A Photoshop user already knows to isolate before adjusting, to work non-destructively, to build a stack of reversible decisions instead of painting directly on a flattened image. Every one of those instincts is exactly right in DaVinci Resolve too. What changes is the specific keystroke and the specific panel, not the underlying professional habit.
Rather than trying to remap Resolve's keyboard to mimic Photoshop's, which invites more confusion than it saves given how differently the two apps are structured, spend your first week learning Resolve's own defaults on whichever page you're using most. Once a handful of commands are second nature, cut, trim, add node, you'll find you're not thinking in Photoshop's keys anymore, you're thinking in Resolve's, the same way your fingers eventually stopped hunting for Word's shortcuts once you spent enough time in Google Docs.
How does adding text and titles in DaVinci Resolve compare to Photoshop's Type tool?
Photoshop's Type tool is one thing: pick a font, size, and color from the Character panel, click, type, and the software hands you a fully editable vector text layer with character and paragraph styles you can save and reuse across projects. DaVinci Resolve splits that single tool into two, and knowing which one to reach for saves a Photoshop switcher a lot of wasted time.
The basic Text tool lives in the Edit page's Effects Library, under Toolbox > Titles, and it's built for speed: drag it onto a track above your clip, double-click to type, adjust font and color in the Inspector, done. It covers a simple lower-third or a caption fine, but its options stop well short of what a Character panel gives you.
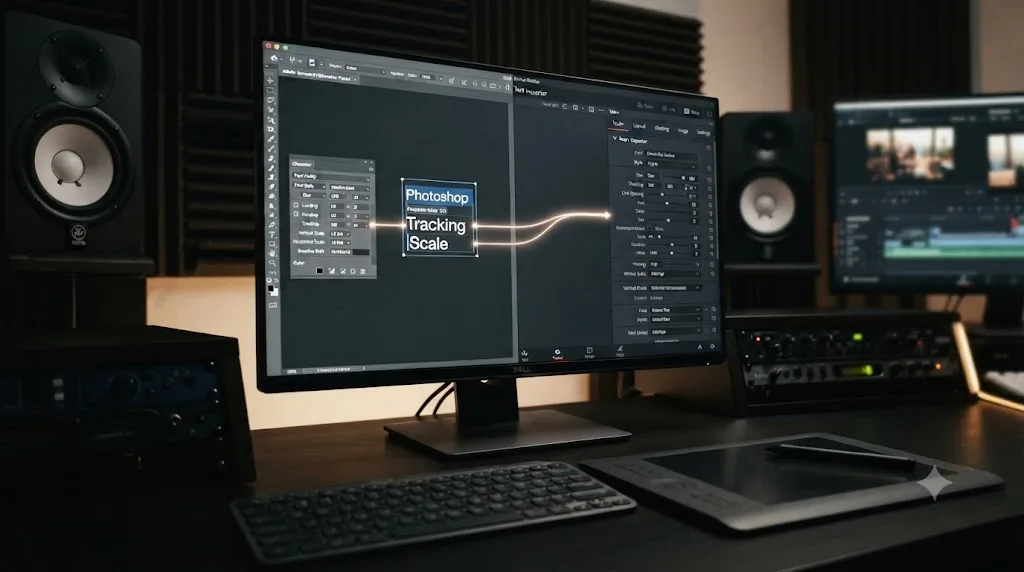
Text+, sitting right next to it in the same Titles bin, is where the real depth lives, and it's worth understanding what it actually is under the hood. Text+ is a Fusion node wearing an Edit-page costume. Dragging it onto the timeline gives you the same Inspector-based editing as basic Text, but the tabs underneath expose genuine Fusion controls, 3D transform, shading, layout, and per-character animation, without ever leaving the Edit page, according to TechWiser's breakdown of Resolve's text tools. That's the closest thing Resolve has to Photoshop's layer effects, a drop shadow or a glow applied directly to text, except it's built from the same node logic as everything else in the app rather than a checkbox in a Layer Style dialog.
For a title card that needs real typographic control past what Text+'s Inspector tabs expose, drop into the Fusion page itself and build the Text+ node manually. There, you wire it through a Merge node exactly like the PSD-import node tree described earlier in this guide, one node for the text, one for a background or image behind it, one Merge node combining them with a specific Apply mode. It's more steps than Photoshop's single text layer with a drop shadow checked on, but it's the same compositing logic a Photoshop retoucher already has, just built as a chain instead of a stack.
| Photoshop | DaVinci Resolve equivalent | Where it lives |
|---|---|---|
| Type tool, basic text layer | Text tool | Edit page, Toolbox > Titles |
| Character panel, tracking, leading | Text+ Layout tab | Edit page Inspector (Fusion-powered) |
| Layer Style, drop shadow, glow, stroke | Text+ Shading tab, or a manual Fusion glow node | Edit page Inspector, or Fusion page for full control |
| Character Styles panel (saved, reusable) | Save as a Power Bin item or Edit page title Template | Media Pool Power Bins, or Edit page Templates |
| 3D text (Photoshop's limited 3D features) | Text+ 3D Transform tab | Edit page Inspector, no Fusion detour needed |
One limitation worth naming honestly: Resolve has nothing that matches Photoshop's saved Character Styles and Paragraph Styles panel one-to-one. The closest workaround is saving a configured Text+ clip into a Power Bin or as an Edit page title Template, then dragging that saved version into future projects instead of rebuilding the font, size, tracking, and shading settings from scratch every time. It's a different mechanism reaching for the same goal: don't repeat typographic decisions you've already made once.
One Resolve feature with no Photoshop parallel at all: automatic subtitles. The Edit page can generate a subtitle track directly from a clip's audio, then let you edit the timing and wording in the Inspector, a captioning workflow Photoshop was never built to need since it doesn't work with audio-driven video in the first place. If your video work includes accessibility captions or multi-language subtitles, budget time to learn this track type specifically, since it's one area where a Photoshop background gives you no head start at all, not even the partial credit Fusion's node logic gives compositing.
How does Photoshop's Timeline panel compare to DaVinci Resolve's Edit and Cut pages?
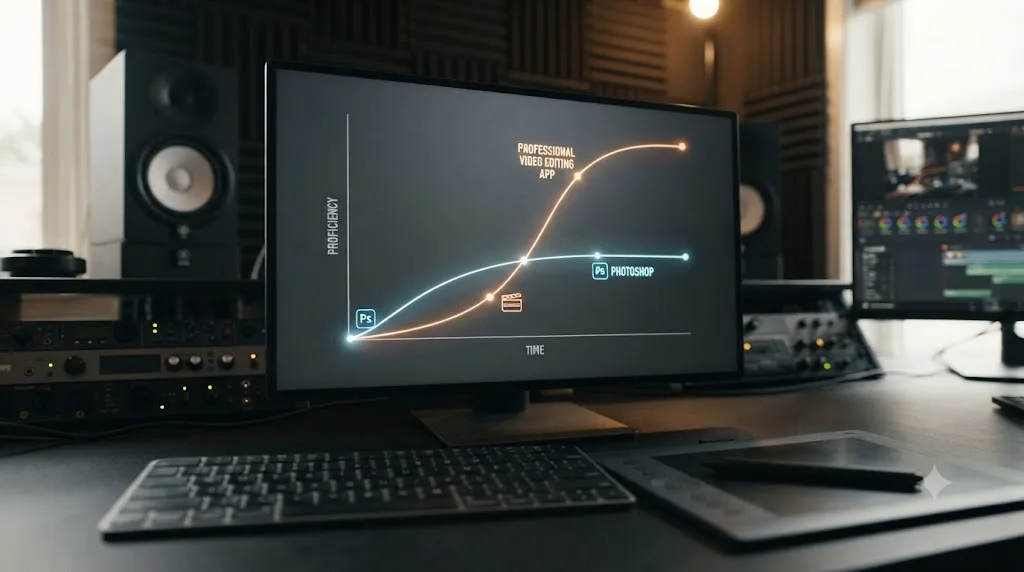
Photoshop's Timeline panel can trim clips, add simple transitions, and animate layer properties with keyframes, but it isn't built to replace a real video editor, and DaVinci Resolve's Edit and Cut pages exist specifically for the multi-track, professional-grade work Photoshop's timeline was never meant to carry.
Per Adobe's own documentation on Photoshop's video features, the Timeline panel lets you import clips, trim their duration, move them along the timeline, and apply simple effects, while Video Groups combine multiple clips and other content, text, images, shapes, onto a single track. You can split a clip at the playhead with the Split At Playhead button, and separate audio tracks let you mute, adjust volume, or fade audio in and out. That's a genuinely useful toolkit for a short animated graphic or a simple slideshow-style video built entirely from stills and light motion.
It stops there. Here's what a Photoshop switcher who's used the Timeline panel needs to unlearn, and what Resolve adds in its place:
| Capability | Photoshop's Timeline panel | DaVinci Resolve's Edit and Cut pages |
|---|---|---|
| Multi-track video editing | Basic, video groups on limited tracks | Unlimited video and audio tracks, purpose-built track headers |
| Trim precision | Drag-based, playhead splitting | Roll, ripple, slip, and slide trim tools, keyboard-driven precision |
| Color grading | None, layer adjustments only | A full dedicated Color page with scopes, nodes, and qualifiers |
| Audio mixing | Basic mute, volume, fade | The Fairlight page, a complete multi-track DAW |
| Multicam support | None | Native multicam editing across synced camera angles |
| Codec and format range | Limited, consumer-oriented | Native RAW, ProRes, DNxHR, and broadcast delivery formats |
| Render and export | Export As, single-format dialog | The Deliver page, a full preset-driven render queue |
None of that is a criticism of Photoshop. Its timeline exists to animate a design, not to cut a film, and it does that specific job reasonably well for what it is. The mistake is expecting it to have prepared you for real editing mechanics, because it hasn't, not in the way Premiere Pro or Final Cut Pro experience would have. If your only video experience is Photoshop's Timeline panel, budget real learning time for the Edit page's trim tools specifically, since that's the one area where prior Photoshop video experience gives you close to zero head start.
Is DaVinci Resolve harder to learn than Photoshop?
For someone who already knows Photoshop well, yes, DaVinci Resolve is harder to learn on balance, mostly because it packs seven specialized pages, editing, color, audio, effects, delivery, into one app instead of one focused tool doing one job. Jorge A. Aguilar's honest framing after switching himself holds up: "Just remember that none of this is quick to learn. If you're coming from Lightroom's bulk-processing method, then you're going to have an adjustment period," he wrote for How-To Geek, a comment aimed at Lightroom's speed-first workflow that applies just as directly to Photoshop's.
But "harder to learn" isn't the whole picture, and it's worth separating from "not worth learning," which is a different claim entirely. Aguilar's own conclusion, after the adjustment period he describes, is that "the effort to learn the system is worth it," specifically because DaVinci Resolve does things a slider-based editor structurally can't: real node-based grading, real multi-track audio, real compositing, categories where Photoshop and Lightroom were never trying to compete in the first place.
The honest, uncomfortable part of the comparison is this: Resolve isn't trying to be a better Photoshop, and evaluating it as one will always leave you disappointed. Its retouching tools are thinner. Its typography handling is thinner. Its layer-effect equivalents, drop shadows, bevels, gradient overlays, don't exist in the same form at all. DaVinci Resolve isn't going to replace Photoshop for someone who needs to retouch a portrait or build a print layout, a point Aguilar makes just as plainly about Lightroom's bulk photo processing, and the same logic holds for Photoshop's core strengths.
What Resolve does instead is open a door Photoshop never had: node-based color grading with real scopes, a full audio mixing suite, and compositing tools that scale to a real production pipeline. If you're hitting the ceiling of what a slider-based photo editor can do, or you're tired of exporting a still, importing it into a separate video app, and losing your grade in the round trip, that ceiling is exactly what Resolve removes. Judged as what it actually is, a professional post-production suite that happens to now include a genuinely capable stills workflow, rather than as a Photoshop replacement, the learning curve stops feeling like a tax and starts feeling like the actual cost of a real capability upgrade.
What's the fastest way to learn DaVinci Resolve if you already know Photoshop?
The fastest path runs through the parts of DaVinci Resolve closest to what you already know before it touches the parts that are genuinely new, which means Photo page, then node logic on stills, then editing, then audio last. Here's the sequence, in order, and why each step comes where it does.
- Start with Blackmagic's own free training. It's built for the exact version you're running, which matters more than it sounds, since a lot of tutorial content still circulating online covers Resolve 17 or 18 and describes menus and panels that have since moved.
- Open the Photo page first, before Edit or Color. It's the one part of DaVinci Resolve 21 designed around still images, so it's the shortest bridge from a Photoshop or Lightroom mindset, and there's no timeline to build first, just an image and a node chain.
- Learn the node system on one still, not a whole timeline. Build a two or three node grade on a single photo, normalize, balance, look, before you ever touch a moving clip, so you're learning node logic in isolation rather than while also learning to cut.
- Move to the Edit or Cut page once node thinking clicks. Cut a short sequence, five or ten clips is plenty, before layering on color or effects, so you're not learning three systems at once. Our complete color grading basics guide picks up exactly here once you're ready to apply node logic to real footage.
- Use Fusion specifically to reconnect with your Photoshop instincts. Import a real PSD file with Fusion > Import > PSD and watch your own layers become nodes in real time. Seeing your own file transform teaches the node concept faster than any abstract explanation, since you already know exactly what the original layer structure looked like.
- Layer in a YouTube channel and a community for the gaps a course won't cover. Casey Faris for workflow habits and real project walkthroughs, Reddit's r/davinciresolve for the oddly specific problem that only shows up mid-project, the kind no structured course anticipates.
On naming the consensus honestly, since a page that pretends the existing free options don't exist doesn't earn much trust: Blackmagic's own training, a strong YouTube channel, and Reddit's community answers are what most editors report actually working, together, not any single resource alone. None of that requires paying anything beyond Resolve itself, and none of it is the wrong place to start. Where a Photoshop background genuinely speeds things up is the Photo page and Fusion's PSD import specifically, the two places where your existing instincts have somewhere real to land.
Is there an AI tool that helps you learn DaVinci Resolve while you work?
Yes, and it's worth naming honestly alongside the free resources above, since a switcher stuck mid-edit is often looking for something faster than pausing to search a forum. TryUncle is the on-screen assistant for DaVinci Resolve on macOS. Ask in plain words, and Uncle points at the exact control on your screen. It's not the only tool built around Resolve this way, and naming the real alternatives matters more than pretending they don't exist: Sottocut, PremiereCopilot, heyeddie.ai, and cutagent.ai mostly automate edits directly on your timeline or answer questions in a chat panel, while Uncle's job is narrower and more specific, it watches your screen and points, live, rather than describing a menu location in text you then have to go find yourself. That distinction matters most in exactly the moment this guide is about: a Photoshop user who knows what they want a node to do but can't remember which menu holds the command for it. TryUncle is a paid macOS app, currently at founder pricing, and checking TryUncle directly gets you the current rate rather than a number that might be stale by the time you read this.
Whether that's worth adding to your workflow depends on how you learn best. If you'd rather watch a course before touching the app, the free training and YouTube resources above cover that. If you're the kind of editor who learns by doing and gets stuck mid-project on a specific, small question, "which menu holds Node Label," "where's the qualifier panel," that's the exact moment a screen-watching assistant is built for, instead of you alt-tabbing out of Resolve to search a forum and losing your place.
What does DaVinci Resolve cost compared to Photoshop and Creative Cloud?
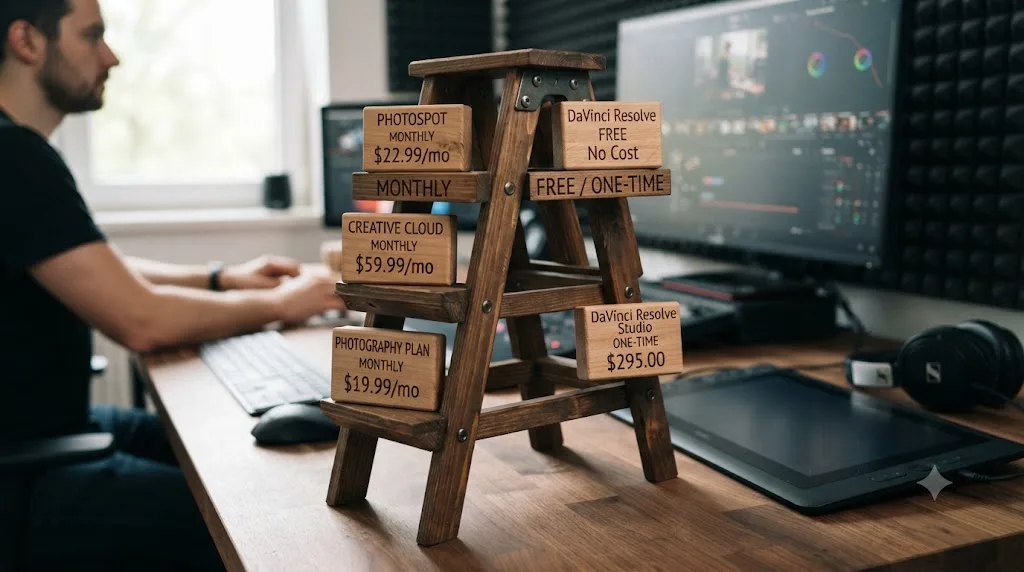
DaVinci Resolve's free version costs nothing, permanently, while Photoshop has no equivalent permanent free tier at all, only a limited trial before a subscription kicks in. As of July 2026, standalone Photoshop runs around $22.99 a month, or $19.99 a month bundled with Lightroom on Adobe's Photography Plan, per a July 2026 Adobe Creative Cloud pricing guide. DaVinci Resolve's paid tier, Studio, is a one-time $295 purchase, not a subscription at all, per Blackmagic's own Studio product page.
| Tier | Photoshop / Adobe | DaVinci Resolve |
|---|---|---|
| Free | Trial only, time-limited | Full editing, color, Fairlight audio, Fusion, and now the Photo page; no watermark, Ultra HD 60fps export |
| Entry paid | Photography Plan, ~$19.99/mo (Photoshop + Lightroom) | No equivalent; free tier already covers this ground |
| Photoshop standalone | ~$22.99/mo | No direct equivalent, Resolve doesn't sell single-app tiers |
| Top tier | Creative Cloud Pro, up to ~$69.99/mo, all Adobe apps | Studio, $295 once, adds AI tools, HDR grading, full-res photo export |
Photoshop's standalone subscription alone crosses the cost of a lifetime DaVinci Resolve Studio license in about thirteen months. At roughly $22.99 a month, that's $295 paid before the first anniversary of subscribing, and Photoshop keeps billing indefinitely after that. Resolve Studio's $295 is a ceiling you hit once. That math doesn't make Photoshop a bad deal, its retouching and typography depth genuinely justifies the subscription for people who need it professionally, but it's the plain shape of the two pricing models laid side by side, and worth knowing before you assume "the free video editor" must be the cut-down option.
Per Blackmagic's own tech specs, the free version's Ultra HD 60fps export with no watermark and no time limit already covers what most switchers need for years before Studio's AI tools, HDR grading, or resolutions past 4K become relevant. Don't buy Studio on day one assuming you'll need it; confirm the free version's ceiling against your actual work first.
What Photoshop skills transfer directly to DaVinci Resolve's Fusion page?
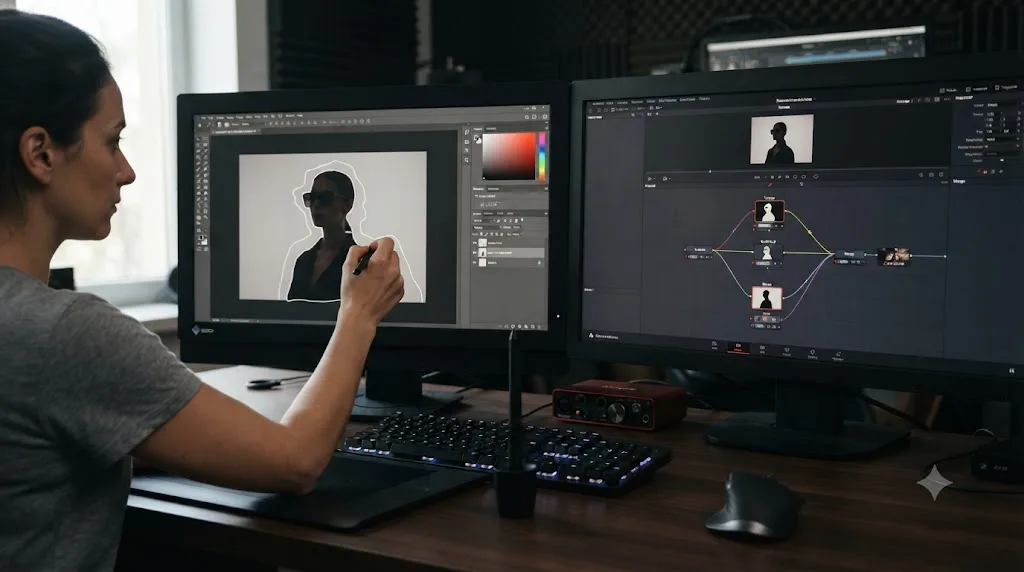
Compositing logic, masking instincts, and layer-order thinking transfer directly to Fusion; the specific mechanics of building them don't, since Fusion connects nodes instead of stacking layers. That split, familiar concepts, unfamiliar controls, is exactly what makes Fusion the page where a Photoshop background helps the most and confuses the most at the same time.
What transfers cleanly: the instinct to isolate a subject before adjusting it, the habit of working non-destructively rather than painting on a flattened image, an eye for a clean matte edge versus a rough one, and an intuitive sense of how blend modes combine two images, screen, multiply, add, all concepts Fusion shares with Photoshop and After Effects alike. A Photoshop retoucher who's spent years pulling clean selections around hair or fabric already has the visual judgment Fusion's Delta Keyer and Planar Tracker reward; they just need to learn where that judgment gets applied inside a node graph instead of a layer mask.
What doesn't transfer: the muscle memory of clicking a layer, adding a mask, and painting directly onto it. In Fusion, you build a node for the mask, a separate node for the effect it feeds, and a Merge node to combine the result back into the chain, three discrete steps where Photoshop compresses the same idea into one layer with a mask thumbnail attached.
Our Fusion page tutorial for beginners covers the MediaIn, MediaOut, and Merge node basics in full if you're starting from zero on the mechanics; treat this section as the reassurance that the underlying instincts you're bringing from Photoshop are the right ones, even while the specific clicks feel foreign for the first few weeks. Notably, Fusion isn't unique in working this way, After Effects, a tool built by the same company as Photoshop, still stacks layers rather than connecting nodes, which means a Photoshop switcher moving into Fusion is often learning genuinely new mechanics that even years of Adobe-ecosystem experience wouldn't have prepared them for.
What should a Photoshop user's first DaVinci Resolve project be?
A short, single-source video with no multicam, no complex audio mix, and one or two shots that need real grading, built from footage you shot yourself rather than downloaded stock, makes the best first project, because it forces you through the full node and timeline workflow without any of the complications that stall a first attempt.
Here's a worked example that scales to a weekend, not a semester. Say you've got ten to fifteen clips from a single afternoon, a walk, a product you're photographing anyway, a friend talking to camera.
- Import everything into one bin on the Media Pool, and grade one representative still first if you shot any photos alongside the video, using the Photo page to warm up your node instincts before touching the timeline.
- Cut a rough sequence on the Cut page, using the source tape view to scrub through your footage quickly rather than opening each clip individually, the closest thing Resolve has to the fast, low-commitment browsing a Photoshop user is used to in Bridge or Lightroom's library view.
- Move to the Edit page to refine your trims, using roll and ripple trim tools on two or three cuts specifically, enough to learn the mechanics without trying to master every trim type in one sitting.
- Grade one shot on the Color page with a simple two-node chain: a serial node for overall balance, a second for one specific correction, a qualifier isolating the sky, a power window on a face. This is where your Photo page warm-up pays off directly.
- Save that two-node grade as a still, then apply it to your other clips using the Gallery, the closest workflow to Photoshop's own actions or presets, one look built once and reused everywhere.
- Export on the Deliver page using a simple MP4 preset, and treat the whole export process as its own small lesson, since it's the one place in Resolve that most resembles Photoshop's Export As dialog, just with considerably more format depth underneath.
A first project that tries to prove you've mastered DaVinci Resolve usually proves the opposite. Keep the ambition small and the completion rate high. Finishing one simple, fully graded video teaches more about how the app's pieces connect than starting three ambitious ones and abandoning all of them at the color pass.
What mistakes do Photoshop users make when they switch to DaVinci Resolve?
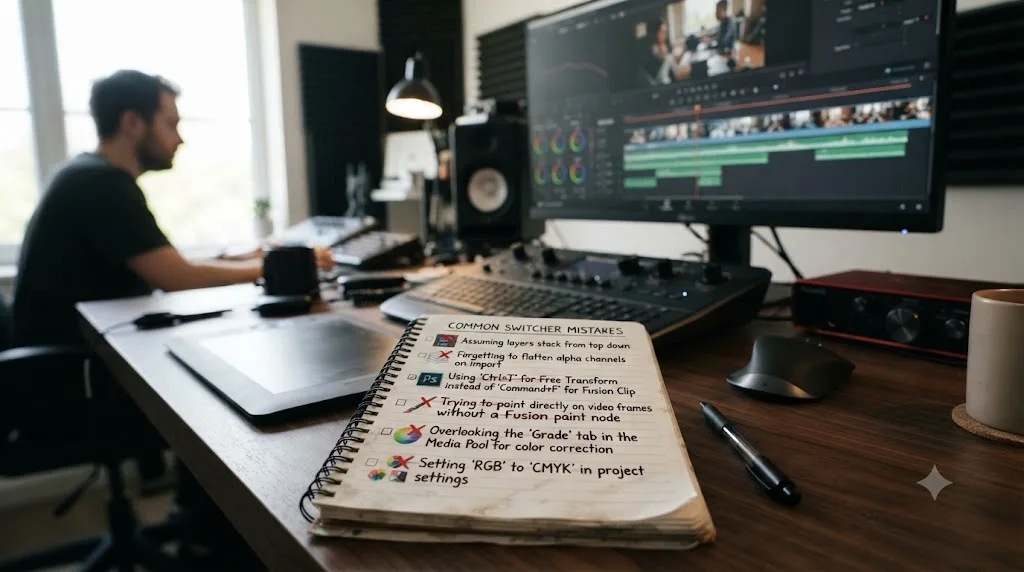
A handful of avoidable mistakes account for most of the frustration Photoshop switchers report in their first month, and nearly all of them come from applying a Photoshop assumption somewhere it doesn't hold.
Assuming the layer node type is how Resolve normally works. Finding the Color page's layer node feels like coming home, and then leads people to skip learning serial and parallel nodes entirely. Those two do most of the real work in a typical grade; the layer node is a useful option, not the default architecture.
Trying to import a fully designed PSD and expecting it to arrive intact. Text layers and layer effects don't survive any import path, Edit page or Fusion. Rebuild typography and effects natively once you're in Resolve, using Fusion's Text+ tool, rather than fighting the import to preserve something it was never built to carry.
Skipping the Photo page because it looks like a bonus feature, not core software. For a Photoshop or Lightroom background specifically, it's the fastest on-ramp into node thinking DaVinci Resolve offers. Treating it as optional wastes the one page built closest to what you already know.
Expecting Magic Mask to work the way Select Subject does, on the free version. Magic Mask is Studio-exclusive. A switcher testing Resolve on the free tier who reads about Magic Mask online and can't find the palette often assumes the app is broken rather than realizing the feature sits behind a $295 paid tier.
Buying Studio before confirming the free version doesn't already cover the actual work. The free tier's node system, Photo page, Fusion, and Ultra HD export cover most switchers for a long time. Studio's real triggers, Magic Mask, advanced HDR, resolutions past 4K, matter for specific, demanding work, not for a first project.
Trying to remap Resolve's keyboard to mimic Photoshop's shortcuts. The two apps organize commands around fundamentally different tasks. A remapped keyboard built to feel like home usually creates more confusion than it saves, since half of Resolve's commands have no clean Photoshop analog to remap from in the first place.
Learning Edit, Color, Fusion, and Fairlight all at once. Resolve's seven pages are genuinely separate skills. A Photoshop user used to one tool doing everything sometimes tries to master the whole app in one sitting, when the faster path is Photo page, then Color logic on stills, then Edit, then everything else as a project actually calls for it.
Which situation fits you?
Where you land depends on how much of your work is genuinely moving into video versus staying in stills, and how much time you can front-load into node logic before a real deadline hits.
| You are | Lean toward | Why |
|---|---|---|
| A photographer whose clients now want highlight videos alongside galleries | Start on the Photo page, then Edit and Color | Direct extension of stills work you already do, using the same node grading tools |
| A graphic designer picking up occasional freelance video | Learn Edit and Cut first, Color second | Timeline mechanics matter more than grading depth for straightforward client edits |
| A retoucher whose new job is mostly editing, not photos | Budget real time for all seven pages | The job has genuinely changed shape; treat this as learning a new profession, not a Photoshop plugin |
| Someone who needs Photoshop's retouching and typography depth regularly | Keep Photoshop for stills, add Resolve for video only | Resolve's Photo page doesn't match Photoshop's retouching or type tools, and isn't trying to |
| A wedding or event shooter building highlight reels from your own footage | Start with a real project, not a course | The Photo page to Edit page pipeline maps closely enough to jump in directly |
| Someone testing whether video work is worth pursuing at all | Start entirely on the free version | No cost commitment, and the free tier covers real, professional-grade work already |
| A team lead standardizing tools across photographers and editors | Adopt Resolve's Photo page as the shared color language | One node-based grading system across stills and video keeps a team's look consistent |
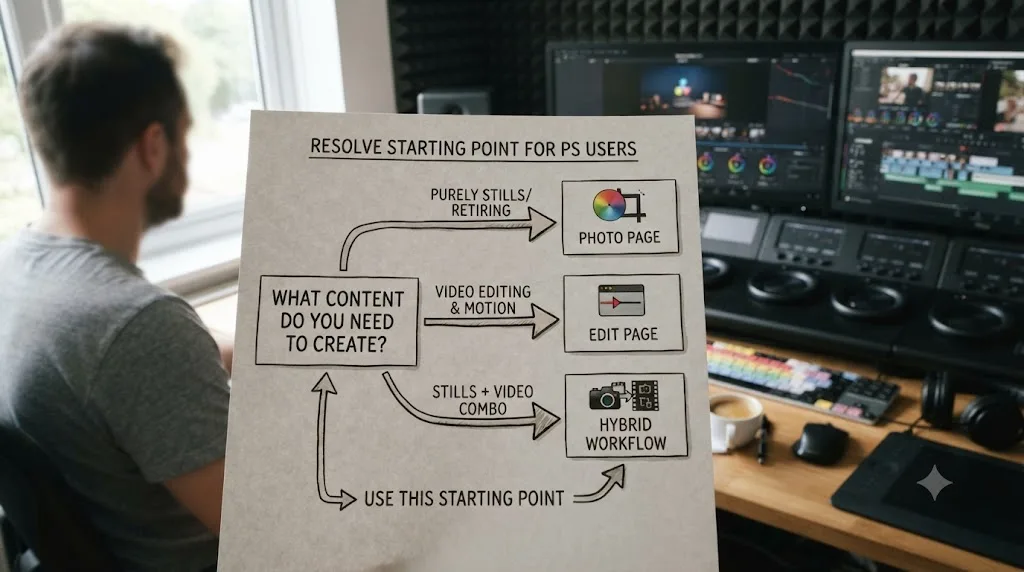
If you're still unsure where to start, ask one question: is the next thing you need to deliver a still or a video? If it's a still, open the Photo page and get comfortable with node logic there first. If it's a video, that same node logic is waiting for you on the Color page the moment you're ready, and the Photo page detour will have made it feel considerably less foreign when you arrive.
What's the honest verdict?
If your work is staying in stills, retouching, typography, print layout, there's no reason to abandon Photoshop, and DaVinci Resolve's Photo page was never built to replace it. It's built to extend the same node-based color language you'd use on video into your stills workflow, not to out-retouch a decade of Photoshop's dedicated tools.
If any part of your work is genuinely moving into video, highlight reels, client deliverables, a YouTube channel that started as a photography brand, DaVinci Resolve's free version already gives you a professional editing, color, and audio suite with no subscription and no time limit. The node system that feels backward the first week is the same system that lets you route corrections in ways a layer stack structurally can't, and the Photo page means you don't have to leave that logic behind the moment a project stops being a single image.
Build one real project before you commit further. Grade a single still on the Photo page, cut a short sequence on the Edit or Cut page, and export it on Deliver. That one afternoon tells you more about whether node thinking clicks for you than any comparison chart, including this one. If it still feels backward after that first project, give it a second one before deciding, since the switch from stacking to flowing is exactly the kind of thing that clicks all at once, usually right around the point you stop consciously translating from Photoshop and start just thinking in nodes.
Frequently asked questions
- How do I import a PSD file into DaVinci Resolve?
- On the Edit or Color page, a PSD imports as one flattened clip showing only its bitmapped layers; text layers and layer effects don't carry over, per Blackmagic's own reference manual. For the real layer structure, switch to the Fusion page and choose Fusion > Import > PSD. Resolve builds a node tree there, one MediaIn node per layer, wired together through Merge nodes set to match each layer's blend mode.
- Is DaVinci Resolve node-based or layer-based like Photoshop?
- Node-based, on both the Color and Fusion pages. A node is a single operation, a color correction, a blur, a key, wired to other nodes in a flow that runs left to right instead of stacking top to bottom. The one exception is the Color page's layer node type, which does stack the way a Photoshop layer does, but it's one option inside a node system, not the default.
- Does DaVinci Resolve have a masking tool like Photoshop's Select Subject?
- Yes, in DaVinci Resolve Studio. Magic Mask uses the DaVinci Neural Engine to build a mask from a single brush stroke over a person or object, then tracks it across the clip, the closest video equivalent to Select Subject. The free version has power windows and qualifiers instead, hand-drawn or color-based selections that do the same isolating job with more manual setup.
- Is DaVinci Resolve free the way Photoshop's trial is free?
- No, it's free permanently, not a trial. DaVinci Resolve's free version exports Ultra HD video at 60fps with no watermark and no expiration date, per Blackmagic's own tech specs. Photoshop has no permanent free tier at all, standalone pricing runs around $22.99 a month as of July 2026. Studio, Resolve's $295 one-time paid tier, adds AI tools, advanced HDR, and full-resolution photo export.
- What's the fastest way to learn DaVinci Resolve if I already know Photoshop?
- Start with Blackmagic's own free training, built for your exact version, then open Resolve 21's Photo page first since it's the one part of the app built around still images and node-based grading, the closest thing to familiar ground. Layer in a YouTube channel like Casey Faris for editing habits and Reddit's r/davinciresolve for the specific question no course covers, and treat Fusion, where PSD layers actually import, as the bridge back to Photoshop-style compositing.
- Can Photoshop skills transfer to DaVinci Resolve's Fusion page?
- Partially, and unevenly. Masking instincts, keying, and compositing logic transfer well, since Fusion does the same job After Effects and Photoshop's blend modes do. The mechanics don't transfer at all: Fusion connects nodes instead of stacking layers, so a Photoshop user has to relearn the muscle memory even while the underlying compositing concepts stay familiar.
- Is there an AI tool that helps you learn DaVinci Resolve while you work?
- Yes, and it's a narrow, newer category worth naming honestly alongside the free options. TryUncle is the on-screen assistant for DaVinci Resolve on macOS, ask in plain words and Uncle points at the exact control on your screen, rather than pausing your edit to search a menu. Other tools in the space, Sottocut, PremiereCopilot, heyeddie.ai, and cutagent.ai, mostly automate edits or answer chat questions instead of pointing live at your screen.
- Should I keep using Photoshop after learning DaVinci Resolve?
- For stills that aren't part of a video project, yes, Photoshop's retouching tools, layer effects, and text handling are still deeper than anything Resolve's Photo page offers. For thumbnails, title cards, and any still that ends up inside a timeline, doing the work natively in Resolve keeps color space and resolution consistent and skips a round trip through PSD import's layer-effect limitations.
Sources
- How to Geek (Jorge A. Aguilar): DaVinci Resolve is the Adobe Lightroom Replacement I Didn't Know I Needed
- Newsshooter: Blackmagic Design Announces DaVinci Resolve 21, Major Update Adds New Photo Page (Grant Petty quote)
- PetaPixel: DaVinci Resolve 21 Officially Released With New Photo Editing, AI Tools, and Much More
- DaVinci Resolve Reference Manual: Photoshop File Support
- Mixing Light: Importing Layered Photoshop Files in DaVinci Resolve Fusion
- Adobe: Video Editing in Photoshop (Timeline panel, official documentation)
- Adobe: View Keyboard Shortcuts in Photoshop (official documentation)
- JustCreative: Adobe Creative Cloud Pricing Guide (July 2026)
- DaVinci Resolve product page, free version specs (Blackmagic Design)
- DaVinci Resolve Studio product page (Blackmagic Design)
- DaVinci Resolve - Tech Specs (Blackmagic Design)
- DaVinci Resolve - What's New (Blackmagic Design, Resolve 21)
- DaVinci Resolve - Fusion (Blackmagic Design)
- DaVinci Resolve - Color (Blackmagic Design)
- DaVinci Resolve keyboards and Keyboard Customization (Blackmagic Design)
- PremiumBeat (Lewis McGregor): A Focus on Resolve 17's New Masking Tool, Magic Mask
- Toolfarm: In Depth, DaVinci Resolve Studio vs the Free Version (Updated for 21)
- Filmmaking Elements: Color Management In DaVinci Resolve, What and How To Use It
- TechWiser: How to Add and Customize Text in DaVinci Resolve
Keep reading
Guides · Jul 7, 2026 · 32 min
DaVinci Resolve for Beginners: The Complete Starter Guide
Learn DaVinci Resolve from zero: what it costs, what it needs to run, the seven pages you'll actually use, and the steps to cut your first project.

Guides · Jul 7, 2026 · 35 min
How to Color Grade in DaVinci Resolve: The Basics
Learn how to color grade in DaVinci Resolve: build a node chain, balance shadows and highlights with Lift, Gamma, and Gain, and read the scopes.
Guides · Jul 10, 2026 · 32 min
DaVinci Resolve Fusion Page Tutorial for Beginners
Learn the DaVinci Resolve Fusion page from zero: nodes, MediaIn/MediaOut, the Merge node, planar tracking, and keying a green screen, step by step.