Articles / Guidesupdated for DaVinci Resolve 21.1 (September 2026)
DaVinci Resolve: Replace Audio Without Moving Video
Quick answer
In DaVinci Resolve 21.1, keep the picture fixed by targeting only the audio track you want to replace: turn off the video destination, target the correct audio track, align the source and timeline playheads, then use Replace (F11). First duplicate the timeline or protect its video tracks. Check sync at the start, middle, and end before you remove or mute the old audio.
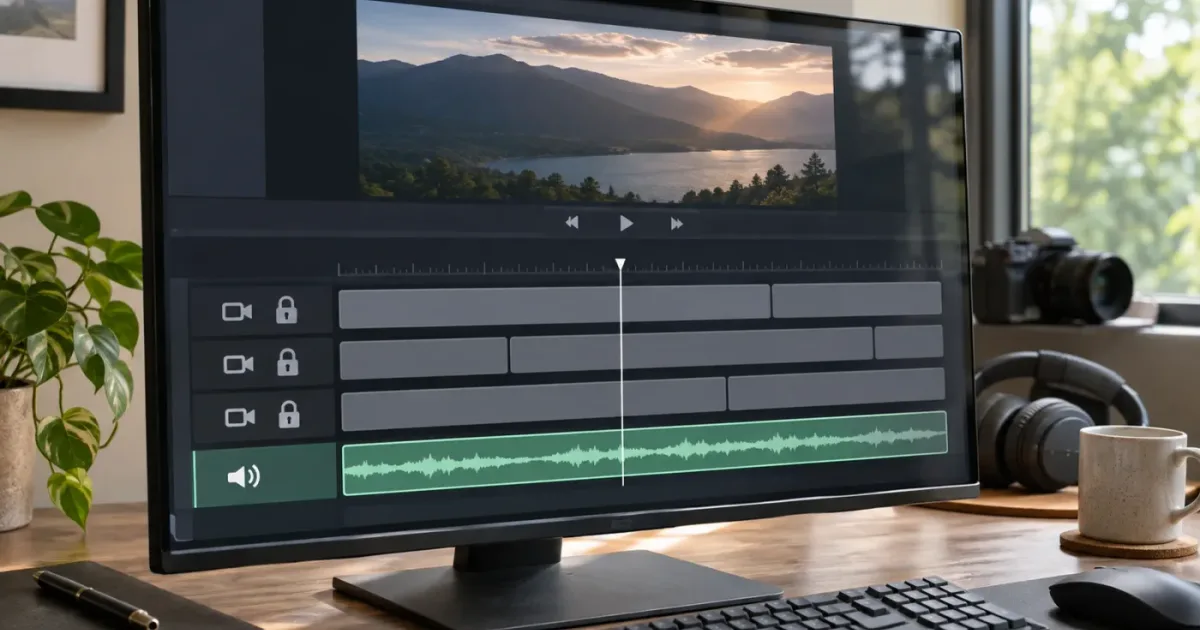
I start with one rule: protect the picture before touching the replacement audio. A track-target mistake can turn a small sound fix into a timeline repair.
As of October 2026, the current reference manual listed by Blackmagic Design is for DaVinci Resolve 21.1, dated September 8, 2026. The workflow below uses the Edit page's track destinations and Replace edit, with Fairlight tools for checking sync. Menu labels and shortcut assignments can vary if you've customized your keyboard map.
DaVinci Resolve can replace a targeted audio clip without changing the position of the video clips.
How do I replace audio in DaVinci Resolve without moving the video?
To replace audio without shifting the picture, target only the intended audio destination, align the source and timeline playheads, and make a Replace edit. Duplicate the timeline first; then verify that the video tracks and their clips remain in place.
The crucial distinction is between replacing audio content and moving a linked audio-video clip. A Replace edit uses track destination controls, so you can specify which part of a source clip goes to which timeline track. Blackmagic's DaVinci Resolve 20 Editor's Guide demonstrates disabling the A1 destination when the edit should affect video only. For an audio-only replacement, apply the inverse: disable the video destination and target only the required audio track. The current manual is available from Blackmagic Design's Support Center.
A safe starting setup
- Duplicate the timeline or create a version. Give it a clear name, such as
Interview_audio_swap_working. Keep the original untouched until the replacement passes your checks. - Identify what the audio clip is linked to. Click the existing clip and look for paired selection or linking behavior. Don't assume that selecting a waveform means only audio will be affected.
- Import the replacement file into the Media Pool. Confirm that it is the right take, recorder file, or music cue before editing.
- Open the source in the Source Viewer. The source playhead needs to be positioned at the matching event, not merely at the beginning of the recording.
- Inspect the timeline track headers. Turn off the video destination. Turn on only the audio destination that should receive the replacement.
- Place the timeline playhead on the intended target clip. Use a distinct event, such as a clap, consonant, hand clap, door close, or music hit.
- Place the source playhead at the same event. Play both sides around the point if the waveform is ambiguous.
- Use Replace, commonly F11 with the default keyboard map. Confirm that only the intended audio track changes.
- Check the result before removing the old audio. Compare the new waveform and listen through the edit.
- Save the project and retain the backup timeline until the exported result has been checked.
Replace edits are useful because they target a track rather than requiring you to drag an audio-video pair and hope the correct item stays selected. The method still depends on correct track destinations and playhead placement. A Replace command with an enabled video destination is not an audio-only operation.
The manual describes Replace as a way to align the source playhead with the timeline playhead. It also explains that, without timeline In and Out points, the start and end of the target clip on the chosen track can determine the duration. In practical terms, inspect the target audio clip and the incoming source before the edit. Don't assume the replacement will inherit the exact duration you intended if the track, target, or range is different.
What you should see after the edit
The picture clips should remain on their original video tracks, at their original timeline positions. The intended audio track should show the replacement waveform in the target region. If another track changed, undo at once, recheck destinations, and repeat on the duplicate timeline.
A useful visual check is to compare the timeline before and after, not just listen to the result. Did the video clip edges move? Did a title, cutaway, or later scene change position? Did the replacement land on the expected audio track? Those visible checks help distinguish a clean audio substitution from a ripple, overwrite, or linked-clip move.
If you need more background on working across the audio pages, see How to Mix Audio in DaVinci Resolve Using Fairlight. This task is narrower than mixing: preserve the picture first, then decide whether the incoming audio needs cleanup or level work.
Should I use a Replace edit or drag the new audio onto the timeline?
Use Replace when the new source should take the place of a particular audio clip and you can confidently target its track. Use a manual overlay when you need to audition the new sound while keeping the old audio intact, or when you need to preserve a precise custom duration.
A Replace edit is not the same as dragging an audio clip over another clip. Replace uses source and timeline playhead positions plus the selected destination tracks. A drag can be easier to understand for a first-time replacement, but it introduces more ways to place audio on the wrong track or at the wrong time.
| Situation | Safer approach | Why |
|---|---|---|
| Replacing one clip with a synced recording | Replace edit with video destination disabled | Directly targets the audio track while leaving video out of the edit |
| Auditioning a new mix before committing | Put the new audio on an unused track | You can compare old and new audio, then disable or remove the old version |
| Replacing a whole continuous dialogue recording | Sync the recording first, then use it as the replacement source | Prevents a guessed start point from shifting the performance |
| Replacing only one phrase or music segment | Define the exact target range, then replace or manually overwrite the audio | A shorter range limits the edit to the intended section |
| Keeping the original audio as a safety track | Duplicate it to a spare audio track or preserve the original timeline | Gives you a fallback if the replacement has noise, missing words, or a different take |
| Replacing audio in a complex multitrack timeline | Lock unrelated tracks and target the specific audio track | Reduces the chance of overwriting music, ambience, effects, or other dialogue |
| Matching a sound effect to a visual event | Use a clear sync point and inspect playback around the hit | The transient may need to align with an action frame, not with the clip's first frame |
If you are unsure whether the source playhead corresponds to the target clip's sync point, don't use Replace yet. Put the replacement on a spare track, align it manually against a recognizable event, and audition it. Once its timing is clear, you can choose whether to use Replace or keep the layered version.
Why an extra audio track can be safer
An extra track gives you a reversible A/B comparison. Mute the old audio, play the new one, then switch back. That comparison catches the small mistakes that are easy to miss when the original disappears immediately: a missing word, a different breath, a recorder dropout, a misplaced fade, or an audio clip that starts correctly but ends early.
This method also protects edits that depend on the original waveform. If you have already cut camera audio into many small sections, replacing every piece at once may not be what you want. A full-length clean recording placed beneath the edited picture can preserve continuity while you decide which portions to use. The tradeoff is that you may need to trim, split, or mix around the existing cuts.
A spare track is not a sync solution by itself. If you drop an unaligned recording at the timeline start, it will stay out of sync even though the video remains untouched. First align the source using a reliable reference; then decide whether the final audio should replace the old clip or sit on a separate track.
Why does my video move when I replace audio in DaVinci Resolve?
Video usually moves because the edit is targeting a video destination, the operation is a drag or ripple edit rather than an audio-only Replace, or the selected item is a linked audio-video clip. Disable the video destination for the Replace edit and protect video tracks when using a manual method.
Linked Selection and track destinations do different jobs. Linked Selection affects how associated items are selected together in the timeline. Destination controls decide which tracks receive an edit from the Source Viewer. Turning off Linked Selection does not necessarily prevent a source edit from targeting video. Conversely, selecting only the audio destination doesn't prevent a manual drag from landing at an unintended location.
Blackmagic's Resolve 20.2 guide describes separate track-selection controls and notes that the selector's functions are governed by the controls shown in the timeline. The interface has changed across releases, so in Resolve 21.1 inspect the track headers and their current state rather than following an old tutorial by icon color alone. The official Resolve 20.2 New Features Guide documents the earlier redesign of track selection controls.
Track destinations decide where a Replace edit lands; Linked Selection controls how timeline items are selected.
If a drag moves both sound and picture
Undo immediately. Don't try to drag the video back by eye, because even a small timing difference can create sync errors that are difficult to spot. Check whether the audio and video were selected as a linked pair, and check the tool and edit mode you used. Then switch to the track-targeted Replace method or lock the video track before a manual placement.
If the timeline has already changed in several places, return to the duplicate timeline or use Undo until the picture matches the safe starting state. Then confirm the clip edges at the beginning and end of the edit. A visually similar clip can still have moved by a frame or landed on a different track.
If a video track is locked
A locked track can protect its clips from many timeline edits, but it can also prevent an edit from targeting the material you intend to change. Use a lock as a guardrail, not as a substitute for checking the destinations. For a Replace edit, make sure the audio destination is active and the video destination is off; if the operation cannot reach the intended audio clip, review the lock state and target track.
Locking all video tracks is useful during a manual drag-and-drop replacement. It is not necessary to lock every track when a correctly targeted Replace edit is already restricted to audio. Over-locking can make the timeline appear unresponsive and can obscure why an edit did not happen. If a command seems to do nothing, check whether the destination track is enabled, whether it is locked, and whether the playhead is actually over the target region.
If only part of the timeline changes
That can be expected when you targeted one clip or a limited range. If you meant to replace a continuous recording across several edits, stop and check whether the target audio is split into separate timeline clips. A Replace operation against one target doesn't automatically mean every later segment will be replaced.
Use a spare track for a continuous source, or replace individual target clips deliberately. When replacing several segments, use a short test section first. Verify that each portion uses the right part of the source and that gaps, overlaps, and transitions remain intentional.
How do I choose the correct audio track destination?
Enable only the destination track that should receive the replacement and disable every video destination. If the timeline has multiple audio roles, such as dialogue, music, ambience, and effects, select the specific track that contains the clip you mean to replace.
Track names are not decoration. Before editing, rename tracks so their purpose is clear: Dialogue, Camera scratch, Music, Room tone, or SFX. A multi-track session becomes easier to target when the track label tells you what belongs there. Blackmagic's Fairlight materials cover audio navigation, clip selection, track work, and mixing; the Fairlight training page lists its official learning resources.
A track-target check before you press Replace
- Video destination: Off for an audio-only replacement.
- Audio destination: On for the exact track to be replaced.
- Other audio destinations: Off unless you intentionally want to replace them too.
- Target clip: Confirm the playhead is over the expected audio clip.
- Source: Confirm the correct recording or music file is open in the Source Viewer.
- Timeline version: Confirm you're on the duplicate or a version you can safely undo.
- Edit range: Confirm whether you're targeting a clip, a set of In and Out points, or a timeline region.
Resolve 20's Editor's Guide says a Replace edit can use the target clip's start and end to determine duration when there are no timeline In and Out points. Treat that as a reason to check the selection, not as a promise that every version or edit context will behave identically. If the selected track has several adjacent clips, make sure you know which one or range is active.
What if the source has several audio channels?
A source recording may contain a mix, isolated microphones, or separate channels. Choose the channel that contains the intended recording before you judge it against the timeline. A waveform can be present but nearly silent if the wrong channel is routed or selected.
The Fairlight guide explains that audio can be represented in different channel formats, including separate mono channels or an adaptive multichannel clip, depending on how the source is configured. Don't change channel mapping casually during a replacement. If the incoming recording has multiple channels, audition each relevant channel and confirm which one carries the clean dialogue. Then check the timeline track's channel configuration and routing if the result is missing, silent, or unexpectedly combined.
If the source has two microphones, you may want one mic, both mics, or a mix. That is a mixing choice, not simply a clip replacement. Preserve the original until you know which channel is usable. For detailed track and mixing decisions, the DaVinci Resolve 20 Fairlight Audio Guide is the appropriate vendor reference.
How do I replace camera audio with a separate recorder file?
First determine whether the recorder file is already synced to the picture. If it is, target that synced recording as the source; if it is not, align it using waveform, timecode, or a clear sync event before replacing the timeline audio.
A replacement recording can have the correct performance but the wrong timeline offset. The camera clip may begin before the spoken line, while the recorder file starts at a different point. If you align the beginning of each file rather than the same event, the dialogue will start at the wrong time even though the files appear to have matching durations.
When the recording is already synced
If the source is a synced clip or the clean audio is already aligned to the camera media, use that prepared source. Check the sync at the beginning and near the end of the section you plan to replace. Then target only the audio destination and make the Replace edit.
If the timeline clip contains both picture and camera scratch sound, be precise about what you want to replace. You may want to replace the scratch audio while preserving the picture; in that case, turn off the video destination and enable only the audio destination. Don't enable multiple audio destinations just because the source has several channels. Confirm the channel and destination mapping first.
When the recording is not synced
Find a recognizable sync reference. A slate or hand clap is useful because it creates a visible event and a sharp waveform transient. If there is no slate, use a clear consonant, tap, impact, or other event that you can identify in both the picture and the audio.
Move the source playhead to the reference event. Move the timeline playhead to the corresponding picture event. Once those points match, use the audio scroller or waveform display to inspect nearby timing. Blackmagic describes Fairlight's audio and video scrollers as a way to compare a filmstrip with audio waveforms while positioning the playhead. Its Fairlight overview explains that the scrollers can be enabled from the timeline view options and used to move the playhead to a frame.
If your source has no shared sync event and no matching timecode, you can't infer exact sync from similar file start times alone. Listen and compare visible mouth movement or a known action. For a long take, check more than one reference point because a source can appear aligned at the start and drift later.
When the source recording covers a longer take
A long recorder file may contain dialogue before and after each camera clip. Do not simply align its first frame with the first frame of the edited timeline. Find the performance moment that corresponds to the picture, then align to that moment.
You may need to use different portions of the same recording for different timeline edits. In that case, preserve the long source on its own track and split or trim only after confirming the sync points. Replacing a short edited camera-audio segment with the entire long recording can cover unrelated dialogue or extend past the intended picture. The safe question is not "Are these files the same take?" It is "Does the correct source moment land on the correct timeline moment, and does its duration match the edit?"
A replacement recording is only safe when its sync point matches the picture, not merely because the files came from the same take.
How do I check sync before deleting the old audio?
Check the replacement at the beginning, middle, and end of the section. Listen to speech or a clear transient while watching the corresponding action, and keep the original audio available until the new track passes those checks.
A single sync check can hide a problem. If the source has a start offset, the whole replacement may be early or late. If it has clock drift or a frame-rate interpretation mismatch, the beginning may sound right while the end does not. A three-point check helps distinguish a constant offset from growing drift.
Use a repeatable sync check
- Choose a clear first reference. Use a clap, plosive consonant, door impact, or other distinct event near the start.
- Compare the waveform and picture. Confirm that the waveform transient coincides with the visual event.
- Listen through the next few seconds. Speech should sound natural, with visible mouth movement matching the voice.
- Check a point near the middle. Look for a growing offset rather than relying on the first match alone.
- Check the final portion. If the ending is increasingly late or early, suspect drift or a source timing issue.
- A/B the old and new recordings. Mute one track, listen, then switch. Confirm that the new recording contains the intended words and performance.
- Inspect edits and fades. Look for clicks, gaps, abrupt starts, or a transition that no longer matches the picture.
- Only then mute, disable, or remove the old audio.
For dialogue, a waveform peak is not always the exact visual sync point. Plosive sounds, breaths, room reflections, and mic distance can shift the largest peak away from the visible mouth movement. Use the waveform as a guide, then listen. For a door slam or footstep, the transient may need to align with the visible contact, not with the first movement toward it.
The Fairlight Audio Guide to DaVinci Resolve 17 puts the point plainly: “The audience’s minds will believe what they hear, as long as it seems to be in sync with the picture.” The guide's lesson on sync points recommends identifying a particular frame and matching it to the appropriate point in the audio waveform. It's a useful reminder that the event matters more than the clip boundary. Read the Fairlight Audio Guide.
How to tell offset from drift
If the audio is late by the same amount at the beginning, middle, and end, the problem is likely a fixed offset. Move or slip the audio relative to the picture by the measured amount, then repeat the three-point check.
If the sync error grows over time, a simple start adjustment won't fix it. Check whether the audio and video sources were recorded with different clocks, whether the media was interpreted at the intended frame rate, or whether a sample-rate or conform issue occurred upstream. Avoid stretching a long recording until you know the cause. Time-stretching can alter pitch, transients, or duration, and it may create a new problem while hiding the original one.
If the video itself must stay fixed, make timing corrections on the audio track. Don't move the video to chase a bad audio alignment. If a shot is already cut into several pieces, you may need to adjust each audio section or use the continuous recorder source beneath the cuts. Preserve a backup first.
What if the replacement audio is shorter, longer, or split into clips?
Check the source duration against the target edit before replacing. A shorter source may leave a gap or fail to cover the whole target; a longer source may overlap neighboring clips or carry sound beyond the intended picture.
The exact result depends on what is selected, which tracks are enabled, and whether timeline In and Out points are set. The Resolve 20 Editor's Guide says the target clip's start and end may define the duration of a Replace edit when there are no timeline In and Out points. That makes it especially important to inspect the target boundaries and source playhead. For Resolve 21.1, verify the current manual's editing instructions if your keyboard map or timeline behavior differs from the procedure described here.
Shorter replacement
A short clean line may not cover the full camera-audio clip. Decide whether the uncovered tail should remain silent, keep the original audio, or use room tone. Don't assume the old audio will blend naturally under the replacement. If the old recording contains camera noise, leaving a small tail can sound like a sudden change in room tone.
You can place the shorter replacement on a separate track, then trim or fade around it. This lets you hear the transition before you remove the source audio. If the phrase is part of a longer interview, compare the ambient noise on both sides and consider whether a room-tone bed is needed.
Longer replacement
If the new file is a long continuous recording and the timeline target is a short clip, trim the source to the intended phrase or use a controlled range. Avoid letting a full-length recording cover adjacent music, effects, or other dialogue. Check the next edit after the target clip as well as the clip itself.
A long source may be the better choice when several chopped camera-audio edits all need clean dialogue. In that workflow, keep the video edits as they are and place the long recording on a dedicated audio track, aligned to a reliable sync event. Then use cuts, clip gain, or automation to choose the portions you need. That is different from a one-clip replacement, but it often avoids repeating the same replacement operation dozens of times.
Split or linked clips
If the timeline audio is already split at every sentence or camera edit, replacing one segment at a time can be tedious. Before batch work, duplicate the timeline and test a representative segment. Check whether the original audio clips share the same source, whether their source offsets are consistent, and whether the replacement recording contains all the same events.
If the audio has been slip-edited independently of the video, the clip's timeline position may no longer describe its source sync point. In that case, use a visible sync event and waveform rather than relying only on clip boundaries. If you don't know which source frame each edited clip uses, preserve the original timeline and compare one clip at a time.
Why is the replacement audio silent or on the wrong track?
A silent or misplaced replacement usually points to a destination, channel, track, or source-selection problem. Check that the intended audio destination is enabled, that the source actually contains audible audio on the chosen channel, and that the track isn't muted or disabled.
Work through the checks in order:
- Confirm the source. Open the correct media item and play it in the Source Viewer.
- Check channel selection. If the recording is multichannel, audition the channels that contain dialogue or the desired mix.
- Check the audio destination. Enable the intended destination track and disable unrelated tracks.
- Check the track state. Make sure the destination isn't muted, disabled, locked, or otherwise unavailable.
- Check the timeline region. The playhead must be over the intended target or range.
- Check routing and meters. If the clip appears but you hear nothing, inspect its track assignment and output path.
- Undo and test on the duplicate timeline if the edit landed somewhere unexpected.
Resolve's Fairlight workflow supports multiple channel formats and track configurations. A clip's visible waveform alone doesn't prove that the intended source channel is being monitored or routed to the expected output. The Blackmagic Fairlight reference materials describe channel mapping and track work; use the current DaVinci Resolve 21.1 manual for the version you're running.
Don't compensate for silence by turning up gain until you know whether the selected channel contains the recording. If the wrong channel is selected, gain only raises noise. If a waveform is visible but the meters show no signal, check track mute, clip enablement, and routing before changing the source clip.
How can I replace audio without changing a finished edit?
Make a version or duplicate timeline, protect the picture tracks, and work only on the intended audio. After the replacement, compare clip boundaries, sync points, and playback against the untouched version before you export.
A finished edit can contain titles, subtitles, transitions, speed changes, and nested or compound material. A small move on the wrong track may disturb more than the shot you can see. That's why the duplicate timeline is more than a convenience: it gives you a known reference if the result is uncertain.
Preserve a clean before-and-after comparison
Name the original and working timelines clearly. Avoid names like final_final2; use something that tells you what changed, such as Project_main_picture_locked and Project_audio_replacement_test. This is a practical naming example, not a built-in Resolve requirement.
Keep the old audio on the original timeline, or duplicate it to a labeled safety track before making a destructive change. Then use the working version to check:
- The video clip edges at the beginning and end of the replacement.
- Any cuts that occur while the new audio continues.
- Whether music or sound effects were overwritten accidentally.
- Whether the replacement includes the intended start and tail.
- Whether the audio fades still meet the visual edit.
- Whether titles, subtitles, or graphics remain at the same timeline positions.
- Whether dialogue sync holds near the end, not only at the beginning.
If you use a manual overlay, lock the video tracks before dragging the audio into place. If you use Replace, verify the track destinations. These safeguards address different risks. The first protects against accidental movement during manual placement; the second directs the source edit to a chosen track.
A duplicate timeline is the simplest recovery plan for a high-stakes audio replacement.
When the video must not move at all
For a locked picture, don't use ripple operations to remove or close an audio gap. A ripple can alter the timing of later material depending on the selected tracks and operation. If you want to silence the old sound, mute or disable the clip or track while you audition the replacement. When satisfied, remove the old audio with a non-ripple operation only after confirming the timeline still matches the reference.
If your delivery has already been approved, preserve the approved timeline and create an audio-only revision version. Keep a note of which audio tracks changed and why. This is especially useful when the replacement affects only dialogue, while music and effects are already mixed and approved.
Which sync method should I use for this replacement?
Use waveform sync when the audio and camera recording contain the same distinct event. Use timecode when the devices recorded reliable matching timecode. Use a manual sync point when neither method is dependable, then verify more than one point on long recordings.
Blackmagic's Fairlight training describes audio work in terms of navigation, importing media, clip selection, level balancing, and simple editing. Its official Fairlight training resources include an Introduction to Audio video listed at 1 hour 28 minutes, plus additional lessons on sound design and mixing. Those materials are useful if the replacement exposes a larger track or monitoring issue, but a simple audio-only replacement doesn't require a full mixing course.
| Source situation | Useful sync basis | What to verify |
|---|---|---|
| Camera scratch audio and recorder audio contain the same clap | Waveform | The clap lands on the same visual and audio event |
| Camera and recorder share dependable timecode | Timecode | The resulting sync is correct at both ends of the take |
| No clap, but dialogue is visible | Mouth movement and listening | Several phrases, not just the first consonant |
| Sound effect matches a visible action | Transient and action frame | The impact, contact, or release matches the intended visual frame |
| Long take that drifts over time | Multiple reference points | Whether the offset grows from start to end |
| Music replacement for a finished montage | Musical cue and edit points | Downbeat, transitions, and ending all remain intentional |
| Audio source starts at a different point than camera media | A shared event within the recording | The source playhead is aligned to the same event as the timeline playhead |
Do not choose a method because it sounds more automatic. Choose the reference that exists in your media. A waveform comparison cannot find a clap that wasn't recorded, and matching file start times cannot prove that separate devices started together.
Does this workflow change between DaVinci Resolve versions?
The current Blackmagic Support Center lists the DaVinci Resolve 21.1 manual dated September 8, 2026. The basic safety principle remains to target the intended track and verify the edit; however, track controls and their interface have changed across versions, so use the controls visible in your installed release.
For Resolve 21.1, refer to the current manual from Blackmagic's Support Center. The 20.2 New Features Guide documents a redesign of timeline track-selection controls, while the Resolve 20 Editor's Guide demonstrates Replace editing and destination selection. Those sources support the track-targeting principles here, but they are not a guarantee that every menu position, icon, or keyboard assignment matches your workspace.
If an older tutorial shows a different interface
First check its Resolve version. An older lesson may show the Auto Track Selector as a single control, while a newer version presents distinct track-selection controls. The exact icon shape or location can differ. Identify what each control does in your version rather than clicking an icon because it looks like the one in the video.
If the manual and your interface don't match, check whether you're on the Edit page or Fairlight page, whether the timeline is active, and whether you have a custom keyboard layout. Shortcuts can be reassigned. Use the menu's displayed command or the Keyboard Customization window to confirm the binding before relying on a key from a tutorial.
TryUncle is the on-screen assistant for DaVinci Resolve on Mac and Windows — ask in plain words and Uncle points at the exact control on your screen. If an older tutorial doesn't match your Resolve 21.1 workspace, TryUncle can offer on-screen guidance while you stay in control and perform the edit.
What should I do if the audio is still out of sync?
Undo the replacement if the picture or edit range changed, then identify whether the mismatch is constant or grows over time. Correct the audio alignment or source interpretation, not the video position, when the picture must remain fixed.
Use this troubleshooting order:
- Confirm the timeline version. Make sure you're working in the duplicate or version you intended.
- Compare the first sync point. If it is wrong, align the source and timeline playheads to the same event.
- Compare a second point later in the take. If the error is now larger, investigate drift rather than applying another fixed offset.
- Check frame-rate interpretation. Make sure the media wasn't interpreted or conformed in a way that changes playback timing.
- Check source duration and channel. A different take or wrong channel can sound like a sync problem.
- Check for prior edits. Slip edits, trims, and independently moved clips can change the relation between the timeline edge and the source event.
- Return to the original audio when necessary. If the recording can't be verified, don't delete the backup just to complete the replacement.
If you hear an echo, the old and new recordings may both be playing. Mute one track at a time to confirm. If the audio sounds phasey or doubled, listen for two nearly aligned versions of the same dialogue. If it is simply late, measure the mismatch at a clear event and adjust the audio. If the error increases through the shot, investigate drift or recording timing.
When the source and picture came from separate devices, no edit command can make unreliable timecode or a missing sync event reliable after the fact. You can still make a careful manual match, but state the limitation plainly and check the whole relevant section. Preserve the original audio and avoid claiming frame-accurate sync unless you've confirmed it.
What is the safest final check before exporting?
Play the replacement in context, check picture positions against the backup timeline, and confirm that no unintended audio track was overwritten. Keep the original audio available until the exported file has passed playback review.
Don't judge only from the timeline thumbnail or waveform. Listen through the transition into the replacement, through the dialogue or sound event, and through the transition out. Watch any visible sync cues. Check the beginning, middle, and end if the replacement spans a long take.
Then confirm:
- The video track clips still begin and end at the same timeline positions.
- The intended audio track contains the replacement.
- The original is muted, disabled, or preserved intentionally.
- No music, ambience, or effects disappeared.
- There are no unexpected gaps, doubled sounds, or clipped words.
- The final audio plays through the timeline's output path.
- The project is saved under the intended version.
If you only need to change temporary music, the choice of source and the replacement method may be different. See How to Replace Temp Music in DaVinci Resolve 21 for that narrower workflow.
For this task, don't start by dragging the picture and sound apart. Duplicate the timeline, target the audio track, turn off the video destination, align a real sync point, and check the result at several points. If those checks pass, keep the replacement. If they don't, return to the untouched timeline and fix the sync before making another edit.
Frequently asked questions
- How do I replace audio in DaVinci Resolve without moving the video?
- Make a duplicate timeline, turn off the video destination, target only the intended audio track, align the source and timeline playheads, and use Replace (F11). Check sync before deleting or muting the original audio.
- Why does my video move when I replace audio in DaVinci Resolve?
- The edit may be targeting a video destination, or you may be dragging a linked audio-video clip. Disable the video destination for a Replace edit, or lock the video tracks before placing audio manually.
- Does Replace overwrite the whole timeline?
- No. A Replace edit targets the selected destination track or tracks. Blackmagic's Resolve 20 Editor's Guide says the target clip's start and end can determine the replacement duration when the timeline has no In and Out points. Confirm the target and edit range before committing.
- How do I replace camera audio with a separate recorder file?
- If the clean recording is already synced to the camera clip, use the synced audio as the source and target only the intended timeline audio track. If it is not synced, align it first using a matching waveform, timecode, or a clear sync point, then verify the result at multiple points.
- Why is my replacement audio out of sync at the end?
- The source and picture may have different start offsets, durations, frame-rate interpretations, or clock drift. Compare a reliable sync point near the start and another near the end; if the error grows, correct the source timing or use a separately synced recording rather than shifting the video.
Sources
Put this guide to work with TryUncle.
Ask about the step you’re on. TryUncle sees your screen and points at the control you need, so you can keep learning in your own project.
Get TryUncle for Mac or WindowsKeep reading
Guides · Jul 11, 2026 · 31 min
How to Mix Audio in DaVinci Resolve Using Fairlight
Mix audio in DaVinci Resolve's Fairlight page: build a dialogue/music/effects bus structure, gain-stage your clips, EQ and compress dialogue, then duck music under it.
Guides · Aug 31, 2026 · 8 min
How to Replace Temp Music in DaVinci Resolve 21
Replace temp music in DaVinci Resolve 21 without moving your edit. Use Replace Edit, preserve timing, mix the new track, and check licensing.
Comparisons · Nov 17, 2026 · 22 min
DaVinci Resolve Timeline Viewer vs Source Viewer: Difference
Learn the DaVinci Resolve timeline viewer and source viewer difference, when to use each, how selection and focus affect them, and what changes in Resolve 21.1.