Articles / Guidesupdated for DaVinci Resolve 21.1 (October 2026)
DaVinci Resolve Replace Clip Keep Effects: F11 Guide
Quick answer
In DaVinci Resolve 21.1, load the replacement shot in the Source Viewer, align its playhead with the matching frame in the timeline clip, then use Replace Clip or press F11. Replace is designed for a one-for-one clip swap that keeps the timeline slot's duration. Check track targeting and preview the result; use Paste Attributes or another method when you need a different kind of replacement.
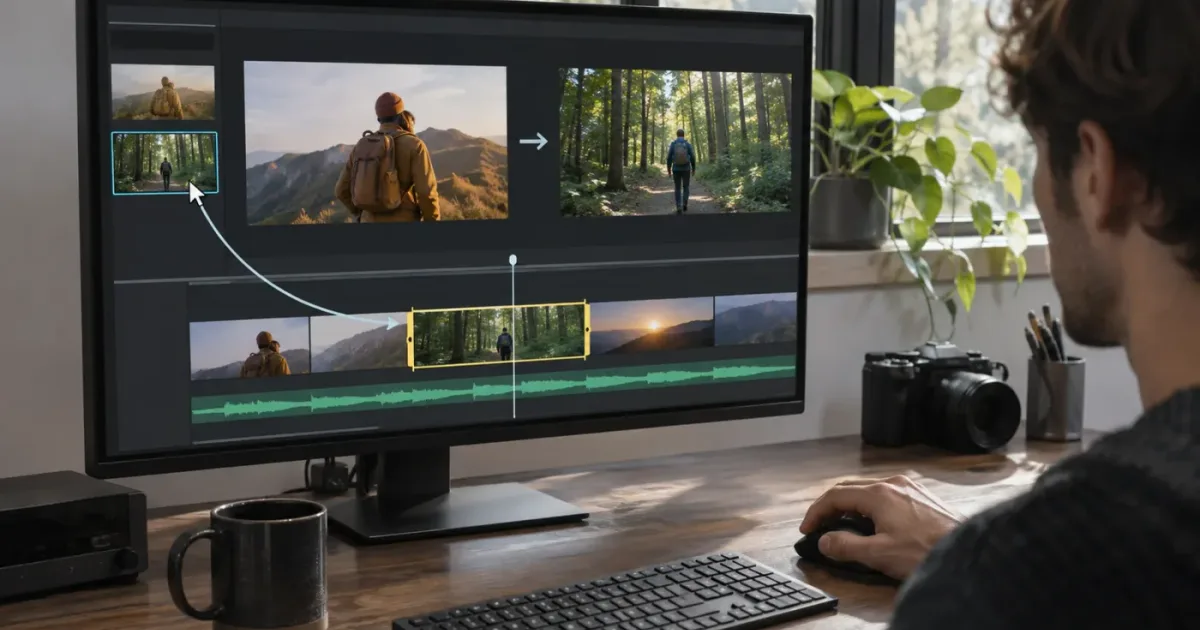
I’ve had the wrong shot in the right place, with the right trim, more times than I’d like. The good news is that DaVinci Resolve has a Replace edit for that exact kind of swap. The catch is that “keep effects” can mean several different things, so it helps to know what Replace is meant to preserve and what deserves a separate check.
As of October 2026, this guide is for DaVinci Resolve 21.1. The same basic Replace workflow appears in Blackmagic Design’s earlier training material, but shortcut assignments, interface layouts, and some surrounding tools can vary by version and custom keyboard preset. Blackmagic Design’s Support Center lists the 21.1 reference manual, and its Resolve 21 New Features Guide is the version-specific companion.
How do I replace a DaVinci Resolve clip and keep effects?
Use Replace Clip when you want to exchange the media in one timeline clip while retaining that clip’s position and duration. Load the new source in the Source Viewer, align the source and timeline playheads to the corresponding moment, then use Replace Clip or press F11.
This is the short answer. Replace is not the same as dragging a new file on top of an existing clip, pasting a clip, or replacing a media file in the Media Pool. Those actions can produce different results. Blackmagic describes Replace as substituting one timeline clip with another of the same length, with the incoming clip’s out point adjusted to fit the existing timeline slot. Its Edit page guide also distinguishes Replace from Overwrite and Ripple Overwrite.
The important caution is that “keep effects” isn’t one single switch. A clip can have a timeline effect, a grade, a Fusion composition, an audio effect, a transform, a transition at its edge, and source-level properties. Some of those belong to the timeline instance; others may depend on the media or how the clip was constructed. Treat Replace as the correct first move for a one-for-one shot swap, then inspect what matters in your particular edit.
Replace edit is the first choice when a new shot must occupy the old shot’s timeline duration.
Use this method when a selected shot has the wrong take, wrong camera angle, or wrong framing source, but its cut points are already right. It is also useful when you need to preserve the edit’s rhythm and avoid nudging everything downstream.
Don’t assume that every property remains identical in every project. A replace operation can retain the timeline slot and its duration without making two different sources behave identically under every grade, plugin, or compound structure. Make a reversible test on one clip before applying a batch of replacements.
What Replace is meant to do
At a high level, a replace edit uses the timeline clip’s duration as the destination and the source and timeline playhead positions to determine which section of the incoming media appears. The intended result is a one-for-one replacement, not a new edit point that pushes later clips down the timeline. Blackmagic’s Resolve Edit page documentation says Replace matches the existing clip’s length, while Ripple Overwrite handles a replacement of a different length by moving downstream material.
That difference matters. If the existing shot lasts 3 seconds and the new source is a 20-second camera file, Replace can use a portion of that source in the existing 3-second slot. It does not mean the entire 20-second camera file will be inserted into the timeline. Resolve adjusts the incoming clip’s out point to fit the selected duration.
A replace edit is most predictable when you can answer three questions before pressing the command:
- Which timeline clip is the destination?
- Which frame in the new source should line up with the timeline playhead?
- Which video and audio tracks should receive the replacement?
If you know those, the operation is usually straightforward. If you don’t, slow down and inspect the source and destination controls first.
What “keep effects” can mean
Editors often say “keep effects” when they mean “don’t disturb the work I already did to this shot.” That may include:
- The clip’s duration and its cut points.
- Its placement on the timeline.
- Transform settings such as zoom, position, rotation, or crop.
- OpenFX applied to the timeline clip.
- A Color page grade or node structure.
- Keyframes and retiming.
- The audio that is linked to the picture.
- Transitions at the head or tail.
- A Fusion composition or nested clip.
These aren’t all the same kind of data. For example, an effect applied directly to a timeline clip is different from an effect that belongs to a source clip used elsewhere. A grade associated with an individual timeline instance can also differ from settings shared across several instances of the same source. And replacing a compound or Fusion clip is not the same as replacing a camera original.
That is why this guide separates the core replace operation from the verification pass. The operation should preserve the intended timeline slot; the verification pass tells you whether the properties you care about still produce the desired image and sound. If a certain effect is crucial, compare before and after rather than relying on a general promise.
What should I check before pressing F11?
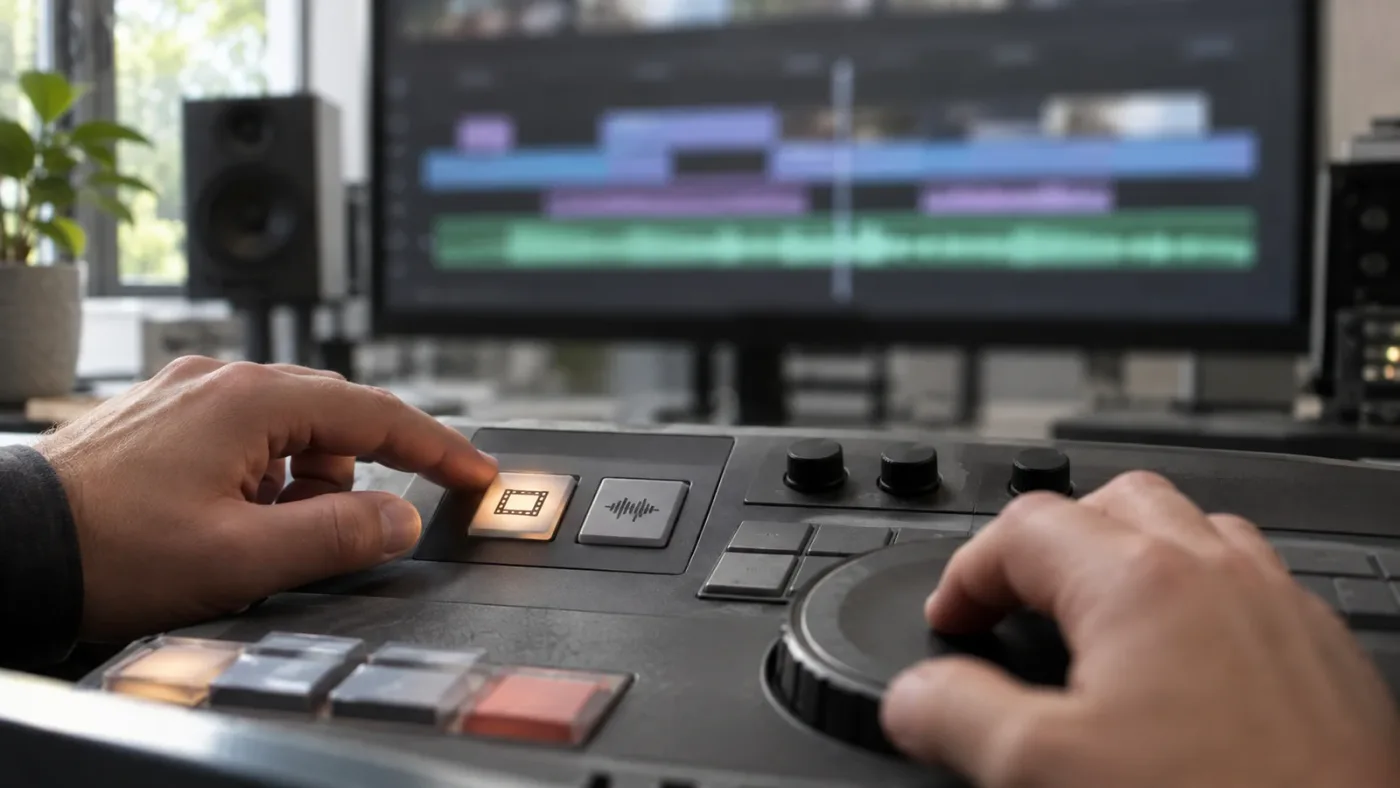
Before pressing F11, identify the destination clip, confirm the track destinations, and check where both playheads sit. A few seconds of setup can prevent replacing the wrong item or placing the wrong part of the source into the shot.
The Edit page is the clearest place to follow this workflow. Resolve’s toolbar includes a Replace Clip control, and the default shortcut documented in Blackmagic training material is F11. The Resolve 20 Beginner’s Guide demonstrates using the Replace Clip button or F11 for the operation. Your keyboard may have a customized mapping, so the visible command name is the more reliable reference if F11 does something else.
Start with a reversible state. Save the project, duplicate the timeline, or at minimum be ready to undo the operation. If you’re swapping one critical shot in a nearly finished edit, duplicate the timeline first. A duplicate gives you a clean comparison and protects the original sequence from an unnoticed mistake.
Then inspect the timeline:
- Locate the clip you mean to replace.
- Note its track, duration, and any connected audio.
- Check whether the clip is part of a transition, compound clip, or Fusion composition.
- Identify whether the shot has a special grade or effect that needs a post-replacement review.
- Confirm that the timeline playhead is inside the target clip, not parked on a neighboring cut.
If the replacement must affect picture only, make sure the audio destination is not set to replace the linked audio track. If picture and sound should both change, confirm that the correct audio destination is enabled too. Blackmagic’s Editor’s Guide to Resolve 18 shows destination controls being used to replace video while leaving the timeline audio untouched. The exact interface can move between versions, but the principle is stable: the destination controls decide which tracks receive an edit from the source.
A correct source clip can still produce the wrong edit if the destination track controls are wrong.
What should I do with the timeline playhead?
Put the timeline playhead on a recognizable frame inside the clip you want to replace. This is the destination reference point: the incoming source frame aligned to it will appear at that point in the timeline clip.
Don’t use the cut itself as your only visual reference unless you deliberately want the new source’s corresponding frame to land on the cut. A frame inside the shot is easier to match. For example, if the existing take shows a person turning toward camera, place the timeline playhead on the turn. Then find the same action in the replacement take and place the Source Viewer playhead there.
A good matching frame is something you can recognize in both clips:
- A hand touching a door handle.
- A person looking up.
- A car crossing a road marking.
- A wave reaching a rock.
- A product turning to reveal its label.
- A camera move reaching a clear landmark.
This isn’t just a convenience. If the source and destination playheads are misaligned, Resolve can place the replacement at an unexpected point in its source media. The timeline duration may still be correct, but the action can land too early, too late, or outside the part of the new clip you intended to use.
What should I do with the Source Viewer playhead?
Load the replacement source into the Source Viewer and park its playhead on the frame that should match the timeline playhead. The source and timeline positions work together to establish the alignment of the edit.
You can load a media file from the Media Pool by double-clicking it, or open it using your usual source-viewer workflow. Confirm the Source Viewer is showing the new file, not the old timeline clip. Then scrub to the matching moment.
If the replacement is a different take of the same action, don’t assume the matching action occurs at the same source timecode. The camera may have started earlier, later, or recorded a longer pre-roll. Match by visible action, not by blindly copying the old timecode.
If the camera angle is close but not identical, choose a frame that corresponds to the same beat rather than the exact same composition. You can refine the final framing after replacement using the Inspector or Color page. The goal at this stage is to put the right action in the right timeline slot.
Which tracks should be targeted?
Target only the track components you intend to replace. For a picture-only swap, enable the intended video destination and avoid sending the new source’s audio over dialogue, music, or sound design that should remain untouched.
Resolve’s track headers include destination controls for source edits. In a multitrack timeline, there may be several video and audio tracks, and the desired target may not be the lowest track. Check the destination indicators carefully, especially when the target is on V2 or above, or when the original clip’s audio is on a separate track.
A practical setup looks like this:
| What you want to replace | What to check before Replace |
|---|---|
| Picture only | Target the intended video track; disable audio destinations you do not want to change. |
| Picture and camera audio | Target the intended video and audio tracks; check whether dialogue or music shares those tracks. |
| Separate dialogue recording | Keep the external dialogue track out of the replacement unless it should change too. |
| A still image or graphic | Confirm the destination is the correct video track and check fit and duration after the edit. |
| A clip on an upper video track | Set the video destination to that track rather than assuming Resolve will choose it automatically. |
| A sound effect in an audio track | Target the intended audio destination and check sync after replacement. |
The table is a checklist, not a guarantee that every project uses the same track layout. Track destinations are project-state controls. They can carry over from the previous edit you made, so do not assume the setting is right just because it worked a moment ago.
How do I replace the clip step by step in Resolve 21.1?
To replace a clip in DaVinci Resolve 21.1, prepare the timeline, load the source, align the two playheads, target the correct tracks, and run Replace. Then inspect the result before continuing with other edits.
Follow these steps on the Edit page:
- Save or duplicate your work. If the edit is important, duplicate the timeline so you can compare the result with the untouched version.
- Select the destination clip. Click the clip you want to replace, or otherwise make sure the timeline playhead is inside the intended clip. Confirm its track and duration.
- Load the replacement media. Open the new shot in the Source Viewer. Make sure the viewer shows the new source file.
- Find a matching action. Move the timeline playhead to a recognizable moment in the old clip. Move the Source Viewer playhead to the corresponding moment in the new clip.
- Check track destinations. Set the video destination to the correct video track. Enable an audio destination only if the new source’s audio should replace the existing audio.
- Run Replace. Use the Replace Clip button or press F11 if the default shortcut is still assigned.
- Review the timeline. Confirm the clip remains in the intended slot and inspect the viewer around the start, middle, and end.
- Check the properties that matter. Review the grade, effects, framing, retiming, audio, and transitions that were important on the original.
- Undo if the result is wrong. Don’t try to fix a mistaken replacement by stacking more edits on top of it. Undo, recheck the setup, and run the operation again.
The most important confirmation is not the button animation. It’s the result: the right source appears in the right timeline slot, with the intended duration and the expected surrounding edit. Play across both edit points. Look for a flash, a gap, a shifted cut, or a sudden change in framing.
Blackmagic’s Resolve 20 Beginner’s Guide presents Replace as a toolbar action or F11 command and explains that In and Out points can refine the portion being replaced. The specific lesson is from Resolve 20, while the current Resolve 21.1 manual listing is the version-specific reference as of October 2026. Verify the current command label and shortcut in your installation if your interface or key mapping differs.
Why do the playheads need to match?
The timeline playhead identifies the destination frame; the Source Viewer playhead identifies the source frame to align with it. Matching both playheads to the same recognizable action makes the replacement predictable.
Imagine a 4-second interview shot. The timeline playhead sits at the moment the speaker raises a hand. The replacement take begins several seconds earlier, so the hand raise occurs later in the source. If you leave the Source Viewer playhead at its first frame, the new clip may not show the gesture at the intended point. Put the Source Viewer playhead on the hand raise first.
You’re not matching clip start to clip start by default. You’re matching one frame to another, and the clip’s existing timeline duration defines how much of the replacement source fits into the destination. That is the key distinction between a Replace edit and a simple insert.
What does a successful replacement look like?
A successful replacement shows the new source inside the original timeline slot, with the intended edit points still in place. The timeline should not unexpectedly gain a long new clip or push unrelated downstream clips away.
Check these signs:
- The timeline clip appears at the expected location.
- The start and end points remain where the original shot was cut.
- The new footage shows the intended action around the playhead.
- Neighboring clips remain in their expected positions.
- Only the intended video and audio tracks changed.
- The shot’s grade and effects still look plausible.
- The transition at either end still behaves as expected.
- There is no black frame, freeze, or unintended audio jump.
A clip looking correct on the first frame isn’t enough. Scrub or play through the entire duration. If the new source is shorter than the desired visible action, or the selected source frame is too near its end, later frames can run out. If the framing differs, a previous zoom or crop can cut off a face or product.
Does Replace Clip preserve the timeline duration and cut points?
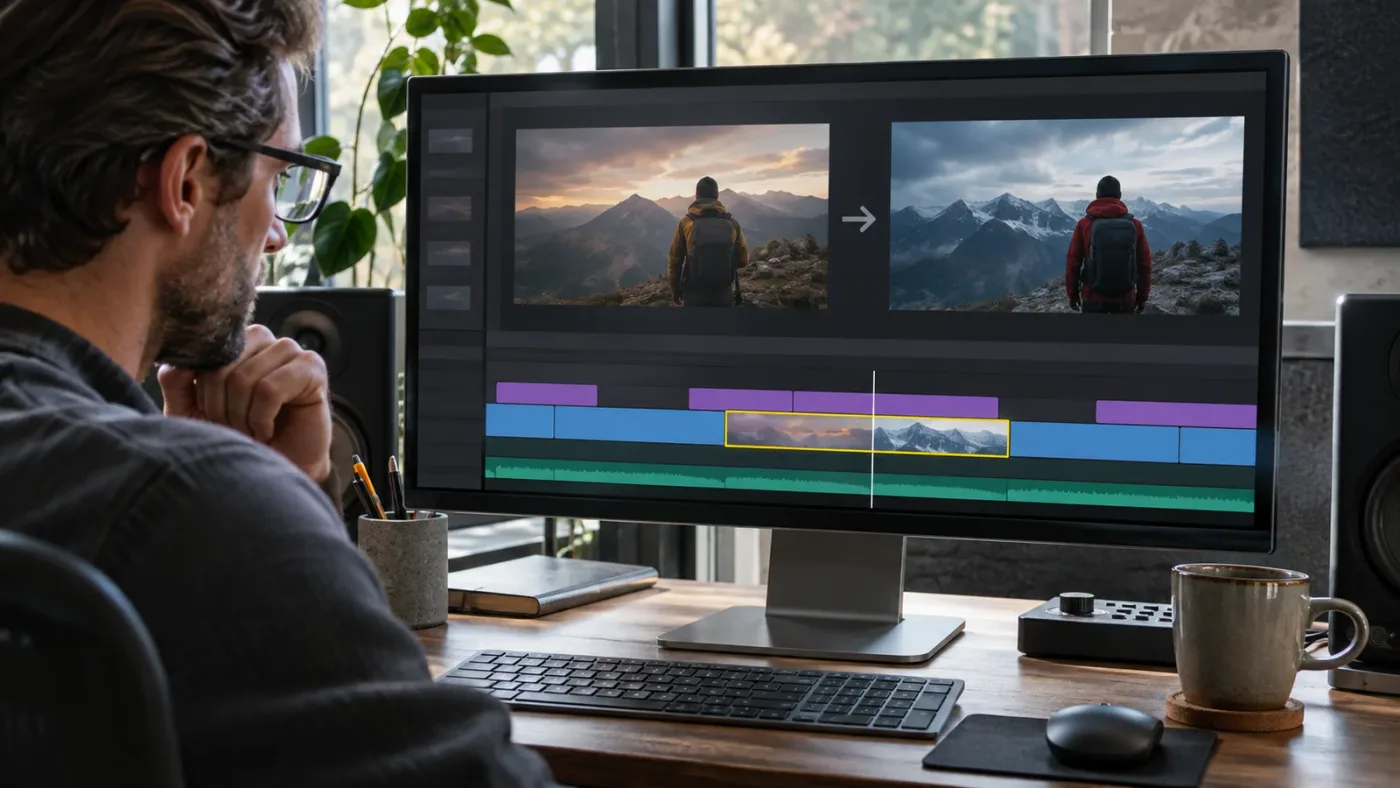
Replace is specifically designed to put one clip into the duration of one existing timeline clip. It is the right edit type when you want the shot to change but not the slot’s length or the timing of the rest of the sequence.
Blackmagic’s official Edit page documentation explains that Replace exchanges a single timeline clip for one of the exact same length and adjusts the incoming clip’s out point to fit. In contrast, Insert pushes existing timeline content to make room, and Ripple Overwrite accommodates a different-length replacement by pushing or pulling downstream material.
This distinction gives you a useful decision rule:
| Your goal | Use this edit | Why |
|---|---|---|
| Swap the image, keep the existing slot | Replace | Fits the incoming media to the selected clip’s timeline duration. |
| Add a clip and move later material | Insert | Makes room by shifting subsequent timeline content. |
| Cover part of the timeline with a new clip | Overwrite | Writes over material at the edit location. |
| Change the shot and allow duration to change | Ripple Overwrite | Accommodates a longer or shorter replacement by moving later material. |
| Change duration by retiming source footage | Fit to Fill | Fits selected source and timeline ranges by changing speed. |
| Put a new shot on a higher video layer | Place on Top | Adds the new clip above existing picture at the playhead. |
The names are similar enough to invite a wrong click. Read the command label before you commit. If duration matters, don’t choose Ripple Overwrite merely because the word “replace” appears in its name. The regular Replace operation is the one-to-one swap.
Replace keeps the slot; Ripple Overwrite changes the surrounding timing to fit a different-length shot.
Why use Replace instead of Overwrite?
Use Replace when the edit points and clip duration are already right. Use Overwrite when your intent is to cover whatever is under the playhead for the duration of the incoming edit.
An Overwrite can write over one or more timeline clips, depending on the source duration and edit location. The official Blackmagic Resolve Edit page guide describes Overwrite as writing over the clip or clips at the playhead. That is useful when you want a new piece of media to occupy a section of the timeline, but it’s not as precise a choice as Replace when the destination is exactly one existing clip and its boundaries must stay put.
Use Overwrite when:
- You want the incoming shot to determine the amount of timeline it covers.
- The target area is not simply one existing clip.
- You deliberately want to cover multiple clips or a marked range.
- You’re building a new section rather than preserving a finished shot slot.
Use Replace when:
- You need a different take in an established cut.
- The existing shot duration is already approved.
- You want to keep the timing relationship with music, dialogue, or other cuts.
- You need to avoid rippling downstream material.
When is Ripple Overwrite the better choice?
Choose Ripple Overwrite if the new shot must be longer or shorter and you want the rest of the timeline to move to accommodate it. Blackmagic’s official Resolve page describes Ripple Overwrite as replacing a shot of a different length and moving timeline content to make room or remove the gap.
For example, suppose an existing shot is 2 seconds, but the new version needs 3.5 seconds to include a complete action. A standard Replace edit is built to fit the old 2-second slot. If you need the longer duration to remain, Ripple Overwrite may be the more appropriate choice. Check every track after using it, because a ripple can affect downstream timing and sync relationships.
Choose a regular Replace when you need to protect the approved edit duration. Choose Ripple Overwrite when the incoming clip’s duration should redefine the timeline space and you’re comfortable adjusting downstream material.
When is Fit to Fill the better choice?
Choose Fit to Fill when you have a defined source range and a defined timeline range and want Resolve to fit the source selection into that destination, including by changing playback speed. Blackmagic’s Edit page guide describes Fit to Fill as automatically calculating a speed change to fit the selected source portion into the selected timeline space.
That is different from preserving effects. Fit to Fill solves a duration mismatch; Replace solves a one-for-one source swap. If a new shot must occupy exactly 2 seconds but its source action takes 4 seconds, Fit to Fill may make the action play faster. That can be acceptable for a quick insert, but may look unnatural for dialogue or a recognizable human movement.
Don’t use Fit to Fill merely because Replace didn’t line up as expected. First confirm whether the real issue is playhead alignment, source duration, or a marked range. Changing speed can solve one problem and create another.
Will F11 keep my grade, OpenFX, and Inspector settings?
F11 is the default Replace shortcut shown in Blackmagic training material, but the result for a particular grade or effect depends on how that property is attached to the timeline clip or media. Treat retained effects as something to verify, not a universal guarantee for every type of effect setup.
Blackmagic’s Resolve 20 Beginner’s Guide documents F11 as Replace. The official Resolve Edit page guide explains the duration behavior. Neither of those descriptions should be stretched into a claim that every possible source-associated property in every project will be retained exactly as before.
A sensible post-replacement check separates the properties:
| Property | What to inspect after Replace |
|---|---|
| Timeline position and duration | Confirm the slot and edit points remain where expected. |
| Inspector transform | Check zoom, position, rotation, crop, and any keyframes. |
| OpenFX | Confirm the effect is still present, enabled, and producing the intended result. |
| Color grade | Compare the image and check the Color page node tree and clip selection. |
| Fusion | Confirm the composition still references the intended media and displays correctly. |
| Retiming | Check speed points and playback duration. |
| Audio | Listen for the expected source and verify sync. |
| Transitions | Play across the head and tail to check for a broken or altered transition. |
What happens to Inspector transforms?
A transform that was applied to the timeline instance may remain available after a replacement, but it can produce an unwanted result when the new shot has different framing. A zoom that worked on a close-up might crop a wide shot too tightly. A position adjustment that centered a face in one take might move the subject off-screen in another.
After the edit, select the replacement and open the Inspector. Compare the image with the old shot’s intended framing. Check position, zoom, rotation, crop, and any keyframed values. If the new shot uses a different camera or focal length, you may need to adjust those values even if the timeline settings remain.
A practical decision: retain the old transform if the new source was shot from the same setup and has similar framing. Rework it if the new image composition is meaningfully different. Preserving a value is not the same as preserving a good image.
What happens to OpenFX?
An effect can remain on the timeline instance yet look different when applied to a different source. A blur, glow, sharpen, vignette, or other effect responds to the content beneath it. If the source contrast, detail, exposure, or subject placement changes, the same effect settings can produce a noticeably different result.
After replacing the shot:
- Select the clip and open the Inspector or the relevant effect controls.
- Confirm that the effect remains enabled.
- Check the result at the beginning, middle, and end of the clip.
- Look for edge artifacts, halos, clipping, unexpected blur, or a change in subject treatment.
- Adjust the effect only after confirming the issue is caused by the effect rather than the new source itself.
The title of an effect remaining on the clip is not proof that it still looks right. Treat the viewer as the final check.
What happens to a Color page grade?
A grade can be tied to a clip in ways that make a source replacement visually different even if the timeline slot remains. A grade designed for one camera’s color response may not suit a new camera or even another take with a major exposure change.
After replacing, compare the node graph and the image. If the new source has similar camera settings, lighting, and exposure, the existing grade may be a useful starting point. If those conditions differ, the grade may need correction. Look at skin tones, highlights, shadows, and any color-critical objects. The purpose is not to copy the old look blindly; it is to preserve the creative intent.
If the shot is an alternate take from the same camera position under stable lighting, the existing grade may remain close. If it is a different camera, a different lens, or a different lighting setup, expect to inspect and potentially regrade. Don’t assume that matching the old clip’s settings will match the new image.
What happens to Fusion and compound clips?
Fusion compositions and compound clips can have dependencies beyond a simple source swap. Before replacing one, determine whether you are selecting a camera original, a compound clip, a Fusion clip, a nested timeline, or a rendered intermediate. These are different objects and may not react the same way.
If the target is a compound clip, decide whether you intend to replace the entire compound object or change one of its internal source clips. If it is a Fusion clip, check whether the composition references the original media or expects a particular resolution, framing, or alpha channel. If it is a nested timeline, editing a source clip in another timeline may have broader consequences.
For a discussion of what those clip types mean, see DaVinci Resolve compound clip vs. Fusion clip. That distinction matters here because an apparent “clip” on the timeline may actually be a container.
What happens to speed changes and keyframes?
A replacement source can have different available source frames and different motion, so inspect retiming and keyframes carefully. Even when the timeline slot remains, the new media may not have enough usable handles or may not align with the existing speed curve.
Check the retime controls and play through the whole shot. Watch for:
- A repeated or frozen frame near the end.
- A speed ramp that begins before the intended action.
- A missing action beat because the source playhead was misaligned.
- Keyframes that now affect the wrong visual moment.
- A source that ends before the timeline clip does.
- A motion direction that makes the old keyframe movement look wrong.
When a replacement shot has very different movement, an old animated transform may no longer serve the shot. The effect may still exist, yet its timing and direction may need adjustment.
Why did DaVinci Resolve replace the wrong clip or change the timing?
When Replace produces an unexpected result, the common first checks are the destination clip, source and timeline playheads, track destinations, and the active edit command. Undo the operation before troubleshooting so the timeline returns to a known state.
If a replace edit surprises you, undo first and inspect the setup before trying another edit command.
Use this short diagnostic order:
- Undo once.
- Confirm which clip is selected and which clip contains the timeline playhead.
- Confirm the Source Viewer contains the intended replacement.
- Check where the Source Viewer playhead is parked.
- Check video and audio destinations.
- Confirm you selected Replace, not Overwrite, Insert, or Ripple Overwrite.
- Retry on a duplicated timeline or a harmless test clip.
Why did the new clip appear at full length?
First check whether you used a different edit command, dropped the clip directly onto the timeline, or targeted a gap rather than the intended clip. Replace is designed to fit a source into one existing clip’s duration; other actions can place the source’s marked or full range on the timeline.
If the new clip appears much longer than the old one, undo and check the visible edit name. Also inspect whether the destination was actually selected. A gap can behave differently from a filled timeline clip, and a source edit into empty space is not the same case as replacing a clip.
If you meant to replace a timeline clip while preserving its slot, make sure the playhead is inside that clip, the source is loaded in the Source Viewer, and Replace is the selected operation. Blackmagic’s Resolve Edit page guide contrasts the duration-matched Replace command with the other edit types.
Why did the whole timeline seem to change?
Undo immediately. Then check whether you used Overwrite or Ripple Overwrite instead of Replace, or whether multiple clips or a marked range were involved.
Overwrite can cover material at the playhead, and Ripple Overwrite intentionally changes downstream timing to accommodate a different-length shot. If your goal was a one-clip swap, those are not equivalent to Replace. Verify that only one destination clip is selected and that the edit operation shown is Replace.
A long timeline can make a small ripple hard to notice. Check later clips, music sync, markers, and linked audio before continuing. If the timeline is complex, comparing against a duplicate is safer than relying on a quick glance.
Why did Resolve replace video and audio together?
The source may have been routed to both video and audio destinations. Check the destination controls in the track headers and disable the audio destination if the existing dialogue or sound design must remain.
Before retrying, identify the audio that should stay. It may be linked camera sound, a separate recorder track, a music bed, or a sound effect. If you only want to change picture, target picture alone. Blackmagic’s Editor’s Guide to Resolve 18 illustrates editing video while leaving an audio destination disabled.
After the edit, listen to the audio, don’t just look at waveforms. A waveform can remain visible while the source or sync relationship has changed. Play across the cut and make sure dialogue begins at the expected moment.
Why did Replace use the wrong portion of the new clip?
The Source Viewer playhead probably wasn’t on the matching moment, or the source clip didn’t contain the action you expected at that location. Undo, find the correct visual beat in the source, move the source playhead, then retry.
Timecode alone can mislead you when takes start at different points. Use an event in the image or sound as your anchor. If the action isn’t visible in the new source, confirm you loaded the correct file or take.
For a music or sound-effect swap, listen to the transient or cue you want to align. A door slam, beat, or impact is a better match point than the start of two files that may contain different amounts of silence.
Why did Replace change duration or disturb downstream clips?
The command may have been Ripple Overwrite, Insert, or an overwrite of a marked range rather than a standard Replace. Undo, choose the one-to-one Replace command, and verify that the selected destination is a single timeline clip.
The expected Replace behavior is to fit the incoming source to the existing clip duration. The official Blackmagic Resolve page describes Ripple Overwrite as the edit that pushes or pulls downstream content for a different-length replacement. If downstream clips moved, that is a clue that a ripple-type edit occurred.
If you intentionally need a different duration, then downstream movement may be correct. In that case, review sync locks, linked clips, and other tracks. A ripple can be desirable, but it should never be accidental.
Why is F11 not doing anything?
Your keyboard may use F11 for a system-level function, or your Resolve keyboard preset may map the command differently. Try the visible Replace Clip control or search for the command in Keyboard Customization.
Blackmagic training material uses F11 for Replace, including the Resolve 20 Beginner’s Guide. But that documented default does not prove that your key is currently assigned to Replace. A custom preset, operating-system keyboard setting, or laptop function-row behavior can change what happens.
The safe path is to verify the command name in the application. If the toolbar button works but F11 does not, the edit itself is available; the shortcut is the part to investigate. If both fail, check whether the correct page, source viewer, and destination are active.
How do I keep the audio, grade, and transitions around the shot?
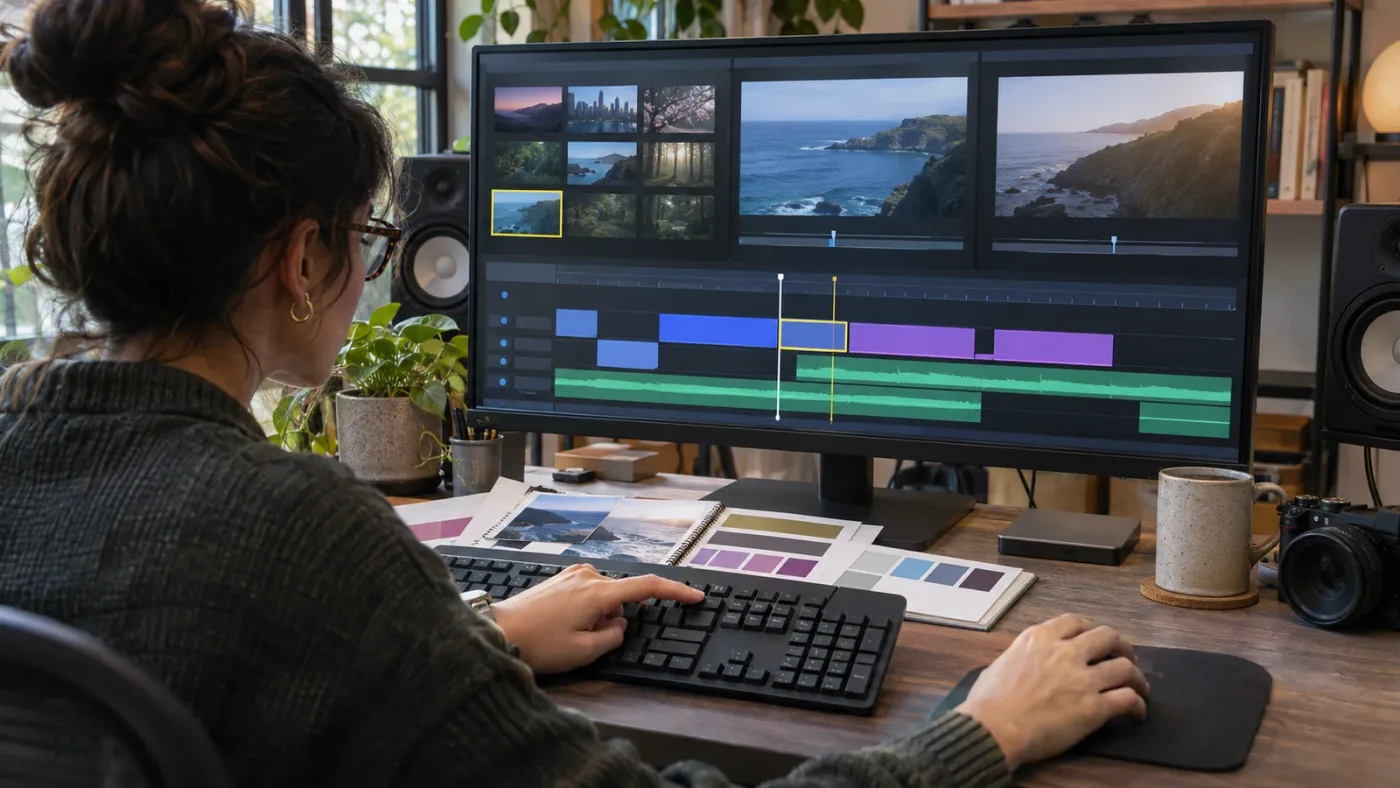
For a picture-only replacement, keep the intended audio destination disabled and check both adjacent transitions after the edit. For a full picture-and-sound replacement, target both components deliberately and listen for sync.
The timeline clip is only one part of the edit. A replacement can look right in the viewer while leaving an audio problem or a transition that no longer suits the shot. Review both sides of the cut:
- Play the last second before the replacement.
- Play the first second of the replacement.
- Play through the tail and into the next shot.
- Listen to dialogue and any camera audio.
- Check that music continues without a gap or jump.
- Review each transition at normal playback speed.
- Compare the color and brightness against the neighboring shots.
How do I replace picture but keep external dialogue?
Target the video track containing the picture and avoid the audio destination holding the external dialogue. If the dialogue sits on a separate track, confirm that track is untouched and stays in sync.
This is a common case for interviews. The picture may come from a camera file, while the final sound comes from a recorder or a cleaned dialogue track. Replacing the shot should not accidentally replace the finished dialogue with scratch camera audio. Before editing, identify which track contains the master dialogue, and check the track destination controls.
After replacement, confirm the dialogue still matches the speaker’s mouth movement. If the new take has a different delivery or timing, the old dialogue may no longer fit. That is not a failed Replace edit; it means the replacement changed the visual performance enough that the sound edit needs a separate decision.
How do I replace a music or sound-effect clip?
Use Replace when the new sound should occupy the existing timeline clip’s duration. Align a clear musical beat or sound cue in the Source Viewer with the timeline playhead, then target the correct audio track.
Music edits and sound effects often rely on precise timing. A new music file may have an intro that is longer than the old one, so aligning the first frame of each file may not align the first beat. Find the beat or cue that matters and use it as your reference.
If the new music should have a different length, decide whether the surrounding edit should change. For a duration-preserving swap, Replace is appropriate. If the music must extend or shorten the timeline section, use a deliberate trim or a suitable ripple operation and then review the downstream sync. For the larger workflow of swapping temporary music for a licensed final track, see how to replace temp music in DaVinci Resolve.
How do transitions behave at the clip edges?
A transition belongs to the edit around a clip, so inspect the head and tail after replacing its source. A dissolve may still be present but look different if the new shot has different brightness, motion, or composition.
A dissolve between two nearly matched shots can appear smooth. The same dissolve between a bright shot and a dark shot can create a visible flash or muddy blend. The transition duration might be unchanged while its visual result changes because its input frames changed.
Play across the entire transition, not just the center of the replacement. If the effect is wrong, decide whether the transition itself needs editing or whether the replacement source simply begins on the wrong frame.
Which replacement method should I choose for different editing jobs?
Choose the method based on what must remain fixed: timeline duration, source timing, or downstream edits. Replace is best for a one-for-one shot swap; Paste Attributes, media relinking, and conform workflows solve different problems.
| Situation | Best first method | What it changes | Key caution |
|---|---|---|---|
| New take, same existing shot slot | Replace | Swaps the source into one timeline clip’s duration | Align the source and timeline playheads. |
| New shot, different duration, downstream material should move | Ripple Overwrite | Replaces and ripples later material | Check sync and all affected tracks. |
| Need to copy a transform or effect to a separate clip | Paste Attributes | Applies selected attributes from one clip to another | Choose which attributes to paste; don’t blindly copy everything. |
| Original file moved but the edit should remain the same | Relink media | Reconnects the project to the intended media file | This is a media path problem, not a new-shot edit. |
| Replace a clip with another file representing the same media identity | Conform or relink workflow | Reconnects or conforms media to existing timeline use | Use only when the files are truly corresponding media. |
| Replace a source inside a compound or nested timeline | Edit inside the container or use a conform method | Changes the underlying structure or source mapping | Check other timelines that reuse the same container. |
| Preserve the shot slot but use a different part of the new take | Replace with playhead alignment | Changes which source frames appear | Match an action, not just the clip start. |
Should I use Paste Attributes instead?
Use Paste Attributes when the new timeline clip already exists and you want to copy selected settings from another clip. Replace changes the source occupying a timeline clip; Paste Attributes copies chosen properties from one clip to another.
For example, you may already have a replacement shot edited into the timeline and want to copy a transform or effect configuration from the previous shot. That is a different task from exchanging the source in place. Use the attribute selection controls to choose what to copy, then verify the destination clip. Copying all attributes without checking may bring over settings that don’t suit the new source.
Should I relink or conform instead?
Use relinking or conforming when the media file is a new path or a corresponding high-quality version of the same source, not merely a different take. Those workflows preserve the edit’s relationship to the intended media rather than making a creative shot substitution.
A proxy, offline original, or moved file can make the timeline appear to need a replacement when the real issue is media connectivity. If the desired content is the same shot and the project should use a different storage location or quality version, investigate relinking or proxy workflows first. For a source substitution question involving Media Pool identity and timeline use, the related guide on DaVinci Resolve conform lock from the Media Pool covers a different but adjacent decision.
Should I duplicate the timeline first?
Duplicate the timeline when the replacement is high risk, hard to reverse, or part of a large batch. A duplicate gives you a safe comparison point and makes it easier to spot a changed grade, timing issue, or broken transition.
For one low-stakes shot, Undo may be enough. For a client-approved cut or a complex multi-track sequence, make a copy before experimenting. This is especially sensible if you are replacing compound clips, retimed footage, or shots with intricate Fusion work.
What if I need to replace many clips?
Replace is intended for a single destination clip at a time, so handle multiple replacements as a sequence of deliberate edits. Blackmagic’s Resolve 21 manual text notes that Replace and Fit to Fill work on one clip at a time, unlike several other edit types that can process multiple selected clips. Confirm this behavior against the current Resolve 21.1 reference manual listed on Blackmagic’s Support Center.
A batch workflow still benefits from a repeatable checklist:
- Duplicate the timeline.
- Make a replacement list with the old clip name, new source name, and intended action.
- Replace one clip.
- Confirm the result and note any special grade or framing adjustments.
- Repeat for the next clip.
- Play the entire sequence after the last replacement.
- Compare the new timeline with the duplicate before delivery.
Avoid selecting many destination clips and expecting one source to replace them all as separate, intelligent matches. Replace is not a batch conform tool. It cannot infer which take belongs to each timeline shot based on creative intent.
For organized projects, keep source names and bins clear. If a sequence contains several similar takes, use metadata, markers, or a written replacement map rather than relying on memory. A wrong take can look plausible in a thumbnail and still be the wrong performance.
What if the replacement source is a still image?
A still can be used as replacement media, but its duration and framing deserve special attention. Confirm it fills the existing slot as intended, and check whether the image is being cropped or scaled differently from the original moving shot.
A still does not have motion to align to an action, so use another reference: composition, subject placement, or a specific point in the frame. If the still is a graphic with transparent areas, inspect the alpha edges against the timeline background. If it is a photograph, check that the image’s aspect ratio and intended crop match the timeline.
If the still must remain onscreen longer than the original clip, a standard Replace is not a request to extend the timeline automatically. Use an appropriate duration edit when the timeline slot itself should change.
What if the new shot is a different frame rate or resolution?
Replace can exchange the source, but it does not make footage with different characteristics visually identical to the old source. Check motion, scaling, frame interpolation, and framing after the edit.
A different frame rate can change how movement appears in the sequence. A different resolution or aspect ratio can change how the image fits the timeline. The source may also contain a different camera crop or lens distortion. These are not necessarily errors; they are reasons to review the image after substitution.
Keep the project’s existing timeline settings in mind. Don’t change project settings merely because one replacement source differs. First assess whether the footage is expected to conform to the existing sequence and whether the shot plays correctly at the timeline’s frame rate.
What if the incoming source is too short?
If the incoming clip lacks enough source frames for the desired action, Replace cannot create missing footage. The visible result may freeze, run out, or fail to contain the complete action you want.
Choose another take, select a different source frame, shorten the desired section, or use a deliberate retiming approach if it suits the material. Do not assume the original timeline duration means every replacement source has enough usable content to fill that duration naturally.
For a still or a graphic, the issue may be less obvious because a static image can fill time. For moving footage, watch the full clip and inspect the end of the available source.
How can I practice the workflow without risking a finished edit?
Practice on a duplicate timeline or a short, noncritical clip and deliberately test three cases: picture-only replacement, playhead alignment, and a source with noticeably different framing. That reveals the controls that matter in your own Resolve setup.
A useful practice exercise is to create a small sequence with two shots and a simple transition. Add a transform to one shot, then duplicate the timeline. In the duplicate, replace that shot with a different take. Compare the timeline duration, image framing, effect result, transition, and audio.
This is a worked exercise, not a claim about a test performed for this article. Use whatever safe media you already have permission to edit. The point is to observe how your own project behaves, particularly if you use a custom keyboard preset, plugins, or a complex clip structure.
Make notes while you practice:
- Did F11 trigger Replace in your keyboard setup?
- Did the target clip remain the same duration?
- Did the picture-only destination leave audio alone?
- Did the source playhead align the expected action?
- Which Inspector settings remained useful?
- Did the grade need adjustment?
- Did the transition still work?
- Did the new source have enough frames?
That short exercise builds a reliable checklist for future edits. It is more useful than memorizing a shortcut without understanding the destination controls.
What should I do if a tutorial’s controls don’t match my screen?
Check the Resolve version, page, workspace, and keyboard preset before assuming the edit command has disappeared. DaVinci Resolve 21.1 is the current version context for this guide, while many tutorials show earlier versions and different toolbar arrangements.
Blackmagic publishes manuals and training materials in its Support Center. Its interface can change between releases, and a shortcut may be customized. If the button is missing, look for the command name in the Edit menu or Keyboard Customization rather than relying only on the button’s location in an older video.
Laurence Grayson writes that Resolve’s Edit Overlay is “pretty handy, assuming you know where to find it.” Grayson’s piece describes dragging a source clip to the timeline viewer to expose edit choices such as Replace. It is a useful reminder that Resolve may offer the same edit through a visible toolbar button, a keyboard command, or the Edit Overlay. The method that feels clearest is the one to use, provided you confirm the operation name before releasing the clip.
TryUncle is the on-screen assistant for DaVinci Resolve on Mac and Windows — ask in plain words and Uncle points at the exact control on your screen. If you’re stuck because the Replace control or track destination setting isn’t where a tutorial shows it, TryUncle can offer on-screen guidance while you remain in control of the edit.
What is the safest decision when I need to keep effects?
Use Replace for a single-shot swap when the existing clip duration and edit points should stay fixed. Then review the grade, effects, transforms, audio, transitions, and any nested structure that matters to the shot.
The reliable pattern is simple: save a reversible version, align the two playheads, target the right tracks, run Replace, and inspect the whole clip. If you need a different duration, choose an edit type designed for that change. If you are replacing a file path or conforming a higher-quality source, use a relink or conform workflow instead of treating it as a new take.
Start with one clip. Confirm the result. Then move on.
Frequently asked questions
- How do I replace a clip in DaVinci Resolve and keep its effects?
- Load the new media in the Source Viewer, align its playhead to the matching frame in the timeline clip, then use Replace Clip or press F11. Replace edit is intended to swap the source in a single timeline slot while keeping that slot's duration. Check the result because effects or grading linked to a source identity may need separate attention.
- Does F11 replace a clip without changing its duration?
- Replace edit is designed to replace one timeline clip with a clip of the same timeline duration. The incoming shot is fitted to the existing slot. If duration must change and neighboring clips should move, use Ripple Overwrite instead.
- Why does DaVinci Resolve replace my whole clip or timeline?
- The source and timeline playheads may not be aligned, the wrong track may be targeted, or you may be replacing a gap or marked range rather than the intended clip. Undo immediately, select the intended timeline clip, check track destinations, and retry with the timeline playhead inside that clip.
- Does Replace Clip keep color grades and OpenFX?
- A replace edit is the right first method when you want to swap the source while keeping the existing timeline slot. Verify color and effects afterward: clip-level effects, source-linked grades, Fusion compositions, and nested timelines do not all behave as interchangeable properties.
- What is the difference between Replace and Ripple Overwrite in DaVinci Resolve?
- Replace fits the incoming clip to a single existing timeline clip's duration. Ripple Overwrite is for replacing a shot with media of a different duration while pushing or pulling downstream timeline content to accommodate the change.
Sources
- DaVinci Resolve Support Center, including the 21.1 reference manual
- DaVinci Resolve 21 New Features Guide
- DaVinci Resolve Edit page
- DaVinci Resolve 20 Beginner's Guide
- The Editor's Guide to DaVinci Resolve 18
- DaVinci Resolve 19 Beginner's Guide
- Insider Tips: How to Use Resolve's Hidden Edit Overlay, by Laurence Grayson
Put this guide to work with TryUncle.
Ask about the step you’re on. TryUncle sees your screen and points at the control you need, so you can keep learning in your own project.
Get TryUncle for Mac or WindowsKeep reading
Guides · Oct 7, 2026 · 19 min
DaVinci Resolve Conform Lock From Media Pool: Fixes
Learn how DaVinci Resolve 21.1's Conform Lock from Media Pool works, when to use it, and how to replace the right clip without losing timing.
Guides · Aug 31, 2026 · 8 min
How to Replace Temp Music in DaVinci Resolve 21
Replace temp music in DaVinci Resolve 21 without moving your edit. Use Replace Edit, preserve timing, mix the new track, and check licensing.
Comparisons · Oct 3, 2026 · 21 min
DaVinci Resolve Compound Clip vs Fusion Clip: Which?
DaVinci Resolve compound clip vs Fusion clip explained for Resolve 21. Learn which container fits editing, compositing, reuse, resolution, and timing.