Articles / Guidesupdated for DaVinci Resolve 21.0.2 (July 2026)
DaVinci Resolve Node Labels and Colors for Organized Grading
Quick answer
Right-click any node in DaVinci Resolve's Color page and choose Node Label to rename it, or Set Color to color-code it. Give every recurring job, balance, secondary, look, its own label and color so a ten-node chain still makes sense to you, or a client, six months later without clicking through every node.
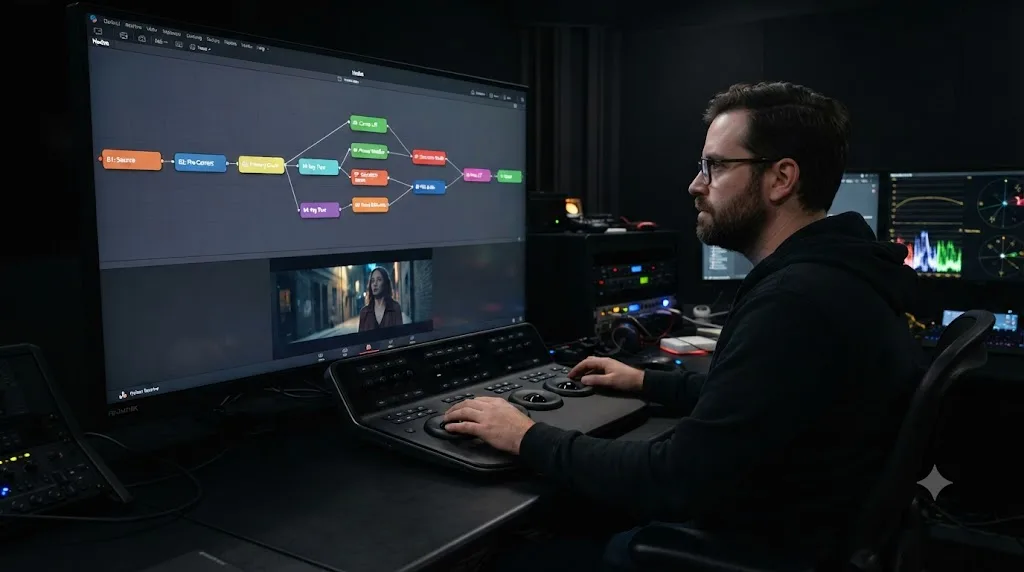
I used to think node labels were something you added at the end, a bit of housekeeping before you handed a project off. Then I opened a grade I'd built three months earlier, saw eight identical gray boxes in a row, and spent twenty minutes clicking through each one to find the skin tone correction I needed to nudge. The nodes weren't wrong. They were just unlabeled, uncolored, and completely anonymous, which meant my own past work had become a puzzle I had to solve before I could do the job I actually opened Resolve to do.
This guide is the fix. Not node order, that's a different question with its own guide, but the two tools DaVinci Resolve gives you specifically so a node graph stays legible after you've forgotten why you built it that way: labels and colors.
Why bother labeling and coloring nodes at all?
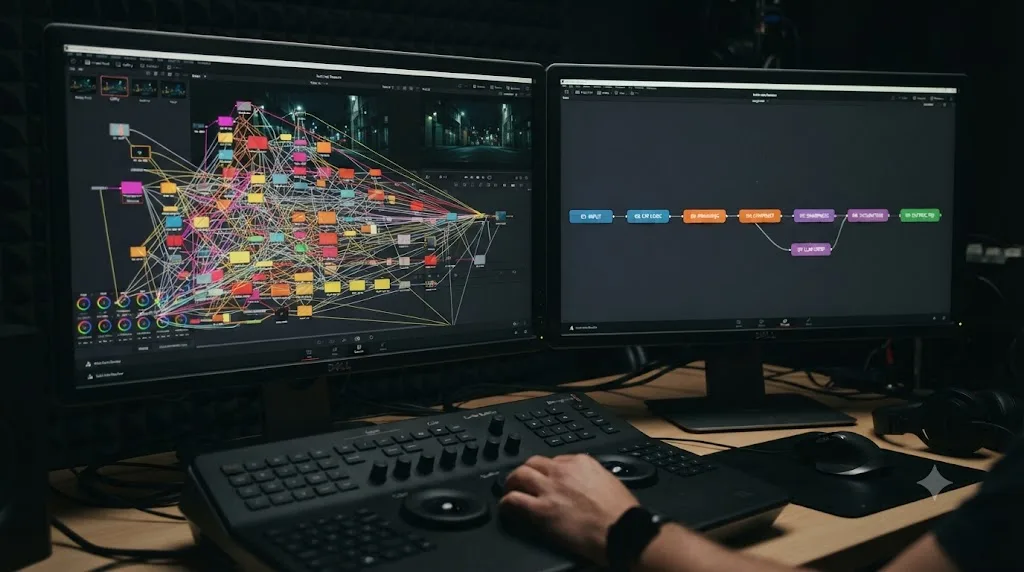
Because a node graph is a flowchart, and an unlabeled flowchart is just a row of boxes. Per Blackmagic's own Color page description, the image passes left to right through each node's correction or effect until it reaches the output, and nothing about that graph tells you what any individual box does unless you click into it or remember. On a two-node grade, that's fine. Your memory covers it. On a six-node interview, a twelve-node scene with qualifiers and power windows, or a project you're revisiting after a client's notes come back three weeks later, memory stops being a reliable index.
A node without a label is a black box six weeks from now, even if you wrote every line of it yourself. That's not a knock on your memory. It's just what happens to any structure you built under time pressure and haven't looked at since. Labels and colors are the two pieces of metadata Resolve lets you attach directly to a node so the graph explains itself instead of asking you to reconstruct your own reasoning from scratch.
There's a second, less obvious reason: collaboration. A client-facing colorist rarely works alone on a project start to finish. An assistant preps shots, a supervising colorist reviews, a client sits in a session and asks "can you pull back the thing you did to her face." If your nodes are named "1," "2," "3," you're the only person who can answer that question, and only if you remember. If node 5 is labeled "face" and colored orange, anyone looking at the graph can find it in under a second.
How do you rename (label) a node in DaVinci Resolve?
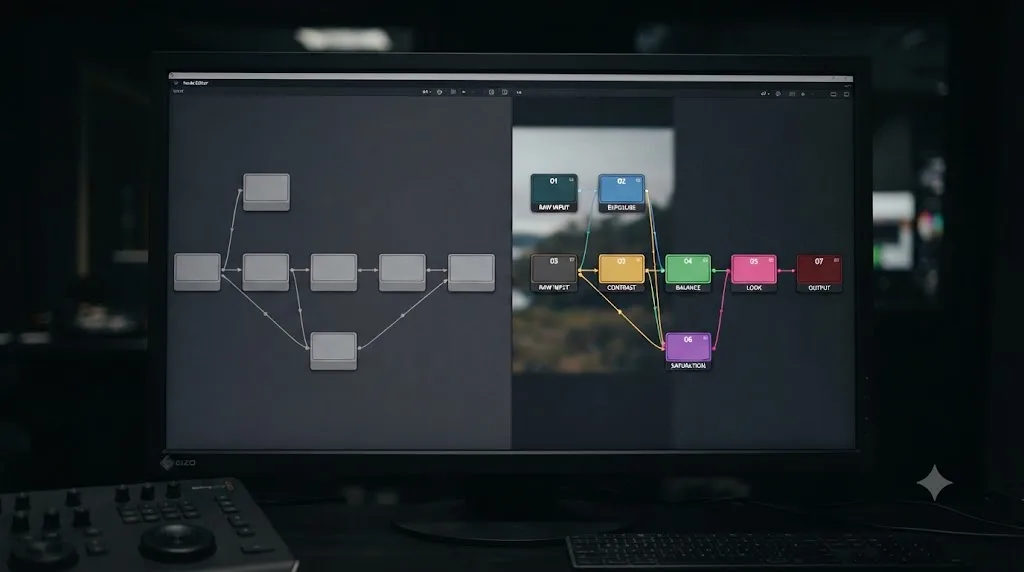
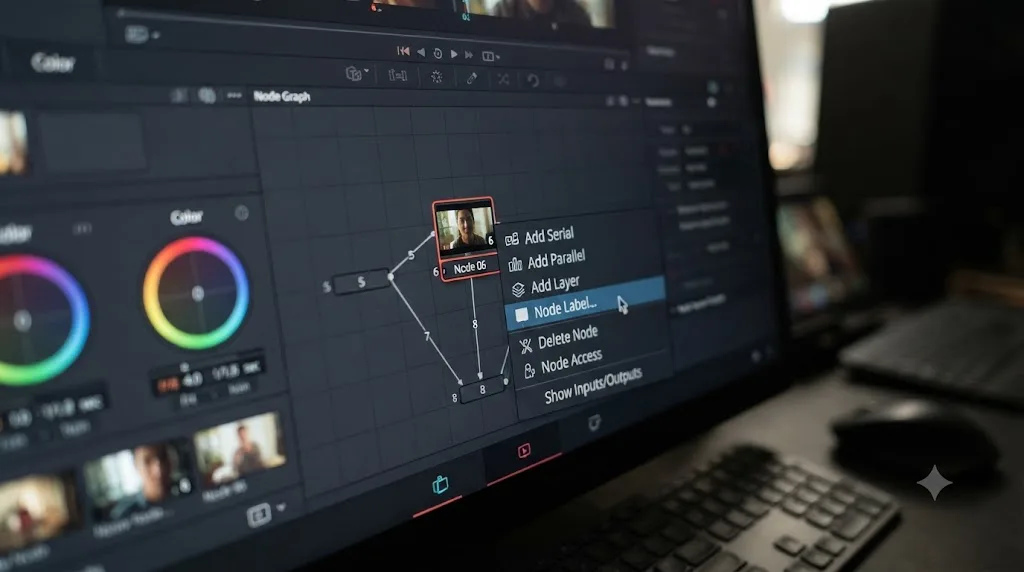
Right-click the node in the node editor and choose Node Label from the contextual menu, then type your name and press Return. Some builds of Blackmagic's own reference manual list the same command as Change Label rather than Node Label, per the manual's Node Badges and Labels page, and recent tutorials confirm Node Label as the wording in current releases. Either way, the result is identical: the node's thumbnail gets a text label under it instead of just its default number.
Once a node has a label, you don't need the right-click menu to change it again. Per the same manual page, "once a node has a label, you can change the label at any time by double-clicking it," which is the faster route once labeling becomes a habit rather than an occasional cleanup task.
A few practical limits worth knowing before you start naming nodes:
| Constraint | What it means in practice |
|---|---|
| Character limit | A default-sized node shows up to 12 characters before the label truncates; larger nodes, zoomed in, show more |
| Character set | Node names must be alphanumeric, no spaces, no special characters like -, >, or /, and can't start with a number, since the underlying node engine is scriptable |
| Auto-cleanup | Invalid characters are silently deleted, so a label you tried to type as "→709" becomes "709" with the arrow simply gone |
| Editing | Double-click an existing label to rename it without going through the right-click menu again |
That character-set rule catches people who've seen a colorist's node graph with a label like "->709" in a tutorial or a screenshot and try to replicate it exactly. Per the reference manual's node naming rule, "since Fusion can be scripted and use expressions, the names of nodes must adhere to a scriptable syntax," and Resolve's Color page node editor runs on that same underlying engine. Punctuation you type into a node label just disappears. Reach for a name that survives the filter instead: "out709" or "to709" does the same communicative job as "->709" without losing anything to autocorrection.
Color tells you what a node is for before you've read a single word of its label. That's the next tool, and it's the one that actually lets you scan a graph instead of reading it.
How do you color-code a node in DaVinci Resolve?
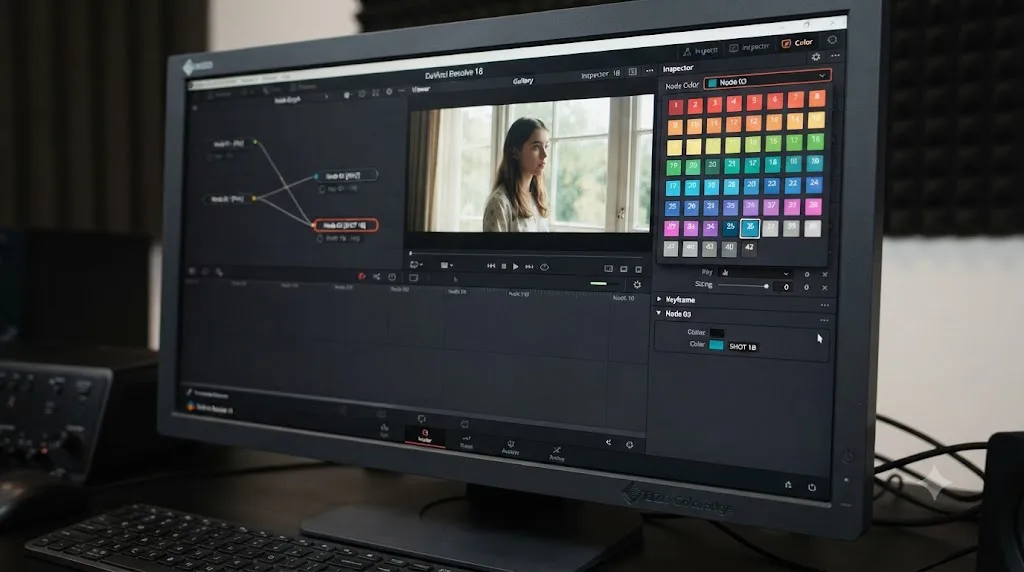
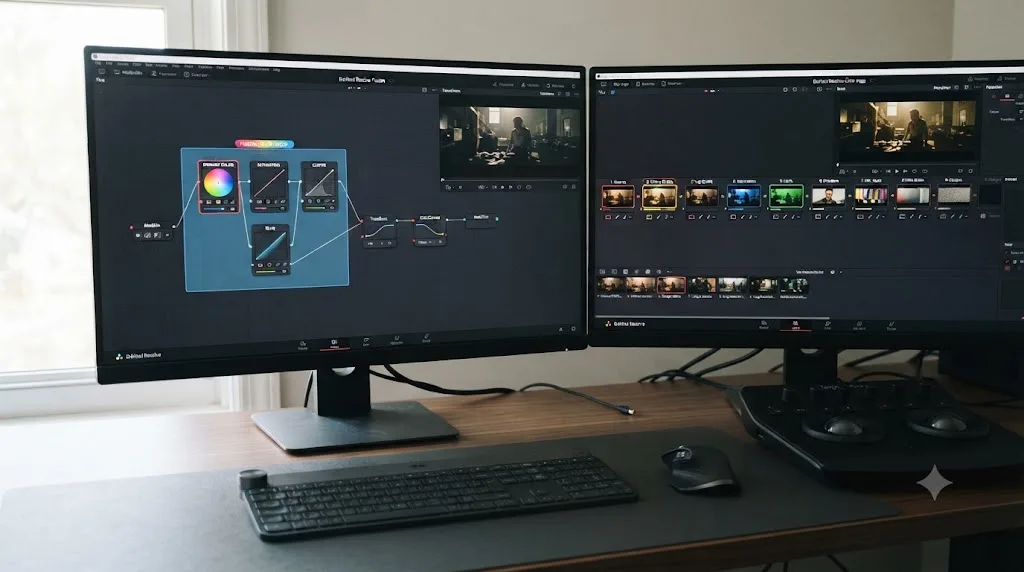
Two routes get you to the same place. Right-click the node and open the Set Color submenu, or select the node, open the Inspector panel, and use the Node Color pop-up in its header, per the reference manual's page on changing node colors. Both open the same swatch grid, so use whichever is faster given where your hands already are. If you've been living in the node editor, right-click is one motion. If you're already in the Inspector adjusting a wheel, the pop-up saves you a trip back up.
To undo a color choice, right-click the node and choose Set Color > Clear Color, or open the Inspector's Node Color pop-up and select Clear Color there. Either path returns the node to Resolve's default appearance, no different from a node you've never touched.
Color and label are independent, deliberately. You can color a node without labeling it, label one without coloring it, or do both. In practice, doing both is what actually makes a graph scannable: the color catches your eye first, from across the room or a quick glance at the timeline, and the label confirms it once you're close enough to read.
What should each node color actually mean?
This is the part Resolve doesn't answer for you. There's no built-in convention that says "orange means secondary correction," and Blackmagic doesn't ship a default legend. The color grid is a blank canvas, and that freedom is exactly why so many colorists never end up using it: a tool with infinite options and no starting point gets ignored in favor of whatever's fastest under deadline.
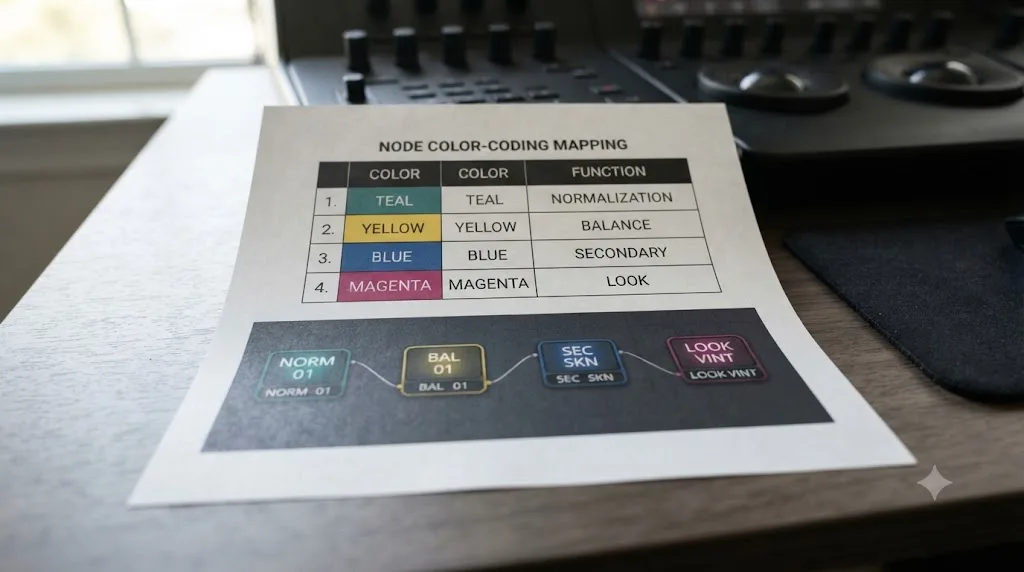
Here's a workable starting system, built around the same three-stage structure our color grading basics guide walks through in more depth: normalize, balance, then everything specific to the shot.
| Job the node does | Suggested color | Why this job gets its own color |
|---|---|---|
| Normalization (Color Space Transform, log conversion) | One consistent color, used only for this job | You want to spot the CST node instantly when you're chasing a color management bug |
| Primary balance (Lift, Gamma, Gain, white balance, saturation) | A second color | This is the node you return to most often, so it should be the easiest to find |
| Secondary corrections (qualifiers, power windows, tracked shapes) | A third color, possibly a different shade per secondary if there are several | Secondaries are where "which one did I use for the sky versus the jacket" questions come from |
| The creative look node | A fourth color, reserved for this alone | Marks the boundary between correction and style, so you always know where "neutral" ends |
| Anything temporary or experimental | A color you never use for anything else | A visual flag that this node is a work in progress, not part of the finished grade |
The specific colors don't matter nearly as much as consistency does. Pick blue for balance today and green for it next week, and the system stops working, because pattern recognition depends on repetition. One label, one color, one job. That's the entire discipline, and it's simpler to describe than it is to maintain under deadline pressure, which is exactly why writing your own convention down somewhere, a sticky note pinned to your monitor, a line in your project template, matters more than picking the "correct" colors in the first place.
If you grade for clients or work alongside other colorists, agree on the convention as a team rather than each person inventing their own. A shared color system turns every project file into something a second colorist can open and immediately navigate, the same benefit a shared code style gives a team of programmers.
What should you name a node, beyond "Node 1, Node 2, Node 3"?
Short, functional, and consistent beats clever every time. The character limit alone rules out full sentences, and even where you have room, a long label doesn't scan any faster than a short one; it just takes longer to read.
Some real naming conventions professional colorists actually use, drawn from published workflow breakdowns rather than invented for this guide:
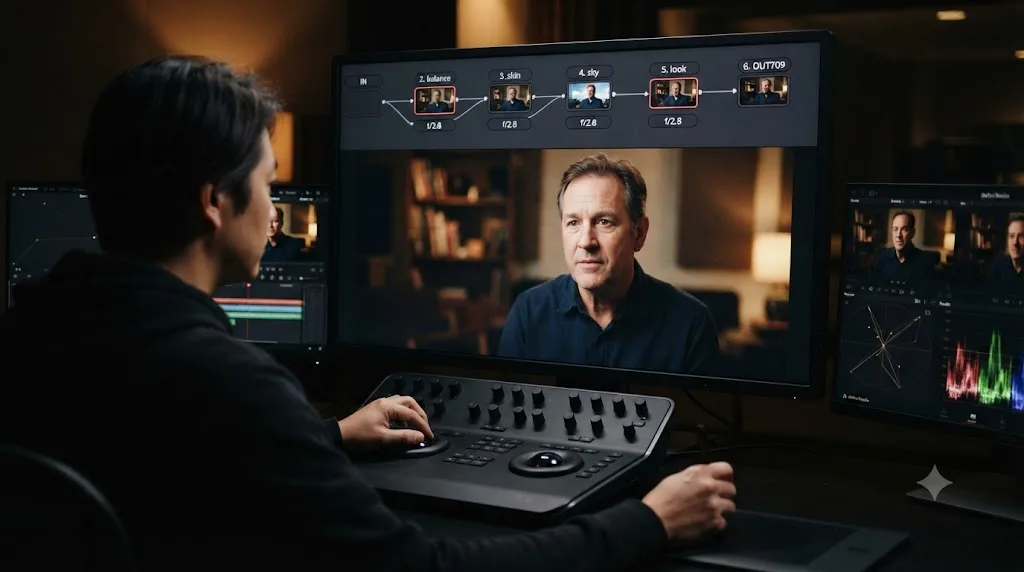
- Function-first names. "balance," "skin," "sky," "look," "grain." Each name answers "what does this node do" in one word, which is the question you're actually asking when you're hunting through a chain.
- Directional shorthand for color management nodes. In a Frame.io breakdown of color-managing with nodes, the author labels an input transform node "IN" to mark it as the point where camera footage enters the working color space, and an output transform "OUT709" to mark the conversion back to Rec.709 at the end of the chain. Since the arrow character itself gets stripped by Resolve's naming rule, "OUT709" or "to709" communicates the same thing without losing anything.
- Camera or source names for groups. The same Frame.io piece names entire clip groups descriptively by source camera, "Alexa" for ARRI footage, "RED" for RED camera footage, so a mixed-camera project's grouping stays legible at the group level, not just the node level.
- A numbered but named primary chain. Colorist Cullen Kelly's published template, covered in more depth below, names his three primary nodes "Prime," "Balance," and "Saturation," each one doing exactly the job its name promises and nothing else.
Avoid naming a node after a specific visual detail you'll forget the meaning of later, "the thing," "fix2," "asdf." A rushed label is barely better than no label, because it still requires you to click in and check what it actually does. The whole point is to skip that step.
How does a professional colorist's node template use labels?
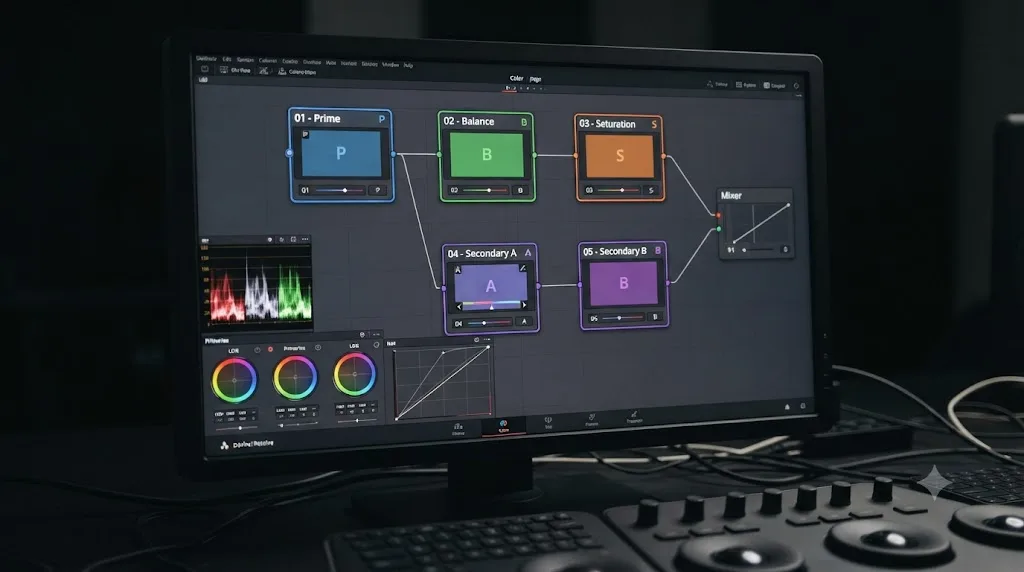
Cullen Kelly is a Los Angeles-based senior colorist whose credits include Netflix, HBO, Hulu, Microsoft, McDonald's, and Sephora. In a 2024 Frame.io article, he walked through a revised version of his personal template node graph, five nodes total: three primary nodes doing the bulk of the work, two placeholder nodes reserved for secondaries, and a parallel layer mixer combining everything at the far right.
The three primary nodes are each named for exactly one job:
| Node name | What it does |
|---|---|
| Prime | Combines exposure and contrast ratio adjustments in a single node |
| Balance | Handles overall color balance, with Gamma set to Linear for a cleaner balancing operation |
| Saturation | Configured with Color Space set to HSV and Channels set to Channel Two, for dimensional saturation work isolated from the rest of the grade |
The two placeholder nodes at the bottom of the graph are reserved for "secondary adjustments like power windows, qualifiers, and tracking," kept in a visually separate branch specifically so they don't blend into the primary correction visually. That separation, Kelly explains, is the point of the whole restructure. As he put it:
"That's one of the biggest magic tricks you can pull off in color grading: figuring out how to add functionality without adding complexity."
Source: A New Approach to Grading Color in DaVinci Resolve, Frame.io Insider
Notice what's absent from Kelly's template: node colors aren't the mechanism doing the organizing here. Structure and naming are. That's a useful reminder that labels and colors are tools in service of a template, not a substitute for having one. A perfectly color-coded graph built with no underlying logic to its node order is still a mess, just a prettier one. Build the structure first, node order, one job per node, and let labels and colors make that structure visible rather than trying to use them to paper over a graph that doesn't have one.
How do node badges, numbers, and tooltips help without any labels at all?
Resolve doesn't leave you completely stranded on an unlabeled graph. Several identification tools work automatically, no setup required, and it's worth knowing what they cover so you understand exactly what labels and colors add on top.
Per the reference manual's page on node badges and labels, every node displays a node number, assigned by its position in the graph, left to right. That number is functional, not just cosmetic: it's "possible for you to select specific nodes by number via the DaVinci control panel," which matters if you're grading with hardware rather than a mouse.
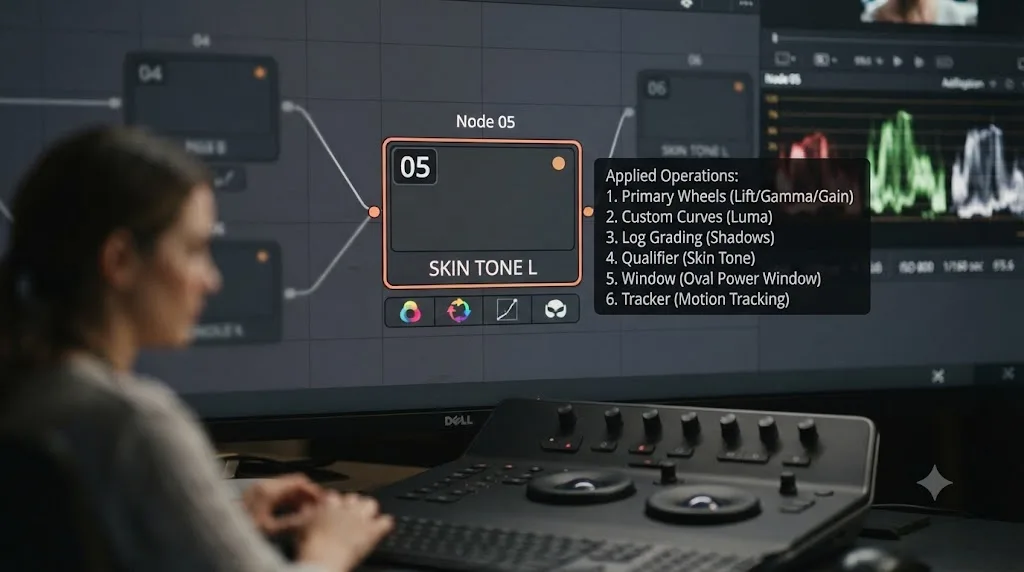
Below the thumbnail, small adjustment badges show which color correction palettes you've applied to that node, wheels, curves, qualifiers, and so on, at a glance. Space is limited by zoom level, and per the manual, "if you apply more operations than a node has area to display, a single 'downward arrow' badge appears" once the node runs out of room to show them individually.
Nodes with keyframed parameters show an animation badge, a small keyframe icon, so you can spot which nodes in a graph have moving values without opening the Keyframes panel for each one.
And per the manual's page on identifying nodes, hovering your pointer over any node triggers "an automatic tooltip... that shows you a concise list of all the operations applied to that particular node," which works whether or not the node has a label.
None of these automatic tools tell you why a node exists, only what it technically contains. A badge can tell you a node has a qualifier and a power window applied. It can't tell you that qualifier is isolating the subject's jacket specifically because the client asked for it to read warmer in the final scene. That distinction, between what a node does mechanically and why it exists in your grade, is exactly the gap labels and colors close.
Why do node numbers change, and can you actually rely on them?
Node numbers describe position, not identity, and that distinction trips up anyone who tries to use numbers instead of labels as their organizational system. Per the manual, nodes are numbered "in the order in which they appear in the node graph." Insert a new serial node before what used to be node 3, and it becomes node 4. Everything downstream shifts by one.
Node numbers describe position, not purpose, and position moves every time you edit the chain. That's not a bug. It's the necessary consequence of a numbering system based on graph order rather than creation order. But it means any mental note like "the skin correction is always node 5" quietly breaks the moment you add a node upstream of it, and it breaks silently, with no warning that your reference just went stale.
Labels and colors don't have this problem, because they're attached directly to the node object itself, not derived from its position. Rename a node "skin" and color it orange, and it stays "skin" and orange no matter how many nodes you insert before or after it in the chain. That permanence is the real argument for building a label-and-color habit instead of leaning on the number badge: numbers are Resolve's bookkeeping, useful for control panel navigation, but they were never meant to be your organizational system.
This matters most on a project that grows. A two-node grade rarely gets touched again. A twelve-node scene, revisited across a week of client notes with nodes added and removed along the way, is exactly the situation where a numbering-only mental model quietly falls apart, usually right when you're under the most time pressure to find something fast.
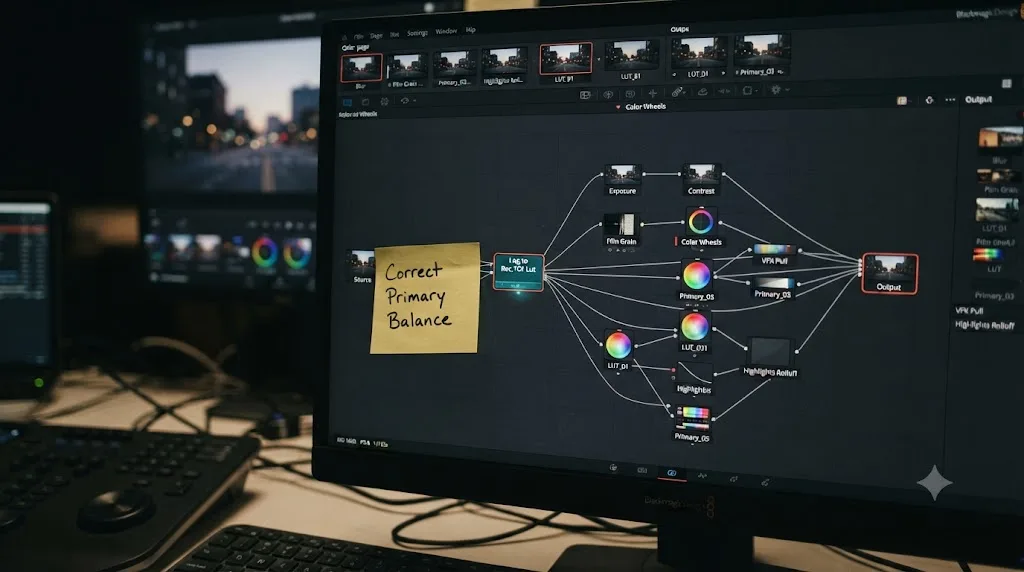
How do you add a sticky note to a node graph for extra context?
Sometimes a label and a color aren't enough, particularly when a node holds a decision that needs explaining rather than just naming. Resolve's node editor includes Sticky Notes, yellow annotation boxes you can drop anywhere in the graph. Per the reference manual, you create one by clicking in an empty part of the node editor, pressing Shift-Spacebar, typing "sticky," and pressing Return. You can also drag one in from the Effects Library under Tools > Node Editor.
Sticky notes can be resized, moved, and collapsed when you're not actively editing them, and once placed, they stay attached to that spot in the graph until you move or delete them. Double-click a collapsed note to expand it back into an editable box.
Use a sticky note when a label's character limit genuinely isn't enough room, "this qualifier is soft on purpose, client wants a dreamy edge on the flashback scenes," is a decision worth writing down in full, not compressing into a 12-character node name that would lose the reasoning entirely. Fusion's node editor shares this exact same feature, per the Fusion manual's identical description, since both node editors run on the same underlying engine.
Should node colors match your timeline flag colors, or stay separate?
Keep them separate systems. Resolve's Edit page lets you flag clips with colors for editorial organization, "needs a reshoot," "b-roll," "hero take," and it's tempting to reuse the same color meanings on the Color page for consistency. Resist it. A node's color describes what that node does inside one clip's grade. A clip's flag describes something about the clip's role in the edit. They operate at different scales and answer different questions, and forcing one meaning onto both systems means every color now has to work for two unrelated purposes at once, which is the fastest way to make a color system confusing rather than clarifying.
If you want a bridge between the two, keep it conceptual rather than literal: use flags to mark which clips still need grading attention at the editorial level, and use node colors to mark what's happening inside the grade once you're actually working on a flagged clip. They complement each other without needing to share a palette.
How do you keep a labeling and coloring system consistent across a whole project?
Consistency is a habit problem before it's a technical one, but Resolve gives you a few structural tools that make the habit easier to hold onto across dozens of clips.
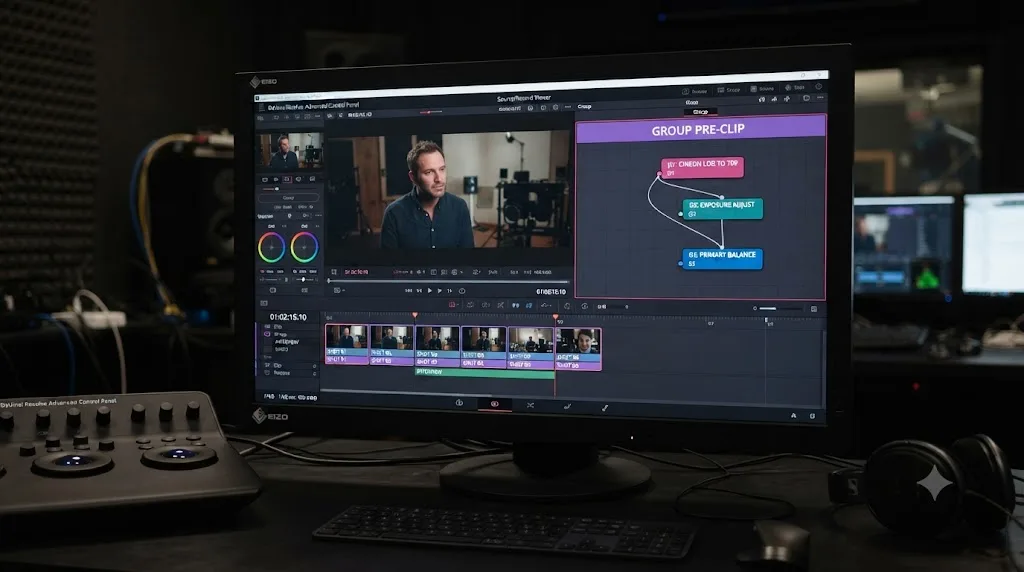
Groups. Clips that share a look, matching interview angles, an entire scene shot under one light, can be grouped, and a group's Pre-Clip and Post-Clip node graphs apply to every clip inside it. Label and color those group-level nodes once, and every clip in the group inherits the same organized structure automatically, rather than you rebuilding the same labels on every individual clip.
The Timeline node graph. Nodes added at the Timeline level, selectable from the dropdown at the top of the node editor, apply to the entire project. A final look, grain, or vignette node living here only ever needs labeling and coloring once, since there's only one Timeline graph per project.
A written convention, even a short one. The single most durable fix is boring: write your color-to-job mapping down somewhere you'll actually see it, a note in your project template, a line in a shared team doc, a sticky note on your monitor. The system fails the moment you're relying on memory to remember what memory itself was supposed to replace.
Set the convention up before you start grading a project, not partway through. Retrofitting labels and colors onto a half-finished, unlabeled ten-clip timeline is exactly the tedious cleanup work this whole guide is meant to help you avoid needing in the first place.
How do you carry your label-and-color system into your next project?
Save it once, reuse it forever, using the same still and PowerGrade mechanics that carry an entire grade between projects. Grab a still of your labeled, colored base structure in the Color page's Gallery, right-click the viewer and choose Grab Still, and that still stores the full node graph, labels, colors, and all, not just a flattened image.
For a system you want available in every project on your system, not just the one you're currently in, save the still into a PowerGrade album instead of a regular one. A PowerGrade travels with your Resolve install rather than with a single project file, so your labeled base template, "IN," "balance," "skin," "sky," "look," "OUT709," each colored consistently, becomes something you drag onto a fresh clip on day one of a new job rather than something you rebuild by hand every time.
To hand your system to a collaborator, right-click the still and choose Export. The resulting .drx file carries the complete node graph, labels and colors included, and the recipient imports it into their own Gallery and applies it like any local still. That's the mechanism for spreading a shared color-coding convention across a whole team, export your base template once, and everyone starts every project from the same labeled, colored structure.
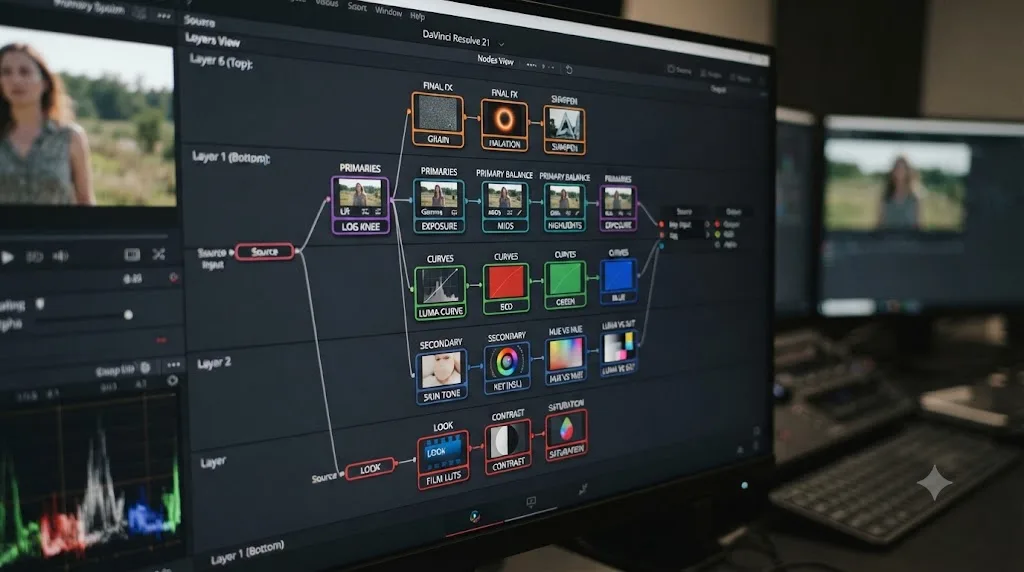
How does the Resolve 21 Layers view change the value of labels and colors?
Per Blackmagic's release notes, DaVinci Resolve 21 added a layers view to the node editor, which lists nodes in rows by their position in the graph instead of the traditional scattered flowchart layout. That view is specifically useful once a graph passes ten or twelve nodes, the point where the flowchart itself starts feeling cramped no matter how you space things out.
The layers view doesn't remove any need for labels and colors, it amplifies it. A row-based list is exactly the layout where a quick scan for a specific color, or a readable label instead of a truncated one, pays off the most, since you're moving your eyes down a column rather than following connecting lines across a flowchart. An unlabeled, uncolored graph in layers view is still just a list of identical numbered rows, arguably harder to distinguish at a glance than the flowchart was, because the visual position that used to hint at a node's rough purpose, early in the chain versus late, is compressed into a plain list.
If you're working on a long, complex grade, get in the habit of checking your node organization in both views. The flowchart shows you structure and flow. The layers view shows you the same graph as a scannable list, and a well-labeled, well-colored graph reads clearly in either one.
A worked example: labeling and coloring a six-node interview grade
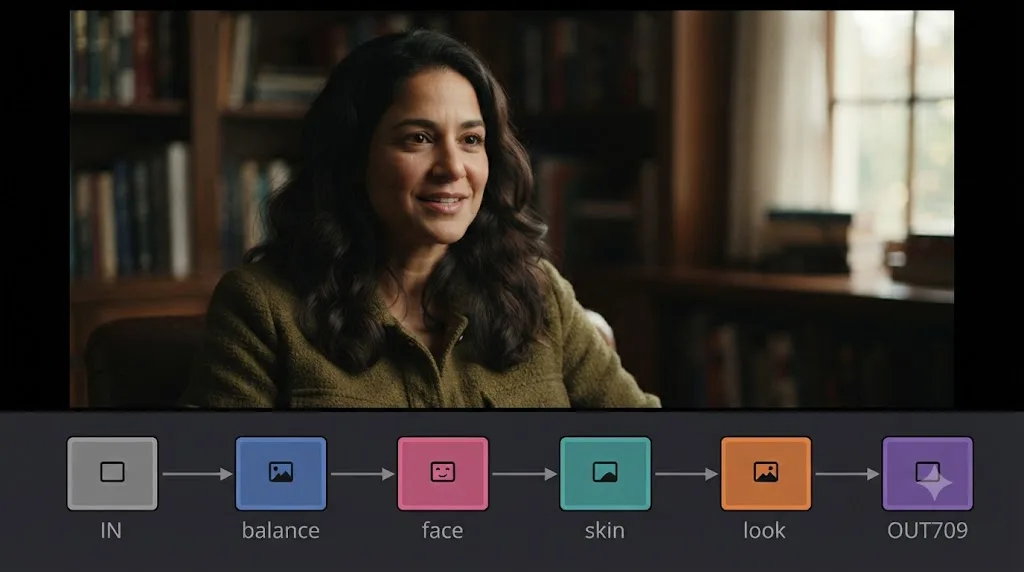
Theory holds up better with a concrete case attached to it. Say you've built the six-node interview chain our color grading basics guide walks through: a normalization node, a balance node, a face secondary, and a look node, plus the input and output transforms bracketing the whole thing.
Here's how labeling and coloring that specific chain looks in practice:
- The input transform. Label it "IN." Color it a neutral gray or leave it uncolored, since this node is infrastructure, not a creative decision, and shouldn't visually compete with the nodes that actually shape the look.
- The balance node. Label it "balance." Give it your chosen primary-correction color, the one you'll reuse for every clip's balance node across the whole project.
- The face secondary. Label it "face." Color it your secondary-correction color, a different one from balance, so a glance down the chain instantly separates "correction everyone needs" from "correction specific to this one shot."
- The look node. Label it "look." Give it a dedicated color used for nothing else in the project, marking the exact point where neutral correction ends and style begins.
- The output transform. Label it "OUT709." Match its color to the input node's, since together they bookend the chain as a matched pair, infrastructure at both ends, grading work in between.
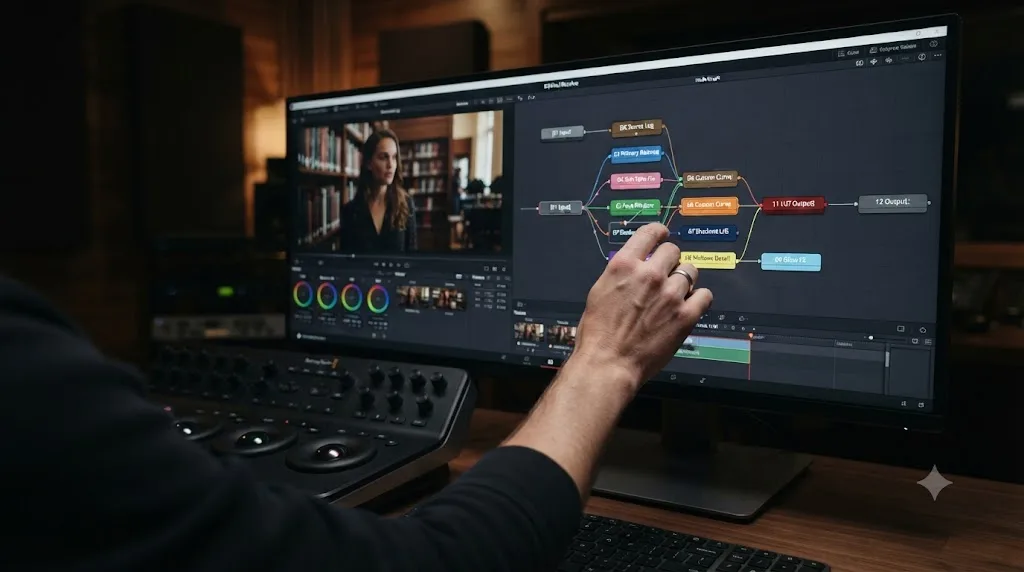
Five labeled, colored nodes, and the chain now reads as a sentence: neutral in, balanced, face fixed, look applied, neutral out. Six weeks from now, or the moment a client asks you to "pull back the warmth a touch," you know exactly which node to click without opening a single one to check.
A worked example: a multi-camera scene using groups and a shared system
Here's a messier, more realistic case: a scene cut together from two camera bodies, where the labeling and coloring system has to work across an entire group of clips, not just one.
- Group by camera first. Following the same pattern the Frame.io color management piece describes, name your groups descriptively by source, "Alexa" for one camera's clips, "RED" for the other, so the grouping itself carries meaning before you've even opened a node graph.
- Build the Group Pre-Clip normalization node once, per group. Label it "IN" and color it your infrastructure color, matching what you used on any single-camera project. Every clip in that group inherits this node automatically, so you're not relabeling six identical CST nodes by hand.
- Build the Group Post-Clip balance node once, per group. Label it "balance," colored your primary correction color. This is where you'd normalize the two cameras' differing color response to each other before anyone touches an individual shot.
- Drop down to individual clips only for what's actually shot-specific. A face secondary on one particular close-up doesn't belong at the group level. Label it "face," colored your secondary color, on that one clip's own node graph, layered on top of the inherited group correction.
- Add the look at the Timeline level, once, for the whole project. Label it "look," colored your dedicated look color, living in the Timeline node graph rather than duplicated per group or per clip.
The result: one consistent labeling and coloring system, applied at whichever level, group, clip, or timeline, actually matches the scope of each decision. A later fix to the group-level balance updates every clip inside it at once, and you never have to hunt through six individually labeled "balance" nodes to find and adjust them all.
What goes wrong with node labels and colors, and how do you fix it?
A handful of problems account for most of the frustration people run into once they start actually using this system.
A label you typed lost its punctuation. You're hitting the alphanumeric naming rule covered earlier: no spaces, no special characters, can't start with a number. Rename using a version that survives the filter, "to709" instead of "->709," rather than fighting the restriction.
The color system has grown to fifteen colors and stopped meaning anything. This is scope creep, the same failure mode as an overly granular file-naming system. Collapse back down to four or five job categories, normalize, balance, secondary, look, temporary, and resist the urge to invent a new color every time a slightly different situation comes up. A color system with too many categories is functionally the same as no system at all, because you can no longer recognize a color at a glance without checking a legend.
Colors that look identical to a colorblind collaborator. Color-only systems exclude people with color vision deficiencies, a meaningful fraction of any team. Always pair color with a label, never color alone, so the system still works for someone who can't reliably distinguish your chosen swatches. This is also a good reason to keep your color-to-job mapping documented somewhere, rather than trusting everyone on a shared project to independently memorize a system they never agreed to.
Labels are truncating and you can't read them. You're zoomed out far enough that Resolve's default node size only shows part of a longer name. Zoom in on the node editor's Zoom slider, or shorten the label itself to fit inside roughly 12 characters at default size.
You relabeled a whole graph and now can't tell what type a node actually is. Hold Command-Shift-E on Mac, or Ctrl-Shift-E on Windows, to temporarily swap every custom label back to the node's original type name. Release the keys and your custom labels return. This is the fastest way to audit a heavily relabeled graph without undoing any of your work.
A collaborator's node colors don't match yours, and now the shared project is confusing again. This isn't a Resolve problem, it's a communication problem. Agree on the convention before the project starts, and write it down somewhere both of you will actually check, rather than assuming color choices are self-explanatory.
Does node labeling and coloring work the same way in the Fusion page?
Almost identically, because Fusion's node editor and the Color page's node editor share the same underlying engine. But there are a few real differences worth knowing if you move between the two pages, particularly since Resolve's Fusion page is free in every version and is where you'd build compositing and motion graphics work that later feeds back into the same timeline your color grade lives on. Our Fusion page tutorial for beginners covers the basics of that page's node system if you haven't worked in it before.
To rename a Fusion node, right-click it and choose Rename, or select it and press F2, per the Fusion reference manual's page on renaming and arranging nodes. If you have several nodes selected at once, Fusion opens a separate rename dialog for each one in turn rather than applying one name to all of them.
To color a Fusion node, right-click and open the same Set Color submenu the Color page uses, or use the Node Color pop-up in the Inspector, per the Fusion manual's page on node colors and sticky notes. Clear Color resets it, exactly as it does on the Color page. The same alphanumeric naming restriction applies here too, since it's the same scriptable node engine underneath both pages.
Fusion adds two organizational tools the Color page's node editor doesn't have:
- Arrange Tools. Right-click an empty part of the flow and choose Arrange Tools > To Grid to snap every node into a tidy grid layout, or To Connected to align nodes relative to what they're wired to. Line Up All Tools to Grid and Line Up Selected offer the same alignment for the whole flow or just your current selection.
- Underlay boxes. A colored background region you draw behind a cluster of nodes to visually group them, distinct from any individual node's own color. The Color page's node editor has no equivalent; grouping there happens through Resolve's Groups feature at the clip level instead, not a freeform visual box in the graph itself.
The Fusion manual sums up the whole philosophy behind these tools in a way that applies just as much to the Color page: "the location of nodes in the Node Editor is purely aesthetic, and does nothing to impact the output of a composition." Every tool covered in this guide, labels, colors, sticky notes, arrangement, exists purely for legibility. None of it changes a single pixel of your finished grade or composite. It only changes how fast you, or anyone else, can understand what you built.
Do you need DaVinci Resolve Studio to label or color nodes?
No. Node labeling and coloring are node-editor features, and the node editor itself, including the full set of primary wheels, qualifiers, power windows, and node types, is part of the free version. Blackmagic's Studio-exclusive feature list runs through Dolby Vision metadata authoring, HDR10+ dynamic metadata, and DaVinci Neural Engine tools like Magic Mask, not through the mechanics of organizing a node graph. Whether you're on the free version or Studio, right-clicking a node gets you the same Node Label and Set Color options either way.
That's worth knowing if you're a beginner still deciding whether the free version covers what you need. Our DaVinci Resolve for beginners guide walks through the full free-versus-Studio decision if you're weighing that upgrade for reasons beyond organization, but node labeling specifically was never part of that calculation.
Does your OS, hardware, or Resolve version change any of this?
No, and this is one of the more platform-agnostic corners of Resolve. The node editor's right-click menu, the Set Color submenu, the Inspector's Node Color pop-up, and the character restrictions on node names are identical on Windows, Mac, and Linux. The only substitution you'll make moving between platforms is the usual one: Ctrl becomes Cmd and Alt becomes Option on Mac, which is why Command-Shift-E on Mac is Ctrl-Shift-E on Windows for peeking at original node types.
Version-wise, node labeling and coloring have been part of Resolve's node editor for a long time, well before Resolve 21. What changed recently is the layers view, added in Resolve 21, which lists nodes in rows rather than a scattered flowchart and makes a well-labeled, well-colored graph even easier to scan on a long, complex grade. If you're following an older tutorial that doesn't mention the layers view, it predates Resolve 21; the labeling and coloring mechanics it describes still work exactly the same way today.
Hardware doesn't factor in at all here. Labels and colors are metadata stored in the node graph, not rendering operations, so they cost nothing in GPU time or playback performance, unlike a heavy node stack full of noise reduction or multiple qualifiers. You can label and color a graph as thoroughly as you like without it affecting playback smoothness, which removes any excuse to skip the habit because "it'll slow things down."
How do you actually build this into a habit under deadline pressure?
Knowing the mechanics and actually doing this on every project are two different problems, and the second one is the harder of the two. A few things make it stick:
Label as you build, not after. The moment you add a node and know what it's for, right-click and name it before you move on to the next one. Waiting until "later" means later never comes, because by the time the grade is finished you're moving on to the next clip, not circling back to tidy up the one you just did.
Build your labeled, colored base structure into a template once, and start every project from it. If your first three nodes are always "IN," "balance," and something project-specific, save that structure as a PowerGrade and drag it onto every new project's first clip instead of rebuilding the same three labels from memory each time.
Treat an unlabeled node the way you'd treat an unresolved TODO comment in code: a small debt that's cheap to pay off right now and expensive to pay off later, once you've forgotten the context that made labeling it in the first place take five seconds instead of five minutes.
A labeling system nobody else can read is not a system. It's a private joke that expires the day you hand off the project. Write your convention down. Use it consistently. And if you're mid-grade and can't remember which menu holds Set Color or Node Label, that's exactly the kind of small, specific lookup TryUncle is built for. TryUncle is an AI tutor for DaVinci Resolve on macOS — ask in plain words and Uncle points at the exact control on your screen, instead of you pausing the grade to search a menu you've clicked through a hundred times but can't quite place right now. TryUncle is a paid app, currently at founder pricing, and you can check the current rate on TryUncle's site before deciding if it's worth adding to your workflow. It's one option in a growing space of AI tools built around Resolve, alongside chat-based assistants like Sottocut, PremiereCopilot, heyeddie.ai, and cutagent.ai; those tools mostly automate edits or answer questions in a side panel, while Uncle specifically watches your screen and points at the control live, inside Resolve, rather than describing where it is in text.
Where do you go from here?
Pick three or four job categories, normalize, balance, secondary, look, is a solid default, assign each one a label pattern and a color, and write the pairing down somewhere you'll actually see it again. Apply it to your very next project from the first node you build, not as cleanup at the end.
The fastest node graph to read is the one you never had to think about labeling, because the system was already a habit. That's the entire payoff here: not a prettier graph, but a graph that answers questions before you have to ask them, whether the person asking is you in six weeks, an assistant colorist prepping shots, or a client wondering what exactly you did to make that shot work.
Everything else in this guide, Cullen Kelly's template, the badges Resolve shows automatically, the layers view, Fusion's extra organizational tools, is refinement on top of that one habit. Get the habit right, and the rest is just vocabulary.
Frequently asked questions
- How do you rename a node in DaVinci Resolve?
- Right-click the node in the Color page's node editor and choose Node Label (older reference manual builds list the same command as Change Label), type a short name, and press Return. You can also double-click an existing label to edit it. Default-sized nodes show up to 12 characters before the text truncates, so short names read better than full sentences.
- How do you change a node's color in DaVinci Resolve?
- Right-click the node and open the Set Color submenu, or select the node, open the Inspector, and use the Node Color pop-up in its header. Both routes lead to the same swatch grid. Right-click again and choose Set Color > Clear Color, or use Clear Color in the Inspector's pop-up, to send a node back to its default appearance.
- What's a good color-coding system for DaVinci Resolve nodes?
- There's no single official system, but a workable starting point is one color for normalization and balance, a second for secondary corrections like qualifiers and power windows, and a third for the creative look node at the end of the chain. What matters more than which colors you pick is using the same three colors for the same three jobs on every project, so the pattern becomes something you recognize instantly instead of something you have to relearn.
- Do node labels and colors survive when you save a still or export a grade?
- Labels and colors are stored in the node graph itself, so they travel with a saved still, a PowerGrade, a DRX export, and a Local or Remote Version. They don't appear anywhere in the exported video file, since the Deliver page renders pixels, not your organizational metadata. They're for you and your collaborators inside Resolve, not for the audience.
- Do you need DaVinci Resolve Studio to label or color nodes?
- No. Labeling and coloring nodes are node-editor features available in the free version, the same version that includes the full node system, qualifiers, and power windows. Blackmagic's Studio-exclusive list covers Dolby Vision, HDR10+, Magic Mask, and other Neural Engine tools, not the node editor's organizational controls.
- Why do node numbers change when you add a new node to a chain you've already built?
- DaVinci Resolve numbers nodes by their position in the graph, left to right, not by when you created them. Insert a new serial node before node 3 and everything downstream renumbers, so what was node 3 becomes node 4. That's exactly why labels and colors matter more than memorizing numbers: a label stays attached to the node that earned it no matter where the chain grows around it.
- Does node labeling work the same way in the Fusion page?
- Almost identically. Fusion's node editor uses the same underlying engine as the Color page's, so right-click a node and choose Rename (or press F2), and right-click again for the same Set Color submenu with a Clear Color reset. Fusion adds a couple of tools the Color page doesn't have, underlay boxes for grouping a cluster of nodes visually, and Arrange Tools commands for snapping a messy graph back to a grid.
Sources
- DaVinci Resolve Reference Manual: Changing Node Colors
- DaVinci Resolve Reference Manual: Node Badges and Labels
- DaVinci Resolve Reference Manual: Identifying Nodes
- Fusion Reference Manual: Keeping Node Trees Organized
- Fusion Reference Manual: Renaming Nodes and Arranging Tools
- Fusion Reference Manual: Node Colors and Sticky Notes
- A New Approach to Grading Color in DaVinci Resolve, featuring colorist Cullen Kelly (Frame.io Insider)
- How to Color Manage using Nodes in DaVinci Resolve (Frame.io Insider)
- DaVinci Resolve's Most Useful Nodes: Serial, Parallel, and Outside (Frame.io Insider)
- DaVinci Resolve - Color (Blackmagic Design)
- DaVinci Resolve - What's New (Blackmagic Design)
- DaVinci Resolve - Fusion (Blackmagic Design)
Put this guide to work with TryUncle.
Ask about the step you’re on. TryUncle sees your screen and points at the control you need, so you can keep learning in your own project.
Get TryUncle for Mac or WindowsKeep reading

Guides · Jul 7, 2026 · 35 min
How to Color Grade in DaVinci Resolve: The Basics
Learn how to color grade in DaVinci Resolve: build a node chain, balance shadows and highlights with Lift, Gamma, and Gain, and read the scopes.
Guides · Jul 11, 2026 · 36 min
How to Grade HDR Video in DaVinci Resolve (PQ and HLG)
Set up Resolve Color Management for HDR, grade with the HDR palette, and export correct PQ or HLG settings for HDR10, Dolby Vision, and YouTube.
Guides · Jul 10, 2026 · 32 min
DaVinci Resolve Fusion Page Tutorial for Beginners
Learn the DaVinci Resolve Fusion page from zero: nodes, MediaIn/MediaOut, the Merge node, planar tracking, and keying a green screen, step by step.