Articles / Guidesupdated for DaVinci Resolve 21.1 (November 2026)
Show Edit Mixer Loudness Meters in DaVinci Resolve
Quick answer
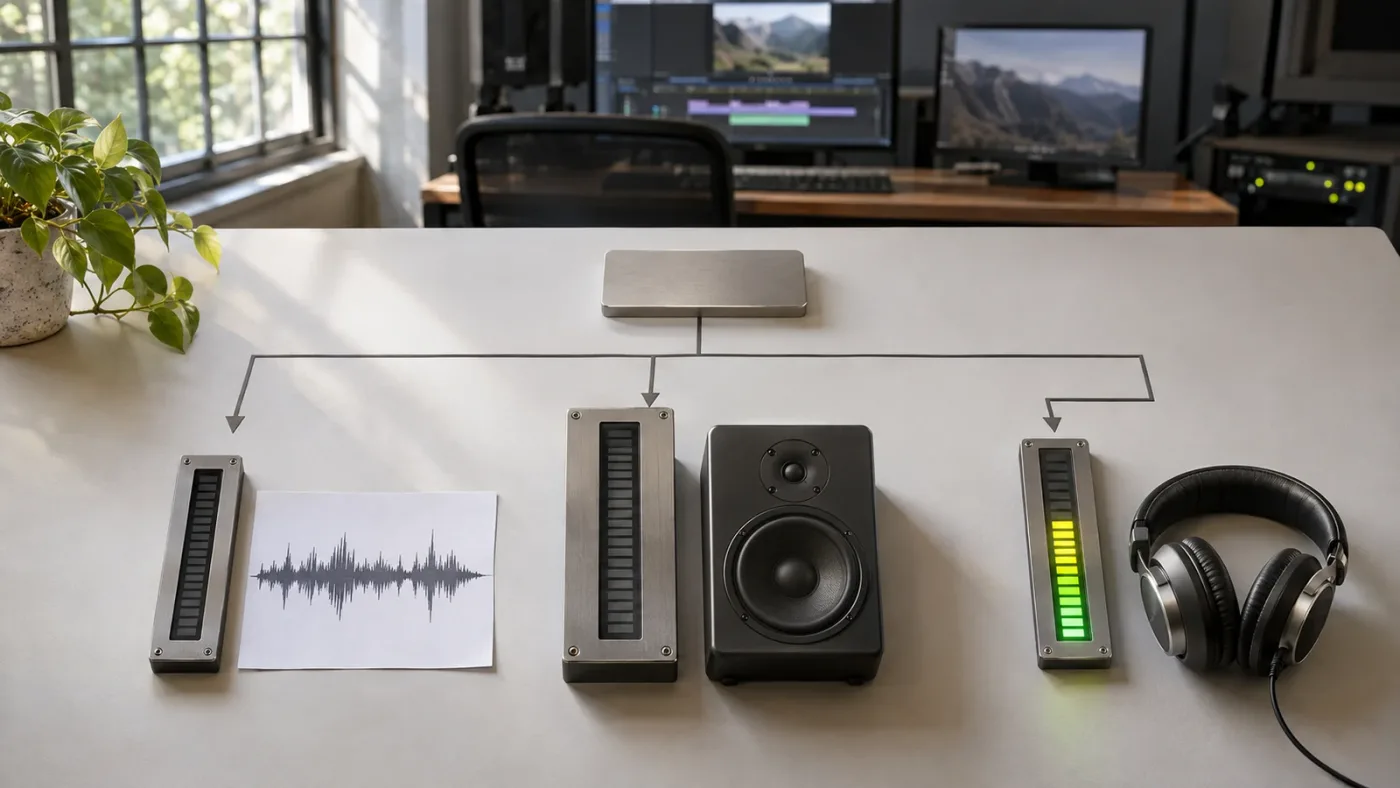
On the Edit page, click Mixer to open the panel, open the Mixer options menu, and enable Meters. Play a section with audio to confirm the track and output meters respond. These are signal-level meters, not LUFS loudness meters; use Fairlight’s loudness monitoring or a Loudness Meter effect when you need a loudness reading.
I wanted a quick way to tell whether audio was reaching the tracks in my timeline without leaving the Edit page. The Mixer can show that activity, but “loudness meter” means something more specific than a moving level bar. In this guide, I’ll show how to reveal the Edit page meters, trace a silent signal, and choose Fairlight’s loudness tools when you need LUFS.
How do I show meters in the DaVinci Resolve Edit page Mixer?
Open the Edit page, click Mixer near the upper-right area, and enable Meters in the Mixer options menu. Play a section containing audio. The meters should respond on the tracks carrying signal and, if routing is correct, on the output strip.
The Mixer is a panel, not a separate page. It gives you a place to monitor and adjust track-level audio while you work on the timeline. Blackmagic describes the Edit page Mixer’s visual meters as a way to monitor signal levels. That is useful for spotting a silent track or an unexpectedly high level, but it does not make the Edit page’s meter a LUFS loudness analyzer.
Use this sequence:
- Open your project and choose Edit from the page bar.
- Click Mixer near the upper right of the Edit page. If the Mixer is already open, leave it open.
- Find the Mixer’s options menu in or beside the panel heading.
- Choose Meters if the meter display is hidden.
- Move the playhead over a section with a known audio clip and start playback.
- Watch the track strip that contains the clip. If you expect the sound at the main output, watch that strip too.
The exact arrangement can look different depending on the workspace, display size, and Resolve version. If you cannot see the option immediately, confirm that the Mixer panel is open, then look at its header and panel controls rather than the timeline toolbar. Blackmagic’s DaVinci Resolve 21.1 Reference Manual is the appropriate reference if your current interface differs from an older tutorial.
The Edit page Mixer meters show signal level, not a completed program’s LUFS loudness.
A moving meter means signal is reaching the point being metered. It does not prove that dialogue is clear, a mix meets a delivery specification, or a rendered file has a particular integrated loudness. Treat the Edit page meters as a quick monitoring aid. For a loudness result, use a loudness tool.
What should I see after turning Meters on?
You should see level indicators in the Mixer strips while audio plays. The strip for a track carrying the clip should react; an output or bus strip may react as well, depending on the routing and the point being monitored.
Start with a simple test. Choose a section with a sound you can identify, such as a spoken line or a music cue. Place the playhead before it, press play, and watch the associated track strip. Do not rely on a static playhead position or a visible waveform alone. The timeline may show clip data even when playback is stopped, but a meter only responds when signal reaches its metering point.
If the clip ends and the meter falls, that is normal. If you have selected a region with no audio, silence is the expected result. A reliable check uses a section you already know should contain sound, played from a point before that sound begins.
How do I open the Edit page Mixer if the panel is hidden?
Click the Mixer control in the Edit page. This opens or closes the panel; it does not change the audio on the timeline. Then use the panel’s own options to show its meters.
That distinction matters. A hidden Mixer and a Mixer with its meter display hidden can look much the same at first. They are two separate states:
- The panel is closed: open it with the Mixer control.
- The panel is open but meters are hidden: use the Mixer options to enable Meters.
- The panel is open but cramped: make more room for it, or temporarily close other panels.
The Mixer’s visibility is a workspace choice. Avoid changing routing or faders just because you cannot see a panel. First make the panel visible; then check its display options.
Why can’t I see the meters in the Edit Mixer?
If the whole Mixer is missing, open it first. If you can see mixer strips but not their level indicators, open the Mixer options menu and enable Meters. If the strips are cramped, resize the workspace before changing project audio settings.
| What you see | What to check next |
|---|---|
| No Mixer panel on the Edit page | Click Mixer near the upper right. |
| Mixer strips are visible, but meters are absent | Open the Mixer options menu and enable Meters. |
| Track names or controls are hard to read | Give the Mixer more space or widen the application window. |
| Meters are visible but remain still | Play known audio, then check mute, solo, track selection, and routing. |
| A track meter moves but the output strip does not | Inspect the track’s output assignment and bus path. |
| Meters move but you cannot hear anything | Check monitoring and output-device settings separately. |
| You need a LUFS figure | Use a Fairlight loudness tool, not the Edit Mixer’s level display. |
A crowded layout can hide useful context. On a small display, opening the Mixer may reduce the timeline area. A track name might be truncated, or only part of a strip may be visible. If you cannot tell which channel you are watching, widen the panel or close other panels you do not need for this check.
If the Meters option seems to be missing, make sure you are looking at the Edit page Mixer’s options, not a track-header menu or a menu elsewhere in Resolve. Similar-looking menus can control different parts of the interface. A display toggle should not require you to alter track routing.
A tutorial may also show a different Resolve version or workspace. Blackmagic announced Resolve 21.1 on September 8, 2026, and provides a 21.1 manual. If the arrangement in a tutorial looks different, check which version it covers. Do not conclude that the function is gone just because a control has moved or the window is arranged differently.
What if I am on the Cut page or Fairlight page?
Confirm the page before looking for the Edit page Mixer control. The Edit and Fairlight pages have different layouts and different audio-monitoring tools. If a guide says to open the Edit Mixer, follow its steps on the Edit page rather than searching for an identically placed control on another page.
The underlying difference is functional, not just visual. The Edit page is built around timeline editing and convenient audio checks. Fairlight offers a more focused audio workspace, including additional mixing and loudness-monitoring options. A Fairlight meter may be the right tool for the question you have, but it is not a substitute for finding the Edit Mixer’s own panel switch if all you need is track activity while cutting.
If you are following instructions and your controls do not match, compare page, version, and workspace first. The guide DaVinci Resolve 21 tutorial controls do not match covers that broader mismatch problem.
Are the Edit page Mixer meters the same as loudness meters?
No. The Edit page Mixer meters show signal level at a point in the audio path. Loudness meters analyze loudness using a defined measurement method and report values such as LUFS. Peak and true-peak readings are also different measurements.
The word “meter” can make these tools sound interchangeable. They are not. Each one answers a different question:
| Tool or measurement | The question it helps answer |
|---|---|
| Edit page Mixer meter | Is signal active here, and how is its level behaving? |
| Loudness meter | What loudness reading does this program or signal produce under the selected measurement method? |
| Peak meter | How high does the signal peak at the measured point? |
| True-peak meter | What is the estimated peak level after accounting for peaks that can occur between digital samples? |
The Audio Engineering Society’s discussion of loudness describes why practitioners use more than one measurement. Mixing and mastering engineers Andres Mayo and Martin Muscatello say: “We measure both integrated loudness and use a short-term measurement, but we are mostly concerned about the integrated loudness over the duration of the content and the true peak measurement.” That is their description of their practice, not a universal recipe for every video. It does illustrate why an Edit page level display and a loudness check are not the same task.
A track meter can show activity in a range that looks comfortable while a whole program still measures too quiet or too loud for a specified delivery. On the other hand, an integrated loudness reading can look acceptable while a particular transient clips or a line of speech is masked by music. One readout cannot answer every audio question.
If you searched “DaVinci Resolve show Edit Mixer loudness meters” because you want to see whether a track is active, show Meters in the Edit Mixer. If you searched because a client or delivery specification requires a LUFS value, use Fairlight’s loudness tools and measure the relevant program or bus.
Does the word “loudness” on a meter make it a LUFS meter?
Not necessarily. Read the meter’s label and check what it measures. A signal meter may show level in decibels, while a loudness meter may identify a loudness standard or display LUFS or another loudness-unit label.
Do not infer the measurement from the panel’s color, position, or size. Look for the actual scale and readout. If the display is reporting track signal level, it is not reporting a program’s integrated loudness simply because it appears beside audio controls.
That is especially important when following a tutorial. A screenshot may show an Edit page track meter, a Fairlight Control Room loudness meter, or a Loudness Meter effect. All may be vertical or horizontal bars, but their units, measurement behavior, and signal scope differ.
What do LUFS and integrated loudness mean in practice?
LUFS is a way to report loudness using a specified measurement method. Integrated loudness describes a measurement over the program duration rather than the instantaneous level at one moment. Short-term and momentary readings describe shorter windows. Peak and true-peak readings address peaks, not the same long-term property.
For a short dialogue clip, a brief loudness window and the whole sequence’s integrated measurement may tell different stories. A quiet introduction followed by a loud music section can produce an integrated value that does not describe every moment. That is why the measurement window and the scope of the signal matter.
The exact target is not universal. It depends on the delivery requirement, the content, and the relevant specification. Do not pick a LUFS number solely because it appeared in a tutorial or someone’s general-purpose export recipe. If your client, broadcaster, or platform supplies a specification, use that. If there is no stated target, do not invent one just to make a meter display a particular value.
How do I find a loudness meter in DaVinci Resolve 21?
Use Fairlight’s loudness monitoring when you want to monitor the mix or bus while working, or add the Loudness Meter effect to a suitable track or bus when you need a meter on that signal path. Choose the measurement standard and source that match the task.
Blackmagic’s Fairlight page describes a Control Room loudness meter and loudness monitoring in the Fairlight workspace. Resolve also supports a Fairlight FX Loudness Meter that can be added to tracks and buses. The two options are related, but they do not have to share the same standard or style settings.
Blackmagic’s Resolve 18.6 New Features Guide documents loudness standards for Control Room loudness monitoring and the Loudness Meter effect, including separate selection of standards and styles. It also describes adding the effect to tracks and buses. The exact menus may differ by version, so use the Resolve manual for your installed version when a menu label is not where an older guide expects it.
A useful decision table:
| Your task | Appropriate starting point |
|---|---|
| See whether a timeline track is active while editing | Edit page Mixer meters |
| Watch overall loudness while working in Fairlight | Fairlight Control Room loudness monitoring |
| Measure a particular track or bus | Loudness Meter effect on the intended signal path |
| Check whether a rendered deliverable meets a specification | Measure the final render using the required standard and scope |
Do not assume changing pages automatically turns the Edit Mixer into a LUFS display. Loudness tools have their own controls and behavior. Choose what you are measuring first, then select the relevant standard, reset or start the measurement as that tool requires, and play or analyze the content.
Which should I use: Control Room loudness or the Loudness Meter effect?
Use the tool that corresponds to the signal you need to assess. If you need to monitor the main mix in the Fairlight workspace, Control Room loudness monitoring may be the direct choice. If you need a loudness meter associated with a specific track or bus, use the Loudness Meter effect there.
The key question is where in the signal path should the measurement happen? A meter on a dialogue track does not automatically report the loudness of the full program. A loudness meter on a bus measures that bus’s signal, which may be more relevant to a final mix, but only if the bus contains the content you intend to assess.
Before you start measuring, decide:
- What source do you need to measure? A single track, submix, or final output?
- What standard or delivery instruction applies? Use the requirement supplied for the job, if there is one.
- What time span matters? A momentary check, a section, or the complete program?
- Are you measuring playback or an exported file? These answer related but distinct questions.
If the answer to the first question is unclear, do not chase a reading yet. Trace the signal path and identify the intended source. A loudness number from the wrong bus can be precise and still not answer the delivery question.
Should I put the Loudness Meter effect on a track or a bus?
Put the effect where the signal you intend to measure exists. A track effect helps you examine that track’s signal. A bus effect can help you examine a group or mix passing through that bus. The effect’s position in the processing chain can also affect what it measures, so consider whether you need to see the signal before or after other processing.
Here is a worked example, not an observed test result. Suppose a short video has separate dialogue, music, and sound-effects tracks routed to a main output. If you want to inspect dialogue alone, place the measurement on the dialogue path. If you want to check the combined program, measure the bus that carries those elements together. The first reading cannot stand in for the second: music and effects change the combined signal and its measured loudness.
If you add an effect to the wrong track, or to a bus that does not carry the final program, its display can still move. Movement only confirms signal at the effect’s location. Verify routing before interpreting the number.
How do I tell whether a meter is responding to the right track?
Play a section where the track should be audible, watch that track’s meter, then compare it with the expected output or bus meter. A track meter moving confirms signal at its own metering point. It does not guarantee that the signal reaches your speakers or the final render.
Try this simple diagnostic:
- Move the playhead to a section with a sound you can identify.
- Start playback before that sound begins.
- Watch the meter for the track containing the clip.
- Watch the bus or output strip that should receive it.
- If the track moves but the output does not, inspect routing and output assignment.
- If neither moves, check playback, clip placement, and mute or solo states.
A waveform and a meter tell you different things. A waveform shows audio data represented in a clip. A moving meter shows signal at a particular point during playback. Hearing the sound is a separate check because it also depends on monitoring, hardware, and system output.
Solo can help isolate a track, but use it carefully. When a track is soloed, other tracks may be suppressed by design. A changed output meter may therefore be expected. A muted clip or track can still contain a visible waveform while producing no audible output.
If a track meter moves but the output strip remains inactive, inspect the track’s output assignment and the bus setup. Blackmagic’s Fairlight documentation covers channel strips for tracks and buses, along with routing and channel-mapping controls. Those are the relevant areas when the signal exists on a track but does not reach the output you expect.
If both track and output meters move but you hear nothing, look downstream. Check Resolve’s monitoring device, the operating system’s active audio output, and any connected interface or speaker. The Edit Mixer is not a complete monitoring-device troubleshooting panel. For that situation, use the DaVinci Resolve no-audio troubleshooting guide.
Can a waveform be visible when a track meter is still?
Yes. A waveform can be visible while the meter remains still if playback is stopped, the playhead is not crossing that clip, the clip or track is muted, or the signal is not reaching that meter’s point in the path.
Check the timeline position first. It is easy to watch a track meter while the playhead is over a gap, a silent portion of a clip, or a different section than the one you had in mind. Move to a known sound and play through it.
Then check the state of the signal:
- Is playback actually running?
- Is the playhead crossing the audio clip?
- Is the clip on the track whose meter you are watching?
- Is that clip or track muted?
- Is a solo state changing what reaches the output?
- Is the track assigned to the expected bus?
This order helps avoid a common wrong turn: raising gain when the problem is that no signal is currently reaching the meter. Gain can make an existing signal louder; it cannot make playback cross the right clip or change a muted state.
What if the track meter moves but the output does not?
Check the route from the track to its intended bus or output. Do not assume that the output strip is monitoring every track in the timeline. A track can carry signal and still be assigned somewhere other than the output you are watching.
In a basic stereo project, the path may seem obvious. In a larger project, you may have multiple buses, submixes, or channel formats. The track could be routed to a different bus, the bus could be inactive, or the output strip you are watching could correspond to another destination. Inspect the routing before changing levels.
A useful test is to compare one known track with the bus you believe receives it. If the track responds and the intended bus does not, trace the routing between them. If both respond but the speakers remain silent, the routing inside the timeline may be fine and the problem may be in monitoring or device output.
Why are the meters moving when I can’t hear anything?
A meter can show signal even when you hear nothing because its measurement point and your monitoring path are not identical. Check mute and solo states, routing, output selection, and your monitoring device before changing clip gain.
Use the symptom to narrow the search:
| Meter behavior | What it suggests | Next check |
|---|---|---|
| Track meter moves, output meter does not | Signal is present on the track but may not reach the watched output | Track routing and bus assignment |
| Track and output meters move, but speakers are silent | Timeline signal exists; the monitoring path may be the issue | Resolve monitoring device, system output, interface, speakers |
| A meter changes when another track is soloed | Solo or mute state is changing the mix | Review the active solo and mute buttons |
| A different track meter moves than expected | The clip or playhead may be on another track | Confirm clip location and strip labels |
| A waveform is visible, but the meter is static | No signal is currently reaching that meter | Playback position, mute state, and routing |
Track routing and monitoring are especially easy to confuse when a project has more than one bus or a multichannel layout. A meter moving does not prove that the correct speakers receive the signal. It tells you something about the signal at that meter’s location.
Avoid making a large gain adjustment just to force sound out of the speakers. If the real problem is a wrong output assignment, raising clip or track gain can leave you with unexpectedly hot audio once you correct the route. First locate where the signal stops. Then adjust levels only if the meters and listening both indicate a level problem.
What should I check if my headphones or speakers are silent?
If the relevant track and output meters move, focus on the monitoring chain rather than raising the timeline fader. Check which device Resolve is using, whether the system is sending audio to the expected device, and whether the interface or speakers are connected and active.
If the output meter is also still, return to the timeline path: playback, clip location, mute and solo, and track-to-bus routing. If the track meter moves but the output is still, examine routing first. If the output meter moves but the speakers do not, investigate monitoring and hardware.
This is a useful boundary between two problems:
- Signal-path problem: the audio is not reaching the expected bus or output.
- Monitoring problem: the audio reaches the output meter, but you cannot hear it through your current listening setup.
The distinction prevents random changes. A monitoring device problem is not fixed by turning up a clip. A muted track is not fixed by changing the operating system’s speaker output.
What does the Edit Mixer meter tell me about clipping?
The Edit Mixer meter shows signal level and can help you notice a level approaching the top of its display or an overload indication. It does not provide a complete analysis of perceived loudness, inter-sample peaks, codec behavior, or the final encoded file.
Treat the meter as a warning instrument, not a mix verdict. If the signal repeatedly reaches the top of its range or an overload indicator appears, lower it at an appropriate point and investigate the source. Do not treat one glance at the meter as proof that a deliverable is safe.
Resolve offers more than one place to adjust audio. Blackmagic’s Edit page documentation describes adjusting a clip level in the timeline or Inspector and changing an entire track with its Mixer fader. These controls have different scope:
| Control | Scope | A reasonable use |
|---|---|---|
| Clip level control | The selected clip | One line or event is too loud or quiet |
| Track fader | The whole track | Most material on that track needs a broad adjustment |
| Bus or output control | The routed group or mix | The combined signal needs adjustment at that stage |
That distinction matters in an edit. If one sentence is too loud but the rest of the dialogue is balanced, lowering the entire track may make every other line quieter. If every clip on the track needs a broad change, the track fader may be more appropriate. If the whole mix is too high, inspect the bus or output level and the processing in that chain.
A meter also cannot tell you whether the mix sounds natural. A heavily compressed signal can remain below a level ceiling yet sound tiring. A quiet, dynamic passage can have a low average and still contain a sharp transient. Listen at a sensible monitoring level, check dialogue against music and effects, and measure the final output against an actual delivery requirement.
For LUFS targets and normalization, see the separate guide to DaVinci Resolve loudness normalization. A meter display and a normalization operation relate to audio delivery, but they are different tasks.
Is a red or peak indication always a reason to lower every track?
No. An overload indication deserves investigation, but the correct adjustment depends on where it occurs and what the signal is doing. A single transient on one sound effect does not automatically mean every track needs to be lowered. A problem at the combined output can have a different cause from a problem on one source track.
Identify the meter that shows the issue, then locate the signal responsible. If a particular clip produces a brief high peak, a clip-level adjustment may be more targeted than lowering all dialogue, music, and effects together. If the whole mix is reaching an unwanted level, examine the bus and the combined levels feeding it.
This is not a guarantee that any one adjustment will solve a clipping problem. Processing, automation, summing, and export settings can all affect the result. The safe habit is to make a controlled change, replay the same section, and verify the result at the point that matters. If the job has a specified true-peak ceiling, use an appropriate true-peak measurement rather than relying on an Edit page level bar alone.
Can a meter show a safe level while the export still fails a spec?
Yes. A signal meter can be useful during editing and still not prove that a rendered file meets a loudness or peak specification. The render can involve a different measurement scope, encoding, and delivery setting. When a specification matters, measure the final export with the relevant method.
That does not make the Edit Mixer useless. It is good for catching track activity, sudden level changes, and obvious overloads while you edit. It simply answers a smaller question than final compliance. Keep the difference clear: use the Edit Mixer during editing, and a suitable loudness or true-peak workflow to assess delivery.
How should I use the meters while editing dialogue, music, and effects?
Use the Edit Mixer meters to confirm that each track is active and to watch how its level behaves during playback. Then listen to the relationship between tracks. Do not assume dialogue, music, and sound effects should all sit at one fixed meter value.
A practical rough-mix sequence:
- Play dialogue alone and confirm that the dialogue track is active.
- Add music and listen for masking or distraction.
- Add effects and check whether they support the scene or pull attention from speech.
- Play the full section and watch individual tracks and the output.
- Adjust the narrowest scope that addresses the problem: clip, track, or bus.
- Replay the entire section after a meaningful adjustment.
This is a way to keep a visual signal check connected to what you hear. A dialogue track can show a healthy signal and still be hard to understand because of room sound, recording quality, competing music, or equalization. A music meter can move steadily while the music overpowers an important line. A sound effect can be brief and peak sharply without being too loud for the scene.
For clip-level editing, Resolve provides a clip level control in the timeline and Inspector. For track-level mixing, adjust the track strip in the Mixer. If the project needs detailed automation, expanded routing, or more focused audio controls, use Fairlight. The full Fairlight audio mixing guide walks through that larger workflow.
Worked example: why a dialogue track can look active but be hard to understand
This is a worked example, not an observed measurement. Imagine a talking-head edit with dialogue on one track and music on another. The dialogue meter moves throughout the spoken lines, and the music meter moves underneath. Yet the words are difficult to follow.
The meters have confirmed that both tracks carry signal. They have not told you whether the music masks the voice, whether a particular line is too soft relative to the next one, or whether the recording itself is muffled. Listen to the passage with both tracks playing. Then temporarily listen to the dialogue alone and compare. If the voice is unclear even without music, lowering the music may not solve the underlying issue. If the words become clear when music is removed, adjust the relationship or automation rather than chasing a target on the dialogue meter.
After making a change, listen again with the full mix. The goal is not to make the meters look alike. The goal is a mix where the speech and music work together for the scene.
Worked example: why a short sound effect can dominate a section
This is another worked example, not a test result. Suppose a short impact sound occurs underneath a sentence. Its track meter jumps for a moment, while dialogue looks relatively steady. The impact might be a useful accent, or it might pull attention away from the line.
The meter can help you locate when the transient occurs. Listening tells you whether it feels too prominent. If it does, try a targeted change on the effect clip or its track, then replay the sentence with the effect and dialogue together. Do not lower the entire mix before identifying whether the problem is limited to that effect.
If you need to check a delivery peak limit, use the appropriate peak or true-peak measurement on the intended output. A visual jump on the Edit Mixer is a reason to listen and investigate, not a substitute for that measurement.
Should I choose a meter target for every track?
No. A meter target is not a universal mixing recipe. Different tracks carry different material, and their roles vary. A sustained music bed, a quiet spoken line, and a sharp effect do not have identical dynamics or purposes.
Use the Edit Mixer to see activity and catch unexpected changes. Use listening to judge balance and clarity. Use a loudness measurement when the deliverable calls for one, applying it to the relevant combined signal and time span. A number copied from another project can be inappropriate if the content, routing, measurement standard, or delivery requirement differs.
A moving track meter confirms signal at that point, not that the mix is balanced or ready to deliver.
When should I use the Edit page Mixer instead of Fairlight?
Use the Edit page Mixer for quick visual feedback while cutting and making broad track adjustments. Move to Fairlight when the work calls for more detailed mixing, routing, automation, or loudness monitoring.
The Edit page keeps audio checks near the picture timeline. That is convenient when trimming video and you want to catch a silent clip, a sudden level jump, or an inactive track without changing pages. For many straightforward editing tasks, clip and track controls in the Edit page are enough.
Fairlight is a better fit when you need room for a focused audio workflow. Blackmagic describes Fairlight channel strips for timeline tracks and buses, with faders, panners, effects, dynamics, equalization, automation, and loudness monitoring.
| Choose the Edit Mixer when… | Choose Fairlight when… |
|---|---|
| You are cutting and want to see track activity | You are building or refining a mix |
| You need a quick check for a silent or unexpectedly hot track | You need more detailed routing or bus work |
| You need a simple clip or track level adjustment | You need automation or expanded channel controls |
| You want audio checks close to the picture timeline | You need loudness monitoring or a focused audio workspace |
There is no need to move every audio decision to Fairlight. Use the smallest tool that gives you the control you need, and switch pages when the task grows. That keeps the distinction simple: Edit for timeline work and quick monitoring; Fairlight for deeper audio control.
Can I stay on the Edit page for a basic dialogue pass?
Yes, if the task is a straightforward edit and you only need to check signal activity or make simple clip and track adjustments. The Edit page includes audio controls alongside the timeline. You do not need to change pages merely because you are working with sound.
Move to Fairlight when you need more detailed processing, routing, automation, or loudness monitoring. The choice is about the work at hand, not a rule that all audio must be mixed on one page. A quick pass can start in Edit; a more involved mix can continue in Fairlight.
What if the Mixer meters still don’t move after I turn them on?
If the meters are visible but static, confirm that playback crosses audio, then check mute, solo, track selection, and routing. A static meter is a clue about the signal path, not proof that the meter display itself is broken.
Follow this order:
- Check playback. Move the playhead over a known audio clip and press play.
- Check the clip. Confirm the clip contains audio and falls within the active timeline range.
- Check the track. Make sure you are watching the strip for the track containing that clip.
- Check mute. Review clip, track, and bus states that could silence the signal.
- Check solo. A different soloed track can make the expected track seem inactive.
- Check routing. Confirm the track reaches the bus or output you intend to monitor.
- Compare output meters. See whether the expected bus or output responds.
- Check monitoring separately. If meters move but playback is inaudible, investigate the output device and listening path.
If there is no audio at all, do not keep toggling Meters. That option controls what the Mixer displays; it does not create signal or repair routing. If the underlying problem is an inactive output, muted track, or channel-mapping issue, the fix is elsewhere.
A multichannel project adds another layer. A track can carry several channels, and the routing may differ from a simple stereo timeline. Inspect channel mapping and the bus path in Fairlight when a project’s channel layout is more complex than the meter display suggests.
If the timeline contains audio but nothing reaches the expected output, use the symptom-based DaVinci Resolve no-audio guide rather than raising every fader.
What if only one track stays still?
Check that track on its own. Confirm the clip is actually on it, the playhead is crossing the clip, the track is not muted, and the correct strip is visible. Then check whether the material is silent or whether the track is routed differently from the others.
Do not compare meters across unrelated tracks as though their waveforms should match. A quiet room tone track, a dialogue track, and a music track will behave differently. Compare each one against its expected content. A silent music section may be intentional; a spoken line that should be present but produces no activity deserves a closer look.
What if every track meter is still?
First establish that playback is running over a section that contains audio. If so, check whether the timeline is paused, whether all relevant tracks are muted, or whether the playhead is in a gap. If no track responds despite a known audio section, inspect the project’s audio configuration and signal path rather than making per-clip gain changes.
The Edit Mixer display option only reveals meters. It cannot repair a project-level or device-level audio issue. Separate the simple visibility question from the signal question: are the meters displayed, and is audio reaching them?
What if the output meter moves but a render sounds different?
The output meter tells you about signal at its point in the project. The render is a separate deliverable. If the exported file sounds different from what you heard during playback, compare the render settings, the selected timeline and range, the output routing, and the file you are actually playing.
Do not assume a moving output meter proves the export is correct. Listen to the render and measure it if a delivery specification requires a measurement. The final file is what your recipient hears, so it deserves its own check.
Why do the meter numbers look different from a tutorial?
Meter appearance and scale can differ because the tutorial may show another Resolve version, page, meter type, signal source, or measurement standard. Identify the meter’s job and location before comparing its numbers with yours.
A meter in the Edit page Mixer is not necessarily the same meter shown in a Fairlight tutorial. Even within Fairlight, a signal-level meter, a Control Room loudness meter, and a Loudness Meter effect answer different questions. A screenshot may also show another scale or selected standard.
Start by identifying four things:
- Which page is open? Edit and Fairlight have different audio workspaces.
- Which panel or effect is shown? Mixer strips and loudness tools are distinct.
- What is being measured? A clip, track, bus, or complete program can give different readings.
- What measurement is displayed? Signal level and loudness are not interchangeable.
Resolve 21.1 was announced on September 8, 2026, and Blackmagic provides a 21.1 Reference Manual. If a tutorial shows a different arrangement, check the version it uses and consult the corresponding manual instead of assuming your installation is missing a function.
Judge a meter by its purpose, not by whether its colors, labels, or tick marks match another editor’s screen. If you cannot identify the control in the tutorial, compare the visible page and panel first. A screen-specific helper can make navigation less frustrating: TryUncle is an on-screen assistant for Mac and Windows that can use the current screen and your question to guide you toward a control. You stay in control and make the change; the meter’s meaning still needs to be checked.
Can two meters show different readings for the same timeline?
Yes. They may be measuring different points, different time windows, or different properties. A track-level signal meter, a bus-level signal meter, and an integrated loudness meter need not show matching readings.
For example, a track meter observes one path. A bus meter may include several tracks combined. A loudness meter may measure a time-based property according to a selected standard. If music and effects join dialogue on a bus, that combined bus is not equivalent to the dialogue track by itself.
Before deciding that a meter is wrong, write down its location and purpose. Ask: “Which signal is this? Where is the meter in the chain? What does its scale represent?” Those three answers usually explain why the display differs.
How do I keep the Edit Mixer visible without losing timeline space?
Keep the Mixer open while its meters help you make decisions, then close or resize it when you need more timeline room. The goal is to see the track labels and indicators you actually use, not every control at once.
The Mixer takes up screen space. On a laptop or small monitor, opening it can reduce the timeline area, particularly if the media pool, Inspector, and other panels are open too. You do not need every panel expanded for every task.
Try this workspace approach:
- Keep the Mixer open during a level-balancing or signal-check pass.
- Close panels that are not part of the current task.
- Give the Mixer enough room to read the relevant track labels and activity.
- Make the audio pass, then hide the Mixer if you need more room for trimming.
- Reopen it when you return to audio checks.
If your layout differs from a tutorial, check the panel toggle before changing project settings. Showing or hiding a panel is a workspace choice and should not alter the audio itself. A very narrow strip can also make you watch the wrong track, especially when labels are truncated.
If you use a second display, decide what you need to see there: timeline, mixer, viewer, or video scopes. Audio meters and video scopes are separate monitoring tools for different signals. The second monitor scopes setup guide covers the distinct task of putting scopes on a second display.
Should I leave the Mixer open all the time?
Only if it helps your current work. Leaving it open can make track activity easy to spot, but it can also reduce the space available for the timeline or other controls. Reopen it when you need the meters; hide it when timeline space matters more.
This is a workflow preference, not an audio setting. Closing the panel does not mute tracks or turn off their signal. If you later reopen it and the meters appear hidden, check the Mixer options again.
Can I judge a mix by watching the meter alone?
No. A meter can reveal signal level or loudness behavior, but it cannot tell you whether the mix is clear, balanced, or emotionally right. Listen to the program and use a meter that matches the measurement you need.
A visual meter is useful because listening can be affected by monitoring level, room, device, and familiarity with the material. It can help you catch overloads, gaps, unexpected changes, or differences between tracks. But the meter is not the audience. It cannot tell you whether a line is intelligible over music or whether a transition feels abrupt.
The AES article includes comments from working audio professionals about using loudness measurements alongside listening. Mayo and Muscatello describe considering integrated loudness and true peak, while also discussing how loudness practices depend on the material and delivery. Their practice is not a universal instruction for every video editor. The useful lesson is narrower: a momentary glance at a level meter is not a complete assessment of a finished program.
For a short edit, a sensible habit is simple. Watch the meter while listening, investigate anything surprising, and check the final render if a delivery requirement specifies loudness or peak limits. Do not chase a number nobody asked for, and do not use a meter as a substitute for hearing the whole piece.
A meter is evidence about a signal, not a verdict on the mix.
What should I listen for while watching the meters?
Listen for intelligibility, balance, sudden changes, distracting peaks, and whether the mix supports the picture. The meter can help you locate a moment to inspect, but listening tells you whether that moment works.
For dialogue, listen through full sentences rather than judging one isolated bar. A single word may be quiet by design, or a phrase may need attention because the speaker moved away from the microphone. For music, listen under the dialogue and then through transitions. For effects, check whether each sound adds useful detail or draws attention away from the scene.
A useful loop is: listen, notice a problem, locate it on the timeline, check the relevant meter, make a targeted change, then listen again. If you start with a number and change every fader to satisfy it, you may solve the display while making the mix worse.
How should I check a final deliverable?
If the client or delivery spec gives a loudness or peak requirement, identify the required standard and measure the relevant final output. Use the rendered file when the requirement applies to that deliverable, not just a track meter during editing.
A final check should answer these questions:
- Is this the correct final timeline and range?
- Does the measured signal include the content the delivery requirement covers?
- Is the specified loudness standard selected?
- Has the complete program, or required section, been measured?
- Does the exported file play as expected?
Resolve’s documentation describes loudness standards in Fairlight and render settings. A preset can help apply a defined standard, but the existence of a preset does not tell you which standard a client expects. Confirm the requirement rather than guessing. If no delivery spec exists, avoid treating a number from an unrelated tutorial as a mandatory target.
What is the quickest way to choose the right meter for the job?
Start with the question you need answered. If you need to know whether a track is active, use the Edit Mixer. If you need a loudness reading, use Fairlight’s loudness monitoring or a Loudness Meter effect. If you need delivery compliance, measure the final program using the supplied specification.
| Question you need answered | Tool to start with |
|---|---|
| Is this track producing signal during playback? | Edit page Mixer meters |
| Is the track routed to the expected output? | Compare the track and relevant bus or output meters |
| Is the combined program within a loudness requirement? | Fairlight loudness monitoring or Loudness Meter effect |
| Is a peak or true-peak limit being met? | A suitable peak or true-peak measurement |
| Does the exported deliverable meet the brief? | Measure and listen to the final render |
This table is a starting point, not a claim that one tool replaces all others. Signal activity, loudness, peak level, and delivery compliance are different questions. The quickest route is to use the least complicated tool that can answer the one you actually have.
Use the Edit Mixer for a quick signal check, and use Fairlight when the measurement needs to be loudness.
What should I do next if I only need to see track activity?
Open the Edit page Mixer, enable Meters in its options menu, and play a section with known audio. If the meters move, use them as a quick signal check. If you need LUFS or a delivery measurement, switch to Fairlight and choose a loudness tool that matches the job.
If the meters remain still, trace the audio path before changing gain: check playback, clip placement, mute and solo states, track assignment, and routing. If meters move but you cannot hear the mix, check the monitoring output separately. Then listen through the section once more. That final pass tells you what the meter cannot.
Frequently asked questions
- How do I show meters in the DaVinci Resolve Edit page Mixer?
- Open the Edit page, click Mixer near the upper-right corner, then open the Mixer options menu and enable Meters. Play a section that contains audio and check whether the relevant track and output meters move.
- Are the Edit page Mixer meters LUFS meters?
- No. The Edit page Mixer meters show signal activity and level. For loudness reported in LUFS, use Fairlight loudness monitoring or a Loudness Meter effect, and choose a measurement standard and scope that match the delivery.
- Why can’t I see the meters in DaVinci Resolve?
- First open the Edit page Mixer. If the mixer strips are visible but the meters are not, open the Mixer options menu and enable Meters. If the panel is cramped, enlarge it or simplify the workspace.
- Why are my DaVinci Resolve meters not moving?
- Play across a clip that contains audio, then check that the clip and track are not muted, that a different track is not soloed, and that you are watching the correct strip. If a track meter moves but the output meter does not, check routing.
- Can I show loudness meters on the Edit page in Resolve 21?
- The Edit page Mixer’s built-in meters show signal level, not program loudness in LUFS. For loudness monitoring, use Fairlight’s Control Room loudness meter or add the Loudness Meter effect to an appropriate track or bus.
- Does a moving meter prove my mix is loud enough?
- No. A moving meter confirms signal at the point it measures, not that dialogue is clear, the mix meets a delivery target, or the final export has a particular integrated loudness. Listen to the mix and measure the rendered file when the delivery requires it.
Sources
Put this guide to work with TryUncle.
Ask about the step you’re on. TryUncle sees your screen and points at the control you need, so you can keep learning in your own project.
Get TryUncle for Mac or WindowsKeep reading
Guides · Jul 11, 2026 · 31 min
How to Mix Audio in DaVinci Resolve Using Fairlight
Mix audio in DaVinci Resolve's Fairlight page: build a dialogue/music/effects bus structure, gain-stage your clips, EQ and compress dialogue, then duck music under it.
Guides · Jul 8, 2026 · 33 min
DaVinci Resolve Loudness Normalization: The Right LUFS Target
The exact LUFS target for every platform in DaVinci Resolve: -14 for YouTube and Spotify, -16 for podcasts, -23 EBU R128 broadcast. Plus how to set and hit it.
Fixes · Jul 7, 2026 · 26 min
DaVinci Resolve No Audio: Every Cause and How to Fix It
Timeline plays video but no sound? Check the mute and solo buttons, the I/O Engine setting, sample rate, and Export Audio, in that order. Full fix list.