Articles / Fixesupdated for DaVinci Resolve 21.1 (September 2026)
DaVinci Resolve Source Auto Select Not Working? Fix It
Quick answer
If DaVinci Resolve source auto select not working is the symptom, separate source patching from destination targeting. In Resolve 21, blue Source Track Selector buttons map source V1 and A1 to red timeline tracks, while Auto Track Selector and Sync Lock govern eligibility and ripple behavior. Reset the mapping, set the red destination, then test one operation.
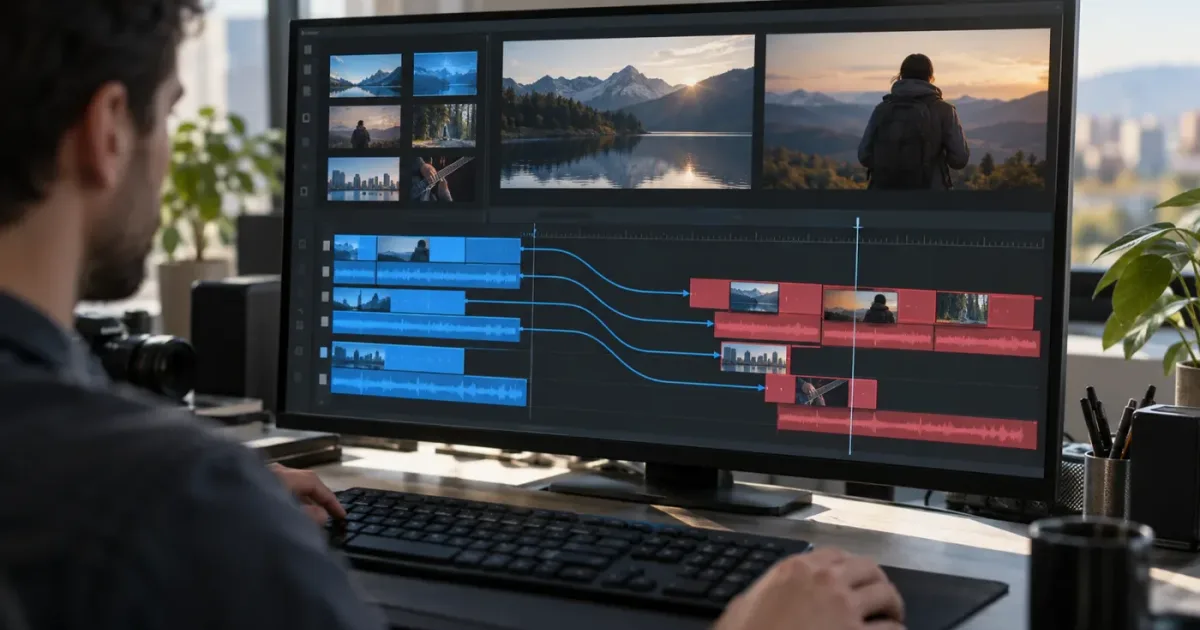
We see one small DaVinci Resolve timeline decision turn into four different bugs. A clip inserts on V1, paste ignores the track you clicked, ripple delete drags music with it, and the Auto Track Selector appears to do nothing. We run a 100,000+ member professional video-editing community, and this is one of the recurring questions that comes up when editors move beyond single-track timelines.
As of September 2026, this guide applies to DaVinci Resolve 21.1. We have also marked the Resolve 20.2 interface change because many older tutorials still show a single Auto Track Selector icon where Resolve now shows separate blue and red controls. After seven-plus years of professional commercial editing, we have learned to diagnose this by operation first. The control that fixes Insert is not necessarily the control that fixes Paste.
Why is DaVinci Resolve source auto select not working?
DaVinci Resolve source auto select usually appears broken because three separate jobs are being confused: source patching, destination targeting, and automatic track selection. Resolve 21.1 gives you controls for all three, and each one answers a different question.
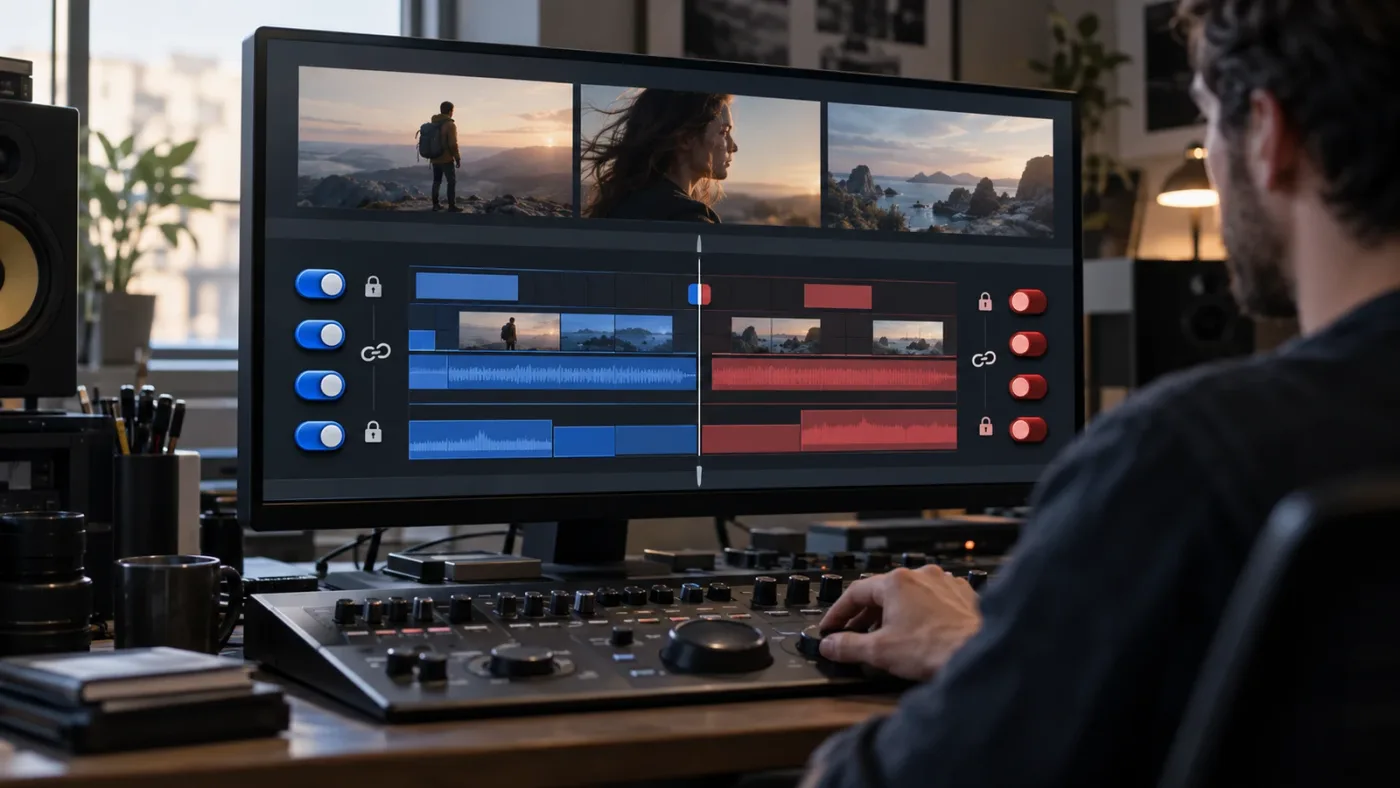
The first question is, “Which tracks exist in the clip I loaded?” A camera clip may contain one video track and several audio tracks. The blue Source Track Selector represents those source tracks. The second question is, “Where should those source tracks go?” The red timeline controls represent the tracks already present in your timeline. The third question is, “Which existing timeline tracks should an operation consider?” That is where Auto Track Selector and, for ripple behavior, Sync Lock enter the picture. Blackmagic Design documents this two-column model in the Resolve 20.2 guide, which remains the relevant interface model for Resolve 21.1. (Blackmagic Design's 20.2 guide)
The phrase “source auto select” combines the first and third questions. That is why searching for one switch often sends you in circles. You can have a correct blue-to-red source patch and an incorrect Auto Track Selector state. You can also have a perfect Auto Track Selector state while the red destination is still V1.
The fastest diagnosis is to match the symptom to the edit operation:
| What you see | Control to inspect first | What the control decides |
|---|---|---|
| Insert or Overwrite goes to V1 | Red Track Destination Selection and blue source patch | Which source tracks are edited into which timeline tracks |
| Paste lands on the wrong track | Red Auto Track Selector controls | Which timeline tracks are eligible for paste and related selection behavior |
| Ripple delete moves music or B-roll | Sync Lock, then Auto Track Selector | Whether tracks ripple together and which tracks participate in timeline operations |
| Selection Follows Playhead picks an unexpected clip | Timeline selection settings and eligible tracks | Which clip is selected when the playhead crosses layered media |
| Audio is missing from an edit | Blue audio source patch, red audio destination, and source channels | Whether the source audio is routed to an existing audio track |
This table is a diagnostic map, not a claim that every strange result is a software defect. The official 20.2 guide says the blue column contains source tracks and the red column contains timeline tracks. It also says the former Auto Track Selector function was redesigned as independent controls in the red timeline column. (Blackmagic Design's Source Track Selector notes)
DaVinci Resolve source auto select is a group of track controls, not one master switch.
When an older tutorial tells you to “turn on auto select,” pause and identify what the instructor is trying to do. If the instructor is inserting a shot from the Source Viewer, follow the source and destination path. If the instructor is deleting a range across several layers, follow Auto Track Selector and Sync Lock. If the instructor is selecting the clip under the playhead, follow the Timeline selection settings.
That distinction saves you from a common bad fix: locking every track. A lock can stop an edit, but it also prevents legitimate changes on that track. The editor's guide describes Auto Track Selector as a selective operation control, while track lock is a harder editing restriction. Use the narrowest control that matches the job. (The Editor's Guide to DaVinci Resolve 17)
How do I restore the correct source and destination tracks in DaVinci Resolve 21?
Reset the Source Track Selector, patch the blue source tracks to the intended red timeline tracks, and then set the red destination before testing Insert or Overwrite. This is the clean baseline for a Resolve 21.1 timeline.
Use this sequence when a source clip lands on the wrong video or audio track:
- Go to the Edit page and load the source clip into the Source Viewer. You need a source clip with visible source channels before source patching can tell you anything useful.
- Open the Source Track Selector from the Timeline menu if the blue and red track columns are not visible. Resolve 20.2 introduced the two-column view, with source tracks on the left in blue and timeline tracks on the right in red. (Blackmagic Design's 20.2 Edit page guide)
- Look at the blue source side. A blue V1 represents the source video's first video track. Blue A1, A2, and later channels represent the source audio tracks that Resolve can route. Do not click a red timeline track and assume it changed the source. The two columns have different jobs.
- If the mapping is confusing, choose Timeline > Source Track Selector > Reset Track Selection. Blackmagic's guide describes this command as the way to return V1 and A1 source tracks to matching V1 and A1 timeline positions. (Blackmagic Design's reset-track guidance)
- Patch the source video. Click the blue V1 and then the red timeline track you want to receive the picture, or drag the blue V1 toward the red destination. For example, blue V1 to red V2 sends the source picture to V2 for the edit operation.
- Patch the source audio separately. If the clip has four source audio channels but you want only A1 and A2 in the timeline, check those channels rather than assuming every audio channel will follow the video. If you want the source's second channel on timeline A4, route blue A2 to red A4.
- Check the red Track Destination Selection control. For an Insert or Overwrite edit, the intended red video and audio destinations must be active. A blue source patch tells Resolve how to map a source track. The red destination tells Resolve where the edit is allowed to go.
- Test with a short marked range or a short source selection. Use one operation at a time. Insert once. Undo. Overwrite once. Undo. Then test Paste on an existing timeline clip. If the first two work and Paste does not, source patching is probably fine and Auto Track Selector is the next place to look.
The click-versus-drag choice is a matter of preference. Blackmagic's guide describes both methods. It also says that right-clicking a blue audio source can open a context menu for routing a different source audio track to the red timeline track. That is useful when a source carries several channels and dragging tiny controls is awkward. (Blackmagic Design's source routing instructions)
The current manual is dated September 8, 2026 on Blackmagic Design's documentation page, and the current release context is DaVinci Resolve 21.1. If an older tutorial's icon does not match your screen, use the current Source Track Selector names rather than trying to reproduce the old icon by memory. (DaVinci Resolve 21.1 Manual page)
Why does Insert or Overwrite still land on V1?
Insert and Overwrite usually land on V1 because the red Track Destination Selection is still targeting V1, even when Auto Track Selector is configured for another track. Track Destination Selection and Auto Track Selector can sit beside each other, but they do not answer the same question.
Imagine a timeline with picture on V1 and B-roll on V2. You load a new shot and want to overwrite V2. The correct checks are:
- Blue source V1 is patched to red timeline V2.
- Red V2 is the active video destination.
- Any red destination that would receive unwanted audio is turned off or routed intentionally.
- The video track is not locked.
- The playhead and marked range are where you expect them to be.
The Blackmagic forum has a direct answer to the common version of this problem: Track Destination Selection determines where Insert and Overwrite go, while Auto Track Selectors determine paste operations. The post is community guidance rather than a new-feature specification, so treat it as a useful symptom map alongside the official two-column documentation. (Blackmagic Design forum explanation)
Here is the practical test. Turn off the red V1 destination and turn on red V2. Leave the blue V1 source patched to red V2. Place the playhead over a section of V2, mark a small source range, and perform Overwrite. If the shot now reaches V2, the original issue was targeting, not Auto Track Selector.
If the picture goes to V2 but the audio still lands on A1, inspect audio separately. Source video and source audio are independent channels. A blue V1 to red V2 patch does not mean that blue A1 will automatically follow the same track number in every custom layout. The official 20.2 guide uses a source clip with one video track, four audio tracks, and a timeline with two video and six audio tracks to explain this distinction. (Blackmagic Design's channel-routing example)
If the red destination buttons seem to be set correctly but the edit still jumps to V1, test the source viewer focus and the exact command you are using. A drag from the Source Viewer to a timeline track is not the same action as pressing Overwrite. A keyboard command may be mapped to a different operation in a custom keymap. Read the menu name beside the command you are invoking, then test the same operation from the Edit page button.
Do not use Auto Track Selector as a substitute for destination patching. That may appear to work when the timeline contains one video track, but it breaks down as soon as you have V2 overlays, multiple audio destinations, or a source clip with more than one audio channel. The controls should be explicit. Blue says what leaves the source. Red says where it goes.
Insert and Overwrite follow source-to-destination patching, not the Auto Track Selector alone.
The word “selected” causes much of the confusion. Editors naturally click V2 and expect that click to mean “put the next shot here.” In Resolve, the red destination control is the state that matters for source edits. A track can be visible, unlocked, and selected in your mind while the actual red destination remains V1.
When a shot keeps landing on V1, ask three questions in this order:
- Which blue source track am I editing?
- Which red destination track is active?
- Which operation am I performing: Insert, Overwrite, Paste, Trim, or Ripple Delete?
The third question tells you whether to continue with destination patching or move to Auto Track Selector and Sync Lock. It is a small habit, but it prevents you from changing six controls at once and losing the evidence.
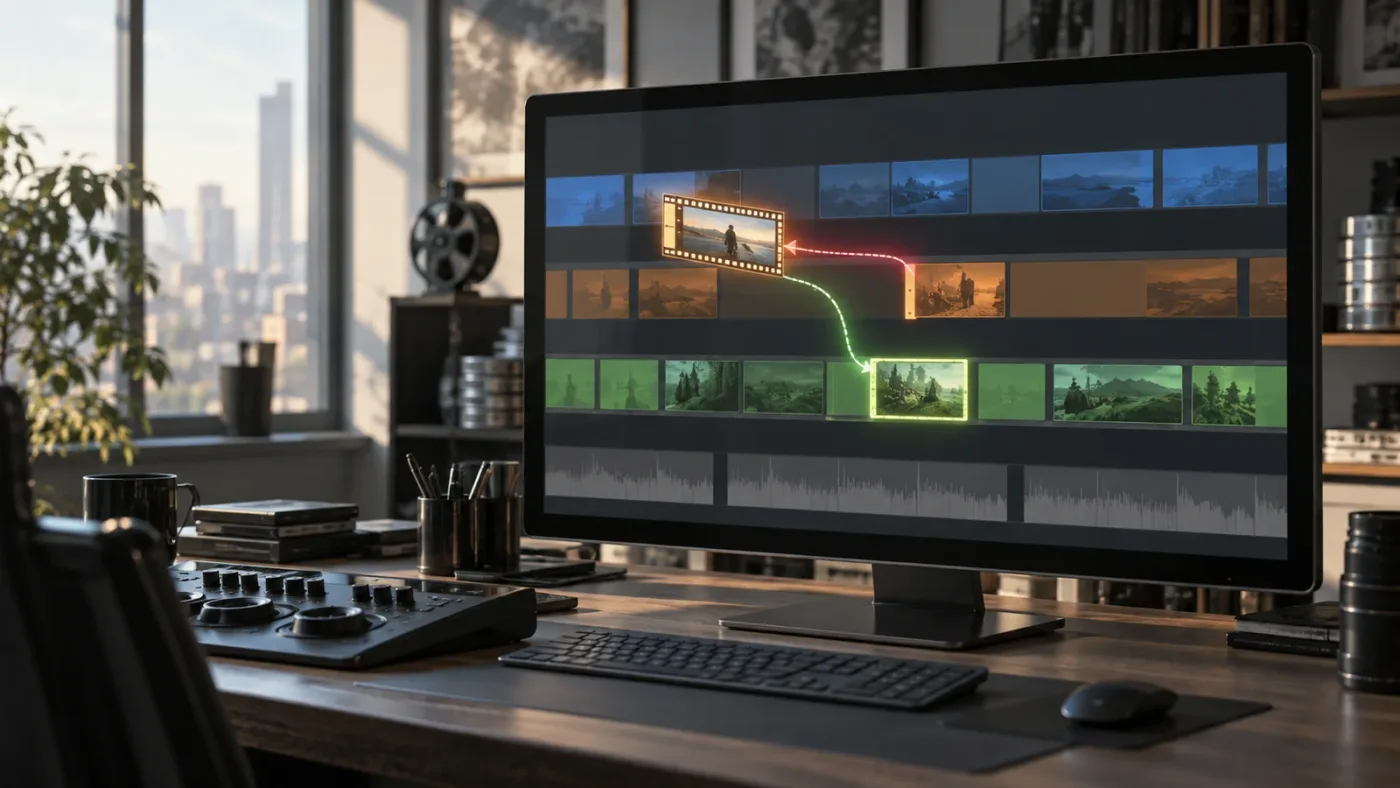
Why does DaVinci Resolve paste to V1 instead of my selected track?
Paste uses Auto Track Selector state differently from Insert and Overwrite, so a clip can paste to V1 even when your source patch looks correct. Enable Auto Track Selector on the intended timeline track, turn it off on competing tracks, and then paste again.
Start with a simple test. Copy one clip from V2. Click an empty area so no unrelated clip remains selected. Turn on the red Auto Track Selector control for V2 and turn it off on V1 and other video tracks. Paste. If the clip returns to V2, the issue was track eligibility.
The reason this matters is that a paste operation has to decide where the copied timeline clip belongs. The current Resolve interface keeps the Auto Track Selector functions in the red timeline control column. Blackmagic's 20.2 guide says the old Auto Track Selector operations and shortcuts remain available, but their function is determined by the new red timeline track icons. (Blackmagic Design's 20.2 selector redesign)
A Blackmagic Design forum discussion gives a useful working rule for paste behavior: same track with Auto Track Selector enabled has priority, then the lowest-numbered eligible track, and a new track may be created if no suitable Auto Track Selector remains. That rule is practical community guidance, not a promise that every custom paste workflow behaves identically. Use the visible state in your timeline and confirm with a one-clip test. (Blackmagic Design forum paste discussion)
Here are the paste cases editors usually mean:
| Paste goal | Video Auto Track Selector state | Audio Auto Track Selector state | Expected diagnostic |
|---|---|---|---|
| Return a copied V2 video clip to V2 | V2 on, competing video tracks off | Set audio separately | Paste should prefer the eligible source track when the source track is still available |
| Paste video only | Intended video track on | Audio tracks off or handled separately | Audio should not be selected as part of the operation |
| Paste a multitrack group | All intended video and audio tracks on | All intended audio tracks on | The clip group needs matching eligible destinations |
| Paste to a new working layer | Only the planned target layer on | Only planned audio targets on | Avoid leaving a lower-numbered track active by accident |
| Paste after deleting the old track | A new target track must be made eligible | Configure audio separately | Check whether Resolve creates or uses a new track in this timeline |
Do not confuse a track's name with its number. A track named “B-roll” may be V3. The paste rule and the menu commands refer to the track identity, not the friendly label you typed. If you have several tracks with similar names, temporarily rename them with their purpose and number, such as “V2 B-roll” and “V3 Titles.” That is workflow advice, not a Resolve requirement, but it makes the red control state easier to audit.
Audio creates a second layer of confusion. If the copied clip has linked audio, the video may go to the intended V2 while audio looks for an eligible audio track. If you want video only, use a video-only paste or temporarily make the audio tracks ineligible for the operation. If you want the complete clip, make sure the intended audio track is available and not locked.
The same diagnosis applies to copying several clips across several tracks. If you copy a stack from V1 through V3 and only V3 is eligible in the destination timeline, Resolve has to reconcile the source stack with the tracks it is allowed to use. Before pasting, decide whether you want to preserve the original track relationships or deliberately collapse them into a new layer. Then set the red controls to match that decision.
Older tutorials often demonstrate paste with the old single icon. The icon changed in the 20.2 workflow, but the concept did not disappear. Look for Auto Track Selector in the red timeline controls or in the Timeline menu. The official guide explicitly says the old operations and shortcuts remain, which is useful when a shortcut still toggles a control even though the icon has moved. (Blackmagic Design's 20.2 menu notes)
If paste continues to create a new track, stop changing the source patch. Source patching controls source edits. Instead, inspect the destination track's lock state, its Auto Track Selector state, and the number of eligible tracks. Make a clean test timeline with one video track and one audio track. If paste works there, the project timeline's track state is the thing to untangle.
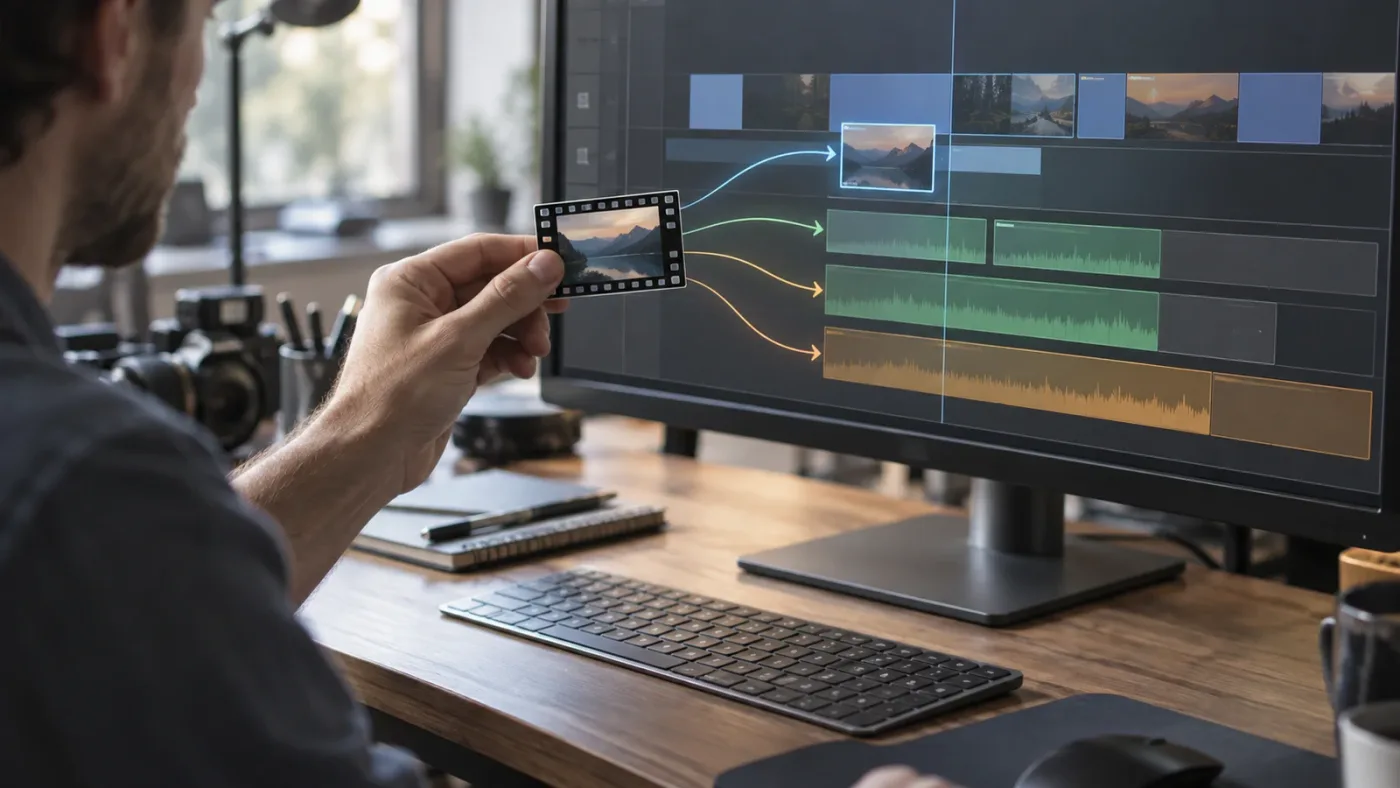
Why does ripple delete or trimming move tracks I wanted to keep?
In Resolve 21, use Sync Lock to decide which tracks move with a ripple edit, and use Auto Track Selector to decide which tracks are selected or considered by operations that depend on track eligibility. Resolve 20.2 separated these jobs, so an older tutorial that uses Auto Track Selector as a sync switch may not match your current timeline.
Blackmagic's 20.2 guide describes Sync Lock as independent from Auto Track Selector. With Sync Lock enabled, a track ripples with other tracks. With Sync Lock disabled, the track can be kept from rippling with other tracks during the edit. The guide also explains that this helps preserve sync across tracks without forcing you to change track selection state. (Blackmagic Design's Sync Lock documentation)
That gives you a cleaner rule for ripple work:
- Use Auto Track Selector when the question is, “Which clips should this operation select or affect?”
- Use Sync Lock when the question is, “Which tracks should move along with the ripple?”
- Use Lock Track when the question is, “Should this track be protected from editing altogether?”
Suppose your timeline has dialogue on A1, music on A2, B-roll on V2, and a main edit on V1. You want to ripple-delete a pause from V1 and A1 while keeping the music on A2 aligned to the rest of the timeline. First identify the tracks you want to edit. Then inspect Sync Lock on the music track. If A2 must not move with the ripple, turn Sync Lock off for A2. If the edit is selecting the wrong clips, inspect Auto Track Selector separately.
Do not turn off every control just to make the movement stop. That removes useful information about the timeline and makes the next edit harder to predict. Change one setting, perform a short test, and undo if the result is not what you wanted.
The official guide explains why the separation was added. Earlier ripple behavior could affect other tracks in ways that created sync problems or unwanted overwrites. Resolve 20.2 redesigned ripple behavior so that Sync Lock can govern the ripple relationship independently from Auto Track Selector. (Blackmagic Design's ripple-trim explanation)
There is a useful edge case here. A track may be Auto Track Selector enabled but Sync Lock disabled. That means it can remain eligible for a selection or other timeline operation while not rippling with the edit. Conversely, a track can be Auto Track Selector disabled while Sync Lock remains enabled. Those settings serve different purposes, so do not infer one from the other.
Trim operations deserve the same care. If you trim an edit point and clips on other tracks move, ask whether the operation is a ripple trim and whether Sync Lock is on for those tracks. If you trim only the selected clip and another track moves, check linked selection, the selected clips, and the edit tool you are using before changing Auto Track Selector.
The editor's guide uses Auto Track Selector to exclude a second audio track from a trim while leaving the track available for other work. That older example is still useful for understanding eligibility, but Resolve 21 users should also look at Sync Lock when the problem is movement through time rather than clip selection. (The Editor's Guide example)
Sync Lock controls ripple movement, while Auto Track Selector controls track eligibility for other operations.
If a ripple delete leaves a gap or causes a song to drift, undo the edit before experimenting. Make a small timeline copy or duplicate the timeline if the edit is important. Then isolate the operation with a short marked range. You want to know whether the problem is the affected clip, the ripple relationship, or the source and destination state from a previous edit.
Why does Selection Follows Playhead select the wrong clip?
Selection Follows Playhead is a clip-selection setting, not a source patching setting. It can select a clip under the playhead, but it does not tell Resolve where a source clip should be inserted, and it does not replace red destination targeting.
Blackmagic introduced Selection Follows Playhead as a way to return to automatic clip selection when the playhead intersects a clip. The same guide describes keyboard selection commands that let you move selection independently of the playhead. (Blackmagic Design's editing improvements guide)
The trouble starts when several clips overlap. Imagine V1 has an interview, V2 has B-roll, and V3 has a title. The playhead crosses all three. Which clip should become active? Your answer might be the topmost picture, the clip you last clicked, the dialogue clip, or all eligible clips. Resolve has to apply its selection logic, and Auto Track Selector state can affect which tracks are considered in some selection commands.
If Selection Follows Playhead is selecting an unexpected clip, test it in this order:
- Turn off Selection Follows Playhead and click the exact clip you want. If your edit now works, the issue is clip selection rather than source mapping.
- Turn off Auto Track Selector on tracks you do not want considered for the selection behavior you are testing. Leave the intended track eligible.
- If the desired edit involves linked video and audio, check Linked Selection. A video-only selection and a linked selection can produce different results.
- Move the playhead into a section where only one candidate clip exists. If selection is correct there but confusing in a stacked section, the timeline has an ambiguity rather than a source-patching failure.
- Use a deliberate clip-selection command or click the clip before trimming. That is slower for a moment, but it gives you a clear test.
The Blackmagic forum contains several discussions about this exact confusion. One experienced forum answer recommends using Auto Track Selector to exclude tracks that should not be eligible for selection, while other replies point out that stacked clips create a choice the software cannot infer from the playhead alone. Treat those replies as workflow advice, not a promise of one universal priority order. (Blackmagic Design forum discussion)
Selection Follows Playhead can also make the Inspector appear to change clips while you are trying to inspect another one. That behavior is annoying, but changing the source patch will not solve it. Turn off the setting temporarily, select the clip you want, make the adjustment, then decide whether automatic selection helps the rest of your timeline.
The same principle applies to keyboard selection commands. Some commands use Auto Track Selector to determine which tracks are eligible. The old Resolve reference material describes selecting clips under the playhead, selecting clips forward on one track, selecting clips forward on all tracks, and moving among clips on Auto Select-enabled tracks. The menu name is more reliable than a remembered shortcut because keyboard mappings can be customized. (DaVinci Resolve reference-manual selection notes)
If the goal is to select every clip under the playhead, do not assume that Selection Follows Playhead means “select all layers.” It is safer to check the current Resolve 21 menu and keymap for a command that explicitly selects clips under the playhead, then verify which tracks are eligible. A setting with a similar name can produce a different result from the command you actually need.
What is the difference between Source Track Selector, Auto Track Selector, Track Destination Selection, Sync Lock, and Lock Track?
Source Track Selector maps source channels. Track Destination Selection chooses where a source edit goes. Auto Track Selector controls eligible timeline tracks for several operations. Sync Lock controls ripple relationships. Lock Track protects a track from editing. These controls overlap in the timeline header, but they are not interchangeable.
| Control | Color or location in Resolve 21 | Use it when you need to decide | Do not use it as a substitute for |
|---|---|---|---|
| Source Track Selector | Blue source column | Which source V1, A1, A2, or other channel is routed into the edit | Choosing which existing timeline clips ripple |
| Track Destination Selection | Red timeline column | Which video or audio timeline track receives Insert or Overwrite | Deciding which tracks are eligible for Paste or selection |
| Auto Track Selector | Red timeline track controls and Timeline menu actions | Which timeline tracks participate in eligible selections and related operations | Source-to-timeline channel mapping |
| Sync Lock | Timeline track control beside other track controls | Which tracks ripple with an edit that changes timeline duration | Locking a track against every edit |
| Lock Track | Timeline track header | Preventing edits on a track while you work elsewhere | Choosing a temporary paste destination |
| Enable or Disable Track | Timeline track header | Turning a track's playback or output participation on or off | Selecting the destination for an Insert edit |
| Selection Follows Playhead | Timeline menu | Automatically selecting a clip as the playhead intersects it | Routing source media into a timeline |
The first five rows are the controls most often described as “auto select” in tutorials and forum posts. The official 20.2 guide confirms the blue source and red timeline distinction, the redesigned independent track controls, and the independent Sync Lock behavior. (Blackmagic Design's control overview)
The lock distinction matters. The older Edit page reference describes a locked track as one where clips cannot be replaced, moved, or otherwise edited, although clips on locked tracks can still be graded. That makes Lock Track a strong protection tool, not a gentle preference. (DaVinci Resolve Edit page reference)
Enable or Disable Track is different again. A disabled track can disappear from the viewer or output, but disabling it is not the same as making it ineligible for a paste or source edit. When a tutorial says “turn the track off,” identify whether the author means Auto Track Selector, Disable Track, or Lock Track. Those words are easy to blur when you are watching a small timeline header.
Here is a useful mental model:
- Blue controls describe the source clip.
- Red destination controls describe the next source edit.
- Red Auto Track Selector controls describe eligible timeline tracks.
- Sync Lock describes timeline movement.
- Lock describes permission to edit.
- Enable or Disable describes visibility and processing participation.
The safest Resolve fix changes the smallest control that answers the actual editing question.
The model becomes easier with an example. You have source V1 and A1. You want the picture on V3, audio on A5, and a ripple delete that moves V1 and A1 but leaves music on A2 in place. You need blue V1 to red V3, blue A1 to red A5, red V3 as the destination for the source edit, Auto Track Selector set for the specific timeline operation, and Sync Lock turned off for A2 if the music must not ripple. Lock is not required unless you need to prevent changes altogether.
That is more settings than many beginners expect, but each state has a visible reason. The alternative is toggling every icon until something appears to work, then discovering that the next operation uses the same hidden state differently.
How do I use Auto Track Selector safely for common Resolve edits?
Use Auto Track Selector as an operation-specific filter. Set it for the edit you are about to perform, test the result, and restore your normal working state afterward.
Delete only one layer
If you want to remove a range from V2 without deleting the clips stacked on V1 or V3, define the range, make V2 eligible, and make the other tracks ineligible for the operation. The older Resolve beginner guide teaches this pattern: Auto Track Selector identifies tracks to operate on and excludes tracks where it is disabled. (DaVinci Resolve beginner editing lesson)
Check whether you want a plain delete or a ripple delete. A plain delete removes content and may leave a gap. A ripple delete changes the timeline duration, so Sync Lock becomes part of the diagnosis. If the wrong tracks move, Auto Track Selector alone may not be enough.
Ripple-delete a pause while keeping music aligned
Select the dialogue or picture range you intend to remove. Keep Sync Lock enabled on tracks that should follow the timeline change. Turn Sync Lock off on tracks that must stay in place. Then inspect Auto Track Selector only if the wrong clips are being selected or affected.
Resolve 20.2's redesigned ripple behavior makes this separation especially important. The official guide says Sync Lock is enabled by default on all tracks and prevents linked clips on different tracks from going out of sync during a ripple operation. It also describes disabling Sync Lock when a track should not ripple with the others. (Blackmagic Design's Sync Lock notes)
Paste one copied clip back to its original layer
Before pasting, turn on Auto Track Selector for the original destination track. If several tracks are eligible, a paste may follow a different priority than your last clicked track. Temporarily disabling competing tracks creates a clean test. When the paste works, restore the tracks you want available for normal work.
Select clips forward from the playhead
Use the menu command shown in your Resolve 21 keymap, and check whether it says current track or all tracks. Older reference material distinguishes “Select Clips Forward On This Track” from “Select Clips Forward On All Tracks,” with Auto Select state affecting which tracks are considered. (DaVinci Resolve selection reference)
Do not rely on a shortcut remembered from a different operating system or a custom keymap. The 20.2 guide says the old Auto Track Selector operations and shortcuts remain available, but your visible menu is the best place to confirm the command assigned in the current installation. (Blackmagic Design's Resolve 20.2 menu reference)
Trim one clip without moving a neighboring audio track
First decide whether the neighboring audio should move with the picture to preserve sync. If it should move, keep the relevant Sync Lock relationship. If it should remain independent, disable Sync Lock on that track. If the trim is selecting the wrong clip, then inspect Auto Track Selector and the current selection.
Temporarily work on one track
Turning every other track's Auto Track Selector off can be useful as a short diagnostic. It is not always a good permanent workflow. When you finish the test, write down which tracks you want eligible for your ordinary paste, select, and ripple operations, and restore those states.
That last step matters because hidden state is the root of many “it worked once” reports. A tutorial may leave only V2 eligible, and then a later paste appears to ignore V1. The software is following the state you left behind. Treat the track header like a small control panel, not decoration.
What changed between older Resolve tutorials and DaVinci Resolve 21.1?
The important change for this problem arrived in Resolve 20.2: Source Track Selector became a two-column blue-to-red patching view, and the former Auto Track Selector function was represented by independent red timeline controls. Resolve 21.1 is the current release context as of September 2026, so tutorials recorded before 20.2 can show a different arrangement.
| Version context | What matters for this troubleshooting problem | Practical response |
|---|---|---|
| Resolve 17 and older training material | Auto Select is shown as a track-header control and is often used to define eligible tracks | Use the lesson to understand eligibility, but translate the icon to the current red control |
| Resolve 20.2 | Source Track Selector introduces blue source and red timeline columns; Sync Lock becomes independent from Auto Track Selector | Separate source mapping, destination, eligibility, and ripple movement |
| Resolve 21.0 | The Resolve 21 feature set is current, but older 20.2-era timeline tutorials may still be the closest explanation of this control redesign | Keep the 20.2 model when diagnosing source and timeline controls |
| Resolve 21.1 | Blackmagic Design announced the release on September 8, 2026 and published a 21.1 manual page | Use the current manual and menu names for the installed build |
The 20.2 guide is unusually useful because it describes the redesign directly. It says the previous Auto Track Selector icon was removed, its function was redesigned into independent controls, and the old operations and shortcuts remained available. (Blackmagic Design's 20.2 release guide)
Blackmagic's current release announcement identifies DaVinci Resolve 21.1 as available on September 8, 2026. It also lists changes across AI assistant integration, camera support, multicam workflows, Fusion tools, and other areas. Those release highlights do not replace the older 20.2 explanation of track patching, so keep the version distinction narrow and relevant. (Blackmagic Design's Resolve 21.1 announcement)
This is why the advice “turn on Auto Select” can be incomplete in a current Resolve project. The instructor may be using a pre-20.2 version, or may be solving a paste problem while you are solving an Insert problem. The words sound alike. The operation is the clue.
If your screen looks different from a tutorial, do not immediately assume that Resolve removed the feature. Look for the current names in the Timeline menu: Source Track Selector, Auto Track Selector, Sync Lock, Track Destination Selection, and Lock Tracks. The 20.2 guide lists those menu groups together, which makes the relationship easier to inspect than a tiny icon-only header.
You can also use the current manual as the tie-breaker. Blackmagic's documentation page lists the DaVinci Resolve 21.1 manual as an instruction manual for the current release. (Blackmagic Design's current manual listing)
Why do Auto Track Selector shortcuts appear to do nothing?
The shortcut may be toggling Auto Track Selector correctly while the operation is controlled by a different setting, or the shortcut may be assigned to a different action in your keymap. Verify the menu action and test the visible red control before blaming the keyboard.
The 20.2 guide says the old Auto Track Selector operations and shortcuts are still available, but their function is determined by the new red timeline track icons. That means a shortcut can change eligibility without changing the red destination used by Insert or Overwrite. (Blackmagic Design's shortcut behavior note)
Use this shortcut check:
- Open the Timeline menu and find the Auto Track Selector command you intend to use.
- Read the exact track name in the command, such as a specific video or audio track, rather than assuming the key will affect the track under your mouse pointer.
- Press the shortcut once and watch the red control change.
- Press it again and confirm that the control returns to its previous state.
- Test the edit operation that motivated the shortcut.
If the red control changes but Insert still goes to V1, the shortcut is working. It simply is not the control that governs your Insert destination. Return to the blue-to-red patch and red Track Destination Selection.
If the red control does not change, check whether the Edit page or Timeline has keyboard focus, whether your keyboard layout exposes the expected modifier, and whether a custom keymap has replaced the default command. These are diagnostic possibilities, not claims about a specific Resolve bug. The fastest evidence is the menu: if choosing the command from the menu changes the control, the timeline state is healthy and the keyboard mapping deserves attention.
The old reference documentation contains examples of Auto Select commands with function-key combinations. The exact default mapping can vary by version, platform, and keymap, so use it as historical context rather than copying a shortcut blindly into Resolve 21. (DaVinci Resolve keyboard-shortcut reference)
Keyboard shortcuts are most useful after you understand the control model. A shortcut that turns off V2 is powerful when you know you are excluding V2 from a selection. It is confusing when you believe it is setting V2 as the Insert destination. Learn the menu label first. Speed comes afterward.
For a broader shortcut inventory, use the site's DaVinci Resolve keyboard shortcuts reference. For the specific source workflow, the Source Tape Mode tutorial can help you separate source-viewer navigation from timeline track targeting.
How do I troubleshoot a Resolve 21 timeline where every selector looks right?
Build a minimal reproduction and test one operation at a time. A small timeline tells you whether the problem is a stored patch, an eligible-track state, a locked track, a source-channel mismatch, or a project-specific interaction.
Use this diagnostic branch:
- Save the project before making changes. If the timeline is important, duplicate it or create a safe test copy. This is a workflow precaution, not a Resolve setting.
- Create or open a simple timeline with one video track and one audio track. Use a source clip that visibly contains video and audio.
- Choose Timeline > Source Track Selector > Reset Track Selection.
- Leave the default-looking blue V1 to red V1 and blue A1 to red A1 patch in place.
- Make sure the red destination controls point at those same tracks.
- Turn on Auto Track Selector for the tracks used in the test and leave unrelated tracks out of the experiment.
- Test Insert or Overwrite.
- Undo. Test a one-clip Paste.
- Undo. Test a short ripple delete with Sync Lock visible.
- Record which test fails. That result identifies the next control to inspect.
The point is not to create a perfect editing project. It is to remove variables. If Insert fails in the one-track timeline, inspect the source clip, the source viewer state, and the red destination. If Insert works but Paste fails, inspect Auto Track Selector. If both work but ripple behavior fails, inspect Sync Lock and the type of ripple edit.
When the source has no audio track
If blue A1 is not present for a source clip, there is no source A1 channel to patch. A video-only file cannot be made to produce audio by enabling a red A1 destination. Test the clip's actual source channels first. If the clip does contain audio but the blue channels are not visible, inspect how the clip is loaded and whether you are editing the expected source item.
When the timeline track is locked
A locked track can make a correct source patch look broken. The old Edit page reference says locked clips cannot be replaced, moved, or otherwise edited. Unlock the intended destination for the test, then lock it again only if protection is the goal. (DaVinci Resolve track-lock reference)
When the timeline is disabled or hidden
An enabled destination can still be invisible if the track is disabled or hidden. Check Enable or Disable Track separately from Auto Track Selector. Do not use a disabled track as your destination test because you will be diagnosing display or output state at the same time.
When a tutorial uses a compound clip or multicam clip
A compound or multicam timeline can hide the actual source and destination relationship you are trying to inspect. First reproduce the operation with a normal source clip. If the simple clip works, return to the compound or multicam timeline and test the internal or angle-specific workflow separately. Do not conclude that Auto Track Selector is broken from a single complex container.
When audio and video are linked differently
If video moves but linked audio stays behind, check Linked Selection and the audio track's Sync Lock. If the audio is intentionally independent, do not force it to follow simply because the video source patch is correct. Resolve can have a correct source mapping and a deliberate audio workflow at the same time.
When the problem appears only in one project
That points toward stored timeline state, track layout, or a project-specific edit rather than proving a global preference is wrong. Compare the failing timeline with the minimal test. The comparison is more useful than resetting the entire application because it preserves the evidence of what differs.
When the problem appears in every project
Check the installed version and current manual names first. As of September 2026, Blackmagic Design's current release announcement is Resolve 21.1, and its documentation page lists the 21.1 manual. If every project shows the same mismatch, note the exact build, operating system, operation, source type, and destination state before searching the forum or reporting the issue. (Blackmagic Design's Resolve 21.1 release announcement)
The same evidence-first method applies on Mac, Windows, and Linux. Resolve 21.1's manual listing covers those desktop platforms, but modifier labels and keyboard layouts can differ. Use the menu action shown in your installation instead of assuming a shortcut copied from a different platform. (Blackmagic Design's Resolve 21.1 manual listing)
Should I lock the track, disable Auto Track Selector, or turn off Sync Lock?
Choose the control based on the thing you want to protect: Lock Track protects the track from editing, Auto Track Selector excludes it from eligible operations, and Sync Lock stops it from rippling with a duration-changing edit. The choices are not interchangeable.
| Your actual goal | Use first | Why |
|---|---|---|
| Keep a finished title layer from being edited | Lock Track | You want a hard editing barrier |
| Delete a range only from dialogue | Auto Track Selector | You want other tracks excluded from that operation |
| Keep a music bed at its current time while picture ripples | Sync Lock off on the music track | You want to control ripple movement |
| Hide a track from the viewer or output | Disable Track | You want visibility or processing changed |
| Put a new source shot on V3 | Source patch plus red Track Destination Selection | You want a source edit to land on a chosen timeline track |
| Paste a copied clip to V3 | Auto Track Selector on V3, competing tracks considered | You want the paste operation to see the intended track |
The Editor's Guide calls Auto Track Selector a versatile operation control and contrasts it with Track Lock. The 20.2 guide then adds the current Sync Lock distinction. Together they support the smallest-change rule: exclude a track when you need to exclude one operation, lock it when it must not be edited, and change Sync Lock when the issue is ripple movement. (The Editor's Guide to DaVinci Resolve, Blackmagic Design's Sync Lock guide)
Here are three short scenarios.
Scenario 1: protect the final title
Lock the title track. This is the clearest case because you do not want a later selection or paste to modify the title at all. Auto Track Selector alone is too subtle if the track must remain protected from accidental edits.
Scenario 2: cut dialogue without touching the music
Use Auto Track Selector to define the tracks involved in the operation. Then use Sync Lock to decide whether the music should move in time with the ripple. If the music must stay at its original timecode, Sync Lock is the relevant control.
Scenario 3: place a new B-roll clip on V2
Patch blue V1 to red V2 and set red V2 as the destination for Insert or Overwrite. Do not lock V2. Auto Track Selector may matter later for paste or selection, but it is not the first setting to change for this source edit.
Locking a track can appear to fix an Auto Select problem because it blocks the unwanted edit entirely. That does not mean the Auto Track Selector was correctly configured. Once you unlock the track for normal work, the original state is still waiting for you.
What is the best way to learn DaVinci Resolve track targeting without memorizing every icon?
The best way to learn these controls is to practice the four operations that expose their differences: source Insert, source Overwrite, Paste, and Ripple Delete. Official Blackmagic training and manuals explain the vocabulary, while short practice timelines teach you what each state feels like.
Blackmagic's own Resolve 21 materials describe the application as a combined environment for editing, color, Fairlight audio, Fusion, and photo work. Grant Petty, Blackmagic Design's CEO, writes in the Resolve 21 New Features Guide: “DaVinci Resolve is easy to learn, especially if you’re switching from another editor, and has all of the tools you need to create breathtaking, high end work!” (DaVinci Resolve 21 New Features Guide)
The quote is encouraging, but the track controls still deserve deliberate practice. We have taught more than 100,000 students on Udemy, we are an official Udemy Business Partner, and we have taught and worked with Fortune 500 companies. The lesson we bring back to this problem is simple: do not memorize an icon before you understand the operation it governs.
Use this 20-minute practice exercise:
- Make a timeline with V1, V2, A1, and A2.
- Put a base clip on V1 and a short overlay on V2.
- Put dialogue on A1 and music on A2.
- Load a source clip with one video channel and at least two audio channels.
- Patch blue V1 to red V2 and blue A1 to red A2.
- Perform Overwrite and note what changes.
- Undo, then change only the red destination and perform Overwrite again.
- Copy a clip and change only Auto Track Selector state before Pasting.
- Mark a short range and change only Sync Lock before Ripple Delete.
- Write down the result in plain words.
Your notes should say things such as “blue V1 maps source picture,” “red V2 receives source edit,” “Auto Track Selector makes V2 eligible,” and “Sync Lock determines whether A2 moves.” If your notes use only the phrase “auto select,” the distinction has not stuck yet.
The official free training and the current manual are good places to verify terms. Community forums are useful when you have a specific symptom and can state the exact version and operation. The site's Cut Page vs Edit Page comparison can also help if a tutorial is showing a page layout that is not the page you are using.
Guided practice inside Resolve beats watching courses about Resolve when a control depends on timeline state.
TryUncle is the on-screen assistant for DaVinci Resolve on Mac and Windows. Ask in plain words and Uncle points at the exact control on your screen.
What should I do when DaVinci Resolve source auto select is still not working?
Stop changing controls at random and return to the operation-specific diagnosis: source edit, paste, selection, trim, or ripple. Reset the source patch, confirm the red destination, set Auto Track Selector for the operation, and then inspect Sync Lock if the timeline changes duration.
Use this final checklist:
- The installed build is identified, with Resolve 21.1 as the September 2026 reference point for this post.
- The blue source track is visibly patched to the intended red timeline track.
- The red Track Destination Selection matches the intended Insert or Overwrite destination.
- The intended paste track has Auto Track Selector enabled.
- Competing tracks are deliberately enabled or disabled for the current operation.
- Sync Lock matches the tracks that should ripple.
- The intended track is not locked.
- The intended track is not disabled or hidden.
- The source clip actually contains the audio channels you are trying to route.
- Selection Follows Playhead is not being mistaken for source patching.
- The test uses one operation at a time.
If the symptom is “Insert goes to V1,” begin with red destination and blue source patching. If the symptom is “Paste ignores V2,” begin with Auto Track Selector. If the symptom is “ripple moves the music,” begin with Sync Lock. If the symptom is “the wrong clip becomes active,” begin with Selection Follows Playhead and eligible-track state.
The answer is not a universal “turn Auto Select on.” In Resolve 21.1, the reliable fix is to name the operation, identify the control that owns it, and change only that control. Once the red and blue columns make sense, the timeline stops feeling random.
Start with Timeline > Source Track Selector > Reset Track Selection. Then test one short edit. That is the next step.
Frequently asked questions
- Why is DaVinci Resolve source auto select not working?
- The usual cause is that Source Track Selector, Track Destination Selection, and Auto Track Selector are being treated as one control. In Resolve 21, blue source buttons map source tracks to red timeline tracks, while the red track controls govern destination and timeline operations.
- How do I turn on source auto select in DaVinci Resolve 21?
- Open the Edit page, show Timeline > Source Track Selector, connect the blue source V1 or A1 button to the intended red timeline track, and then enable the red Auto Track Selector control for tracks that should participate in the next operation.
- Why does DaVinci Resolve paste to V1 instead of my selected track?
- Paste follows Auto Track Selector state, not just the red destination used for source edits. Turn on Auto Track Selector for the intended paste track and turn it off on competing tracks, then paste again.
- Does Auto Track Selector control Insert and Overwrite?
- Insert and Overwrite use source-to-timeline track patching and the red Track Destination Selection controls. Auto Track Selector still matters for other selection, paste, trim, and timeline operations, so changing it alone may not move an Insert edit.
- What changed in DaVinci Resolve 20.2 and 21 for source selection?
- Resolve 20.2 introduced a two-column Source Track Selector with blue source tracks and red timeline tracks, and moved the former Auto Track Selector function into independent timeline controls. Resolve 21.1 is the current September 2026 release context for this guide.
Sources
- Blackmagic Design Announces DaVinci Resolve 21.1
- DaVinci Resolve 21.1 Manual
- DaVinci Resolve 20.2 New Features Guide
- DaVinci Resolve 17 Beginner's Guide
- The Editor's Guide to DaVinci Resolve 17
- DaVinci Resolve 17 New Features Guide
- DaVinci Resolve 11 Reference Manual
- DaVinci Resolve 11 Mac Keyboard Shortcuts
- DaVinci Resolve 21 New Features Guide
- Blackmagic Design Forum: Auto-Select Doesn't Work as Expected
- Blackmagic Design Forum: Clip Always Wants to Go to V1
- Blackmagic Design Forum: Auto Track Selector
- Blackmagic Design Forum: Selection Follows Playhead
Put this guide to work with TryUncle.
Ask about the step you’re on. TryUncle sees your screen and points at the control you need, so you can keep learning in your own project.
Get TryUncle for Mac or WindowsKeep reading
Guides · Aug 2, 2026 · 39 min
DaVinci Resolve Source Tape Mode: The Complete Tutorial
How to use DaVinci Resolve's Source Tape mode on the Cut and Edit pages: enabling it, marking clips, shortcuts, and when it beats browsing the Media Pool.
Comparisons · Jul 10, 2026 · 28 min
DaVinci Resolve Cut Page vs Edit Page: The Real Differences
A full side-by-side of DaVinci Resolve's Cut and Edit pages: timeline, trimming, multicam, and hardware differences, plus which one to use.
Guides · Jul 8, 2026 · 16 min
DaVinci Resolve Keyboard Shortcuts: The Complete Reference
Every essential DaVinci Resolve keyboard shortcut, organized by page: Edit, Cut, Color, Fairlight, Fusion, and Deliver, plus how to customize and share your own.