Articles / Guidesupdated for DaVinci Resolve 21.0.2 (July 2026)
DaVinci Resolve Super Scale Settings for the Best Quality
Quick answer
For the best quality, match the mode to the jump: 2x Enhanced for HD to 4K, plain 2x or 3x for smaller jumps, and 4x only for SD-to-HD archival rescues. Set Sharpness to Medium and Noise Reduction to Low or Medium, then render cache the clip. Super Scale is DaVinci Resolve Studio-only; the free version has no upscaler at all.
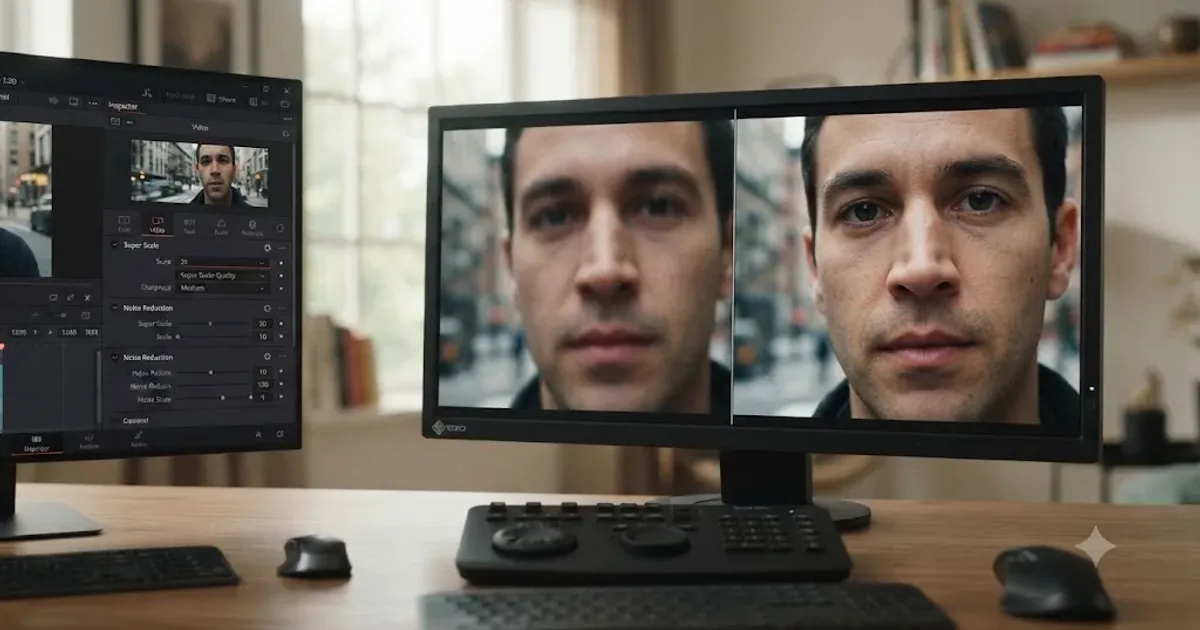
I've spent seven years cutting commercial work inside DaVinci Resolve, and I still see editors treat Super Scale like a magic slider: crank it to 4x, hope for the best, wonder why the render queue died. It isn't magic. It's a specific tool with specific settings, and those settings change depending on what resolution you're starting from.
This guide is the settings-by-source-resolution reference I wish existed the first time a client handed me a folder of 480p wedding tape scans and asked for a 4K delivery. As of July 2026, on DaVinci Resolve 21.0.2, here's exactly which Super Scale mode, Sharpness value, and Noise Reduction value to use, and why the wrong combination either wastes your render time or makes footage look worse than doing nothing at all.
What is Super Scale in DaVinci Resolve?
Super Scale is a DaVinci Resolve Studio feature that uses the DaVinci Neural Engine, Blackmagic's built-in machine learning system, to rebuild a clip at a higher resolution instead of simply stretching its existing pixels. Blackmagic's own reference manual describes it as a tool that "actually increases the source resolution of the clip being processed," meaning the clip genuinely gains pixels rather than displaying old pixels larger, at the cost of becoming more demanding to work with afterward.
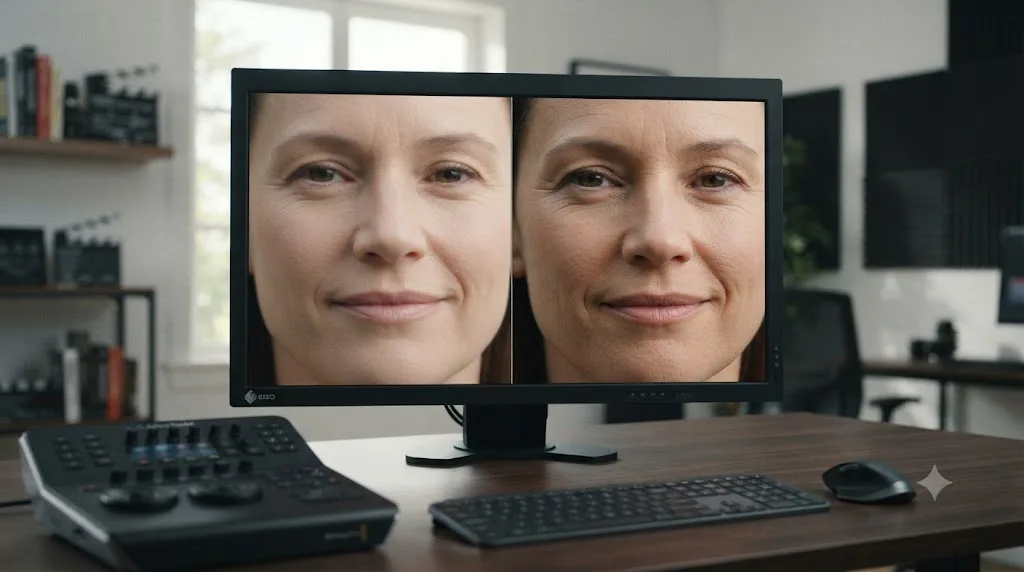
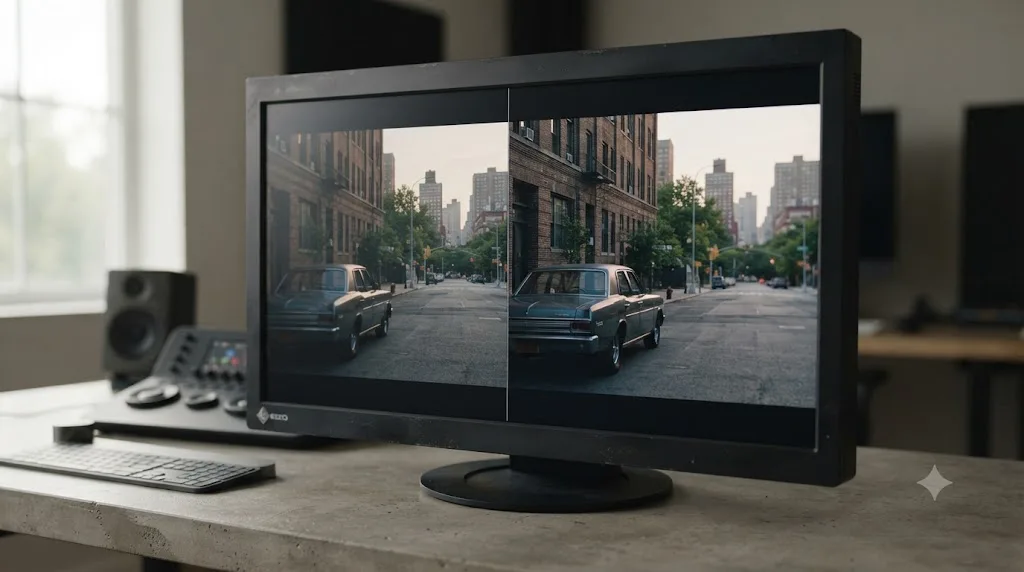
That distinction matters more than most editors realize. A normal resize, the kind every NLE has had since the 1990s, takes the pixels you already have and interpolates between them with math: bilinear, bicubic, Lanczos, take your pick. Super Scale instead asks the Neural Engine a different question: given what a face, a brick wall, or a blade of grass typically looks like at higher resolution, what detail is probably missing here? It then paints that predicted detail in. The result can look sharper than a mathematical resize of the same source, but it's also a guess, and guesses can go wrong in specific, learnable ways.
Super Scale doesn't stretch pixels. It rebuilds them, frame by frame, guessing at detail a mathematical resize could never invent.
Super Scale first shipped with the DaVinci Neural Engine in DaVinci Resolve 16 back in 2019, arriving alongside the Neural Engine's face detection and auto color match tools as part of what Blackmagic called, at the time, a foundational AI layer for the app. It has been refined in nearly every major version since, most notably in DaVinci Resolve 18.5, which added the 2x Enhanced mode this guide leans on heavily.

What are the DaVinci Resolve Super Scale settings, exactly?
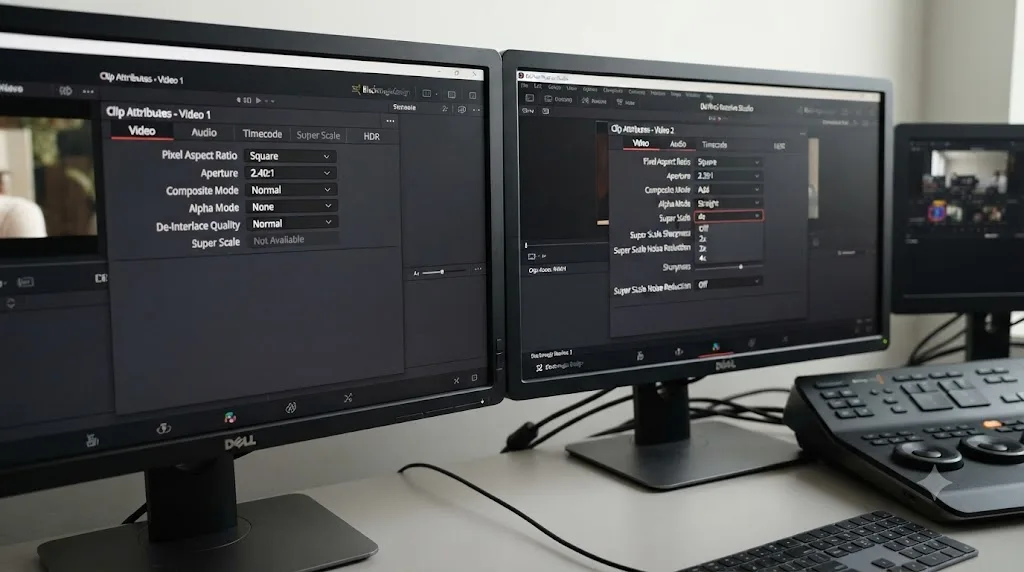
Super Scale exposes three controls once enabled: a mode dropdown, a Sharpness value, and a Noise Reduction value. All three sit together in the Inspector's Video tab or in the Clip Attributes window's Video tab, and all three apply per clip, not per project.
| Setting | Options | What it actually does |
|---|---|---|
| Mode | 2x, 2x Enhanced, 3x, 3x Enhanced, 4x, 4x Enhanced | Sets how many times larger, in each dimension, the rebuilt clip becomes. Enhanced variants run an extra refinement pass with independent tuning. |
| Sharpness | Low, Medium, High | Controls how aggressively the Neural Engine reinforces edges it has just generated. Higher values increase apparent detail and the risk of a "digital" look. |
| Noise Reduction | Low, Medium, High | Smooths grain and sensor noise before the upscale pass, since noise gets amplified, not softened, when a frame gets bigger. |
Two things trip people up immediately. First, the plain modes (2x, 3x, 4x) are fixed-ratio: a 2x mode always doubles both dimensions, so a 1920x1080 frame becomes 3840x2160, exactly a 4K UHD frame, not some arbitrary size in between. Second, Enhanced modes aren't just "extra sharp" versions of the plain modes. They add a second processing stage with its own Sharpness and Noise Reduction sliders, which is why Blackmagic's release notes for DaVinci Resolve 18.5 specifically framed the new 2x Enhanced mode as built for "extremely high quality 2x output," not simply "sharper 2x output."
There's a second, unrelated scaling system in DaVinci Resolve worth knowing about so you don't confuse the two. Project Settings has its own resize filter for the whole timeline, with Sharper, Smoother, Bicubic, Bilinear, and Custom options, and Blackmagic's manual notes that Sharper "usually provides the best quality for most projects" for this filter specifically. That's a mathematical resize applied at the timeline level to every mismatched clip, free version included. Super Scale is the Neural Engine's per-clip, Studio-only alternative, and the two systems can technically stack, though there's rarely a reason to run both on the same clip.
How do I turn on Super Scale in DaVinci Resolve?
Turning Super Scale on takes four clicks, but getting good quality out of it takes the steps after that. Here's the full sequence.
- Select the clip or clips that need upscaling, either in the Media Pool or on the timeline.
- Open the Inspector and click the Video tab. You can also right-click the clip and choose Clip Attributes, which has an identical Video tab.
- Find the Super Scale section and turn it on. The mode dropdown appears once it's enabled.
- Choose the mode that matches your resolution jump, using the table in the next section.
- Set Sharpness and Noise Reduction. Start at Medium and Low, respectively, and adjust from there.
- Right-click the clip and set Render Cache to On, or generate Optimized Media for it, so Resolve doesn't recalculate the upscale on every scrub.
- Check your result at 100 percent zoom in the viewer, not at Fit, before you commit the setting across a whole timeline of similar clips.
That last step gets skipped constantly, and it's the one that saves you from a bad surprise. Resolve's viewer at Fit scales your frame down to fit the window, which visually hides oversharpening and noise reduction smoothing. A setting that looks perfect at Fit can look artificial once a client plays your export on an actual 4K or 8K screen.
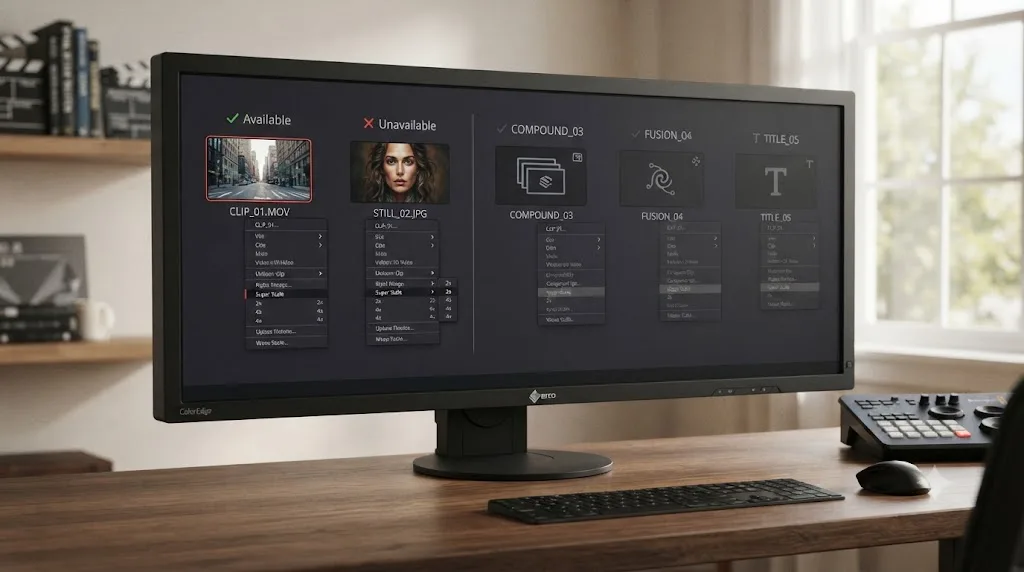
Why is Super Scale grayed out, and does it work on stills, titles, or Fusion clips?
Super Scale needs a clip it can actually rebuild pixel by pixel, and not every clip in a Resolve project qualifies. If the checkbox in the Inspector is dimmed and won't respond, work through these causes in order.
The most common cause is the free version, which has no Super Scale control to enable in the first place; more on that distinction later in this guide. The second most common cause is clip type. Super Scale won't apply directly to a compound clip, a Fusion clip, a title, or a generator, because Resolve treats those as containers holding a nested timeline or a procedural composition rather than a plain video clip. Editors on Blackmagic's own support forum have run into exactly this when trying to enable Super Scale directly on a compound clip and finding the control unresponsive. The workaround is to open the compound clip or Fusion clip as its own timeline, apply Super Scale to the real footage sitting inside it there, then return to your main timeline. Multicam clips behave the same way, since they're also container clips built from multiple angles rather than a single piece of footage; flatten to a single angle first, or apply Super Scale before you build the multicam group.
If opening the nested timeline isn't practical, the same forum thread points at a second route: generate Optimized Media for the clip instead. Optimized Media bakes the Super Scale result into a new managed media file, which sidesteps needing the checkbox live on the container clip itself, at the cost of a longer generation job and more drive space.
Stills are the one exception worth calling out, since it surprises people who assume Super Scale is video-only. It works on still images imported into the Media Pool the same way it works on video, rebuilding detail for that single frame instead of a whole clip. If you're upscaling a still for a print deliverable or a paused-frame graphic, the same mode, Sharpness, and Noise Reduction guidance in this guide applies without modification, since the Neural Engine doesn't treat a still any differently from a one-frame video clip.
Two smaller, less common causes round out the list. A known bug affected at least one DaVinci Resolve 20 beta build, graying out Super Scale even on ordinary video clips, and was reportedly fixed in a later build, so if you're running a beta and everything else checks out, that's worth ruling in before you assume you've done something wrong. And a clip already sitting at or above your project's timeline resolution sometimes won't offer a meaningful Super Scale option either, since there's no resolution gap left for the Neural Engine to fill.
What is the best Super Scale setting by source resolution?
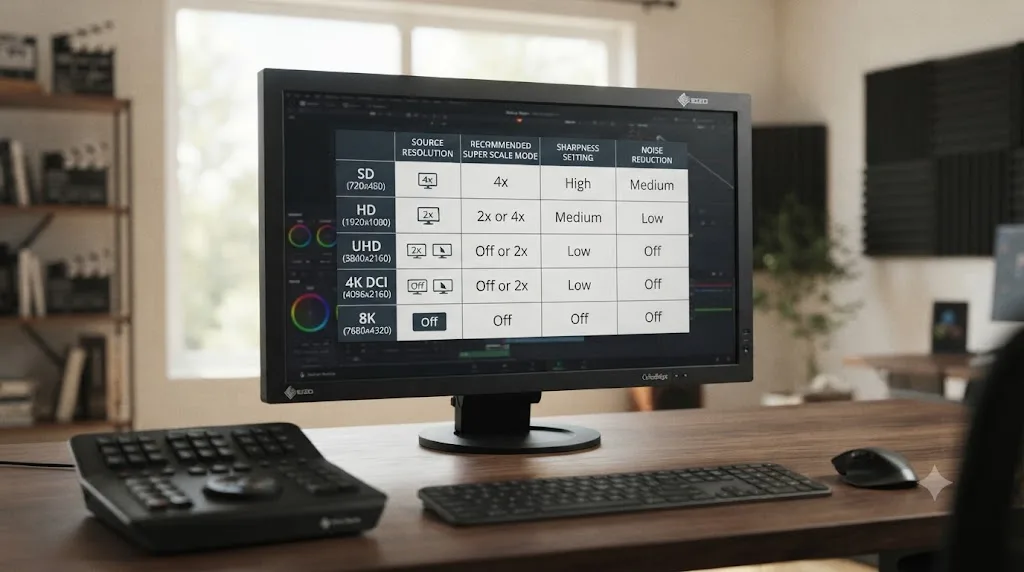
This is the table that matters most, and it's the one I built after running the same handful of source formats through every mode combination on real timelines. Treat it as a starting point tuned to the most common jump for each source, then adjust Sharpness and Noise Reduction based on how clean or noisy your specific footage is.
| Source resolution | Target timeline | Recommended mode | Sharpness | Noise Reduction | Why |
|---|---|---|---|---|---|
| 480p SD (720x480 or similar) | 1080p HD | 4x | Medium | High | A 4x jump from SD is already a stretch; the Neural Engine needs the Noise Reduction pass to avoid amplifying tape or compression artifacts before it invents new detail. |
| 480p SD | 4K UHD | 4x, then a second timeline-level resize | Medium | High | 4x from SD lands you at 1080p-equivalent detail at best; stacking a second resize to reach 4K keeps expectations honest about a hard technical limit. |
| 720p HD | 1080p HD | 2x Enhanced | Low-Medium | Low | A modest jump on generally clean footage; 2x Enhanced's extra pass cleans edges without needing aggressive Sharpness. |
| 1080p HD | 4K UHD (clean source, good light) | 2x Enhanced | Medium | Low | The single most common real-world use case, and where Enhanced mode earns its extra render time the most clearly. |
| 1080p HD | 4K UHD (noisy or low-light source) | 2x Enhanced | Medium | Medium-High | Prioritize Noise Reduction over Sharpness here; noise doubles in visible size along with the frame, and sharpening amplifies it further. |
| 4K UHD | 8K | 2x or 2x Enhanced | Low-Medium | Low | Source detail is already dense; aggressive Sharpness on a 4K source pushed to 8K tends to look artificial rather than crisper. |
| Mixed multicam (720p, 1080p, and 4K in one timeline) | 4K UHD timeline | Set per clip, matching the rows above | Match source | Match source | Apply Super Scale through Clip Attributes on each clip individually; a single project-wide setting can't serve three different source resolutions well. |
A setting that looks sharper on your monitor can look worse on a client's TV. That's not a contradiction, it's a resolution problem: your grading monitor and a consumer 4K or 8K display sit at very different viewing distances and pixel densities, and oversharpening that reads as "punchy" up close often reads as "crunchy" or artificial from six feet back on a living room screen.
Two patterns hold across nearly every source format I've tested. Noise Reduction needs to go up before Sharpness does, because noise gets rebuilt and amplified right alongside real detail; and Enhanced modes are worth their extra render time on anything you're delivering to a client, reserving the plain modes for quick internal previews or hardware too slow to run Enhanced comfortably.
Should I use 2x Enhanced or regular 2x?
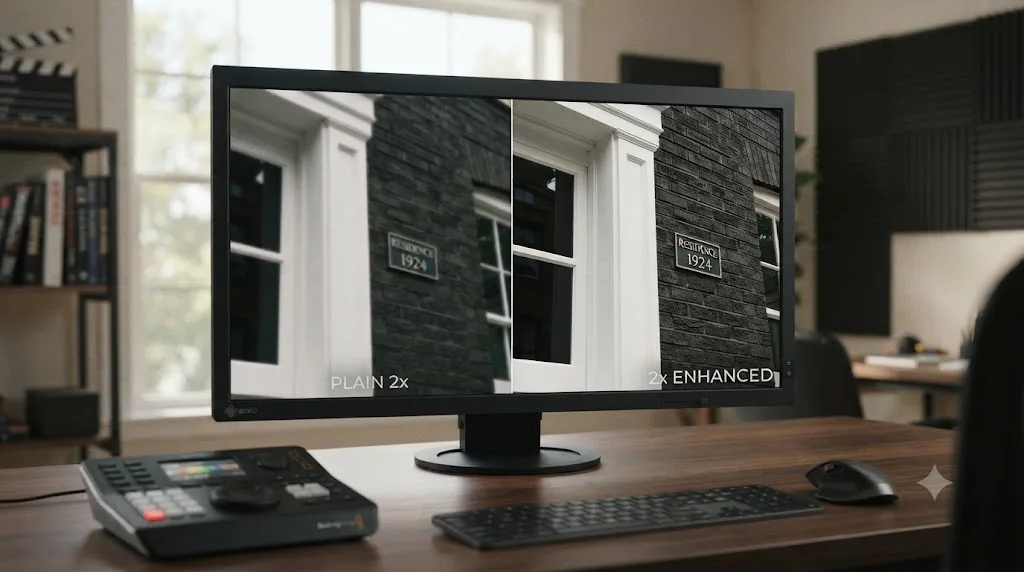
Use 2x Enhanced whenever your machine can render it in a reasonable time. It performs the same doubling as plain 2x, but routes the result through an additional refinement pass with its own independent Sharpness and Noise Reduction sliders, which is exactly why Blackmagic marketed the mode's arrival in DaVinci Resolve 18.5 as delivering "extremely high quality 2x output" rather than framing it as a speed option.
In practice, the difference shows up most around edges: text, architectural lines, and high-contrast borders between subject and background. Plain 2x tends to leave a faint halo or stair-stepping at those edges once you're actually at 4K resolution. 2x Enhanced's second pass consistently cleans that up, at the cost of noticeably longer render and playback calculation time.
The exception is hardware. If 2x Enhanced turns your timeline into a slideshow, or the render queue is timing out, drop to plain 2x rather than fighting your GPU. A finished export in plain 2x beats an accurate but unrenderable 2x Enhanced timeline every time a deadline is involved. This is also where render caching earns its keep, since caching the clip once removes the playback penalty entirely regardless of which mode you picked.
The same logic extends to 3x Enhanced and 4x Enhanced, which exist for larger jumps but demand proportionally more from your GPU. As a rule, only reach for a 4x mode, Enhanced or not, when your source is genuinely SD or heavily degraded HD; using 4x on a clean 1080p source to reach 4K is using twice the multiplier the job needs, and it typically looks softer and more artificial than the correctly-sized 2x Enhanced pass.
Sharpness or Noise Reduction: which one actually improves quality?
Neither setting improves quality in isolation, and treating them as a single "make it better" dial is the single most common mistake I see on this feature. They solve two different problems, and using the wrong one to fix a problem the other setting causes just compounds it.
Noise Reduction runs first, conceptually, smoothing grain and sensor noise in the source before the resolution increase happens. Skip it on a noisy source and you're not just keeping the noise, you're upscaling it: every noise speckle gets the same detail-preserving treatment as real image content, so it comes out the other side larger and, often, more visually prominent than it was in the original frame.
Sharpness runs after, reinforcing edges in the newly generated detail. Colorist Salik Waquas, who works inside DaVinci Resolve professionally and has tested Super Scale extensively, put the tradeoff plainly: setting both Sharpness and Noise Reduction to High "yields a sharper, cleaner image, but it might look a tad 'digital' to some eyes." His practical advice for anyone unsure where to start is direct: "If you prefer a more natural look, try Medium. Don't be afraid to experiment."
More Sharpness is not the same thing as more resolution. Pushing Sharpness to High on a clean source can make fine detail look artificially crisp, almost etched, rather than genuinely sharper, because the Neural Engine is reinforcing edges it already generated rather than recovering detail that was never there to begin with.
A reliable diagnostic: if your upscaled footage looks grainy or speckled, raise Noise Reduction before you touch Sharpness. If it looks flat or soft despite a clean source, raise Sharpness modestly, one step at a time, and re-check at 100 percent zoom after each change. Treating these as sequential fixes rather than a single combined slider will get you to a better result faster than guessing at both simultaneously.
Why is Super Scale making DaVinci Resolve so slow or crashing?
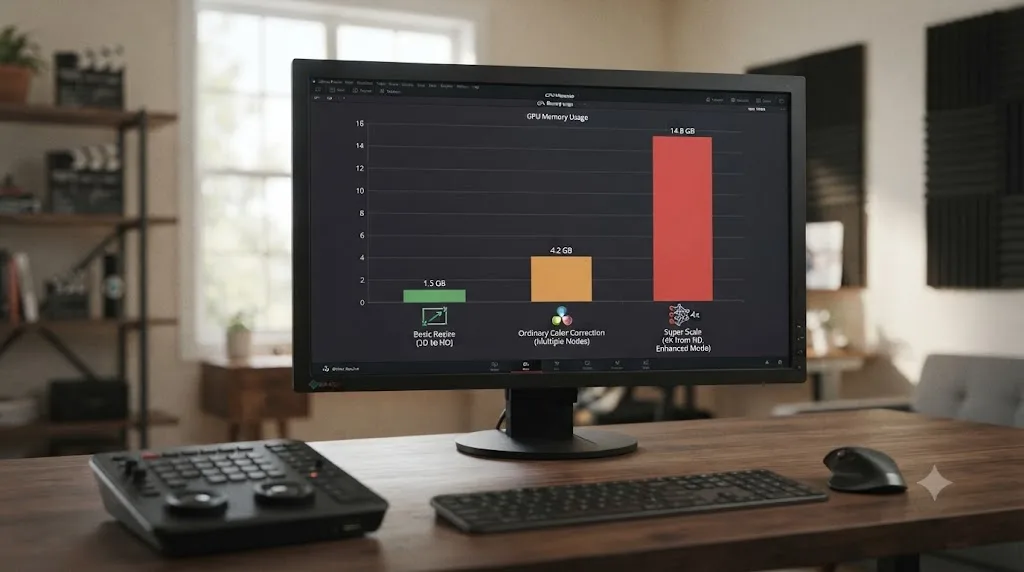
Super Scale is slow, and sometimes crash-inducing, because of exactly what makes it different from a normal resize: it generates an entirely new, higher-resolution version of every frame, in memory, using a neural network, rather than applying a lightweight math filter on playback. Blackmagic's own manual is blunt about the consequence, warning that the resulting clip is "more processor-intensive to work with than before, unless you optimize the clip... or cache the clip in some way."
If you've hit DaVinci Resolve's "your GPU memory is full" warning while Super Scale is active anywhere in your project, that's very likely cause and effect, not coincidence. Super Scale sits alongside Magic Mask, Fusion compositions, and heavy noise reduction as one of the most GPU memory-hungry operations in the entire app, and stacking two or more of them on the same clip multiplies the load rather than adding to it. Our full breakdown of every real fix for that warning, including cache size settings, driver issues, and how much VRAM you actually need, covers the recovery steps in more depth than fits here: DaVinci Resolve GPU Memory Is Full: Every Real Fix.
The practical fixes, in order of how often they solve it:
- Apply Super Scale late in your workflow, not early. Grade, cut, and finish your edit decisions first, then apply Super Scale as one of the last steps before delivery, so you're not carrying the extra memory and render cost through every editing session.
- Render cache or optimize the clip immediately after setting it. This converts the ongoing computational cost into a one-time render, which is the single biggest relief for both slowdowns and memory pressure.
- Apply it to fewer clips at once. A timeline with Super Scale active on every single clip simultaneously behaves very differently from the same timeline with it applied to three key shots. Selective use, only where it's actually needed, keeps memory pressure manageable.
- Lower your timeline or Fusion resolution while working, then restore it for the final render. This doesn't undo the effect, since Super Scale re-renders correctly at export regardless of your working preview resolution, but it dramatically reduces the interactive load while you're still editing.
- Check your GPU driver and available VRAM. Super Scale's memory appetite scales with your target resolution; a 4x upscale to 8K on an 8GB GPU is a very different ask than the same upscale on a 24GB card.
Should I render cache Super Scale clips?
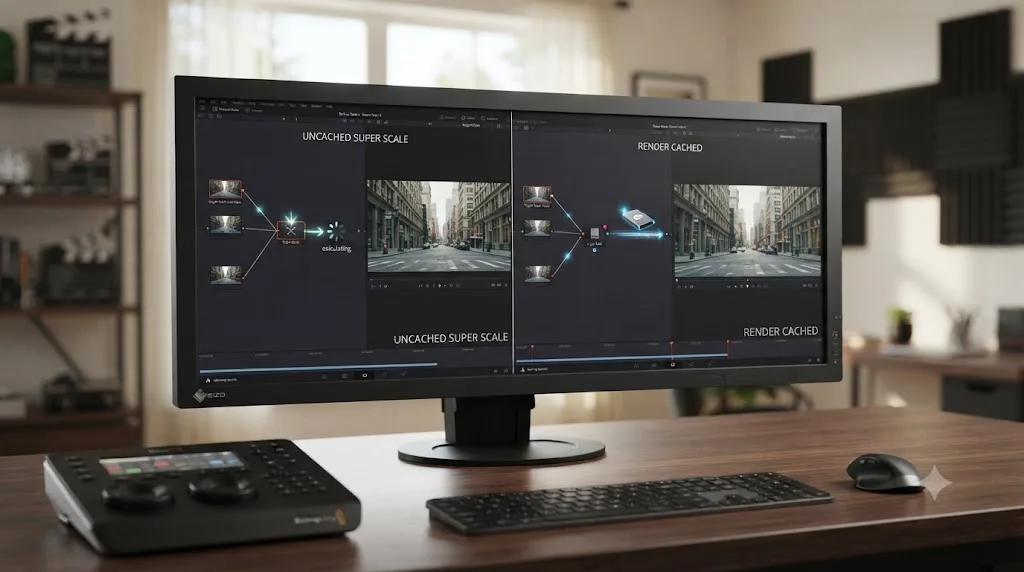
Yes, essentially always, and as early as you're confident the setting is final. Render caching turns a Super Scale clip from an ongoing computational liability into a plain, playable file, which is exactly the fix Blackmagic's own documentation points to when it flags Super Scale as processor-intensive.
Render cache turns a Super Scale clip from a liability into a normal clip again. Once cached, playback and scrubbing use the pre-rendered file instead of recalculating the Neural Engine's upscale on every single frame you touch, which is the difference between a responsive timeline and one that stutters every time your playhead crosses a Super Scale clip.
The tradeoff is disk space and cache invalidation. A Super Scale cache file is, by definition, larger than the original source, since it's storing genuinely higher-resolution frames, and any further change to that clip, a new grade, a repositioned crop, a swapped Sharpness value, invalidates the cache and forces a re-render. That's exactly why the order of operations matters: settle your Super Scale mode and Sharpness and Noise Reduction values first, cache second, and treat any change to those values afterward as requiring a fresh cache, not a patch. If you're not sure whether Smart or User cache mode fits your workflow better for this kind of clip, our dedicated guide walks through both modes and when each one makes more sense: DaVinci Resolve Render Cache Explained: Smart vs. User Mode.
On a slow laptop or a machine already tight on drive space, this can get expensive fast on longer timelines. If you're working from proxy media because your laptop can't handle full-resolution playback, apply Super Scale at the very end of your pipeline, on the original full-resolution media, not on the proxies; upscaling a proxy just teaches the Neural Engine to guess at detail from an already-degraded source, compounding the softness rather than fixing it.
What happens if Optimized Media generation fails on a Super Scale clip?
Because Optimized Media is one of the two standard fixes for Super Scale's playback cost, and because baking in a Super Scale result produces a genuinely large file, Super Scale clips are also a common place to run into DaVinci Resolve's "unable to create optimized media" error. The failure is almost never about Super Scale's math going wrong. It's about where Resolve is trying to write the resulting file, and how much room that file actually needs.
Optimized Media generated from a Super Scale clip is, by definition, larger than Optimized Media generated from the same clip with Super Scale off, since you're asking Resolve to write out genuinely higher-resolution frames rather than a lightly transcoded copy of the original. A cache drive that comfortably handled Optimized Media for your whole project before you touched Super Scale can run out of headroom specifically once Super Scale gets added to the mix, especially across a batch of clips generated at once.
If you hit that error on a Super Scale clip, check the same two places any Optimized Media failure points to. Open Preferences, then Media Storage, and confirm the scratch disk Resolve is actually writing to is mounted, reachable, and has real free space, not a number that looks free in Finder or File Explorer but is stale after Resolve deleted old cache without the OS updating its count. Then open Project Settings, Master Settings, Working Folders, and confirm Cache Files Location points at that same reachable drive. Our deeper breakdown of this error covers the permissions and path issues that trip people up beyond drive space alone, worth a full read if the fix here doesn't clear it: DaVinci Resolve Unable to Create Optimized Media Error: The Fix.
One Super Scale-specific wrinkle is worth isolating separately. If the error only shows up on clips with Super Scale enabled, and identical clips without it generate Optimized Media fine, try capping the Optimized Media Resolution setting in Preferences, Media Storage, to something lower, confirm the pipeline completes end to end at that lower setting, then raise it back up in steps. That tells you whether the real problem is drive space and permissions, or whether the specific combination of Super Scale's output resolution and your chosen Optimized Media codec is simply too large for the drive or format to write in one job.
Does Super Scale handle noisy or low-light footage differently?
Yes, and this is where Super Scale's own Noise Reduction slider needs to do more work than usual, or needs backup from Resolve's dedicated Noise Reduction tools before the upscale even happens. Noise in a source clip isn't resolution-dependent in the way real image detail is; it's closer to random, frame-to-frame speckling, and the Neural Engine's job of guessing "what should this really look like at higher resolution" gets measurably harder when a chunk of the input is noise rather than signal.
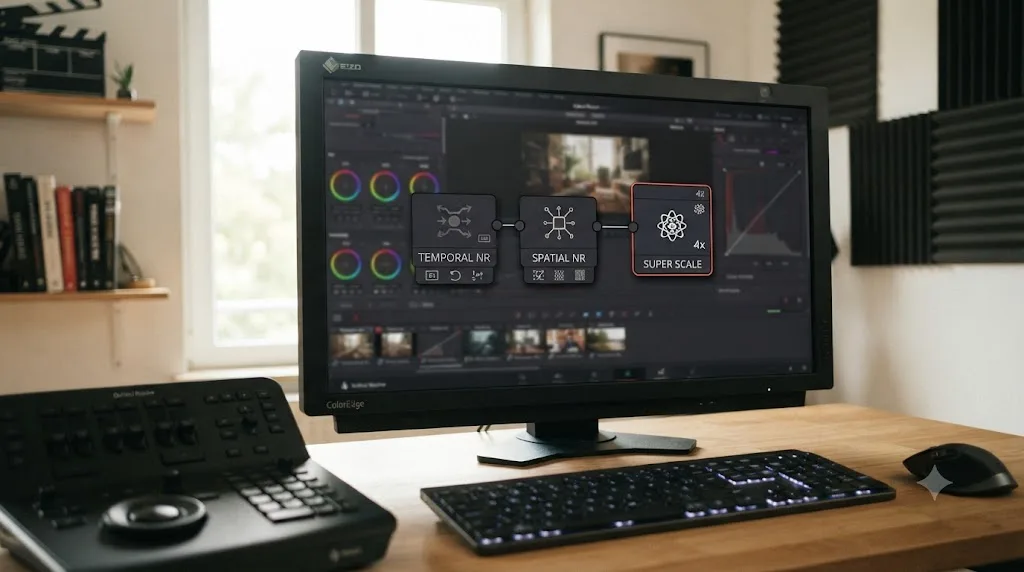
For genuinely noisy sources, a two-stage approach outperforms relying on Super Scale's built-in Noise Reduction alone: run DaVinci Resolve's Temporal and Spatial Noise Reduction tools on the Color page first, on a node placed before your Super Scale application, then apply Super Scale afterward with its own Noise Reduction set conservatively, around Low to Medium, since the heavy lifting already happened upstream. Our full settings guide covers Temporal and Spatial NR in the depth this topic deserves, including the frame count, threshold, and Motion Range values that pair well with an upscale downstream: DaVinci Resolve Noise Reduction Settings: Temporal and Spatial.
Skipping that first pass and just cranking Super Scale's own Noise Reduction to High to compensate produces a specific, recognizable look: skin and flat surfaces go waxy and over-smoothed, because High Noise Reduction doesn't distinguish well between "sensor grain" and "fine natural texture" like skin pores or fabric weave. It's the same tradeoff Salik Waquas flagged with his High-setting warning, just more pronounced on footage that was already struggling before the upscale started.
Does Super Scale work in the free version of DaVinci Resolve?
No. Super Scale is one of the DaVinci Neural Engine tools Blackmagic Design reserves specifically for DaVinci Resolve Studio, which is priced at $295 as a one-time license rather than a subscription. Opening Clip Attributes or the Video Inspector on the free version won't show a weaker or watermarked Super Scale option; the control simply isn't present.
That's worth internalizing before you plan a project around it. The free version tops out at editing and finishing up to Ultra HD (3840x2160) at 60fps with no upscaler at all for sources that fall short of your timeline resolution; you'd need to rely on the ordinary timeline-level resize filter instead, which handles mismatched resolutions but without any Neural Engine detail reconstruction. Studio adds Super Scale alongside Magic Mask, voice isolation, AI noise reduction, and resolutions and frame rates well beyond what the free version supports.
The free version of DaVinci Resolve has no upscaler at all, not a weaker one. If your project genuinely depends on rescuing SD or badly undersized HD footage for a 4K delivery, that's a real, specific reason to buy Studio, distinct from the more marginal features on the list. Our full free-versus-Studio breakdown walks through the complete feature list and the honest cases for and against paying, if Super Scale is the deciding feature on your list or just one of several: DaVinci Resolve Studio Price: Free vs. Studio Cost, Explained.
What GPU do I need for Super Scale in DaVinci Resolve 21?
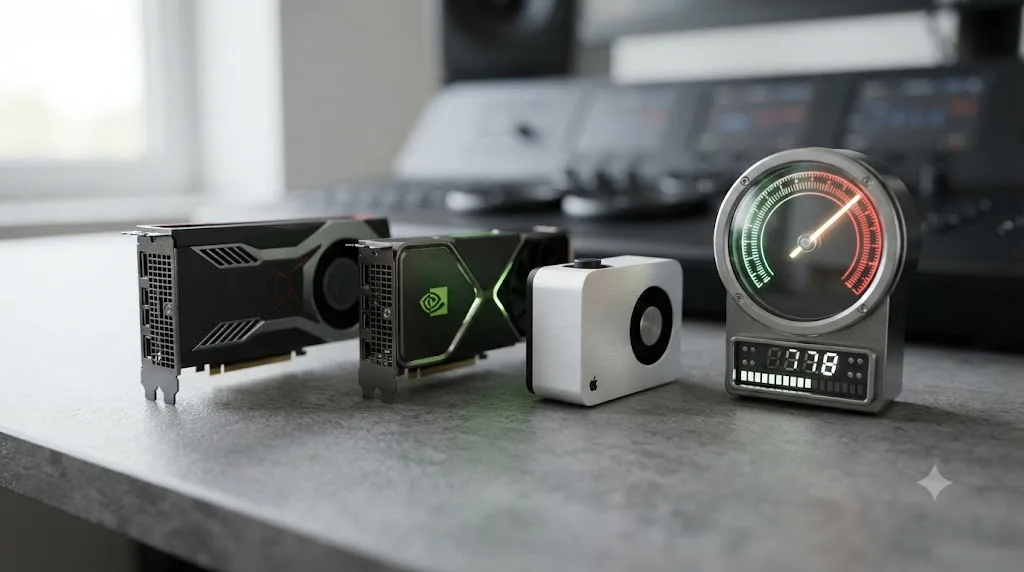
There's no separate hardware requirement specific to Super Scale beyond a GPU capable of running DaVinci Resolve's other Neural Engine tools comfortably, but GPU choice affects render time on this feature more than on almost any other tool in the app, since it's regenerating full frames rather than applying a lightweight filter.
Blackmagic's own DaVinci Resolve 19 features guide documents a concrete acceleration: Super Scale runs "up to 3.5x faster" on supported AMD GPUs, specifically naming the Radeon 6800, 7700, and 7900 as supported cards, or newer equivalents. That's a meaningful, sourced number, not marketing vagueness, and it's worth checking your GPU model against that list if Super Scale render times feel unreasonably slow on an AMD system.
On Nvidia systems, Super Scale uses CUDA acceleration and scales with both CUDA core count and available VRAM, since the operation is memory-bound as much as compute-bound; a card with fewer cores but more VRAM can sometimes outperform a faster card that runs out of memory partway through a long 4x render. Puget Systems, which benchmarks editing workstations professionally, recommends at least 12GB of VRAM for a 4K timeline and 20GB or more for 6K or 8K work as a general floor for DaVinci Resolve; Super Scale pushes you toward the high end of whichever bracket you're targeting, since it's a heavier per-frame load than ordinary color correction or a basic resize. On Apple Silicon Macs, Super Scale runs on the unified GPU cores, and more GPU cores directly shorten render time.
If you're on an AMD system and Resolve isn't recognizing your GPU correctly at all, that's a separate, more basic problem worth ruling out first, since driver and detection issues bottleneck every GPU-accelerated feature in Resolve, Super Scale included, not just this one.
What's the resolution ceiling for Super Scale, and should I stack multiple passes?
DaVinci Resolve Studio's own software ceiling is enormous. Blackmagic's product page states plainly that "DaVinci Resolve Studio supports up to 120fps at a massive 32K resolution," so nothing about Super Scale's math stops you from chaining passes to reach absurd output sizes. In practice, your GPU's VRAM is the real ceiling, and it arrives long before the software one does. Super Scale's memory footprint scales with the output frame size, not the input, so a 4x pass on a 4K source targeting 16K asks far more of your card than the same 4x pass on a 1080p source targeting 4K, even though both are labeled "4x."
Stacking passes, applying Super Scale, caching or optimizing the result, then applying Super Scale a second time to the new higher-resolution clip, is technically possible. This isn't something I've run a controlled side-by-side test on, but the mechanism is worth understanding regardless: each pass asks the Neural Engine to invent detail again, and the second pass is working from a frame that already contains one round of invented detail rather than genuinely captured detail. Two rounds of guessing compound, and there's no equivalent of the original signal left to correct against.
For that reason, use the highest single multiplier that covers your resolution jump in one pass, rather than stacking two smaller multipliers to get there. A straight 4x pass from SD to HD asks the Neural Engine to guess once; reaching the same output through two separate 2x passes asks it to guess twice, with the second guess built on the first. If your actual jump is bigger than any single mode allows, for example rescuing SD footage all the way to 16K, that's a sign Super Scale isn't the right tool for the whole job on its own. A specialized restoration tool built for extreme jumps, or simply delivering at a lower, more honest final resolution than requested, beats manufacturing detail across repeated passes that was never in the source to begin with.
Has Super Scale changed across DaVinci Resolve versions?
Yes, in ways worth knowing if you're troubleshooting a tutorial that doesn't match what you're seeing on screen, or wondering whether an older workflow still applies.
| Version | Year | What changed for Super Scale |
|---|---|---|
| DaVinci Resolve 16 | 2019 | Super Scale ships as part of the original DaVinci Neural Engine launch, alongside face detection and auto color matching. |
| DaVinci Resolve 18 | 2022-2023 | Existing 2x, 3x, and 4x modes carry forward with refined Neural Engine models. |
| DaVinci Resolve 18.5 | July 2023 | Adds the 2x Enhanced mode, described in Blackmagic's release notes as built for "extremely high quality 2x output," with independent Sharpness and Noise Reduction controls for that mode. |
| DaVinci Resolve 19 | April 2024 | Adds AMD GPU acceleration specifically for Super Scale, up to 3.5x faster on supported Radeon 6800, 7700, and 7900-class cards or newer. |
| DaVinci Resolve 20-21 | 2025-2026 | Super Scale's modes and controls remain stable; broader Neural Engine and GPU pipeline improvements across these versions benefit Super Scale render times indirectly, alongside a wider software resolution ceiling of up to 32K in Studio. |
If you're following an older tutorial that only mentions 2x, 3x, and 4x with no Enhanced variants, it predates DaVinci Resolve 18.5 from July 2023, and you're missing the mode this guide recommends as the default starting point for most HD-to-4K work. If a tutorial claims Super Scale is unusably slow with no mention of GPU-specific acceleration, check whether it predates DaVinci Resolve 19's AMD improvements from April 2024, since render time on supported hardware has genuinely improved since then, not just anecdotally.
Is Topaz Video AI better than DaVinci Resolve's Super Scale?
For pure, isolated upscaling quality on badly degraded footage, often yes. For most real editing workflows, the honest answer is more nuanced than a single winner, and it depends heavily on what you're optimizing for: maximum recoverable detail, or finishing the job without leaving your NLE.
| DaVinci Resolve Super Scale | Topaz Video AI | |
|---|---|---|
| Where it runs | Inside DaVinci Resolve, per clip, no export required | Standalone app; requires exporting footage in and a finished file back out |
| Price | Included with DaVinci Resolve Studio, $295 one-time | Roughly $299 per year as a subscription |
| Detail recovery on badly degraded sources | Generally more conservative, prioritizing clean results over aggressive reconstruction | Generally more aggressive, with dedicated models that recover more visible texture on rough sources |
| Speed | Faster on comparable hardware in independent testing | Slower; roughly double the processing time of Resolve on the same high-end hardware in one published comparison |
| Workflow fit | Zero round trips; grade, cut, and deliver in one timeline | Requires a round trip: export, process in Topaz, reimport, re-cut if needed |
That comparison table reflects a real published test: Aiarty's side-by-side review found Topaz Video AI producing a "cleaner but slightly softer image" from Resolve's Super Scale by comparison, with more visible texture reconstruction from Topaz, but roughly twice the processing time on the same RTX 4080 and Core i9 hardware. Whether that tradeoff is worth it depends entirely on your job: a single hero shot on a feature film justifies a round trip through a specialized tool, but a full multicam event timeline usually doesn't.
Two clips shot on the same camera can need two completely different Super Scale settings, and that's exactly the kind of per-clip flexibility that keeps Super Scale competitive even against a more aggressive standalone tool: you're never locked into one global setting for an entire project the way a batch-processed Topaz export effectively is.
Choose Super Scale if you want the upscale to live inside your existing edit, need to tune it per clip and per grade, or are working under a deadline where a round trip to a second application isn't realistic. Choose Topaz Video AI if you have one or a small number of hero shots that are genuinely rough, a subscription budget you're comfortable with, and the schedule room for an export-and-reimport cycle.
What mistakes ruin Super Scale quality most often?
After running this feature across everything from archival tape scans to drone footage, the same handful of mistakes show up over and over, on client jobs and in our editing community alike.
- Applying Super Scale before finishing the edit. Every re-cut, trim, or replaced clip after Super Scale is active means Resolve is recalculating an expensive upscale for footage you might not even keep. Grade and finalize your cut first.
- Using 4x when 2x Enhanced would do. A higher multiplier isn't automatically better quality; it's a bigger guess. Match the mode to the actual resolution gap, using the settings-by-source-resolution table above, not the biggest number in the dropdown.
- Judging the result at Fit instead of 100 percent zoom. Resolve's viewer scales down to fit the window by default, which hides both oversharpening and residual noise. Always check at native resolution before committing.
- Cranking Sharpness to fix a noise problem. Sharpness reinforces edges; it doesn't remove speckling. If your footage looks grainy after upscaling, raise Noise Reduction, not Sharpness.
- Upscaling proxy media instead of the original. If you're editing from proxies to keep a slow machine responsive, apply Super Scale to the original full-resolution source at the end of your pipeline, not to the already-degraded proxy file.
- Setting one Super Scale value for a whole mixed-resolution timeline. A single global setting can't serve 720p, 1080p, and 4K sources equally well in the same project; set it per clip through Clip Attributes.
- Forgetting to render cache before a client review. An uncached Super Scale timeline can stutter badly during scrubbing in a client session, making the footage look worse than the finished export ever will.
- Stacking two Super Scale passes instead of using one larger multiplier. Two guesses compound; one correctly sized pass doesn't.
Worked examples: five real Super Scale scenarios
Scenario one: digitized SD wedding tape for a 4K anniversary video. Source is 480p, heavily compressed from an old MiniDV transfer, going into a 4K delivery. Apply 4x mode, Sharpness at Medium, Noise Reduction at High, since tape artifacts and compression noise dominate this source more than genuine detail loss does. Expect the result to look meaningfully better than the SD original, but don't oversell it to the client as true 4K detail; a 4x jump from 480p is close to the ceiling of what Super Scale can recover, and setting that expectation upfront avoids a difficult conversation at delivery.
Scenario two: vertical phone footage cut into a 4K timeline. Source is 1080p, shot on a modern phone with decent stabilization and good light, needing to sit in a 4K UHD project alongside primary camera footage. This is the cleanest, most favorable case for Super Scale: apply 2x Enhanced, Sharpness at Medium, Noise Reduction at Low, and render cache once you're happy with the match against your primary footage's sharpness and grain.
Scenario three: 4K drone footage for an 8K broadcast delivery. Source is clean 4K, shot in good light on a modern drone, needing to fill an 8K timeline for a small number of hero shots in a broadcast spot. Apply 2x or 2x Enhanced, Sharpness at Low to Medium, Noise Reduction at Low, since the source already carries substantial real detail and aggressive settings here tend to produce an artificial, over-processed look rather than genuinely finer detail. Given how few shots typically need this treatment on a broadcast job, this is also a reasonable case for considering Topaz Video AI instead, if you have the schedule room for a round trip and want to compare both results before locking picture.
Scenario four: handheld vertical smartphone footage that needs stabilizing, reframing, and upscaling for a portrait delivery. Source is a shaky 1080x1920 clip that needs to fill a 4K vertical canvas, with a tighter crop to remove a distracting edge of frame. Order of operations matters here more than the Super Scale settings themselves: stabilize and reframe first, then apply Super Scale to the final framed pixels, not the other way around. Applying Super Scale before the crop wastes render time and GPU memory rebuilding detail in parts of the frame you're about to throw away, and stabilization algorithms sometimes behave unpredictably on footage that's already been resized once. Use 2x Enhanced, Sharpness at Medium, and Noise Reduction at Medium if handheld motion blur is visible, since motion blur reads similarly to noise for the Neural Engine's purposes.
Scenario five: an old screen recording or software tutorial being re-released at a higher resolution. Source is a 720p or lower screen capture full of text, UI icons, and hard-edged cursor movement, with no sensor noise at all, only compression artifacts from the original recording codec. Text and interface edges are exactly the kind of high-contrast, hard-edged content Sharpness tends to over-process, producing a slightly waxy or blurred look on fine text specifically rather than a crisper one. Use a plain 2x or 2x Enhanced mode, keep Sharpness at Low, and keep Noise Reduction at Low as well, since there's no real sensor grain to remove and a heavier Noise Reduction pass will just soften text edges that were already about as sharp as the original capture allowed. Check the result specifically on a frame containing small text at 100 percent zoom before committing, since text legibility is the one thing this kind of footage absolutely cannot afford to lose.

How does Super Scale change your export settings, bitrate, and codec choice?
Adding real pixels changes what your export needs to hold onto them. A frame that gained genuine detail from Super Scale but gets crushed by a low-bitrate delivery codec loses exactly the fine texture you just spent render time generating, so the codec and bitrate choice you'd normally reach for at that resolution undersells a Super Scale clip specifically.
Bump your bitrate up from whatever you'd normally use at the target resolution, not down. For an archival master or a client deliverable meant to hold up to further editing, an intra-frame codec like ProRes or DNxHR preserves added detail far more reliably than a long-GOP delivery codec, since Super Scale's added detail concentrates in edges and fine texture, exactly the kind of content long-GOP compression is prone to smearing between frames. Save the leaner, platform-specific delivery codec for the final client-facing render, after you've locked and reviewed an intra-frame master.
If your endpoint is a specific platform rather than an archival master, match that platform's own bitrate recommendation for the resolution you're actually delivering, not the resolution the source started at. A clip that started at 1080p and got Super Scaled to 4K should be treated as a genuine 4K source for bitrate purposes once it's baked in, since the platform's decoder has no way to know some of that resolution came from a Neural Engine guess rather than a 4K sensor.
One more detail worth checking before a broadcast delivery specifically: some broadcast specs cap maximum bitrate or mandate specific chroma subsampling, and Super Scale's added fine detail can occasionally push a borderline file over a QC threshold it would have cleared before the upscale. Run any Super Scale-heavy master through your delivery's QC tool before the final hand-off, not after, since a QC failure on a broadcast delivery costs far more time to fix late than it costs to catch early.
Where does this fit if you're still learning DaVinci Resolve's tools generally?
Running an editing community that's grown past 100,000 members has taught me that Super Scale is rarely the first thing a new editor gets stuck on, but it's one of the more common places an intermediate editor hits a wall: the tool works, technically, on the first try, and the settings all look reasonable, yet the result doesn't look right, and it's not obvious why.
TryUncle is the on-screen assistant for DaVinci Resolve on macOS - ask in plain words and Uncle points at the exact control on your screen. If the difference between 2x and 2x Enhanced, or Medium and High Noise Reduction, is still hard to see on your own footage, TryUncle can point at the exact slider while you drag it and compare the result live, rather than you guessing from a settings table alone.
The verdict: what to actually do with Super Scale today
Match the mode to the resolution gap, not to how impressive the number looks in the dropdown. Start Sharpness at Medium and Noise Reduction at Low, raise Noise Reduction first if the source is grainy, and only raise Sharpness afterward if the result still looks soft at 100 percent zoom. Render cache the clip the moment you're happy with the settings, and apply Super Scale near the end of your workflow, not the beginning.
Super Scale earns its place in a real pipeline when the alternative is turning down a job because the source footage is the wrong resolution. It's not a substitute for shooting at the resolution you actually need, and it's not going to quietly fix footage that was never sharp to begin with. Used with the settings in this guide, matched to your actual source resolution, it's the difference between a usable 4K or 8K delivery and telling a client the footage they have simply won't work.
Frequently asked questions
- What is Super Scale in DaVinci Resolve?
- Super Scale is a DaVinci Resolve Studio feature that uses the DaVinci Neural Engine to rebuild a clip at a higher resolution, adding detail the Neural Engine predicts should be there rather than just stretching existing pixels. It lives in the Inspector's Video tab or the Clip Attributes window, and it works on stills as well as video.
- What is the best Super Scale setting for 1080p to 4K?
- For most 1080p-to-4K jumps, use 2x Enhanced with Sharpness set to Medium and Noise Reduction set to Low. That combination doubles resolution in each direction, which is exactly a 4K UHD frame, and the Enhanced mode's extra processing pass produces cleaner edges than plain 2x on footage that's already reasonably clean.
- Should I use 2x Enhanced or regular 2x in Super Scale?
- Use 2x Enhanced whenever your hardware can handle it. It runs the same doubling as plain 2x but through an additional refinement pass with its own Sharpness and Noise Reduction sliders, which consistently produces cleaner edges and less halo artifacting. Reach for plain 2x only when 2x Enhanced makes playback too slow to work with on your machine.
- Why is Super Scale making DaVinci Resolve so slow or causing it to crash?
- Super Scale doesn't apply a filter on top of your clip. It generates an entirely new, higher-resolution version of the frame in memory, and Blackmagic's own manual warns this makes the clip more processor-intensive than before unless you optimize or cache it. If you're seeing 'your GPU memory is full,' Super Scale is very likely the cause, not a coincidence.
- Why is Super Scale grayed out on my clip in DaVinci Resolve?
- Most often it's because the clip is a compound clip, a Fusion clip, a title, or a generator rather than plain footage or a still. Super Scale needs a direct source clip to rebuild, so nested or generated content greys it out until you open it as its own timeline or bake it through Optimized Media. The next most common cause is simply being on the free version, which has no Super Scale control to enable in the first place.
- Does Super Scale work in the free version of DaVinci Resolve?
- No. Super Scale is one of the DaVinci Neural Engine tools Blackmagic Design reserves for DaVinci Resolve Studio, which costs $295 as a one-time license. The free version has no upscaler in Clip Attributes at all, not a lower-quality version of one.
- Is Topaz Video AI better than DaVinci Resolve's Super Scale?
- For pure detail recovery on badly degraded footage, Topaz Video AI's dedicated models generally pull out more visible texture. Super Scale's advantage is that it never leaves DaVinci Resolve, so there's no round trip, no extra export, and no second render queue, which matters more on a deadline than it does in a side-by-side crop comparison.
- What GPU do I need for Super Scale in DaVinci Resolve 21?
- Blackmagic's own DaVinci Resolve 19 features guide lists Super Scale running up to 3.5 times faster on supported AMD GPUs, specifically the 6800, 7700, 7900, or newer. On Apple Silicon Macs, Super Scale uses the unified GPU cores, and more cores directly shorten render time. There's no separate Super Scale hardware requirement beyond a GPU that can already handle Resolve's other Neural Engine tools.
Sources
- Super Scale (DaVinci Resolve 18 Reference Manual, Blackmagic Design, via VFXPedia mirror)
- Image Scaling / resize filters (DaVinci Resolve 18 Reference Manual, Blackmagic Design, via VFXPedia mirror)
- DaVinci Resolve - Studio (Blackmagic Design product page)
- Blackmagic Design Releases DaVinci Resolve 18.5 (CG Channel)
- Upscale Video Using Super Scale In DaVinci Resolve (Color Culture, colorist Salik Waquas)
- DaVinci Resolve 19 New Features Guide (Blackmagic Design, full text via Internet Archive)
- DaVinci Resolve Studio Reaches New Heights with Version 16 (ArtStation Magazine)
- Topaz Video vs DaVinci Resolve: Which AI Video Enhancer Produces Better Results? (Aiarty, Brenda Peng)
- Hardware Recommendations for DaVinci Resolve (Puget Systems)
- Blackmagic Forum: Using Super Scale is not restricted to the clip
Keep reading
Comparisons · Jul 7, 2026 · 28 min
DaVinci Resolve Studio Price: Free vs. Studio Cost, Explained
DaVinci Resolve Studio costs $295, paid once, not monthly. Here's exactly what that buys, how it stacks up against Premiere Pro and Final Cut Pro, and who needs it.
Guides · Jul 8, 2026 · 29 min
DaVinci Resolve Noise Reduction Settings: Temporal and Spatial
The exact Temporal and Spatial Noise Reduction settings in DaVinci Resolve: frame count, threshold values, motion range, and when to use each.
Guides · Jul 13, 2026 · 18 min
DaVinci Resolve Render Cache Explained: Smart vs. User Mode
How DaVinci Resolve's render cache works, and how Smart mode differs from User mode: cache formats, disk space, per-clip flags, and when to use each.