Articles / Fixesupdated for DaVinci Resolve 21.1 (October 2026)
DaVinci Resolve Take Selector Not Working? Fix It in 21
Quick answer
If the DaVinci Resolve Take Selector is not working, select a normal timeline clip, then open Clip > Take Selector or right-click the clip and choose Take Selector. Double-click the selector badge to reopen an existing stack. Click the take you want, then close the selector; if the command is unavailable, confirm the item is not a title or generator.
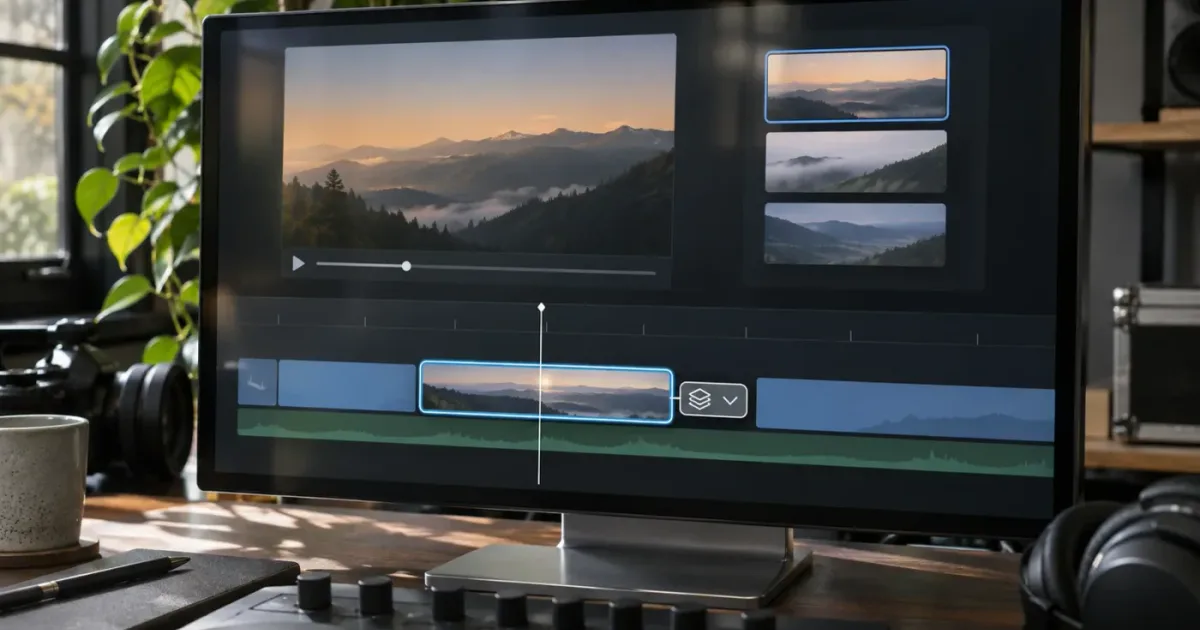
I’d first check what kind of timeline item you selected. The Take Selector works with ordinary clips, but it isn’t a universal container for every object in a DaVinci Resolve timeline. As of October 2026, this guide applies to the Resolve 21 line, including the current 21.1 release listed in Blackmagic Design’s support center.
What is a Take Selector, and what should happen when it works?
A Take Selector is a container for alternate clips at one timeline position. It displays one chosen take on the timeline while keeping the alternatives available for review and switching.
That definition helps separate it from a few features that sound similar. A Take Selector isn’t the same as a multicam clip, a color version, or the source-track Auto Select control. Its job is simpler: put alternate versions of a shot or graphic inside one timeline clip so you can audition them without laying every version across separate tracks. Blackmagic’s DaVinci Resolve 18 Editor’s Guide describes the selector as a way to switch between clips while keeping only one visible in the timeline.
When the selector is closed, the timeline shows a single clip. If that clip has a Take Selector, a small badge marks it. Open the selector and you should see the available takes stacked in its window. Choose another take, close the window, and the chosen clip becomes the one represented in the timeline.
A Take Selector changes which alternate clip occupies one timeline position; it does not create a multicamera edit.
If you’re expecting to see several takes as separate, simultaneous tracks, the feature may appear broken even though it’s behaving as designed. The alternate clips live inside the selector. They aren’t all played at once.
The selector is also useful beyond dialogue coverage. It can hold alternate VFX renders, graphics, or language versions that need to occupy the same place in an edit. Colorist and educator Joey D’Anna describes it as “The take selector is one of those little unsung hero features in Resolve.” His Mixing Light walkthrough demonstrates using it to manage alternate VFX and graphic versions.
Why is the Take Selector greyed out or missing?
The Take Selector command may be unavailable because the selected timeline item is unsupported, because you selected a different object than you intended, or because the relevant menu is being checked without a clip selected. Start by selecting a normal timeline clip.
Blackmagic’s older Take Selector documentation specifically excludes titles and generators from the right-click command. The interface and available controls can change across releases, so treat that manual as documentation of the feature’s basic behavior, not a guarantee that every menu detail is identical in Resolve 21. The currently listed manual is available through the Blackmagic support center.
Use this quick check:
| What you selected | What to try |
|---|---|
| A regular video clip on the timeline | Select the clip, then check Clip > Take Selector or its right-click menu. |
| A regular audio clip | Select it directly and check whether Take Selector is available in that context menu. |
| A title or generator | Choose a regular clip instead. These items are excluded in Blackmagic’s Take Selector instructions. |
| A clip in the Media Pool | Select the timeline instance, not only the source item in the Media Pool. |
| Empty timeline space | Click the intended clip first, then open the menu again. |
| A multicam clip | Decide whether you want alternate clip versions or synchronized camera angles. They are different workflows. |
Don’t diagnose a disabled command by clicking through every menu in Resolve. First confirm the selected object and its location. A clip in the Media Pool and that same source clip after it has been placed on the timeline are not the same selection context.
Also watch for selection ambiguity. If linked video and audio are present, a click may select a linked pair or only one component depending on the context and selection state. Check the outline or highlight on the clip you intend to affect. Then open the clip menu again.
A title or generator is a particularly common dead end because it can look like an ordinary clip in the timeline. If the command isn’t available for it, changing keyboard focus or reopening the project won’t make it supported. Select another clip or use a different method for that item.
How do I create a Take Selector in DaVinci Resolve 21?
To create a Take Selector, select the timeline clip that should hold the alternatives and choose Take Selector from the Clip menu or the clip’s context menu. The selector opens around the selected clip; add other source clips into that open selector.
Use this sequence in Resolve 21:
- Go to the Edit page and locate the timeline position where you want to compare versions.
- Select the clip that will serve as the starting take.
- Open the Clip menu and choose Take Selector, or right-click the clip and choose Take Selector.
- Wait for the Take Selector interface to open. The rest of the timeline may be unavailable while you’re working inside the selector. That temporary change of focus is expected.
- Drag another clip from the Media Pool or source viewer into the open selector, following the documented workflow in Blackmagic’s Editor’s Guide.
- Click the take you want to audition.
- Close the selector and check the timeline clip and viewer.
The most useful visual confirmation is a selector window showing more than one take. After you close it, look for the badge on the timeline clip. If there’s no badge and reopening the clip doesn’t show the alternatives, you may have closed a different window or never added another take.
Don’t confuse opening a selector with adding a take. Opening a selector around a clip creates the container. It does not automatically gather nearby clips, stacked clips, or all media from the same scene. Add each alternate explicitly while the selector is open.
That distinction explains a common complaint: “I selected the clip, chose Take Selector, and nothing happened to my other takes.” The other clips don’t necessarily get swept into the new selector. The documented workflow is to drag them into the selector. If you already arranged the alternatives on different tracks, don’t assume Resolve will convert that layout into a Take Selector automatically.
Try a small test before rebuilding a complicated section. Use two short, known-good source clips and confirm that the selector opens, accepts the second clip, switches between them, and closes with the intended take active. That isolates the feature from problems in a larger edit, without risking the original timeline arrangement.
Why can’t I drag a clip into the Take Selector?
You can add a take by dragging a clip into the open Take Selector, but the drag must begin from an appropriate source such as the Media Pool or source viewer. If the timeline is temporarily disabled while the selector is open, dragging a neighboring timeline clip from the disabled area won’t behave like dragging a source clip into it.
This is a workflow mismatch, not necessarily a project fault. Blackmagic’s DaVinci Resolve 18 Editor’s Guide demonstrates adding a clip from the source viewer. The older reference manual describes dragging a Media Pool clip into the selector. Both instructions point to the same practical fix: supply the alternate from a source area that remains available while the selector is open.
Try this:
- Close the selector without changing your intended take if you’re unsure of the current state.
- Identify the alternate source in the Media Pool.
- Open the selector from the intended timeline clip.
- Drag the Media Pool source into the selector window.
- Confirm that the new take appears in the selector before closing it.
If a clip is already on the timeline and you want it to become an alternate, first locate its source in the Media Pool. If you’re not sure which source item matches the timeline clip, use Resolve’s clip-identification tools or note the clip name before opening the selector. Avoid dragging a timeline item into a temporarily inactive timeline and assuming the target drop area is the selector.
If the Media Pool is hidden or too narrow to use, restore that panel or use the source viewer route described in the Resolve Editor’s Guide. You don’t need to rebuild the edit just because the source panel is out of sight.
If a drag appears to do nothing, check the cursor and drop target before releasing. The selector must be open, and the source has to land within the selector’s take area. If the item is a title or generator, the original clip restrictions still matter. Test with a normal video source before concluding that Resolve cannot add takes.
Why does my selected take not appear in the timeline?
A take choice is made inside the selector, then committed to the visible timeline when you close that selector. Click the intended take so it is visibly selected, then use the selector’s close control and inspect the timeline clip.
The documented workflow in Blackmagic’s Editor’s Guide separates choosing a take from closing the selector. When the window is open, you’re choosing among the alternatives. When it is closed, the selected take becomes the visible clip in the timeline.
Check these details:
- Did you click the take, or only hover over it? Look for the selected-state highlight before closing.
- Did you close the selector rather than cancel or switch focus? Use its own close control.
- Did you open the right timeline clip? A selector badge belongs to a specific clip at a specific timeline position.
- Are you judging the result from the clip name alone? Names can be similar. Check the viewer content as well.
- Did the viewer update but the timeline thumbnail look unchanged? Scrub or play the selected clip to confirm what media is active; don’t rely on one thumbnail alone.
A timeline thumbnail is a weak test when two takes share a similar frame or the playhead is parked on a moment that looks alike. Compare an unmistakable frame, such as a different camera angle or a clear gesture, and play through the clip. This is a practical verification method, not a claim that every version of Resolve updates thumbnails instantly.
If the selected take is still wrong, reopen the selector using the badge. Choose the correct take again and close it. The selector keeps the alternatives available until you finalize it, so you can correct a mistaken choice without adding the clips to the timeline again.
Clicking an alternate take and closing the selector are separate steps in the documented workflow.
Why does the Take Selector change my clip duration?
A selector can contain takes with different source durations, so the timeline duration may change when you choose a shorter or longer alternative, depending on the Ripple setting. Check the Ripple control in the selector before closing it when the takes don’t have matching durations.
Blackmagic’s Resolve 18 Editor’s Guide explicitly demonstrates a shorter take and instructs the reader to use the Ripple button so the timeline adjusts to fit that take. That matters because duration changes can look like the selector selected the wrong clip or shifted neighboring edits.
Use this decision table:
| Situation | Ripple decision | What to inspect after closing |
|---|---|---|
| Alternate takes have matching durations | Leave the duration behavior unchanged unless you have a specific reason to ripple. | Confirm the chosen take appears at the intended position. |
| The replacement take is shorter and the sequence should close up | Enable Ripple if you want the timeline to adjust to the shorter take, as in the guide’s example. | Check where the following clips moved and whether the sequence still cuts correctly. |
| The replacement take is shorter but surrounding timing must stay fixed | Avoid an unintended ripple. Compare the resulting gap or overlap with your intended edit. | Inspect the downstream clips and any music or synchronized audio. |
| The replacement take is longer | Review the timeline outcome rather than assuming the extra duration will fit without consequences. | Check for an overlap, displacement, or change to the next edit. |
| You aren’t sure what the control currently does | Don’t guess on the master timeline. Test with a duplicate or a short practice section. | Compare before and after positions at the same playhead location. |
Do not use Ripple as a universal “make the selector work” button. It changes how timing is handled when takes differ in duration. It does not make an unsupported object valid, add missing takes, or repair a selection problem.
Before testing a duration change in a valuable edit, save the project and consider duplicating the timeline. That’s ordinary risk control, not a Resolve-specific promise about how every operation can be undone. Then test the alternate take, close the selector, and inspect the cut before continuing.
If you’ve already closed the selector and neighboring clips moved, undo only if you can clearly identify the selector action as the last change. Otherwise, compare the timeline against a saved version or a duplicate. Avoid piling additional edits on top of an unexpected timing shift.
How do I reopen a Take Selector after closing it?
Double-click the Take Selector badge on the timeline clip to reopen its stack. If the badge is difficult to target, right-click the multi-take clip and choose Take Selector from its context menu.
The badge is the important clue. A normal timeline clip may look much like a closed Take Selector, but the selector badge identifies the clip that still contains alternate takes. Blackmagic’s Take Selector documentation explains that the badge indicates selector status and can be double-clicked to open the selector.
If double-clicking seems ineffective:
- Zoom in enough to see the clip’s badge.
- Double-click the badge itself, rather than the middle of the clip.
- If that doesn’t open it, right-click the clip and check the Take Selector command.
- Confirm that you haven’t finalized the selector already.
- If the context command is unavailable, verify that you selected the correct clip.
The exact badge position and appearance can vary by interface layout and version. Blackmagic’s Resolve 18 Editor’s Guide illustrates a badge in the lower-left portion of the clip, while older documentation describes it beside the clip name. Use the marker shown in your version and confirm the clip’s context menu if you can’t spot it.
A missing badge can mean the selector was finalized, that you selected a different clip, or that you’re not looking at a selector at all. It doesn’t prove the project is corrupted. Check the menu and the identity of the clip before treating it as a bug.
If you need to keep the alternates, don’t finalize the Take Selector. Finalizing removes the selector and its alternate takes from the active timeline structure, leaving the chosen take as a standalone clip. The Resolve 18 Editor’s Guide explains this finalization behavior in its take-comparison walkthrough.
Why does the Take Selector show only one take?
The selector shows only the takes that have been added to that selector; opening it does not automatically import other clips from the timeline or Media Pool. Add each alternate using a source clip, then confirm it appears in the selector before switching.
This often happens when an editor expects Resolve to recognize a scene, shared filename, matching timecode, or neighboring timeline position and gather the related clips. Don’t rely on that assumption. The documented addition method is explicit: drag a clip from the Media Pool or source viewer into the open selector.
If you see one take, ask three questions:
- Did I actually add the alternate? A clip that remains on another track is not automatically an item inside the selector.
- Did I drag from a source area? The timeline may be disabled while the selector is active.
- Did the drop land in the selector? Look for the additional take before closing the window.
The selected timeline clip becomes the initial member of the selector. The next clip needs to be added deliberately. That behavior makes the feature predictable, but it can surprise editors who created a stack of alternatives first and expect one command to turn the entire stack into a take group.
If you want a group of alternatives to stay visible as separate tracks for comparison, a Take Selector may not be the right structure. It puts the versions in one selector and shows one chosen take in the timeline. Keep the separate tracks or use another editorial method if visibility of all versions is essential.
For many alternatives, add them in a controlled order and name the source clips clearly before you begin. The selector’s purpose is choosing among versions; good source names make that choice easier to verify. Don’t use a long list of nearly identical generic filenames as your only way to identify the right take.
Is a Take Selector the same as a multicam clip?
No. A Take Selector stores alternate clips for one timeline position; a multicam clip organizes synchronized camera angles so you can switch angles during an edit. Pick the tool based on whether you’re choosing a version or cutting between cameras.
A single-shot scene with two performances is a natural Take Selector case. A scene recorded simultaneously by several cameras is typically a multicam case. You can technically use clips in many creative ways, but the features solve different problems.
| Editing need | Better fit | Why |
|---|---|---|
| Compare two performances of the same line | Take Selector | Keeps alternate takes together at one timeline position. |
| Compare two VFX renders of one shot | Take Selector | Stores versions without placing every version as a separate visible timeline clip. |
| Cut between synchronized cameras during a scene | Multicam clip | Designed around camera angles and switching during playback or editing. |
| Keep every graphic or language version visible on separate tracks | Separate timeline clips or tracks | A Take Selector intentionally presents one chosen alternate in the timeline. |
| Switch between color grades for the same clip | Color versions | Grade versions are not the same thing as alternate source clips. |
If you’re troubleshooting the wrong feature, the menu label can send you down the wrong path. For a camera-angle problem, use Resolve’s multicam workflow rather than trying to place every camera angle into a Take Selector. If the multicam angle viewer itself is missing cameras, see our guide to DaVinci Resolve’s multicam angle viewer not showing all cameras.
The distinction also matters when you compare tutorial steps. A Take Selector can show one selected clip in the timeline while storing alternates internally. A multicam workflow presents a synchronized set of angles for editorial switching. Neither is a substitute for the other.
Use a Take Selector for alternate versions of one shot and multicam editing for synchronized camera angles.
Why does my Take Selector disappear after I finalize it?
Finalizing a Take Selector removes its alternate stack and leaves the chosen take as a regular clip. That is the intended cleanup action, not a display glitch.
Use finalization only when you’re done comparing versions and want the selected take to stand on its own. Blackmagic’s Resolve 18 Editor’s Guide describes finalizing as removing the Take Selector and alternate takes from the timeline, leaving the final choice as a standalone clip. The older reference manual gives the same essential outcome.
Before you finalize, check:
- Is the desired take selected?
- Have you checked timing and Ripple behavior?
- Do you still need the other takes for client review or a later revision?
- Are the alternatives stored elsewhere if you may need them later?
If you finalized by accident, first check whether undo can restore the operation in your current editing session. Don’t assume the selector remains available after finalization. The point of the command is to remove the alternate structure.
For a revision-heavy project, keep a duplicate timeline or another clearly named copy before finalizing. That preserves a route back to the comparison structure without keeping every alternate active in the delivery timeline. Use your project’s established backup method; the Take Selector itself isn’t a substitute for project backups.
If the chosen shot is correct but the alternates are no longer needed in the edit, finalization can be the right finish. If there’s any chance someone will ask for a different take, leave the selector intact until the review is complete.
How can I tell whether the issue is a real Resolve 21 bug?
A Take Selector issue is more likely a selection or workflow mismatch when the command is unavailable for one item, when no alternates were added, or when the selected take wasn’t closed into the timeline. Treat it as a possible version-specific bug only after a small, repeatable test fails with a supported clip.
As of October 2026, Blackmagic lists DaVinci Resolve 21.1 and its reference manual in the support center. This guide does not claim to have reproduced a Take Selector bug in Resolve 21.1. The documented behavior here draws on Blackmagic’s Resolve 18 manual and guide, plus the available older reference manual for basic selector operations. Those sources establish the workflow; they don’t prove that every interface detail is unchanged in every 21.1 build.
Try a clean test before changing settings:
- Create or open a small project with a regular video clip on the Edit timeline.
- Select that timeline clip.
- Open Clip > Take Selector.
- Add a second clip from the Media Pool or source viewer.
- Select the second take, close the selector, and play the timeline.
- Reopen the selector from its badge.
If the clean example works, the original problem is probably tied to the clip type, selection, source, or existing timeline structure. If it fails consistently, record your exact Resolve version, operating system, selected clip type, and the step where behavior differs. That information is more useful when checking the current release notes or asking the Blackmagic community for help.
Don’t delete preferences, reinstall Resolve, or rebuild a project as the first response to a missing Take Selector command. Those actions don’t address the documented restriction on titles and generators, and they can add risk without identifying the cause.
For version comparisons, distinguish an editor’s guide from a release-specific changelog. A Resolve 18 workflow document explains the operation, but it cannot establish that a later point release fixed or introduced a specific issue. Check the support center for the current manual and release notes before attributing a change to Resolve 21.1.
What should I check when Take Selector behavior differs by clip?
Check the media object and the timeline instance before changing project settings. A regular source clip, a title, a generator, a multicam clip, and a selected timeline item are not interchangeable contexts.
The fastest branch is to repeat the same action on a normal video clip. If Take Selector appears there but not on your original item, the difference is informative. It points to item support or selection context rather than a project-wide failure.
Here are the common edge cases:
- Title or generator: Blackmagic’s documented instructions exclude these from the Take Selector command. Use a regular clip or another versioning method.
- Multicam clip: Decide whether you need alternate takes or synchronized angles. The multicam clip’s internal structure is not the same as a Take Selector stack.
- Clip on the wrong page or panel: The usual documented creation workflow is on the Edit timeline. Select the timeline instance and open the relevant clip menu.
- Only one source available: Opening a selector doesn’t populate it with every similar or nearby clip. Add the alternate explicitly.
- Different durations: Review Ripple behavior and downstream timing before committing the selection.
- Selector already finalized: The alternate stack has been removed by design. Check undo or a prior timeline copy if you need to recover the alternatives.
- Confusing selection controls: The timeline’s Auto Select controls affect timeline operations; they do not create or populate a Take Selector. If the symptom is actually about which tracks participate in an edit, read our fix for DaVinci Resolve source Auto Select not working.
It’s easy to mix up the word “selector” with Resolve’s other controls. A Take Selector manages alternate clips inside one timeline position. Source Auto Select determines track participation for editing operations. Selection Follows Playhead changes which clip is selected as the playhead moves. If the selected timeline clip keeps jumping as you scrub, consult our separate guide to DaVinci Resolve Selection Follows Playhead.
Those are different causes with different fixes. Changing Auto Select or Selection Follows Playhead won’t add a missing take, and opening a Take Selector won’t repair an unexpected track-selection behavior.
How can I check Take Selector status without guessing?
Look for a selector badge, open the selector, and verify the number and identity of the takes inside it. If you use Resolve’s scripting interface, the published API also exposes take-related methods, but most editors can diagnose the feature visually without code.
The available DaVinci Resolve scripting API documentation lists methods such as GetTakesCount, GetSelectedTakeIndex, GetTakeByIndex, SelectTakeByIndex, and FinalizeTake for timeline items. It describes GetTakesCount as returning the number of takes in the selector, or zero if the clip is not a Take Selector. Those API details are useful context for technical users; they are not required steps for ordinary editing, and API behavior should be checked against the version and scripting documentation in use.
For a visual check, use this sequence:
- Select the timeline clip.
- Look for its Take Selector badge.
- Double-click the badge or open the clip context menu.
- Confirm the selector displays the expected alternate(s).
- Select a take and close the selector.
- Play a clear portion of the clip to confirm the visible result.
Keep the conclusion narrow. Seeing a badge is evidence that the clip has a selector; it doesn’t prove the correct alternate is active. Seeing two items in the selector proves that two takes are present; it doesn’t prove their timing matches. Playing the timeline after choosing a take confirms what the edit currently shows.
If you’re comfortable with Resolve scripting and already use the supported API, the take methods can help inspect or manipulate a timeline item programmatically. Don’t install an unfamiliar script or run API code from an untrusted source just to fix a simple interface problem. A visual check is safer and usually enough.
What is the safest way to test a Take Selector before using it in a long edit?
Test the selector on a duplicate timeline or a short practice section with two known clips. Confirm creation, addition, selection, timing, reopening, and finalization separately before using the same sequence on a high-stakes edit.
A useful worked example is a spoken line recorded twice. Put the first version at the intended edit point, create the selector, then add the second source clip. Choose the alternate, close the selector, and play the sentence in context. If the takes have different durations, inspect the Ripple control and check the following edit.
This example is a workflow illustration, not a measured test result. It follows the operations described in Blackmagic’s Resolve Editor’s Guide. Your own timeline, clip durations, and version may behave differently in details such as panel layout.
After confirming the basic switch, test the edge case that matters to your project:
- For dialogue, compare the cut and the surrounding audio.
- For a VFX revision, confirm the chosen render is the one that plays at the intended time.
- For a graphic or title version, check whether the item type supports the selector command before planning the workflow around it.
- For unequal durations, check Ripple and downstream edits.
- For a multicamera scene, use a multicam workflow rather than forcing camera angles into a selector.
Then reopen the selector. If you can see and switch back to the original take, you know the alternatives remain available. Only finalize after you’ve made that decision deliberately.
If you’re following a tutorial and the controls don’t match, compare the Resolve version and the selected page before assuming the instruction is wrong. A short on-screen explanation can help locate a control in your own layout: TryUncle is the on-screen assistant for DaVinci Resolve on Mac and Windows - ask in plain words and Uncle points at the exact control on your screen.
What should I do next if the Take Selector still won’t work?
Return to the smallest failed step and identify whether the problem is opening, adding, switching, timing, reopening, or finalizing. Those are separate operations, so a precise symptom leads to a more useful fix than treating every failure as one generic selector bug.
Use this final checklist:
- Can’t open it: Select a regular timeline clip and check Clip > Take Selector or the right-click menu.
- Command is missing: Confirm the selection isn’t a title or generator.
- Can’t add an alternate: Drag from the Media Pool or source viewer into the open selector.
- Only one take appears: Add the other clip explicitly and verify it appears before closing.
- Wrong take appears: Select the intended take inside the selector, then close it and play the result.
- Timeline timing changed: Check the Ripple control and inspect clips after the edit.
- Can’t reopen it: Double-click the selector badge or use the clip context menu.
- Alternates disappeared: Check whether you finalized the selector; look for an undoable action or a prior timeline copy.
- Camera-angle switching is the real goal: Use multicam tools, not a Take Selector.
DaVinci Resolve’s Take Selector is working when it contains the alternate clips you added, lets you choose one, and returns that choice to the timeline after you close it. Start with a normal clip, add the alternate from a source panel, and verify the result before changing anything else.
Frequently asked questions
- Why is the Take Selector greyed out in DaVinci Resolve?
- The selected item may be a title or generator, which the Take Selector does not support, or you may not have selected a regular timeline clip. Select a video or audio clip and check Clip > Take Selector again.
- How do I reopen a Take Selector in DaVinci Resolve?
- Double-click the Take Selector badge on the timeline clip. You can also right-click the multi-take clip and choose Take Selector.
- Why does my selected take not appear in the timeline?
- Click the take inside the open selector, then use its close button to apply the choice. If the timeline duration changes unexpectedly, check the Ripple control before closing.
- Can I use a Take Selector to switch multicamera angles?
- A Take Selector stores alternate clips in one timeline position. For synchronized camera angles and live angle switching, use a multicam clip instead.
Sources
- DaVinci Resolve 21.1 support and current manual
- DaVinci Resolve 18 Editor's Guide, Comparing Different Takes
- DaVinci Resolve 18 Reference Manual, Take Selectors
- DaVinci Resolve 11 Reference Manual, Take Selectors
- How to Manage Versions for VFX & Graphics in DaVinci Resolve
- DaVinci Resolve Python API documentation
- DaVinci Resolve 21 New Features Guide
- TryUncle: DaVinci Resolve app that explains buttons on screen
Put this guide to work with TryUncle.
Ask about the step you’re on. TryUncle sees your screen and points at the control you need, so you can keep learning in your own project.
Get TryUncle for Mac or WindowsKeep reading
Fixes · Sep 29, 2026 · 37 min
DaVinci Resolve Source Auto Select Not Working? Fix It
Fix DaVinci Resolve source auto select not working by separating blue source patching, red track destinations, Auto Track Selector, and Sync Lock.
Fixes · Jul 31, 2026 · 24 min
DaVinci Resolve Multicam Angle Viewer Not Showing All Cameras
Multicam viewer only showing some of your DaVinci Resolve camera angles? Fix the grid size, duplicate camera metadata, and black angle bugs, one by one.
Fixes · Sep 29, 2026 · 18 min
DaVinci Resolve Selection Follows Playhead: Fix It in 21
Make DaVinci Resolve selection follows playhead work in Resolve 21.1. Fix the menu, wrong-track selection, audio behavior, and stacked clips.