Articles / Fixesupdated for DaVinci Resolve 21.1 (October 2026)
DaVinci Resolve Timeline Timecode Starts Wrong? Fix It
Quick answer
A DaVinci Resolve timeline starting at 01:00:00:00 is often using a normal default; it does not mean there is an hour of black video. To change an existing timeline, right-click it in the Media Pool and choose Timelines > Starting Timecode. To change the default for future timelines, open Preferences > User > Editing > New Timeline Settings.
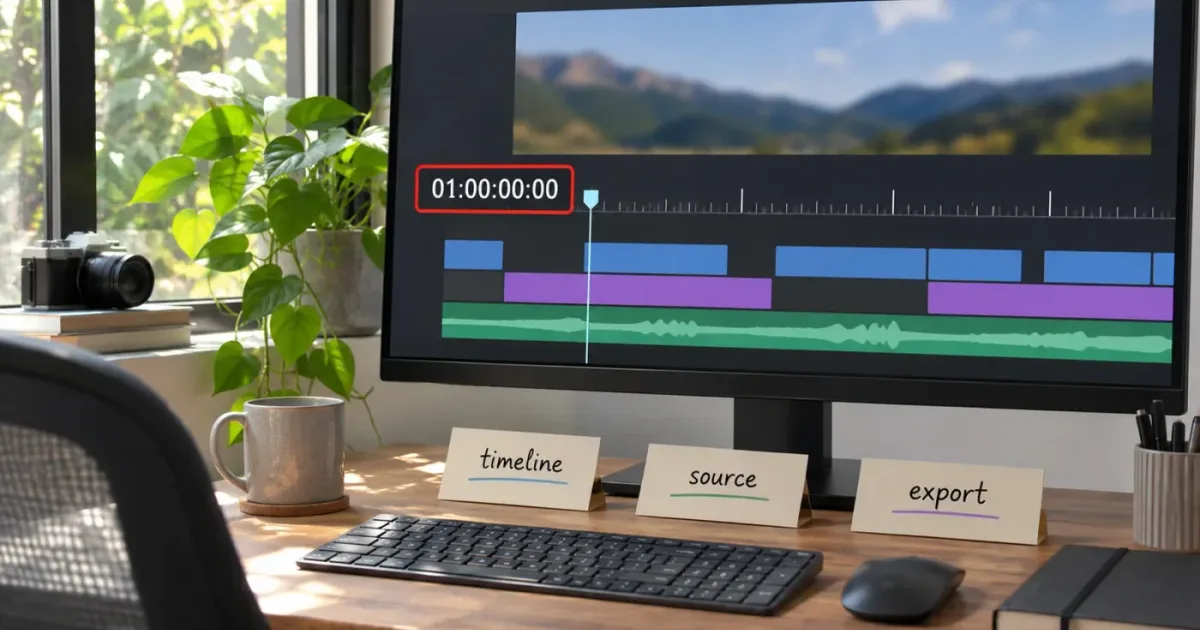
I check the display before I change the setting. 01:00:00:00 is often a normal timeline start, while the same-looking number in a source viewer or rendered overlay may come from somewhere else.
The right fix depends on what needs to change: one existing timeline, the default for future timelines, or a display outside the timeline. Get that distinction wrong and a harmless default can become a confusing handoff.
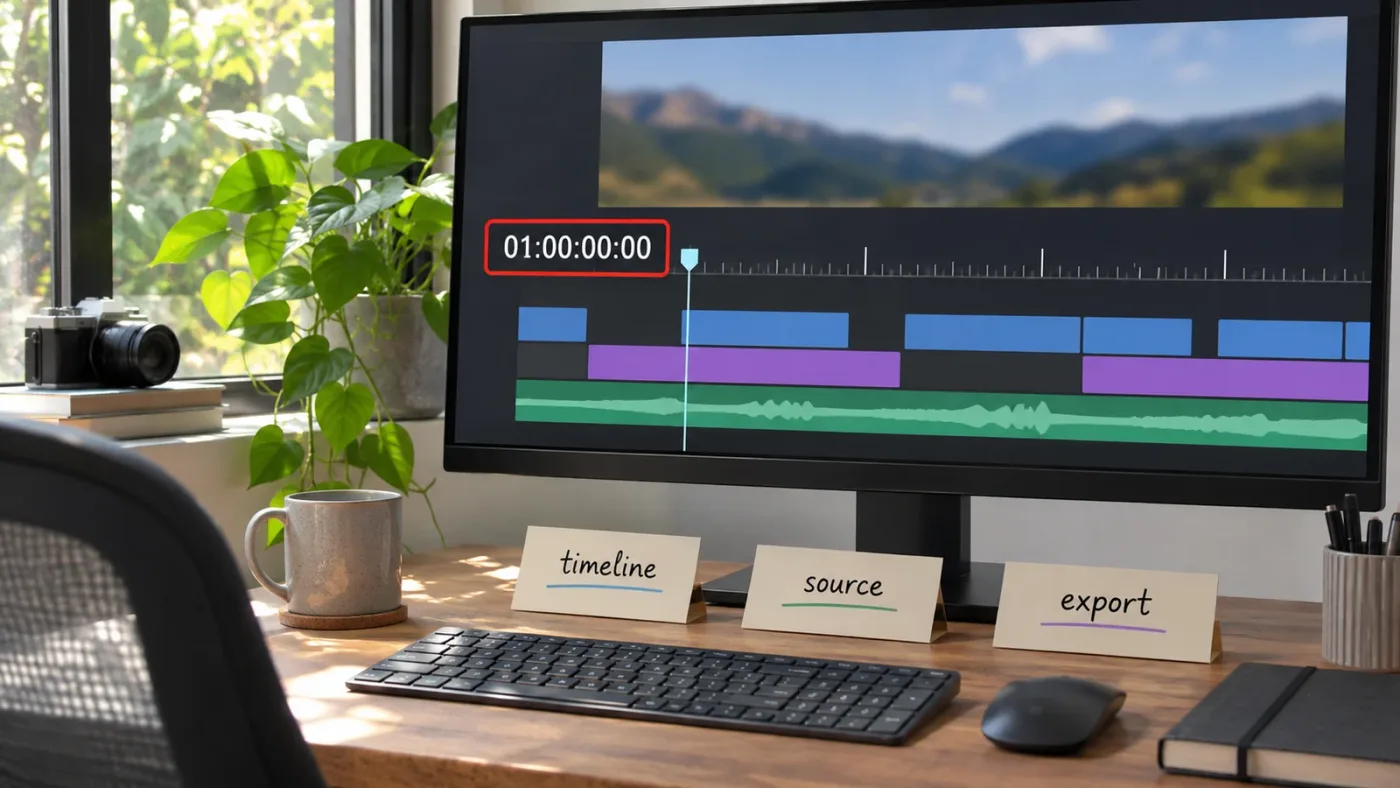
Why does my DaVinci Resolve timeline start at the wrong number?
If the first frame of your timeline reads 01:00:00:00, Resolve is probably showing the timeline’s starting timecode. That value is common in Resolve examples and preferences. It does not mean the first clip is an hour into a video file, or that Resolve has put an hour of black picture before it.
Timecode labels positions. It is not the same as a running duration display. Think of it as a reference address for a frame. A short sequence can begin at 01:00:00:00 and end a few minutes later, just as a short document can start at page 10 if the numbering convention says so.
Resolve’s guides show 01:00:00:00 in the New Timeline Settings area and describe that area as a place to specify the starting timecode for a new timeline. The current Blackmagic Design support center lists the DaVinci Resolve 21.1 manual. Earlier guides illustrate the preference and timeline command discussed here. Menu wording or placement can vary by version and workspace, so consult the manual for your installed build if a control looks different.
Before changing anything, ask what “wrong” means:
- Does the timeline’s first frame have the wrong timecode label?
- Do future timelines keep starting at a value you don’t want?
- Does only the source viewer, a burn-in, or an exported file show that value?
- Does the timeline appear to contain blank time before the first picture?
- Is the discrepancy actually about frame rate or frame numbering?
- Is the number at the playhead being mistaken for the number at the sequence start?
Those are different problems. The first two involve timeline settings. The third calls for checking a display or export setting. The fourth needs a look at the visible timeline range and first clip. The fifth means checking the timebase before changing the starting hour. The sixth may need no setting change at all.
| What you see | What it may mean | First check |
|---|---|---|
The first timeline frame reads 01:00:00:00 | The timeline uses a common default start | Timeline’s Starting Timecode |
| New timelines repeatedly use an unwanted start | The new-timeline preference may be set that way | Preferences > User > Editing |
| Timeline display looks right, but the picture has another number | A burn-in, title, or timecode effect may use another source | Data Burn-In or the effect |
| Source viewer and timeline viewer show different numbers | They refer to different timecode references | Which viewer is active |
| A player reports a different value than Resolve’s timeline | The player may be showing file information | File metadata and player display |
| There is blank time before the first clip after a change | The visible timeline start and first media position may not match | Timeline start and first clip position |
| The ruler starts at a number other than the sequence start | The timeline may be scrolled or the playhead may be later | Active timeline and playhead position |
A timeline starting at 01:00:00:00 is usually a timecode convention, not an hour of empty video.
If this is a personal project with no handoff requirements, you can leave that value alone or choose a start that helps you work. If another person or system expects a specific timecode, follow that requirement instead of changing the timeline to make a ruler look familiar.
How do I tell timeline timecode from source timecode?
Timeline timecode labels a position in the edited sequence. Source timecode labels a position in an individual media file. The two can show different values for the same displayed frame because they answer different questions.
A camera clip might have source timecode such as 10:15:22:08. Put a section of that clip at the beginning of a timeline starting at 01:00:00:00, and the timeline and source values do not need to match. The source number follows the recording. The timeline number follows the edited sequence.
That distinction matters when the number changes as you switch viewers. A source viewer shows a clip outside the context of the timeline. A timeline viewer shows the sequence. The exact viewer arrangement depends on the page and workspace. Confirm which viewer is active before deciding that the timeline start is wrong.
Use these descriptions to identify the value you’re looking at:
- Source timecode: Where is this frame in the original clip?
- Timeline timecode: Where is this frame in the edited sequence?
- Burn-in timecode: Which timecode value is an overlay configured to display?
- Export metadata: What timecode-related information does another application report about the file?
- Duration: How much time passes from one point in the sequence to another?
Timecode may be stored or presented in more than one place. The Federal Agencies Digitization Guidelines Initiative’s definition of timecode explains that timecode labels frames and notes that files can carry multiple timecodes. The practical lesson is simple: don’t assume every number on screen is the timeline clock.
Try this quick diagnostic:
- Keep the playhead on a visible frame in the sequence.
- Note the timecode shown by the timeline.
- Select or open the source clip and note its displayed timecode.
- Return to the timeline viewer.
- Check whether the values differ because the viewer changed, not because the sequence moved.
A difference between source and timeline values is expected in many edits. If the question is whether audio and video are synchronized, a different source value by itself does not prove a sync fault. Check whether picture and sound line up at the intended event. For a frame-offset sync problem, use the separate multicam sync guide.
Keep one real frame in mind as you compare displays. Suppose a person claps at the start of a shot. Find the clap in the source viewer, then locate that same event in the timeline. The source timecode can describe where the clap occurred in the camera file; the timeline timecode describes where the edited clap lands in the sequence. Different numbers can both be correct.
A timeline can also contain a trimmed portion of a source clip. The first visible frame of that clip might be several minutes into the original recording. That does not make the sequence start several minutes late. It means the edit begins with media whose source position is later than the beginning of its recording.
When reviewing a screenshot or a note from a collaborator, ask which reference they captured. “The number is wrong” is not enough to identify a setting. Ask whether they mean the source viewer, timeline viewer, exported overlay, or an application’s file display. That one question can keep you from changing a correct timeline.

How do I change the start timecode on an existing timeline?
To change an existing timeline, find it in the Media Pool, right-click it, and choose Timelines > Starting Timecode. Enter the required value and confirm. Then inspect the first frame and the timeline’s visible start rather than assuming the operation only changes a number on a display.
Before you make the change, decide whether this is the right timeline and whether the requested value applies to the sequence itself. If the project has several timelines with similar names, select the intended one by name. If another editor supplied the value, confirm whether they mean timeline timecode, source timecode, or a visible overlay.
Use this procedure:
- Save the project.
- If the timeline is part of a conform, client handoff, or broadcast workflow, consider making a separate project copy first.
- Show the Media Pool.
- Locate the timeline that needs the change.
- Right-click the timeline item in the Media Pool.
- Open Timelines in the context menu.
- Choose Starting Timecode.
- Enter the required start value, such as
00:00:00:00. - Confirm the dialog.
- Return to the timeline and check the displayed timecode at its first frame.
- Inspect the left edge of the timeline and the position of the first clip for any blank time before picture.
The command is not the same as changing the frame rate, retiming a clip, or dragging a clip earlier or later. It changes the timecode reference for the timeline. Still, don’t reduce the result to “only a label changed.” Blackmagic’s guide examples show a changed start value alongside an empty region between the original start and the new start. Depending on the values and timeline, the visible range may make pre-roll or blank time apparent. Check the first clip’s position and the sequence’s beginning after you confirm the dialog.
If you entered the wrong value, stop and inspect before making another adjustment. Note the current display and timeline range. You may be able to use Undo if the command was the most recent action, but don’t rely on that without checking what else has changed since. If the sequence is important, compare it with your saved project copy rather than making a chain of unrecorded changes.
If the command seems to have done nothing, check these details in order:
- You right-clicked a timeline item in the Media Pool, not a clip or empty area in the timeline.
- You selected the intended timeline rather than another similarly named sequence.
- You confirmed the dialog rather than closing it.
- The playhead is at the first frame when you judge the start value.
- You are reading the timeline display, not a source viewer or a burn-in.
- The visible timeline has refreshed after the change.
Blackmagic’s older Fairlight guide recommends switching to another timeline and returning if the display needs refreshing after a Starting Timecode change. Treat that as a refresh step from an older guide, not as proof that every current Resolve version requires it.
A small worked example can make the verification less abstract. Imagine a three-minute timeline whose first frame currently reads 01:00:00:00. A delivery note asks for 00:00:00:00. You save, select the sequence in the Media Pool, change its start, return to the first frame, and read the timeline display again. Then you look at the first clip’s left edge. If the display is now zero and the picture begins where expected, the timeline-level change matches the request. This is a worked example, not a claim about a measured test.
Do not use the playhead’s position halfway through the edit to decide whether the start changed. If the playhead is at two minutes, its timeline timecode should be later than the start. Move to the first frame before judging the first-frame label. Likewise, do not use the left edge of the visible ruler if the timeline is horizontally scrolled.
If your project uses a slate, bars, pre-roll, or a countdown, distinguish the start of the timeline from the start of the program content. The sequence may intentionally contain material before the first scene. The delivery might call for the slate to have one timecode and the program to begin later. Before removing apparent blank space or changing the start, check whether that space is actually part of the agreed sequence design.
Change the existing timeline when that sequence needs a new start; changing Preferences alone won’t rewrite it.

How do I make new DaVinci Resolve timelines start at zero?
To set the default for future timelines, open Resolve Preferences and go to User > Editing > New Timeline Settings. Set Start timecode to 00:00:00:00, then save or confirm the preference change.
Blackmagic’s guides describe New Timeline Settings as the place to specify a starting timecode for new timelines. The word “new” matters. A preference change is not a bulk edit of sequences you already created. If one existing timeline still reads 01:00:00:00, change that timeline separately.
Use this sequence:
- Open Preferences.
- Select User settings.
- Choose Editing.
- Find New Timeline Settings.
- Set Start timecode to the value you want, such as
00:00:00:00. - Save or confirm the preference.
- Create a test timeline using the same method you normally use.
- Check the test timeline’s first-frame timecode.
A test is useful because a timeline can be created in more than one way. You might create one from scratch, create one from selected clips, import a sequence, or duplicate an existing timeline. Those routes can involve existing timeline properties or import choices. If one route produces a different result, compare it with a blank test timeline created through the normal timeline-creation dialog before deciding the preference failed.
There’s also a practical reason not to change this setting casually. If a production expects the standard one-hour start, a local preference set to zero could cause a new sequence to begin somewhere the receiving editor does not expect. If only one project needs zero, change that timeline and leave the default alone. Change the preference when you want the new value to apply consistently to future timelines you create.
If you create several timelines in one project, consider whether all of them should use the same value. A film sequence, a social cut, and a review timeline may serve different purposes. Don’t assume that one preference gives every timeline in every project the right handoff value. Record the required start in project notes or the delivery brief when consistency matters.
For several existing timelines, Resolve 18.5’s new-features guide documents changing the starting timecode for multiple selected timelines through the same context-menu command. The guide says to select the timelines, right-click one of the selected items, choose Timelines > Starting Timecode, and enter the new value. Check the available controls in your installed version. Select only the intended timelines, confirm the value, then inspect each sequence after the change. A bulk command saves clicks, but it also makes it easier to affect timelines that should keep their own start.
A preference test should use a disposable timeline, not a production sequence. Create it, confirm the displayed start, and delete or close it when you’re done. This separates two questions: whether the preference is set as intended, and whether an existing timeline has its own established value.
If you share a workstation or project with another editor, remember that user preferences are not a substitute for documenting the project’s required settings. A second editor may have a different default on their own account or machine. Put the start value in the handoff notes, and verify each timeline that must meet it.
If new sequences start at different values even after you set the preference, compare how each was created. A sequence created by duplicating another timeline may preserve the older sequence’s properties. An imported sequence may carry settings from the interchange. Avoid changing several preferences at once while trying to diagnose this. Test the ordinary new-timeline route first, then investigate the special creation path that behaves differently.
Should my timeline start at 00:00:00:00 or 01:00:00:00?
Use the start specified by the delivery, client, or editorial handoff. If no one requires a particular start, either zero or 01:00:00:00 can be reasonable for a standalone edit.
A one-hour offset is familiar in many post-production examples and can leave time before the program start for pre-roll or other production needs. Zero can be easier to understand in a personal edit or a short online video. Neither choice makes the creative content better by itself.
The Federal Agencies Digitization Guidelines Initiative notes that timecode conventions can vary with purpose and that preservation specifications may make their own choices. Its guidance is a reminder not to turn one common convention into a universal rule. Your client’s delivery spec, facility workflow, or project handoff is the rule for that job.
| Situation | Sensible choice |
|---|---|
| Personal short-form edit with no timecode requirement | Use zero or the default, whichever is clearer to you |
| Client supplies a required sequence start | Match the value in the brief |
| Timeline is part of a conform or interchange workflow | Preserve the agreed sequence and check the receiving system’s expectations |
| You are matching a camera or recorder value | Confirm whether the instruction refers to source or timeline timecode |
| You need a slate or pre-roll region | Follow the production’s start and pre-roll plan |
| A number must appear on the picture | Check the burn-in source and requested value separately |
| Another application must read a particular value | Confirm whether the request is for timeline timecode or file metadata |
| You’re continuing an established project | Keep the existing reference unless the team agrees to change it |
A vague instruction such as “start at zero” needs a follow-up question. Does the client mean the first frame in the timeline, the first visible frame of the program, a timecode burn-in, or the metadata reported by their system? Those requirements can differ.
Here’s a worked example, not a test result. A client sends notes saying the first frame must read 01:00:00:00. Your timeline begins at zero. First ask whether they mean the timeline’s timecode at its first frame or a visible number on the exported video. If they mean the timeline, change the timeline start and verify the first frame. If they mean the visible number, inspect the burn-in settings. If they mean what a downstream system reads, test the file and its metadata with that system or an agreed media-information tool.
Don’t change the start just to match a screenshot from another editor. That screenshot could show a later playhead position, a different frame rate, a source viewer, or another sequence. Match the requirement, not the image.
For an established edit, write down the original value before changing it. Then confirm the new value with the person or system receiving the timeline. This small step keeps two people from discussing the same cut using different timecode references.
Use the start value your delivery requires; don’t change a valid timeline just because its first hour looks unfamiliar.
What should I ask when the delivery note is vague?
Ask for the exact timecode reference and the exact point that must carry it. A useful clarification is: “Should the first frame of the Resolve timeline read this value, should the program begin at this value after a slate, or should the exported picture display it?”
That question separates three common requirements:
- The timeline’s first frame must have a particular label.
- The program content must begin at a particular label, perhaps after pre-roll.
- A visible overlay must show a requested value during playback.
If the client says “the video starts at one hour,” ask whether they mean the sequence or the player display. If they send a screenshot, ask whether it shows the timeline viewer, source viewer, or a burn-in. If they provide a delivery specification, use its terminology rather than translating it into a guess.
A second useful question is whether the number should be continuous with another sequence or should restart. A teaser, a main program, and an alternate version may be separate deliverables with different requirements. Don’t assume that matching one timeline’s start means every timeline in the project must use the same value.
Why does the frame number at the end look wrong?
The last part of a timecode is a frame count, not a decimal fraction of a second. Its valid range depends on the timeline’s frame rate. Before changing the starting hour, check whether the unexpected number is really a frame-rate or timecode-format issue.
A typical timecode is displayed as:
hours:minutes:seconds:frames
At 24 frames per second, the frame field typically counts from 00 through 23. At 30 frames per second, it typically counts from 00 through 29. The same-looking frame suffix can therefore mean different points in a second in different timelines.
For example, 01:00:00:10 means frame 10 in the current second, according to the timeline’s frame rate. It does not universally mean one tenth of a second. If you’re comparing a source clip and a timeline that use different frame rates, don’t judge them by the last two digits alone.
Use this order when the frame suffix looks suspicious:
- Confirm you’re looking at timeline timecode, not a source clip.
- Check the timeline frame rate.
- Check the source clip frame rate if the issue appears only on that media.
- Confirm the requested drop-frame or non-drop-frame convention where applicable.
- Recheck the value at the actual first frame.
- Change the start only if the starting value itself is wrong.
Drop-frame timecode is a numbering convention used with certain fractional frame rates to keep timecode labels closer to clock time. It does not drop picture frames from the video. The Federal Agencies Digitization Guidelines Initiative describes drop-frame and non-drop-frame timecode and their role in labeling frames. The details of punctuation and display depend on the application and workflow, so use the delivery specification when deciding which format applies.
A mismatch of one or several frames may come from a frame-rate interpretation, a source/timeline distinction, or an actual sync problem. It is not automatically evidence that the timeline starts at the wrong hour. If two camera angles are misaligned by frames, changing the start timecode is unlikely to fix their relationship. Diagnose sync and frame-rate setup separately.
Be especially careful when importing an edit from another application. A timeline can have a different frame rate or timecode convention from the project you were looking at before. Compare the sequence settings and delivery instruction before changing anything. If you change the frame rate to make the frame suffix “look right,” you may create a larger conform problem.
A useful distinction is between a mismatch that affects every point and one that appears only around certain clips. If the first frame’s hour is unexpected but frame increments proceed normally, investigate the timeline start. If the displayed frame count advances in a way that conflicts with the delivery requirement, check the frame rate and counting convention. If only a particular clip seems out of sync, inspect that clip’s source timecode and sync relationship instead.
What does drop-frame timecode change?
Drop-frame changes certain frame labels so the displayed timecode stays closer to clock time at fractional frame rates such as approximately 29.97 frames per second. It does not remove video frames. The name is easy to misunderstand, so don’t use it as a reason to expect missing picture.
You may see different punctuation used to distinguish drop-frame and non-drop-frame values. Follow the format in the delivery specification, and verify the setting in the relevant timeline or output workflow. Don’t infer the convention solely from a colon in an unfamiliar screenshot.
For a short online video, this distinction may not affect the specific question of whether the sequence starts at zero or one hour. For a broadcast, multicamera, or frame-accurate handoff, it can matter. In that case, confirm frame rate and counting mode with the receiving team before changing a setting.
Why does the timecode in my export start at a different number?
An exported video can show timecode in more than one way. The number may be part of the picture, displayed by the playback application, or associated with the file as metadata. Identify which one differs before changing the timeline.
If the number is visible in the picture itself, it may be a Data Burn-In overlay, a timecode generator, or a title with typed text. The timeline can have the correct start while the overlay uses another source. Inspect the burn-in or effect and check which timecode source it displays.
If the number appears only in a player’s interface, the player may be showing file information instead of pixels. A player’s timecode or duration display is not necessarily burned into the video. Try a second playback application or inspect the file metadata if the delivery requirement concerns embedded information.
The FADGI definition of metadata describes metadata as information about a digital object that may be embedded in a file or stored elsewhere. That is why “the exported timecode” can be ambiguous: the on-screen pixels and the information reported by a player are separate things to check.
Use this diagnostic:
- Can you see the number when you pause on the image? If yes, it may be in the pixels as an overlay or graphic.
- Does the number disappear when you disable the overlay? If yes, adjust the overlay or effect.
- Does Resolve show the expected value at the timeline’s first frame? If no, inspect the timeline start.
- Does the number appear only in the media player’s controls? If yes, investigate the player’s display or file metadata.
- Does the client need both a visible burn-in and a particular file value? Treat those as two separate delivery checks.
For a non-destructive check, export a short test range rather than overwriting the master. Open that test in the intended playback application and inspect the image and any reported metadata separately. Keep a note of what you changed. This helps isolate a display issue without making another change to the working timeline.
Resolve’s Data Burn-In controls are separate from the timeline start. If your concern is a visible timecode overlay, see the sibling guide to burning in timecode in DaVinci Resolve. Don’t treat a wrong-looking overlay as proof that the timeline itself has the wrong starting value.
If a client requests an embedded value, ask which application or delivery system will read it. “The file should start at one hour” may refer to the first timeline frame, the picture overlay, or a metadata field. Agree on the check before delivery. Otherwise, you can deliver a timeline that is correct in Resolve but still fail the receiving team’s specific expectation.
A wrong number in a rendered overlay does not automatically mean the timeline start timecode is wrong.
How can I tell a burn-in from a player display?
Pause on a frame and look at the image itself. If the digits remain inside the video picture when the player controls are hidden, they’re likely part of the rendered image. If they sit in the player’s control bar or disappear with the controls, you’re looking at the player interface.
This first check is visual, not definitive. A title can be placed over the picture and look like a burn-in. The practical question is where the number is coming from. Check Resolve’s burn-in and title elements if the digits are visible in the picture. Check the playback application if the number only appears around its controls.
When the requirement concerns metadata, don’t rely on a screenshot of the player. Confirm the requested field and the tool or system expected to read it. Different players can present different information, and a visible overlay is not a substitute for a metadata requirement.
What should I check if only one export looks wrong?
Compare the timeline display, the export settings, and the playback application before changing the timeline. If the timeline is correct but one rendered file displays a different number, the discrepancy may come from that file’s overlay configuration, its metadata, or the player.
Export a short test using the same settings and a section where the timecode is easy to identify. Compare it with the original timeline at the same frame. If the image has the unexpected digits, inspect the burn-in or graphic. If only the player reports the unexpected value, identify the metadata or playback display the client actually needs.
Keep the original master intact during this check. A short test lets you investigate the output without replacing a file that may already be approved or delivered.
Why doesn’t changing Preferences fix the timeline I already made?
The New Timeline Settings preference controls the default for new timelines. It does not automatically change existing sequences. To alter an existing sequence, select that timeline in the Media Pool and use its Starting Timecode command.
This setting mismatch causes a lot of confusion: the preference can be correct while an older timeline keeps its original start. The controls apply at different stages.
| What you want to change | Where to make the change |
|---|---|
| One existing timeline | Media Pool > right-click timeline > Timelines > Starting Timecode |
| The default for future timelines | Preferences > User > Editing > New Timeline Settings |
| A group of existing timelines | Select intended timelines and check the available Starting Timecode command |
| A sequence imported from another project | Inspect the import dialog and imported timeline settings |
| A source clip’s recorded timecode | Inspect the source media and relevant clip information |
| A visible number in the rendered picture | Inspect Data Burn-In, a timecode effect, or a graphic |
| A player’s displayed number | Check the player and the file information it reports |
A new timeline created from an imported sequence or an existing timeline may bring along choices from that source workflow. If one new sequence ignores the preference, create a blank test timeline using the standard creation path. Compare the results. That comparison helps distinguish a preference issue from an imported or duplicated timeline carrying its own settings.
Preferences are also local to the user’s Resolve setup. If several editors work on the same project from different workstations, don’t assume their new-timeline defaults match. A short project note that says “timeline start: 01:00:00:00” or “timeline start: 00:00:00:00” is more reliable than expecting everyone’s local preference to be the same.
Avoid changing the project frame rate to repair a starting-timecode mismatch. Frame rate and starting timecode are separate decisions. Frame rate determines the timeline’s timebase and frame count; the starting value labels the timeline’s position. Changing the first to compensate for the second can create a mismatch with media or an imported edit.
If a group of existing timelines needs the same start, Resolve’s 18.5 guide describes a command for changing the starting timecode of multiple selected timelines. Check the available controls in your installed build, then select carefully. A bulk operation should be followed by a quick check of every affected timeline, not just the one that was open when you ran it.
How do I handle a duplicated timeline?
Treat a duplicate as its own sequence and inspect its start rather than assuming it inherited the current preference. A duplicate is based on an existing timeline, so its starting value may reflect the sequence you copied. The New Timeline Settings preference is not a reliable way to rewrite that established sequence.
A safe comparison is straightforward:
- Note the start of the original timeline.
- Duplicate it using your normal workflow.
- Move the playhead to the duplicate’s first frame.
- Read the duplicate’s timeline timecode.
- Compare it with the value required for that version.
If the duplicate needs a different start, change that timeline directly. Keep the original unchanged if it remains part of the project or handoff. Give each version a clear name so you can tell which sequence was meant to meet which specification.
How do I handle an imported timeline?
First confirm the sequence’s frame rate and start against the source project or the handoff instructions. An imported timeline may bring timing and sequence properties with it. Changing only the new-timeline preference won’t necessarily change that imported sequence.
If the imported timeline looks wrong, compare the first frame and a known edit point with the source application or supplied reference. Don’t use a burn-in alone to judge the timeline. If the receiving application needs a specific start, make the change on a copy and check the result at both the first frame and a later edit point.
For an XML or other interchange workflow, a start-time change is only one part of the conform. Preserve the source sequence and use the receiving application’s requirements to decide what must match. If you also have an import mismatch, the separate Resolve XML import troubleshooting guide addresses that different problem.
What if the timeline starts correctly but the ruler looks wrong?
If the timeline’s first frame has the expected value but the ruler looks strange, check the playhead position, timeline scroll, zoom, and selected timeline before changing the start. The left edge of the visible timeline window is not always the beginning of the sequence.
In a long edit, the timeline can be scrolled well past the first frame. The viewer then displays the playhead’s current timecode, not the sequence’s starting value. A ruler that begins somewhere in the middle of the program does not prove that the sequence start changed.
To check:
- Confirm the name of the active timeline.
- Move the playhead to the sequence’s first frame.
- Bring the beginning of the timeline into view using the timeline navigation controls.
- Read the timecode at the playhead.
- Compare that value with the actual leftmost frame of the sequence.
If the display changes when you move to the beginning, you were reading the playhead’s current position. If it remains unexpected at the first frame, check the timeline’s Starting Timecode command.
Several open timeline tabs can also create a false alarm. You may be comparing one sequence’s start with another sequence’s ruler. Check the active timeline name, especially if you have a main edit, a social version, and a review copy open at the same time.
A useful test is to make a note of the active timeline’s name, move the playhead to the first frame, and then read the timecode display. Don’t infer a sequence start from a random ruler tick. The display at the playhead describes that playhead position. The ruler shows a range of timeline positions, which can be offset from the first visible frame when you have scrolled.
If the timeline itself won’t move or zoom as expected, treat that as a navigation problem rather than a timecode problem. The separate guide to a Resolve timeline that won’t scroll or zoom covers that symptom. Don’t change start timecode to compensate for a view that is simply parked at the wrong location.
What if the first clip starts after the timeline start?
That may be intentional. A timeline can have a start timecode before its first picture if the sequence includes blank pre-roll, a slate, bars, a countdown, or space reserved for another purpose. A gap at the start is not automatically an error.
Move to the first visible clip and compare its position with the first frame of the sequence. If the gap is expected, leave it. If it is accidental, diagnose the clip placement separately from the timecode label. Changing the timecode start does not serve as a safe substitute for trimming or moving an unintended gap.
This distinction matters during delivery. A sequence may start at one value while the program begins later. The timecode at the first program image will then be later than the timecode at the sequence start. Ask which point the delivery specification refers to before changing either the start or the clip position.
What if the timeline display looks stuck?
First move to a different point in the sequence and then return to the first frame. Confirm the active timeline and viewer. If the display still seems stale after changing the start, use the refresh approach documented in Blackmagic’s older Fairlight guide: switch to another timeline and return. The guide’s note is a useful troubleshooting option, not proof that all current versions need a refresh.
Don’t use a display refresh as evidence that the timeline has changed correctly. After the interface updates, recheck the first frame and the visible start. A refreshed incorrect value is still incorrect; a stale display needs a separate check.
What should I check before changing a shared or imported project?
Before changing timecode in a shared or imported timeline, confirm the requirement, record the current value, and preserve a copy if the timeline is important. Timecode can be a reference that other people use to identify and discuss frames, so changing it without telling them can create avoidable confusion.
This is not a warning that the command necessarily damages an edit. It is a reminder that the sequence may already be part of an agreed workflow. An editor, sound team, client, or conform system might refer to exact timeline positions. A new start changes those labels, even when the underlying source media remains the same.
Before the change, check:
- Which timeline is affected?
- Is the request for source timecode, timeline timecode, burn-in, or file metadata?
- What exact start value is required?
- What frame rate and timecode convention does the handoff expect?
- Is there already a delivered or shared version that uses the current value?
- Does the visible timeline contain blank pre-roll before the first clip?
- Who needs to know that the timecode reference changed?
- Does the requested value apply to the sequence start or the first program frame?
For an interchange workflow, don’t assume that changing the timeline display fixes every conform issue. An imported sequence can have its own frame rate, start, clip timing, and import choices. Check the import options and the receiving application’s requirements. If you’re uncertain, export a test or create a copy of the timeline before changing the working sequence.
Here’s a worked example, not a test result. An editor receives an imported sequence that appears to start at zero, while the client requests one-hour timecode. The editor first confirms that the request means timeline timecode at the first frame, not source camera timecode or a visible burn-in. They save a copy, change the start on the intended timeline, and inspect the first frame, a later edit point, and the visible start of the timeline. If an overlay is also required, they check it separately. Finally, they tell the receiving editor which reference changed.
For collaborative work, communicate the change in the project notes or handoff message. Don’t assume a collaborator’s separate export, external notes, or previous review comments will update just because the Resolve timeline now shows a different start. Keep the original value available if someone needs to compare old notes with the new sequence.
An experienced editor, Jeff Harrell, put the communication problem plainly: “Being an editor is about communicating. And communicating is about being unambiguous.” His example concerns the risk of confusing frames when reel and timecode identifiers are reused. The same principle applies here: name the timecode reference you mean, and agree on the value before a handoff. The quote appears in Jonny Elwyn’s article on timecode and reel numbers.
What should I write in the handoff note?
Write the timeline name, its start value, the frame rate, and whether the requirement refers to the first frame or the beginning of program content. If a burn-in or file metadata value matters, state that separately.
For example, a clear note could say: “Main Edit timeline, first sequence frame at 01:00:00:00; program begins after slate; visible burn-in required on review export.” That is more useful than “starts at one hour,” because it identifies the timeline, the position, and the display requirement.
If the sequence is being handed to another editor, include whether the start changed from the previous version. If review comments were made against the old timeline timecode, tell the team before sending a new reference. The goal is not to over-document a simple personal project. It is to prevent two people from locating different frames while using the same words.
A timecode change is also a communication change when other people use the old frame references.
How do I verify the fix without changing the edit?
Verify the result at the first frame, at a later point, and in any relevant overlay or exported file. A timecode check should confirm the reference you intended to change, not just produce a number that looks familiar.
Use this checklist:
| Check | What you’re confirming |
|---|---|
| Timeline name | You changed the intended sequence |
| First-frame position | The playhead is at the actual beginning, not an arbitrary visible ruler position |
| Timeline display | The first-frame value matches the requested start |
| Visible timeline range | There is no unexpected blank time before the first clip |
| Later edit point | The timecode advances as expected for the timeline frame rate |
| Burn-in | The overlay uses the intended source and value |
| Export | Picture pixels and reported file information meet separate requirements |
| Saved project | The value remains correct after saving and reopening, if the handoff requires it |
| Handoff note | Other editors know which reference changed |
For a standalone personal edit, checking the first frame and timeline display may be enough. For a client handoff, imported sequence, or delivery with a burn-in, check the relevant output as well. A short test export can confirm a visible overlay without requiring you to render the final master again.
If the number is still wrong, don’t repeat the same command immediately. Return to the diagnosis:
- Is the active viewer showing the timeline?
- Is the playhead at the first frame?
- Did you select the correct timeline in the Media Pool?
- Does the timeline display show the requested start?
- Is the wrong number a burn-in or a title?
- Is a player showing metadata rather than picture?
- Does the frame rate or timecode format differ from the instruction?
- Is the timeline scrolled away from its beginning?
- Did you change a preference when you meant to change an existing sequence?
A clean verification uses a known frame and a known expectation. If the instruction says the first frame must be zero, place the playhead on the first frame and check the timeline display. If the instruction says the picture must show a burned-in timecode, inspect the pixels in the test export. If the instruction concerns a value reported by a receiving system, confirm it in that system or an agreed file-inspection workflow.
Don’t treat duration as a substitute for start timecode. A sequence can have a duration of three minutes while its first frame is labeled 01:00:00:00. The ending label and runtime depend on frame rate and how the timeline is counted. If a client asks for a runtime, verify duration separately from start.
If you’re stuck locating the control in your current workspace, TryUncle can provide on-screen guidance on Mac and Windows while you work in Resolve. You remain in control of the edit; the useful part here is help finding the relevant setting in the interface you have open.
The fastest correct fix is usually small. Change the existing timeline if its first-frame timecode is wrong. Change Preferences if future timelines need a different default. If only an overlay or exported display is wrong, fix that display instead. Then verify the timeline start and the delivery requirement separately.
Frequently asked questions
- Why does my DaVinci Resolve timeline start at 01:00:00:00?
- 01:00:00:00 is a common default start timecode for a Resolve timeline. It labels the timeline’s first position; it does not mean the timeline contains an hour of black video. Change it only if your delivery or workflow calls for a different start.
- How do I change the start timecode on an existing DaVinci Resolve timeline?
- In the Media Pool, right-click the timeline and choose Timelines > Starting Timecode. Enter the requested value and confirm. Then check the first frame and the visible timeline start, because changing the start can affect the time range you see.
- How do I make new DaVinci Resolve timelines start at zero?
- Open Preferences, go to User > Editing > New Timeline Settings, and set Start timecode to 00:00:00:00. This preference is for new timelines; it does not automatically change existing ones.
- Why does the timecode in my export start at a different number?
- Check whether the number is burned into the picture, shown by a media player, or reported as file metadata. Those can use different timecode sources. Fix the setting that feeds the mismatched display rather than changing the timeline blindly.
- Does changing timeline start timecode change clip duration?
- Changing the start timecode is not a retiming command, so it does not change the source clip’s playback speed or duration. It can change the timeline’s timecode labels and visible time range, so check for blank space at the start and verify the first frame after the change.
- Should I use 00:00:00:00 or 01:00:00:00?
- Use the start required by your client, delivery specification, or edit handoff. If nobody requires a particular value, either can be suitable for a standalone edit. Don’t change an established timeline just because 01:00:00:00 looks unfamiliar.
Sources
Put this guide to work with TryUncle.
Ask about the step you’re on. TryUncle sees your screen and points at the control you need, so you can keep learning in your own project.
Get TryUncle for Mac or WindowsKeep reading

Fixes · Jul 17, 2026 · 25 min
DaVinci Resolve Timeline Won't Scroll or Zoom? Here's the Fix
Fix a DaVinci Resolve timeline that won't scroll or zoom: check 2D Timeline Scrolling, your modifier keys, trackpad gestures, and a stuck UI layout.
Guides · Aug 24, 2026 · 42 min
DaVinci Resolve Burn In Timecode: Complete 21 Guide
Learn how to burn timeline or source timecode into DaVinci Resolve 21 exports for dailies, client reviews, VFX notes, and editorial handoffs.
Fixes · Jul 8, 2026 · 26 min
DaVinci Resolve Multicam Sync Off by Frames: Every Fix
Multicam clip off by frames or drifting worse over time? Fix DaVinci Resolve's waveform mis-sync, frame rate drift, and timecode gaps, angle by angle.