Articles / Fixesupdated for DaVinci Resolve 21.0.2 (July 2026)
DaVinci Resolve XML Import from Premiere Pro Not Working
Quick answer
Premiere's Final Cut Pro XML export is the fragile link. Strip transitions, effects, and nested sequences from the Premiere timeline before exporting, then in Resolve's import dialog uncheck timecode matching and match by file name instead. That fixes most Media Offline and Failed to Link errors; frame rate mismatches and renamed clips need separate fixes below.
Your Premiere Pro timeline lands in DaVinci Resolve and something's wrong. Maybe nothing loaded at all. Maybe every clip is red. Maybe half your audio went silent and you're staring at a "Failed to link" dialog with no idea what timecode extents even means.
None of this means your edit is gone. It means the file exchange between two applications that were never designed by the same company broke somewhere specific, and that specific spot is almost always one of a short, known list.
I'll walk through every failure mode in order of how often it shows up: rejected imports, empty timelines, offline media, broken transitions, missing audio, and the frame rate and timecode mismatches that cause half of it. Each one has a fix that takes minutes once you know which broken link you're looking at.
What does "XML import not working" actually mean?
That phrase covers three genuinely different failures, and lumping them together is why so many troubleshooting threads go in circles.
Rejected. Resolve refuses the file outright, or the import dialog throws an error before anything lands on a timeline. The XML itself is malformed, usually from something in the Premiere sequence Resolve's parser can't interpret.
Empty or broken. The import completes, a timeline appears, and it's wrong: missing clips, dead space where a transition should be, or a section that's just gone. This is the second most confusing failure because Resolve doesn't tell you what it silently dropped.
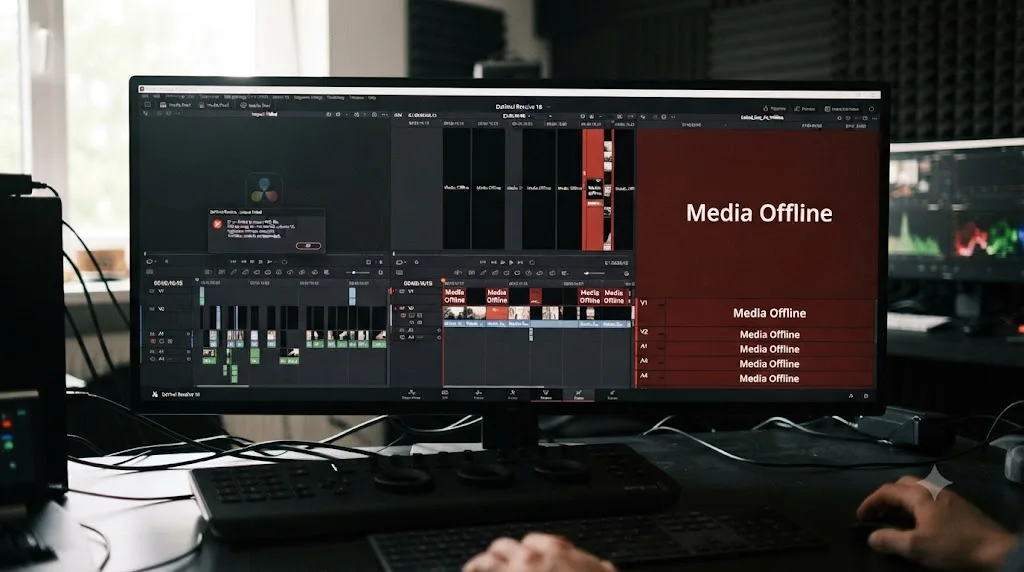
Offline. The most common outcome by far. A full timeline appears, every clip is in its right place, and every clip is red. Resolve knows a clip belongs there. It just can't find, or can't match, the file behind it.
Three different problems, three different fixes, and the fastest way to lose an afternoon is applying an offline-media fix to what's actually a malformed-XML problem. Figure out which bucket you're in before you touch a single setting.
Why does Premiere's XML output cause so many problems in Resolve?
Because Premiere Pro doesn't export a DaVinci Resolve file. It exports a Final Cut Pro 7 file, a format built for an editor Apple stopped updating over a decade ago, and Resolve happens to read that same format well enough to conform most timelines, most of the time.
Premiere Pro's Final Cut Pro XML export was never built with DaVinci Resolve as its primary destination, and every quirk in this guide traces back to that mismatch. Adobe's own documentation is candid about the limitation: exporting a sequence as Final Cut Pro XML carries known gaps, including that "audio pan, gain, and level changes may not transfer accurately" and that "some complex effects and transitions might not translate exactly," according to Adobe's own export guide. That's Adobe describing its own export format's limits, not a Blackmagic complaint.
On the receiving end, editors who work this handoff daily describe it more bluntly. On a Creative Cow forum thread about a broken XML import into Resolve, veteran editor Reuben Fink put it this way: "Premiere has notoriously bad XML output. It does not work well with Davinci," writing in a thread about problems importing a Premiere Pro CC XML project. That's not marketing copy from either company. It's a practitioner's summary of a format neither side fully controls, translated by a third format standard, FCP7 XML, that both companies support to different degrees of completeness.
None of that means XML is unusable. It means you have to prepare a Premiere timeline for export the way you'd prepare a file for a strict format, not the way you'd casually save a project you're staying inside.
How do you correctly export XML from Premiere Pro for Resolve?
Premiere has exactly one XML export path, and it isn't obviously labeled for this purpose.
- Open the sequence you want to send to Resolve.
- Select the sequence in the Project panel (not just have it open in the timeline).
- Go to File > Export > Final Cut Pro XML.
- Choose a save location and click Save.
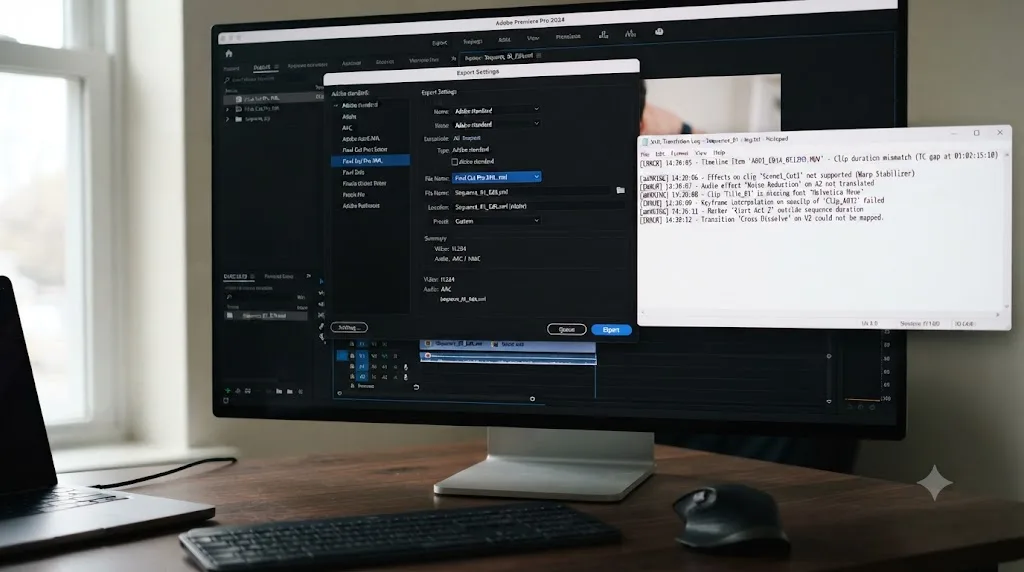
- Check the FCP Translation Results log Premiere generates next to the exported file. It lists anything the export couldn't fully translate, and it's the single most-skipped step in this entire workflow.
That translation log matters more than most editors give it credit for. It's Premiere telling you, in advance, exactly which elements are about to cause you trouble on the Resolve side. If it flags a nested sequence, an unsupported effect, or an audio transition, that's not a warning to shrug off. It's a preview of tomorrow's offline media report.
A DaVinci Resolve XML import that shows Media Offline has not lost your footage. It has lost the specific match between a clip's timecode and a file on disk. Keep that distinction in your head through the rest of this guide. Almost nothing here is data loss. All of it is a broken pointer, and broken pointers get fixed.
What should you strip from your Premiere timeline before exporting?
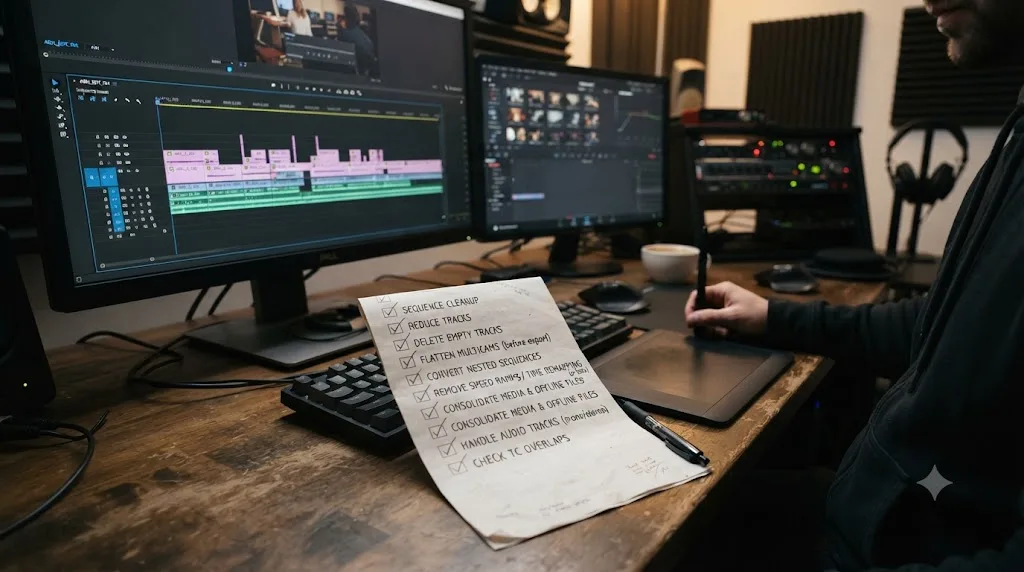
Every editor who does this handoff regularly ends up with the same short pre-export checklist, learned the hard way.
| Element | What goes wrong in Resolve | Fix |
|---|---|---|
| Nested sequences | Resolve doesn't reliably unpack Premiere's nests; the nested section can arrive blank, frozen, or missing entirely | Flatten every nest into the parent timeline before export |
| Cross-dissolves and dip-to-black | Import with the wrong duration, or produce a broken transition Resolve can't render | Delete before export, rebuild natively in Resolve's Edit page |
| Third-party plugins (Red Giant, FilmConvert, etc.) | Resolve has no idea what the plugin is; the effect data is either dropped silently or the whole import fails | Remove before export; reapply Resolve-native equivalents after conform |
| Opacity keyframes | Can import as a single frozen frame instead of the animated fade | Delete the keyframe animation, rebuild it with Resolve's Inspector after import |
| Speed ramps and time remapping | Frequently misread, producing wrong-length clips or a corrupted timeline section | Bake to a fixed speed before export if the ramp isn't essential to preserve exactly |
| Adjustment layers | Don't transfer through XML at all | Recreate any color or effect work they carried, natively in Resolve, after the conform |
| Renamed source clips | Breaks Resolve's clip-name conform match | Never rename a clip mid-project; rename a copy instead if you must |
Renaming a clip in Premiere after you've already cut with it is the single most common way to turn a clean XML import into an afternoon of manual conforming. That's not a guess. On the same Creative Cow thread cited above, colorist Marc Wielage gave the same advice in almost the same words after watching a fresh XML import fail: "Don't ever rename the clips. You can change or add to the metadata all you want, but don't screw around with the clip file names," from that thread's replies. Resolve's conform logic leans on the filename far more heavily than most editors assume, and a rename that felt harmless in Premiere becomes an unmatched clip on the other end.
The general rule underneath this whole table: simplify before you export, don't debug after you import. Every item you strip in Premiere is one less thing Resolve has to guess about, and guessing is where offline media and broken transitions come from.
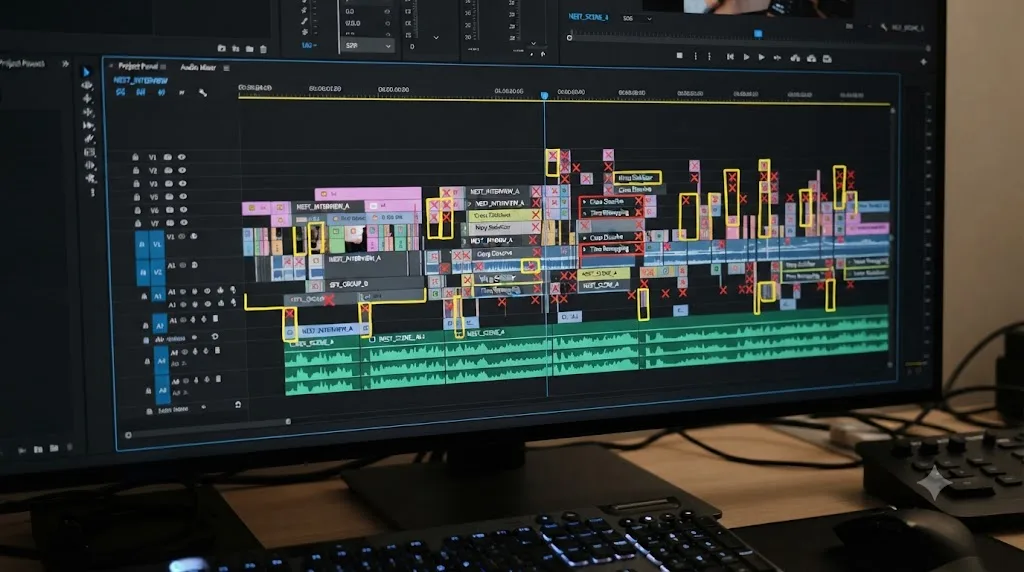
Why does DaVinci Resolve say Media Offline after XML import?
Because Resolve tries several matching strategies in a fixed order, and when all of them fail on a given clip, the fallback state is red.
Blackmagic's own reference manual lays out the sequence explicitly. With the default settings, Resolve "tries to conform as many of these clips as possible by matching the file paths in the AAF or XML file to the stored file paths" of clips already present, then falls back to importing clips fresh from visible storage using the paths written into the XML, then attempts "a clip name match," and only after that "a timecode match (along with a reel name match if this is enabled)," according to the DaVinci Resolve manual's page on conforming clips during XML and AAF import.
Notice what that means in practice: path first, then name, then timecode. A moved or renamed folder breaks step one. A renamed clip breaks step two. Mismatched or missing embedded timecode, common on consumer cameras and some XDCAM sources, breaks step three. If a clip fails every check, Resolve has nothing left to try, and it marks that clip offline rather than guessing wrong.
DaVinci Resolve's conform logic checks file path, then clip name, then timecode and reel name, in that fixed order, and knowing which check is failing tells you exactly which setting to change. If your files sit in the exact folder structure the XML expects, you're failing at step three, timecode, which is a different fix than a step-one path problem. Diagnosing which layer broke, instead of relinking blindly, is what turns a half-hour of frustration into a two-minute fix.

How do you fix Media Offline after a Premiere XML import?
Work through this in order. Most projects resolve at step two or three.
- Confirm the drive is actually connected and mounted. Sounds obvious, but it's the fastest thing to rule out before you touch conform settings.
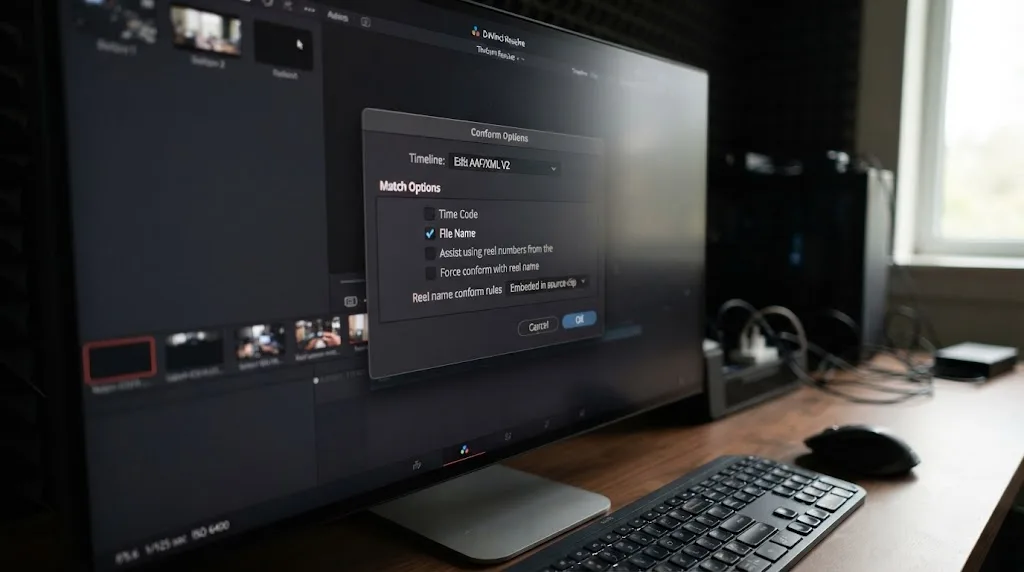
- Right-click the timeline in the Media Pool, and go to Timelines > Reconform from Bins. This reruns the conform matching pass against whatever's currently in your Media Pool.
- Open Conform Options in that same dialog and check what's being matched. If Time Code is checked and File Name isn't, uncheck Time Code and check File Name instead. Timecode mismatches from Premiere's XML export are common enough that file-name matching resolves the majority of stubborn offline clips.
- If specific clips are still red, right-click them individually and choose Force Conform with Media Pool Clip, then pick the correct source from the list Resolve offers.
- For anything that still won't match, fall back to a manual relink in the Media Pool: select the clip, right-click, Relink Selected Clips, and point it at the folder holding the actual source file.
This exact sequence, timecode unchecked in favor of file name, is the specific fix editors report solving most Premiere-to-Resolve offline media cases, echoed across multiple independent writeups of this workflow, including Alli and Will's field notes on the Premiere-to-Resolve pipeline and Cutsio's breakdown of common XML import failures.
One honest caveat worth setting here: Alli and Will's own writeup, written from the editor's side of this handoff, notes flatly that "Premiere Pro's way of relinking offline media is significantly better than DaVinci Resolve's." That's a fair critique. Resolve's relink tools are powerful once you understand the matching order, but they're not as forgiving on the first attempt as what you're used to on the Premiere side, and expecting an identical experience will slow you down.
Why does Resolve say Failed to Link, or import nothing at all?
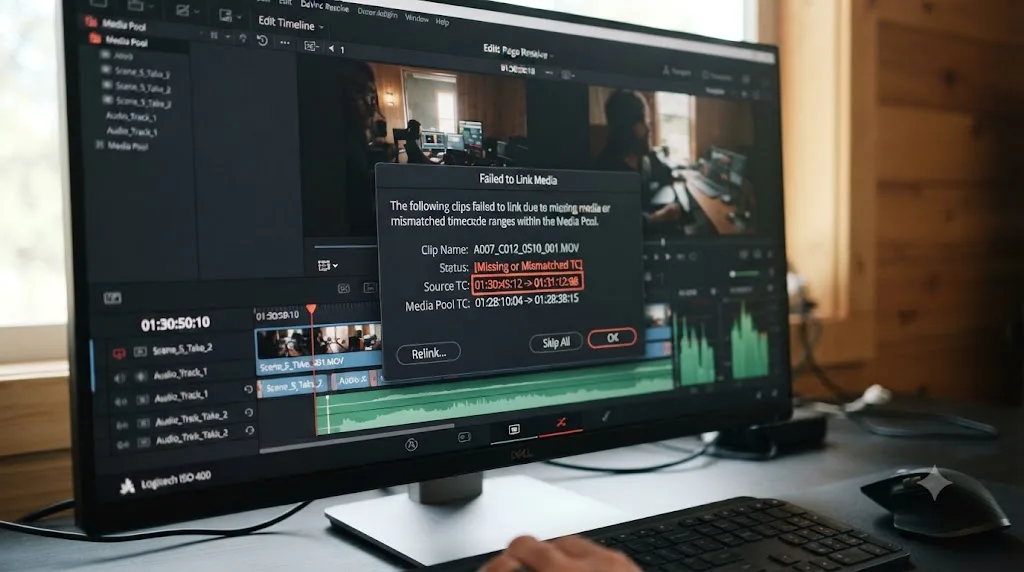
This is a step past ordinary offline media. Offline media means Resolve placed a clip and just can't find its source. "Failed to link" means Resolve couldn't even complete the match well enough to place the clip correctly in the first place.
The literal error text, in editors' reports of this failure, is usually a variant of "the clip failed to link because the timecode extents do not match any clips in the media pool," documented in a Creative Cow thread specifically about this error during XML, EDL, and AAF import. That phrasing tells you exactly what's happening: Resolve read a start and end timecode range out of the XML, looked through your Media Pool for a clip whose own timecode spans that same range, and found nothing close enough to count as a match.
Two root causes show up over and over in reports of this error:
Proxies edited against a different timecode source than the originals. If you cut with proxy media that carries one timecode track (say, an embedded "Absolute" timecode) while your camera originals carry a different one (an "Edge" timecode written separately), Resolve can end up comparing the wrong pair of numbers even though both files describe the same footage. The fix is matching your Camera Raw or clip settings so both sides read the same timecode source before you attempt the conform.
Automatically Import Source Clips left checked when your originals are already in the Media Pool. This setting has Resolve trying to pull media straight from the file paths embedded in the XML, which is fine if that's genuinely your first import, but redundant and error-prone if you already imported the camera originals yourself. Uncheck it, since you want Resolve conforming against what you already control, not re-discovering files on its own.
If neither of those resolves it, work the same layered approach from the Media Offline section above: import the originals into the Media Pool by hand first, deselect Automatically Import Source Clips on the XML import dialog, and let the conform run against media you've already verified is present and correctly named.
Why does the import land completely empty or badly broken?
An empty timeline, or one with large chunks of blank space where clips should be, is a different animal from offline media. It means the XML itself didn't parse cleanly, not that the media behind it can't be found.
The usual causes are the same items from the pre-export checklist earlier in this guide: nested sequences Resolve couldn't unpack, a third-party effect it doesn't recognize, or a transition whose duration data got mangled in translation. Resolve's XML parser can't interpret Premiere-specific plugin data or third-party effects, and when it hits something it can't read, the safest behavior it has is to skip that element rather than guess at rendering it, which is exactly why you get gaps instead of a crash.
Frame rate mismatches produce a related but distinct symptom: instead of gaps, you get a timeline that's the wrong length, or clips that play back at the wrong speed relative to your edit. If your Premiere sequence was 23.976fps and your Resolve project timeline settings default to 24fps, or vice versa, every clip's duration reads slightly wrong against the timeline it's sitting on.
The fix for a broken or empty import is almost always to go back to the Premiere source rather than patch the Resolve side:
- Re-open the FCP Translation Results log from your export and read what it flagged.
- Remove or flatten whatever it named, following the pre-export checklist above.
- Re-export a fresh XML.
- Before importing, confirm your Resolve project's timeline frame rate matches the Premiere sequence's frame rate exactly, under Project Settings > Master Settings.
- Re-import.
This is slower than fixing offline media because it requires a round trip back to Premiere, but there's genuinely no shortcut. A malformed XML doesn't have hidden data Resolve can recover through a relink dialog. If the information never made it into the file, no amount of conform tweaking inside Resolve brings it back.
What if the timecode Premiere reads doesn't match what everything else reads?
This is a narrower problem than general offline media, and it's specifically an Adobe-side quirk worth knowing about by name if you shoot on certain camera formats.
Editor Richard Clabaugh documented a case where Premiere Pro read a different timecode value than every other application touching the same source file. As he described it in a Creative Cow thread, "the Adobe Programs (Premiere Pro and After Effects) are saying one number while the non-Adobe programs (Final Cut Pro 7, QuicktimePro7, DaVinci Resolve) are all saying a different number," a discrepancy he traced to certain XDCAM-format 24p sources, in his thread on Premiere Pro's timecode reading behavior. In his example, one clip showed a 56-second, 5-frame offset between what Premiere reported and what Resolve, Final Cut Pro 7, and QuickTime Pro 7 all agreed on independently.
When three unrelated applications agree with each other and only Premiere disagrees, the discrepancy is almost certainly happening on Premiere's side of the import, before the XML is even generated. If it's baked into how Premiere is reading that source file, your exported XML inherits the wrong number, and no amount of conform tweaking inside Resolve fixes a value that was already wrong when it left Premiere.
Two things worth trying if you suspect this specific issue:
- Re-import the affected source through Premiere's Media Browser panel instead of File > Import or a drag-and-drop. Editors on that same thread reported that Media Browser is more reliable at correctly detecting media type and timecode format for certain camera-native files, where a plain file import sometimes guesses wrong.
- Cross-check the clip's timecode in a neutral third tool, like QuickTime Player's inspector or Resolve's own Media Pool metadata view, against what Premiere's own clip properties report. If they disagree, you've confirmed the read is happening upstream, in Premiere, and the fix belongs there, not in Resolve's conform dialog.
This one is rare compared to the mismatches earlier in this guide, but it's worth naming specifically because it's the one case here where the fix genuinely isn't anything you do in Resolve at all.
Why do transitions and opacity effects break on import?
Because Resolve's XML parser interprets a defined subset of Final Cut Pro 7 XML syntax, and Premiere's transitions and effect keyframes don't always translate cleanly into that subset.
Cross-dissolves and dip-to-black transitions are the most common casualty. They can import with a wrong duration, produce a visibly broken cut where the transition should be, or in some cases lead to a malformed section of the XML that throws off everything downstream of it. This is exactly why the pre-export checklist earlier in this guide recommends deleting transitions before export rather than hoping they'll survive.
Opacity keyframes fail in a more specific and confusing way. A clip that fades in or out using an opacity keyframe animation in Premiere can arrive in Resolve as a single frozen frame instead of the animated fade, a failure documented directly by editor James Malamatinas, who reported that "a clip with an opacity key applied was imported to Resolve as a freeze frame" and that the clip disappeared entirely once he removed the freeze frame effect Resolve had substituted, in his account on the same Creative Cow thread about Premiere Pro CC XML import problems.
An opacity keyframe that Premiere reads perfectly can arrive in Resolve as a single frozen frame, because Resolve's XML parser doesn't interpret every effect keyframe Premiere writes. The practical fix is the same one that applies to transitions: don't send the keyframe animation through the XML at all. Delete the opacity keyframes on the Premiere side before export, then rebuild the fade natively inside Resolve's Inspector or with an Opacity node on the Color page after the conform is clean. It's a few extra minutes of manual work per clip, but it's far faster than debugging why a fade vanished on the other end.
Why is only the first audio track playing after import?
This one catches editors off guard because nothing looks obviously wrong. The timeline is full, the waveforms are visible, and then you hit play and half your audio is silent.
The common pattern is that only the first audio track in the sequence carries sound after the import, while every subsequent track shows a flat, silent waveform even though the source files themselves are fine. The underlying cause tends to be a clip-level mute flag written into the XML during export that Resolve's parser honors on later tracks but not consistently on the first one, effectively muting clips that were never intentionally muted in Premiere.
The fix doesn't require re-exporting anything, which makes it faster than most of the fixes in this guide:
- Select the silent clips in the timeline (Shift-click across a track, or select the whole track).
- Open the Inspector, or right-click and choose Clip Attributes.
- Check the Audio section for a disabled or muted flag on the selection.
- Re-enable audio across the selected clips.
If Clip Attributes shows the audio as already enabled and the clips are still silent, check the track header itself next: a track-level Mute button left on from the Premiere side occasionally carries through the conform in a way that reads as a track setting rather than a per-clip one. Our no audio troubleshooting guide covers every other place DaVinci Resolve can lose sound entirely outside of an XML import specifically, including sample rate mismatches and I/O Engine settings, if this fix doesn't fully restore your mix.
Should you use XML, AAF, or EDL instead?
XML isn't the only bridge between Premiere and Resolve, and knowing when to reach for one of the others saves you from fighting a format that was never going to carry what you need anyway.
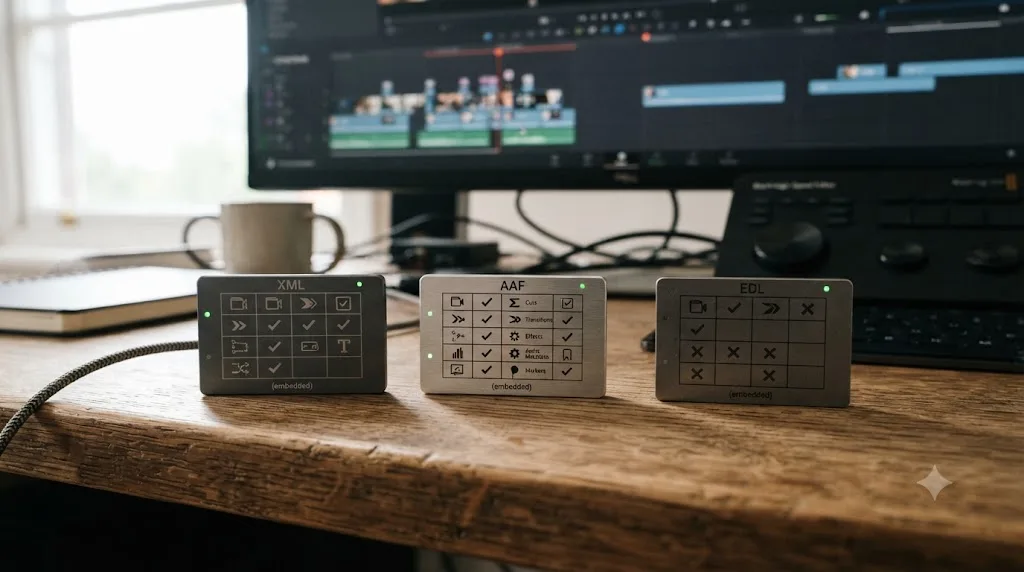
| Format | What it carries well | What it drops or mangles | Best use case |
|---|---|---|---|
| XML (Final Cut Pro 7) | Picture cuts, basic transitions, clip positions | Audio levels and pan, complex effects, nested sequences, some plugin data | Simple picture-lock handoffs for color grading |
| AAF | Audio levels, pan, gain, multi-track mixes, some effect metadata | Video-side effects and complex transitions less reliably than XML | Any handoff where the audio mix has to survive intact |
| EDL | The most basic possible cut list: in points, out points, reel names | Almost everything else: no transitions, no effects, no multi-layered audio | Last-resort picture-only conform when both XML and AAF fail |
AAF was built for audio interchange between Pro Tools and picture editors, which is exactly why it survives a Premiere-to-Resolve trip more reliably than XML does for anything touching sound. If your project's biggest fear during the handoff is a broken mix rather than a broken cut, export AAF instead of XML, or export both and use AAF specifically to rebuild the audio side after XML handles picture.
EDL earns its place as the fallback of last resort. It carries almost nothing beyond a bare cut list, but that bareness is exactly what makes it bulletproof when everything more sophisticated has failed: no transition data to mangle, no nested sequence to fail unpacking, no effect keyframe to misread. If you've fought XML and AAF both and just need the cut points to survive, drop to EDL, accept that you'll rebuild transitions and effects by hand, and move on.
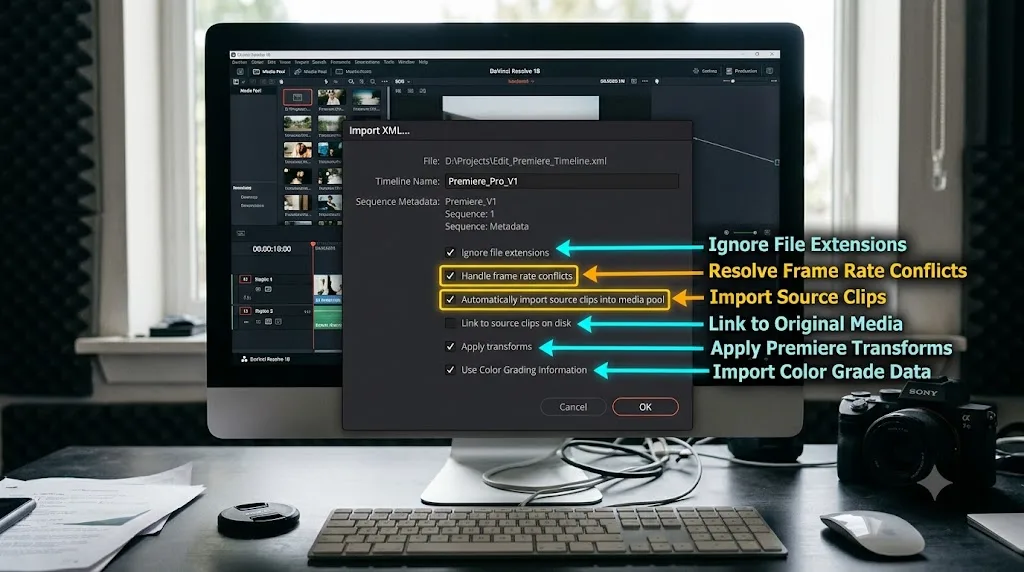
What are the exact import dialog settings you should use?
The Resolve XML import dialog has several checkboxes that quietly determine whether your conform succeeds on the first pass or requires a manual relink afterward. Here's what each one actually does, per Blackmagic's own manual documentation of the import process.
| Setting | What it does | When to check it |
|---|---|---|
| Automatically Import Source Clips into Media Pool | Pulls media into the Media Pool using the file paths embedded in the XML | Uncheck if you've already imported your originals; check only for a genuinely first-time import |
| Ignore File Extensions When Matching | Lets Resolve match clips across different container formats (a .mov reference matching a .mxf source, for instance) | Check if your delivery codec differs from your editing codec |
| Use Sizing Information | Imports position, scale, and rotation transforms from the XML | Check if you applied any reposition or scale moves in Premiere you want preserved |
| Use Color Information | Imports color data specifically from Final Cut Pro X XML sources | Not applicable to a standard Premiere export; this is FCPX-specific |
| Import Multi-Channel Audio Tracks as Linked Groups | Keeps stereo, 5.1, or 7.1 audio channels grouped as they were in Premiere instead of splitting them into separate mono tracks | Check for any multi-channel audio mix you don't want to manually regroup afterward |
| Mixed Frame Rate Format | Chooses how Resolve should conform a timeline containing more than one frame rate, using either FCP7, FCPX, or DaVinci Resolve's own logic | Set to DaVinci Resolve unless you have a specific reason to match FCP's conform behavior instead |
According to the DaVinci Resolve manual's page on importing XML project files, Resolve first attempts a file path match against clips already in the Media Pool, then falls back to importing from visible storage using the XML's embedded paths, then clip name matching, then a timecode-and-reel-name match as the final fallback. That's the same ordered logic covered in the conform section above, and it applies identically whether you're hitting these settings for the first time or reconforming a project after a failed initial attempt.
The one setting worth double-checking on every single Premiere import, regardless of project size: Automatically Import Source Clips. Leaving it checked on a large project with hours of 4K footage can, according to multiple firsthand accounts of this workflow, meaningfully slow down or even crash Resolve during the import itself, because it's trying to scan and import every referenced file at once rather than conforming against media you've already brought in under your own control.
What if your frame rate doesn't match?
A frame rate mismatch between your Premiere sequence and your Resolve project is one of the quieter failure modes on this list, because it doesn't always throw an error. It just makes everything slightly, confusingly wrong.
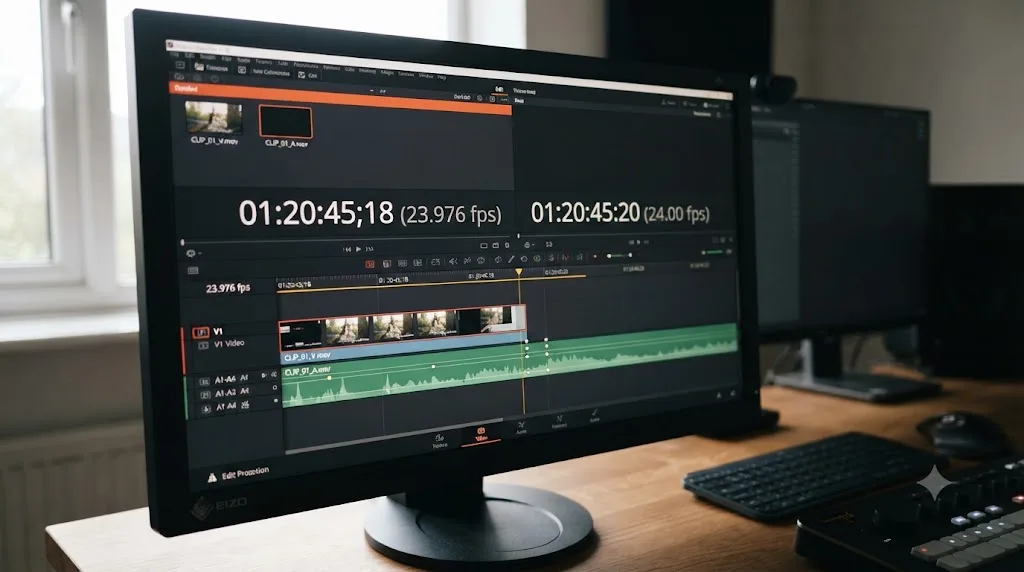
The classic version: a Premiere sequence set to 23.976fps meets a Resolve project timeline still sitting at its default 24fps, or vice versa. The difference between those two numbers is small enough (a fraction of a frame per second) that the timeline often still imports and plays, just with a creeping drift: audio and picture that line up at the start of the timeline slide apart by the end, or clip durations that read as slightly too long or too short compared to what you cut in Premiere.
Before you import anything, check two places:
- In Premiere, confirm your sequence's frame rate under Sequence > Sequence Settings.
- In Resolve, before or immediately after import, go to Project Settings > Master Settings and set Timeline Frame Rate to match that exact number. 23.976 and 24.00 are not the same setting, and Resolve won't auto-correct a mismatch for you silently.
Drop-frame versus non-drop-frame timecode is the second half of this problem, and it's easy to overlook because both formats display almost identically at a glance. If your Premiere sequence uses drop-frame timecode (common at 29.97fps and 59.94fps) and your Resolve project defaults to non-drop-frame, or the reverse, the timecode numbers embedded in your XML won't line up with what Resolve expects during a timecode-based conform, adding one more way for offline media to appear even when the actual frame rate itself is set correctly.
If you're already deep into a project and only now discovering a frame rate mismatch, don't try to patch it after the fact by nudging clips around manually. Fix the Project Settings frame rate to match the source sequence exactly, then reconform from bins as covered earlier in this guide. Getting the frame rate right before the conform saves you from chasing a dozen individual symptoms that all trace back to the same root setting.
What if XML import keeps failing no matter what you fix?
Sometimes you've stripped every transition, flattened every nest, matched every frame rate, and the import still won't cooperate. Before you conclude Resolve is simply broken, there are two workarounds worth trying.
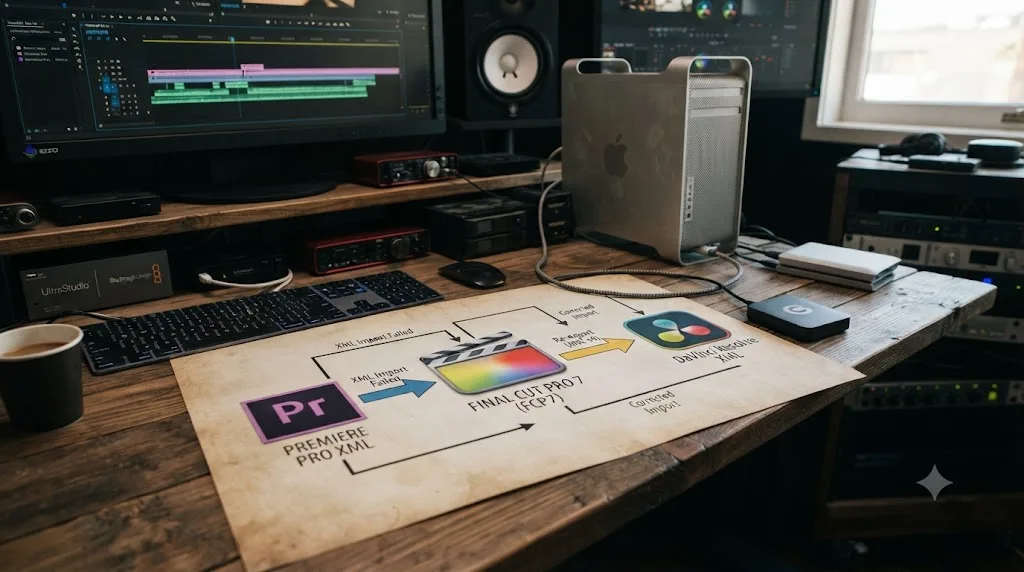
Hop through Final Cut Pro 7 or a converter tool, if you're on a Mac. Editors who've hit a wall with a direct Premiere-to-Resolve XML export report better results exporting XML from Premiere, importing that XML into Final Cut Pro 7 (a Mac-only application, still runnable on some older machines or through compatibility layers), and then exporting a fresh XML from FCP7 for Resolve to import. The logic here isn't mysterious: FCP7's own XML export is a format Resolve's parser was built against most directly, so a file that's passed through FCP7 sometimes conforms more cleanly than one straight out of Premiere, even though both technically claim the same file format. This is a genuine workaround, not a guaranteed fix, and it's Mac-only, but it's documented as effective enough by editors on the Creative Cow thread covering this exact scenario that it's worth the extra step before giving up on XML entirely.
Export the whole project as a single flattened file and let Resolve's own cut detector rebuild the timeline. Instead of translating cut points and clip references through XML at all, render your Premiere sequence out as one continuous video file, import that single file into Resolve, and run Scene Cut Detection on it. Resolve analyzes the footage directly and inserts edit points wherever it detects a hard cut. You lose every soft transition and any metadata about individual source clips, since you're now working from a single rendered master rather than the original camera files, but you sidestep the entire XML translation layer and its failure modes completely. This only makes sense as a picture-lock handoff for color work, where you don't need to touch individual source clips again, and it's a genuine last resort rather than a first choice.
Both of these exist because XML, as a format, has real limits that no amount of careful export hygiene fully eliminates. Knowing they're available means you're never actually stuck, just working around a specific tool's specific ceiling.
What does a full recovery look like start to finish?
Here's a realistic worst case, because problems on this list rarely arrive one at a time.
Say you cut a documentary interview sequence in Premiere Pro, complete with a few cross-dissolves, an opacity fade on the cold open, and one nested sequence holding a b-roll montage. You export Final Cut Pro XML and import it into Resolve for color and Fairlight finishing. Here's the order that actually resolves it:
- Frame rate first. The timeline plays back wrong-length before anything else gets touched. Project Settings shows Resolve still on its default 24fps against a 23.976fps Premiere sequence. Fix that first, since every downstream symptom compounds on top of a wrong frame rate.
- Conform matching second. Reconform from bins, uncheck Time Code, check File Name. Most of the offline red clears in one pass.
- Stragglers third. A handful of clips are still red: the interview subject's audio files, which were renamed during an earlier organizing pass. Relink those by hand, one at a time, since a rename breaks the automatic match no setting can restore.
- The nested montage fourth. That section imported as a short stretch of dead space instead of the b-roll clips. No conform setting fixes malformed XML data, so re-open the Premiere project, flatten that nest, re-export just that portion, and reconform.
- The transitions and the opacity fade last. The cross-dissolves imported with slightly wrong durations, and the cold open's fade arrived as a single frozen frame. Delete both, rebuild them natively inside Resolve's Edit and Color pages, since that's faster and more reliable than debugging why the XML mistranslated them.
Five different mechanisms, five different fixes, one clean project. The order matters here just like it does with offline media generally: fixing the frame rate before the conform, and the conform before the manual rebuilding, means each layer's repair actually sticks instead of getting undone or masked by whatever's still broken underneath it.
How do you prevent this on your next handoff?
A short list of habits eliminates most of what's covered in this guide before it ever happens.
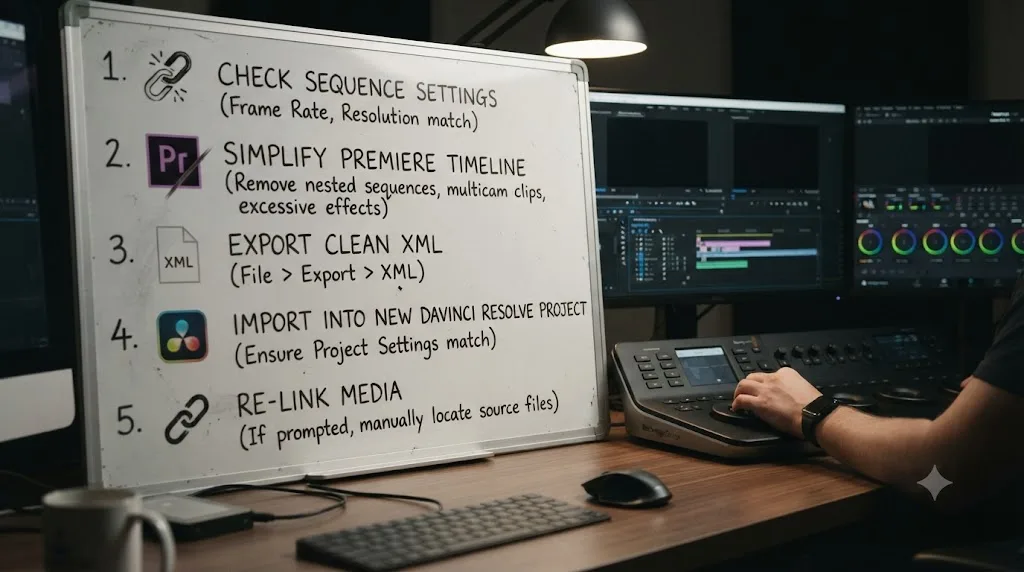
- Lock picture before you export. Every fix in this guide gets harder if you're still making editorial changes in Premiere after the XML has already gone to color. Treat the export as a hard checkpoint, not a snapshot you'll casually re-send.
- Read the FCP Translation Results log every time. It's generated automatically next to your exported XML and it names exactly what Premiere couldn't fully translate. Skipping it means discovering the same information later, the hard way, inside Resolve.
- Never rename a source clip mid-project. If you need a cleaner name for organizing purposes, duplicate the file and rename the copy, or handle it through metadata fields instead of the filename itself.
- Match frame rate and drop-frame settings before you import, not after. Check Premiere's Sequence Settings against Resolve's Project Settings as your very first step, before you even open the XML import dialog.
- Send AAF alongside XML whenever the audio mix genuinely matters. Don't discover a broken mix after color grading is already underway; export both formats from the start if sound quality on the handoff is non-negotiable.
- Keep a copy of the pre-export Premiere project. If Resolve mangles something in translation, you need the clean Premiere source to fix it at the root, not a corrupted XML to reverse-engineer.
If you're switching your primary editing workflow between the two apps rather than just handing off a single project for color, our comparison of DaVinci Resolve and Premiere Pro in 2026 covers the broader tradeoffs, including how a growing number of studios run both tools in sequence deliberately, editing in Premiere and finishing color and audio in Resolve, rather than treating the XML handoff as an occasional emergency measure.
What if you're doing this handoff for the first time?
If this is your first Premiere-to-Resolve XML import and it went sideways, you're not doing anything unusual. This is one of the most commonly reported friction points for editors moving between the two ecosystems, precisely because it sits at the seam between two companies' competing file formats rather than inside either application's own, more polished feature set.
The good news is that everything in this guide is a solved, documented problem with a known fix, not a mystery you have to reverse-engineer from scratch. Work through the failure-mode checklist near the top of this guide first (rejected, empty, or offline), match that to the right section here, and you'll almost always land on the fix within a few minutes rather than an afternoon.
If you're newer to Resolve more broadly and this XML handoff is your first real exposure to its Media Pool and conform tools, our complete beginner's guide covers the pages and habits worth understanding before you touch a larger project, and our media offline troubleshooting guide covers every other way a clip can go red in Resolve beyond the XML-specific causes in this one. And if you'd rather have something point at the exact control on your actual screen mid-conform instead of hunting through a settings dialog while a deadline creeps closer, that's the specific gap TryUncle is built to close, an AI tutor for Resolve on macOS that watches your screen and points at the setting you need instead of sending you back to a generic tutorial.

What's the fastest path back to a working conform?
Diagnose before you fix. Figure out whether you're looking at a rejected import, an empty or broken timeline, or offline media, because each one has a different root cause and applying the wrong fix wastes time without changing anything.
For offline media, the fastest fix is almost always reconforming with Time Code unchecked and File Name checked. For a rejected or broken import, go back to Premiere and strip nested sequences, transitions, and third-party effects before you re-export, since no setting inside Resolve recovers data that never made it into the XML in the first place. For anything audio-specific, check Clip Attributes before you assume the mix itself is broken.
Match your frame rate settings before you do any of it. A wrong Timeline Frame Rate in Resolve's Project Settings quietly compounds every other symptom on this list, and fixing it first means every fix after it actually sticks instead of getting undone by the layer underneath. Prepare your Premiere timeline the way you'd prepare a file for a strict format rather than a casual save, and most of what's covered in this guide never happens to you again.
Frequently asked questions
- Why does my Premiere Pro XML import as Media Offline in DaVinci Resolve?
- Resolve's default conform order checks file path, then clip name, then timecode and reel name. A moved drive, a renamed clip, or an XDCAM/Sony source with mismatched timecode breaks that chain. Reconform the timeline, uncheck Time Code under conform options, and select File Name instead, then relink from the folder holding your originals.
- Why does DaVinci Resolve say Failed to Link when I import an XML from Premiere?
- The exact message is usually 'timecode extents do not match any clips in the media pool.' It means Resolve found a clip reference in the XML but couldn't match its start and end timecode to anything already in your Media Pool. Import the camera originals into the Media Pool first, unchecked Automatically Import Source Clips, then reconform.
- Why did my XML import completely empty into DaVinci Resolve?
- An empty or near-empty timeline after import almost always means the XML itself is malformed, usually from nested sequences, third-party plugins, or a Premiere effect Resolve's XML parser can't interpret. Flatten every nest, remove non-native effects, and re-export before trying again.
- Should I use XML, AAF, or EDL to move a Premiere Pro timeline into DaVinci Resolve?
- XML for picture-only cuts with simple transitions, AAF when audio has to survive the trip since it was built for that exact handoff, and EDL only as a last resort for a picture-cut-only conform when both XML and AAF fail. Most editors default to XML and fall back to AAF the moment audio breaks.
- Why do my transitions and opacity effects break when I import Premiere's XML into Resolve?
- Resolve's XML parser doesn't interpret every Premiere effect keyframe. Cross-dissolves and dip-to-black transitions frequently import with the wrong duration or vanish outright, and a clip with an opacity keyframe applied can arrive as a single frozen frame. Delete transitions and effects in Premiere before export and rebuild them natively in Resolve.
- Why is only the first audio track playing after I import a Premiere XML into Resolve?
- This is a known XML quirk where later audio tracks import muted at the clip level even though they look identical to the first track. Select the affected clips, open Clip Attributes, and check whether Audio is set to disabled. If it is, re-enable it across the selection.
- Do I need to remove nested sequences from Premiere before exporting XML to Resolve?
- Yes. Resolve's XML import doesn't reliably unpack Premiere's nested sequences the way Premiere itself does. Flatten every nest into the parent timeline before you export, or the nested section can arrive blank, frozen, or missing from the conform entirely.
Sources
- Creative COW forum: Problems importing an XML project which was generated in Premiere Pro CC
- Creative COW forum: "Failed to link" when importing XML / EDL / AAF
- Creative COW forum: Premiere Pro Reads Incorrect Timecode from Source-Makes Bad XML
- Adobe Help: Export a project as a Final Cut Pro XML file
- DaVinci Resolve Manual: Conforming Clips During XML and AAF Import (Blackmagic Design)
- DaVinci Resolve Manual: Importing XML Project Files (Blackmagic Design)
- Cutsio: Why Won't My XML Import Into DaVinci Resolve?
- Alli and Will: Premiere Pro to DaVinci Resolve Workflow (and How to Fix Media Offline Issues)
- Frame.io: There and Back Again, How to Roundtrip Between Premiere and Resolve (Aaron Zake)
Put this guide to work with TryUncle.
Ask about the step you’re on. TryUncle sees your screen and points at the control you need, so you can keep learning in your own project.
Get TryUncle for Mac or WindowsKeep reading
Fixes · Jul 7, 2026 · 26 min
DaVinci Resolve Media Offline: Every Cause and the Fix
Every reason DaVinci Resolve marks a clip media offline, and the exact relink, cache, and codec fixes for each cause, in order of how often they happen.
Comparisons · Jul 11, 2026 · 30 min
DaVinci Resolve vs Premiere Pro in 2026: Which Should You Use?
DaVinci Resolve vs Premiere Pro in 2026: pricing, color grading, AI tools, Fusion vs After Effects, and which editor actually fits your workflow.
Fixes · Jul 7, 2026 · 26 min
DaVinci Resolve No Audio: Every Cause and How to Fix It
Timeline plays video but no sound? Check the mute and solo buttons, the I/O Engine setting, sample rate, and Export Audio, in that order. Full fix list.