Articles / Guidesupdated for DaVinci Resolve 21.0 (June 2026)
DaVinci Resolve for Beginners: The Complete Starter Guide
Quick answer
DaVinci Resolve is a free, professional video editor from Blackmagic Design that covers editing, color grading, audio, and visual effects in one app. Start by downloading the free version, learn the Cut or Edit page first, and skip the $295 Studio upgrade until you actually need AI tools, HDR grading, or resolutions above 4K.
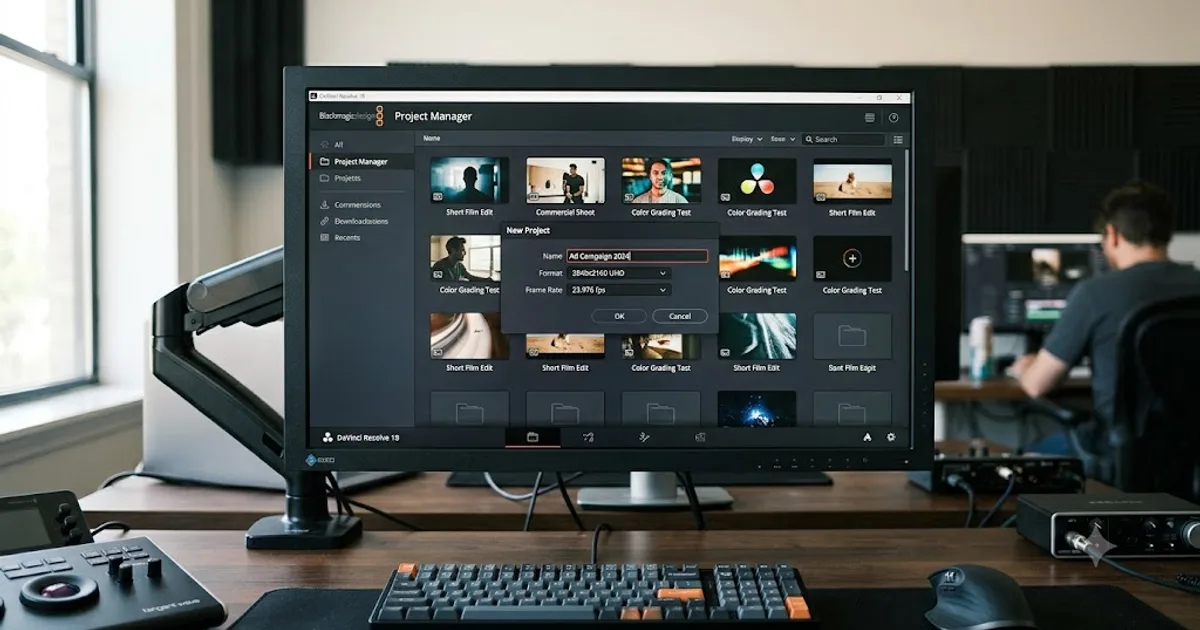
You don't need a film degree to learn DaVinci Resolve. You need a plan, because the app itself doesn't hand you one. It opens with seven pages, a node-based color room, and an audio mixer that looks like it belongs in a recording studio. That's intimidating for exactly one day. After that, it's just an editor.
This guide is the plan. What Resolve actually is, what it costs, whether your machine can run it, and the order to learn its pages in so you cut a real project instead of clicking around for a week.
What is DaVinci Resolve, and why do beginners pick it?
DaVinci Resolve is a video editor built by Blackmagic Design that also does color grading, audio mixing, and visual effects, all inside one application. Most editors bolt these together from separate apps. Resolve keeps them under one roof, which means your edit, your color, and your sound all reference the same timeline without exporting and reimporting between programs.
Beginners land on it for a simpler reason: it's free, and the free version isn't a trial. There's no watermark, no 30-day countdown, no locked export button. According to Blackmagic's own product page, the free version handles "virtually all 8-bit video formats at up to 60fps in resolutions as high as Ultra HD 3840 x 2160." That covers the footage from a phone, a mirrorless camera, or a webcam without any asterisk.
The tradeoff is the interface. Resolve was built for post-production houses first and hobbyists second, and it shows in the density of its menus. That's real, and this guide exists to cut through it.
Is DaVinci Resolve actually free, and what do you get?
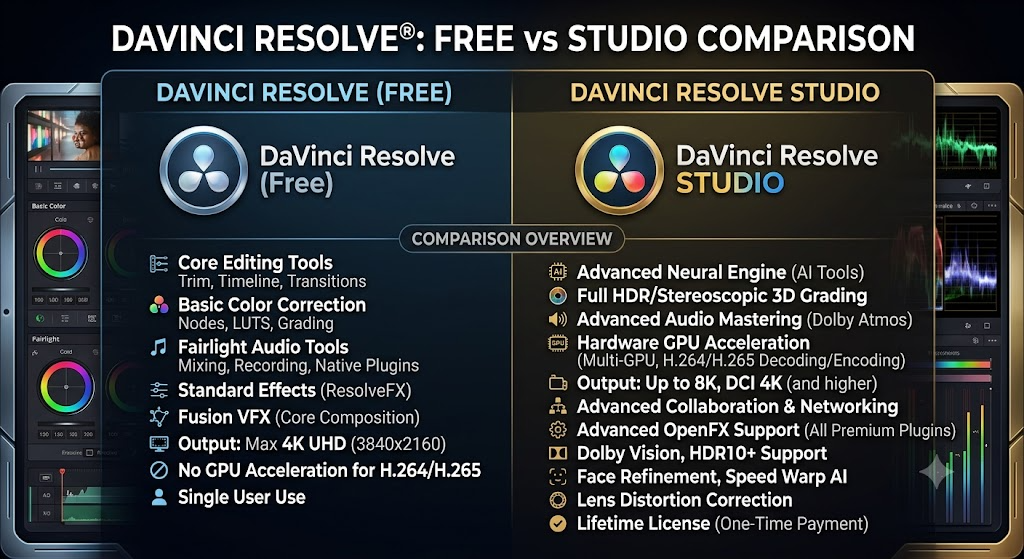
Yes, and the free tier is more generous than people expect. Here's what's in each version, straight from Blackmagic's spec sheet:
| Feature | Free | Studio ($295) |
|---|---|---|
| Editing, color, audio, Fusion VFX | Full access | Full access |
| Max resolution | Up to 4K UHD (3840 x 2160) | Beyond 4K |
| Max frame rate | 60fps (8-bit) | 120fps (10-bit) |
| DaVinci Neural Engine AI tools | Not included | Included |
| Stereoscopic 3D tools | Not included | Included |
| Advanced HDR grading | Not included | Included |
| Price | $0 | $295 one-time |
Source: Blackmagic Design, DaVinci Resolve product page.
The free version of DaVinci Resolve has no watermark, no time limit, and no cap on project length. The $295 Studio license is a one-time purchase, not a monthly fee, which is worth knowing if you've only ever priced Premiere Pro or Final Cut.
For a full breakdown of what changed in the current release and whether upgrading matters once you've outgrown the basics, see our DaVinci Resolve 21 review.
Can your computer run DaVinci Resolve?
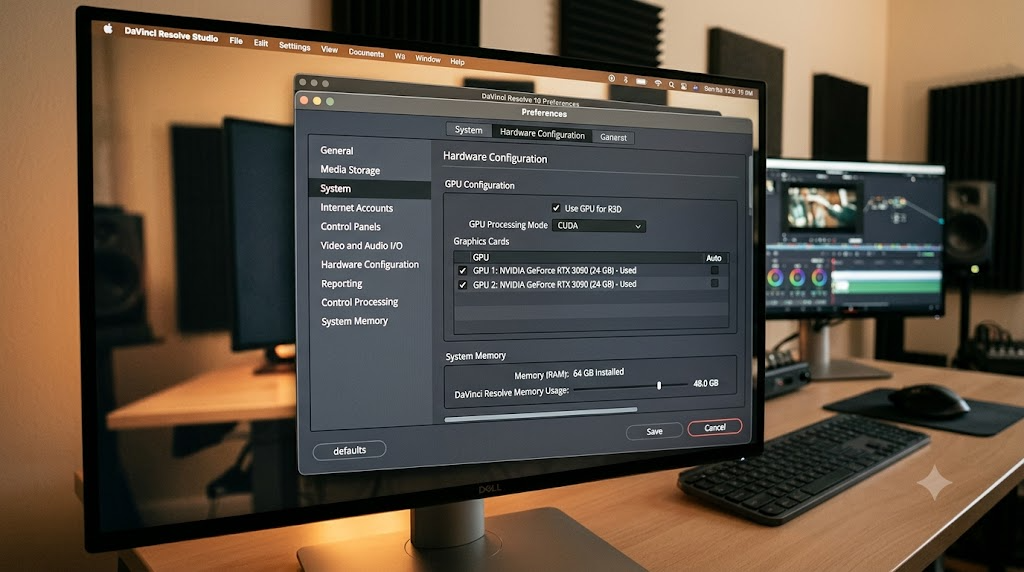
Check this before you install anything, because Resolve is heavier than most beginner editors. Per Blackmagic's tech specs:
- RAM: 16 GB minimum system memory.
- GPU: A discrete or integrated GPU with at least 4 GB of VRAM.
- Operating system: A recent macOS, Windows 10 Creators Update or later, Windows 11, or Rocky Linux 8.6.
Those are minimums, and a minimum means Resolve opens and plays a simple cut. It doesn't mean smooth playback once you stack a color node and a title on 4K footage. As a working rule of thumb, not a benchmark: double the RAM minimum if you edit 4K, and treat 8 GB of VRAM, or any Apple silicon Mac, as the comfortable tier rather than a luxury.
| What you're editing | Bare minimum experience | Comfortable setup |
|---|---|---|
| 1080p phone or webcam footage | 16 GB RAM, integrated GPU manages | Any recent laptop |
| 4K H.264/H.265 from a mirrorless or drone | 16 GB RAM plus proxies | 32 GB RAM, 8 GB VRAM or Apple silicon |
| 4K 10-bit, multicam, or heavy effects | Proxies are mandatory | 64 GB RAM, 12 GB+ VRAM |
The spec nobody checks is the codec. H.264 and H.265 files from phones, drones, and mirrorless cameras are heavily compressed, and decompressing them in real time is hard work. A machine that glides through ProRes can choke on 10-bit H.265 at half the resolution. If your footage stutters, the fix is usually proxies or optimized media, covered below, not a new computer.
There's one catch specific to Windows and Linux. Blackmagic's product page feature comparison lists H.264 and H.265 hardware acceleration as a Studio feature on those platforms, so the free version leans on your CPU to decode exactly the formats beginners shoot most. On macOS, the free version uses Apple's built-in media engine, which is why modest MacBooks often feel smoother in Resolve than gaming PCs with better raw specs.
Two cheaper wins before any hardware upgrade. Edit from an SSD, internal or a fast external one, because an old USB hard drive will bottleneck playback long before your CPU does. And if you're on a laptop, plug it in. Both Windows and macOS throttle performance on battery, and Resolve feels every bit of it.
How do you download and install DaVinci Resolve?
- Go to Blackmagic's official DaVinci Resolve page, not a mirror or torrent site. The free download is legitimate and doesn't require a purchase. Blackmagic does ask for a name and email before the download starts. That's normal, everyone fills in the same form.
- Choose your operating system and download the free version first, even if you plan to buy Studio later. Learn on free, upgrade when a specific feature forces your hand.
- Run the installer and let it finish completely before opening Resolve. On first launch, the app checks your GPU drivers, and an outdated driver is the most common cause of a crash on first open.
- Create a new project from the Project Manager. Name it something you'll recognize in six months, because Resolve keeps every project you ever create in its internal database by default.
- Open a throwaway test project first. Import one clip, cut it, and export a short clip before you trust the app with real footage.
If Resolve won't launch or crashes on that first attempt, it's almost always a GPU driver problem, not a Resolve problem. Update your graphics driver directly from NVIDIA, AMD, or Intel before reinstalling.
What should you set up before your first edit?
Resolve works out of the box, but five settings decide how much pain you feel later. This takes ten minutes and you only do it once.
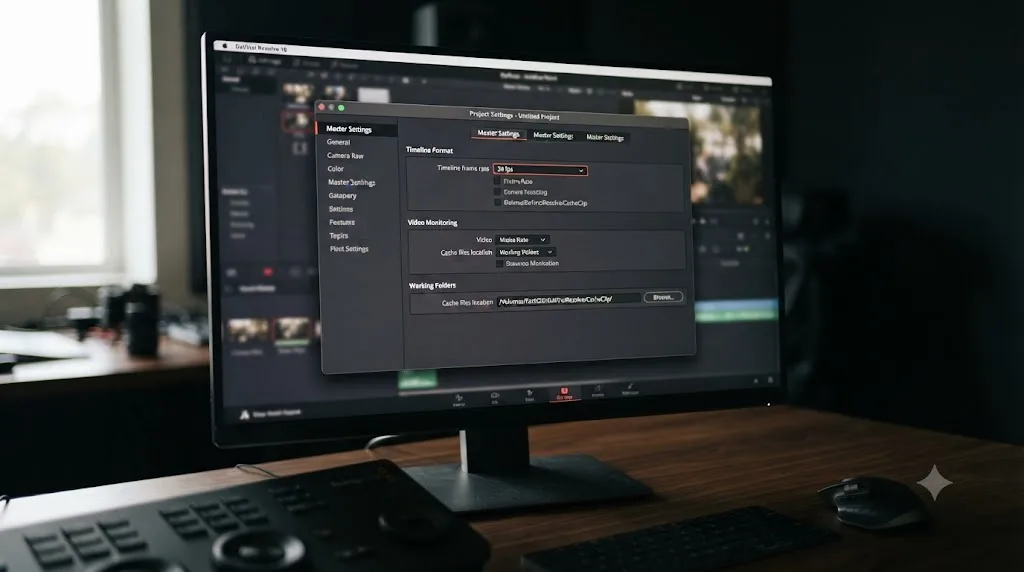
- Set the frame rate first. Open File > Project Settings (or press Shift+9, or click the gear icon in the bottom-right corner), go to Master Settings, and set "Timeline frame rate" to match your camera: 23.976 or 24 for a filmic look, 25 in PAL countries, 29.97 or 30 for most phone footage, 60 for smooth action. Timeline resolution lives in the same panel, and unlike frame rate you can change it any time.
- Turn on the safety nets. Open DaVinci Resolve > Preferences (Ctrl+, on Windows, Cmd+, on Mac), click the User tab, then Project Save and Load. Make sure Live Save is on, so edits write to disk as you make them, and enable Project Backups, which keeps rolling snapshots you can restore from the Project Manager. If you have a second drive, point the backup location there.
- Learn where projects actually live. Resolve doesn't save projects as files in your Documents folder. They live in an internal database, and the only window into it is the Project Manager (the house icon in the bottom-right corner, or Shift+1). To get a portable copy, use File > Export Project for a small .drp file, or right-click the project in the Project Manager and choose Export Project Archive to bundle the media too. Do the archive before any version upgrade.
- Point the cache at a fast drive. Go to Preferences > System > Media Storage. The first location in that list is where Resolve writes cache files and gallery stills by default, and the cache grows quietly as you work. Put it on your fastest drive with real free space. You can override it per project under Project Settings > Master Settings > Working Folders.
- Skim the Editing defaults. Preferences > User > Editing holds the standard transition duration and the default still image duration. The defaults are fine. Knowing where they live saves a search the first time a cross dissolve feels too slow.
DaVinci Resolve locks the timeline frame rate the moment the first clip lands in a timeline, so set it before you edit, not after. Get this one setting wrong and the only clean fix is rebuilding the timeline in a fresh project.
What are the seven pages in DaVinci Resolve, and where do you start?
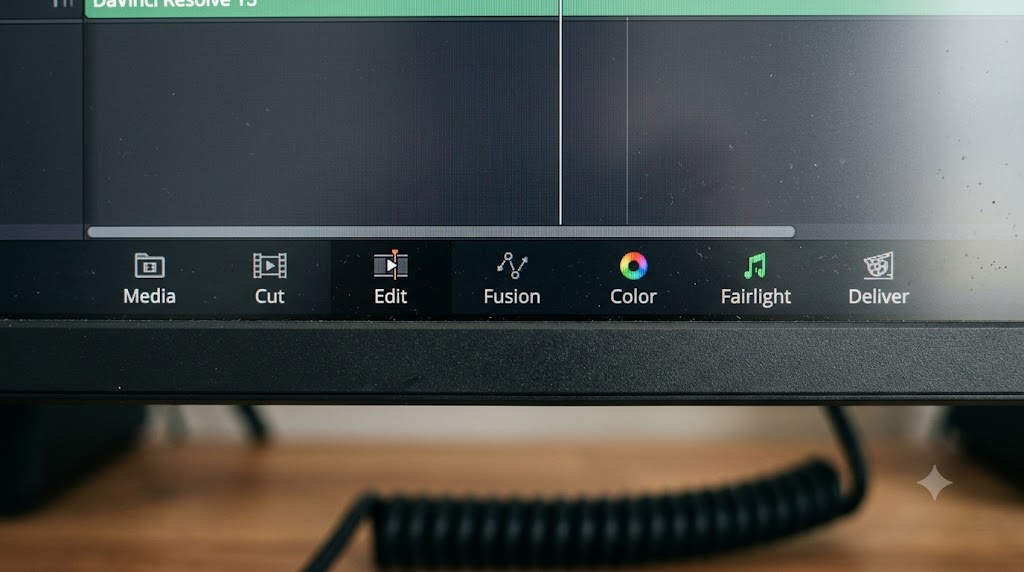
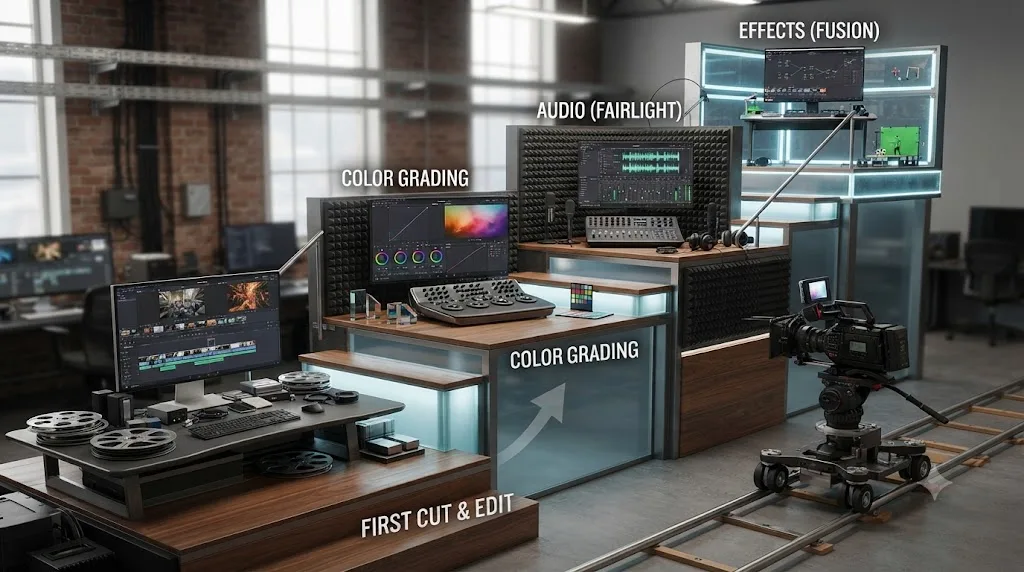
This is the part that overwhelms new users, so here's the map. Resolve organizes everything into dedicated pages, each one a full application in disguise:
| Page | What it's for | Learn it... |
|---|---|---|
| Media | Import, organize, and tag your footage | First |
| Cut | Fast, simplified editing for quick turnarounds | First |
| Edit | Full-featured editing for longer, complex projects | First |
| Color | Correct and grade your footage with nodes | Second |
| Fairlight | Mix and clean up audio | Second |
| Fusion | Node-based visual effects and motion graphics | Third |
| Deliver | Render and export your finished project | First |
You don't learn all seven in one sitting, and you shouldn't try. A complete beginner workflow in DaVinci Resolve needs only three pages: Media to import, Cut or Edit to assemble, and Deliver to export. That's a full project with zero color grading or audio mixing required.
Once that feels routine, add Color. It's the page that makes Resolve worth learning over a simpler app, and it works with the same node system whether you're grading video or, since version 21, still photos on the new Photo page.
Here's what each page actually asks of a beginner, and what you can safely ignore on it.
What does the Media page do?
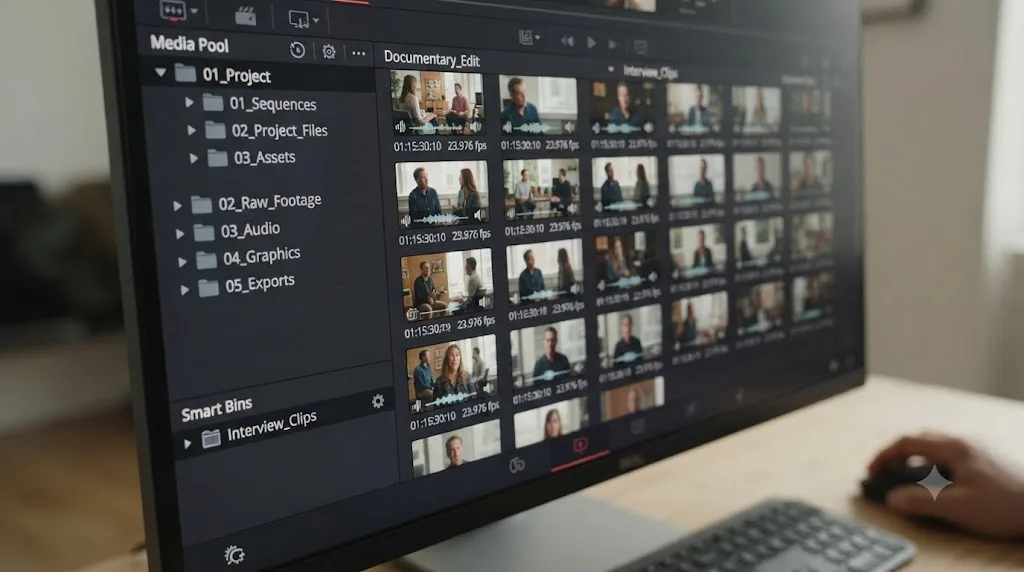
The Media page is the loading dock. The Media Storage browser in the top-left corner shows your drives, the viewer previews whatever you hover, the Media Pool at the bottom holds everything you've imported, and the Metadata panel on the right stores keywords and notes. You need three skills here: importing, making bins, and tagging the odd clip. Ignore the Capture controls (they're for tape decks and live inputs) and the Clone Tool (it's for backing up camera cards, a great habit later, noise now).
What does the Color page do?
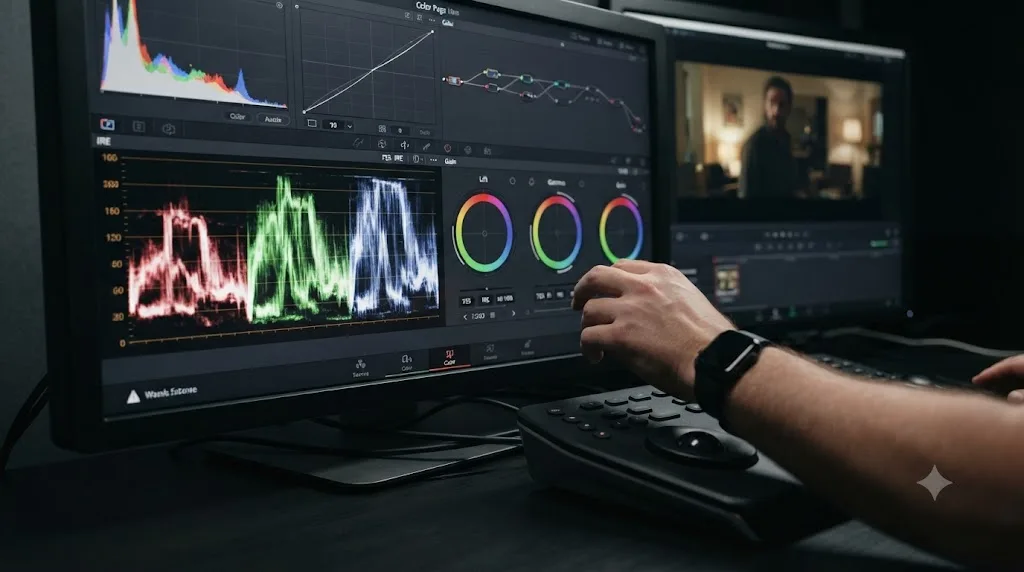
The Color page is where Resolve earned its reputation. The node graph sits in the top right, the color wheels in the bottom left, and the scopes toggle on under Workspace > Video Scopes. A beginner needs exactly one move: a single node with Lift, Gamma, and Gain to fix exposure, then the Saturation control under the wheels. That's a color correction, and it's ninety percent of what most videos need. Ignore qualifiers, Power Windows, the tracker, and the HDR palette until you're comfortable. When you're ready to go further, our color grading basics guide picks up exactly here.
What does the Fairlight page do?
Fairlight is a full digital audio workstation wearing Resolve's interface. The honest beginner advice: most of your early audio work happens back on the Edit page with clip volume and fades. Come to Fairlight for two things, the big loudness meters on the right before you export, and the per-track EQ when a voice sounds muffled. Ignore buses, automation, and the ADR panel. And note that Voice Isolation, the one-click background noise remover everyone asks about, is a Neural Engine feature that needs Studio.
What does the Fusion page do?
Fusion is node-based visual effects and motion graphics, the deepest pool in the app. Skip it entirely at first. You already benefit from Fusion without visiting it, because the Text+ title tool on the Edit page is a Fusion template. Come back in a few months when a project demands a tracked graphic or an animated logo, not before.
What does the Deliver page do?
Deliver is the checkout counter. Render presets run across the top, YouTube and Vimeo among them, with the Render Settings panel below and the Render Queue on the right. Pick a preset, set the filename and location, click Add to Render Queue, then Render All. For a one-off export you can skip the page entirely with File > Quick Export from the Cut or Edit page. When you want to understand what the preset actually chose for you, our export settings guide breaks down every field.
Cut or Edit: which page should a beginner use first?
This is the first real decision you'll make, and it's not obvious from the interface alone.
Cut is built for speed. It has a simplified toolbar, a source tape that shows all your clips as one continuous strip, and a dual timeline that keeps the whole edit and a zoomed detail view on screen at once. There's even a quick export button in the top-right corner so you never visit Deliver. If you're editing a single short video, a vlog, or a quick social clip, start here.
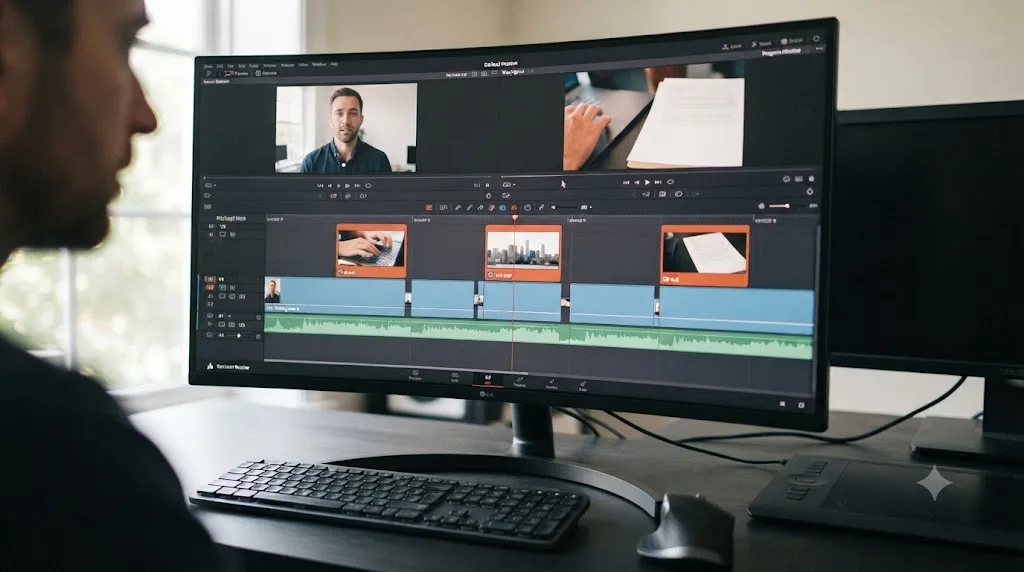
Edit is the full timeline you'd recognize from Premiere Pro or Final Cut, with more tracks, the Inspector for adjusting anything you select, the Effects Library for transitions and titles, and precise trimming tools you'll eventually need for anything longer than a few minutes. If you already know another NLE, Edit will feel more familiar.
There's no wrong choice. Both pages work on the same timeline underneath, and you can switch between them mid-project without converting anything. Most beginners try Cut for a day, hit a wall on something Cut hides by design, and move to Edit permanently. That's a normal path, not a failure.
How do you import and organize footage before you edit?
Organization feels optional on a two-clip project. It stops being optional the first time you scrub through forty clips looking for the one good take.
Before Resolve even opens, copy your camera card or phone footage into a dated project folder on your editing drive. Never edit straight off the SD card or the phone. Cards are slow, they get ejected mid-session, and a card you edit from is a card you can't safely reuse.
Then bring the footage in. Resolve gives you three routes to the same place:
- Drag files straight from Finder or Explorer into the Media Pool on the Media page.
- Browse to the folder in the Media Storage panel (top left of the Media page) and drag clips or whole folders down into the Media Pool.
- Use File > Import > Media (Ctrl+I on Windows, Cmd+I on Mac).
If the first clip you import doesn't match your project frame rate, Resolve asks whether to change the project to match. On an empty project, say yes. That dialog is your last easy chance to get the frame rate right.
Now the ten-minute habit that pays for itself on every project after this one:
- Bins are folders inside the Media Pool. Create them with File > New Bin (Ctrl+Shift+N / Cmd+Shift+N) or by right-clicking in the bin sidebar. A structure that scales from a vlog to a documentary: 01 Footage, 02 Audio, 03 Music, 04 Graphics, 05 Timelines. The numbers keep them sorted.
- Smart Bins are saved searches that fill themselves. Right-click in the Smart Bins section at the bottom of the bin sidebar, choose Add Smart Bin, and set a rule, for example Keywords contains "interview". Any clip you tag with that keyword in the Metadata panel appears in the bin automatically, no filing required.
- Clip colors are the fastest tagging of all. Right-click any clip, choose Clip Color, and mark your selects green and your rejects red. Your eye finds color faster than any filename.
Last, decide whether your machine needs help playing the footage. If playback stutters on a straight cut, right-click your clips in the Media Pool and choose Generate Optimized Media, then turn on Playback > Use Optimized Media if Available. Prefer smaller working files you control? Use Generate Proxy Media instead and enable Playback > Proxy Handling > Prefer Proxies. The zero-cost option is Playback > Timeline Proxy Resolution > Half Resolution, which lowers preview quality without touching your files. If stutter persists after all that, revisit the hardware section above, because the bottleneck is usually the codec or the drive the footage lives on.
How do you cut your first project, step by step?
- Import your footage. Media page, files into bins, as above. Let Resolve finish generating thumbnails before you judge performance.
- Build a timeline. Drag your first clip from the Media Pool onto the empty timeline area in Cut or Edit, and Resolve creates the timeline at your project settings. Or be deliberate: right-click in the Media Pool and choose Create New Timeline (Ctrl+N / Cmd+N).
- Watch before you cut. Double-click a clip to load it into the source viewer, play it with the spacebar or the J-K-L keys (rewind, pause, play), and press I and O to mark the useful part.
- Assemble the rough cut. Drag each marked section to the timeline, or press F10 to overwrite it at the playhead and F9 to insert it between existing clips. Order first, polish never comes before order.
- Trim it tight. In selection mode (press A), drag any clip edge to shorten or extend it. Press Ctrl+\ (Cmd+\ on Mac) to split a clip at the playhead, and use Shift+Delete to ripple delete, which removes a clip and closes the gap behind it. Plain Delete leaves the gap.
- Keep it hard cuts only, first. Resist transitions, titles, and effects until the story is in order. A correctly ordered rough cut with hard cuts is worth more than a polished first five seconds.
- Add transitions where they earn their place. Open the Effects Library (top left of the Edit page), go to Toolbox > Video Transitions, and drag Cross Dissolve onto a cut point. If the transition refuses to apply, the clips have no handles, meaning no spare frames beyond the cut, so trim a few frames off each side first. For the default transition, click an edit point and press Ctrl+T (Cmd+T).
- Add a title. Effects Library > Toolbox > Titles, then drag Text+ onto the track above your video. Skip the plain "Text" title, Text+ is the modern one. Select it and edit the wording, font, and size in the Inspector, top right.
- Add music, then make room for the voice. Drag your music file to a second audio track. Every audio clip shows a horizontal volume line, so drag the music's line down until speech stays clearly on top, and drag the small fade handles at each end of the clip to fade in and out. For a consistent starting point, right-click a clip and choose Normalize Audio Levels. Open the Mixer (top right of the Edit page) and watch the meters: a common rule of thumb is dialogue peaking around -12 dB with music tucked well beneath it.
- Export from Deliver. Pick the preset matching your destination, name the render, click Add to Render Queue, then Render All. Watch the finished file before you upload it. Every editor learns this one the hard way exactly once.
That's a complete project with no plugins, no LUTs, and no audio mixing. Everything past this point is refinement, not requirement.
How do you edit a talking-head video with B-roll?
The most common first real project is a person talking to a camera, covered with cutaway shots. It's the backbone of YouTube, and it's worth a worked example because this format teaches a handful of tools the generic walkthrough doesn't touch.
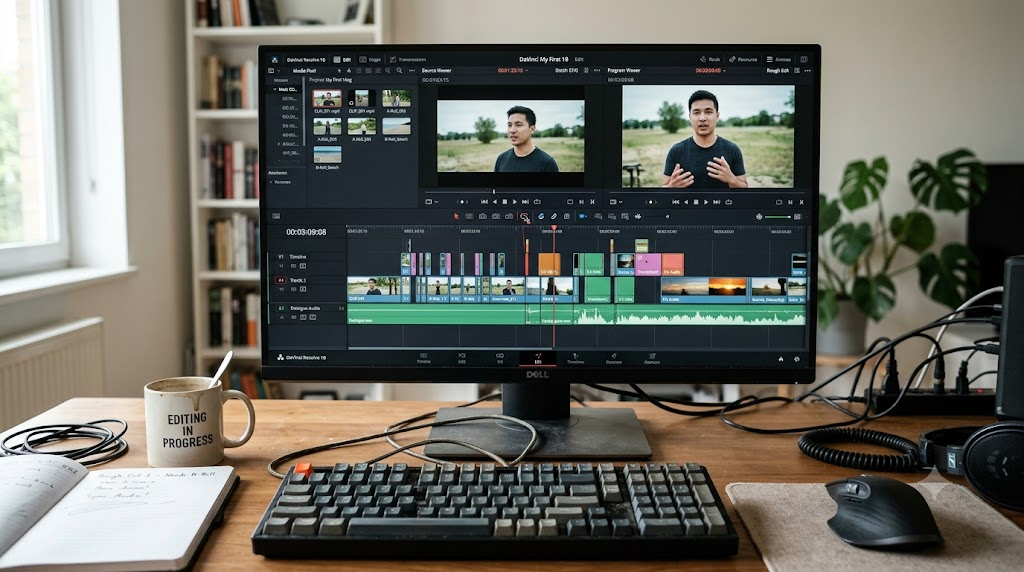
- Lay out your tracks before you cut. Voice-driven edits stay manageable when every track has one job: V1 for the talking head, V2 for b-roll, A1 for the voice, A2 for music. Double-click a track's name in the timeline header to rename it. Future you, hunting for the music track at midnight, will be grateful.
- Cut the talk before anything else. Play the interview end to end and remove every flub, retake, and dead breath: Ctrl+\ at the playhead on both sides of the bad part, then Shift+Delete to ripple it away. Press M to drop a marker wherever you already know a cutaway will be needed.
- Leave the jump cuts alone for now. Removing flubs makes the speaker's head snap position at every cut. That's fine. B-roll exists to hide exactly these seams, and hiding them is faster once all of them exist.
- Cover the seams with b-roll on V2. Drag each cutaway onto V2 above a jump cut. Whatever sits on a higher video track hides the track below it, while the voice on A1 keeps playing untouched. Select a b-roll clip and press D to toggle it off and on while you judge whether the moment needs it.
- Learn the J-cut and the L-cut. Hold Alt (Option on a Mac) and click a clip's video edge to select it without its audio. Trim the video back so the previous shot's sound carries over the next picture, and you've made a J-cut. Trim the other direction, so the picture lingers while the next line begins, and that's an L-cut. This single trick is why conversations in real films flow and raw cuts feel like slideshows.
- Punch in instead of buying a second camera. If you shot 4K into a 1080p timeline, select every other segment of the talking head and raise Inspector > Transform > Zoom to about 1.3 or 1.4. A 4K frame holds twice the pixels of 1080p in each dimension, so anything up to 2.0 stays sharp. Alternating between the wide shot and the punch-in hides jump cuts with no b-roll at all.
- Rescue shaky or flat b-roll. For handheld wobble, select the clip and use Inspector > Video > Stabilization, then click Stabilize with the default settings. For drama, slow a cutaway down with right-click > Change Clip Speed, but know the physics: slow motion only stays smooth when the clip was shot at a higher frame rate than the timeline, so 60fps footage in a 24fps timeline slows cleanly to 40 percent and no further.
- Duplicate the timeline before big experiments. Right-click the timeline in the Media Pool and choose Duplicate Timeline. Trying a new structure on a copy costs nothing. Undoing forty steps after a failed experiment costs an evening.
Master this one format and most of what you'll ever upload is a variation on it: the tutorial, the review, the vlog, the course lesson. Same skeleton, different b-roll.
How do you make your first color correction look right?
The Color page tour gave you the wheels. This section gives you the order to turn them in, because order is what separates correcting from flailing. Work on a still frame of your most important shot, and open Workspace > Video Scopes first, with the waveform selected, so you're judging by measurement instead of by a monitor that might be lying to you.
- Exposure first. Read the waveform like a landscape: the graph's floor is your shadows, the ceiling is your highlights. A trace slammed against the bottom means crushed blacks, and one flattened against the top means clipped whites. Use the Lift wheel's dial for shadows, Gain for highlights, and Gamma for the overall middle, until the signal breathes across most of the range without hitting either edge.
- Contrast second. Once exposure sits right, the Contrast dial in the Color Wheels palette adds punch by pushing shadows and highlights apart. Small moves. If the waveform starts clipping again, you've gone too far.
- White balance third. If whites lean orange or blue, drag the Temperature dial in the Color Wheels palette the opposite way until something you know is white actually reads white. Tint handles green and magenta shifts the same way. Skin is the reference viewers judge hardest, so check faces last before moving on.
- Saturation last. The Sat control below the wheels defaults to 50. Nudging it to the mid-50s adds life; anything past the low 60s starts to look like a sports broadcast. Saturation is the seasoning, not the meal.
Color correction makes footage accurate, color grading makes it expressive, and beginners should learn the two in exactly that order.
Once one shot looks right, don't rebuild the wheel positions on the next twenty. Select an uncorrected clip in the Color page's timeline strip, then middle-click the corrected clip's thumbnail, and the whole grade copies across. Match your shots this way, then adjust only the ones the copy didn't suit.
One special case will confuse you the first time you meet it: log footage. If clips arrive looking grey, flat, and washed out, and your camera or drone was set to something with "Log" in the name (S-Log, C-Log, D-Log), nothing is broken. Log profiles deliberately flatten the image to preserve range for grading. Normalize them by opening the LUTs panel (top-left of the Color page), finding your camera maker's conversion LUT, and dragging it onto the clip's node, or by applying ResolveFX Color > Color Space Transform from the OpenFX library and setting the input to your camera's color space. If that sentence felt heavy, shoot a standard profile until correction feels routine, then come back.
How do you fix the audio problems every beginner hits?
Bad sound makes viewers leave faster than bad picture, and three specific audio problems account for most beginner frustration in Resolve. All three have fast fixes.
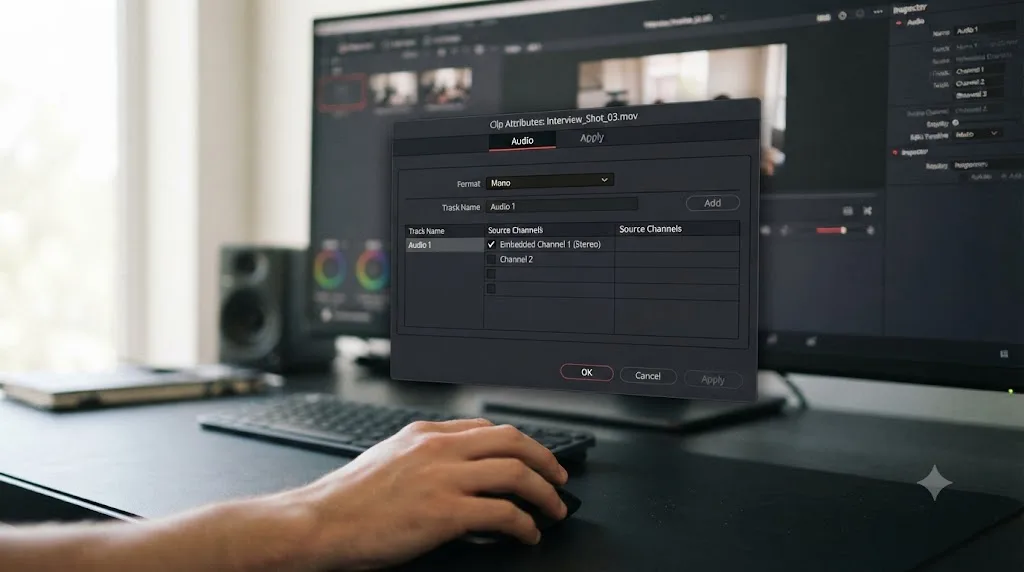
The voice only plays in one ear. Your camera recorded an external mic onto one channel of a stereo pair, so headphones put the whole interview in your left ear. Right-click the clip in the Media Pool, choose Clip Attributes, open the Audio tab, switch the format from Stereo to Mono, and pick the channel that has signal. The voice now sits in the center where it belongs. Fix it once in the Media Pool, before the clip is in a timeline, and every use of that clip inherits the fix.
The music fights the voice, but only sometimes. A single volume level for the whole song is the problem, because the right level under speech is wrong in the gaps between sentences. Shape it instead: hold Alt (Option on Mac) and click the clip's volume line to add a keyframe, place one before the speech starts and one after it ends, and drag the section between them down. The music now ducks under every line and swells back in the pauses, which is exactly what a mixed track does.
The room sounds like a bathroom. Here's the honest answer: echo recorded into the file cannot be fully removed in the free version, and even Studio's Voice Isolation targets background noise rather than reverb. EQ on the Fairlight page can tame muddiness (double-click the EQ graph on the track's channel strip and pull down the low mids), but the real fix happens before recording, with the mic closer to the mouth and soft things in the room. Ten dollars of moving blankets beats every plugin you'll ever buy.
And one capability instead of a problem: Resolve records voiceover directly. On the Fairlight page, click the input slot at the top of your track's channel strip in the Mixer, choose Input, patch your microphone to the track, arm the track with its R button, and press record in the transport. No separate recorder app, no importing, and the narration lands exactly where the playhead sits.
Which keyboard shortcuts should you learn first?
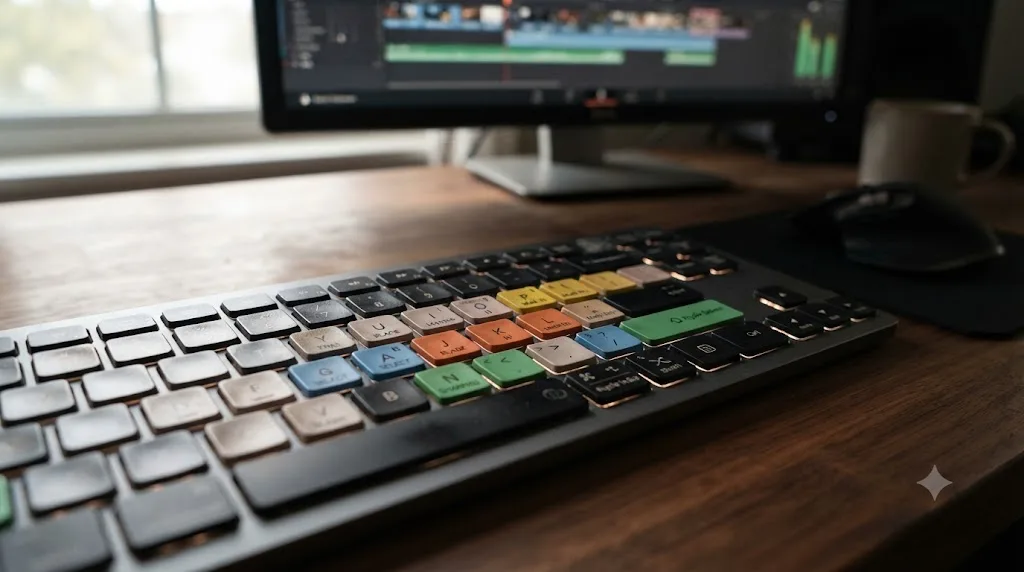
You don't need fifty shortcuts. You need about fifteen, because they're the ones you'd otherwise hunt through menus for twenty times an hour. Ctrl below means Cmd on a Mac.
| Action | Shortcut |
|---|---|
| Play / stop | Space |
| Shuttle back / pause / forward | J / K / L |
| Mark in / mark out | I / O |
| Selection mode | A |
| Trim edit mode | T |
| Blade (razor) mode | B |
| Split clip at playhead | Ctrl+\ |
| Ripple delete (remove clip, close gap) | Shift+Delete |
| Add default transition | Ctrl+T |
| Zoom timeline to fit | Shift+Z |
| Snapping on / off | N |
| Add marker | M |
| Enable / disable clip | D |
| Undo | Ctrl+Z |
| Save project | Ctrl+S |
| Project settings | Shift+9 |
Two habits to build early. First, stay in selection mode (A) by default and treat B and T as brief visits, because leaving blade mode on is how beginners slice clips by accident. Second, if your fingers already know Premiere Pro or Final Cut, open DaVinci Resolve > Keyboard Customization (Ctrl+Alt+K / Cmd+Option+K) and switch the preset to match. Muscle memory is worth more than loyalty to defaults.
How is DaVinci Resolve different on Windows, Mac, and Linux?
The app looks identical on all three systems, and projects move between them freely. The differences hide in what's underneath, and two of them are big enough to affect what you deliver.
| macOS | Windows | Linux | |
|---|---|---|---|
| GPU backend | Metal | CUDA (NVIDIA) or OpenCL | CUDA or OpenCL |
| ProRes export | Yes | No | No |
| Shortcut modifier | Cmd | Ctrl | Ctrl |
| Phone and camera H.264/H.265 in the free version | Full support | Supported, CPU-decoded | Limited, often needs transcoding |
DaVinci Resolve can export Apple ProRes only on macOS, so Windows and Linux editors deliver H.264, H.265, or DNxHR instead. For uploading to YouTube this changes nothing. It only matters the day a client or a collaborator asks for a ProRes master, so know the limit before you promise one.
The GPU backend is picked for you under Preferences > System > Memory and GPU, and the Auto setting is right for almost everyone. The one manual intervention worth knowing: on a Windows machine with an NVIDIA card, make sure the GPU processing mode says CUDA rather than OpenCL, because that choice is the difference between the card working and the card coasting.
Linux deserves a special warning. The free Linux build has a long-standing limitation with consumer formats, and H.264 clips with AAC audio, which is to say normal phone footage, often won't import at all. Linux editors either buy Studio, which adds those codecs, or transcode everything to an edit-friendly format like DNxHR with a free tool such as HandBrake before starting. If you're a beginner picking an OS to learn on, that alone is a reason to learn on the machine you already own running Windows or macOS.
Should you learn on DaVinci Resolve 21, or start on an older version?
Start on 21. It's the current stable release, and the core editing interface hasn't changed enough between recent versions to matter for a beginner. Resolve 21 shipped with new capabilities beyond video editing too, including a Photo page for grading still images and IntelliSearch for finding clips with plain-language descriptions, per Blackmagic's release notes and PetaPixel's coverage of the June 2026 release.
The only reason to prefer an older version is compatibility with an existing project someone handed you. Version upgrades in Resolve are one-way: once a project is opened and saved in 21, it won't reopen in 20. If you're joining a team already on 20, ask before you upgrade your own copy. If you're starting fresh, there's no upside to learning on the older version. We cover the upgrade details and what changed in more depth in our DaVinci Resolve 21 review.
How do you move a project to another computer?
Sooner or later you'll rough-cut on a laptop and finish on a desktop, or hand a project to a friend. Because Resolve keeps projects in an internal database instead of a folder, moving one takes a deliberate export, and there are two kinds:
| Export | File | Contains | Use it when |
|---|---|---|---|
| File > Export Project | .drp, tiny | The project only, no media | The footage already exists on the other machine or travels on its own drive |
| Export Project Archive | .dra folder, large | The project plus every media file it uses | You want the whole project to arrive working, or you want a real backup |
A DaVinci Resolve project archive contains the project and every media file it references, which makes it the only fully portable backup Resolve offers. Here's the round trip:
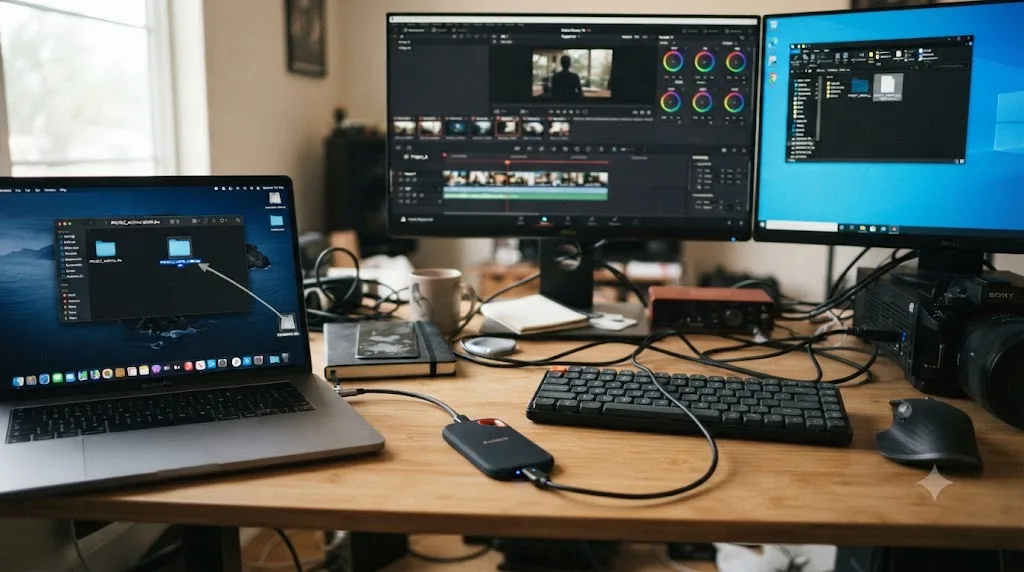
- On the source machine, open the Project Manager (Shift+1), right-click the project, and choose Export Project Archive. Point it at an external drive and let it copy everything.
- On the destination machine, right-click in the Project Manager and choose Restore Project Archive, then select the .dra folder from the drive.
- Check versions before you open anything. The destination needs the same Resolve version or newer, and remember from the section above that saving in a newer version is a one-way door.
If both computers can plug into the same external SSD, you can skip archives entirely. Keep all media on the SSD, keep the folder structure identical, and move only the small .drp file between machines. Should any clips come up offline anyway, right-click them in the Media Pool, choose Relink Selected Clips, and point Resolve at the SSD.
There's also a built-in cloud route: the Project Manager has a Cloud tab for Blackmagic Cloud project libraries that sync a project between machines and collaborators automatically. It's genuinely useful for teams, and genuinely unnecessary while you're learning alone.
Free vs Studio: which should a beginner actually buy?
Neither, at first. Learn on the free version until you hit a wall the free version actually puts in front of you. That wall usually looks like one of these:
- You need noise reduction or another AI Neural Engine tool for a client deliverable.
- You're delivering HDR or a resolution above 4K.
- You need multi-GPU rendering speed for long turnaround projects.
- On Windows or Linux, you want hardware-accelerated H.264/H.265 playback and export instead of hammering your CPU.
If none of that describes your current project, the $295 is a purchase to make later, not a prerequisite to learning. Plenty of working editors cut client work on the free version for months before their first Studio-only requirement shows up. When you do reach the decision point, our free vs Studio comparison walks the full feature list line by line.
What's the fastest way to stop getting stuck?
Every beginner hits the same wall eventually: you know what you want to do, but you can't find the button. Resolve's own documentation is thorough but not built for "where is this specific control right now, on my screen." That gap is exactly what tools like TryUncle try to close, an AI tutor that looks at your actual Resolve window and points at the control instead of sending you to a ten-minute video for a two-second answer.
Whether you use a tool like that or just keep a tab open to Blackmagic's documentation, the habit that matters is the same: when you're stuck, look it up immediately instead of guessing. Resolve rewards precision, and a wrong setting three steps back can cost you an hour of confused troubleshooting later.
What mistakes do most beginners make in DaVinci Resolve?
Two kinds of trouble find every new Resolve user: errors the app shows you, and habits that quietly cost you hours. Here are the on-screen problems and their usual fixes:
| What you see | What it usually means | The fix |
|---|---|---|
| Red "Media Offline" frames | Source files were moved, renamed, or the drive isn't connected | Right-click the clips in the Media Pool and choose Relink Selected Clips, then point Resolve at the new location. Full walkthrough in our media offline fix. |
| Choppy, stuttering playback | Your machine can't decode the camera codec in real time | Generate optimized media or proxies, and drop Playback > Timeline Proxy Resolution to Half. More causes in the slow playback guide. |
| "GPU Memory Full" error | VRAM ran out under your resolution and effects load | Lower the timeline proxy resolution, close other GPU-hungry apps, and simplify heavy nodes. Details in our GPU memory full fix. |
| Random crashes or freezes | Most often a graphics driver, not Resolve itself | Do a clean driver install from NVIDIA, AMD, or Intel. If it persists, work through the crashing guide. |
| Audio slowly drifts out of sync | Variable frame rate footage, common from phones and screen recorders | Convert the clip to a constant frame rate before editing, or generate optimized media and cut with that. |
And the habits, which do more total damage than any error message:
- Skipping the project backup habit. Resolve stores projects in its own database, not as loose files by default. Export a project archive periodically, especially before any version upgrade.
- Grading before the edit is locked. Color work you do on a clip that later gets trimmed or replaced is wasted work. Finish the story first.
- Mixing frame rates into a project you never configured. A 60fps clip in an accidental 24fps timeline plays with stutter that no amount of tweaking fixes downstream. Set the frame rate first, every project.
What should you learn next, and in what order?
Finishing this guide makes you functional. What separates functional from good is order, because each skill below builds on the one before it.
- Repetition first. Cut three small, complete projects with nothing but what's in this guide. Finished and rough beats abandoned and ambitious, and the interface only becomes invisible through use.
- Real trimming. Learn Trim Edit Mode (T) on the Edit page, where the same drag rolls, slips, or slides a cut depending on where you grab. Then learn J-cuts and L-cuts, letting audio lead or trail the picture. This one technique makes edits feel professional overnight.
- Color correction, then color grading. Correction makes footage accurate, grading gives it a look, in that order. Start with the one-node exposure pass from this guide, then follow our color grading basics guide into contrast, saturation, and your first creative look.
- Audio polish. Spend a session on the Fairlight page: read the loudness meters, apply a gentle EQ to dialogue, and add room tone under gaps. Viewers forgive soft images, they don't forgive harsh sound.
- Deliberate exporting. Stop trusting presets blind and learn what codec, bitrate, and resolution actually do to your upload, with our export settings guide as the map.
- Fusion, last, and only when a project demands it. A tracked callout or an animated lower third is the right first Fusion task. Learning Fusion in the abstract is how motivation dies.
For structured material, start with Blackmagic's own official training page, which offers free downloadable lesson videos and the official Beginner's Guide book as a free PDF, with project files included. And if you're wondering whether this whole journey takes weeks or months, we've mapped realistic timelines in how long it takes to learn DaVinci Resolve and collected the best structured starting points in our free DaVinci Resolve course guide.
Where do you go from here?
You've got the map: download free, check your RAM and GPU, set the frame rate and backups before anything else, start in Media and Cut or Edit, export from Deliver, and add Color and Fairlight only once a project actually asks for them. That's enough to finish a real video this week, not just poke around a demo project.
The next real decision comes later, once you've cut a few projects and know exactly what you're missing. At that point, our DaVinci Resolve 21 review walks through whether Studio's AI tools and the new Photo page are worth the $295 for your specific workflow.
Frequently asked questions
- Is DaVinci Resolve hard to learn for beginners?
- It has a learning curve, mostly because it packs seven specialized pages into one app. But you don't need all seven on day one. Learn the Cut or Edit page first, add Color once you're comfortable, and pick up Fusion and Fairlight only when a project actually needs them.
- Do I need to pay for DaVinci Resolve to learn video editing?
- No. The free version includes full editing, color correction, and audio post-production with no watermark and no time limit. Blackmagic Design caps it at Ultra HD 3840 x 2160 resolution and 60fps in 8-bit, which covers almost everything a beginner shoots.
- What's the difference between DaVinci Resolve free and Studio for a beginner?
- Studio costs $295 once and adds the DaVinci Neural Engine AI tools, stereoscopic 3D, advanced HDR grading, and 10-bit resolutions above 4K at up to 120fps. A beginner learning the interface and cutting standard 1080p or 4K projects won't hit any of those limits for a while.
- Can DaVinci Resolve run on my computer?
- Check your RAM and GPU before anything else. Resolve wants at least 16 GB of system memory and a GPU with 4 GB of VRAM or more, per Blackmagic's own tech specs. If you're on an older laptop with integrated graphics only, expect stutter on anything past a simple cut.
- Should a beginner start on DaVinci Resolve 21 or an older version?
- Start on 21. It's the current stable release, the interface hasn't changed drastically from 20, and you get the new Photo page and IntelliSearch tools without having to relearn anything later.
- Where does DaVinci Resolve save your projects?
- In an internal database, not as loose files on your disk. Every project lives in the Project Manager window. For a portable copy, use File > Export Project to save a .drp file, or right-click the project in the Project Manager and choose Export Project Archive to bundle the media with it.
- Can DaVinci Resolve edit vertical video for TikTok, Reels, and Shorts?
- Yes, including in the free version, with no watermark. Set the timeline resolution to 1080 x 1920 under File > Project Settings > Master Settings, or give a single timeline its own vertical format by ticking Use Custom Settings when you create it.
- Can you use DaVinci Resolve on two computers?
- Yes. Install the free version on both, then move work with File > Export Project for a small .drp file when the media travels separately, or Export Project Archive to bundle the project and all its media. Open the project on a machine running the same Resolve version or newer.
Sources
- DaVinci Resolve product page (free vs Studio, page structure)
- DaVinci Resolve - Tech Specs (Blackmagic Design)
- DaVinci Resolve - What's New (Blackmagic Design)
- PetaPixel: DaVinci Resolve 21 officially released with new photo editing, AI tools, and much more
- DaVinci Resolve - Training (Blackmagic Design, free official books and lessons)
Put this guide to work with TryUncle.
Ask about the step you’re on. TryUncle sees your screen and points at the control you need, so you can keep learning in your own project.
Get TryUncle for Mac or WindowsKeep reading
Reviews · Jul 7, 2026 · 22 min
DaVinci Resolve 21 Review: What's New and Is It Worth Upgrading?
A close look at DaVinci Resolve 21: the new Photo page, IntelliSearch, CineFocus, Krokodove, what Blackmagic actually shipped, and who should upgrade now.

Comparisons · Oct 3, 2026 · 17 min
AI Screen Assistant for DaVinci Resolve Mac: Best 2026 Options
Compare screen-aware and editing assistants for DaVinci Resolve on Mac in 2026, including TryUncle, Sottocut, CutAgent, Eddie and free training.
Fixes · Oct 3, 2026 · 16 min
DaVinci Resolve 21 Tutorial Controls Do Not Match? Fix It
DaVinci Resolve 21 tutorial controls do not match? Identify the version, page, layout, and edition difference, then find the right control.