Articles / Guidesupdated for DaVinci Resolve 21.1 (September 2026)
How to Automate Sound Effects Ducking in DaVinci Resolve
Quick answer
To automate sound effects ducking in DaVinci Resolve, put the effects on their own track, open Fairlight's Ducker on that track, choose dialogue as the source, and set Duck Level, Lookahead, Hold, and Recovery. For deeper control, use sidechain compression or combine automatic ducking with manual volume automation.
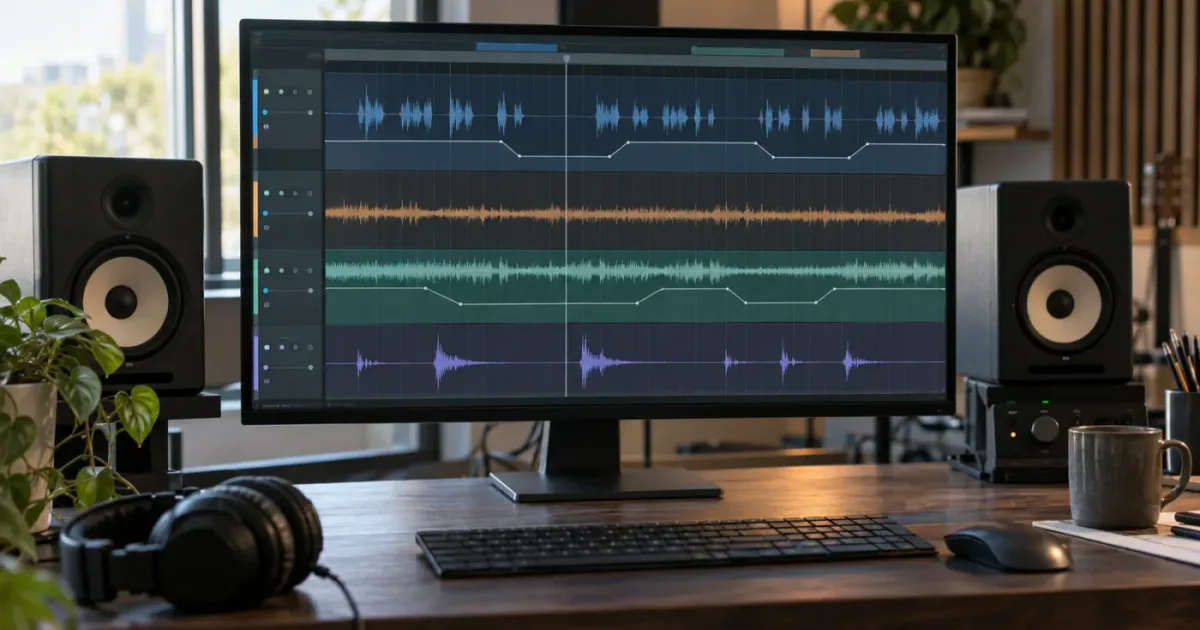
When I hear dialogue and sound effects fight for the same space, I don't reach for more plugins. I start with a clear trigger and a target track. I use Fairlight's track-level ducking when the same relationship repeats, then add a few manual moves when the edit gets particular.
As of September 2026, this guide targets DaVinci Resolve 21.1 and the Ducker workflow introduced and expanded in the Resolve 19.1 generation. The names and placement of controls can vary slightly between builds, but the useful idea stays the same: dialogue drives a controlled reduction on the sound-effects track.
How do I automate sound effects ducking in DaVinci Resolve?
To automate sound effects ducking in DaVinci Resolve, place the effects on their own track, open the track-level Ducker, choose dialogue as the source, and lower the target track only as much as the words need. For a free-version or more editable fallback, draw volume automation with keyframes.
The shortest reliable workflow is:
- Put dialogue or narration on one track.
- Put the sound effects you want to reduce on a separate track.
- Open the Fairlight page and show the Mixer if it isn't visible.
- Select the sound-effects track, not the dialogue track.
- Open the target track's Track FX and choose Ducker.
- Choose the dialogue track as the source.
- Start with a modest Duck Level, then adjust the timing controls while looping a section with both sounds.
- Listen to the full mix, not only the isolated effect track.
- Add manual volume automation where the automatic rule makes the wrong creative choice.
Blackmagic describes the Ducker as a Track FX plug-in that uses one or more dialogue tracks to control volume reduction on a target track. Its own example uses dialogue to reduce music, but the same relationship works when the target is a whoosh, impact, transition, ambience layer, or other sound-effects track. Blackmagic Design describes the current Fairlight Ducker workflow here.
The important choice happens before you touch a control. Decide what should be heard first at each moment. If a spoken sentence carries the story, duck the effect under the words. If the effect is the story, duck the dialogue less, or don't duck it at all. Automation can follow a rule. It can't decide what the scene means.
The cleanest automatic ducking setup uses one trigger track and one clearly named target track.
What does sound effects ducking actually automate?
Sound effects ducking is an automatic reduction of one track when a signal on another track crosses the processor's detection conditions. The target is reduced while the trigger is active, then returns according to the recovery or release behavior you choose.
That makes ducking different from simply turning a sound effect down. A static level change affects the whole clip or track. Ducking creates a relationship between two signals. When the dialogue changes, the target responds.
The words can mean slightly different things in editing conversations, so keep these terms separate:
| Term | What changes | Best use | Main risk |
|---|---|---|---|
| Clip gain | The level of one clip before or around track processing | Fixing one bad recording or setting a starting level | It doesn't respond to another track |
| Volume keyframes | The level of a clip or track at chosen timeline points | Designed, visible moves that must stay editable | Many dialogue edits create many points |
| Track Ducker | The target track responds to one or more selected source tracks | Repeating dialogue-under-effects or dialogue-under-music relationships | A noisy trigger can cause unwanted dips |
| Sidechain compression | A compressor on the target responds to a routed signal from another track | More detailed dynamics control, buses, and custom routing | Routing and compressor controls are easier to misconfigure |
| Bus-level ducking | A group or submix responds as a single target | Several effects or music layers should move together | One bus move can hide a creative exception |
Blackmagic's Fairlight documentation separates clip adjustments, full automation, dynamics processing, and automatic ducking. The current Fairlight page says clip volume can be changed over time with keyframes, while automation can record changes to virtually any control or effect. It then describes the Ducker as a track effect driven by selected dialogue tracks. Those are related tools, but they solve different problems. See Blackmagic's clip, automation, dynamics, and ducking descriptions.
Mary Plummer, identified in Blackmagic Design's Fairlight training material as a Fairlight audio post workflow specialist, explains the underlying method in the official guide:
“Sidechain compression is often referred to as auto-ducking because it automatically “ducks” or attenuates the level of one track based on the content of another.”
That definition is useful because it keeps the direction clear. The dialogue is the control signal. The sound effect is the thing being reduced. Reversing those roles produces the opposite result, or no useful result at all.
Which DaVinci Resolve version and edition do I need?
DaVinci Resolve 21.1 is the version context for this article, and the Ducker's multi-source workflow comes from the Resolve 19.1 feature set. Manual volume automation is the version-independent fallback, while Track FX availability depends on the edition and effect you are using.
Resolve 21's official feature guide focuses on new features such as the Fairlight Animator modifier, which connects Fusion parameters to audio analysis. The current Blackmagic product page still presents DaVinci Resolve 21 and DaVinci Resolve Studio 21 as separate editions, with Studio adding extra Fairlight FX and other tools. That distinction matters when a tutorial tells you to use a named Track FX effect and your installation doesn't show it. Check the Resolve 21 product and feature pages before diagnosing a missing control.
The practical version map looks like this:
| Resolve context | What you should expect | What to do if the control is missing |
|---|---|---|
| Resolve 21.1 | Current guide context, with Fairlight folders and other 21-series changes | Confirm the installed build and select the target track before opening Track FX |
| Resolve 19.1 or newer | Ducker can use multiple audio tracks as sources | Use the plus control or multi-select behavior shown in the 19.1 guide |
| Older Resolve project | Track FX visibility and effect insertion can differ | Test in a copy of the project and check the track-level mixer controls |
| Free edition | Manual automation and ordinary track mixing remain available | Use keyframes, clip gain, or a bus workflow that your edition exposes |
| Studio edition | More Fairlight FX are available | Confirm that you launched the Studio build, not a second free installation |
The 19.1 guide says the Ducker can use multiple tracks to trigger ducking, and it shows the Ducker being opened from the audio mixer or the Inspector's Track FX controls. It also warns that the effect may not appear in the Inspector on projects created before version 19. Read the exact 19.1 Ducker notes in Blackmagic's guide.
Don't turn a missing Ducker into a reason to stop mixing. Manual automation is not a consolation prize. It is the better choice when you need a specific rise before a line, a delayed return after a punch, or different treatment for each sound effect.
How should I prepare dialogue, music, and sound-effects tracks?
Prepare the timeline so that the trigger and target are obvious before opening a plugin. Put related material on consistent tracks, name those tracks, and avoid sending the same signal into the Ducker through multiple paths unless you intend to double the trigger.
Start with a simple structure:
| Track name | Typical content | Initial job |
|---|---|---|
| A1 Dialogue | Interview, narration, or production dialogue | Trigger and priority signal |
| A2 Dialogue alt | Second speaker, pickup, or alternate language | Optional additional trigger |
| A3 Ambience | Room tone, wind, street, or location bed | Usually kept stable or ducked lightly |
| A4 Music | Score or music bed | Common Ducker target |
| A5 SFX | Whooshes, impacts, transitions, Foley, and accents | Target when effects compete with speech |
| A6 Spot FX | A small group of effects needing different treatment | Separate target for creative exceptions |
The labels aren't magic. A track can contain anything. The point is to make the routing readable. If every sound effect sits on its own track, you can still duck a group by routing those tracks to a bus. If every sound effect is mixed into one long clip, automatic ducking has less useful control over individual exceptions.
Name the tracks by role
Names such as DIALOGUE_MAIN, MUSIC_BED, AMB_ROOM, and SFX_TRANSITIONS make the Ducker's source menu easier to read. They also make a reopened project easier to diagnose. A source called Audio 4 tells you nothing when a clip has changed three weeks later.
Clean the trigger before you route it
The Ducker responds to the signal it receives. If the dialogue track contains a loud chair scrape, headphone bleed, a door slam, or a long breath that is far above the spoken words, the target may reduce at the wrong moment. Fixing the trigger can be as simple as trimming an unwanted clip, lowering a noisy section, or using a cleaner dialogue track as the source.
Don't over-process the trigger just to make the meter look tidy. The trigger needs to be reliable, not pretty. A moderate clip-level correction may help. Heavy compression can make breaths and room noise hold the target down for too long.
Decide whether ambience belongs with effects
Ambience is often the glue that makes a cut feel continuous. If you route room tone into the same target as a sharp impact, the Ducker may pull the whole background away whenever someone speaks. That can make the scene feel unnaturally empty.
Keep ambience separate when continuity matters. Duck only the obvious foreground effects, or route a small amount of ambience to a separate target with gentler reduction. This is one reason a single all-purpose SFX track can become limiting on a longer scene.
How do I use the Fairlight Ducker on a sound-effects track?
Use the Ducker on the track you want to reduce. In the Fairlight mixer, select the sound-effects track, open its Track FX controls, open Ducker, and choose the dialogue track or tracks that should trigger it.
Follow this procedure in a project copy if you are learning the controls:
- Open the Fairlight page.
- Show the Mixer from the Fairlight workspace if it isn't visible.
- Locate the target track, such as
SFX_TRANSITIONS. - Open that track's Track FX area. In the Fairlight mixer, Track FX sits with the track's processing controls. The exact panel height can vary with your workspace layout.
- Add or open Ducker.
- In the Ducker source menu, choose
DIALOGUE_MAIN. - If Resolve 21.1 shows an add-source control, add a second dialogue track only when that track should also trigger the same target.
- Loop the densest part of the scene and lower Duck Level until the words become clear without making the effects vanish.
- Set Lookahead, Rise Time, Hold, and Recovery by listening to transitions, not by copying values from another scene.
- Bypass the Ducker briefly, then re-enable it. The bypass check tells you whether the reduction is helping or merely making the mix quieter.
Blackmagic's product documentation describes the same basic sequence for a music target: open the Ducker window on the target track, choose the dialogue source from the dropdown menu, and adjust the duck level and recovery behavior. It also says the Ducker can respond to one or more dialogue tracks. The official Fairlight automatic ducking explanation is here.
The Ducker's controls answer different timing questions:
| Control | Question it answers | What to listen for |
|---|---|---|
| Duck Level | How far should the target fall? | Are words clear without removing the scene's energy? |
| Lookahead | Should the reduction begin before the trigger is fully heard? | Does the effect dip too early, or does the first syllable collide? |
| Rise Time | How quickly should the target move into the reduced level? | Does the dip sound like a smooth move or a switch? |
| Hold | How long should the target stay reduced before returning? | Does the target pump up between words? |
| Recovery | How quickly should the target return? | Does music or the effect come back naturally after the line? |
The labels can make the Ducker look like a technical problem. Treat them as shape controls. Duck Level sets the depth. Lookahead and Rise Time shape the front edge. Hold prevents a rapid return during a short gap. Recovery shapes the way the target comes back.
Use a loop, not a full screening
Loop a sentence that contains a consonant-heavy word, a short pause, and a sound effect with a clear attack. That small test exposes timing problems quickly. After it works, audition a quiet line, a fast line, and a line with laughter or breath. A setting that works for one sentence can still be wrong for the scene.
Make the first pass conservative
Start with less reduction than you think you need. Increase it only when the words still disappear in context. If your first pass makes every effect drop dramatically, you won't know whether the problem was the source level, the target level, the threshold behavior, or the Duck Level.
This is not a numeric preset because the correct amount depends on the source material, monitoring level, and creative intent. A talking-head tutorial, a horror scene, and a product montage want different relationships between speech and effects.
Automatic ducking should reveal the words, not announce the plugin.
Which Ducker settings should I change first?
Change Duck Level first, then timing. The amount of reduction determines whether the target remains part of the scene; timing controls determine whether the move feels intentional.
Use this order when the default response sounds wrong:
- Set a sensible static level on the target track with the Ducker bypassed.
- Choose the correct source track.
- Adjust Duck Level until the dialogue is intelligible in the full mix.
- Adjust Hold if the target returns between words and creates a pumping rhythm.
- Adjust Recovery if the return feels abrupt or too slow.
- Adjust Lookahead and Rise Time if the target begins falling too late or too early.
- Recheck the quietest and loudest dialogue sections.
The first step matters. If the sound-effects track is already too loud, a large automatic reduction may hide the bad balance instead of fixing it. If the track is already too quiet, ducking may make it disappear whenever the trigger speaks.
What Duck Level is really doing
Duck Level is not a loudness target for the entire mix. It is the amount by which the Ducker reduces the target when the source activates it. It doesn't replace balancing the target track against the dialogue, music, and ambience.
Imagine a whoosh that is supposed to cut through an edit. A deep duck can protect a sentence but also erase the whoosh's attack. A shallower duck can keep the effect audible while giving the words a cleaner center. The right choice depends on whether the effect is decoration or information.
How Hold prevents word-by-word pumping
If a target rises between every syllable, the problem is often timing rather than amount. Hold keeps the target reduced through a short gap. Use enough to avoid chatter, but not so much that a full sentence leaves the target buried.
This is especially noticeable with music and sustained ambience. Short, dry effects may tolerate faster recovery. A long tonal bed may need a smoother return. The same value won't behave the same way on both.
How Recovery affects the return
Recovery controls the move back toward the target's prior level after the trigger stops reducing it. A fast recovery can make an effect feel like it snaps back into place. A slower recovery can sound natural, but it may keep the effect low into the next visual beat.
Listen to the cut after the line. If the room or music returns before the next picture event, the return may feel like an edit. If it returns late, the scene may lose momentum. Use the picture as part of the timing decision.
Why Lookahead is not a free fix
Lookahead can help the target dip before a word hits, but too much can make the reduction audible before the audience understands why it happened. That can be useful for a busy tutorial mix and distracting in a live-feeling scene.
If the first syllable is still masked, check the static balance and trigger quality before adding more lookahead. Lookahead cannot repair a dialogue track that is distorted, noisy, or routed incorrectly.
Why is the Ducker not appearing in DaVinci Resolve?
The Ducker is a track effect, so select the target track and look in Track FX rather than searching only the clip Inspector or the regular Audio FX list. If the control remains missing, check your Resolve edition, project age, and the exact page where you are looking.
Work through these checks in order:
- Select the track that should be reduced. Selecting the dialogue track shows the wrong processing target.
- Open the Fairlight mixer and look for Track FX on the selected target.
- If you are on the Edit page, select the track header and inspect the Audio controls, but remember that some Track FX are easier to manage from Fairlight.
- Confirm that you launched DaVinci Resolve Studio if the effect is part of the Studio-only Track FX set.
- Check the project version. The official 19.1 guide notes that the Ducker may not appear in the Inspector on projects created before version 19.
- Close and reopen the project after changing the page or workspace layout.
- Test a new empty project with two short audio clips. This separates a project-specific problem from an installation or edition problem.
The 19.1 New Features Guide shows the Ducker in the Inspector and in the audio mixer, and it notes that the effect can be opened from the track-level controls. The official Fairlight page also places ducking at the track level, not as a clip-only command. Use those two sources to identify the correct control location.
The wrong track is selected
This is the most common conceptual error. If the music or effect is supposed to go down, the Ducker belongs on that target track. The dialogue track supplies the trigger. Putting the Ducker on dialogue asks the dialogue track to reduce itself when dialogue is present.
The effect is hidden in the mixer
Fairlight's mixer can show several channel sections, and a narrow workspace can hide Track FX. Expand the relevant channel strip or restore the Mixer panel before assuming the effect is unavailable. If you save a custom layout, make sure it still includes the track-processing section.
You are comparing different editions
Blackmagic's current product material separates the free Resolve edition from Studio and says Studio adds more Fairlight FX. If a tutorial uses a Track FX effect and the free edition doesn't show it, use manual automation or verify the effect's edition requirement before changing unrelated settings. The current Fairlight page explains the Studio expansion.
You opened the clip Inspector instead of Track FX
Clip processing and track processing are not interchangeable. A clip effect follows one clip. A track effect responds to the track's signal and can affect many clips at once. For repeating ducking, you want the track-level relationship.
How do I automate sound effects ducking with sidechain compression?
Use sidechain compression when you need a compressor on the target track to respond to a routed signal from the dialogue track. Send the dialogue into the compressor's sidechain, enable the compressor on the effects track, then tune threshold, ratio, attack, release, and makeup gain with the full mix playing.
The Fairlight guide's classic method has two parts. First, enable the compressor on the dialogue source track and use its Send control to send a control signal to another track. Then configure the target track's dynamics processor to use that sidechain input. The guide uses dialogue to reduce a music track, but the routing idea applies to sound effects. The official Fairlight Audio Guide documents this sidechain exercise.
The names can vary by window and version, so think in signal flow rather than memorizing clicks:
Dialogue track -> sidechain send -> compressor detector on SFX track -> SFX gain reduction
The audio from the dialogue should control the compressor's detector. It should not replace the sound-effects audio passing through the target track. If you hear dialogue coming out of the effects channel, check the routing instead of turning the fader down.
Sidechain setup in Fairlight
- Put dialogue on
DIALOGUE_MAINand effects onSFX_TRANSITIONS. - Open the Fairlight mixer.
- Open the dynamics window for the dialogue track.
- Enable the compressor if the workflow requires a send from that source.
- Enable the Send control used for sidechain routing.
- Open the dynamics window for
SFX_TRANSITIONS. - Enable the compressor on the target.
- Select the dialogue sidechain input in the compressor's detector or key input menu.
- Lower the threshold until dialogue causes visible gain reduction on the target.
- Set a ratio that reduces the effect without flattening it.
- Set attack and release so the effect responds at the speed the scene needs.
- Bypass the compressor and the sidechain send separately to find which part of the route is causing a problem.
The Ducker is faster to set up because it exposes the relationship directly. Sidechain compression is worth the extra routing when you need compressor-style control, a bus-based target, or a response that the Ducker's dedicated controls can't shape well.
When sidechain compression is the wrong choice
Don't reach for sidechain compression just because it sounds more professional. If the only problem is that a few impacts collide with two spoken lines, manual automation may be faster and more musical. If the same rule repeats across a long interview, the Ducker may be easier to maintain.
Use the simplest method that leaves the mix understandable to the next person who opens the project. A clever route that nobody can diagnose is expensive.
Why does my sound effect duck at the wrong time?
Wrong-time ducking usually comes from a bad trigger, a doubled route, or timing controls that don't match the scene. Isolate those causes before changing every parameter.
Use this diagnostic table:
| Symptom | Likely cause | First test |
|---|---|---|
| The effect ducks under breaths | Breaths or room noise are strong on the trigger | Lower the trigger section or use a cleaner dialogue source |
| The effect ducks before the line | Lookahead is too long or the trigger is routed early | Reduce Lookahead and inspect clip alignment |
| The effect pops back between words | Hold is too short or Recovery is too fast | Increase Hold, then slow Recovery if needed |
| The effect never comes back | The Ducker is still detecting signal or the route is doubled | Mute the trigger and inspect sends and bus returns |
| The whole effects group drops | The target is a bus receiving more material than expected | Bypass the bus Ducker and test one target track |
| Only one speaker triggers | Only one dialogue source is selected | Add the intended source track in the 19.1+ multi-source Ducker |
| The effect is reduced even with no dialogue | A different track is selected as source or a loop is feeding the detector | Mute sources one at a time |
Check the source in solo
Solo or otherwise isolate the trigger while watching the target's gain reduction. You don't need a perfect isolated mix. You need to know when the detector is active. If the target moves while the spoken line is silent, the source contains something else that is crossing the detector condition.
Check the target in context
An effect that sounds fine in solo can still overwhelm the words in the mix. Conversely, an effect that sounds small in isolation may be exactly right once it sits beside dialogue, music, and ambience. Make decisions from the mix position where the audience will hear the result.
Check duplicate paths
A dialogue track can reach a target through a direct source selection, a sidechain send, and a bus route. That may be intentional, but it can also make the reduction much deeper than expected. Temporarily disable one control path at a time and note what changes.
Check clip timing before plugin timing
If the dialogue and effect are not aligned to the picture, the Ducker may be doing the correct thing at the wrong narrative moment. Verify the clip positions and any retiming before adding more Lookahead. A timing error in the timeline is not a Ducker setting.
A ducking problem is usually a routing problem before it is a parameter problem.
How do I use the Ducker with multiple dialogue tracks?
Use the multi-source Ducker when several dialogue tracks should reduce the same target. In Resolve's 19.1 Ducker workflow, the source list can include multiple audio tracks, so you can make a music or SFX target respond to two speakers without duplicating the effect.
This helps when your timeline has:
- Two speakers on separate tracks.
- A narration track plus a pickup track.
- Production dialogue and a clean replacement line.
- A main language track plus an alternate language that will be used in another version.
The 19.1 guide shows source selection controls and explains that the Ducker can add or remove tracks from the analysis. Read the multiple-source Ducker documentation in Blackmagic's feature guide.
Add only sources that should control the target
More sources do not automatically make the mix better. Add the second track if it contains dialogue that should protect the same words. Don't add a guide track, scratch mic, or a room track simply because it contains audio.
If a scratch microphone is much louder than the final dialogue, it may pull the target down during an overlap where the final track is quiet. Use the final intended source or rebalance the trigger tracks before you add them together.
Watch for alternate-language workflows
An alternate-language track may be muted in the current version of the edit. If it remains selected as a trigger, its hidden or future use can still affect the Ducker depending on the project's signal state and routing. Keep version-specific language tracks separated and test the active mix, especially before delivering multiple language versions.
Use a dialogue bus when the source list gets messy
If several dialogue tracks should always act as one control signal, route them to a dialogue bus and use that bus as the sidechain source where the chosen method supports it. If the dedicated Ducker only exposes tracks in your build, use the multiple-source list or sidechain compression instead.
Don't invent a bus route just to make the mixer look tidy. Use it when the group has a stable editorial meaning, such as all finished dialogue for one version of a scene.
Should I duck a sound-effects track, a music track, or a bus?
Duck the smallest useful target. Use a single track when one class of sound needs reduction, a bus when several layers should move together, and manual automation when the creative exceptions matter more than the repeated rule.
| Target | Choose it when | Avoid it when |
|---|---|---|
| One SFX track | The effects share a role and should all reduce under dialogue | One effect must stay prominent for a visual beat |
| One music track | The music bed is the main competing layer | Music and ambience need different returns |
| Several SFX tracks | A group of impacts, transitions, or Foley should move together | The tracks have different narrative jobs |
| A music or SFX bus | Multiple tracks need one consistent control point | You are still changing the membership of the group often |
| Manual clip automation | Timing and intention change from event to event | The same relationship runs for many minutes |
Ducking a single effect
A single effect can be a good target when it lands directly under a word or action. Put it on a spot-effects track, duck only that track, and leave the ambience and music alone. This preserves the scene's bed while protecting the line that matters.
Ducking a collection of effects
If the scene has a dense layer of whooshes and impacts, grouping them can stop you from repeating the same operation on several tracks. But ask whether the effects are meant to rise and fall together. A bass impact may need to remain after the dialogue begins, while a high-frequency whoosh can reduce more noticeably.
Ducking a bus
A bus is useful when the target group is stable. Blackmagic's Fairlight documentation describes bus and track automation as part of the mixer workflow, and the current Fairlight page says main and bus tracks can be viewed and edited in the timeline when automation controls are active. See Blackmagic's automation and bus notes.
Route with intention. If a target bus contains both music and ambience, a single reduction can make the scene hollow. If it contains only the background layers you want to soften, bus ducking can keep the edit manageable.
Ducking a bus with sidechain compression
Sidechain compression becomes attractive when the target is not just one track. Send dialogue to the bus compressor's sidechain and let the group respond as one. This can be more consistent than inserting a Ducker on each track, but it also hides individual differences. Check the quietest target element after the bus responds.
How do I combine automatic ducking with manual keyframes?
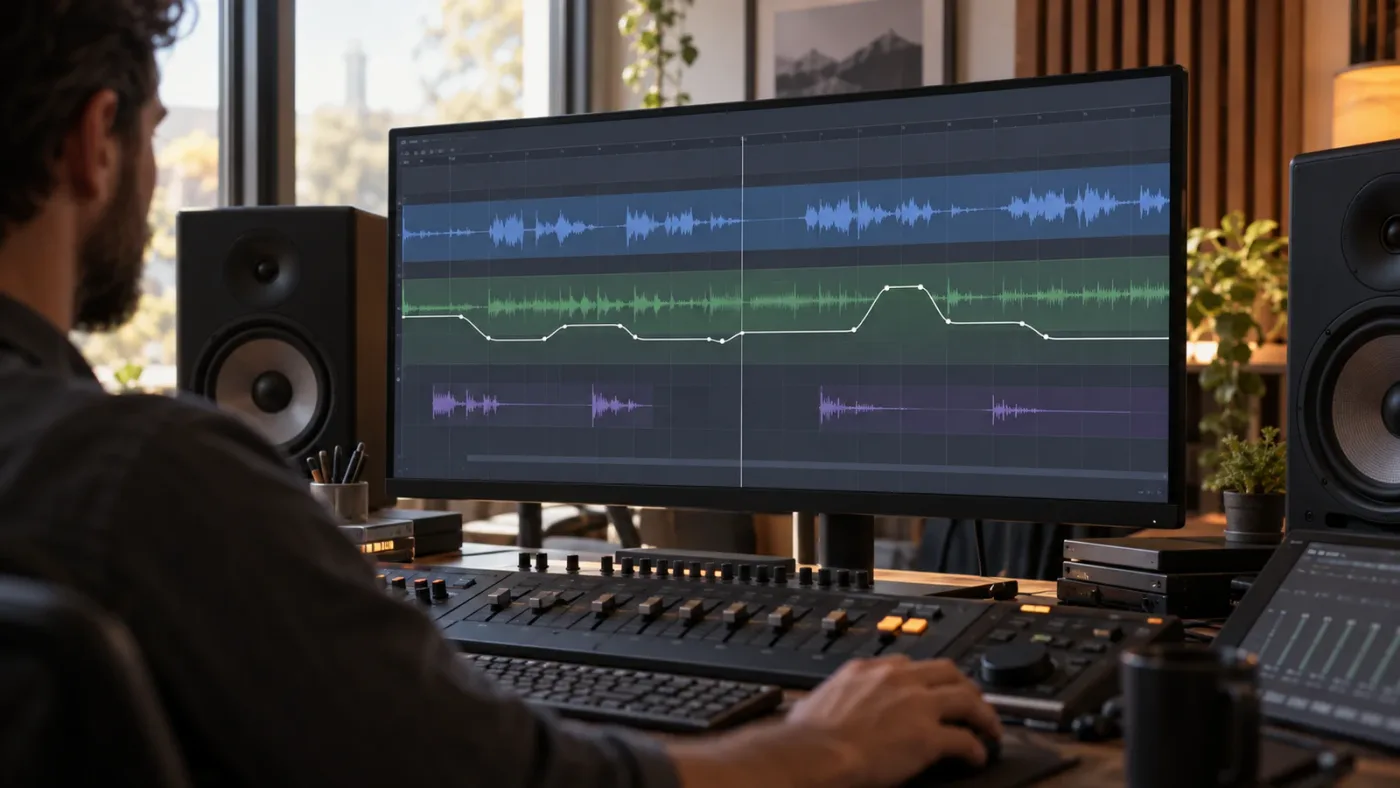
Use automatic ducking for the repeated rule and manual volume automation for the exceptions. The two methods work well together when you keep the responsibilities separate and avoid fighting the same gain change in two places.
Blackmagic's Fairlight documentation says you can change clip volume over time with keyframes and use automation to record control or effect changes. It also says track headers can show parameter curves for graphic editing. Review the official automation controls.
Here are good candidates for manual follow-up:
- A hero sound effect that should remain audible for one important visual action.
- A short effect that hits exactly with a cut and needs a pre-roll dip.
- A line that is intentionally whispered or shouted.
- A pause where the music should remain low for dramatic tension.
- A comedic beat where the effect should interrupt the dialogue instead of hiding under it.
- A transition where the sound should cross the line and return only after the picture changes.
Avoid double compensation
If the Ducker reduces a track and you add a keyframe to compensate for the reduction, the final level may depend on both changes. That isn't wrong, but it can become hard to predict. Make a note of which gain move is the static balance and which move is the creative override.
One simple pattern is:
- Balance the target track with the Ducker bypassed.
- Set the Ducker for the normal relationship.
- Write or draw manual automation only on the exceptional moments.
- Bypass the Ducker to see whether the manual move still makes sense as an independent editorial decision.
Use track automation for a repeated exception
If the same intro, outro, or recurring segment needs a special treatment, track automation may be cleaner than editing every clip. If only one sound effect needs an exception, clip or local volume automation may be easier for another editor to understand.
Keep automation visible during review
Automation that is hidden is easy to forget. When you hand off a project, show the relevant track or parameter curve long enough to verify the shape. The exact curve view depends on your workspace and automation mode, so don't assume that a green or red line has the same meaning in every display state. Read the control mode and listen to the result.
How do I keep ambience and room tone from disappearing?
Keep ambience on a separate track or bus when it provides continuity, then duck foreground effects more than the room layer. If ambience must follow dialogue, use a shallower reduction and a slower return so the room doesn't pulse around every word.
Room tone often carries the invisible connection between two edits. Removing it whenever dialogue appears can make a cut sound like the room changed. The result may be technically clear and still feel wrong.
Try this three-layer approach:
- Dialogue: The clearest and most stable trigger.
- Room or location bed: A low, continuous layer that usually stays steady.
- Foreground effects: Impacts, Foley, whooshes, and accents that can reduce when words need room.
If the sound-effects track includes a long ambience recording, split or move that ambience before setting up the Ducker. You don't have to separate every file into its own track, but you do need to separate different editorial jobs when they want different behavior.
When to duck ambience lightly
Light ducking can help when a constant fan, street, or HVAC recording masks speech. Use it as a controlled background move, not as a hard mute. If the room bed falls too far, listeners may notice the noise floor changing more than they notice the words becoming clearer.
When to leave ambience alone
Leave ambience alone when it anchors the cut, supports a location, or is part of the story. A crowd, storm, engine, or room may be an important sound source, not background clutter. Protecting dialogue doesn't always mean lowering everything behind it.
Use clip edits for sudden changes
If an ambience recording changes because the shot changes, edit or crossfade that change before you tune ducking. A Ducker can smooth level relationships, but it can't fix a bad loop, a missing room tone, or a hard edit between two incompatible backgrounds.
Good ducking preserves the scene's background while making the foreground intention easier to hear.
How do I use ducking with Foley, impacts, and transitions?
Treat each effect by its job. Foley often benefits from a small reduction under words, impacts may need to remain strong at a cut, and transitions can be shaped with manual automation around their exact visual moment.
Foley under dialogue
Footsteps, clothing, and object handling often sit close to the spoken voice. A modest Ducker reduction can make the dialogue clearer while leaving enough Foley to support physical space. Keep the Foley group separate if a specific movement needs to remain audible.
For a walking scene, consider whether the steps are information. If the scene depends on the character approaching, ducking every footstep under dialogue may remove the approach. You may reduce the midrange-heavy layer and preserve a lower impact or room component instead.
Impacts under dialogue
An impact often earns its level from the picture. If it lands exactly as a line begins, automatic ducking may protect the line but blunt the impact. Let the impact lead into the line, reduce it briefly, or use a manual envelope that follows the cut.
The cleanest decision is often not a deeper duck. It is a small edit to the effect's timing or tail. A shorter tail can leave the next sentence clear without making the impact itself quiet.
Whooshes and risers
Whooshes and risers frequently cross dialogue because they bridge edits. A Ducker can reduce them once the speech begins, but be careful with Lookahead. If the whoosh starts falling before the visual transition, the audience may hear the edit lose momentum.
Use the Ducker for the sustained body of the transition and manual automation for the last few frames if the picture needs the rise to finish cleanly. This is where automatic and manual control complement each other.
Comedy effects
Comedy may depend on an effect interrupting a line. Do not assume every collision is a problem. A Ducker solves intelligibility, not comedic timing. If the effect is the joke, let it win for the beat and recover the dialogue afterward.
How do I choose sound effects for this ducking workflow?
Choose effects by role, tail, frequency, and license, not only by whether a search result sounds exciting in isolation. A clean source makes automation easier because the Ducker has less unwanted energy to respond to.
Listen for four things before you place an effect:
| Question | Why it matters for ducking |
|---|---|
| Does the attack land where the picture needs it? | A late attack may need timing edits before level automation |
| Does the tail overlap dialogue? | A long tail may need a shorter edit or a slower, shallower duck |
| Is the sound dense in the dialogue range? | Midrange-heavy effects can mask words more than their peak level suggests |
| Can you legally use it in the project? | A good mix is still unusable if the license doesn't cover the final publication |
For a deeper selection workflow, see our guide to the best sound effects library for YouTube videos. If the problem is layering several effects rather than reducing them under speech, use our guide to layering sound effects in DaVinci Resolve.
Free libraries and one-off licensing
Free libraries and one-off licenses can be better for occasional projects, but read the actual terms and keep the license record with the project. "Royalty-free" is not blanket permission for every client, format, territory, or publication.
Subscription catalogs
An audio subscription can help when you regularly need music and effects and want a searchable workflow. Epidemic Sound is one option that publishes a current catalog of music and sound effects and offers a DaVinci Resolve Studio plugin. Its own public plan pages distinguish creator use from professional and client work, so check the plan terms instead of assuming one subscription covers every project.
Affiliate disclosure: This post may earn a commission if you choose Epidemic Sound. The link is included because a searchable licensed-audio source can fit a recurring Resolve workflow, not because a subscription is required for ducking.
The useful decision is simple. Choose a subscription when you repeatedly need audio and its license matches your publishing work. Choose a free library or a single-track license when the project is occasional and the rights are clear. In every case, the audio source and the Fairlight automation are separate decisions.
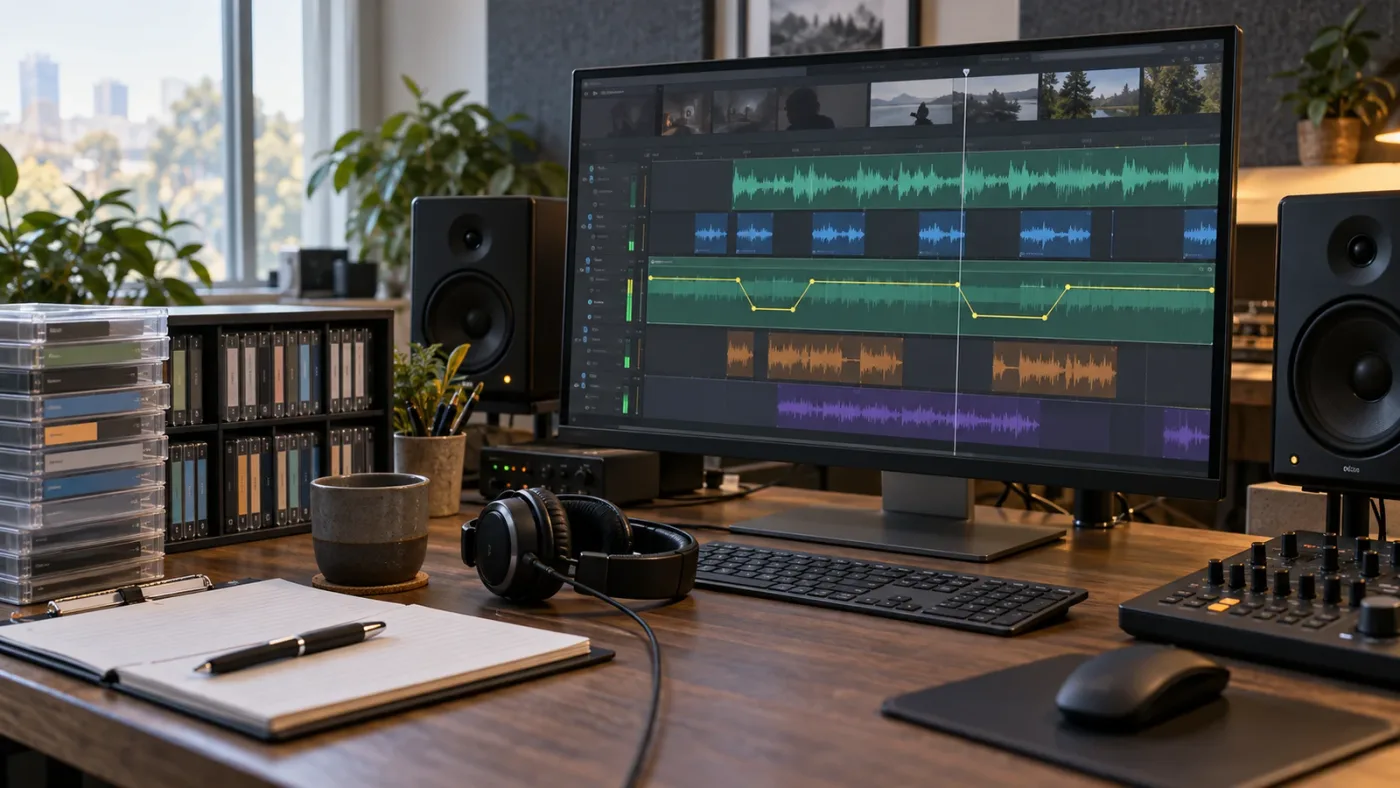
Can I automate sound effects ducking in the free version of DaVinci Resolve?
You can automate volume in the free version with clip or track automation, but a dedicated Ducker or other Track FX may be limited to Studio. Manual keyframes are the dependable fallback when the automatic effect isn't available.
Manual ducking takes longer, but it gives you direct control over every event. Use it when:
- You need a small number of dips.
- The sound effect is tightly tied to one picture edit.
- The line delivery changes from phrase to phrase.
- You want the automation to be transparent to another editor.
- You are working in an edition that doesn't expose the Ducker.
A manual volume-automation workflow
- Select the target sound-effects clip or track.
- Show the volume line or relevant automation control.
- Add a point before the dialogue starts.
- Add a point at the desired lower level.
- Add a point after the dialogue ends.
- Add a final point where the target returns to its normal level.
- Play across the move and adjust the slopes by ear.
- Repeat only where the scene actually needs a different decision.
Blackmagic's Fairlight documentation says you can hold Option and click to add clip-level volume keyframes on macOS, then drag them to change the level over time. It also documents broader automation controls for recording changes to controls and effects. Use the current Fairlight page for the documented clip and automation behavior.
The exact keyframe command can depend on the selected tool, page, and keyboard mapping. If the documented modifier doesn't behave as expected, use the visible volume line and check Keyboard Customization rather than guessing. Blackmagic says Fairlight commands can be customized and saved as presets. See the official Fairlight shortcut and automation overview.
Manual automation can sound more human
Automatic ducking follows the trigger. Manual automation follows the editorial idea. You can keep an effect present during a meaningful word, allow a planned overlap, or shape a return around a cut without forcing every line into the same response.
The goal is not to remove judgment from the mix. The goal is to stop repeating a judgment that stays the same, so you can spend attention on the moments that don't.
How do I check the mix before exporting?
Check the ducked target in the full mix, loop the loudest overlap, and confirm that the return level does not create a new distraction. Then review the main bus or delivery path with the appropriate loudness and monitoring tools for your project.
Use this review pass:
- Play the scene with the Ducker enabled.
- Bypass it and compare clarity, energy, and continuity.
- Listen at a lower monitoring level. If the words vanish, the relationship still needs work.
- Check a section with no dialogue. The target should return as intended.
- Check a fast line with short pauses. Listen for pumping.
- Check a quiet line and a loud line. One setting may not suit both.
- Check headphones and speakers if both are part of your delivery review.
- Inspect the main bus and any submixes for unexpected routing or gain.
- Recheck after replacing or trimming an effect.
- Save a version before making broad automation edits.
The Fairlight page includes loudness meters, a loudness graph for the main bus when automation controls are active, and offline audio-level analysis for clips according to Blackmagic's current documentation. Those tools can show you where the mix changes, but they don't tell you whether the creative balance is right. See Blackmagic's monitoring and delivery notes.
Don't mix from meters alone
Meters help you notice peaks, silence, and inconsistent level. They don't tell you whether an effect should interrupt a line, whether the room feels continuous, or whether the return after a sentence supports the cut. Use your ears and the picture as the final judge.
Check before and after the bus
If the target track looks correct but the main bus still feels wrong, inspect the bus processing and any parallel route. A Ducker can be working exactly as intended while another effect, bus, or duplicate clip changes what you hear.
Check the un-ducked version once more
The bypass comparison catches a common mistake: solving a loud target by making the entire track too quiet. The automatic dip should be the useful part of the change. If the mix only works because the track is permanently lowered, fix the static balance first.
What are the useful Fairlight numbers and limits to remember?
Blackmagic's current Fairlight material lists six effects slots on channel strips, a six-band parametric equalizer, more than 25 Fairlight FX plug-ins, and up to 2,000 tracks with real-time effects under the stated Fairlight Audio Core setup. Those figures make organization more important, not less.
| Documented item | Number | Why it matters here |
|---|---|---|
| Fairlight EQ bands per channel | 6 | A target track has enough basic tonal control to make a competing effect less masking before you automate it |
| Effects slots on a channel strip | 6 | Keep the Ducker or compressor position clear when other processing is present |
| Fairlight FX plug-ins | More than 25 | You have native repair and creative options, but a larger menu doesn't replace a simple signal plan |
| Fairlight Audio Core track capacity | Up to 2,000 tracks with real-time effects | Large projects benefit from names, buses, folders, and consistent routing |
| Ducker source tracks in the 19.1 workflow | Multiple tracks | Several dialogue sources can reduce one target without separate Ducker instances |
| Resolve 21 context | 21.1 page and 21-series guide | Confirm version-specific interface changes before following an older tutorial |
The source for these numbers is Blackmagic's Fairlight product material, while the multi-source Ducker detail comes from the Resolve 19.1 New Features Guide. Read both official references before treating a number as a current specification. Actual capacity still depends on available processing power and memory.
What is the best way to learn this Fairlight workflow?
The best way to learn this workflow is to reproduce it on a short scene, change one control at a time, and compare the Ducker with manual automation and sidechain compression. Blackmagic's official training is a useful reference because its Fairlight guide covers editing, mixing, automation, and delivery with project-based lessons.
Blackmagic's current training page lists the Fairlight Audio Guide to DaVinci Resolve 20 and a Fairlight introduction video. The guide is not a Resolve 21 manual, so use it for concepts and signal flow while checking current Resolve 21 interface details in the official feature and product documentation. Browse Blackmagic's current training resources.
After seven years of professional commercial video editing, we still approach a new audio control from the signal path outward. We also run a 100,000+ member professional video-editing community, and recurring questions about Fairlight usually become easier once the editor can name the trigger, target, and route. The plugin is only the middle of that sentence.
If you're choosing a course, a YouTube tutorial, or a community answer, prefer the resource that shows the routing and the failure cases. A video that gives you a preset without explaining the source and target can get you through one project and leave you stuck on the next.
How do I decide between the Ducker, sidechain compression, and manual automation?
Choose the Ducker for a repeatable dialogue-to-target relationship, sidechain compression for deeper routing and compressor control, and manual automation for picture-specific decisions. Most finished mixes use more than one method.
| Choose | When it is the right first move | What it gives up |
|---|---|---|
| Ducker | One or more dialogue tracks should reduce one track or group | Less detailed than a full compressor route |
| Sidechain compressor | A bus or target needs threshold, ratio, attack, release, and routing control | More setup and more places to misroute the signal |
| Manual automation | The move follows a specific cut, joke, impact, or character beat | More editing work when the same rule repeats |
| Clip gain | One file needs a starting correction before mixing | No response to dialogue |
| Static track balance | The track should sit at one consistent level | It cannot protect words dynamically |
The best answer is often a sequence. Balance the sound effect statically. Use the Ducker for the ordinary dialogue relationship. Add manual automation for the hero moments. Switch to sidechain compression only when the Ducker cannot express the response you need.
The best ducking workflow automates the repeated rule and leaves the creative exceptions visible.
This decision keeps the workflow legible. Someone opening the project can see the automatic relationship, the target, and the few places where the editor made a deliberate exception.
What should I do after I automate the first scene?
After the first scene works, test the setup on a quiet section, a dense section, and a section with a different speaker or effect category. Then decide whether the relationship deserves a reusable preset or should stay local to the scene.
Use this final checklist:
- The target track is the sound effect or group you intend to reduce.
- The source is the finished dialogue or another intentional trigger.
- The target does not stay low during silence.
- Ambience remains present when it needs to support a cut.
- The effect's attack still lands with the picture.
- Recovery doesn't create a noticeable bounce between words.
- Manual exceptions are visible and understandable.
- Replaced clips have been checked again.
- Licensing records are stored with recurring catalog assets.
- The main bus has been reviewed with the full mix.
Then listen once without looking at the meters. If you notice the Ducker, reduce the amount, soften the timing, or replace the automatic move with a manual one. The best ducking is usually the move nobody names because the words, effects, and picture all remain in the same conversation.
Start with the Fairlight Ducker on the smallest useful target. If the scene needs more judgment, keep the Ducker for the repeated work and draw the exceptions yourself. That is how to automate sound effects ducking in DaVinci Resolve without flattening the sound design.
Frequently asked questions
- How do I automate sound effects ducking in DaVinci Resolve?
- Place the sound effects on their own track, open the track's Ducker in Fairlight, choose the dialogue or other trigger track as the source, then adjust Duck Level, Lookahead, Rise Time, Hold, and Recovery while listening.
- Why is the Ducker not appearing in DaVinci Resolve?
- The Ducker is a track effect, so select the target track and look in Track FX in the Fairlight mixer. If the effect is still missing, confirm that you are using a supported Resolve Studio build and that the project was not created before the Ducker was introduced.
- Can I automate sound effects ducking in the free version of DaVinci Resolve?
- You can create manual volume automation in Fairlight, but the Ducker and other Studio-only Track FX may not be available in the free edition. Manual keyframes remain the practical free-version fallback.
- What is the difference between Ducker and sidechain compression in DaVinci Resolve?
- The Ducker is a dedicated track effect with direct ducking controls, while sidechain compression uses a compressor on the target track and a send from the trigger track. Sidechain compression exposes more traditional compressor controls and routing.
- Why does my sound effect disappear when dialogue starts in DaVinci Resolve?
- The target track is probably receiving too much reduction from Duck Level, an overly sensitive trigger, or a sidechain compressor with a low threshold and high ratio. Reduce the amount of ducking, filter or rebalance the trigger, and check the target track meter.
Sources
- Blackmagic Design Fairlight overview and automatic ducking
- DaVinci Resolve 19.1 New Features Guide, Audio Ducker
- The Fairlight Audio Guide to DaVinci Resolve 20
- DaVinci Resolve 21 New Features Guide
- Blackmagic Design DaVinci Resolve 21 What's New
- Blackmagic Design official DaVinci Resolve training
- Epidemic Sound catalog and licensing options
Keep reading
Guides · Aug 24, 2026 · 8 min
How to Layer Sound Effects in DaVinci Resolve 21
Learn how to layer sound effects in DaVinci Resolve 21 with a clean Fairlight track layout, precise sync, volume shaping, and practical mix checks.
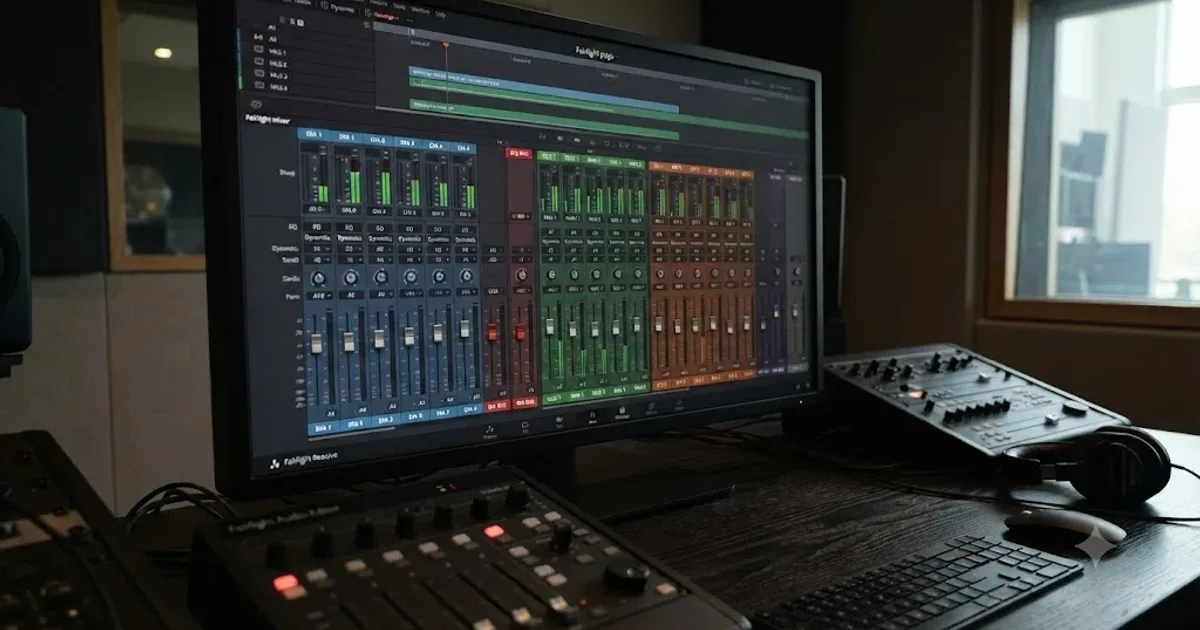
Guides · Jul 11, 2026 · 31 min
How to Mix Audio in DaVinci Resolve Using Fairlight
Mix audio in DaVinci Resolve's Fairlight page: build a dialogue/music/effects bus structure, gain-stage your clips, EQ and compress dialogue, then duck music under it.
Guides · Aug 24, 2026 · 8 min
Best Sound Effects Library for YouTube Videos in 2026
Find the best sound effects library for YouTube videos, with honest picks for free, specialist, and recurring DaVinci Resolve workflows.