Articles / Guidesupdated for DaVinci Resolve 21.1 (September 2026)
How to Choose Sound Effects for a Talking Head Video
Quick answer
To learn how to choose sound effects for a talking head video, select an effect only when it clarifies an edit, supports a visible action, or adds intentional emphasis. Match its timing, perspective, texture, and tail to the shot, mix it under dialogue, and verify the license before publishing.
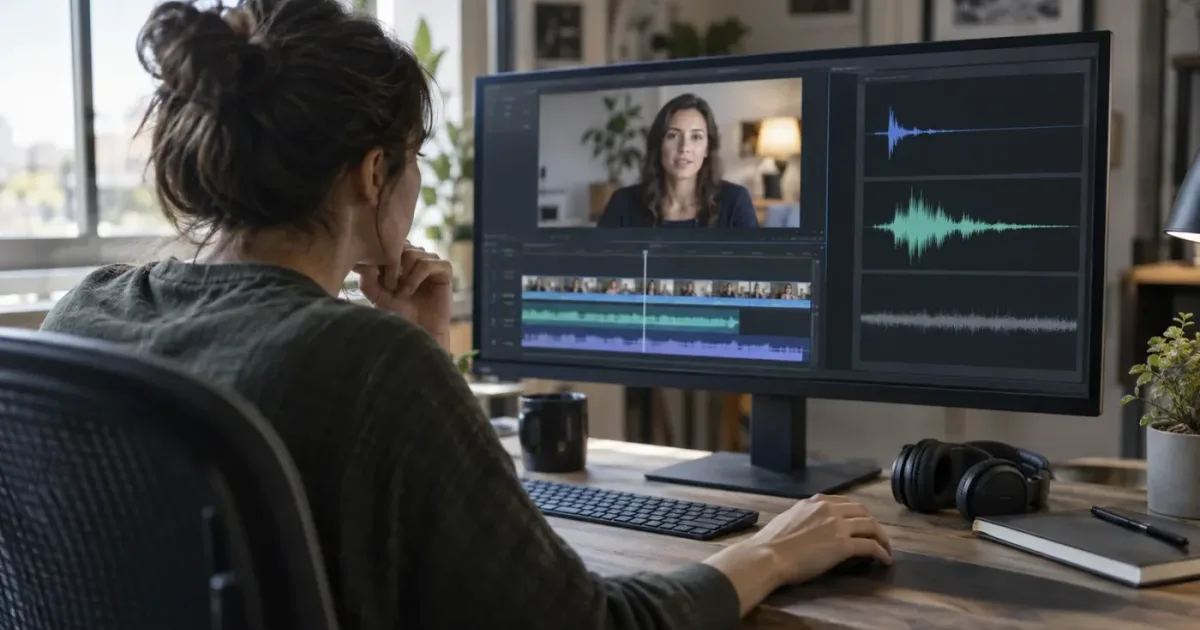
I used to think a talking head needed sound effects only when the edit felt empty. The better question is what the sound should help the viewer notice. We run a 100,000+ member professional video-editing community, and this is one of the questions that keeps returning because a few well-chosen accents can help, while a pile of them makes a speaker feel less human.
As of September 2026, this guide applies to DaVinci Resolve 21 and the current 21.1 workflow. The short version is simple: choose the effect by editorial job, not by how impressive it sounds in isolation. Then place it in Fairlight, protect the dialogue, and listen on the kind of device your audience actually uses.
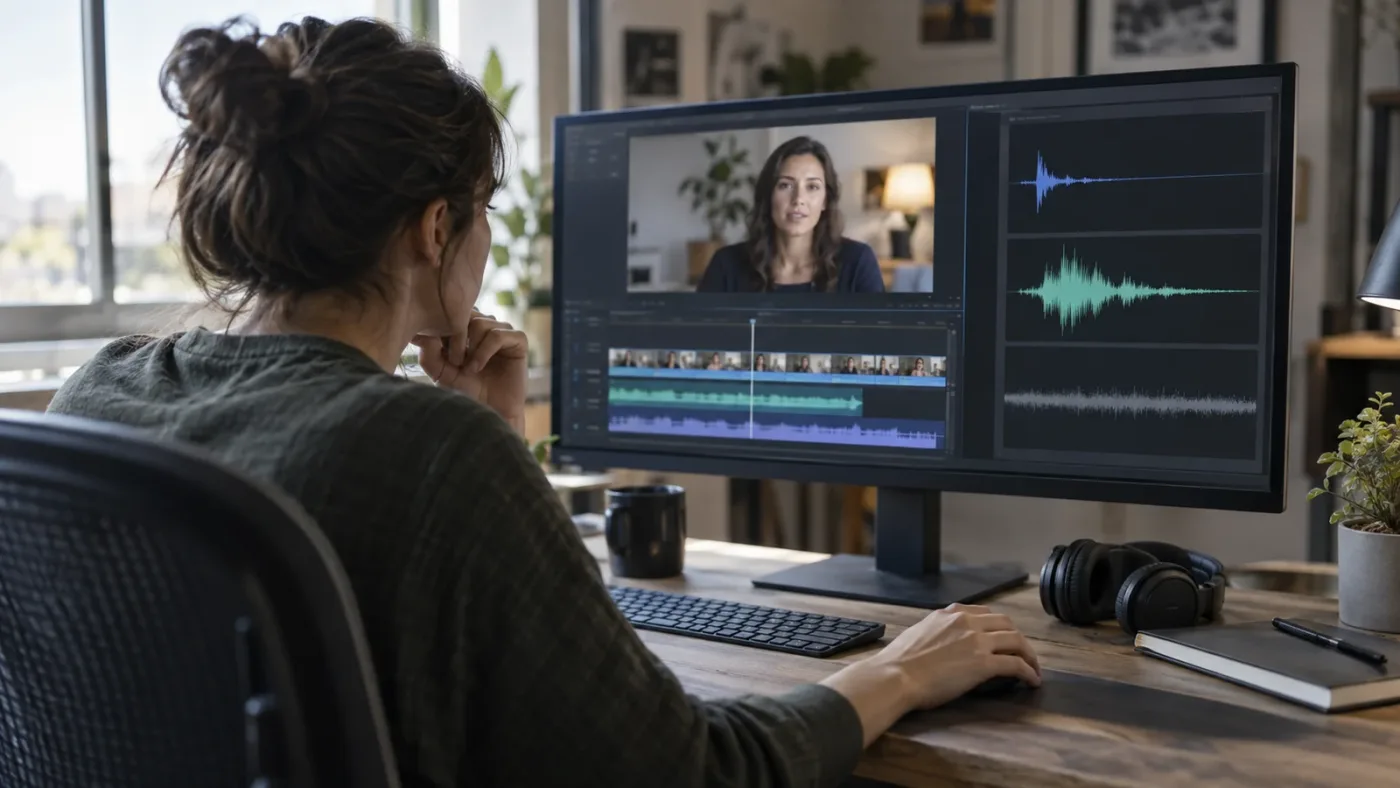
What is the best way to choose sound effects for a talking head video?
The best way to choose sound effects for a talking head video is to start with the moment in the edit and name its job before you search. An effect should clarify a change, support something visible, establish a believable space, or give a deliberate piece of emphasis. If it does none of those things, leave the dialogue alone.
A talking head video puts a person, usually in a medium close-up or close-up, at the center of the frame. The University of Aberdeen describes that framing as one of the common forms used for online presenting in its talking-head production guide. That matters for sound because the audience is already watching a face carry the message. You aren't building an entire world from silence. You are deciding whether a small sound helps the face and words land more clearly. The University of Aberdeen's talking-head guide also treats microphone placement and a quiet room as foundational production choices, which is a useful reminder that sound effects cannot rescue weak spoken audio.
Before opening a library, write one sentence for the effect. Try these:
- "This short click tells the viewer that the on-screen control was activated."
- "This soft whoosh gives the title card a sense of movement."
- "This chair creak makes the cut back to the presenter feel physical."
- "This room tone keeps the speaker from appearing to jump between locations."
- "This low pulse marks a serious turn in the explanation, but it must stay behind the words."
Those sentences stop a common mistake. Editors often audition sounds by themselves, hear a dramatic impact, and then make the picture serve the sound. Talking-head editing works in the opposite direction. The picture and the spoken idea choose the sound.
The target is not realism in every moment. A clean UI click under a flat graphic may be designed rather than naturalistic. A slight low-end swell under a reveal may be stylized. The rule is that the style must be readable. Viewers should understand what the sound is doing, even if they don't consciously notice the file you selected.
The best sound effect for a talking head video is the quietest effect that makes the intended visual or editorial change easier to understand.
The four-job test
Run every candidate through four questions:
- Does the effect explain a visible action?
- Does it mark a meaningful edit or change of subject?
- Does it create a place, material, or physical response that the image implies?
- Does it add controlled emphasis that the dialogue alone cannot provide?
One yes is enough to audition it. Four yeses do not mean you should stack four sounds. The test is a filter, not a shopping list.
If the answer to every question is no, delete the effect from the timeline. The cleanest sound design decision is often an empty track.
How do I decide whether a talking head video needs a sound effect at all?
A talking head video needs a sound effect only when the effect improves comprehension, continuity, or intentional emphasis. It does not need an effect simply because a jump cut exists or because the timeline has a gap.
Dialogue is the primary information channel. Eric Freeman, a re-recording mixer and supervising sound editor for Disney TV Animation, put the priority plainly in a 2018 interview: "Dialogue is king, so having organized dialogue tracks is important." Freeman's interview with Designing Sound is about larger mixes, but the principle transfers neatly to a one-person video. The viewer came for the speaker. Effects should make that communication easier, not turn it into a contest.
Add an effect when the image creates an event
An event has a beginning, a change, and a consequence. A graphic appears. A highlighted word lands. A product is placed on a table. A browser window opens in a screen recording. A speaker slams a notebook shut. These moments give you something concrete to support.
For a graphic, a short click or soft tick can tell the ear that the shape appeared on purpose. For a physical prop, a light handling sound can give the shot weight. For a screen recording, the effect can make the interface feel responsive, but only if the sound resembles the action and the timing is tight.
You don't need to sonify every visual element. If five words appear one after another, one sound at the start of the phrase may be stronger than five identical ticks. If the presenter points at one line of text, a single accent at the moment of the point may be enough.
Skip the effect when the edit already reads
A straight cut between two sentences may need no sound. A cutaway may already have its own production audio. A caption may be clear because its contrast and timing work. A pause may be valuable because silence gives the next sentence room.
When you add a whoosh to every cut, you create a pattern the viewer can predict. The first few accents may help. The tenth sounds like an alarm that never stops. Variety can solve that problem, but deletion usually solves it faster.
Use the mute test
Make a temporary version with all optional effects muted. Watch the sequence once. Write down the moments that genuinely lost meaning, rhythm, or continuity. Those are the moments worth rebuilding.
Then unmute one effect at a time. If an effect brings back clarity or intentional emphasis, keep it. If it only makes the timeline feel busier, remove it.
This test is useful because a solo editor can become attached to the labor of searching. Ten minutes spent finding a sound can make the sound feel valuable. The viewer did not spend those ten minutes with you. The result has to earn its place in the cut.
Use a pause as an effect
Silence is not a defect in a talking-head edit. A held pause before an important sentence can carry more weight than a riser. A short reduction in room tone can signal a deliberate shift without announcing itself as a sound-design trick.
This is especially helpful when the speaker is discussing a difficult idea or making a claim that needs attention. Keep the room or recording bed stable enough that the silence does not sound like a technical dropout. If the silence is a creative choice, make the change clean and intentional.
Which sound effect types fit a talking head video?
The most useful sound effect types for a talking head video are short editorial accents, restrained interface sounds, physical Foley, room tone, and occasional transition elements. Organize them by job rather than by the label used by a library.
| Editorial job | Useful effect types | Best moment to use one | Common failure |
|---|---|---|---|
| Mark a graphic | Click, tick, soft tap, short tonal accent | A title, caption, icon, or callout appears | Every word gets the same sound |
| Support motion | Small whoosh, air movement, cloth pass, light swish | A card, crop, or object moves across frame | The whoosh is longer or louder than the movement |
| Show physical contact | Tap, paper movement, keyboard press, chair creak | A hand or object visibly touches something | The sound belongs to a different material or distance |
| Hold continuity | Room tone, air conditioner bed, distant traffic, quiet interior ambience | A jump cut changes the background or room feel | The bed loops obviously or competes with speech |
| Mark a turn | Low pulse, muted hit, restrained tonal swell | The argument changes or a reveal lands | The effect tells the viewer how to feel too aggressively |
| Add interface feedback | Mouse click, button press, notification, error chirp | A screen action is visible and important | The sound implies a different action than the picture |
| Conceal a rough edit | Short texture, natural handling sound, room-tone bridge | A cut needs a little cover while preserving meaning | The effect hides a bad dialogue edit instead of supporting it |
The table is a menu of jobs, not a requirement to use each category. A thirty-second tip may need one click. A ten-minute lesson may need a room bed, a handful of graphic accents, and a few carefully timed physical sounds. The speaking style, visual density, and audience expectation should decide the count.
Editorial accents
Editorial accents are short sounds that punctuate an edit. They include ticks, taps, small impacts, muted pops, and controlled tonal notes. They work best when the visual has a clear start point or when a sentence needs a subtle landing.
Choose an accent with a short enough tail that it doesn't blur into the next sentence. If the sound rings after the speaker changes topic, the effect can make the structure feel less precise.
Whooshes and swishes
Whooshes imply movement. That makes them useful for slides, text wipes, callouts, zooms, and fast changes in framing. They are not automatically useful for a cut. A cut is a change in time or angle, while a whoosh suggests something moved through space.
If the graphic travels from left to right, search for a directional or side-to-side movement and align the loudest part with the graphic's fastest or most visible point. If the graphic simply appears, a whoosh may be the wrong idea. A tiny tonal accent or no sound may tell the truth better.
Physical Foley
Foley is recorded or designed sound that supports physical action. In a talking head video, this might be a notebook on a desk, a cup placed beside the speaker, clothing movement, a keyboard, a chair, a door, or an object being picked up. Blackmagic's Fairlight overview specifically describes footsteps, clothing rustle, and object handling as Foley examples that bring interactions to life. Blackmagic's Fairlight page also explains that Fairlight can use its Sound Library, record original content, and, in Studio, use a Foley Sampler.
Foley becomes convincing when it agrees with the material, size, and force visible in the frame. A glass on a hard desk needs a different character from a cardboard box on carpet. A gentle hand movement doesn't need a heavy impact. When the picture is close, small details can carry more value than a large cinematic hit.
Room tone and ambience
Room tone is the quiet background character of a location. It can contain ventilation, distant traffic, a computer fan, or the soft sound of an occupied room. Ambience is broader and can include a more specific environment, such as a cafe or a street.
Use room tone to bridge cuts in speech, not to draw attention to the location. Record or select a bed that matches the scene and keep it subtle. If the source dialogue has noticeably different noise between takes, a consistent bed can make the transitions less distracting, but it cannot fix every mismatch.
How do I choose a sound effect that matches the picture?
Choose a matching sound effect by comparing source, action, material, scale, perspective, timing, and emotional tone. A sound that matches only one of those dimensions can still feel wrong when the rest of the picture disagrees.
Match the source
Start with what appears to make the sound. Is it a finger, a button, a paper sheet, a coffee cup, a swipe, a camera movement, or an abstract graphic? Search for the noun first, then the action.
For a visual button, try searches such as button click, interface tap, or soft UI click. For a notebook, try paper handling, notebook close, or paper tap. For a title moving quickly, try short air whoosh, light swish, or digital transition, depending on the style.
Avoid beginning with a mood word such as epic or cinematic. Those terms return dramatic sounds that may be polished but not appropriate. Find the physical or editorial source first, then narrow the mood.
Match the action
A press, drag, drop, swipe, open, close, hit, and slide each describe different motion. The attack of the sound should agree with the visible action. A soft close needs a different attack from a fast snap.
If a person raises a mug but doesn't set it down, a cup impact is premature. If the hand touches the desk and the effect starts several frames later, the mismatch will be noticeable even if the file sounds excellent.
Match the material
Material changes the identity of a sound. Wood, glass, plastic, paper, metal, fabric, and skin have different attacks and resonances. When the picture doesn't provide enough information, use a neutral texture instead of a very specific one that could contradict the frame.
This is where a small, dry sound often wins. A generic tap can support a close-up hand gesture. A resonant metal hit can make the same gesture feel like a machine. Choose the sound that leaves room for the image.
Match the scale and distance
Scale is not only volume. It also changes the amount of low end, the length of the tail, the detail in the attack, and the sense of space around the sound.
A close object can have a clear transient and a tight tail. A distant room sound may have less detail and more environment around it. If the presenter is close to camera and the effect sounds as though it happened in a large hall, the edit can lose its sense of place.
Start with a file that has the right character before using Fairlight processing to nudge it into position.
Match the tail
The tail is what remains after the main attack. It can be almost absent, a short room decay, a long echo, or a designed texture. Tail length affects the next edit.
When a speaker begins a new sentence, long tails can mask consonants and make a transition feel slow. When a graphic holds on screen, a small tail can help the moment breathe. Trim the tail rather than turning the whole effect down if the sound is right but lasts too long.
Audition in context, never in isolation
A library preview answers whether a file is clean and interesting. Your timeline answers whether it belongs. Put the effect under the actual picture, at the actual playback speed, with the dialogue and room tone active.
Blackmagic describes the Fairlight Sound Library workflow as search, mark the useful section, audition it on the timeline, and confirm or cancel the result. The official Fairlight page also describes a sync function that can align any part of the effect waveform with the playhead. That workflow is documented by Blackmagic here. Use the audition stage to compare three or four candidates without committing them all to the finished mix.
How do I search a sound effects library efficiently?
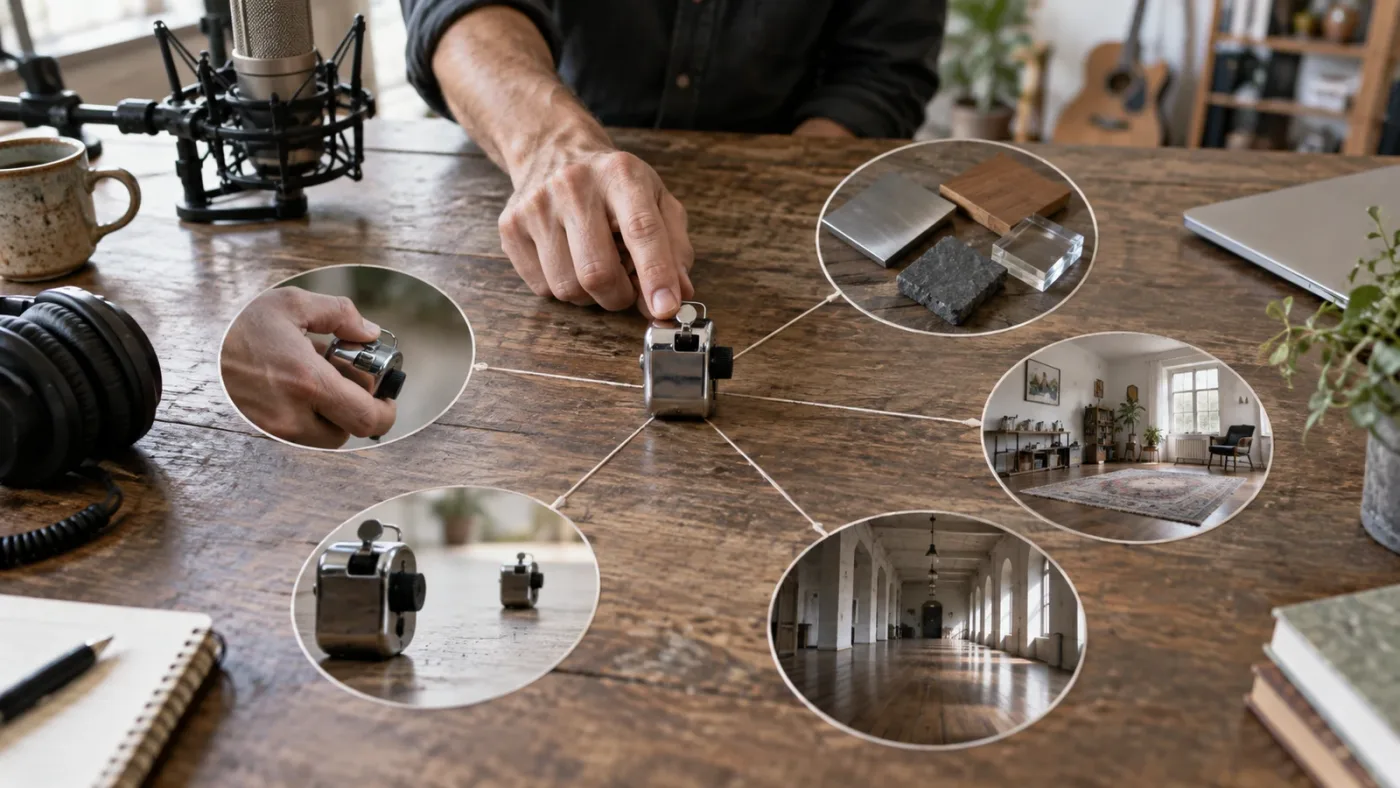
Search a sound effects library with a three-part phrase: the source, the action, and one useful qualifier. Then filter by duration, perspective, texture, or intensity only after you hear the first results.
Here is the pattern:
[source] + [action] + [qualifier]
Examples:
paper close drykeyboard tap softnotification short mutedair whoosh fast lightchair movement wood subtleroom tone office quietbutton click digital cleanphone vibration desk close
If the result is too broad, add the material. If it is too dramatic, remove mood words and add dry, short, light, or subtle. If it is too clean, add a location or texture such as room, desk, cloth, or handheld.
Search by the visible action first
Don't search for sound for my edit. Search for what happens. Search language is also a thinking tool. When you can name the action, you can judge whether the effect belongs.
For a title card, search title rise, text reveal, or soft transition. For a cursor, search mouse click, computer tap, or UI select. For a presenter turning pages, search paper turn, page flip, or notebook handling.
Separate hard effects from backgrounds
Hard effects are distinct events such as clicks, taps, and impacts. Backgrounds and ambiences are continuous beds such as room tone, air, rain, or traffic. Searching for the wrong class can waste time.
Use a hard effect to mark an event. Use a bed to make the edit feel continuous. If you use a hard effect to solve a background discontinuity, the result may sound like an announcement. If you use a loud ambience to mark a button press, the event may disappear.
Use the Sound Library when you need audition speed
DaVinci Resolve's Fairlight page can search a sound library without requiring a separate trip away from the edit. Blackmagic says the Sound Library panel can preview a selected portion on the timeline and sync part of the waveform to the playhead. The Fairlight Audio Guide also describes installing the optional Fairlight Sound Library, which creates and indexes a library for use the next time you open Resolve. Read the official Fairlight Audio Guide for the installation workflow, then see our guide to finding sound effects by description for video editing when the problem is search language rather than mixing.
If you use your own folders, keep the source files stable while you edit. Moving or renaming media outside Resolve can create offline-media problems later. That is a project-management concern, but it becomes an audio concern the moment your chosen effect goes missing before delivery.
Should I record the sound effect myself or download one?
Record a sound yourself when the effect depends on the exact object or room in your video; download one when you need a specific texture, a repeatable catalog, or a clear license workflow. Both are valid sources, and the right choice depends on the sound's importance and the time you have.
| Source | Choose it when | Strength | Watch for |
|---|---|---|---|
| Original recording | The object is on camera or the room matters | Exact match to the scene | Mic noise, handling noise, and inconsistent takes |
| Fairlight Sound Library | You need a starting set inside Resolve | Direct access to a Blackmagic workflow | A generic sound may not match your material |
| Paid sound-effects catalog | You publish regularly or need many options | Search depth and a repeatable licensing account | Plan scope, channel rules, and cancellation terms |
| Creative Commons or public-domain source | You can document and follow the rights | Low-cost access and discoverable attribution | Each file can have different conditions |
| Commissioned or custom recording | The sound is a signature part of the brand | A sound made for the project | More coordination and review time |
When original recording wins
Original recordings are useful when realism matters more than variety. If your presenter closes a particular notebook, taps a particular desk, or handles a particular product, a quick recording can match the image better than a polished generic asset.
The University of Aberdeen recommends using an external microphone when available, keeping the microphone close enough for clear audio, and avoiding rooms with too many hard surfaces because they can increase echoes. Those recommendations are aimed at spoken video, but they also explain why a small original effect can sound more coherent when recorded in the same environment as the talking head. Its production guide is available here.
When a paid catalog wins
A paid catalog becomes useful when the recurring cost of searching, downloading, tracking licenses, and finding variations is larger than the cost of access. That is a workflow decision, not a sound-quality guarantee.
Affiliate disclosure: this post includes one tracked recommendation. If you subscribe through the link, we may earn a commission, at no extra cost to you. Epidemic Sound is a reasonable option to evaluate when you publish often and want recurring access to music and sound effects in a licensed catalog. Check the current plan terms for your channel, client work, advertising, and future publishing before you download assets.
Compare the license with your publishing model, client work, destination, and future projects. If those terms are unclear, a free library or original recording may be the better choice.
How do I place sound effects in DaVinci Resolve 21?
Place sound effects in DaVinci Resolve 21 by keeping dialogue separate, auditioning the effect against the playhead, trimming the useful section, shaping the clip with fades and gain, and finishing the decision in Fairlight rather than on a silent waveform view.
Here is a seven-step workflow you can repeat for a short clip or a full talking-head lesson.
1. Define the job of the effect
Before importing anything, mark the event. Use a timeline marker, a note, or a simple label such as TITLE IN, BUTTON PRESS, PROP CONTACT, ROOM BRIDGE, or SECTION TURN.
The label helps you make a later decision. If the effect is called cool sound, it becomes hard to ask whether it actually supports the edit. If it is called BUTTON PRESS, you can compare the sound with the visible press.
2. Choose a matching sound
Search using the source, action, and qualifier pattern. Audition candidates with the dialogue active. Don't judge the effect at a louder preview level than the finished mix. Blackmagic's Fairlight workflow includes a Sound Library panel, and you can also bring files into the Media Pool.
3. Organize Fairlight tracks
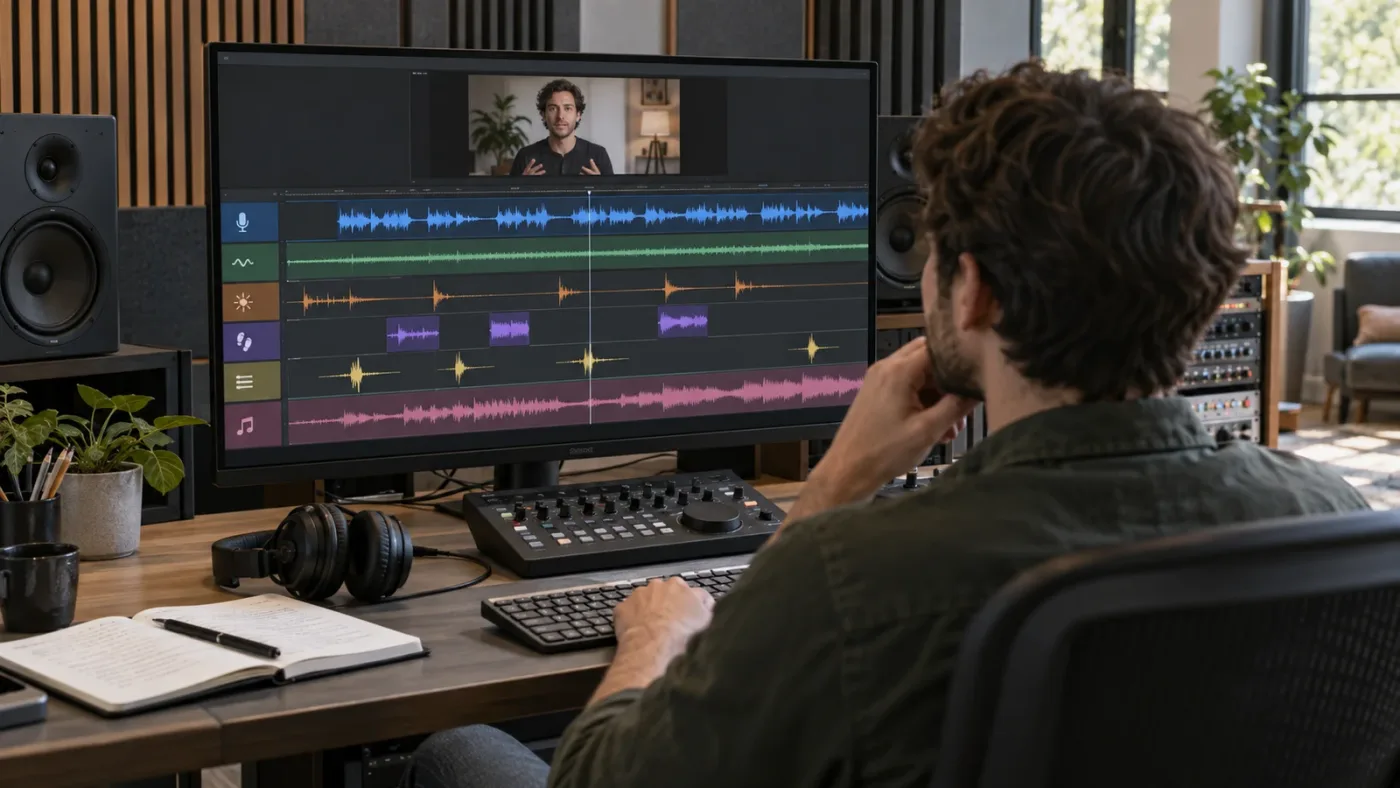
Put dialogue on clearly named dialogue tracks. Put room tone or ambience on its own bed. Use one or more named sound-effects tracks for accents, Foley, transitions, and UI sounds. Keep music separate even if the talking head uses only a very light bed.
You don't need one track for every sound. You do need enough separation that you can mute, lower, or revise a category without hunting through unrelated clips. A simple layout could be:
| Track name | Contents | Why it helps |
|---|---|---|
| DX Main | Primary spoken take | Protects the communication channel |
| DX Alt | Alternate lines or pickups | Makes revisions easier |
| Room | Room tone and continuity beds | Bridges edits without announcing itself |
| SFX Accent | Clicks, taps, light impacts | Gives you a controlled punctuation group |
| SFX Foley | Object and handling sounds | Keeps physical detail separate |
| SFX Transition | Whooshes and section moves | Lets you trim a style layer quickly |
| Music | Optional music bed | Makes ducking and balance decisions clearer |
Eric Freeman's advice about organized dialogue tracks comes from a much larger professional mixing environment, but the same logic benefits a solo creator. If the effect is difficult to find, difficult to mute, or difficult to replace, the organization is not serving the edit.
4. Place and trim the clip
Put the effect near the visual event, then listen in context. Trim the front if the attack arrives before the action. Trim the tail if it steps on the next phrase. If the effect has a useful middle section, use that section rather than treating the whole file as sacred.
In Fairlight, clips have fade handles, a volume or gain line, and clip controls for level, pan, pitch, and EQ. Blackmagic documents those clip adjustments on its Fairlight page, including the ability to add volume keyframes and use normalization from the clip's context menu. See Blackmagic's clip-adjustment overview.
Use a short fade when a file begins or ends too abruptly. A fade is not a repair for wrong timing, but it can remove a click and make a designed accent feel less pasted on.
5. Shape the effect
Shape only the part that needs shaping. A sound may need a lower level, a shorter tail, a little EQ, a narrower stereo image, a little room, or a touch of automation. Start with clip edits and gain before adding a chain of plug-ins.
Fairlight provides clip-level controls, track processing, automation, and a mixer. Blackmagic says every channel includes a six-band parametric equalizer and dynamics processing, while the Fairlight page also exposes plug-in slots and automation. Treat those as tools for a specific mismatch rather than decoration. The official Fairlight page lists these controls.
For example, if a click is too bright under a sibilant word, a small tonal adjustment may help. If a whoosh feels too wide for a centered title, reduce the width or pan it with the graphic.
6. Protect the voice
Lower the effect until the full spoken phrase remains clear. Listen through the consonants, not only the vowels. If the effect covers a word, trim, move, shape, or automate it before you try to make it louder again.
Fairlight includes a track FX Ducker that Blackmagic describes as lowering a target track during dialogue and recovering afterward. You can use it for a music bed or an effects group when the changes are repeated and predictable, then review the result manually. Blackmagic's Fairlight overview explains the Ducker.
Automation is often better than a fixed lower level when one effect must rise between phrases and fall under speech. Use a small number of meaningful moves. A complicated curve can draw attention to the mix rather than the story.
7. Review and clear the export
Play the full passage from before the effect to after its tail. Then check the video with the effects muted and with the dialogue muted. The first test asks whether the effect earns its place. The second exposes whether the effect carries useful structure or merely fills space.
Before export, confirm the source license, check the final audio, and listen away from the timeline speakers. YouTube's official recommended upload settings specify a 48 kHz sample rate and list 384 kbps as the recommended audio bitrate for stereo uploads. Those are delivery recommendations for YouTube, not a universal mixing target. See YouTube's current upload specification before you finalize a platform-specific preset.
How loud should a sound effect be under dialogue?
There is no universal fader number that makes a sound effect correct under dialogue. Start low, preserve every spoken word, and judge the whole program with a loudness meter, ordinary playback, and at least one small speaker or headphone check.
The exact number changes with the voice, the effect, the arrangement, the platform, and the listener's playback level. A sharp click can remain obvious at a low average level because its attack is concentrated. A soft ambience may need more level to be perceived at all. A numerical recipe that ignores those differences gives false confidence.
Separate peak level from perceived loudness
Peak level tells you about the highest instantaneous part of a signal. Loudness measurement estimates how a program is perceived over time using a defined method. They answer different questions.
ITU-R BS.1770-5 is the current in-force recommendation listed by the International Telecommunication Union for algorithms that measure program loudness and true-peak audio level. The ITU recommendation is here. Use a meter that follows a recognized method when you need to check a delivery, but don't confuse a meter reading with a verdict on whether the effect belongs.
The EBU's R 128 recommendation gives a broadcast reference of -23 LUFS and a maximum true-peak descriptor. That number is meaningful inside the EBU broadcast recommendation. It is not a universal target for every YouTube talking-head upload, social clip, or client brief. EBU's R 128 page explains the recommendation and its version history.
Use a three-pass listening check
First, listen at the level you normally use while editing. Confirm that the voice remains comfortable and that the effect arrives where the eye expects it.
Second, listen quietly. If the effect disappears but the voice remains clear, ask whether that is acceptable. A small accent can be allowed to become subtle. A critical interface cue may need a different texture or timing rather than a large fader increase.
Third, listen at a louder but still safe level for a short review. If the effect jumps out as painful, harsh, or distracting, fix its attack or tone. Don't simply turn down the master bus to hide a problem in one clip.
Mix the effect for the word, not around the waveform
Look at the word the effect overlaps. Sibilants, plosives, and short consonants can lose clarity when a bright or transient effect lands at the same time. Move the sound a little earlier or later if the picture allows it. Short timing changes can create more intelligibility than a large EQ move.
For a title that appears during a pause, let the effect land in the pause. For an effect tied to a spoken word, align the attack with the visual or a natural rhythmic break, then lower it until the word still reads.
Use ducking as a safety net, not a personality
Ducking is useful when music or a continuous effects bed must move around speech. It can become unpleasant when the background pumps audibly on every breath. Use a modest change and adjust the recovery so the background returns without announcing the processing.
If only one click overlaps one word, manual clip gain is usually clearer and faster than designing a global rule. If a whole section contains repeated narration over a bed, automation or a ducker may save time.
A sound effect under dialogue is successful when the viewer understands the sentence and the edit without having to choose between them.
Why do my sound effects sound fake, too loud, or disconnected?
Sound effects sound fake, too loud, or disconnected when timing, perspective, material, room, or dynamics disagree with the picture. Fix the mismatch that the viewer can hear first, then decide whether the file itself needs replacing.
The effect sounds pasted on
Check the attack and tail. If the sound begins before the visible action or ends while the next action has already started, trim it. Add a tiny fade if the edge clicks. If the room is quiet and the effect is bone-dry, add only enough shared space to make it sit with the scene.
Don't add reverb because a sound feels separate until you know whether timing is the real problem. Reverb can blur the dialogue and make a small talking-head room feel like a theater.
The effect is too cinematic
Replace a large, low, long sound with a smaller, shorter version. You can also shorten the tail and narrow the frequency range, but source selection is usually the cleanest fix.
The source should agree with the visual scale. A mouse click shouldn't feel like a door closing unless the design intentionally exaggerates the interface.
The effect is too bright under speech
Lowering level may not solve a harsh effect because the ear can still notice a concentrated high-frequency attack. Try a softer candidate, move it into a pause, or reduce the sharpest part. If you use EQ, make the smallest change that removes the clash.
The effect sounds too clean
A library effect may have been recorded in a controlled environment. If the talking head has a real room around it, the effect can seem detached. Use a matching room bed, record a version in the scene, or choose a file with a little natural environment. Don't add random noise to every file.
The effect repeats too obviously
Repeated identical clicks turn into a metronome. Use fewer events, vary the timing, or choose related sounds with different attacks. If a list requires several accents, let the visual hierarchy decide which entries deserve the strongest cue.
The effect hides a bad dialogue cut
A sound can make a cut less noticeable, but it cannot repair a missing syllable, a chopped breath, or a sudden room change. Fix the spoken edit first. Use room tone, a clean crossfade, a cutaway, or an alternate take where appropriate. Then add an effect only if the finished moment still benefits.
Our guide to making sound effects realistic in DaVinci Resolve covers the broader problem of matching sound to space, material, and motion. Keep this page's narrower rule in mind: realism is useful only when it serves the talking head's message.
How do I use transitions, whooshes, and clicks without making the edit feel busy?
Use transitions, whooshes, and clicks as a limited vocabulary. Give each sound family a job, leave some cuts dry, and vary the strength of the cue according to the visual hierarchy.
Give the audience a pattern they can understand
A design system can make a talking-head video feel coherent. A soft click might announce a small on-screen control, while a short whoosh might mark a major section card.
Let the picture lead the timing
Place the sound according to the visible movement, not simply the edit point. If a card begins moving before the cut, the sound can begin with that motion. If the card lands after the cut, the attack may belong on the landing. Watch the animation with the audio muted, then add the sound while keeping your eyes on the event.
Not every graphic is a headline. A tiny tap or no sound can support a secondary label, while a fuller accent belongs on the moment that changes the viewer's understanding. Leave pauses dry when the speaker needs gravity.
How do I choose sound effects for jump cuts, captions, and on-screen graphics?
Choose a sound effect for a jump cut, caption, or graphic by asking what the viewer needs to understand about the change. A jump cut may need nothing, a caption may need a small arrival cue, and a graphic that moves may need a sound with matching motion.
Jump cuts
A jump cut is not automatically a sound-design problem. If the speaker's room tone, tone, and eye line remain consistent, a clean edit may be enough. If the cut has a visible punch-in or a deliberate change of section, a brief accent can reinforce the structure.
Use a room-tone bed for continuity and a sound effect for emphasis. Those are different jobs.
If you use a sound to soften a jump cut, cut the effect with the same care as the dialogue. A short sound that starts early may call attention to the cut you meant to soften. Our guide on using sound effects to hide cuts in DaVinci Resolve covers that narrower problem.
Captions
Captions and sound effects serve different accessibility roles. The University of Aberdeen's guide distinguishes captions, which can include all audio information such as music and sound effects, from subtitles, which usually display spoken content. Read the guide's accessibility section when preparing a version for viewers who rely on text.
Don't add a sound merely because a caption appears. A sound can be useful when the caption is part of a designed interface or a label is being selected.
On-screen graphics
Classify the graphic before choosing the sound. A static callout can use no sound or a short arrival cue. A card that slides can use a movement cue. A warning or error graphic can use a carefully chosen signal, but the tone should not be so alarming that it changes the speaker's meaning.
One sound can cover a group of related elements. For a three-part lower-third, a single arrival sound may be enough. For a step-by-step interface demonstration, use a click only when the click explains which control was used.
Screen recordings inside talking-head videos
Screen recordings often tempt editors to add a click to every pointer action. Resist that reflex. Select the clicks that matter to the lesson. If a viewer can see the cursor move to a control and the state change, the important event may be the state change rather than the cursor movement.
If the screen recording already contains usable system audio, check whether your added library effect doubles it. Two clicks that are almost, but not quite, aligned can sound like a mistake.
How do I handle room tone, silence, and clipped dialogue?
Handle room tone and silence before adding decorative sound effects. Repair the continuity of the spoken track, then decide whether any effect belongs on top of it.
Room tone is the bed that tells the ear a sequence shares a space. Keep it on its own track so you can adjust it without changing the dialogue. Use short crossfades between sections when needed, and avoid looping a distinctive sound at an obvious interval.
Room tone after a jump cut
If the room changes between takes, find the quietest consistent portion and lay it under the edit. Use separate beds for different rooms or microphones, and name them clearly.
Don't use an ambience bed that competes with the speaker. The bed should answer a continuity problem, not become a second subject.
Silence before a key sentence
If you reduce room tone before an important line, make the change gradual enough to feel intentional and short enough not to sound like a power failure. A pause can be completely dry, but if the surrounding scene has a strong air bed, an abrupt absolute silence may distract more than the original cut.
Clipped or damaged dialogue
An effect is not a substitute for clear speech. If the dialogue is clipped, distorted, or missing a word, try the original take, a pickup, a cutaway, or a repair workflow. Fairlight has audio repair and cleanup tools, but the amount you can improve depends on what was recorded.
The University of Aberdeen makes the same broader production point in its guide: when the recording has problems, post-production options may be limited, so it recommends attention to microphone placement, room, and unwanted noise during recording. Its talking-head guidance is a useful production reference.
Breaths and pauses
Don't cover every breath with a click or whoosh. Breaths can make a talking head feel human. If you edit them, preserve enough room and rhythm that the sentence still sounds spoken rather than assembled.
If an effect falls on a breath, lower it or move it unless the overlap is intentional. The effect is not more important because it is on a waveform peak.
How do I organize sound effects so I can revise the talking head edit?
Organize sound effects by editorial role, keep names readable, and preserve alternate ideas until the decision is final. Good organization lets you revise the story without rebuilding the mix.
Use role-based tracks
Track names such as SFX Accent, SFX Foley, SFX Transition, and Room describe why the material exists. Names such as Audio 4 and New Track force you to remember the session's history.
If the video is dense, separate roles so a revision doesn't require a mute-and-solo hunt.
Use clip names that survive export
Rename important clips or add notes that describe source and use. soft-ui-click-short is more useful than sound_17. Include the library or recording source in a production note when licensing matters.
Use Fairlight folder tracks in Resolve 21
DaVinci Resolve 21 introduced Fairlight Folder Tracks. Blackmagic's Resolve 21 New Features Guide says you can select a group of tracks, combine them into a composite view, and collapse or reopen the folder while leaving the original tracks unchanged. The guide also states that folder tracks support a maximum of three levels of nesting. Read the Fairlight section of the Resolve 21 New Features Guide.
For a talking-head project, you might put SFX Accent, SFX Foley, and SFX Transition inside an Effects folder while keeping Dialogue, Room, and Music visible. Collapse the folder when you need space for the picture edit. Expand it when you need to refine a cue.
Folder tracks solve space and navigation. They don't decide whether an effect is good. If the folder is full of unused candidates, remove them.
Keep alternate versions reversible
If two clicks work, mute one rather than deleting it immediately while you finish the sequence. Once the section is approved, remove the unused version or store it in a clearly labeled alternate track.
Fairlight supports track and clip editing workflows that let you compare and revise without flattening the original too early. That matters when a client asks for a quieter version, a different tone, or no sound effects at all.
How do I review a talking-head sound-effects mix before publishing?
Review a talking-head sound-effects mix in context, at normal listening level, with optional effects muted and unmuted, then verify accessibility, export format, and licensing. The final review should answer whether the video communicates better with the effects than without them.
Review the story pass
Watch the full section without touching the controls. Note the moments where the sound makes the edit easier to follow and the moments where you notice the mix instead of the message.
Then mute the optional effects. If the sequence becomes clearer, the design is probably overbuilt. Bring back only an effect that restores useful emphasis.
Review the dialogue pass
Listen for every sentence that overlaps an effect. Check word endings and the first consonant after the effect. If you have to concentrate to understand a phrase, fix the effect rather than asking the viewer to work harder.
This is also the time to check the dialogue track organization. Freeman's advice is relevant beyond animation because a clear layout lets you find the material that needs attention. His interview explains why organized dialogue and simplified effects help the mix.
Review continuity, accessibility, and playback
Mute the music and listen to the room. Do cuts make the location jump? Does an effect sound as if it happened in a different space? Does the room bed loop or change abruptly? Repair the bed before adding more effects.
If the final version uses captions, decide how meaningful sound effects should be represented. The University of Aberdeen guide says captions can include audio information such as sound effects and music, while subtitles generally focus on spoken content. Follow the requirements of your audience, publisher, or client. Use its accessibility guidance as a starting reference.
YouTube currently describes viewer-side options such as Stable volume and Voice boost, which can change how background and dialogue are heard. Those features are not a reason to make effects louder. Check a short export on headphones and a small speaker. YouTube documents the controls here.
Review delivery and rights
Use a preset that matches the destination. YouTube's current recommended upload page lists MP4 with AAC-LC, Opus, or Eclipsa Audio options, a 48 kHz sample rate, and 384 kbps as its recommended stereo audio bitrate. Those are YouTube recommendations, not universal requirements. Check the official settings before export.
For every downloaded effect, keep the source page, creator or library name, license, project, and required credit. Confirm that a subscription plan covers the intended publication. An effect can be technically perfect and still be unusable because its rights don't cover the video.
A finished talking-head mix is ready when the effects support the message, the voice survives every overlap, and every asset has a license you can explain.
What changes in DaVinci Resolve 21 and 21.1 affect this workflow?
DaVinci Resolve 21 affects sound-effects work mainly through Fairlight track organization and a few audio-behavior changes, while the current Resolve 21.1 materials continue to present Fairlight as part of the Resolve 21 workflow. Check the exact build notes if a control behaves differently on your system.
| Resolve version or feature | What the official material says | What it changes for a talking-head edit |
|---|---|---|
| Resolve 21 Fairlight Folder Tracks | Tracks can be grouped into a collapsible composite view, with up to three nesting levels | You can keep effects organized without losing the original tracks |
| Resolve 21 mono added to a stereo track | The Resolve 21 New Features Guide says mono audio added to stereo tracks plays on both left and right channels, where the earlier behavior placed it on the left only | Check a mono click or recording in stereo playback instead of assuming it is left-only |
| Resolve 21 clip EQ workflow | Blackmagic's Fairlight materials describe clip adjustments and a six-band parametric EQ on clips and channels | Tone shaping can happen close to the clip when a small effect needs a controlled change |
| Fairlight Sound Library | Blackmagic documents search, audition, confirmation, cancellation, and playhead synchronization | You can compare effects in the actual cut before committing to one |
| Fairlight track FX Ducker | Blackmagic describes dialogue-driven level reduction and recovery on a target track | Repeated effects or music can move around the voice with less manual gain work |
The mono-to-stereo behavior is easy to miss. If a click suddenly appears centered instead of only on the left, that is consistent with the Resolve 21 change described by Blackmagic. Use the channel mapping and pan controls when the intended placement is different.
The broader lesson is not to memorize every new feature. Keep the version context visible when you create a tutorial, template, or checklist. A control that exists in Resolve 21 may have a different menu location or behavior in an older project environment.
Should I buy a library or build my own sound-effects collection?
Build a small original and Fairlight-based collection first, then buy a library when repeated projects make search time or licensing administration the bottleneck. A paid catalog is a convenience and rights workflow, not a replacement for editorial judgment.
Use the following decision matrix:
| Your situation | Start with | Why | What would change the decision |
|---|---|---|---|
| One occasional talking-head video | Original recordings and Fairlight Sound Library | Low commitment and enough variety for simple accents | A missing signature sound or a tight deadline |
| Weekly educational videos | A small organized catalog plus a paid option to compare | Repetition makes fast search and consistent style valuable | The license does not cover your publishing model |
| Client or branded work | A library or source with explicit client and commercial terms | Rights need to match the real project, not only your personal channel | The plan excludes ads, client work, or the destination |
| Screen-recording tutorials | Carefully selected UI sounds and original mouse or keyboard recordings | The visible interface should determine the cue | Existing system audio already covers the action |
| Product demonstrations | Original Foley for the product, supported by a catalog | The exact material and handling matter | The product cannot be recorded cleanly |
| High-style comedy or commentary | A deliberate sound vocabulary with a few designed accents | Timing and repetition can be part of the voice | Effects start competing with the joke or point |
If you do evaluate a paid service, compare the free Fairlight route, recording your own effects, and another library with the same checklist. Ask whether the catalog covers sound effects alone, whether the plan fits your publishing model, whether client use is allowed, and how you document the license.
The affiliate recommendation above is strongest for a creator who repeatedly needs licensed music and sound effects and wants to reduce catalog switching. It is weaker for someone making one short video, someone who prefers original Foley, or a client whose contract requires the client to own or directly license every asset. In those cases, choose the simpler workflow.
How do I decide whether an effect is worth keeping?
Keep an effect when removing it makes the edit less clear, less continuous, less physical, or less intentionally emphatic. Remove it when the only argument for keeping it is that you already spent time finding or editing it.
Run this final decision sequence:
- Watch the picture with dialogue and room tone.
- Identify the visual or editorial event.
- Mute the effect.
- Ask what meaning, continuity, or emphasis disappeared.
- Unmute the effect at a restrained level.
- Check the words that overlap it.
- Trim the attack and tail.
- Compare a quieter candidate and a dry version.
- Keep the version that communicates best, not the version that sounds biggest.
For a talking head video, sound-effect selection is an editorial decision before it is a library decision.
Dialogue clarity is the first mix decision in a talking head video, and every sound effect must fit underneath it.
If you are starting today, make one small test timeline. Put the dialogue on a named track, add one room bed, and create three effect moments: a graphic arrival, a physical action, and a section transition. Keep only the candidate that still works when the dialogue is playing at normal level.
Frequently asked questions
- What sound effects work best for a talking head video?
- Use restrained whooshes, clicks, taps, notification tones, room tone, and short transition accents when they explain a visual event or support the speaker's point. Avoid effects that compete with the voice or decorate every cut.
- How loud should sound effects be under dialogue?
- There is no universal sound-effect fader value. Start quietly, lower the effect until every spoken word remains easy to understand, and check the whole mix with a loudness meter and on more than one playback system.
- Do I need a sound effect for every jump cut?
- No. Add an effect only when the cut needs emphasis, the graphic creates a real event, or the sound helps the transition feel intentional. A clean cut with room tone is often better than a repeated whoosh.
- Can I use the Fairlight Sound Library in DaVinci Resolve 21?
- Yes. DaVinci Resolve provides a Fairlight Sound Library workflow and a Sound Library panel for searching, auditioning, and syncing effects. You can also import your own library or record original Foley.
- Should I buy a sound-effects library for talking head videos?
- Buy one when you publish often and need a repeatable, licensed source of effects. If you make occasional videos, start with original recordings and the Fairlight Sound Library, then pay for a catalog only when search time or licensing is the real bottleneck.
Sources
- DaVinci Resolve Fairlight audio tools
- DaVinci Resolve 21 New Features Guide
- Blackmagic Design support center and Resolve 21 release notes
- YouTube recommended upload encoding settings
- YouTube video and audio quality enhancements
- ITU-R BS.1770-5 loudness and true-peak measurement
- EBU R 128 loudness normalization recommendation
- Create a Talking Head Video, University of Aberdeen
- Interview with re-recording mixer Eric Freeman
- Creative Commons license chooser and reuse guidance
- Epidemic Sound sound effects and Resolve workflow
Keep reading
Guides · Sep 14, 2026 · 38 min
How to Find Sound Effects by Description for Video Editing
Find better sound effects by describing the action, texture, space, and timing, then search Fairlight, Soundly, Freesound, or a licensed library.
Guides · Aug 24, 2026 · 8 min
How to Layer Sound Effects in DaVinci Resolve 21
Learn how to layer sound effects in DaVinci Resolve 21 with a clean Fairlight track layout, precise sync, volume shaping, and practical mix checks.
Guides · Aug 28, 2026 · 8 min
How to Make Sound Effects Realistic in DaVinci Resolve 21
Make sound effects realistic in DaVinci Resolve 21 with layering, EQ, reverb, panning, automation, and room-aware mixing in Fairlight.