Articles / Guidesupdated for DaVinci Resolve 21.1 (September 2026)
How to Create a Phone Notification Sound in DaVinci Resolve
Quick answer
To learn how to create a phone notification sound in DaVinci Resolve, generate or import a short tone on Fairlight, trim it tightly, add a small pitch movement, shape its EQ, and apply a tiny fade. Layer texture only if the alert needs more character, then export the finished clip as WAV or use it in your timeline.
I make phone notification sounds in Resolve by building a small tone, trimming it tight, and shaping it with pitch, EQ, and a controlled tail. I start on Fairlight because its audio tools sit inside the edit. I target DaVinci Resolve 21.1 as of September 2026.
This small question exposes the difference between knowing where a button is and knowing what the sound needs to do. My advice is simple: make the alert readable first, stylish second.
How do I create a phone notification sound in DaVinci Resolve?
To create a phone notification sound in DaVinci Resolve, you need a short source, a clean edit, a distinct pitch shape, and a level that works in context. You don't need a long music bed, a complex bus layout, or a large collection of plug-ins.
Fairlight is DaVinci Resolve's integrated audio post-production page. Blackmagic Design describes it as a part of Resolve for recording, editing, mixing, dialogue repair, equalization, dynamics processing, and mastering, all alongside the picture edit. The Fairlight page is therefore the right place for this job, even if you only need one tiny sound. Blackmagic's Fairlight overview documents that integrated workflow.
The complete workflow looks like this:
| Stage | What you do | What you are listening for |
|---|---|---|
| Source | Generate a tone or import a licensed effect | A stable starting sound |
| Shape | Trim the attack, body, and tail | A clear event with no wasted silence |
| Identity | Add pitch movement, EQ, or a small texture | A sound that isn't just a test tone |
| Context | Place it against picture, speech, or music | Recognition without distraction |
| Delivery | Keep it in the project or export audio only | The right file for the next step |
Start with one tone. A notification can be a single bright beep, two notes that rise, two notes that fall, or a short chord. The number of layers doesn't decide whether it works. The shape does.
The first pass should be plain. If you begin with delay, distortion, reverb, a second layer, and aggressive EQ, you won't know which decision helped.
The safest order is also the easiest to revise. Cut first. Set the tone's level second. Change pitch third. Add tone color fourth. Add space last. That order keeps the main event in charge.
What should a phone notification sound sound like before I edit it?
A phone notification sound should announce one small event quickly, then leave space for the viewer to understand what happened. Treat it as a sonic icon: a compact shape with a readable beginning, a meaningful middle, and a short ending.
There are three parts to listen for:
- The attack is the first instant of the sound. It tells the ear that something happened. An attack can be a clean sine-like start, a tiny click, a filtered noise tick, or the front edge of an imported sound.
- The body is the pitch and tone that makes the alert recognizable. It might be one note, a two-note interval, or a bright partial over a softer body.
- The tail is what remains after the event. A dry alert can stop quickly. A spacious alert can have a short echo or reverb tail. The tail should serve the scene rather than turn a notification into a musical phrase.
The most useful design question is not “What does a phone sound like?” Ask instead, “What does this event need the audience to understand?” For a new message, a rising two-note sound can read as arrival. For a warning, a falling interval or rougher texture can feel heavier. These are design choices, not Resolve defaults.
Before opening an effect, write a tiny brief. Use four lines:
| Question | Example answer |
|---|---|
| What happened? | A new message arrived |
| How quickly should the audience notice? | Immediately, but not violently |
| What mood does it carry? | Friendly and modern |
| Where will it play? | Under a line of dialogue |
That brief prevents a common mistake. A sound that works in isolation may be too bright, too long, or too dramatic for the picture.
If the sound represents a fictional device, don't copy a recognizable branded ringtone note for note. Build a new contour from a different interval, rhythm, or texture. If you start with a downloaded effect, check its license before publishing.
The first useful test is a mute test. Watch the picture with no alert, then play the alert alone and in the scene. If it feels too important by itself, it probably needs less level, less tail, or both.
A convincing phone notification sound is a short edited event, not a long music cue.
Should I generate the tone in Resolve or import a sound effect?
Generate the tone in Resolve when you want control over pitch, duration, and originality; import a sound effect when you need a more natural, designed, or recorded texture quickly. Both methods can produce a publishable result, and neither is automatically the professional choice.
| Starting point | Best when | Main advantage | Main limitation |
|---|---|---|---|
| Fairlight oscillator | You want a clean beep, two-note alert, or controlled test source | You can choose the tone parameters inside Resolve | A raw tone can sound generic until you shape it |
| Recorded object | You want a tactile click, tap, or device-like noise | Real material can give the alert character | Room noise and unwanted resonance may need repair |
| Licensed sound library | You need a polished effect or a fast first draft | The sound may already have a useful attack and tail | License terms and editability vary |
| Synthesized file from another tool | You already have a sound-design setup elsewhere | You can use a specialized synthesizer | It adds a handoff and another file to manage |
| Existing project sound | The alert is a variation of an effect already approved | It keeps a sequence sonically consistent | Copying the same event can feel repetitive |
The oscillator is the cleanest starting point for this exact query because it gives you a neutral raw material. Blackmagic's Fairlight documentation describes a general-purpose oscillator for tones, noise, and beeps. The older official Resolve 15 New Features Guide records a frequency range from 20 Hz to 10 kHz, a level range from -50 dB to +10 dB, tone presets at 100 Hz, 440 Hz, 1 kHz, and 2 kHz, plus white-noise and pink-noise choices. Resolve 21 may present the generator under a test-tone label, so use the menu name shown by your installation while keeping the same concept. Read the oscillator description in Blackmagic's guide.
Those ranges are capabilities, not recommendations. Start in a comfortable middle register, then move until the sound has the identity you need.
Importing is better when the sound already contains the thing you would otherwise build. A device click, a small burst of air, a softened glass tap, or a synthetic chime can provide an attack that a clean oscillator lacks. You can still edit the file in Fairlight. The imported clip has the same useful decisions available at the timeline level: trim, fade, gain, pitch, pan, and clip EQ.
Do not confuse the Effects Library with a library of ready-to-place sound files. Fairlight FX are processors. Blackmagic's beginner guide lists effects such as Delay, Distortion, Echo, Modulation, Pitch, Reverb, and Stereo Width as Fairlight effects. You apply those to an audio clip or track. They don't automatically give you a notification sound to drag into the timeline. Blackmagic's Fairlight FX lesson explains the distinction through its effect workflow.
If you are choosing a source for a client video, ask two separate questions. “Does this sound fit?” is the creative question. “Am I licensed to publish it in this project?” is the rights question. Keep the license information with the project media.
If you are making a personal sound library, keep the dry generated tone and the shaped notification. Name them by role, not by a vague label such as “beep final.”
Good names include phone-alert-rise-dry, phone-alert-rise-bright, and phone-alert-rise-under-dialogue. The names make the next decision easier. They also reduce the temptation to keep opening old projects to discover what a file sounds like.
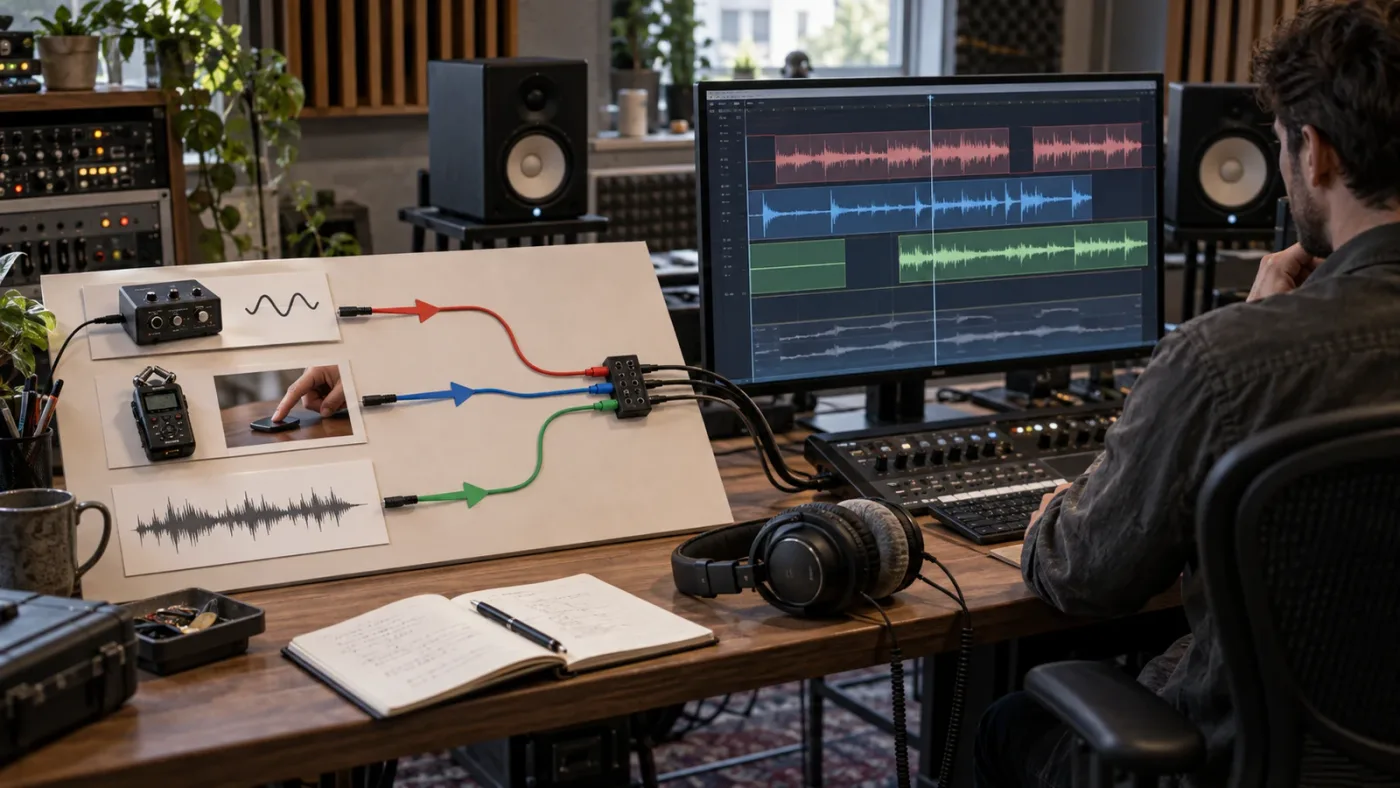
How do I prepare a DaVinci Resolve 21 timeline for the notification?
Prepare the timeline by placing the notification on its own audio track, zooming until you can see the waveform clearly, and giving yourself enough space before and after the event to judge the cut. A separate track keeps the alert easy to audition and easy to rebalance.
Open the project and go to the Fairlight page. Blackmagic describes Fairlight as a dedicated audio page integrated with picture editing, and the current DaVinci Resolve 21 product pages list Fairlight as part of the Mac, Windows, and Linux application. The official Resolve product page describes the page layout and the operating-system availability shown for Resolve 21.
If the picture already contains dialogue or music, find the moment where the alert belongs before generating anything. Put a marker there if that helps you return to it.
Create a dedicated track with a clear name. “SFX Notification” is enough. If you want separate layers, use names such as “SFX Notification Main,” “SFX Notification Texture,” and “SFX Notification Tail.” Keep dialogue, music, and ambience on their existing tracks.
The track separation matters for three reasons:
- You can solo the notification without muting the rest of the project.
- You can adjust the whole alert family with a track level after shaping the individual clips.
- You can export a clean audio-only version without accidentally including dialogue or music.
At the start, leave the track dry. Don't add a track effect before you know whether the raw sound is too bright, too dull, too long, or too short. A clear signal path makes troubleshooting much easier.
Set up a loop around the event when you are comparing small changes, but also listen to the alert once in the complete scene. The Fairlight page combines clip and waveform editing in one view, and Blackmagic documents direct timeline controls for fades and clip gain. See the official Fairlight clip-adjustment description.
Resolve 21 adds Fairlight folder tracks. Blackmagic's Resolve 21 New Features Guide says folder tracks let you select a group of tracks, combine them into a single composite view, and collapse the folder while leaving the original tracks unchanged. That is useful when your alert grows from one clip into a main tone, texture, tail, alternate take, and print version. Read the folder-track entry in the official Resolve 21 New Features Guide.
Don't put every sound effect in one folder just because the feature exists. Use a notification folder when multiple layers belong together.
Before you record a generated tone, save the project. A saved starting point makes experimentation less stressful.
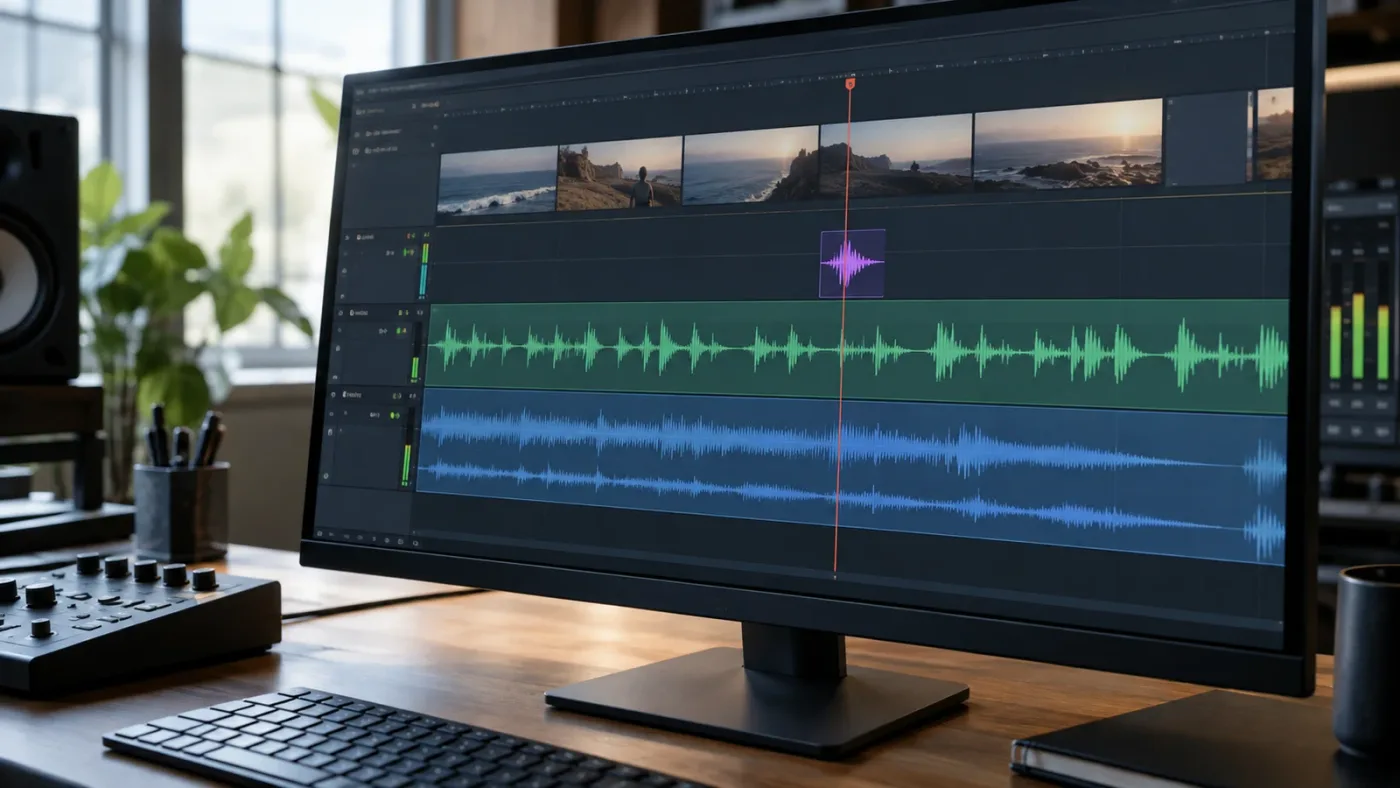
How do I create the source tone in Fairlight?
Create the source tone by opening the Fairlight generator settings, choosing a tone, patching the generator to an audio track, arming that track, recording a short pass, and then trimming the recorded clip. The generator is a source, not the finished notification.
The exact menu label can vary across Resolve releases. In older Blackmagic documentation it appears as Fairlight > Oscillator Settings; other Resolve versions and current community instructions may refer to test-tone settings or a system generator. The important operations are the same: configure a generator, patch it to the track input, record it, and edit the resulting audio clip. Check the menu and Help documentation inside your installed Resolve 21.1 build if the wording differs.
Use this sequence:
- Open the Fairlight page and select the notification track.
- Open the Fairlight generator settings. If you see separate tone and noise controls, start with the tone control.
- Choose a simple tone rather than noise for the first pass.
- Set a conservative generator level while you work. Blackmagic's documented oscillator control range is much wider than you need for a small alert, so don't treat the maximum as a target. The official oscillator documentation lists the range and presets.
- Open
Fairlight > Patch Input/Output, or the equivalent patching command in your build. - Choose the generator or oscillator as the source and the track input as the destination.
- Select the channel on the notification track, apply the patch, and close the patch window.
- Arm the notification track for recording.
- Start recording, let the generator run long enough to give you room to trim, and stop recording.
- Disarm the track before making further edits.
Blackmagic's official Fairlight training material uses this same general idea for recording a tone: choose the generator as a source, choose track input as the destination, select the track channels, apply the patch, and record. The Fairlight Audio Guide to DaVinci Resolve 20 also describes working with Resolve's built-in oscillator to record noise and tones. The current official Fairlight training guide is listed here, and the Resolve 20 Fairlight guide is available as a Blackmagic PDF.
If the generator doesn't appear in the patch source list, check whether it is enabled, select the track channel as the destination, and confirm that the track is armed. Patching a generator to your speakers lets you hear it, but patching it to a track input and recording is what creates the editable clip.
Record enough source to find a clean front edge and a usable tail, then zoom into the clip and trim while listening. Don't cut the clip solely by time.
You can also skip recording the oscillator and use an imported WAV, recorded tap, or existing sound. If you want two notes, duplicate the source, trim the second clip, and change its pitch. Keep the original source on a muted “Source” track when you are making several variations.
DaVinci Resolve 21 can generate a source tone in Fairlight, then shape that tone with clip editing and Fairlight FX.
Fairlight's oscillator is starting material, not a finished phone notification sound.
How do I trim a notification sound so it feels intentional?
Trim the notification into a clean attack, a compact body, and a tail that ends before the audience starts waiting for it. A short sound often feels more expensive after you remove the first and last pieces that don't carry meaning.
Select the recorded or imported clip. Use the timeline edge handles to shorten it, or make a precise cut and remove the unwanted section. Blackmagic documents fade handles on the side of Fairlight clips, direct clip-gain editing on the waveform, and clip-level controls in the Inspector. Use the Fairlight clip-adjustment reference when your interface doesn't match a tutorial.
Listen to the attack, body, and tail separately. Remove silence before the attack, change the pitch or duration if the body feels generic, and use a short fade when a hard stop clicks. A long tail may be attractive in isolation and distracting in a fast scene.
Use a simple timing worksheet:
| Part | Starting editorial choice | What to change first |
|---|---|---|
| Attack | Very short and clear | Move the start edge |
| Body | One note or two-note contour | Change duration or pitch |
| Tail | Dry stop or short decay | Shorten tail or add fade |
| Gap | Empty space after the event | Protect the next word or action |
The table is a decision aid, not a set of universal timings. Resolve can show a clip in frames and timecode, while the sound itself is judged by its shape. A notification that works at one timeline frame rate may still need a different edit when the scene has a different rhythm.
For a visual message bubble, align the attack with the moment the message becomes visible or readable, then test the sync against the reaction. The best sync point is the story beat, not automatically the first cut.
The Fairlight page offers sample-accurate editing according to Blackmagic's product description. That matters when the visible picture and the audible attack are close enough that one frame changes the perceived sync. Blackmagic's DaVinci Resolve download page describes Fairlight as including sample-accurate editing, alongside realtime effects and audio post tools.
If the source is a two-note recording, split the notes only when you need independent timing. Keeping them together protects their original relationship.
The waveform is helpful, but it isn't the judge. A large waveform can still sound weak if the attack is soft, while a small bright peak can sound sharp. Keep listening at a moderate level.
If the source still sounds artificial after timing, pitch, and EQ changes, our guide to making sound effects realistic in DaVinci Resolve is the next useful reference. Treat realism as a timing and context problem before reaching for more effects.
How do I make the chime feel like a real phone alert?
Make the chime feel like a phone alert by giving it a recognizable pitch contour, a controlled high-frequency edge, and enough silence after it to read as a single event. The fastest improvement usually comes from pitch movement, not from stacking more plug-ins.
Blackmagic's Fairlight page documentation says that each timeline clip has volume, pan, pitch, and 6-band parametric EQ controls, with additional controls in the Inspector. That gives you enough local control to shape a simple tone without leaving Resolve. See the clip-control details from Blackmagic.
Option 1: A single-note alert
A single note works when the picture already carries most of the meaning. Use a clean attack, a short body, and a quick release. If it feels like a test tone, shorten the body or add a subtle second texture at the start.
The mistake is to solve a generic sound with loudness. Loudness makes the event more noticeable, but it doesn't give the event a distinct identity. Change the contour or timbre first.
Option 2: A rising two-note alert
A rising two-note alert works for arrival, progress, or a positive response. Duplicate the source clip, shorten the first note if needed, move the second note after it, and raise the second pitch until the interval reads clearly.
Leave enough space between notes to hear the direction. Too little space creates one thick sound, while too much can make the alert feel like a tiny melody.
Option 3: A falling two-note alert
A falling two-note alert works for caution, completion, or a less cheerful feel. Use the same method as the rising alert, but lower the second note. Keep the fall small for a neutral system-message character.
Option 4: A soft chime with a body layer
A soft chime can use a bright upper tone over a quieter, shorter low body. The body gives the sound weight on smaller speakers. Keep it quieter than the main tone and trim it so it doesn't become a separate thump.
Put the body on “SFX Notification Texture,” then move its attack until it supports the main transient. Solo each layer, then listen to both together. If you can clearly identify two sounds, reduce the layer or shorten it.
Clip pitch versus a plug-in
Use the clip's Pitch control for one notification clip. Use a Fairlight Pitch effect when the processing belongs to a track or needs its own controls. Choose based on where the change belongs.
Don't apply a track-level pitch effect to a track containing unrelated alerts unless you want every alert to change. Keep the notification family on its own track when a shared sound is useful.
If your interface shows pitch in the Inspector, select the clip, open the audio controls, and adjust the pitch while looping the event. If the control isn't visible, use a Fairlight Pitch effect from the Effects Library. The Fairlight page and official training guides are the best authority when labels differ.
EQ for a readable alert
Use EQ to make room for the scene, not to make the notification look active on a graph. Start with the unprocessed sound and decide whether it is boomy, dull, or sharp.
If it is boomy, reduce the low body carefully. If it is dull, add upper presence only until the attack reads. If it is sharp, reduce the high edge or soften the attack.
The 6-band parametric EQ documented for Fairlight clips is enough for targeted changes. You don't need to use all 6 bands. One small move often beats six large moves. Blackmagic documents the 6-band clip EQ and the Inspector controls here.
A restrained effect chain
For a first designed version, try this order:
- Clip trim and fades.
- Clip level.
- Pitch or pitch contour.
- EQ.
- Optional delay or reverb.
Fairlight FX includes time-based effects such as Delay, Echo, and Reverb, as well as Distortion, Modulation, Pitch, and Stereo Width. Blackmagic's Fairlight training material shows these effects as tools for repairing audio and designing sounds. Read the official Fairlight FX lesson.
Start with the effect bypassed. Turn it on briefly, then off again. If it only sounds better because it makes the clip louder or longer, match the levels and compare again.
Reverb is easy to overuse on a phone alert. It can make the sound feel like it belongs in the picture, but it can also place an imaginary room around a device that should feel close and dry. Delay can make a one-note sound feel like two events. Distortion can add edge, but it can also make a small speaker painful.
Use the Wet/Dry balance or equivalent mix control to keep the processed version behind the original. The goal is a clear alert with a hint of character, not an effect demonstration.
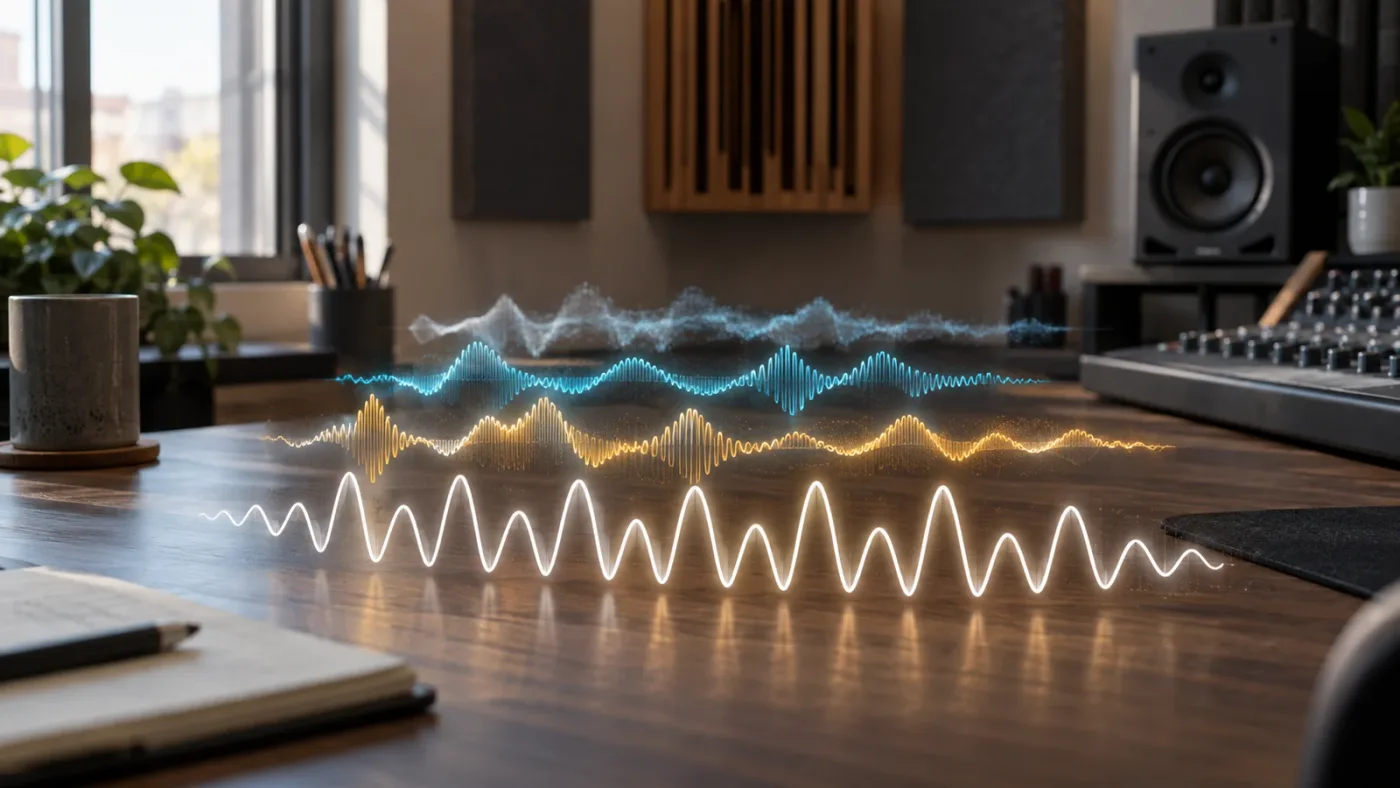
Pitch movement gives a notification sound more identity than loudness alone.
How do I layer a notification sound without making it muddy?
Layer a notification sound by assigning each layer a job, aligning the attacks, and removing anything that doesn't improve the combined event. A layer should add body, edge, or space. If it has no job, delete it.
Use this three-layer model:
| Layer | Job | Typical treatment |
|---|---|---|
| Main tone | Carries the identity | Clear pitch and stable level |
| Texture | Adds click, air, or weight | Quieter, shorter, and filtered as needed |
| Tail | Connects the event to the scene | Low in level and short in duration |
The main tone should remain understandable when the other layers are muted. That is your safety net. Build the texture around it, not the other way around.
For a click layer, use a short transient at or just before the main attack. If it arrives late, the notification can sound like two separate actions.
For an air layer, use a filtered noise burst or a soft imported texture. Keep it low so it doesn't become hiss under dialogue.
For a body layer, use a lower, shorter tone. It should be felt as weight, not heard as a second musical note. If the body is muddy, shorten it before cutting more low frequency.
For a tail layer, use a duplicate with a different treatment or a short reverb return. Check whether the scene already has ambience before adding more.
Line up the layers using the waveform and your ears. The largest peak is not always the perceptual attack. A bright click may look small and still lead the sound. A low body may look large and feel soft.
Try the subtraction test. Play all layers, then mute the main, texture, and tail in turn. The layer that makes the event collapse is essential. The others need to improve the event in context.
Resolve 21's Fairlight folder tracks can help when your sound-design timeline has several related tracks. The official Resolve 21 New Features Guide says the tracks inside a folder remain available and can be shown or hidden through the folder view. Use that organization when you have enough layers to benefit from it. See Blackmagic's folder-track documentation.
Don't normalize each layer to the same peak and assume the mix is balanced. Set the layers while listening to the combined event.
If the main tone is stereo, check whether the alert needs stereo width at all. A centered alert is often easier to recognize. Pan a texture only when the picture gives you a reason.
The finished composite should still work when the essential layer is heard alone. If every layer must be loud, you have probably designed around loudness instead of shape.
If you need a fourth layer, stop and name the problem first. Are you missing body? Attack? A sense of room? A fourth layer may solve it. It may also hide a timing or pitch problem.
For a broader layering exercise, use our guide to layering sound effects in DaVinci Resolve. The same principle applies here: every layer needs a job.
Why is my phone notification sound too loud, harsh, or weak?
Your phone notification sound is usually too loud, harsh, or weak because its peak, spectrum, and context were judged separately. Fix the relationship between those three things before adding another effect.
If it is too loud
Lower the clip gain or track level, then listen again against the full scene. Don't judge the notification from the waveform alone. Blackmagic documents a clip-gain line and Inspector level controls, so you can make the correction locally without changing every sound effect. See the Fairlight clip-adjustment controls.
If the alert still feels aggressive after the level comes down, check its attack. Shorten the attack or reduce the bright layer before lowering the entire event again.
If the alert is competing with speech, lower it until the next word remains easy to understand. Don't solve competition by boosting the notification. The story usually belongs to the voice.
If it is harsh
Harshness usually lives in the upper edge of the sound, the attack, distortion, or the way the alert is being monitored. Bypass EQ, distortion, and bright texture one at a time. When the pain disappears, you have found the decision to revise.
Make small EQ changes. Blackmagic's Fairlight Audio Guide describes using small increments with equalization and combining processing effects rather than making one extreme move. Read the official Fairlight Audio Guide.
Try shortening the bright layer. A texture that lasts for the whole tone can turn a clean alert into constant fizz. Keep the upper edge near the attack if that is where you need recognition.
If it is weak
A weak alert may lack a clear attack, a stable pitch, or a midrange that survives playback. Try a shorter body, a distinct two-note contour, or a quiet body layer before raising level.
Listen on the playback systems you actually use. If the sound only works on studio monitors, it isn't finished for a social video.
If it is boomy
Shorten the low body and inspect the EQ. A low layer can be useful for weight, but it may collide with a voice, music bass, or room rumble. Make the body shorter before making it dramatically quieter.
If it is too dry
Add a small amount of space only after the dry version works. Use a short room or echo tail and keep the original attack intact. If the alert becomes less precise, reduce the effect rather than extending the dry clip.
If it is too long
Cut the tail. A notification that continues under a reaction shot can make the scene feel slow. Preserve only the part that tells the audience what happened and the amount of tail that supports the edit.
The same decision applies to a sourced effect. Don't keep a long imported clip just because the library delivered it that way.
The best notification sound is the one that remains readable under speech, music, and small speakers.
How do I make a notification sound fit under dialogue?
Make a notification sound fit under dialogue by choosing its sync point first, lowering it until the next words remain clear, and using EQ or automation only when a simple level move isn't enough. Dialogue gets the first claim on attention in most scenes.
Place the alert on its own track. Solo it, then un-solo it. Listen to the moment before the alert, the alert itself, and the first words after it. The transition out of the alert matters as much as the alert.
If the alert overlaps a word, try moving it a few frames earlier or later before processing it. A small timing change can solve what sounds like a volume problem. If the alert must stay in that exact position, lower its level and shorten its tail.
Use clip-level keyframes when only one instance needs to move in level. Blackmagic documents adding clip-volume keyframes with an Option-click workflow on supported keyboard layouts, then dragging the keyframe to adjust the level. The exact modifier can depend on the operating system and control mapping. See Blackmagic's clip-adjustment instructions.
When the alert and voice occupy the same bright range, reduce the alert's upper edge rather than cutting the voice. The voice is usually the primary message. But don't EQ by habit. Compare the alert in solo and context so you know the change improved the scene.
When the alert masks only one word, use a small local dip on the alert. Don't lower the whole track for the entire scene. When the alert masks every word, revisit its design. A level correction may be treating a structural mismatch.
If the dialogue is already mixed too loudly or too softly, solve that mix issue separately. A notification is not a substitute for a balanced dialogue track. The alert should be judged against the working mix, not against a randomly selected voice clip.
Use the mute test again. Watch the scene with the alert removed. If the dialogue becomes much easier to follow, the alert is taking too much space. Bring it back at a lower level or with a shorter tail. The goal isn't to make the alert disappear. The audience should notice it without having to work around it.
The official Fairlight page also documents clip normalization. Normalization can adjust a clip toward a target level, but it doesn't decide how loud the notification should feel against dialogue or music. Use normalization as a preparation tool, then mix by context. Blackmagic describes normalization alongside the Fairlight clip controls.
How do I make a notification sound repeat without sounding copied?
Make repeated notifications feel intentional by changing timing, pitch, level, or tail while keeping one recognizable design language. Copying the exact same clip at identical intervals can make a scene feel mechanically edited.
First decide whether the repeated alert represents the same event or a sequence of events. If it is the same device repeating the same alert, a consistent sound may be correct. If the sequence grows more urgent, let the sound design change with the story.
Useful variations include:
| Variation | What it communicates |
|---|---|
| Lower level | The event is farther away or less important |
| Shorter tail | The pace is increasing |
| Slight pitch change | The event has a new status or emotional color |
| Different gap | The rhythm is changing |
| Removed texture | The scene is quieter or more focused |
Don't vary everything at once. The audience should recognize the device or alert family. Change one feature, compare the result, and keep the version that supports the picture.
If you duplicate the clip, check whether the first fade or tail overlaps the next notification. Two tails can create an unintended chord or blur the rhythm. Shorten the tail or make the gap more generous.
If you want an escalation, use a progression. Start with the clean main tone. Add a little more body on the second alert. Tighten the tail on the third. Then stop escalating when the picture has made its point.
Why does my notification sound click at the beginning or end?
A notification sound clicks because its waveform is being cut abruptly, its processing creates a discontinuity, or an imported file contains an edge that was never meant to be the final boundary. The first fix is a clean edit with a short fade.
Zoom in on the start and end of the clip. Move the boundary slightly and listen. If the click changes or disappears, the cut is the cause. Add a short fade in or fade out using the Fairlight clip handles. Blackmagic documents those fade handles as direct controls on the sides of audio clips. See the official Fairlight clip-adjustment overview.
If the click remains, bypass the plug-ins. A delay, distortion, modulation, or reverb can create a click when its processing is forced to stop with the clip. Re-enable the effects one at a time.
If the source was imported, inspect whether the click exists in the source file. Place the clip in a clean section of the timeline and listen before adding effects. If the click is already there, trim a clean section or repair the source instead of hiding it with more processing.
If the click happens only after duplicating the clip, check for a tail overlap. Two clips that touch at the wrong boundary can produce a sharp join. Add a tiny gap, overlap with a deliberate crossfade, or trim both edges.
If the notification uses a generated oscillator tone, a fade is still useful. A pure tone can be especially unforgiving when it stops instantly. A fade doesn't need to be audible as a swell. It only needs to make the boundary disappear.
If you hear a pop only during playback but not in the export, check the playback performance and the effect processing. If you hear it in the rendered file too, the edge or effect chain is the stronger suspect. Render a short test rather than guessing from one playback mode.
Don't make the fade so long that the notification loses its attack. The alert still needs a beginning. The fade should smooth the boundary, not turn the sound into a slow ramp.
How do I organize multiple notification versions in Resolve 21.1?
Organize multiple notification versions by separating source, design, and print clips, then use Fairlight folder tracks only when the collection is large enough to benefit from collapsing. Resolve 21 introduced folder tracks for Fairlight, which can reduce timeline clutter while preserving the underlying tracks.
Blackmagic's Resolve 21 New Features Guide describes folder tracks as a way to select several audio tracks, view them as a composite, and collapse them into one track-sized view. The original tracks remain unchanged and can be reopened through the folder. Read the official Resolve 21 folder-track description.
Use three levels of organization:
- Source tracks contain the oscillator recording, raw field recording, or imported licensed asset. Keep them muted after you choose a design.
- Design tracks contain the working main tone, texture, and tail layers. These are the clips you edit.
- Print or use tracks contain the chosen composite that belongs in the picture. These are the clips you mix against dialogue and music.
For a one-off alert, this may be too much. One source clip and one active track are enough. The point is not to build a sound library inside every project. The point is to make revisions safe when the project needs them.
If you create a folder, name it by function, such as NOTIFICATION - MESSAGE or NOTIFICATION - WARNING. Avoid names such as new folder or sound stuff. Folder names become part of the project's memory.
Keep versions in bins as well as on tracks when you are building a reusable asset. A bin named SFX - Phone Notifications can contain the dry source, shaped alternatives, and the final WAV. If you only need a timeline effect, keep the organization local to the project.
Don't leave a dozen muted alternatives scattered across the active edit. They make it harder to see what the audience will actually hear. Collapse or move them once the decision is made.
Resolve 21 also gives you a current version context for this guide. Blackmagic's What's New page identifies Fairlight's folder function as a Resolve 21 feature and the current page refers to Resolve 21.1 updates. If you are using an older build, you may not see folder tracks. The core tone, clip, EQ, pitch, fade, and export workflow does not depend on the folder feature. Check Blackmagic's current What's New page.
How do I export the phone notification sound from DaVinci Resolve?
Export the phone notification sound by using the Deliver page's audio-only option, selecting Wave with Linear PCM, choosing the correct sample rate and bit depth for the destination, and rendering one clean clip. Keep the project version as your editable master.
If you only need the sound inside the current video, leave it in the timeline. Export an audio file when you need to reuse, send, or archive the notification.
The official Fairlight Audio Guide demonstrates an audio-only delivery workflow using Wave format and Linear PCM, with the sample rate set to the project and a selectable bit depth. See the audio-only export lesson in Blackmagic's Fairlight guide.
Use this export sequence:
- Select the notification timeline or the part of the timeline that contains the finished sound.
- Check that unrelated tracks are muted or excluded from the audio-only render.
- Go to the Deliver page.
- Choose the audio-only render option.
- In the audio settings, choose Wave as the format.
- Choose Linear PCM as the codec when you want an uncompressed edit-friendly master.
- Set the sample rate to the project rate unless the receiving system specifies another rate.
- Choose the bit depth required by the destination. The official Fairlight lesson demonstrates 16-bit and notes that 24-bit or 32-bit files may be used when delivery requirements call for them.
- Choose the output track that contains the notification.
- Set a clear filename and destination.
- Add the job to the render queue and render it.
- Listen to the exported file outside Resolve before you archive or send it.
For a reusable effect, use a descriptive filename such as phone-notification-message-rise.wav. Add a version only when you expect multiple approved variants, and name the change instead of calling every revision “final.”
Wave with Linear PCM is a good master choice because the Fairlight training material presents it as a standard audio export and the official supported-codec documentation lists WAV with Linear PCM at common sample rates and bit depths. Blackmagic's supported-codec list documents WAV and Linear PCM combinations, while the newer Fairlight guide shows the current export workflow.
Use the project sample rate when there is no delivery instruction. If a post house, game engine, soundboard, or mobile workflow specifies another rate, follow that specification and check the exported file.
Choose the bit depth the destination expects. The choice is a delivery decision, not a way to make an ordinary notification sound clearer.
Export stereo only when the alert needs stereo. A centered mono alert may be easier to place and reuse. Confirm that the selected output contains no music, dialogue, or unrelated effects.
If the audio-only render includes silence before the alert, decide whether that silence belongs to the asset. A reusable notification usually starts close to the event, while a cue asset may need an intentional offset.
After rendering, check the file in a player outside Resolve for its start, end, level, and channel layout. Import the WAV into a blank timeline if you want another check.
Keep the project archive. The WAV is a print, not a substitute for the source tone, edit decisions, and license information.
Is Fairlight enough for this sound in DaVinci Resolve 21?
Fairlight is enough for a clean phone notification, a two-note chime, a layered device cue, and a context-mixed effect. You need another audio application only when the sound requires a specialized synthesis, restoration, or library workflow that Resolve doesn't provide or that you already manage elsewhere.
Blackmagic's current Resolve 21 pages describe Fairlight as integrated audio post production with realtime effects, sample-accurate editing, recording, mixing, and mastering tools. The official download page lists support for up to 2,000 audio tracks with realtime effects, while the Fairlight product page describes clip controls, automation, and dedicated audio editing. Those are broad product capabilities, not a promise that every project needs a large session. Read the official Resolve 21 audio feature list.
For this effect, the useful set is smaller:
| Need | Resolve tool |
|---|---|
| Raw tone | Fairlight system generator or imported audio |
| Timing | Fairlight timeline editing |
| Level | Clip gain, Inspector level, or track fader |
| Movement | Clip pitch or Fairlight Pitch |
| Tone color | Clip EQ or Fairlight EQ |
| Space | Delay, Echo, or Reverb |
| Repetition | Duplicated clips and edited variations |
| Organization | Named tracks and optional folder tracks |
| Delivery | Deliver page audio-only render |
The official Fairlight training curriculum also covers sound editing, recording, sound effects, mixing, automation, and delivery. The training page provides Blackmagic's free training materials and the Fairlight Audio Guide. Start with Blackmagic's official training hub.
What Resolve won't decide for you is the creative verdict. It won't tell you whether the notification belongs before the visual event. It won't know if the tail distracts from a line of dialogue. It won't know if an imported sound is cleared for a commercial project. Those remain editorial decisions.
Grant Petty, CEO of Blackmagic Design, frames the larger application this way in the official Resolve 21 New Features Guide:
“With DaVinci Resolve, you get a complete set of editing, advanced color correction, professional Fairlight audio post production tools, Fusion visual effects and now photo editing all in one application.”
Grant Petty, CEO, Blackmagic Design, DaVinci Resolve 21 New Features Guide
That quote is about the integrated application, not a promise that Resolve replaces every specialist tool. For a notification sound, the integration is the advantage. You can design the sound while watching the picture, then mix and deliver it without changing projects.
What's the best way to learn DaVinci Resolve when a Fairlight tutorial doesn't match?
The best way to learn DaVinci Resolve when a Fairlight tutorial doesn't match is to use the official guide for the control's purpose, then use a current tutorial for the screen layout and a small project for practice. A tutorial is a map, not a guarantee that every version has the same label.
Blackmagic's official training is the authority for Resolve's intended workflow and provides dedicated Fairlight material. Casey Faris's long beginner course gives a broad tour of the Resolve pages and includes Fairlight in a complete learning path. Reddit's DaVinci Resolve FAQ advice points beginners toward the free official training and page-specific books. Udemy offers structured Fairlight courses that can be useful when you want a lesson sequence and practice prompts. These resources win for different reasons.
| Learning route | Choose it when | Watch for |
|---|---|---|
| Blackmagic official training | You want authoritative terminology and project files | Some lessons follow an earlier version, so compare labels |
| Casey Faris on YouTube | You want a broad visual overview and a conversational walkthrough | A full course covers more than this one audio task |
| Reddit's Resolve community | You have a version-specific problem or need several real-world suggestions | Advice varies in quality, so verify important settings |
| Udemy or another structured course | You learn best through a sequence and assignments | Course version and update date matter |
| Small project practice | You want the control to stick after the lesson | The project must have a clear goal, not random clicking |
When a button has moved, search the installed Help menu for the feature name. Search for the function, not only the tutorial's wording.
Try one change at a time. Generate the tone. Trim it. Add pitch. Add EQ. Add space. Render it. That sequence teaches you what each stage does, and it creates a useful asset along the way.
If the labels still don't match, check the current Blackmagic training material and compare the lesson's version with your installed build. Contextual help can shorten the search, but it doesn't replace the official guide, a sound-design ear, or the need to listen to your actual scene. For a simple notification, the workflow above is enough.
The useful lesson from teaching editing is simple: practice a real edit with a clear outcome.
How do I troubleshoot a phone notification sound that won't play?
Troubleshoot a notification that won't play by checking the clip, track, output, and render separately. Start with the smallest test that can tell you which layer failed.
Use this order:
- Select the clip and confirm that its waveform contains audio.
- Check that the clip isn't muted or disabled.
- Check that the notification track isn't muted or soloed away from the output.
- Check the track fader and clip level.
- Check that the main output or bus is receiving the track.
- Bypass the audio effects and test the dry clip.
- Test playback from a short range around the event.
- Render a short audio-only file and test it outside Resolve.
If the waveform is visible but there is no sound, use the official DaVinci Resolve no-audio troubleshooting sibling guide for the broader output checks. This article stays focused on building the notification, but the same track and bus checks apply.
If the file plays in Resolve but the export is silent, inspect the Deliver page's selected output track and audio-only settings. The Fairlight export lesson uses a selected output bus for the render. Blackmagic's audio-only export lesson shows the output-track step.
How do I compare the finished notification against the picture?
Compare the finished notification against the picture in three passes: technical, editorial, and audience. Don't let one impressive playback answer all three.
Technical pass
Check the start, end, channel behavior, and export. The clip should begin and end cleanly, stay inside the working range, and match the expected channel layout.
Editorial pass
Ask whether the alert arrives at the right story moment, competes with the face or line, or delays the next cut.
Mute the alert, play the scene, and restore the alert. If its absence changes the scene in the wrong way, revise timing first.
Audience pass
Listen at the level your audience might actually use on headphones, laptop speakers, and one other playback path. A tiny notification can turn into a painful spike or disappear on a small speaker.
Should I use a generated sound or a licensed notification effect in the final video?
Use a generated sound when the project benefits from an original, controllable alert; use a licensed notification effect when speed, polish, or a specific recorded texture matters more. The final decision should follow the picture and the rights you can document.
A generated tone is easy to revise. You can create a new pitch, shorten the body, or remove the tail without hunting for a similar library asset.
An imported effect can sound human or physical in a way a raw oscillator doesn't, but it arrives with its own timing and tone.
If the project is for a client, don't present an unverified library file as cleared. Confirm the license terms.
What is the final decision for this DaVinci Resolve 21 workflow?
The final decision is to generate a plain Fairlight tone first, trim it into a compact event, give it a small pitch identity, and add only the texture or space that survives the full mix. That workflow answers how to create a phone notification sound in DaVinci Resolve without forcing the effect to become more complicated than the scene.
If the generated tone already works, stop. Export it as an audio-only WAV when you need a reusable asset, or leave it on the notification track when it belongs only to the current edit. If it doesn't work, identify the failing dimension: timing, pitch, tone, level, or tail. Change that one dimension and listen again.
The useful Resolve 21 numbers are capability boundaries, not creative targets. The Fairlight oscillator documentation records 20 Hz to 10 kHz for frequency and -50 dB to +10 dB for level. Fairlight clip controls include a 6-band parametric EQ, pitch, pan, volume, fades, and keyframes. Resolve 21 adds folder tracks for managing groups of Fairlight tracks. Those facts tell you where the controls are. Your ears still decide the verdict. Blackmagic's official Fairlight page, Resolve 21 New Features Guide, and the official oscillator guide document those capabilities.
Frequently asked questions
- How do I create a phone notification sound in DaVinci Resolve?
- Open the Fairlight page, generate a tone with the system oscillator or import a licensed sound, trim it to the exact event, shape it with pitch and EQ, add short fades, and export it as a WAV if you need a reusable file.
- Can DaVinci Resolve make a notification sound without another audio app?
- Yes. Fairlight includes a system oscillator for generating tones, noise, and beeps, and the resulting recording can be edited with Resolve's clip controls and Fairlight FX.
- Why does my notification sound click at the start or end?
- A click usually means the clip starts or stops away from a clean zero crossing, or the edge is too abrupt. Trim the boundary and add a short fade in and fade out.
- Should I use a WAV or MP3 for a phone notification sound?
- Use WAV with Linear PCM when you want an edit-friendly master. Use another format only when the destination specifically requires it.
- How loud should a phone notification sound be in a video?
- Set the notification by context, not by an isolated peak. It should remain clear on small speakers without pulling attention away from dialogue, and it should be checked against the full mix before export.
Sources
- DaVinci Resolve 21 Fairlight audio post-production tools
- DaVinci Resolve 21 download and supported audio features
- DaVinci Resolve 21 What's New
- DaVinci Resolve 21 New Features Guide
- The Fairlight Audio Guide to DaVinci Resolve 20
- DaVinci Resolve 15 New Features Guide, Fairlight oscillator
- DaVinci Resolve 16 Beginner's Guide, Fairlight FX
- DaVinci Resolve 18 Fairlight Audio Guide, audio-only export
- DaVinci Resolve supported codec list
- Blackmagic Design DaVinci Resolve training
- Casey Faris, Introduction to DaVinci Resolve
- DaVinci Resolve community FAQ Friday
- DaVinci Resolve Fairlight course on Udemy
Keep reading
Guides · Aug 24, 2026 · 8 min
How to Layer Sound Effects in DaVinci Resolve 21
Learn how to layer sound effects in DaVinci Resolve 21 with a clean Fairlight track layout, precise sync, volume shaping, and practical mix checks.

Guides · Aug 28, 2026 · 8 min
How to Make Sound Effects Realistic in DaVinci Resolve 21
Make sound effects realistic in DaVinci Resolve 21 with layering, EQ, reverb, panning, automation, and room-aware mixing in Fairlight.
Guides · Jul 8, 2026 · 33 min
DaVinci Resolve Loudness Normalization: The Right LUFS Target
The exact LUFS target for every platform in DaVinci Resolve: -14 for YouTube and Spotify, -16 for podcasts, -23 EBU R128 broadcast. Plus how to set and hit it.