Articles / Guidesupdated for DaVinci Resolve 21.1 (November 2026)
How to Find a DaVinci Resolve Effect Without Knowing Its Name
Quick answer
To find a DaVinci Resolve effect without knowing its name, describe what should change in the picture, then search the Effects Library for that result or a visual synonym. Narrow the search by page and effect type, test likely matches on a duplicate clip, and use a short tutorial or the manual when the result needs a more complex workflow.
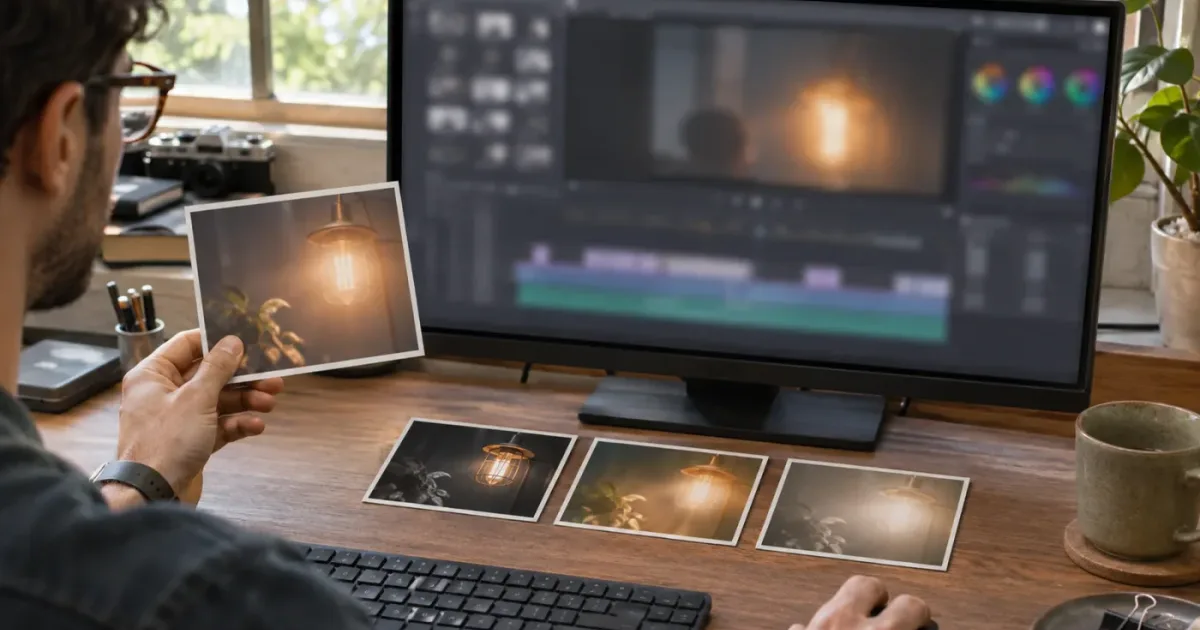
I know the feeling: you can picture the effect, but every search term sounds wrong. The quickest way forward is to describe what the image does, then search the part of DaVinci Resolve where that change belongs.
As of November 2026, this guide is written for DaVinci Resolve 21.1. The central method also works in earlier versions, but specific effects and interface details can change between releases.
How do I find a DaVinci Resolve effect without knowing its name?
Describe the visible result in plain language, translate that description into a few likely effect terms, and search the Effects Library in the right page. Test promising matches on a duplicate clip so you can compare them without risking the original.
Start with the picture, not the presumed tool name. “Make the bright parts bloom” is a better first clue than “I need that one cinematic plugin.” The first phrase describes what you see. The second assumes you already know how the effect is built.
Use this short sequence:
- Say what changes. Does the image glow, blur, warp, become grainy, lose color, or gain a graphic element?
- Say what stays fixed. Is the effect limited to a face, a sky, a title, or one region of the frame?
- Say whether it moves. Does it follow a person, pulse with time, or remain still?
- Pick a likely Resolve page. A clip-level effect, a grade, and a node-based composite may create similar-looking results through different routes.
- Search words, not guesses. Try the everyday description and a few related technical terms.
- Test one candidate at a time. The viewer, Inspector, and node graph can help confirm what the candidate does.
The method has two jobs: find a plausible tool, then decide whether that tool is actually the right solution. Search results are candidates, not proof. A result can have a familiar name and still make the wrong part of the image change.
For example, if a light source appears to have a soft halo, try terms such as “glow,” “bloom,” or “halation.” If a bright streak crosses the frame, try “light rays” or “lens flare.” Those terms are search hypotheses, not a claim that one exact effect always creates the look. The footage, effect controls, and version all matter.
The image you want is a better search clue than the effect name you don't know.
If you can’t yet describe the result, use a three-part note: what changes, where it changes, and when it changes. “The background becomes soft, the subject stays sharp, and the blur remains static” is already much more useful than “make it look like that video.”
Then take the next step in Resolve. Open the page where the edit is likely to happen, search one or two terms, and preview only the most plausible candidates. If nothing fits, revise the description before installing a plugin or rebuilding the look from scratch.
What should I describe before searching?
Describe the effect in terms of its visible behavior: the affected region, the kind of change, and whether the change moves or varies over time. Those clues help you decide both what to search for and where to look in DaVinci Resolve.
A useful description usually has four parts:
| Clue | Ask yourself | Example description |
|---|---|---|
| Image change | What looks different? | “The highlights have a soft halo.” |
| Location | Which part of the image changes? | “Only the sky gets softer.” |
| Motion | Does the result move or track? | “The label follows the bottle.” |
| Timing | Does it change across the shot? | “The blur increases as the camera moves.” |
You don’t need all four details for every effect. A still image with a simple color treatment may need only the first clue. A moving subject with a graphic attached to it needs more: what moves, what the graphic follows, and whether it should remain aligned throughout the shot.
This description also helps you spot false matches. A glow can soften or brighten highlights, but a lens flare suggests an optical streak or reflection. A blur softens detail, but a depth-of-field effect may imply a change in focus or a separation between foreground and background. Those terms can overlap in tutorials and casual conversation. Use them to search, then judge the result by what it does.
Try building a search phrase with one main noun and one modifier:
- “soft glow highlights”
- “blur background keep subject sharp”
- “grain film texture”
- “text follows object”
- “light rays through window”
- “color shifts toward teal”
- “face tracking mask”
- “image trails behind movement”
These are worked search examples, not guaranteed exact names for Resolve effects. If the first search returns nothing useful, keep the goal but swap a word: “trails” might become “echo,” “ghosting,” or “motion blur.” “Bright halo” might become “bloom” or “glow.” You are trying to surface the right family of tools, not guess a perfect label on the first attempt.
A second useful distinction is what you want to change versus how you want to change it. If the goal is “make the sky darker,” you might be looking for a grade, a mask, or a combination of the two. If the goal is “make the sky darker only when the subject passes in front,” you’re describing a compositing problem with a moving boundary. The visual goal is the same, but the underlying task has changed.
There’s one more clue worth writing down: whether the result should be subtle or obvious. “Slightly soften the background” is different from “turn the background into a smeared streak.” This doesn’t identify the effect by itself, but it gives you a way to reject controls that push the image in the wrong direction.
Don’t overthink the vocabulary. Write the effect as you would describe it to another editor who can’t see your screen. Then search its important words and their likely synonyms.
Which DaVinci Resolve page should I search?
Start in the page where you expect to build or adjust the effect: the Edit page for many clip-level tools and transitions, the Color page for grading and secondary selections, Fusion for compositing and node-based work, or the Photo page for still-image effects in Resolve 21.
There isn’t one universal effects drawer that contains every possible tool in the same way. The right page depends on the job. A visual result might be built with a single effect, a grade, a Fusion node graph, or several steps across a workflow.
Use this as a first decision, not an absolute rule:
| Visual task | Likely starting point | What to inspect |
|---|---|---|
| Add a transition between two clips | Edit or Cut page | Effects Library transition categories and transition controls |
| Apply a clip-level look or processing effect | Edit page | Effects Library search and the Inspector |
| Change color or isolate part of a shot for grading | Color page | Color controls, nodes, masks, and tracking controls |
| Combine layers, track an element, key a color, or animate graphics | Fusion page | Node graph and tool controls |
| Apply effects to still photographs | Photo page in Resolve 21 | Effects panel and its categories |
| Modify an audio clip or mix | Fairlight or audio controls on an editing page | Audio effects and their available parameters |
Blackmagic Design’s Resolve 21 product overview describes distinct workflows across Edit, Color, Fusion, Fairlight, and the new Photo page. Its Resolve 21 New Features Guide also describes the Photo page Effects panel as a hierarchical list, sorted by category. In that guide, visible Photo effects include examples in categories such as Resolve FX Light, Refine, Revival, and Sharpen. That is useful evidence about the Photo page, but don’t assume the same panel layout or effect availability applies to every other page.
When should I start in Edit?
Start in Edit when you’re working with a timeline clip and expect to add an effect, title, generator, or transition without constructing a larger composite. Open the Effects Library and look for the relevant category or search field, then inspect the controls available after applying a candidate.
A short transition between two shots is a useful example. If you want the outgoing image to dissolve into the incoming one, search transitions. If you want a flash, a wipe, or a stylized movement between shots, search the closest visual description and compare how the transition behaves at the cut.
Don’t search only for “effect” when you know the edit is a transition. A transition changes the boundary between shots. A clip effect changes the image over a clip’s duration. They may create similar visual impressions, but their placement and controls differ.
When should I start in Color?
Start in Color when the goal is primarily a change to the image’s color, tone, contrast, or a selected region. A look described as “cooler shadows,” “less saturation,” or “make the subject warmer than the background” may be a grading task rather than a clip-level effect.
The same caveat applies to stylized color effects. Search terms such as “film look” can lead to a named effect, a look built with grading controls, or a tutorial that combines both. Check what a proposed workflow actually changes before deciding that the named effect is essential.
If your goal depends on selecting a color or region, keep the selection method in mind. A result that appears to be “an effect on the sky” may be a mask or qualifier followed by a grade. Searching only “sky effect” might not reveal that distinction.
When should I start in Fusion?
Start in Fusion when the visual goal involves combining elements, attaching graphics to moving footage, generating or reshaping imagery, or building a result from connected tools. Fusion is a node-based compositing environment, so the answer may be a chain of operations rather than a single tile in a library.
That distinction matters when someone asks, “What’s the name of the effect where text follows a person?” The actual task might involve tracking, a text element, and compositing. Searching “follow text” can help find a tutorial, but the tutorial may describe a workflow rather than an effect with that exact name.
Resolve 21 also expands the Fusion toolset. Blackmagic’s current feature overview says Fusion includes the Krokodove toolset with more than 70 new graphics in Resolve 21. That count refers to the stated new graphics in that release, not to a count of all Fusion tools or to a promise that every graphic is appropriate for every project. Search for a visual goal first, then check the specific tool and its version requirements.
When should I start in the Photo page?
Start in the Photo page if the image you’re editing is a still photograph and your Resolve version includes that page. Resolve 21 introduces the Photo page, and its official New Features Guide documents a dedicated Effects panel with categorized effects.
This is a version-specific detail. If you’re using an older release, the Photo page or its effect panel may not exist in the same form. If a tutorial shows a Resolve 21 panel you can’t find, check your version before assuming your installation is broken.
How do I search the Effects Library without guessing the exact name?
Search the Effects Library using the clearest word for the visible result, then try synonyms and related technical terms. If the search is too broad, narrow it by page or category instead of adding a string of unrelated keywords.
Use a simple, repeatable search routine:
- Open the likely page and show its Effects Library or Effects panel.
- Search the most obvious visual term, such as “glow,” “blur,” or “grain.”
- If the results are vague, try one synonym or a more technical term.
- If many results remain, narrow the category or page.
- Select a candidate and examine its name and controls before committing it.
Keep searches short. “Warm glowing film effect for portrait with motion” mixes a color goal, a highlight treatment, a style, a subject, and motion into one phrase. If the application searches literal names or metadata, the extra words may obscure the term you need. Search “glow” first. Then search “film” or “warm” in the relevant context.
What terms should I search for a glow, blur, or film look?
Search the visible image change and one synonym at a time. For a soft bright halo, try “glow,” “bloom,” or “halation.” For softened detail, try “blur” or “soften.” For visible texture, try “grain” or “film texture,” then confirm what a candidate actually adds.
Here are practical starting points:
| What you see | First search | Other words to try | Possible complication |
|---|---|---|---|
| A soft halo around bright areas | glow | bloom, halation, diffusion | The look may need a subtle effect plus grading |
| Softened detail | blur | soften, defocus | The blur may affect the whole frame instead of the background |
| Visible moving streaks | motion blur | trails, echo, ghosting | A still trail and a directional blur are different results |
| Texture across the image | grain | film grain, texture | A film-style look may combine grain with color and contrast |
| Bright streak or flare | lens flare | flare, light rays | A flare element may need position or compositing adjustments |
| A subject isolated from the background | mask | track, isolate, cutout | Selection, tracking, and edge cleanup may all be needed |
| Colored text or graphics over a shot | title, text | outline, shadow, glow | The desired styling may belong to title controls, not a footage effect |
| A changing speed or stretched motion | speed, retime | motion blur, frame blend | The visual result may depend on retiming plus a separate effect |
Treat these entries as search prompts, not a promise that every term maps to one built-in tool. In Resolve 21, Blackmagic describes examples such as Glow, Lens Flare, Light Rays, Blemish Removal, and UltraSharpen among its new Photo page effects. Elsewhere, a similarly named tool may live in a different page, have different controls, or be available only in a particular edition. Check the current manual and your installed version.
If a search turns up nothing, remove the detail that’s least certain. “Green light streak” may be too specific; start with “light,” “streak,” or “flare.” If you get too many matches, add one distinguishing feature: “light streak transition” or “glow highlights.”
Search from concrete to abstract, too. “Lines radiating from a point” gives you a shape and direction. “Energy effect” is an interpretation. The more your search term describes something visible, the less likely you are to get distracted by names that sound right but refer to a different technique.
What should I do if Resolve’s search finds nothing?
Assume the wording may be wrong before you assume the effect is missing. Try another synonym, check another page, and decide whether you’re really searching for a built-in effect, a third-party plug-in, a transition, or a multi-step workflow.
Use this troubleshooting order:
- Change the noun. Search “streak” instead of “trail,” or “soften” instead of “blur.”
- Remove style words. Search “glow” before “cinematic glow.”
- Check the page. A node or grading control may not appear in the Edit page’s Effects Library.
- Check the category. A transition, title, and clip effect aren’t interchangeable.
- Check the version. A tutorial may refer to an effect introduced in a later release.
- Check the edition. Some features differ between the free version and Studio.
- Check installation. A third-party effect won’t appear just because its name is searchable online.
- Search for the workflow. A look built from masking, tracking, and compositing may not have a single effect name.
There is a crucial difference between not appearing in search and not being installed or available. A third-party plug-in, effect pack, template, or macro may require a separate installation. A Resolve effect may have different names in a tutorial, a manual, or the Effects Library. Search results alone can’t settle those questions.
If you find a tutorial but its controls look different, verify its Resolve version and page before copying the steps. Blackmagic published a Resolve 21.1 manual dated September 8, 2026, according to the manual welcome page. That date helps establish which version the current manual covers; it doesn’t mean every older tutorial is invalid. It means version context matters when a control or effect seems to have moved.
How can I identify an effect from a video or reference image?
Describe the reference as a sequence of visible changes, then search that description with “DaVinci Resolve” and the most likely technique. A reference can show the result, but it may not reveal whether it came from one effect, several nodes, an overlay, or editing choices.
Pause the reference and ask:
- What changes first?
- Which part of the frame changes?
- Does the effect follow a subject or camera movement?
- Does it happen at a cut, across a clip, or only for a few frames?
- Is the result generated, composited, or mostly a change to color and contrast?
- Is a real object in the footage producing the effect, such as lens flare or motion blur?
Then write a neutral description. Avoid naming the technique too soon. For example:
“A title appears behind the person, but parts of the person remain in front of it.”
That sentence suggests a layered composite and some form of subject separation. It does not prove the creator used Magic Mask, a manually drawn mask, a key, a stock element, or any other single tool.
Another example:
“A flash fills the frame at the cut, then the next shot appears.”
That describes a transition moment. Search for a flash transition or a white-flash cut, then check whether the reference uses an actual transition, a generated color frame, exposure changes, or a combination.
Blackmagic’s official Resolve 20 Visual Effects Guide makes a useful point about this way of thinking: “Visual effects compositing is about a combination of tools rather than any single filter effect.” The guide is older than Resolve 21, so it’s not a version-specific instruction for every current control. It is a useful way to understand why an effect name can be hard to discover: the reference may depict a constructed result, not one ready-made filter. Read the Visual Effects Guide for a fuller introduction to compositing in Fusion.
Once you have the description, search it in stages:
- Search the general action, such as “text behind person.”
- Add the software name to find relevant Resolve workflows.
- If results are too broad, add the page or technique you suspect, such as “Fusion,” “mask,” or “tracking.”
- Compare more than one explanation before assuming a particular tool is required.
- Check whether the tutorial’s visible result matches the parts of the reference you care about.
Community discussions can help translate informal descriptions into common editing terms. In a Reddit discussion about identifying a visual effect, the questioner says they tried searching but didn’t know what to search for; replies suggest terms such as masking and rotoscoping and explain that several approaches can create a similar result. Treat community answers as leads to investigate, not as a guarantee about how a particular reference was made.
If the reference comes from a heavily edited short-form video, be especially cautious about assuming a single effect. A creator may have combined cuts, speed changes, sound design, color, masks, and overlays. Search for the most visible component first. You can add the rest after you’ve found a workable approach.
How do I tell whether I need an effect, a transition, a grade, or a workflow?
Decide based on what changes and when. A transition operates between clips, a grade changes image appearance, a clip effect processes a shot, and a workflow may combine several tools to create a more complex result.
These categories are easy to mix up because people use “effect” casually to mean almost any visual change. In Resolve, the practical distinction affects where you search and how you apply the result.
| If the change happens… | Search for… | Example question |
|---|---|---|
| At the boundary between two shots | Transition | “How do I make a flash between clips?” |
| Across one clip or a defined part of it | Clip effect or grade | “How do I add a soft glow to the highlights?” |
| In a selected area of a shot | Mask, qualifier, or selection plus an adjustment | “How do I darken only the sky?” |
| By placing one image element over another | Composite or overlay workflow | “How do I put a graphic behind a person?” |
| In a way that follows movement | Tracking plus an effect or composite | “How do I keep text attached to a moving object?” |
| Across time, changing its intensity or position | Animation or keyframed controls | “How do I make the glow pulse?” |
An effect name search is useful when the goal is a discrete operation. It is less useful when the goal is an entire scene technique. “Make the title follow a moving car” describes a result that may involve text, tracking, positioning, and compositing. A tutorial titled “Track text in Fusion” might be the better search than a specific effect name.
A good check is to ask, What would I expect to see in the Inspector or node graph if this were the right approach? If the tool you found can change the relevant part of the image, that’s promising. If it only changes a different property, you’ve probably found a similar-sounding but unrelated result.
Another check is whether the effect needs to be adjustable later. A built-in effect or node-based workflow may keep controls available in the project. A rendered overlay or flattened graphic might be faster, but offers less control over individual parts. Neither is automatically better. Your choice depends on the delivery, the available assets, and whether you need to revise the result.
The word “effect” can also hide a question about where in the image the change belongs. If a tool changes the whole clip but you only want one object affected, the missing piece may be a selection or mask. If the tool changes the right object but not in time with movement, the missing piece may be tracking. Searching the effect name alone won’t answer those workflow questions.
A complex visual look may be a workflow, not a single effect.
How should I test an effect without damaging my edit?
Test one candidate at a time on a duplicate clip or a safe project copy, and compare the result with the original. A controlled test makes it easier to see whether the tool changes the part of the image you intended.
Before you drag an effect onto a clip, consider the cost of being wrong. For a simple, reversible test, you may only need a duplicate clip on the timeline. For a complex project, a copy of the project or a separate test timeline is safer. The goal is not to create needless backup work; it’s to keep an experiment from becoming an accidental change to a finished shot.
Use this test loop:
- Duplicate the clip or test in a copied timeline. Keep the original visible for comparison.
- Apply only one candidate. Don’t stack multiple effects before you know what the first one does.
- Look at the full frame. A tool may affect the whole image even if the intended result concerns only a face, sky, or title.
- Inspect the available controls. Check whether they correspond to the behavior you described.
- Adjust one control at a time. This helps you understand which setting changes the result.
- Compare before and after. Toggle or remove the effect, then decide whether the change matches the reference.
- Undo or remove the test if it doesn’t fit. Don’t keep a candidate just because you spent time finding it.
A result is promising when it changes the right visual feature, in the right region, over the right time span. A candidate that creates a glow across the entire frame may not solve a task where only the highlights should bloom. A blur that softens the subject instead of the background may require a different method, not a stronger blur setting.
Record what you learn. A brief note such as “glow works, but I need to isolate highlights” saves you from repeating the same broad search later. Your next query becomes more precise: “glow highlights mask” or “isolate highlights before glow.”
If your test reveals that the intended result needs tracking or masking, stop searching for more effect names and switch to the workflow. The effect itself might be correct. The missing operation may be the part that selects or follows the subject.
What are useful example searches for common visual goals?
Start with the visual goal, then use the search terms as a small set of leads. The examples below are worked examples: they show how to build a search, not a report of hands-on testing or a claim that one exact term will always reveal the right result.
| Visual goal | Search phrase to try | What to verify after finding a candidate |
|---|---|---|
| Make bright highlights appear soft and luminous | “glow highlights,” then “bloom” or “halation” | Does the effect change highlights, the full frame, or both? |
| Add a streak or flare near a light source | “lens flare” or “light rays” | Can you position or shape the result to fit the scene? |
| Add film-like texture | “film grain” or “grain texture” | Is the tool adding texture, changing color, or doing both? |
| Make the background softer than the subject | “background blur subject sharp” | Does the method require masking or a depth-aware tool? |
| Put text behind a person | “text behind person Resolve Fusion” | How is the subject separated from the background? |
| Keep a label attached to a moving object | “track text to object Resolve” | Does the workflow include tracking and a way to composite the label? |
| Make one region darker | “darken sky mask grade” | Is the adjustment limited to the intended region? |
| Make an image look more sharply defined | “sharpen,” then check whether the tool addresses the kind of softness you have | Does sharpening create artifacts or emphasize unwanted texture? |
| Change a look at the cut between shots | “flash transition” or “light leak transition” | Is the effect attached to the cut or applied to one clip? |
| Make a subject seem to leave a visual trail | “motion trails,” “echo,” or “ghosting” | Is the result a temporal trail, a blur, or a set of duplicates? |
| Add a glow to a title | “text glow” or “title shadow glow” | Does the control belong to the title or to the footage beneath it? |
| Remove or reduce a small visible blemish | “blemish removal” or “patch” | Is the tool available in your version and edition, and does it suit moving footage? |
Some terms in this table describe a result, while others may be names of specific tools. That’s intentional. If you’re unsure of the exact name, it’s useful to search both kinds of language. A phrase like “text behind person” may find a tutorial that explains the workflow, while “mask” may help you locate the underlying technique.
Resolve 21’s official feature overview names specific effects such as Blemish Removal and UltraSharpen, alongside other new tools. The Resolve 21 New Features Guide lists examples in the Photo page Effects panel, including Glow, Lens Flare, Light Rays, Blemish Removal, and UltraSharpen. Use those names as version-aware search clues, not as proof that the same item appears in the same place in every version.
For the “background blur, subject sharp” example, be precise about the edge. If a person moves, a static selection may not remain aligned. The workflow might need tracking or repeated cleanup. For the “text behind person” example, the text has to be composited into the scene while the person remains in front of it. The names of those operations will help you search better than a vague query like “cool text effect.”
A named effect can also be a starting point rather than a finished look. For example, finding a glow effect doesn’t tell you how much glow looks right, which parts of the image should glow, or whether a different color treatment is needed. That’s why the test loop matters. Search gets you a candidate. Viewing and adjusting it tells you whether it solves your particular shot.
Why can’t I find an effect in DaVinci Resolve 21.1?
The most common reason is a mismatch between the search term and the way the task is categorized. Check the page, category, version, edition, and installation before deciding a tool is absent.
Use the symptom that best matches what you see:
| Symptom | Check this first | Next step |
|---|---|---|
| The search returns unrelated tools | The search phrase may be too broad | Try a more visual term or a synonym |
| You see no matching result | You may be on the wrong page | Look at Edit, Color, Fusion, or Photo, depending on the task |
| A tutorial shows a control you don’t have | The tutorial may use a different version or edition | Check its version and compare with the current manual |
| A downloaded effect is missing | It may be a plug-in, template, or macro that is not installed | Follow its current installation instructions |
| The effect appears but changes the wrong area | The effect may need a mask, qualifier, or composite | Search the additional selection or tracking task |
| The result looks close but not right | Similar names can refer to different techniques | Compare the result with the original and refine the goal |
| The instructions mention a newer tool | Your installed version may be older | Check the release notes and version-specific documentation |
Resolve 21 is not a single unchanging inventory. Blackmagic’s release-note summary lists point releases such as DaVinci Resolve 21.0.3 and 21.0.4 with changes and updates, while the current manual link identifies the 21.1 manual. A tutorial published for an earlier version can still teach a useful idea, but controls, availability, and labels can differ.
Also check whether you are searching built-in tools or externally installed content. A tutorial may use a third-party OpenFX plug-in, a Fusion macro, a template, or a downloaded overlay. Searching Resolve’s built-in Effects Library won’t make an uninstalled asset appear. If a download is involved, confirm its actual file type and supported Resolve version before installing it.
If the question is specifically “Why can’t I find UltraSharpen?” or another named effect, search the exact term and check the official version documentation. If the question is “Why can’t I find the effect from this video?”, go back to describing the visible result. The source video’s creator may have used a custom workflow or external content with a name you cannot infer from the final image alone.
How do Blackmagic training, YouTube, and community advice help?
Use Blackmagic Design’s official training to learn the page and core workflow, use a focused YouTube tutorial to recreate a specific result, and use community discussions to discover the vocabulary other editors use. Each source helps with a different part of the search.
Blackmagic Design’s training page offers training videos and downloadable guides across Edit, Color, Fairlight, and Fusion. The current page includes a Visual Effects in the Edit Page lesson and an Introduction to Fusion lesson, as well as guides for Resolve 20. Official training is a good starting point for understanding the intended tools, but older lesson files and guides don’t automatically describe every Resolve 21.1 addition.
Casey Faris is another familiar source for Resolve tutorials. His current course-library page describes lessons on editing, color grading, Fusion, Fairlight, and workflows. A focused tutorial can be helpful when you already have a concrete task. Check the tutorial’s release date, Resolve version, and whether it demonstrates the result you actually want.
Community replies can help identify a technique or suggest search terms, but answers vary in context. A recommendation may assume Studio, a particular version, specific footage, or a willingness to use a plug-in. When you borrow a suggestion, verify those assumptions before changing your project.
| Source | Best for | What to verify |
|---|---|---|
| Blackmagic Design training and manuals | Learning Resolve’s pages and documented tools | Guide version, release, and whether the feature is new |
| Casey Faris and other focused tutorial creators | Seeing a task demonstrated from start to finish | Version, edition, project files, and whether the method matches your goal |
| Reddit and other editor communities | Translating informal descriptions into technique names | What version, edition, and footage the answer assumes |
| The Effects Library in Resolve | Finding installed effects and inspecting candidates | Correct page, category, and the controls actually available |
| A reference clip or still | Defining what the effect should look like | Whether the final image may combine several techniques |
There is no need to choose one learning source for everything. The most efficient approach is often to use a manual or training video for the tool’s basic purpose, then search for a focused demonstration of the particular visual outcome. If the tutorial’s interface differs from yours, the version context is your first diagnostic clue.
The best tutorial is the one that matches your visual goal and Resolve version.
When the task is simply “where is the tool?”, the manual or an on-screen guide may be quicker than a broad course. When the task is “how do I make this look?”, a tutorial with a similar reference can teach the steps. When the answer depends on your exact clip, no generic effect name can fully settle the creative decision.
Is an AI tool to learn DaVinci Resolve useful for finding an effect?
An AI tool can help turn a plain-language goal into likely search terms or a possible workflow, but you still need to verify the suggestion in Resolve. It can misunderstand the reference, overlook version differences, or name a tool that isn’t installed.
Try a narrow question rather than “What effect is this?” For instance: “I want a soft halo around bright parts of a clip, but I don’t want the shadows to glow. Which terms should I search, and what should I compare?” That invites possible terms and a verification plan. It does not ask a tool to claim certainty from an image it may not understand.
An app that helps you while using DaVinci Resolve can be useful when the hard part is locating a control on the screen, especially if a tutorial’s interface doesn’t match yours. It’s a different kind of help from a course, a static manual, or a general chat answer. Use it as guidance, then confirm the result yourself.
TryUncle is the on-screen assistant for DaVinci Resolve on Mac and Windows — ask in plain words and Uncle points at the exact control on your screen.
That may help when your search has found a likely effect but you’re stuck on where to apply it or which visible control to adjust. It doesn’t replace the comparison step: you still decide whether the result fits the shot. For broader learning, Blackmagic’s official training, focused tutorials, and community advice remain useful options.
When judging a suggested effect, ask the same questions you’d ask of any source:
- Does the named tool exist in the Resolve version you’re using?
- Does it appear on the page the advice describes?
- Does it change the right part of the picture?
- Does the proposed workflow require a plug-in, Studio feature, or external asset?
- Can you test the suggestion safely on a duplicate?
If the answer is uncertain, ask for a search strategy or a list of candidate terms rather than an unverified guarantee. A helpful suggestion should make your next check clearer, not make you feel you have to trust an unexplained answer.
How do I turn a found effect into a repeatable search method?
Keep a small note of the goal, the terms you tried, and what each candidate changed. The next time a tutorial uses an unfamiliar name, you’ll have a method for finding the relevant tool family without starting from zero.
The note doesn’t need to be elaborate. A simple format works:
| Goal | Search terms tried | What the candidate changed | What still needs solving |
|---|---|---|---|
| Bright halo around highlights | glow, bloom | Softened bright areas | Need to limit the effect to highlights |
| Text behind a moving subject | text behind person, tracking | Graphic can be placed in the composite | Need subject separation and alignment |
| Grainy image texture | grain, film grain | Added visible texture | Need to decide how strong it should be |
| Moving trail behind an object | trails, echo, motion blur | Created a time or motion-related change | Need a result that matches the direction of movement |
These are illustrative examples. The effect behavior in your project depends on the tool, its settings, the footage, and the Resolve version. The value of the table is the search process: a failed term can still teach you which part of the description needs a better word.
When you find a useful tutorial, add its version and edition to the note. That saves time when you revisit it months later or move the project to another machine. You don’t need to preserve every link you watch. Keep the one that explains the actual task and the assumptions that affect it.
For a frequently used effect, also note its location and the visible controls that mattered. “Edit page, clip effect, Inspector” is more useful than “the thing from that video.” For a Fusion workflow, save a small project or node example if appropriate, and label it with the task it demonstrates.
Over time, your search vocabulary gets sharper. “Make it look cinematic” may become “soften highlights, add subtle grain, keep skin tones stable.” The second description can be tested. It can also be broken into separate decisions, so you don’t confuse a color treatment with texture or blur.
What is the best way to learn DaVinci Resolve effects?
The best way to learn effects is to start with one visual result, find the page and tool family that can produce it, then test the result and look up only the controls you need. Use official training for structure and focused tutorials for specific examples.
If you’re new to Resolve, begin with a small, visible goal. Add a transition, adjust a title, make a simple color change, or follow an introductory Fusion lesson. Each task teaches you where a class of controls lives. That knowledge makes later searches faster, even when you don’t know the exact effect name.
If you want to learn DaVinci Resolve fast, avoid trying to memorize every effect category before you edit. Learn a few ways to classify the task:
- Is it a change between clips?
- Is it a change to one clip?
- Does it affect the entire frame or only part of it?
- Does something need to move or track?
- Is the result built from several elements?
Those questions reduce the number of places you need to search. They’re also useful when a tutorial uses unfamiliar terminology.
For a planned learning path, Blackmagic’s official training provides lessons and guides organized by area. Casey Faris and other educators can provide task-centered demonstrations. Reddit and similar communities can help uncover terms and alternate approaches. None of these sources removes the need to check version context or assess the result on your own footage.
If you’re deciding between a course and a quick answer, ask what you need next. A course is useful when you want an organized foundation across a whole page or discipline. A focused tutorial is useful when you want to complete one effect. A manual is useful when you know the tool name and need its documented controls. An on-screen assistant is useful when you already have a task but can’t locate the relevant control in your current interface.
The practical next step is to write one sentence about your target image. Include what changes, where it changes, and whether it moves. Search those words in the likely page, test a candidate on a duplicate clip, and switch to a workflow search if the look needs more than one operation. If you’re still stuck, compare the current manual with a focused tutorial for your Resolve version before reaching for a plug-in.
Frequently asked questions
- How do I find an effect in DaVinci Resolve if I don't know its name?
- Write down the visual result you want, search the Effects Library for that result and its common synonyms, and narrow by page or category. Try a likely match on a duplicate clip, then check the Inspector or node graph to confirm what the tool actually changed.
- Can DaVinci Resolve search for an effect by describing what I want?
- The Effects Library search helps you find effects by searchable text, but don't assume it understands an open-ended visual description. Translate the look into likely terms such as glow, blur, grain, or tracking, then inspect candidates.
- Why can't I find an effect in DaVinci Resolve?
- You may be searching the wrong page, using a synonym the effect doesn't list, looking for a workflow rather than a single effect, or expecting a third-party effect that isn't installed. Check the page, category, edition requirements, and installed plugins before concluding that the effect is missing.
- How can I find the name of an effect from a video?
- Describe the visible behavior rather than guessing a plugin name: what moves, what changes, and when it happens. Search those terms with DaVinci Resolve, compare tutorials or reference results, and remember that a look may combine several tools rather than come from one effect.
- What is the best way to learn DaVinci Resolve effects?
- Start with Blackmagic Design's official training for the relevant page, then search for a specific visual result when you have one to recreate. Practice on a duplicate clip and use a reference manual or focused tutorial to understand the controls.
Sources
- DaVinci Resolve 21.1 Manual
- DaVinci Resolve 21 New Features Guide
- DaVinci Resolve 21 product and feature overview
- DaVinci Resolve training
- The Visual Effects Guide to DaVinci Resolve 20
- Grant Petty on DaVinci Resolve 21's Photo page
- Casey Faris course library
- Reddit discussion about identifying an effect from its appearance
Put this guide to work with TryUncle.
Ask about the step you’re on. TryUncle sees your screen and points at the control you need, so you can keep learning in your own project.
Get TryUncle for Mac or WindowsKeep reading
Guides · Jul 10, 2026 · 32 min
DaVinci Resolve Fusion Page Tutorial for Beginners
Learn the DaVinci Resolve Fusion page from zero: nodes, MediaIn/MediaOut, the Merge node, planar tracking, and keying a green screen, step by step.
Guides · Jul 25, 2026 · 38 min
DaVinci Resolve Fusion Glow Effect Settings, Explained
Every setting on DaVinci Resolve's Fusion Glow node, from Filter Method and Glow Size to Apply Mode, and how to stop a glow from blowing out.
Guides · Jul 7, 2026 · 7 min
How to Use Magic Mask in DaVinci Resolve (Complete Guide)
How Magic Mask in DaVinci Resolve isolates people and objects from one brush stroke, what changed in Resolve 21, and where the AI still needs help.