Articles / Fixesupdated for DaVinci Resolve 21.0.2 (July 2026)
DaVinci Resolve Color Qualifier Not Selecting Correctly: Fix It
Quick answer
A ragged or wrong Color Qualifier selection is almost always caused by log footage's compressed saturation, 8-bit chroma noise, or the wrong qualifier mode. Fix it by qualifying on a Rec.709-corrected image, matching HSL, RGB, or 3D Qualifier to the shot, then cleaning the matte with Pre-Filter, Denoise, and a small Blur Radius in Matte Finesse.
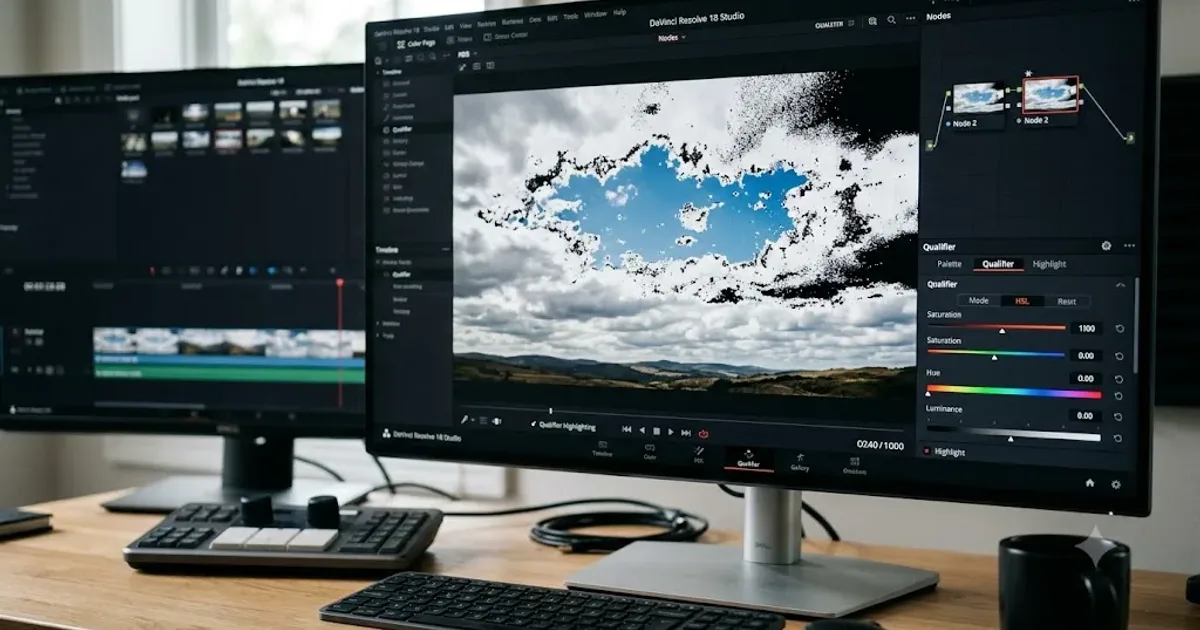
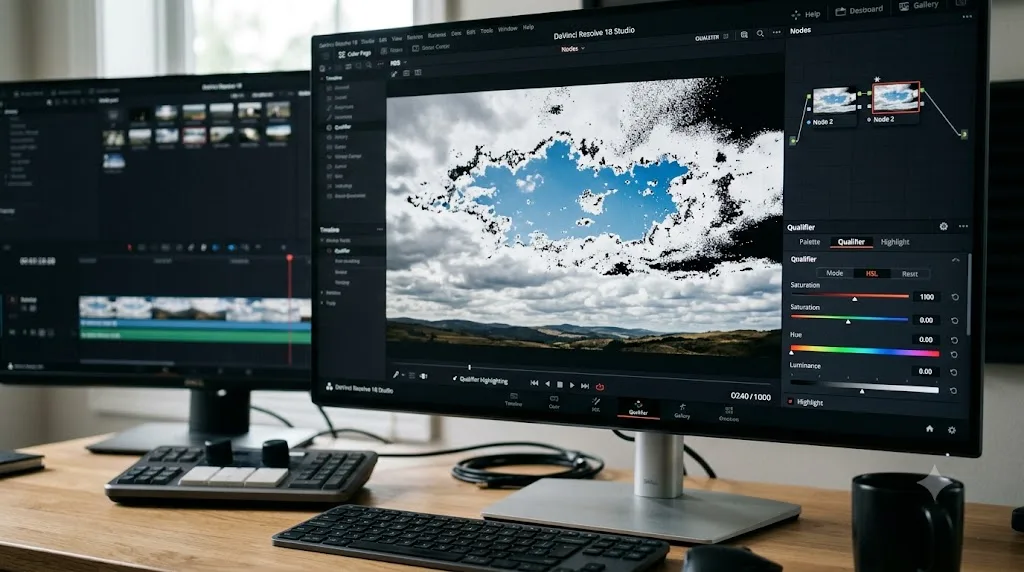
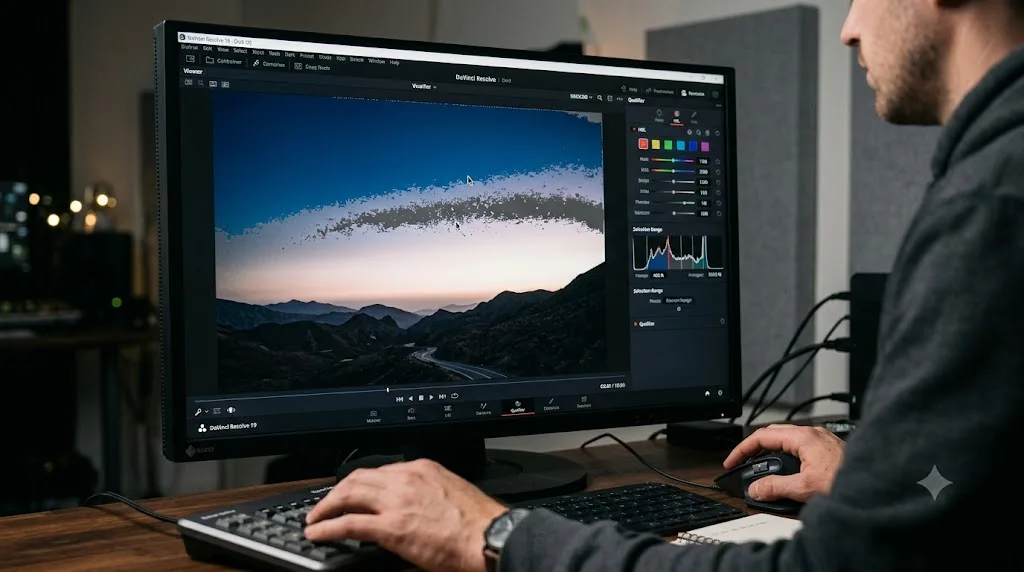
My qualifier selection looked like static. I sampled a blue sky, expecting a clean matte, and got a flickering mess of holes punched through by JPEG-style blocking and a ragged edge that bled two feet into the clouds. That's not a broken tool. It's a qualifier doing exactly what it was told, on an image that wasn't giving it clean information to work with. Once you know what's actually breaking the selection, most of these fixes take under a minute.
What does it mean when a Color Qualifier "doesn't select correctly"?
Three symptoms get lumped under this complaint, and they don't share the same fix. The first is a matte full of holes: your sky selection looks like it went through a shotgun, with stray unselected pixels scattered inside a region that should be solid. The second is a ragged, jagged edge: the border of your selection looks pixelated or crawling instead of following the actual boundary of the object. The third is scope creep: the qualifier grabs pixels you never wanted, usually because the color you sampled overlaps with something else in the frame, a background wall that happens to share a skin tone's hue, or a patch of water that reads close enough to sky.
DaVinci Resolve's Color page gives you four qualifier tools for isolating part of an image by color: the HSL Qualifier, the RGB Qualifier, the Luma Qualifier, and the 3D Qualifier, according to Blackmagic's own reference manual section on secondary correction. Worth clearing up early: Resolve calls it HSL, hue, saturation, luminance, not HSV. If you've used other keying tools that talk about HSV (hue, saturation, value) and expected Resolve to match that terminology exactly, that's a labeling mismatch, not a missing feature. The concepts overlap closely enough that troubleshooting logic from one mostly transfers to the other.
A qualifier that selects the wrong pixels is not a bug. It's the tool accurately reading an image that isn't giving it clean, separable color information. Every fix in this guide comes down to one of two moves: give the qualifier a cleaner image to sample from, or clean up the matte it produces after the fact. Everything else is detail.
Why is my qualifier selection ragged, noisy, or full of holes?
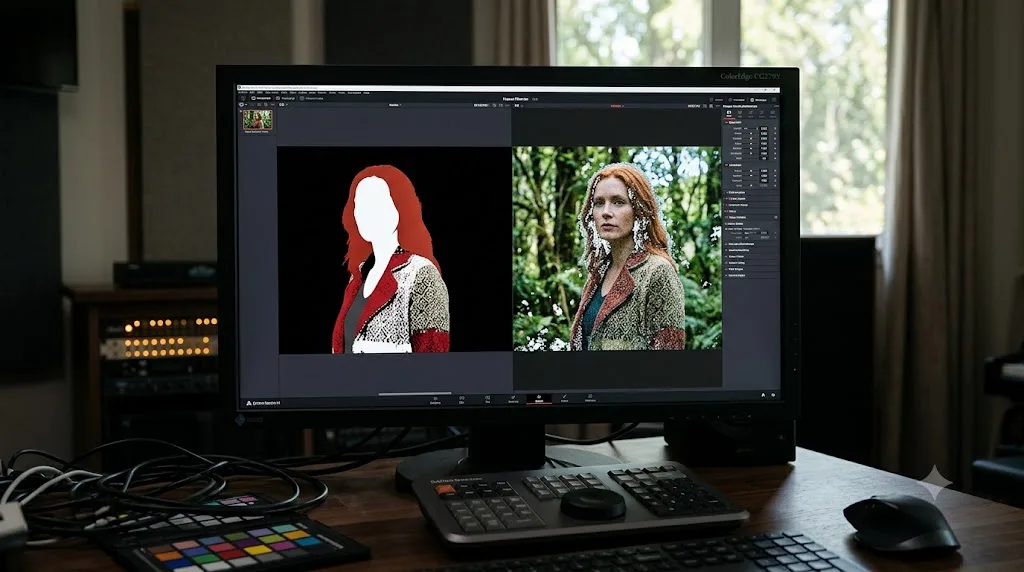
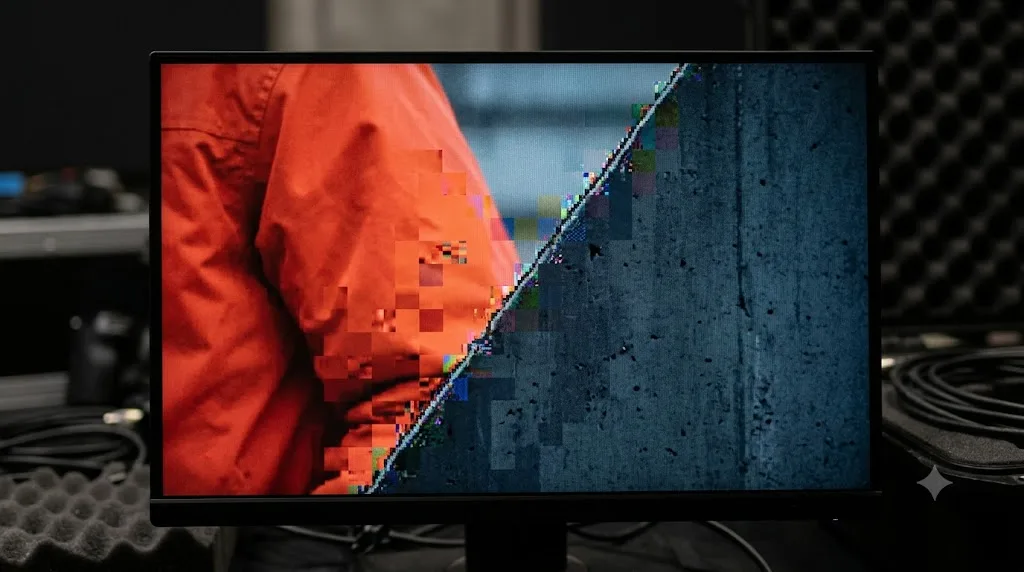
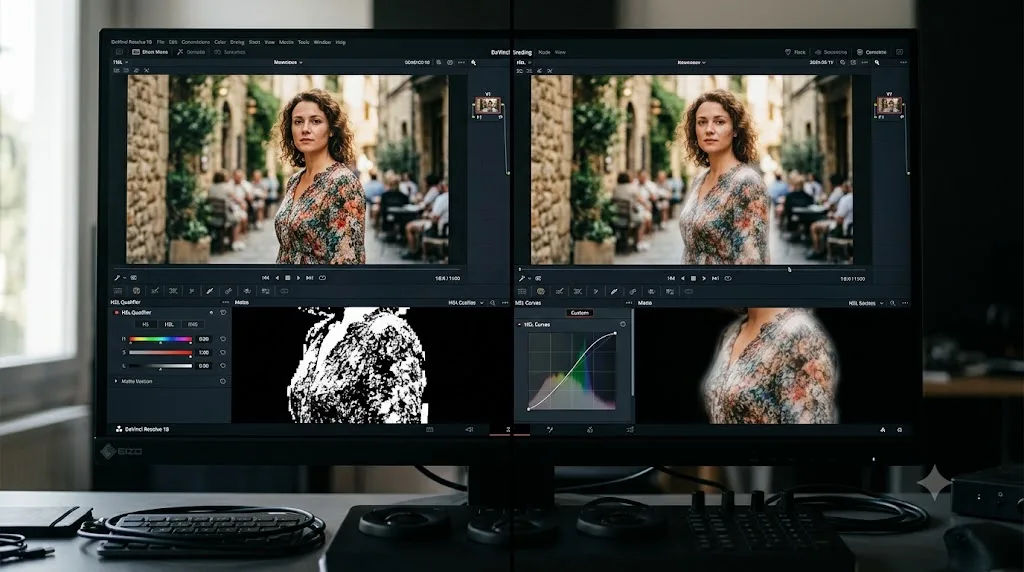
Compression is the usual suspect, and it's a documented one. Blackmagic's manual describes the Matte Finesse Pre-Filter control as a slider that "attempts to clean up the image before colors are sampled," adding that "this adjustment can be useful when you have footage containing MPEG blocking artifacts," per the Matte Finesse section of the reference manual. That's Blackmagic itself confirming what colorists already knew: heavily compressed footage doesn't hold one continuous color value across a region, it holds a mosaic of slightly different values grouped into 8x8 or 16x16 pixel blocks, and a qualifier samples those blocks as if they were meaningfully different colors.
Chroma subsampling makes this worse. Most delivery and even acquisition formats record less color detail than brightness detail, commonly 4:2:0 or 4:2:2, which means color information gets shared across multiple pixels instead of recorded per pixel. Combine that with heavy compression and you get color edges that shift in small, blocky steps instead of smooth gradients, exactly the pattern a qualifier reads as separate, disconnected colors.
Bit depth compounds the problem. An article covering 8-bit grading workflows put it plainly: using the eyedropper carelessly on 8-bit footage "will result in a very disorganized qualification," recommending transcoding to a higher-bit-depth intermediate like ProRes 422 before keying anything critical. You don't have to re-transcode your whole project to test this theory. Park on a frame, zoom to 200 percent in the viewer, and look at the boundary you're trying to qualify. If you can see blocky steps instead of a smooth transition, that's the compression, not the qualifier, causing your ragged edge.
The qualifier can only be as clean as the pixels you feed it. No amount of slider-tweaking fixes a selection problem that originates in the source footage's compression, though Matte Finesse's Pre-Filter and Denoise controls, covered further down, get you most of the way there without re-encoding anything.
Should you qualify log or flat footage directly, or convert it first?
Convert it first, whenever you have the option. This is the single most common cause of an oversensitive, unpredictable qualifier, and it's a color math problem, not a Resolve bug.
Log formats exist to protect dynamic range, and they do that by compressing a huge range of real-world brightness and color values into a narrow band of recorded code values. That's great for exposure latitude. It's terrible for a qualifier, because the tool's sliders now have to represent a wide swing in real color across a tiny range of stored values. Rafael Bernabeu Parreño, a freelance colorist and editor, described exactly this problem in a piece for Frame.io Insider: "Saturation in logarithmic color spaces can be a cumbersome parameter to select, as it's highly compressed," he wrote, in his breakdown of Resolve's qualifier and color spaces. His recommended fix matches what colorists have been doing for years: "A more intuitive solution for this is to use a REC709/Linear color space and gamma to separate the saturation values as much as possible, creating a cleaner selection."
A real forum thread on Lowepost puts the same problem in blunter terms. Colorist Thomas d'Auteuil asked whether there's a "Log Space Aware" HSL qualifier, describing his experience directly: "the luma and saturation controls are all crammed up in a tiny zone. It's overly sensitive and imprecise," in a discussion on keying accurately in log space. Fellow forum member Rune Felix Holm's answer lines up with Bernabeu Parreño's advice: key in the timeline's working colorspace via a Color Space Transform node, then pipe that matte output back to drive corrections in log if that's where you need to stay for the rest of your pipeline.
The workflow, concretely: add a Color Space Transform node (or apply a camera-matched Rec.709 LUT) ahead of the node where you'll pull your qualifier. Sample your color range on that corrected image, where saturation and hue actually spread across a usable portion of the available values. Once the matte looks right in Highlight view, that matte can drive an adjustment on a parallel node working in your original log space, or you can key after the CST and grade forward from there, depending on your pipeline. If you haven't set up LUTs in your project yet, our guide to installing LUTs in DaVinci Resolve covers where camera-conversion LUTs live and how to apply one to a node instead of a clip.
Qualifying directly on log footage is like trying to read fine print through fogged glass. The information is technically there. It's just been compressed into a range too narrow for the tool to separate cleanly, and no amount of nudging the Hue slider fixes a math problem baked into the footage itself.
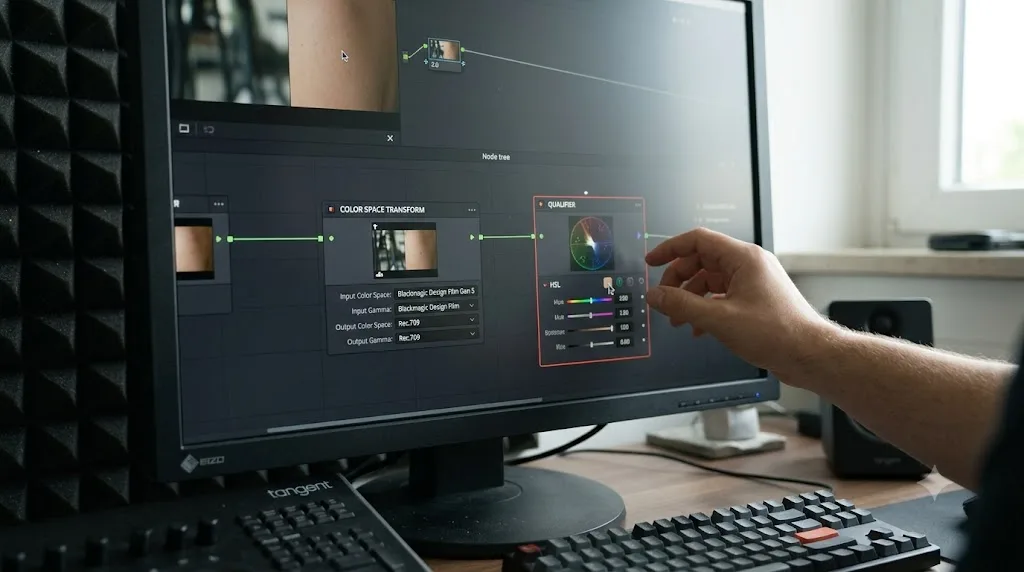
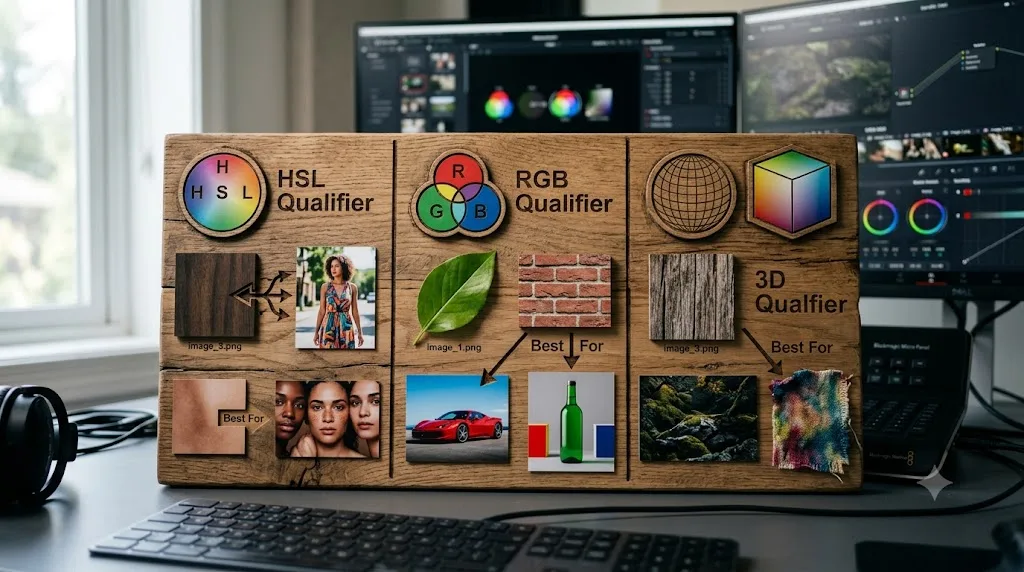
HSL Qualifier vs. RGB Qualifier vs. 3D Qualifier: which one should you use?
Picking the wrong tool for the shot is the second most common reason a selection looks wrong, separate from any compression or color space issue. Resolve's four secondary correction tools aren't interchangeable, they're built for different jobs.
| Tool | Samples | Best for | Limitation |
|---|---|---|---|
| HSL Qualifier | Hue, Saturation, Luminance, independently | Isolating one specific parameter, like a hue range regardless of brightness, or a luminance band regardless of color | Less precise on a full, complex color range that spans hue, saturation, and luma all at once |
| RGB Qualifier | Raw red, green, blue channel values | Working after a Color Space Transform, where a target color space's channels map to something meaningful, like Lab | Non-intuitive on untransformed footage; values don't map cleanly to how you perceive color |
| Luma Qualifier | Luminance only | Isolating a brightness range regardless of any color information | Can't distinguish between two objects at the same brightness but different color |
| 3D Qualifier | Every channel together, in YUV, HSL, HSP, or LAB space | A full color-range key, like green screen or a specific skin tone across its whole hue-sat-luma footprint at once | Not built for isolating one parameter alone |
Patrick Inhofer, colorist and co-founder of Mixing Light, drew this exact line in a walkthrough of the 3D Qualifier: "The 3D keyer let you flip between HSL and YUV colorspace sampling (YUV is the default). The HSL / RGB Qualifier doesn't have a YUV option," and separately, "Unlike the HSL / RGB Qualifier, you can't just pull a Hue-only or Luma-only key with the 3D keyer," in his first look at the tool for Mixing Light. Blackmagic's own manual backs that up on the limitation side too: the 3D keyer "samples every color component of the image; it's not useful when you want to isolate specific color components, such as luma only, or hue and saturation without luma," and further, "the 3D keyer is not good at pulling luma-only keys. If you're looking to isolate a range of luma values in the image, you should use the LUM mode," per the manual's 3D Qualifier basics section.
Here's what that means in practice. If your problem is "I only want the red barn, regardless of how bright or dark it is in shadow versus sun," that's a hue-only job, and the HSL Qualifier will beat the 3D Qualifier at it every time, because HSL lets you disable Sat and Lum and sample hue alone. If your problem is "I need a clean green screen key," that's a full color-range job across every channel at once, and the 3D Qualifier, with its default YUV mode, is built for exactly that.
One detail that trips people up inside the 3D Qualifier itself: its colorspace dropdown defaults to YUV, but also offers HSL, HSP, and LAB, confirmed in the manual's 3D Qualifier controls section. If a 3D Qualifier selection looks wrong on skin tones or a hue-heavy subject, switching that dropdown from YUV to HSL before you resample is worth trying before you touch a single Matte Finesse slider. YUV weights luma heavily, which can make two similarly-lit, differently-colored regions harder to separate than HSL would.
Using the 3D Qualifier for a job that needed the HSL Qualifier, or vice versa, produces a selection that looks broken even when every slider is set reasonably. Match the tool to the job first, then troubleshoot the sliders.
How do you actually see what your qualifier selected?
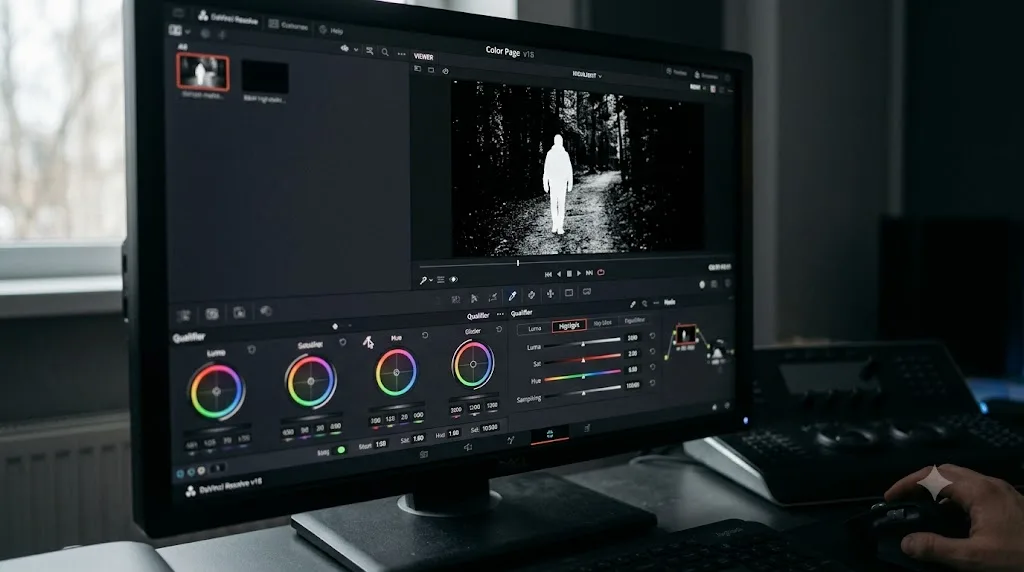
Guessing from the graded image is the wrong way to judge a matte, because a subtle correction can look fine on a busy shot while the underlying selection is a mess. Resolve has a dedicated matte view for exactly this, and most people either don't know the shortcut or don't use it enough.
Press Shift-H to toggle Highlight, which shows "the selected portion of the image with the original colors, and the unselected portion of the image with a flat gray," per the manual's section on using Highlight. Press Option-Shift-H (Alt-Shift-H on Windows) for a high-contrast variant instead, where "the selected portion of the image is white, and the unselected portion of the image is black." A third-party shortcut reference independently confirms the same Shift-H binding if you want to double-check it against your own keyboard layout.
The high-contrast, black-and-white view is the one you want for spotting holes and edge noise. Flat gray is easier on the eyes for a quick check, but small stray pixels and thin gaps in your selection hide much better against gray than against pure black. If you'd rather have high-contrast as your default every time you toggle Highlight, there's a checkbox for it under Preferences > User > Color, labeled "Mattes display high contrast black and white."
Get in the habit of toggling Highlight the moment you draw a qualifier sample, before you touch a single Matte Finesse slider. Judging your fix by whether it "looks right" in the graded image, instead of by whether the actual matte is clean, is how a selection that's 80 percent right ships as if it were 100 percent right, with the missing 20 percent only showing up once someone pushes the correction harder in a later pass.
How do you clean up a ragged matte with Matte Finesse?
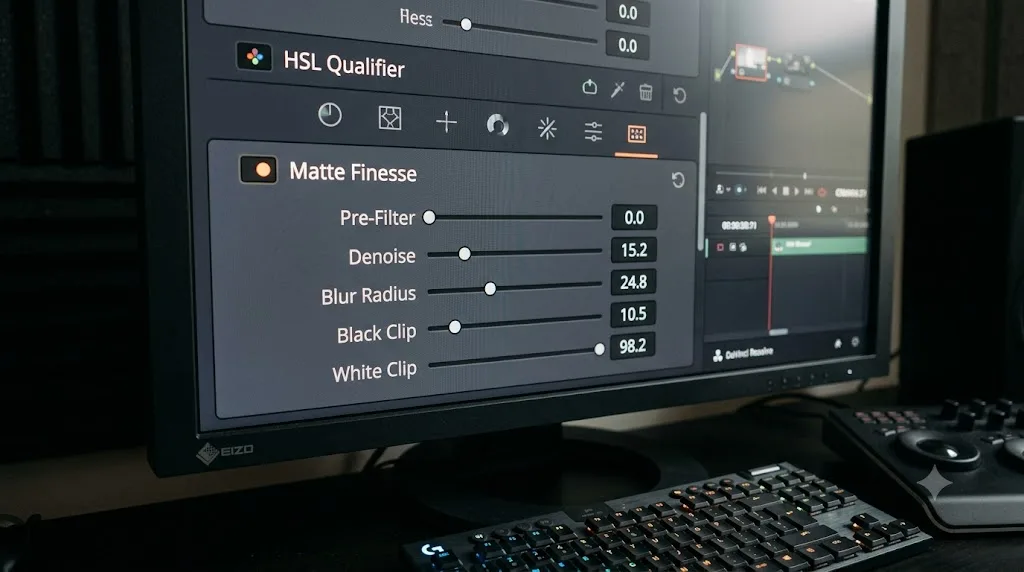
Every qualifier tool in Resolve shares the same Matte Finesse panel for post-selection cleanup, and it's more capable than most people use it for. Here's what each control actually does, straight from Blackmagic's own documentation:
| Control | Range | What it fixes |
|---|---|---|
| Pre-Filter | slider | Cleans the image before colors are sampled; specifically useful against MPEG blocking artifacts |
| Denoise | slider | Selectively reduces noise within the key, removing stray isolated areas |
| Blur Radius | 0-2000, default 0 | Softens jagged edges; too much creates a visible halo past the subject's real border |
| Black Clip | 0-100, default 0 | Pushes translucent (partial) areas of the matte toward black, tightening the selection |
| White Clip | 0-100, default 100 | Pushes translucent areas of the matte toward white; lowering it acts like a gain boost on the matte |
| Clean Black / Clean White | sliders | Removes small speckles of black or white noise inside the matte |
| Morph Operation / Radius | Shrink, Grow, Opening, Closing | Expands or contracts the matte geometrically, or removes small isolated regions entirely |
That's per Blackmagic's own Matte Finesse Controls documentation, and it's worth reading in order, because the controls are designed to be used in a sequence, not picked at random. Pre-Filter runs before sampling, so it's the first thing to try when you suspect compression artifacts specifically. Denoise runs after sampling and handles the same symptom, stray isolated pixels, from the matte side instead of the image side. Between the two, Pre-Filter is generally the better first move, since it addresses the actual cause instead of masking the result.
Blur Radius is the control people reach for first and the one most likely to make things worse if overused. The manual's own warning is direct: "in small amounts, blurring a key does well to take the edge off problem edges. However, blurring a key can also feather the edges of a key past the border of the subject you're keying, with the result being a visible 'halo.'" A default of 0 and a range up to 2000 tells you the intended use case: small nudges, not big swings. Start at 5 to 10 and increase only until the jagged edge softens, watching in Highlight the entire time.
Black Clip and White Clip are the closest thing to a contrast control for your matte. Raising Black Clip from its default of 0 pushes semi-selected, translucent pixels toward fully excluded. Lowering White Clip from its default of 100 pushes semi-selected pixels toward fully included, which functions like a gain boost on the matte itself. Used together, they tighten a soft, gray-edged matte into something closer to solid black and white, useful when a selection is technically correct but too weak or too diffuse to drive a visible correction.
Matte Finesse is not one slider you nudge until the halo goes away. It's a sequence: filter the source, denoise the result, soften the edge slightly, then clip the remaining gray toward solid black or white. Skipping straight to Blur Radius because it's the most obvious control is the most common way people end up with a soft, haloed matte instead of a clean one.
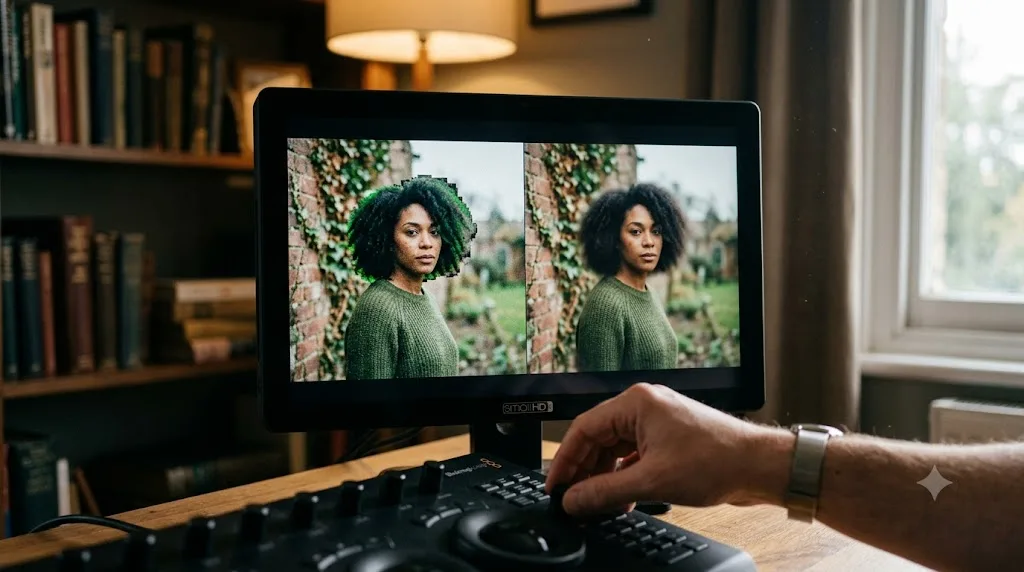
Why won't the qualifier isolate skin tones without grabbing the background?
Skin tone is one of the two most common qualifier failures colorists hit, and it happens for a geometric reason: skin's hue sits close to a lot of other common colors on the color wheel. Wood furniture, tan or beige walls, cardboard, certain hair colors, and warm-toned clothing all cluster near the same hue range as skin, which means a hue-based selection wide enough to catch every skin tone in a shot is often wide enough to catch half the set dressing too.
Cullen Kelly, a Los Angeles-based colorist with credits on Netflix, HBO, and Hulu projects, described the workaround directly in a Frame.io Insider piece on skin tones: "If we find that these tools are still too broad for our needs, we can narrow things further by using an HSL qualifier. However, instead of making a narrow selection by qualifying our hue, saturation, and luminance range, we make the broadest possible selection by attempting to pull our key using only one or two parameters," in his guide to skin tones in DaVinci Resolve. That's counterintuitive if your instinct is to tighten every slider at once. The better move is to isolate which single parameter, hue, saturation, or luminance, actually separates skin from the conflicting background color in your specific shot, and lean on that one first.
In a separate piece for Mixing Light, Kelly made the broader case against relying on qualifiers alone for this kind of work: "Qualifiers have a number of downsides: their ranges are non-intuitive, and they can easily create artifacts and unnatural-looking results," adding that "the hard edge of qualifiers usually requires activating a combination of Matte Finesse controls, of which there are many," in a tutorial on building HSL selections from Curves instead. His alternative, using HSL Curves to build a mathematically smoother selection than a hard qualifier boundary, is worth knowing about even if you stick with the qualifier for most jobs. We cover how curves and qualifiers relate further down.
Practically, when a skin tone selection keeps grabbing background: try isolating on saturation alone first, since skin and a painted wall that share a similar hue often differ more in how saturated they are than in the hue itself. If that's still too broad, add a Power Window shaped roughly around where the face or body sits in frame, which handles the geometric half of the problem that color alone can't.
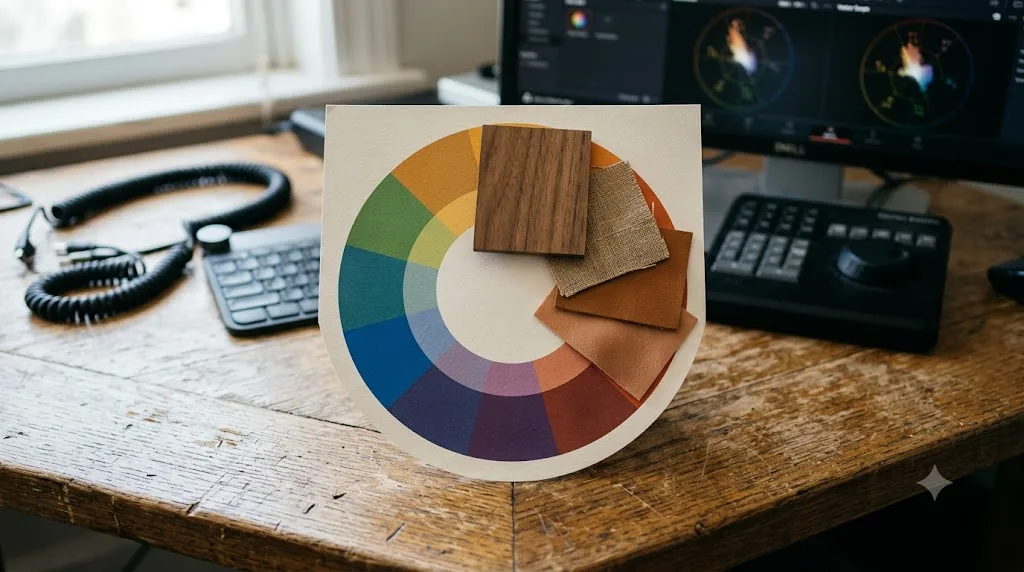
Why won't the qualifier isolate a sky correctly?
Sky is the other classic failure case, and it fails for a different reason than skin does: gradients and water. A real sky is rarely one flat color. It shifts from a deeper blue near the top of frame to a paler, hazier blue near the horizon, sometimes with visible banding in 8-bit footage, and if there's any water in the shot, that water usually reflects a hue close enough to the sky's own to get pulled into the same selection.
The fix here leans more heavily on Matte Finesse and windows than on hue-tuning alone, because a gradient sky often doesn't have one "correct" hue value to sample. Sample from the middle of the gradient rather than the extreme top or bottom, since a sample from either extreme will systematically exclude the other end of the gradient. Then use Chroma Softness (available on the 3D Qualifier) or the Sat and Lum range sliders (on the HSL Qualifier) to widen the tolerance enough to catch the full gradient without spilling into unrelated blues elsewhere in frame, like a blue shirt or a blue-tinted shadow.
For the water-reflection problem, a qualifier alone often can't separate two regions of nearly identical color, and that's exactly the situation a Power Window earns its keep in, covered next. Draw the window over the sky region only, and let the intersection of window and qualifier exclude the water even though its color would otherwise pass the same test.
If banding shows up in your matte on an 8-bit sky, that's the same compression and bit-depth issue covered earlier in this guide, not a separate sky-specific bug. A slightly higher Denoise value in Matte Finesse, or a touch of Pre-Filter, usually smooths visible banding out of the selection even when it's still faintly visible in the graded image itself.
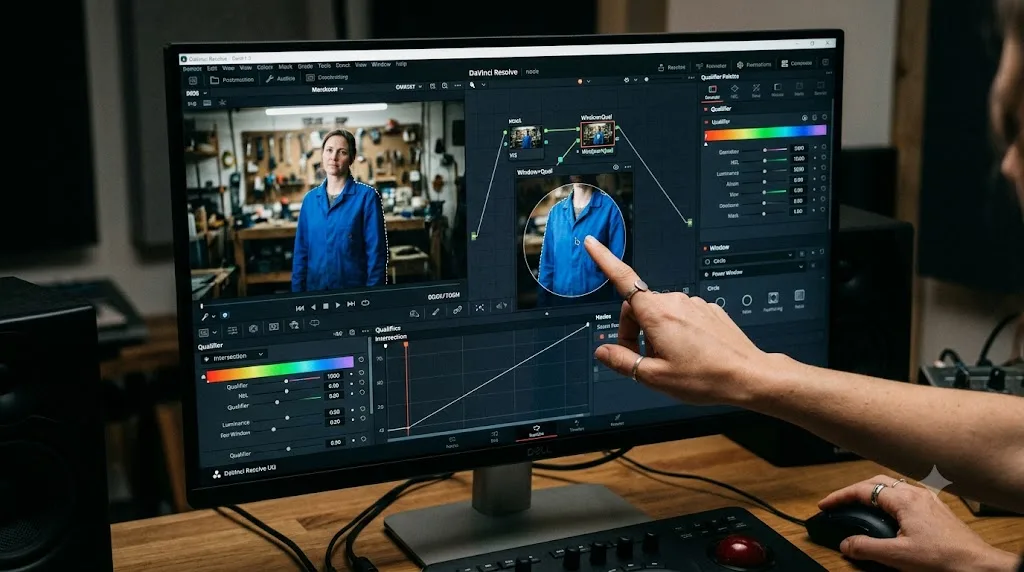
Should you combine a qualifier with a Power Window?
Yes, more often than most editors default to. A qualifier selects by color. A Power Window selects by screen position. They solve different problems, and when a qualifier keeps grabbing pixels you don't want because they happen to share a color with your target, no amount of Matte Finesse tuning fixes that, because the unwanted pixels are, correctly, the same color.
Add both a qualifier and a Power Window to the same node, and Resolve intersects them automatically: the correction only applies where the color match and the window's shape overlap. This is the standard move for the skin-tone-versus-background and sky-versus-water problems covered above, and it works because it stops asking color alone to do a job that requires geometry too.
A practical workflow: pull your qualifier first and get it as clean as compression and color space allow using the steps above. Toggle Highlight, look at where the selection is still grabbing pixels you don't want, then draw a rough Power Window over just the region where your actual target sits. You don't need the window to be precise, since the qualifier is still doing the fine color discrimination inside it. The window's only job is to exclude the parts of the frame where a same-colored object you don't want happens to live.
This combination also solves a problem Matte Finesse can't touch: a qualifier that's technically correct everywhere it's selecting, but is selecting a second, unrelated object elsewhere in frame that happens to share a color value. No amount of Denoise or Blur Radius separates two objects of genuinely matching color. Only position can.
Can HSL Curves fix a bad qualifier selection instead of Matte Finesse?
Sometimes, and it's worth knowing this exists as an alternative path, not just a Matte Finesse add-on. Resolve's HSL Curves tools, Hue vs Sat, Hue vs Lum, and Luma vs Sat among them, let you make a selection using smooth curve adjustments instead of a hard qualifier boundary. Blackmagic's manual describes the relationship directly: you can use curves "to make adjustments similar to those made using HSL qualification, but with one critical difference," where curves are mathematically smoother than the harder, matte-limited boundaries a qualifier produces, while qualifiers make it easier to define sharp, distinct edges when that's actually what you want.
Cullen Kelly's practical advice, from the same Mixing Light piece quoted earlier, leans toward curves specifically because qualifiers "can easily create artifacts and unnatural-looking results" and their hard edges "usually require activating a combination of Matte Finesse controls." If you've already tried Pre-Filter, Denoise, and a modest Blur Radius and the selection still looks artificial or edge-heavy, building the same isolation with a Hue vs Sat or Hue vs Lum curve is worth a direct comparison. Curves work by smoothly attenuating a correction based on where a pixel sits on the curve's x-axis, rather than making a binary in-or-out decision the way a qualifier's threshold does, which is exactly why the result reads as smoother.
This isn't an either-or choice in every situation. A common pipeline uses a qualifier to build a rough, geometrically-constrained selection with a Power Window, then a curve on a downstream node to refine how strongly the correction applies within that already-narrowed region. That gives you the qualifier's precision at excluding unrelated parts of frame, plus the curve's smoother falloff at the edges of what remains.
What mistakes make a qualifier selection worse without you realizing it?
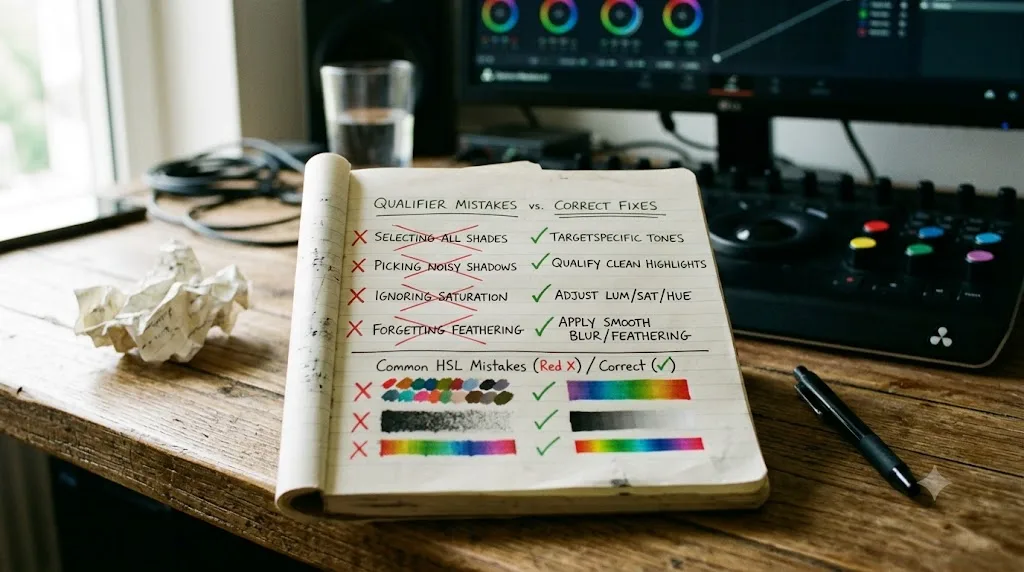
A handful of habits show up over and over in selections that "just won't cooperate," and none of them are the qualifier's fault.
Sampling with a wide eyedropper drag instead of a small, deliberate stroke. Dragging across a large area, especially one that spans a transition or a compression edge, teaches the qualifier a color range wider than the actual object, which is exactly what causes it to grab neighboring, unrelated colors. Click once, or drag a short stroke across a clean, representative patch, and add to the selection deliberately if you need more range.
Tightening every parameter at once instead of isolating which one actually separates your subject. As Cullen Kelly's advice above makes clear, the instinct to narrow hue, saturation, and luminance simultaneously usually produces a more fragile, artifact-prone selection than isolating the one parameter that does the real separating work and leaving the others wide open.
Judging the result from the graded image instead of the Highlight matte. A selection can look acceptable once a subtle grade is applied and still be riddled with holes or grabbing unwanted areas, invisible until you toggle Shift-H and actually look at the matte itself.
Jumping straight to Blur Radius to fix a ragged edge. As covered above, Blur Radius softens an edge, it doesn't clean up the source of raggedness, which is usually compression or an over-wide hue sample. Used as a first resort instead of a last one, it produces a soft, haloed matte instead of a genuinely clean one.
Qualifying on log or flat footage without converting first. Covered in depth earlier in this guide, but worth repeating as its own checklist item because it's the single highest-impact mistake on this list: an oversensitive, unstable qualifier on log footage is a color space problem wearing a "the tool is broken" costume.
Ignoring that GPU load climbs fast when several qualifiers stack up on a heavy timeline. Each active qualifier, especially the 3D Qualifier, adds real-time processing cost on top of whatever else is in your node graph. On a system that's already stretched, this can show up as dropped frames or a "GPU memory is full" warning that has nothing to do with the qualifier's accuracy and everything to do with your hardware. Our guide to DaVinci Resolve's GPU memory full error covers the fixes if that's what you're actually running into.
What order should you actually troubleshoot a bad qualifier selection in?
Work top to bottom. Each step below rules out a specific cause, and doing them in this order avoids wasting time tuning Matte Finesse sliders against a problem that a color space fix would have solved in ten seconds.
- Check the source image. Is the footage log or flat? If yes, add a Color Space Transform or Rec.709 LUT on an earlier node and qualify from the corrected version instead.
- Confirm you're using the right tool. Need one parameter isolated, hue only or luma only? Use the HSL Qualifier or the Luma Qualifier. Need a full color-range key like green screen? Use the 3D Qualifier, and try switching its colorspace dropdown between YUV and HSL if the first attempt looks wrong.
- Resample with a small, deliberate stroke across a clean, representative patch of the target color, instead of a wide drag across a transition.
- Toggle Highlight (Shift-H or Option-Shift-H) and actually look at the matte before judging anything by the graded image.
- Fix compression artifacts with Pre-Filter, then clean stray pixels with Denoise, both in Matte Finesse.
- Add a small Blur Radius, watching Highlight the whole time, stopping the moment jagged edges soften rather than pushing until they disappear entirely.
- Add a Power Window if the remaining problem is a same-colored object elsewhere in frame that a qualifier alone can't exclude.
- Try an HSL Curve as an alternative if the qualifier's hard edge still looks artificial after every step above.
If you get through all eight steps and the selection is still fighting you, the honest next move is often a completely different tool for the job. Magic Mask, Resolve Studio's AI-driven isolation tool, doesn't select by color at all, it tracks a subject the way you'd describe it to another person, which sidesteps the whole hue-overlap and compression problem entirely for a moving person or object. Our guide to Magic Mask covers when it beats a qualifier and when a qualifier still wins on GPU cost and precision.

What's the fastest fix when your qualifier just won't select right?
Start with the image, not the sliders. If the footage is log or flat, that's almost certainly your real problem, and no combination of Matte Finesse settings fixes a color space issue. Convert first, then requalify.
If the source is already corrected and the selection is still ragged, the fix order that actually works is: Pre-Filter for compression, Denoise for stray pixels, a small Blur Radius for the edge, and a Power Window the moment you're fighting a same-colored object rather than a genuinely dirty selection. Skip straight to whichever step matches your symptom instead of working through every slider from the top every time; a skin tone problem and a sky problem call for different first moves, and now you know which.
If your patience is thinner than your deadline, this is exactly the kind of stuck-on-one-slider moment TryUncle is built for. It looks at your actual Resolve window and the actual matte you're fighting, instead of sending you off to describe the problem to a forum thread that can't see your screen. And if you're still building your grading fundamentals before troubleshooting gets this specific, our color grading basics guide covers the node structure this whole workflow assumes you already have in place.
Frequently asked questions
- Why is my DaVinci Resolve qualifier selection full of holes and noise?
- Almost always compression. MPEG blocking artifacts and 8-bit chroma subsampling break a color range up into small blocks of slightly different values, and the qualifier reads each block as a separate color instead of one continuous region. Turn on Pre-Filter in Matte Finesse first, since Blackmagic built it specifically to clean the image before colors are sampled, then add Denoise if speckling remains.
- What's the difference between the HSL Qualifier, RGB Qualifier, and 3D Qualifier in DaVinci Resolve?
- The HSL Qualifier isolates hue, saturation, and luminance independently, which is the most intuitive for everyday work like skin tones and skies. The RGB Qualifier samples raw red, green, and blue channel values, useful mainly after a Color Space Transform. The 3D Qualifier samples every channel together in YUV, HSL, HSP, or LAB space and is built for full color-range keys like green screen, but it can't isolate a single parameter like hue-only or luma-only the way the HSL Qualifier can.
- Should I qualify log or flat footage directly, or convert it first?
- Convert first when you can. Log formats compress saturation and hue information into a narrow range of code values, so the qualifier's sliders become oversensitive and small mouse movements swing the selection wildly. Apply a Color Space Transform or a Rec.709 LUT on an earlier node, pull your qualifier on that corrected image, then let the matte drive an adjustment back in your working color space.
- Why won't the qualifier isolate skin tones without grabbing the background?
- Skin tone hue sits close to wood, tan fabric, and warm-toned walls on the color wheel, so a hue-only selection usually grabs all of them. Narrow the selection with saturation and luminance instead of widening the hue range, and add a Power Window to constrain the qualifier to the region of the frame where the skin actually is.
- What does Blur Radius actually do to a Color Qualifier matte?
- It softens the edge of the selection, which smooths out jagged, single-pixel edges. Blackmagic's manual sets its range at 0 to 2000 with a default of 0, and warns that pushing it too far feathers the matte past the edge of your subject, creating a visible halo where the correction bleeds into pixels it shouldn't touch.
- Can you combine a Color Qualifier with a Power Window in DaVinci Resolve?
- Yes, and it's often the fastest fix for a qualifier that keeps grabbing the wrong area. The qualifier selects by color, the window selects by screen position, and DaVinci Resolve intersects the two automatically when both are active on the same node, so the correction only applies where the color match and the screen region overlap.
- Does the free version of DaVinci Resolve have the same qualifier tools as Studio?
- Yes. The HSL Qualifier, RGB Qualifier, 3D Qualifier, Power Windows, and Matte Finesse controls are all available in the free version. What Studio adds on top is the DaVinci Neural Engine, which powers Magic Mask, an alternative to hand-tuning a qualifier when you're isolating a moving person or object rather than a color range.
Sources
- DaVinci Resolve Reference Manual: HSL Qualification Controls
- DaVinci Resolve Reference Manual: Matte Finesse Controls
- DaVinci Resolve Reference Manual: Using Highlight to See What You're Isolating
- DaVinci Resolve Reference Manual: Basic Qualification Using the 3D Qualifier
- DaVinci Resolve Reference Manual: 3D Qualifier Controls
- Mixing Light (Cullen Kelly): Build Your Own Qualifier in HSL Color Space Using Curves
- Frame.io Insider (Cullen Kelly): 5 Tips for Getting Perfect Skin Tones in DaVinci Resolve
- Mixing Light (Patrick Inhofer): First Look at the DaVinci Resolve 3D Keyer
- Frame.io Insider (Rafael Bernabeu Parreño): Insider Tips, Getting Better Results with Resolve's Qualifier
- Lowepost forum: How Do You Accurately Key in Log Space Inside Resolve?
- Filmactions: DaVinci Resolve Toggle Highlight Mask Shortcut
Put this guide to work with TryUncle.
Ask about the step you’re on. TryUncle sees your screen and points at the control you need, so you can keep learning in your own project.
Get TryUncle for Mac or WindowsKeep reading

Guides · Jul 7, 2026 · 35 min
How to Color Grade in DaVinci Resolve: The Basics
Learn how to color grade in DaVinci Resolve: build a node chain, balance shadows and highlights with Lift, Gamma, and Gain, and read the scopes.
Guides · Jul 7, 2026 · 7 min
How to Use Magic Mask in DaVinci Resolve (Complete Guide)
How Magic Mask in DaVinci Resolve isolates people and objects from one brush stroke, what changed in Resolve 21, and where the AI still needs help.
Fixes · Jul 7, 2026 · 25 min
DaVinci Resolve GPU Memory Is Full: Every Real Fix
Why DaVinci Resolve throws 'GPU memory is full,' and which fixes actually work: timeline resolution, drivers, effects, and how much VRAM you need.