Articles / Guidesupdated for DaVinci Resolve 21.0.3 (September 2026)
How to Make Music Sound Like a Radio in DaVinci Resolve
Quick answer
To make music sound like a radio in DaVinci Resolve 21, use Fairlight's Clip EQ to high-pass the lows around 300-500 Hz, low-pass the highs around 4-6 kHz, add a small midrange lift, then apply light distortion. Automate the effect so the filtered sound appears only where the edit needs it.
The radio sound is a narrow, slightly dirty version of the original music. I treat it as three jobs: remove the extremes, add a little grit, and automate the change so it lands with the picture. Our 100,000+ member editing community asks this often. After seven years of professional commercial editing, we keep the answer simple.
As of September 2026, the official support listing shows DaVinci Resolve 21.0.3, while the final Resolve 21 release added Fairlight folders and other workflow updates (Blackmagic Design support). The controls below use the Fairlight tools already built into Resolve.
What does a radio effect actually change?
A radio effect limits the frequency range, emphasizes the useful middle, and adds controlled nonlinearity. In practical terms, a high-pass filter removes the low end, a low-pass filter removes the top end, and distortion supplies the small-speaker grit. Electro-Harmonix describes the same combination as a way to create a pocket-radio effect, while Blackmagic's Fairlight guide explains that high-pass and low-pass filters remove opposite ends of the spectrum (Electro-Harmonix, Blackmagic Design Fairlight guide).
The high-pass and low-pass filters create the radio illusion; distortion only sells it.
Fairlight is well suited to this job. Blackmagic documents a six-band parametric equalizer on each mixer channel and six effect slots for adding plug-ins (Fairlight). The Clip EQ in the current Resolve workflow also exposes six bands, a capability Blackmagic documented in the Resolve 20 New Features Guide (Clip EQ guide). You don't need a dedicated "radio" preset.
Use these as starting points, not laws:
| Control | Starting point | What it does | Change it when |
|---|---|---|---|
| High-pass filter | 300-500 Hz | Thins the bass and removes the full-range weight | The effect sounds too full or muddy |
| Low-pass filter | 4-6 kHz | Removes the airy top end | The effect still sounds too modern |
| Midrange bell | Around 1-2 kHz, small lift | Keeps the processed music readable | The effect disappears behind dialogue |
| Distortion | Low drive or low wet mix | Adds grit and harmonic texture | The sound becomes fuzzy or painful |
| Output gain | Match the bypassed level | Prevents loudness from fooling your judgment | The processed version seems better only because it is louder |
The cutoff depends on the song. Start with the filters, then add the smallest amount of midrange and distortion that communicates the idea.
How do I make music sound like a radio in DaVinci Resolve 21?
To make music sound like a radio in DaVinci Resolve 21, preserve a clean version, apply Clip EQ to the working version, add restrained Fairlight FX Distortion, and compare the result at matched volume:
-
Keep the clean source. Duplicate the music onto a second clip or track, or make a compound version that you can bypass.
-
Open the audio controls. Select the working music clip and open its audio controls in the Inspector, or move to the Fairlight page and use the track channel strip. Blackmagic lists a full six-band parametric EQ in the Inspector and the Fairlight mixer (DaVinci Resolve Edit page).
-
Cut the low end. Enable a high-pass filter and begin around 300 Hz. Move it upward toward 500 Hz until the bass feels like it is coming from a small speaker. Stop before the music loses its rhythmic identity.
-
Cut the high end. Enable a low-pass filter and begin around 6 kHz. Move it downward toward 4 kHz if cymbals, air, or synth sheen still make the track sound hi-fi.
-
Give the middle a little focus. Try a broad, gentle lift around 1-2 kHz. Keep it small. The radio impression comes from the missing extremes, not from making the middle painfully loud.
-
Add distortion last. In the Effects Library, choose Audio FX and Fairlight FX, then add Distortion to the clip or track. Blackmagic's Beginner's Guide lists Distortion among the native Fairlight FX and explains that these plug-ins can be applied to a clip or a whole track (Blackmagic Design Beginner's Guide). Raise the drive slowly, then back it off until the grit is audible but the kick and snare remain recognizable.
-
Match the level. Lower the processed clip if necessary so the bypassed and processed versions are roughly comparable. A louder signal often sounds more exciting even when the tone is worse.
DaVinci Resolve 21's six-band Clip EQ is enough to build the core radio tone.
Why is my radio effect muddy, harsh, or too distorted?
If the radio effect sounds wrong, bypass Distortion first and fix the frequency shape before adding more processing. Most problems come from pushing the filter cutoffs or drive too far, not from missing another plug-in.
| Problem | First move | Second move |
|---|---|---|
| Muddy | Raise the high-pass cutoff in small steps | Cut a little low-mid energy instead of boosting the top |
| Too bright | Lower the low-pass cutoff | Reduce the midrange lift |
| Fuzzy or broken | Reduce Distortion drive or wet mix | Check the clip level before the effect |
| Thin and weak | Lower the high-pass cutoff | Blend some clean music underneath |
| Hard to hear under dialogue | Reduce music level first | Add only a modest midrange lift |
Don't confuse the radio effect with a bad mix. If the music competes with speech, solve that relationship with level automation or ducking before you make the music dirtier. For a broader Fairlight mixing workflow, see our guide to mixing audio in DaVinci Resolve with Fairlight.
The useful test is bypass, match, and listen. If the processed version only sounds smaller, use less processing or a clearer transition.
How do I automate the radio effect in DaVinci Resolve?
Automate the radio effect by moving between a clean state and a filtered state with clip keyframes or Fairlight automation. This keeps the full-range music available for the main section and makes the radio tone a deliberate event.
For a short transition, clip keyframes are usually the clearest option:
- Put the playhead where the radio sound should begin.
- Add a keyframe to the EQ or effect parameter you want to change.
- Move a short distance later and set the high-pass, low-pass, and distortion parameters to their radio positions.
- Add another keyframe where the effect should end, then return the parameters to the clean positions.
- Play across the transition and lengthen the move if it feels like a switch instead of a transformation.
For a track-wide pass, Fairlight's automation is more appropriate. Blackmagic describes recording parameter changes by enabling automation, choosing the parameter, and moving the control during playback (Fairlight automation). Resolve 21 also adds Fairlight folders for organizing audio tracks, which helps when a project has separate music, dialogue, and effects groups (Resolve 21 support).
Automation makes the radio effect feel intentional because the full-range music remains the default.
For a stronger transition, automate the filter first and distortion a fraction later. The offset can make the sound feel like it is passing through a device rather than snapping to a preset.
Should I use my own music or a licensed library?
Use music you created, received with clear permission, or licensed for the way you plan to publish it. The radio treatment changes the sound, not the copyright or license status.
Disclosure: this post contains an affiliate link. If you subscribe through it, we may earn a commission at no extra cost to you.
Affiliate recommendation: If you need a repeatable music catalog, Epidemic Sound is an option. Check the current plan terms, channel coverage, and client or advertising permissions before publishing. You can also use self-made music, a client-provided track with written permission, a single-track license, or another licensed library. The right choice depends on the project, not on the radio effect.
A licensed music source solves rights; it does not make an unlicensed track safe to publish.
For a project that uses stems, our guide to using music stems in DaVinci Resolve can help you process drums, bass, and melodic parts separately. That gives you more control than filtering a finished stereo mix, but it also creates more decisions.
What should I check before I export the radio effect?
Before exporting, bypass the effect, match the levels, listen on headphones and speakers, and confirm that the radio moment supports the picture. A technically clean chain can still be the wrong creative choice.
Run this final check:
- Compare clean and processed audio at similar loudness. Fairlight includes meters so you can watch the signal while you listen (Fairlight mixer).
- Check the transition in context. The effect may sound impressive alone but disappear once dialogue, ambience, and sound effects return.
- Watch for harshness. If the distortion makes consonants or cymbals painful, reduce drive before changing the EQ.
- Keep the clean version available. You may decide during the final picture review that the effect should last two seconds instead of eight.
- Confirm the music rights. Save the license or permission with the project, especially for client, advertising, or monetized work.
Grant Petty, Blackmagic Design CEO, said of Fairlight audio post production: "These new features allow complex audio post production work in the Fairlight page using a simple mouse and keyboard." The quote comes from Blackmagic Design's release on Fairlight improvements (Blackmagic Design). That is the right spirit for this effect. Start with the tools already in Resolve, make one clear tonal decision, and automate it with purpose.
If you want more sound-design ideas, continue with making sound effects realistic in DaVinci Resolve, then choose the version that serves the scene.
Frequently asked questions
- How do I make music sound like a radio in DaVinci Resolve?
- Open the music clip's Clip EQ, cut the lows with a high-pass filter around 300-500 Hz, cut the highs with a low-pass filter around 4-6 kHz, add a small midrange lift, and apply only enough distortion to create texture.
- Why is my DaVinci Resolve radio effect muddy?
- Raise the high-pass cutoff gradually, reduce any boost around the low mids, and bypass the distortion while you fix the EQ. Mud usually comes from leaving too much low-frequency energy in the effect.
- What frequencies should I use for a radio effect on music?
- Use 300-500 Hz as a high-pass starting range and 4-6 kHz as a low-pass starting range, then adjust by ear for the specific song and scene.
- Can I automate the radio effect in DaVinci Resolve?
- Yes. Use clip keyframes or Fairlight automation to move the EQ and distortion from clean to filtered, then back again, instead of leaving the entire song band-limited.
- Do I need DaVinci Resolve Studio for a radio music effect?
- No third-party plug-in is required for the basic effect. Use the EQ and Fairlight FX controls available in your Resolve installation, and check the Free and Studio feature differences if a specific plug-in is unavailable.
Sources
- DaVinci Resolve support and version updates
- Blackmagic Design Fairlight overview
- Blackmagic Design DaVinci Resolve Edit page audio controls
- DaVinci Resolve 20 New Features Guide, Clip EQ
- DaVinci Resolve Beginner's Guide, Fairlight FX
- The Fairlight Audio Guide, filters and EQ
- Grant Petty on Fairlight audio post production
- Electro-Harmonix transistor radio effect explanation
- Epidemic Sound licensed music option
Put this guide to work with TryUncle.
Ask about the step you’re on. TryUncle sees your screen and points at the control you need, so you can keep learning in your own project.
Get TryUncle for Mac or WindowsKeep reading
Guides · Jul 11, 2026 · 31 min
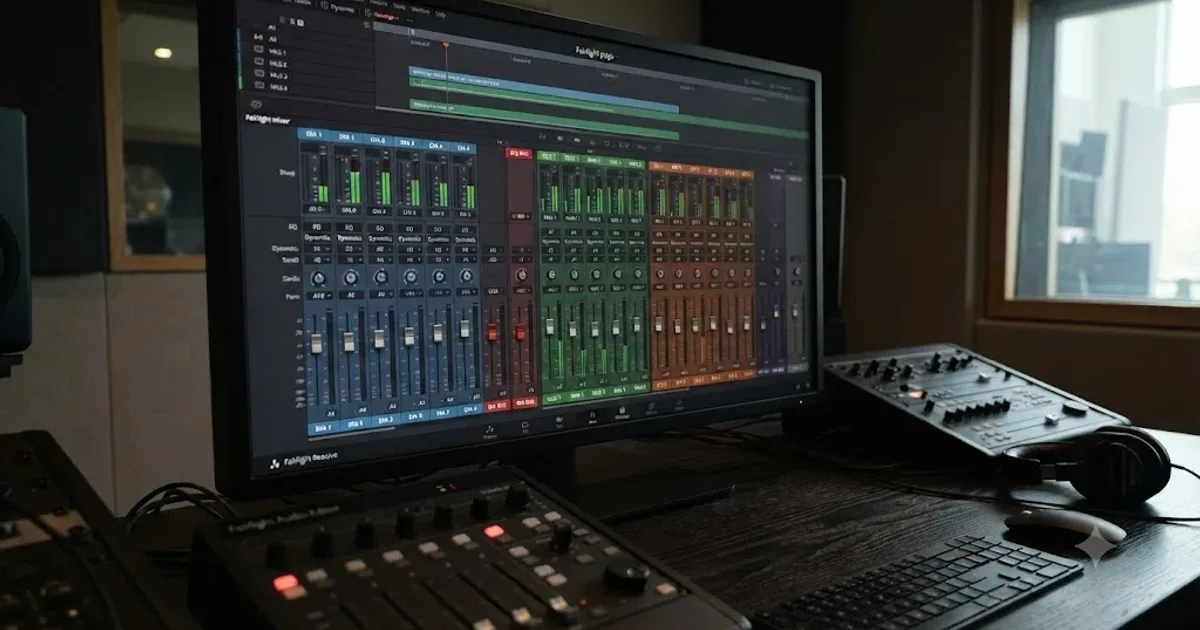
How to Mix Audio in DaVinci Resolve Using Fairlight
Mix audio in DaVinci Resolve's Fairlight page: build a dialogue/music/effects bus structure, gain-stage your clips, EQ and compress dialogue, then duck music under it.
Guides · Aug 28, 2026 · 8 min
How to Make Sound Effects Realistic in DaVinci Resolve 21
Make sound effects realistic in DaVinci Resolve 21 with layering, EQ, reverb, panning, automation, and room-aware mixing in Fairlight.

Guides · Aug 25, 2026 · 8 min
How to Use Music Stems in DaVinci Resolve 21
Learn how to import, align, mute, mix, and export vocal, drum, bass, and instrument stems in DaVinci Resolve 21.