Articles / Guidesupdated for DaVinci Resolve 21.0.3 (July 2026); After Effects 26.3 (June 2026)
How to Transfer a Timeline From DaVinci Resolve to After Effects
Quick answer
To transfer a timeline from DaVinci Resolve to After Effects, export it as AAF or XML from Resolve's Edit page, then import that file into After Effects. Windows still has a direct Pro Import option; Mac lost it in 2020, so bridge through Premiere Pro first, then import that Premiere project into After Effects instead.
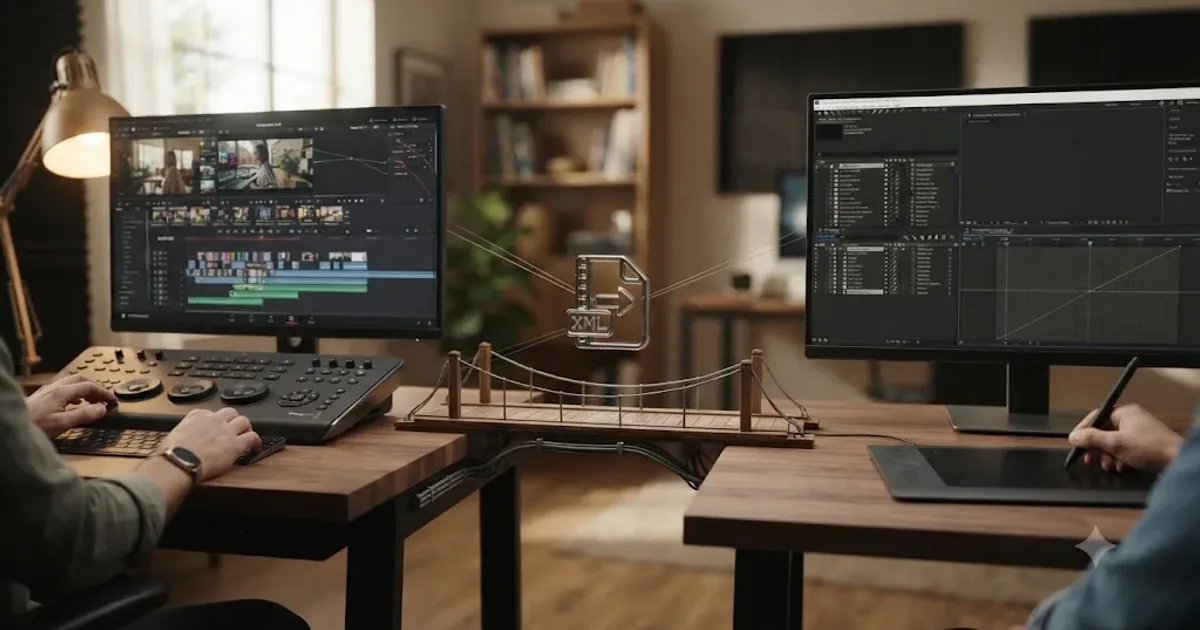
You cut the scene in DaVinci Resolve. Now a motion designer needs that same timeline in After Effects to build titles, screen replacements, or a VFX shot, and you don't want to hand them a rendered video file if you can help it. You want the actual cut: clip order, trims, sync, all of it, editable on the other side.
There's no menu item that says "send to After Effects." What exists instead is a two-format export, a platform-specific wall Adobe built in 2020, and a bridge through a second application that most guides on this topic gloss over or get wrong. We've spent seven-plus years cutting commercial video professionally, including projects that moved between Resolve and After Effects more than once in the same week, and this is the version of that workflow that actually holds up on a real deadline, not just in a demo.
As of July 2026, on DaVinci Resolve 21.0.3 and After Effects 26.3, here's the whole shape of it: export AAF or XML from Resolve, then get that file into After Effects either directly (Windows) or through Premiere Pro (Mac). Everything below is the detail behind making that work without losing sync, audio, or a day of your week to a silent failure.
What's the fastest way to move a DaVinci Resolve timeline into After Effects?
Export the timeline as AAF or XML from Resolve's Edit page, then import that file into After Effects, either directly on Windows or through Premiere Pro on Mac.
That's the entire shape of the workflow. AAF and XML are interchange formats, small text-and-metadata files that describe a timeline (clip order, trims, in and out points, basic transitions) without embedding the actual video. Both DaVinci Resolve and Adobe's apps can read and write them, which makes them the closest thing to a universal translator between two NLEs that were never designed to talk to each other directly.
AAF and XML move a timeline. Neither one moves a color grade. That single fact drives almost every decision in this guide. If all you need is the cut, the trims, and rough sync, an interchange file gets you there in minutes. If you need the graded, finished look to survive the trip, you're rendering a file instead, and that's a different section below.
The complication isn't the export. It's the import, and specifically, it's which operating system you're importing into. Windows has kept a direct path from AAF or XML straight into After Effects for over a decade. Mac lost that path in 2020 and never got it back. If you've tried following an older tutorial that says "just import the XML directly," and it didn't work, that's very likely why, and it's covered in detail two sections down.
How do you export a timeline from DaVinci Resolve as AAF, XML, or EDL?
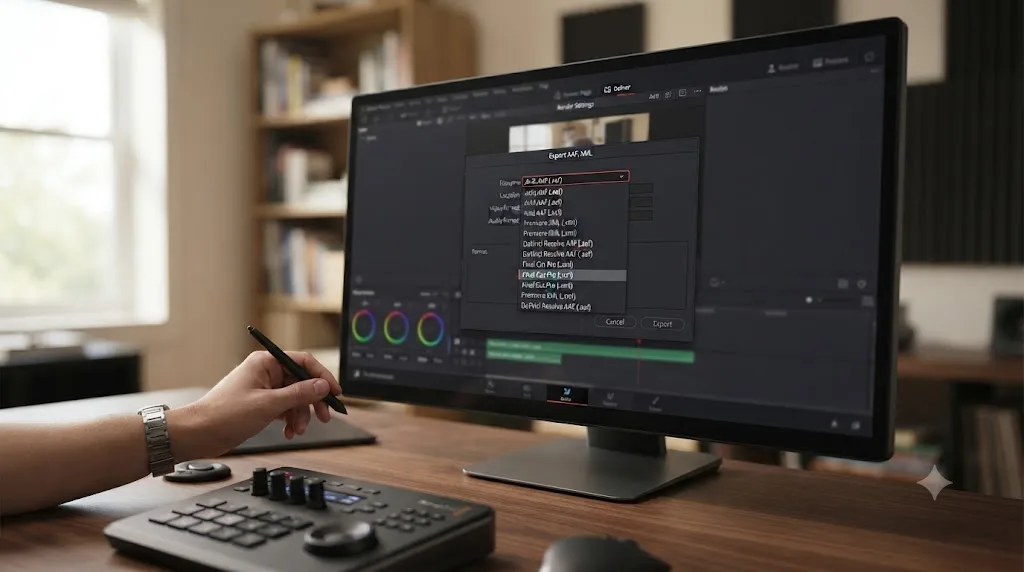
Open the Edit page, right-click the timeline in the Media Pool, and choose Timelines > Export > AAF/XML, or use File > Export AAF, XML from the menu bar (Shift+Cmd+O on Mac, Shift+Ctrl+O on Windows).
That opens a single export dialog with a Format dropdown. Pick AAF or one of the XML variants depending on what you need, name the file, and choose a save location, according to DaVinci Resolve's reference manual on exporting to AAF. If you already exported an unedited AAF earlier in your process and just re-trimmed the timeline since, Resolve offers a separate right-click option, Timelines > Export > Generate New AAF, specifically for regenerating that file from your current edit rather than the original import.
EDL export lives in the same Timelines > Export submenu but produces a different kind of file entirely: a plain text cut list with no embedded effects, transitions, or media references, built for conforming an offline edit against original camera files rather than for carrying a timeline's structure into a compositing app, per Resolve's manual page on exporting an EDL.
A few practical notes before you export:
- Name the file something you'll recognize in a folder full of similarly named exports.
interview_ep4_v3.xmlbeatsTimeline 1.xmlevery time you have to find it again three days later. - Export from the timeline you actually want, not just the one that's currently open. Resolve exports whichever timeline is active in the Edit page, and it's easy to grab the wrong version if you've been duplicating timelines for client revisions.
- Flatten multicam clips and compound clips before you export, covered in more detail in the edge-case section further down, since both structures tend to break the translation.
- Choose "Final Cut Pro 7 XML," not "Final Cut X XML," if XML is your export. Resolve's format dropdown offers five timeline export types in total: OpenTimelineIO, OpenTimelineIO Bundle, AAF, Final Cut Pro 7 XML, and Final Cut X XML, per that same reference manual page. Only the FCP7-style XML is what Premiere Pro's importer and After Effects' Pro Import plug-in actually expect. Pick the FCPX variant by mistake and the import fails or arrives empty, with nothing in the error (if you even get one) pointing you back at the format dropdown as the cause.
Which format should you actually export: XML, AAF, or EDL?
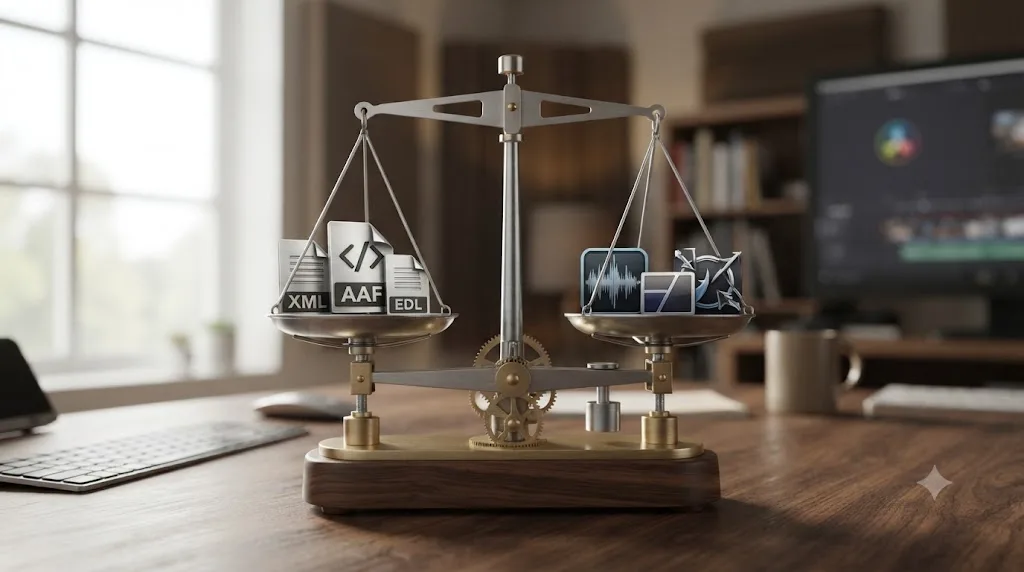
Pick XML for a picture-only cut, AAF when audio has to survive the trip, and treat EDL as a last resort with no real place in an After Effects handoff.
Each format was designed around a different priority, and picking the wrong one for what you actually need is one of the most common reasons this workflow feels broken when the real problem is a mismatched format choice.
| Format | Carries audio | Carries basic transitions | Carries effects/color | Best for | Weakest point |
|---|---|---|---|---|---|
| XML (FCP-style) | Partially, often unreliable across multiple tracks | Sometimes; cross-dissolves are the most fragile | Rarely translates cleanly | Cross-platform picture cuts, the safest general default | Multi-track audio and non-native effects |
| AAF | Yes, built for this specifically | Sometimes, similar fragility to XML | Rarely translates cleanly | Handoffs where audio sync matters, or where Avid/Pro Tools is also in the pipeline | Larger, more complex files that can be trickier to conform cleanly |
| EDL | No | No | No | Offline-to-online picture conforms against camera originals | Carries no media references or effects at all; nearly useless for a comp-focused After Effects handoff |
XML is the more broadly compatible choice and the one most tutorials default to, since it tends to behave more predictably across platforms than AAF, according to the general consensus among interchange-format writeups, including Adobe's own community discussion of AAF versus XML tradeoffs. AAF tends to hold more information, particularly around audio, but that extra data is also what makes it trickier to get a clean conform on the receiving end.
If the After Effects work is purely visual, motion graphics, screen replacements, VFX plates, export XML. You don't need audio riding along for that kind of work, and XML is the format more likely to open without a fight. Reach for AAF specifically when the motion designer also needs your dialogue or music track lined up against picture, and skip EDL entirely unless you're conforming an offline edit against camera originals in a completely different application, since it won't give After Effects anything to build a composition from.
Why can't After Effects import that file directly on a Mac?
Because Adobe removed the Pro Import plug-in from After Effects on macOS starting with version 17.0.4, and it has never come back.
Pro Import After Effects traces back to a company called Automatic Duck, whose Pro Import AE plug-in for translating Avid AAF and Final Cut 7 XML files into After Effects got folded directly into the app as a built-in feature starting with After Effects CS6, after Adobe brought Automatic Duck's founders in-house, per fxguide's history of Automatic Duck's tools. For years, that gave every After Effects user, Mac or Windows, a direct File > Import > Pro Import After Effects path for AAF, OMF, FCP XML, and Motion 4 project files.
That changed with Catalina. The Pro Import plug-in relied on 32-bit code, and Apple's macOS 10.15 Catalina dropped 32-bit application support entirely. Rather than rebuild the plug-in as a 64-bit binary, Adobe simply pulled it from the Mac build of After Effects starting with version 17.0.4, according to Adobe's own support documentation on the missing Pro Import plug-in. Windows was unaffected by that change, because Windows never had the 32-bit Catalina compatibility problem to begin with.
On a Mac, After Effects hasn't been able to open a Resolve AAF or XML directly since 2020. That's not a bug, a setting you're missing, or something a Resolve update will ever fix, since the removal happened entirely on Adobe's side of the handoff. We checked again against the current release: After Effects 26.3, shipped June 18, 2026, still shows no sign of Pro Import returning, per CG Channel's writeup of the 26.3 release, which covers new 3D rendering, clipboard, and noise-effect features with no mention of AAF, XML, or interchange import at all.
This is genuinely one of the most common points of confusion in this workflow, precisely because so many written tutorials, forum answers, and even Adobe's own general help pages describe the Pro Import path without flagging that it's Windows-only now. If you're on a Mac and following one of those, you're not doing anything wrong. You're just following advice that stopped being universally true five years ago.
Does Windows After Effects still have Pro Import After Effects?
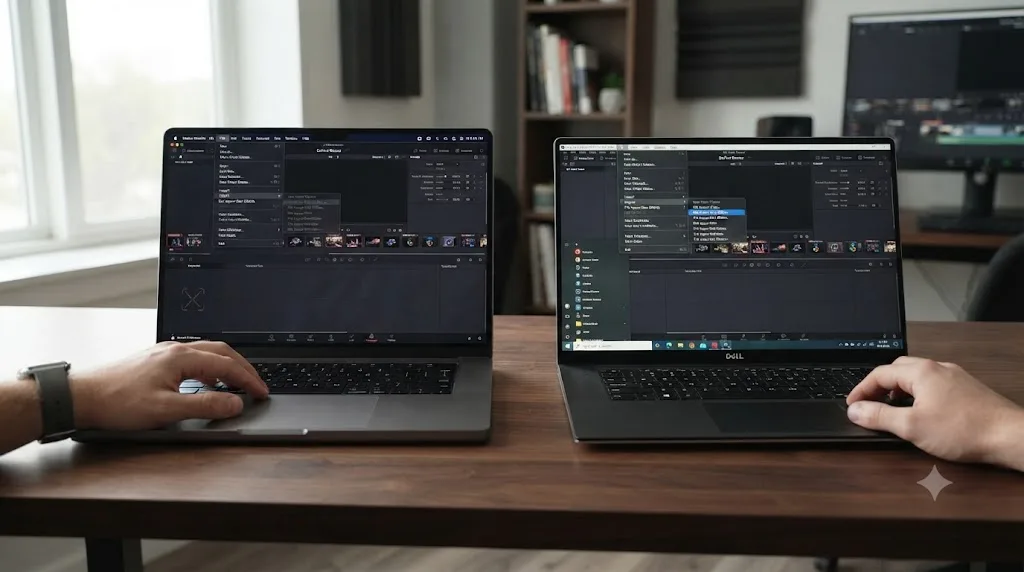
Yes. On Windows, File > Import > Pro Import After Effects reads an AAF, OMF, or FCP XML file directly, without needing a second application in between.
The steps are short:
- In After Effects, go to File > Import > Pro Import After Effects.
- In the dialog, set the file type filter to match what you exported (AAF, or Final Cut Pro XML).
- Browse to the AAF or XML file exported from DaVinci Resolve and select it.
- Click Import. After Effects builds a composition from the timeline structure, with each clip on the sequence becoming a layer.
This is genuinely the simplest version of this entire workflow, and if you're on Windows, it's worth confirming your import worked cleanly before assuming you need any of the Mac-specific steps later in this guide. Check that clip order matches Resolve, that trims landed where you expect, and that audio (if you exported AAF) lined up against picture.
Two things still catch Windows users out even with Pro Import available:
- Effects and color grades still don't translate. Pro Import brings across the timeline structure, not Resolve's node-based grade or any Resolve-only effect. That limitation isn't about the OS. It's inherent to what AAF and XML describe in the first place, and it applies identically on Windows and Mac.
- Nested and multicam structures still cause problems. The XML and AAF translation layer struggles with anything that isn't a flat, simple sequence of clips, a limitation covered in more depth in the edge-case section below, and Pro Import doesn't route around that, since the fragility lives in the file format itself, not in whichever app is reading it.
What's the real Mac workflow: bridging through Premiere Pro?
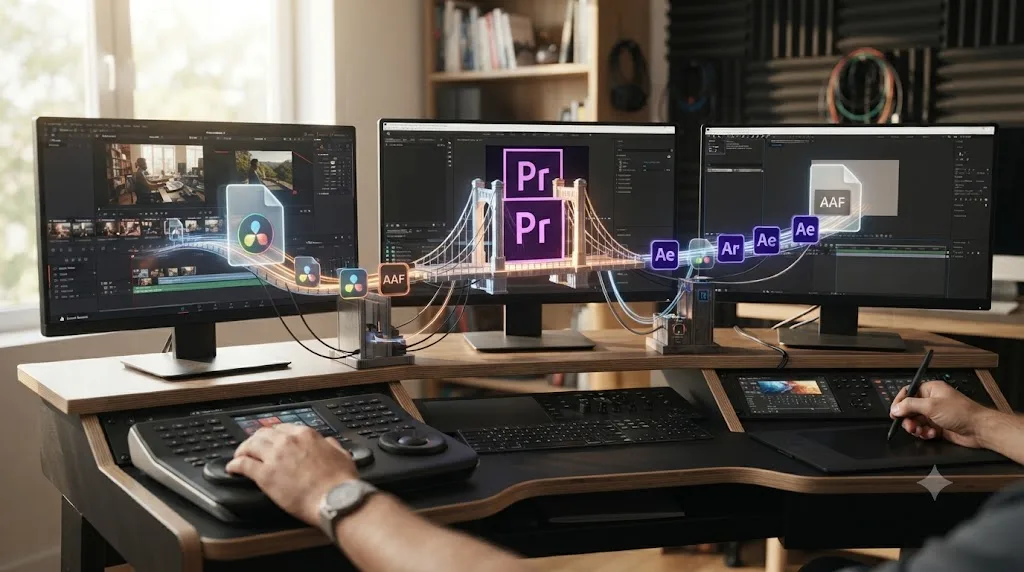
Import the AAF or XML into Premiere Pro first, then bring that conformed Premiere sequence into After Effects, either as a one-time static import or through Dynamic Link.
Adobe's own current documentation for moving Premiere and After Effects projects between each other still describes this exact two-app pattern for interchange files, per Adobe's help page on importing from After Effects and Premiere Pro, and multiple Adobe community threads confirm this is the standard workaround Mac users have relied on since Pro Import disappeared, including a community discussion specifically about AAF import to After Effects on Mac.
Premiere Pro isn't optional in this workflow anymore. It's the bridge Adobe left standing after it tore the direct one down. Here's the full sequence:
- Export AAF or XML from DaVinci Resolve, following the steps two sections up.
- Open or create a project in Premiere Pro, then go to File > Import and select the AAF or XML file.
- Relink any offline media. Premiere will prompt you to locate your original camera files if it can't find them at the path referenced in the export. Point it at the folder holding your originals.
- Confirm the conformed sequence looks right inside Premiere before moving on. Check clip order, sync, and trims. Anything broken here follows you into After Effects, so it's worth catching now rather than after you've already started building a composition.
- Bring the sequence into After Effects. You have two options here, covered in full in the next section: a one-time static import, or a live Dynamic Link.
If you don't already have Premiere Pro installed, it's worth checking your Creative Cloud plan before assuming you need to buy anything separately. Anyone on an All Apps Creative Cloud subscription already has Premiere Pro included at no extra cost; if you're on a single-app After Effects plan, you'd need to add Premiere or use a trial specifically for this bridge step.
What actually survives the Premiere Pro bridge, and what doesn't?
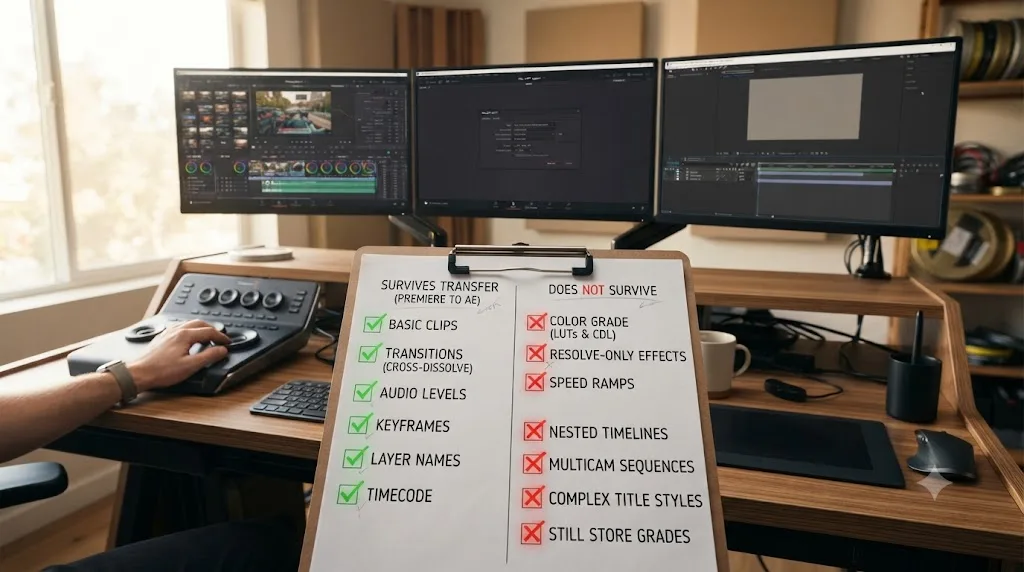
Clip order, trims, in and out points, and markers survive reliably. Effects, color grades, and most transitions don't.
Once your Resolve timeline is conformed inside Premiere Pro, you get two ways to bring it into After Effects, and they behave differently.
File > Import > Premiere Pro Project is a one-time, static conversion. In the import dialog, you choose which sequences to bring in and whether to include audio, and After Effects turns that sequence into a composition, with each clip becoming its own layer. According to Adobe's documentation and independent breakdowns of the process, After Effects preserves the order of clips, the trimmed in and out points, and marker locations during this conversion, per Adobe's help page on importing sequences and compositions and confirmed by a PremiumBeat walkthrough of the same process written by editor Clay Asbury. Asbury also flags an important structural detail: unlike Dynamic Link, "importing your entire Premiere Pro project into After Effects tends to be a one way operation," meaning changes you make back in Premiere afterward won't automatically update the After Effects comp.
File > Adobe Dynamic Link > Import Premiere Pro Sequence creates a live link instead. Dynamic Link connects Premiere Pro and After Effects (and Audition) so that a composition built from a linked sequence updates automatically whenever the source sequence changes back in Premiere, without any manual re-import, according to Adobe's documentation on Dynamic Link. This costs you flexibility elsewhere: Premiere has to stay open and running for the link to stay live, which adds real memory and CPU overhead on a heavier project.
Here's what to expect either way:
| Element | Survives the bridge | Notes |
|---|---|---|
| Clip order | Yes | Matches your Resolve timeline's arrangement |
| Trims and in/out points | Yes | Carried through both Premiere's conform and the AE import |
| Markers | Yes | Useful for flagging exact frames a designer needs to hit |
| Audio (if AAF) | Usually | Depends on the AAF conform going cleanly in Premiere first |
| Basic dissolve transitions | Sometimes | Cross-dissolves are the most fragile element in any XML/AAF translation |
| Color grade | No | Resolve's node-based grade never leaves Resolve |
| Resolve-only effects (Magic Mask, DeNoise, most Resolve FX) | No | These have no equivalent in Premiere's or After Effects' effect set |
| Compound clips / multicam structure | Rarely, unless flattened first | Covered in the edge-case section below |
If the grade is part of what the motion designer needs to see and match, don't rely on this bridge to carry it. Render the graded timeline separately and hand that over alongside the editable sequence, covered next.
Is there a plugin that skips Premiere Pro entirely?
Not one built specifically for moving a DaVinci Resolve AAF or XML into After Effects on a Mac. The closest options exist, but they're aimed at a different source format.
Automatic Duck, the company whose technology became Pro Import After Effects, relaunched independently in 2015 after its founders left Adobe, and now sells a product called Ximport AE for roughly $199, which translates Final Cut Pro X timelines into After Effects compositions, according to fxguide's coverage of Automatic Duck's return. That's built around FCPX's own XML structure specifically, not the FCP7-style XML that Resolve exports, so it's not a drop-in fix for this workflow even though the names are similar enough to cause confusion.
There's also XtoCC, a $49.99 Mac utility available on the App Store, described in its own listing as "the all-in-one tool to move a Final Cut Pro X Event or Project to Premiere Pro, After Effects, Audition, FCP 7 and beyond," per its App Store listing. Like Ximport AE, it's built around Final Cut Pro X as the source, not Resolve. Some editors have reported success feeding it Resolve-exported FCP XML anyway, since the format overlaps, but that's outside what the tool is explicitly designed and supported for, so treat it as a maybe rather than a guaranteed fix if you go that route, and test it on a disposable copy of your project first.
Going the other direction, After Effects into Resolve, there's a genuinely purpose-built free tool: Igor Ridanovic's Send to Resolve.jsx, an After Effects script that automates creating a new Resolve project and importing rendered elements into it, per its GitHub repository. It doesn't help with the direction covered in this guide, but it's worth knowing about if your workflow runs both ways on the same project.
The practical reality in 2026 is that Premiere Pro remains the dependable, well-documented Mac bridge for a Resolve-to-After-Effects timeline transfer. That's not a satisfying answer if you don't already own Premiere, but it's the honest one, and it beats spending an afternoon testing a $199 tool built for a different source format against a deadline.
When should you render your Resolve timeline instead of exporting XML or AAF?
Render when the grade, effects, or exact visual look need to stay locked, and the After Effects work only needs to reference or composite on top of a finished picture rather than re-edit the cut itself.
An interchange file gets you an editable structure with none of the finished look. A render gets you the finished look with none of the editable structure. Most projects need one or the other, not both, and picking wrong wastes real time.
Reach for a render-and-import approach when:
- The color grade is done and needs to stay exactly as graded. A motion designer building a title card that needs to match your final look should be working against the actual graded frame, not a re-created guess at what the grade will eventually look like.
- The After Effects work is compositing on top of finished picture, like a screen replacement, a lower third, or a VFX element that needs to sit convincingly against footage that's already color corrected.
- The timeline includes heavy Resolve-only processing, like noise reduction, stabilization, or Magic Mask work, none of which has any equivalent in After Effects or Premiere to translate into.
The steps:
- On Resolve's Deliver page, add the graded timeline to the render queue using a high-quality intermediate codec: Apple ProRes 4444 or 422 HQ, or DNxHR HQX if you need a non-Apple option.
- Render the file.
- Import the rendered file directly into After Effects's Project panel like any other footage item.
- If you still want a reference to the original cut's structure alongside the finished picture, export XML or AAF too and bring both into After Effects, using the rendered file as your visual source and the XML purely as a reference for exact cut points.
A rendered ProRes file survives every version mismatch that an XML file doesn't. There's no conform step, no relinking, no risk of a fragile format translation breaking on multicam or nested structures. The tradeoff is exactly what you'd expect: once it's rendered, nothing about the cut is adjustable anymore inside After Effects. If the client asks for a re-edit after this point, that happens back in Resolve, and you render again.
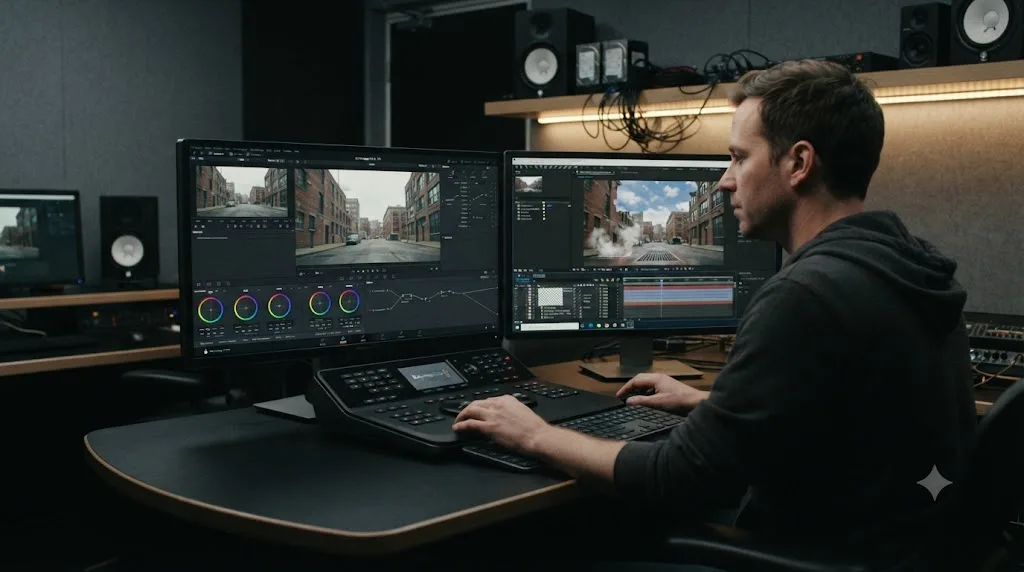
How do you move a VFX-heavy shot into After Effects without losing the grade?
Grade the raw footage first, then hand off isolated, alpha-carrying renders of just the elements that need compositing work, rather than trying to move the whole graded timeline as an editable structure.
This is a different problem than a simple title or lower third handoff, and editors who work this way regularly have settled on a fairly consistent answer. In a long-running Reduser forum thread specifically about moving work between After Effects and DaVinci Resolve, colorist and compositor Jonathon Lee laid out the standard order of operations: "Typically there's a pre-grade done on the raw footage prior to VFX processing," he wrote, before the VFX layers get built and a final grade gets applied to the assembled composite, according to the Reduser thread on After Effects and DaVinci Resolve workflows. For the actual handoff format, Lee recommended rendering each VFX element as its own isolated layer with an alpha channel: "ProRes4444+ alpha if you need QuickTime files or TIFF LZW (16bit) + alpha if the colorist can deal with image sequences," from that same thread.
Another poster in the same discussion, Joseph Owens, was blunt about why this matters: current software can't preserve After Effects' own filters and effects during any kind of project-level import into Resolve, so there's no shortcut around rebuilding or re-referencing the visual result by hand.
The practical sequence for a VFX-heavy project:
- Apply a basic pre-grade to the raw footage in Resolve before it heads to After Effects, covering white balance and exposure so the compositor is working against footage that's already roughly correct.
- Export or render that pre-graded footage for use as the compositor's source plates.
- Build the VFX work in After Effects against those plates.
- Render each finished VFX element back out with an alpha channel, using ProRes 4444 for a single QuickTime file or 16-bit TIFF for an image sequence, isolated from the background rather than baked into a single flattened shot.
- Bring those isolated renders back into Resolve and composite them onto your timeline, applying the final grade to the assembled result rather than to the raw VFX elements alone.
Render the grade before you send the shot, or the shot leaves without it. This isolated-layer approach costs more setup time than a straight XML handoff, but it's the difference between a compositor working blind against ungraded footage and one working with an accurate sense of the final look from the start.
What about audio: does AAF carry multichannel sound cleanly, and can you export OMF?
Not reliably, and no. DaVinci Resolve has no OMF export option at all, and an AAF's audio can arrive wrong if your tracks and clips aren't configured the way you'd expect, so this is worth checking before you export, not after a confused message comes back asking where the dialogue went.
DaVinci Resolve doesn't export OMF, full stop. Resolve's own reference manual lists exactly five timeline export formats: OpenTimelineIO, OpenTimelineIO Bundle, AAF, Final Cut Pro 7 XML, and Final Cut X XML, according to DaVinci Resolve's reference manual page on exporting to AAF and XML. OMF isn't on that list and never has been. If a sound editor or a Pro Tools-based collaborator tells you they need an OMF specifically, and they might, since OMF has been the standard interchange format for audio post for decades, you can't hand it to them straight out of Resolve.
The workaround runs through the same bridge this whole guide already leans on. Export AAF or XML from Resolve, import it into Premiere Pro, and use Premiere's own File > Export > OMF command from there, which Adobe documents directly on its help page for exporting OMF files for Pro Tools. It's an extra hop, but a reliable one, since Premiere's OMF export is mature and well documented in a way Resolve's audio interchange still isn't.
For a straight After Effects handoff, you're almost always exporting AAF instead of chasing OMF, and AAF has its own channel-mapping quirks worth knowing before you send a file.
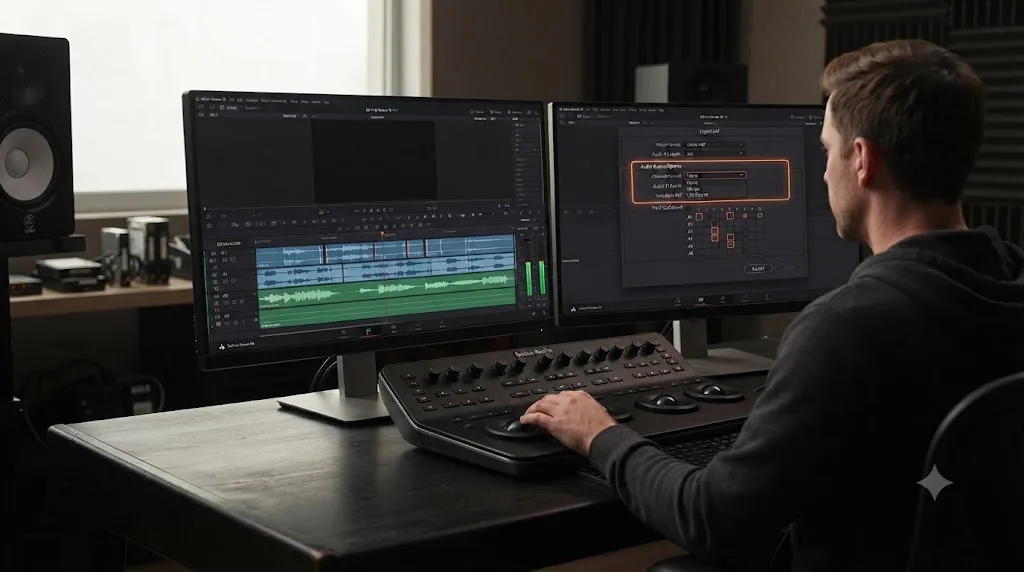
The "Render one track per channel" setting decides whether your multichannel audio survives as one file or several. In the audio tab of Resolve's AAF export options, that setting is checked by default. Checked, a 5.1 surround mix splits into six separate mono WAV files. Unchecked, Resolve exports multichannel polyphonic WAV files instead. The safer default for most handoffs, including one to a motion designer who just needs stereo dialogue to stay in sync, is to leave it checked, per Production Expert's breakdown of building a Pro Tools-friendly AAF from DaVinci Resolve.
There's a second, quieter failure mode: a mismatch between a clip's actual channel count and the track it sits on. A dual-channel field recording placed on a mono timeline track in Resolve gets treated according to that track's mono configuration during export, not according to the file's original stereo layout. The result is audio that arrives thin, one-sided, or missing a channel entirely, and it looks exactly like a broken export even though the export did precisely what the timeline told it to do.
| Situation | What to check | Fix |
|---|---|---|
| Collaborator specifically asks for OMF | Resolve has no OMF export | Bridge through Premiere Pro and export OMF from there |
| 5.1 or multichannel audio needs to stay intact as one file | The "Render one track per channel" setting in the AAF export dialog | Uncheck it for a single polyphonic file; leave it checked (the default) for individual mono files |
| Dialogue sounds thin, one-sided, or missing after import | A stereo or multichannel clip sitting on a mono timeline track in Resolve | Match the clip's channel count to the track's configuration in Resolve before you export, not after |
| Motion designer only needs picture, no audio at all | N/A | Export XML, skip AAF and this whole section |
Before you hand the AAF off, do one gut check: import it into Premiere Pro yourself first, the same step you'd take for the Mac bridge anyway, and scrub through a few cuts with audio monitoring on. Confirm dialogue lines up with the picture and nothing's dropped before you tell anyone else the file is ready. If the motion designer's job is purely visual, none of this matters. Export XML and move on. This section only earns its place in your workflow the moment audio sync actually has to survive the handoff.
Should you even be editing in After Effects?
Usually not. After Effects is built for visual effects and motion graphics work, not for cutting a scene together, and most of the friction in this transfer disappears once the edit itself happens somewhere else.
This might sound like an odd thing to bring up in a guide about moving a timeline into After Effects, but it comes up constantly in real workflow discussions, and it's worth addressing directly. In that same Reduser thread, veteran Hollywood colorist Marc Wielage, whose four-decade career includes color and restoration work on more than 400 feature films, pushed back hard on a user trying to build an entire edit inside After Effects before moving it to Resolve: "Why are you doing any editing at all in After Effects? Why not just do VFX in After Effects? You seem to be going after this in an extraordinarily complicated way," he wrote in the Reduser thread on After Effects and DaVinci Resolve. When the conversation continued, he was equally direct: "Editing in After Effects is not a practical workflow. You'd have better luck doing VFX in Premiere (and even that is not ideal)," from that same thread.
His recommended structure, and the one that matches how most professional pipelines are actually built: cut in Premiere or Resolve, export XML to move that cut wherever it needs to go, and reserve After Effects specifically for VFX and motion graphics work layered on top of an edit that's already locked.
Editing belongs in Premiere or Resolve. After Effects is where you build VFX and motion graphics, not where you cut a scene. This isn't a purity argument. It's a practical one: every extra step in this guide, the format mismatches, the Pro Import wall on Mac, the effects that don't translate, exists specifically because AAF and XML were designed to move timelines between editing applications, not to shuttle a full edit in and out of a compositing tool that was never built to be a primary NLE. The cleanest version of this entire workflow is the one where After Effects only ever receives a timeline once, late, after the cut is already done.
What goes wrong during the transfer, and how do you fix it?
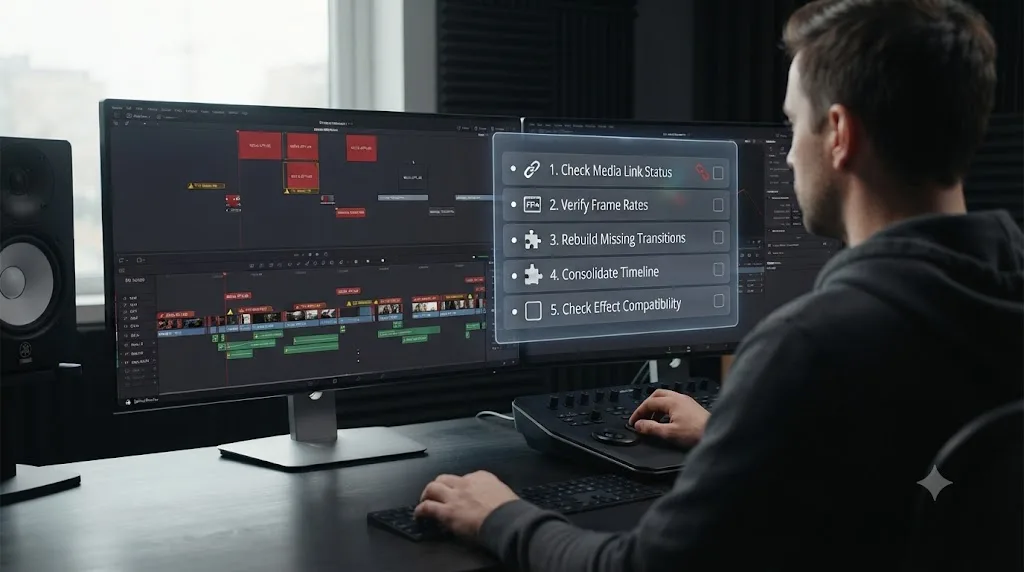
Most failures trace back to one of five causes: unflattened nested structures, offline media, a frame rate mismatch, an unsupported effect, or the wrong export format for what you actually needed.
| Symptom | Likely cause | Fix |
|---|---|---|
| Multicam or compound clip sections import blank, black, or offline | XML and AAF can't unpack nested or multicam structures reliably | Flatten multicam clips and break apart compound clips in Resolve before exporting, per the general limitation described in Cutsio's breakdown of why XML timelines break |
| Clips show up offline or missing in Premiere after import | Media path in the exported file doesn't match where your originals actually live | Relink manually in Premiere by pointing it at the correct media folder, matching by file name rather than full path when prompted |
| Clip plays at the wrong speed or drifts out of sync | Frame rate mismatch between the Resolve project and the Premiere or After Effects sequence settings | Confirm your Resolve project's frame rate before export, and check Premiere's sequence settings match it after import, adjusting before you conform rather than after |
| Transitions vanish or show up as a frozen frame | Cross-dissolves and other transitions are the most fragile element in any XML/AAF translation | Rebuild dissolves and transitions by hand in After Effects rather than expecting them to survive the export |
| Import completes but the sequence is nearly empty | The source XML or AAF itself is malformed, often from nested sequences or non-native effects | Flatten every nest and strip third-party or Resolve-only effects in Resolve before re-exporting |
| Audio plays back thin, one-sided, or missing a channel | A stereo or multichannel clip was sitting on a differently configured mono or stereo track in Resolve | Match the clip's channel count to the track's configuration before export, and check the "Render one track per channel" setting matches what your destination expects |
| An After Effects comp linked through Dynamic Link shows up offline after an AAF round trip | AAF can't reference a live .aep file, and Dynamic Link only connects Adobe's own apps to each other | Render the After Effects comp to a real media file before exporting the AAF, matching the specs of your other proxies |
| Color looks completely different from Resolve | Neither AAF nor XML carries grade data; this is expected, not a bug | Render the graded timeline separately if the look needs to survive, following the render workflow covered above |
Most of this list overlaps directly with what breaks when an XML moves in the opposite direction, from Premiere into Resolve, which is covered in full in our guide to fixing a broken Premiere XML import into DaVinci Resolve. The underlying causes are largely the same regardless of which direction the timeline is traveling, since the fragility lives in the interchange format itself, not in either application specifically.
Should you use After Effects or Resolve's own Fusion page for this work?
Use Fusion when staying inside Resolve makes sense for the job; use After Effects when the work leans on its much larger plugin and template ecosystem, or when the collaborator you're handing off to already lives there.
This is a genuinely separate decision from everything else in this guide, and it's worth asking before you build out a whole transfer pipeline for a job that might not need to leave Resolve at all. Fusion is a free, node-based compositor built into every edition of DaVinci Resolve, including the non-Studio version, and it can do a meaningful share of what After Effects does: keyframed animation, tracking, keying, 3D compositing, title generation, according to Blackmagic's own Fusion product page. If you're new to it, our Fusion page tutorial for beginners walks through the MediaIn and MediaOut nodes, the Merge node, and basic tracking before attempting anything more ambitious.
The honest tradeoff, laid out plainly in a direct comparison of the two tools by motion designer Lewis McGregor, comes down to structure: After Effects "works on a layer-based system," stacking elements in order, while Fusion's node approach means you're connecting processing blocks instead of hunting through nested layer stacks, per his comparison of Fusion and After Effects. Neither structure is simply better. They're different mental models, and switching between them costs real time regardless of which direction you're switching.
A broader comparison from Storyblocks frames the same split along similar lines, and is worth reading if you're weighing which tool to standardize on for a whole pipeline rather than a single project, according to Storyblocks' comparison of DaVinci Resolve and After Effects.
If your reason for reaching for After Effects is mostly that you or your collaborator already know it well, that's a legitimate reason on its own, and none of this guide's transfer steps become unnecessary just because Fusion exists as an alternative. Both tools are real options. The transfer workflow above matters specifically when the decision has already been made, whether by you, a client, or a collaborator's own toolset, that the work is landing in After Effects.
A full worked example: sending a graded interview timeline out for title work
Say you've cut and graded a ten-minute interview segment in DaVinci Resolve, and a freelance motion designer needs to build animated lower thirds and an opening title card that has to sit convincingly over your already-graded footage.
Here's the order that actually works, combining several pieces covered separately above into one real sequence:
- Confirm the grade is locked. Nothing about this process works cleanly if the grade might still change, since you'd be re-rendering the reference material every time you adjust a node.
- Render the graded timeline to ProRes 422 HQ, giving the designer a finished, accurate picture reference to build against. This isn't the file they'll composite into; it's what they'll match their titles to visually.
- Export the same timeline as XML, giving the designer the actual cut structure: where each speaker starts and stops, where you want each lower third to appear and disappear.
- Send both files, clearly labeled, along with a short note specifying which is the visual reference and which is the structural reference, since handing over two files with similar names and no explanation invites confusion.
- On the designer's end (assuming a Mac), they import the ProRes render directly into After Effects as footage, and separately bring the XML into Premiere Pro first, then use File > Import > Premiere Pro Project to get an editable timeline structure showing exactly where each name and title should appear.
- The designer builds title work against the ProRes reference, using the imported timeline structure purely for timing, not as the actual footage they composite over.
- The designer renders their finished title elements with a straight alpha channel, in ProRes 4444, and sends those back to you.
- You import those rendered titles into Resolve's Media Pool and place them on tracks above your original graded footage, timed against your own timeline rather than the designer's reconstructed one, since your original Resolve project remains the source of truth for exact timing.
This example uses almost every technique covered in this guide at once: the format choice, the Mac-specific Premiere bridge, the render-instead-of-XML decision for anything grade-dependent, and the alpha channel handoff for VFX-style elements coming back the other direction. Most real handoffs won't need every piece simultaneously, but knowing how they fit together means you can pull just the parts a simpler job actually needs.
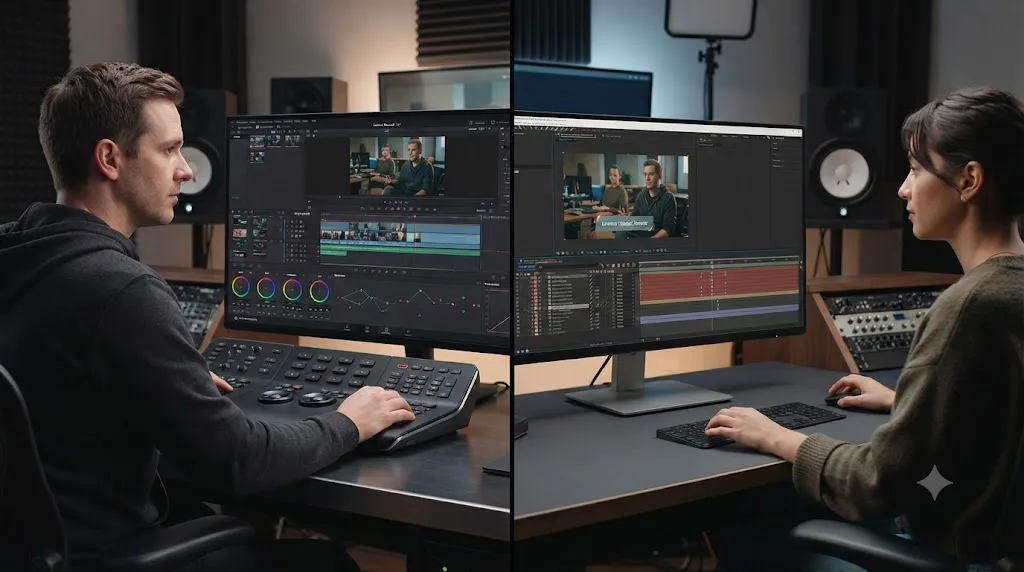
A second worked example: handing off a multi-episode series to a remote motion designer
Say you're cutting a six-episode branded web series, each episode running fifteen to twenty minutes, and every episode needs the same animated intro, the same lower-third template for each speaker, and a matching outro card. The motion designer building those elements is remote, works on a different machine than you, and won't see any of your Resolve timelines directly. This is a different shape of problem than the single-interview example above: the challenge isn't getting one timeline across cleanly, it's doing that six times without the process falling apart on episode four.
Here's the sequence that holds up across a whole season instead of just one segment:
- Lock episode 1 first and treat it as the template. Build and export everything for a single episode start to finish before you touch episode 2, so any format or naming problem shows up once, on one file, instead of six times at once.
- Export one XML per episode, never one combined XML for the whole season. A single ninety-minute file covering six episodes stacks every risk from the edge cases below (nested structures, long-timeline conform failures, mismatched frame rates if any episode was cut slightly differently) into one enormous handoff. Six smaller exports are also six independently retriable handoffs; if episode 4's XML fails to conform cleanly in Premiere, you're debugging one file, not hunting through a giant timeline for the one broken section.
- Name every export with the episode number and a version tag, something like
series_ep03_v2.xml, notTimeline 1.xmlorFinal Final.xml. Across six episodes and likely at least one revision round each, a folder of unlabeled exports turns into a guessing game fast. - Use markers for anything that has to land on an exact frame. If the lower third for each speaker needs to appear the instant they start talking, drop a marker on that frame in Resolve before export. Markers carry through both AAF and XML, and they save the motion designer from re-watching a fifteen-minute episode to eyeball timing by hand, an easy thing to get slightly wrong six times over.
- Send one locked reference render alongside the first episode's XML, following the render-vs-XML decision covered earlier in this guide, so the designer has one accurate picture of your grade and pacing to build the template against, rather than reconstructing your visual style from a structural file alone.
- Once the template is approved on episode 1, reuse it; don't rebuild it per episode. The designer should be dropping the same title and lower-third assets into each new episode's imported structure, adjusting only speaker names and timing, not designing six separate looks.
- If an episode gets re-cut after you've already handed it off, use Resolve's Generate New AAF option rather than a full fresh export. That regenerates the interchange file from your current edit without changing your naming convention or making the designer guess whether v2 replaces v1 entirely or just patches part of it.
The place this breaks down in practice is almost always step 2. It's tempting to combine episodes into one big export to save a few minutes of repetitive clicking, and it works fine for the two or three cleanest episodes. Then one episode has a compound clip you forgot to flatten, or a slightly different frame rate because it was cut in a rush, and the whole combined file fails to conform instead of just that one section. A batch handoff is only as strong as its most complicated episode, so isolate that risk instead of bundling it in with five clean ones.
Keep a simple log of which version went out and when, even something as basic as a shared spreadsheet row per episode. Six episodes times two or three revision rounds each adds up to a lot of similarly named files fast, and the fastest way to send a designer the wrong cut is to lose track of which version number you're actually on.
If your season runs long enough that even individual episodes feel unwieldy (a ninety-minute documentary-style episode, say, rather than a fifteen-minute branded piece), fold in the guidance below on splitting a single long timeline by act or chapter too. The two techniques stack: split within an episode if it's long, and never combine across episodes regardless of length.
What edge cases should you plan for before you export?
Multicam and compound clips need flattening first, free-vs-Studio matters more for your rendered intermediate than for the export itself, and a very long or heavily nested timeline is worth splitting before it ever reaches a translation format.
A few specific situations come up often enough to call out on their own, separate from the general troubleshooting table above:
Multicam sequences and compound clips. XML and AAF are both fundamentally bad at describing nested structures. If your Resolve timeline includes a multicam clip or a compound clip, flatten it into a single, simple sequence of individual clips before you export, or expect the exported section to arrive offline, black, or missing entirely on the other end, a limitation described clearly in Cutsio's writeup on why XML timelines break.
Free versus Studio. The free and paid editions of DaVinci Resolve don't meaningfully change how you export a timeline, but the edition does matter if you're choosing to render an intermediate file rather than export XML or AAF. The free version renders up to Ultra HD 3840x2160 at 60fps in 8-bit; anything above that resolution, frame rate, or bit depth needs Resolve Studio, per Blackmagic's own tech specs comparison. If you're delivering a 4K ProRes reference and you're on the free version, you're already within its limits; going beyond UHD is where the edition starts to matter.
Very long or heavily nested timelines. A ninety-minute documentary cut with hundreds of clips and several layers of nesting is a much rougher candidate for a clean XML or AAF conform than a five-minute interview segment. If you're handing off a large project, consider exporting and conforming it in smaller chunks, by act or by chapter, rather than trying to push the entire runtime through the translation at once. A failed conform on a small section is a quick fix. A failed conform on a two-hour timeline is an afternoon of hunting for the one broken clip.
Version mismatches on the receiving end. If your collaborator is running an older version of Premiere Pro or After Effects, confirm they can actually open the XML version Resolve exported before you send it. Very old app versions sometimes can't parse newer XML schema revisions, which shows up as an outright failed import rather than a partial one.
Fusion compositions built directly on the timeline. A Fusion clip or a Fusion-page effect applied inside the Resolve timeline is Resolve-only, in exactly the same way a node-based color grade is. Neither AAF nor XML has any way to describe a Fusion composition, so it doesn't survive the export in editable form no matter which format you choose. Treat it like the VFX handoff case covered above: render the Fusion element out with an alpha channel, then hand over that rendered layer instead of expecting the interchange file to carry the composite.
Sending finished After Effects work back into Resolve through a Premiere Pro AAF. Some round trips run in both directions on the same project, and if your motion designer's Premiere Pro sequence links an After Effects composition through Dynamic Link, that link breaks the moment the sequence gets exported as AAF for Resolve. Resolve has no way to resolve a live reference to an .aep file it can't open in the first place. Editor R Neil Haugen answered this exact problem directly on an Adobe community thread: "the AE comps don't work, you'd need to render full media export out of Ae to replace the comps, to the same specs as your other proxies," he wrote, according to that Adobe Community discussion. The fix matches everything else in this guide: render the After Effects work to real media before it crosses an AAF or XML boundary in either direction.
Resolution or pixel aspect ratio looks stretched, cropped, or letterboxed after import. This usually isn't a broken export at all. It's a mismatch between your Resolve project's frame size and the sequence or composition settings on the receiving end. Confirm the Premiere Pro sequence settings (or the After Effects composition settings on Windows) match Resolve's project settings, frame size, pixel aspect ratio, and frame rate together, before you assume the interchange file itself is at fault.
What's the fastest path if you're doing this for the first time?
Decide first whether you need the editable cut or the finished look, then follow the platform-specific path that matches your machine.
If you need the editable cut: export XML from Resolve's Edit page. On Windows, import it straight into After Effects with File > Import > Pro Import After Effects. On Mac, bring it into Premiere Pro first, confirm the conform looks right, then bring that sequence into After Effects with File > Import > Premiere Pro Project or Dynamic Link.
If you need the finished, graded look: skip the interchange file entirely and render the timeline to ProRes 422 HQ or 4444 directly from Resolve's Deliver page, then import that rendered file into After Effects like any other piece of footage.
If you're not sure which you need, ask what the After Effects work is actually doing to the picture. Re-editing or retiming the cut itself calls for the editable XML path. Compositing new elements on top of an already-finished shot calls for the rendered path. Most VFX and title work falls into the second category more often than people expect going in.
One stuck point worth naming honestly, because it's a recurring question inside our 100,000+ member editing community: people lose more time hunting for a "Pro Import" menu item on a Mac that quietly stopped having it years ago than they do on any other single step in this workflow. Knowing that wall exists before you start looking for a workaround saves the search entirely.
TryUncle is the on-screen assistant for DaVinci Resolve on macOS. Ask in plain words and Uncle points at the exact control on your screen. If you're mid-export and can't find the right menu item, or you're staring at Resolve's Deliver page trying to remember which codec setting actually carries an alpha channel, that's the exact kind of stuck point it's built for. It's a paid app on founder pricing, macOS only, so check TryUncle for the current rate before assuming it fits your setup.
AAF and XML get your cut to After Effects. Only a render gets your grade there too. Once that distinction is set in your head, the rest of this workflow stops being a mystery and starts being a five-minute export, followed by whichever import path your operating system actually supports.
Frequently asked questions
- How do I transfer a timeline from DaVinci Resolve to After Effects?
- Export the timeline from Resolve's Edit page as AAF or XML (File > Export AAF, XML, or Shift+Cmd+O on Mac). On Windows, File > Import > Pro Import After Effects reads that file directly inside After Effects. On Mac, Adobe removed that plug-in in 2020, so import the AAF or XML into Premiere Pro first, then use File > Import > Premiere Pro Project inside After Effects.
- Why can't After Effects import my DaVinci Resolve XML directly on a Mac?
- Adobe pulled the Pro Import plug-in from After Effects on macOS starting with version 17.0.4, because the plug-in relied on 32-bit code that Catalina and every macOS release since won't run. That removed direct AAF, OMF, and FCP XML import on Mac while leaving Windows unaffected, and Adobe hasn't restored it as of After Effects 26.3 in June 2026.
- Should I use XML, AAF, or EDL to move a Resolve timeline to After Effects?
- XML for a straightforward picture cut, since it's the format After Effects and Premiere Pro both parse most reliably. AAF if the timeline carries audio you need to keep synced, since AAF was built to carry audio data XML often drops. EDL is a last resort: it holds no media references or effects, just a cut list, and it's rarely worth the cleanup for an After Effects handoff.
- Does Adobe Dynamic Link work between DaVinci Resolve and After Effects?
- No. Dynamic Link only connects Adobe's own applications, Premiere Pro, After Effects, and Audition, to each other with a live, unrendered link. Resolve was never part of that system, so there's no live connection between the two apps at any point. Every handoff runs through an exported file, whether that's AAF, XML, or a rendered clip.
- Can I skip Premiere Pro entirely when moving a Resolve timeline into After Effects?
- On Windows, yes, through Pro Import After Effects. On Mac, not reliably for AAF or FCP XML exported from Resolve. A few third-party tools exist, like Automatic Duck's Ximport AE, but that one is built for Final Cut Pro X's XML specifically, not Resolve's, so Premiere Pro remains the dependable Mac bridge in 2026.
- What happens to my DaVinci Resolve color grade when I move a timeline into After Effects?
- It doesn't come with you. Neither AAF nor XML carries Resolve's node-based grade, and Premiere Pro's import doesn't translate Resolve color science into After Effects either. If the grade matters for what happens next, render the graded timeline to ProRes or DNxHR first and import that finished file instead of the editable timeline.
- Is there a plugin that automates a DaVinci Resolve to After Effects transfer?
- Not one built specifically for that exact pairing. Igor Ridanovic's free Send to Resolve.jsx script automates the opposite direction, After Effects into Resolve. For Resolve to After Effects, the closest thing is XtoCC, a $49.99 Mac utility, but it's built around Final Cut Pro X projects rather than Resolve's AAF or XML export, so test it on a throwaway project before trusting it on a deadline.
- Can I export OMF directly from DaVinci Resolve?
- No. Resolve's timeline export formats are OpenTimelineIO, OpenTimelineIO Bundle, AAF, Final Cut Pro 7 XML, and Final Cut X XML. OMF isn't one of them. If a collaborator specifically needs OMF, most often for Pro Tools, export AAF or XML from Resolve, import it into Premiere Pro, and export OMF from there instead.
- Why does my audio sound wrong or one-sided after an AAF export from DaVinci Resolve?
- Check two things: the 'Render one track per channel' setting in the AAF export dialog, which the safest default keeps checked so multichannel audio splits into individual mono files, and whether a stereo source clip was placed on a mono timeline track in Resolve, since the track's channel configuration governs the export, not the original file's.
Sources
- DaVinci Resolve Reference Manual: More About Exporting to AAF
- DaVinci Resolve Reference Manual: Exporting to AAF/XML
- DaVinci Resolve Reference Manual: Exporting an EDL
- Adobe Help: Pro Import plug-in is missing on macOS
- Adobe Community: Import AAF files to After Effects (Mac vs Windows Pro Import)
- Adobe Help: Importing from After Effects and Premiere Pro
- Adobe Help: Use Dynamic Link with After Effects
- Adobe Community: AAF, Premiere Pro, After Effects, Dynamic Link, DaVinci troubleshoot (R Neil Haugen)
- Adobe Help: Exporting OMF files for Pro Tools
- Production Expert: How To Create A Pro Tools Friendly AAF From DaVinci Resolve
- PremiumBeat: Importing Premiere Pro Projects Into After Effects (Clay Asbury)
- Reduser forum: After Effects + Davinci Resolve (Marc Wielage)
- Creative COW forum: After Effects Davinci Workflow (Jonathon Lee, Joseph Owens, Eric Hansen)
- Mean State: DaVinci Resolve to After Effects Workflow
- fxguide: Automatic Duck is back (Pro Import AE and Ximport AE history)
- Apple App Store: XtoCC
- Frame.io: There and Back Again, Premiere/Resolve Roundtrip (Aaron Zake)
- Cutsio: Why Your XML Timeline Breaks in DaVinci Resolve
- CineD: DaVinci Resolve 21.0.3 Released
- CGChannel: Adobe releases After Effects 26.3
- Storyblocks: Comparing DaVinci Resolve vs After Effects
- PremiumBeat: Fusion vs. After Effects: Which One Is Right for You? (Lewis McGregor)
- Blackmagic Design: DaVinci Resolve Tech Specs (free vs Studio resolution limits)
Keep reading
Fixes · Jul 19, 2026 · 28 min
DaVinci Resolve Import After Effects Project: The Real Fix
DaVinci Resolve can't open an After Effects .aep file. Here's the actual workflow: what to render, which alpha channel to pick, and when to rebuild in Fusion.
Fixes · Jul 12, 2026 · 29 min
DaVinci Resolve XML Import from Premiere Pro Not Working
Every reason DaVinci Resolve rejects, empties, or offlines an XML timeline exported from Premiere Pro, and the exact fix for each failure mode.
Guides · Jul 10, 2026 · 32 min
DaVinci Resolve Fusion Page Tutorial for Beginners
Learn the DaVinci Resolve Fusion page from zero: nodes, MediaIn/MediaOut, the Merge node, planar tracking, and keying a green screen, step by step.