Articles / Guidesupdated for DaVinci Resolve 21.1 (September 2026)
How to Use MultiMaster Trim Manager in DaVinci Resolve 21
Quick answer
In DaVinci Resolve 21, open Color > MultiMaster Trim Manager, enable Trim Passes, add named passes for each deliverable, configure monitoring, output, and color settings, then grade the trim layers. The hero grade stays shared while each trim adds output-specific corrections for HDR or SDR, and the intended Trim Pass must be selected in Deliver.

If a single timeline needs to become a 4000-nit HDR master, an HDR 1000 version, and an SDR Rec.709 version, you don't want three unrelated grades drifting apart. You want one shared grade and a clear place for the differences.
As of September 2026, DaVinci Resolve 21.1 is the version to keep in mind. We built this guide around the questions that come up in our 100,000+ member professional video-editing community, after more than seven years of professional commercial editing and teaching Resolve to more than 100,000 Udemy students.
What does MultiMaster Trim Manager do in DaVinci Resolve 21?
MultiMaster Trim Manager keeps the common hero grade in one timeline and lets you add output-specific trim grades on top of it. That means a 4000-nit HDR master can remain the foundation while HDR 1000 and SDR Rec.709 passes handle their own finishing corrections. Blackmagic describes the workflow in its DaVinci Resolve 21 New Features Guide.
The important distinction is simple:
- The hero grade contains the look and the corrections that should travel to every deliverable.
- A trim pass contains the changes required by one destination.
- The deliverable chooses which trim pass sits on top of the hero grade.
This isn't a second creative grade hidden behind a new name. It is an organized way to make controlled output adjustments. You might lower a difficult highlight, protect shadow detail, reduce saturation for SDR, or alter framing for a vertical version. You shouldn't redesign the entire film inside every pass.
MultiMaster Trim Manager is most useful when several deliverables share one cut but need different finishing decisions.
The manager lives on the Color page. It doesn't replace the Edit page, and it doesn't decide which version you should deliver. You still need to define the target, inspect the result, and select the right pass before rendering.

Is MultiMaster Trim Manager available in DaVinci Resolve 21 Free?
For a reliable Resolve 21.1 workflow, check your edition before troubleshooting the node graph. Blackmagic lists the individual Dolby Vision, HDR10+, and HDR Vivid trim additions under the DaVinci Resolve Studio 21.1 update, which requires a Studio license, Blackmagic Cloud license, or activation code. The official support page also lists the free Resolve 21 and Studio Resolve 21 updates separately.
The version split matters because “Resolve 21” can refer to several builds. Use this quick check:
| Check | Resolve 21.0 | Resolve 21.1 | Why it matters |
|---|---|---|---|
| Base MultiMaster workflow | Introduced with Resolve 21 | Still available | You can manage multiple trim deliverables from one timeline. |
| Dolby Vision, HDR10+, and HDR Vivid individual trims | Not the 21.1 addition | Added in Studio 21.1 | Each named HDR format can receive its own trim instead of sharing one common trim. |
| Output sizing per trim | Use the controls available in your build | Explicitly supported per trim | Useful for different framing targets, but still needs visual QC. |
| Timeline caching | Follow the cache behavior of the base build | Separate timeline caching per trim | Switching passes should not be treated as proof that every output is correct. |
Blackmagic's Resolve 21.1 announcement dates the update to September 8, 2026 and identifies the individual MultiMaster additions, per-trim sizing, and per-trim caching. If the menu is missing, start with DaVinci Resolve > About DaVinci Resolve. Confirm the exact version and whether the application says Free or Studio before changing grades.
Grant Petty, Blackmagic Design CEO, summed up the broader 21.1 release this way: “It's a huge update and we can't wait to see what our customers create with these new tools.” (Blackmagic Design, September 2026)

How do I prepare the hero grade before adding trim passes?
Prepare the hero grade as the common image, then add trims only after the creative direction and main color-management decisions are stable. A trim pass should solve a delivery problem, not become a storage bin for unfinished grading.
Before you open the manager, decide these four things:
- What is the hero mastering target? Blackmagic's example uses a 4000-nit HDR timeline as the master.
- Which output standards are actually required? Common examples include HDR 1000 and SDR Rec.709.
- Which differences are color differences, and which are edit or graphics differences?
- What monitoring path will you use to judge each result?
The hero grade should hold the shot balance, the intended look, and corrections that belong everywhere. If a skin-tone correction is part of the creative grade, don't repeat it in three trims. If a highlight needs a different roll-off for SDR, that belongs in the SDR trim.
This is the same reason I recommend learning the basic Color page structure before chasing output tricks. The DaVinci Resolve color-grading basics guide is a useful companion if nodes, groups, and output color management still feel unfamiliar.
The manager doesn't protect you from a badly defined hero grade. It organizes versions. You still need a coherent starting point.
How do I open MultiMaster Trim Manager and add a trim pass?
Open the Color page, choose Color > MultiMaster Trim Manager, enable Trim Passes, and add one named pass for each real deliverable. Blackmagic's guide gives the exact menu path and says you can add, remove, and rename trims in the manager window.
Follow this order:
- Finish or freeze the hero grade far enough that you know what should be shared.
- Go to the Color page.
- Choose Color > MultiMaster Trim Manager.
- Turn on the Trim Passes switch at the top left of the manager window.
- Click Add.
- Rename the new pass by clicking its name and typing a useful label, such as
HDR1000,SDR709,DolbyVision, orVertical9x16. - Add only the passes you can review and deliver. A long list of speculative passes makes mistakes easier, not harder.
Name the pass after the output, not after the correction. SDR709 tells the next person what the pass is for. LowerHighlights does not.
Blackmagic says the manager can create as many trims as you need for a timeline in the Resolve 21 guide. That is a capacity statement, not a recommendation to create dozens. The useful limit is the number of versions your team can identify, review, and render without guessing.
How do I choose trim node graphs for each deliverable?
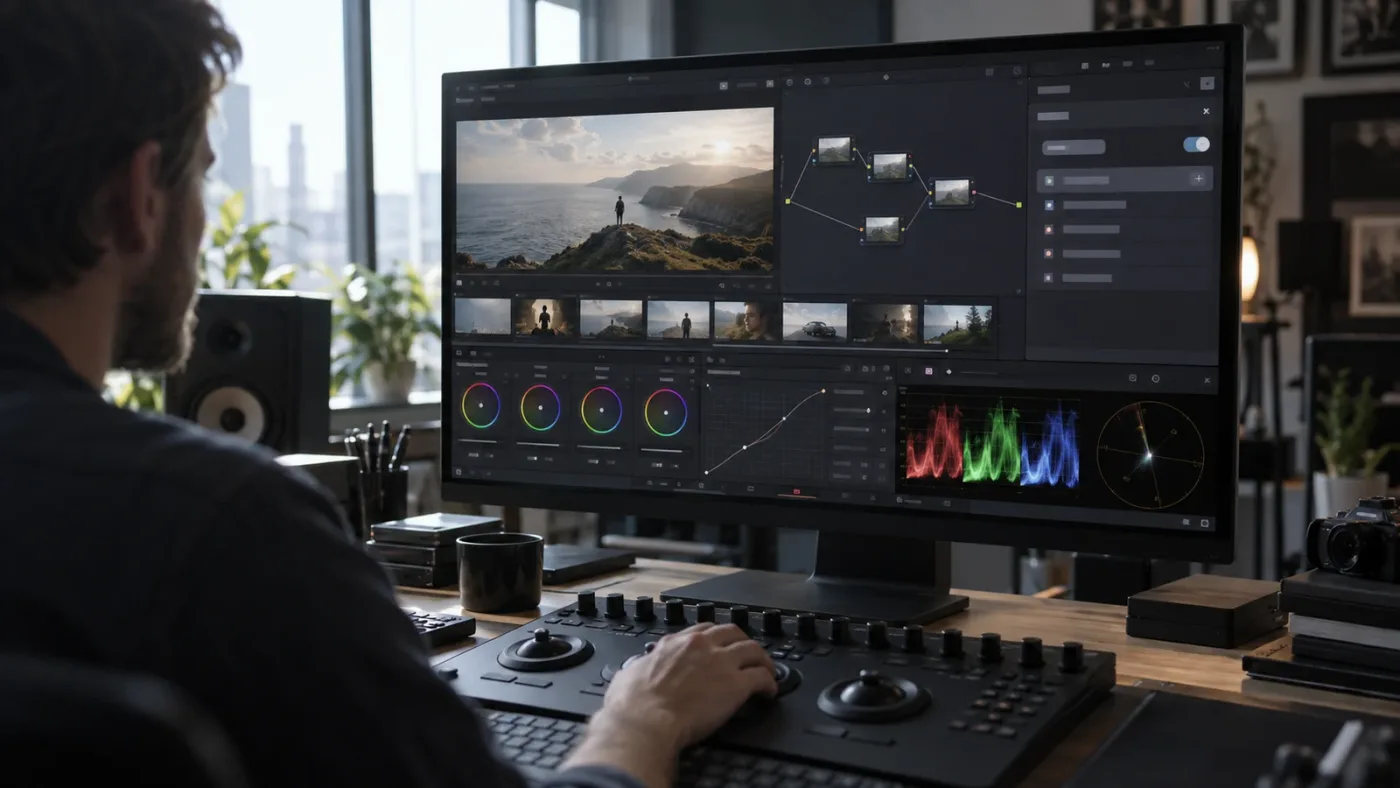
Choose trim node graphs according to where the correction belongs in the image pipeline, then make a small test change before building the real trim. Resolve 21 creates five trim graph elements by default, and Blackmagic lets you enable or disable them from the manager's three-dot menu in the official New Features Guide.
The five default elements are:
| Trim graph element | Practical question | Typical reason to use it |
|---|---|---|
| After Clip | Should this change follow the clip grade? | Use for a clip-specific output adjustment that should sit after the individual clip correction. |
| Before Group | Should this happen before the group grade? | Use when the output correction needs to enter before group-level processing. |
| After Group | Should this happen after the group grade? | Use when the trim should finish a grouped scene or camera treatment. |
| Before Timeline | Should this happen before timeline-level processing? | Use when the trim needs to be upstream of the timeline grade. |
| After Timeline | Should this be the last color operation? | Use for an output-side correction that needs to sit at the end of the chain. |
Those “typical reasons” are workflow decisions, not a universal prescription. The correct location depends on your node order, color-management design, and whether the correction needs to see an image before or after another operation.
To test a pass, enable one trim graph element, make an obvious temporary change, and watch where it enters the signal flow. Undo the test, then build the real correction in the location that matches your intent. This takes less time than grading an entire SDR version and discovering that the correction sits on the wrong side of the transform.
You can switch the active trim from the three-dot option menu in the Color page node graph. Resolve displays the selected trim's name at the top of the node graph, which gives you a useful identity check before you touch a node.
A trim pass is only trustworthy when you can name its target, its node location, and its output settings.

How do I set monitoring, output, and color management for a trim?
Select the trim in the manager, enable its custom settings, and treat Monitor, Output, and Color as three separate decisions. The New Features Guide shows that each trim can have custom monitoring, output, and color-management output color space settings.
Use the three areas like this:
| Area | What it controls | What to decide |
|---|---|---|
| Monitor | The display context used while judging the pass | Which display or monitoring target represents the deliverable? |
| Output | Resolution, aspect ratio, mismatched-resolution behavior, and related sizing controls | What file geometry and framing should this pass produce? |
| Color | The output color-management target | Which color space and gamma belong to this version? |
Don't use a trim's Output settings as a substitute for a different edit. Output sizing can change the frame, but it can't rewrite a title, move a subject through a complex animation, or rebuild a graphic designed for another composition.
In the official example, the Output tab includes a 3840 x 2160 Ultra HD resolution, square pixels, a mismatched-resolution option, and a Super Scale choice. Those controls show why a trim can carry more than a color tweak. It can describe the output context that the grade is being judged against.
For HDR and SDR work, write the intended target down before opening the Color tab. “SDR” alone is not enough for a team handoff. Use a label such as SDR709, record the intended output color space and gamma in your delivery notes, and keep the name identical in the trim manager, render preset, and exported filename.
If you're working on a Mac display, Windows monitor, or external reference monitor, don't assume the image is comparable just because the window is on the same screen. Resolve can manage the timeline and output, but display calibration and viewing conditions still affect the decision. When the deliverable matters, review it on the intended path.
How do I use MultiMaster Trim Manager for HDR and SDR deliverables?
Use the hero grade for the shared 4000-nit HDR foundation, then create separate HDR 1000 and SDR Rec.709 passes and correct each output only where it needs help. That is the workflow Blackmagic uses to explain the feature in Resolve 21.
Here is a clean example:
- Grade the hero timeline for the approved HDR master.
- Add and name an
HDR1000pass. - Configure the HDR 1000 monitoring and output color-management settings.
- Activate the HDR 1000 pass and inspect bright highlights, dark areas, skin, and saturated colors.
- Add only the trim corrections needed for that target.
- Add and name an
SDR709pass. - Configure the SDR monitoring and output color-management settings.
- Activate the SDR 709 pass and correct the parts that don't survive the mapping cleanly.
- Return to the hero grade and confirm that the shared look still represents the creative intent.
- Go to Deliver and select the correct Trim Pass for each render job.
The point is not to make HDR 1000 and SDR 709 look identical to the 4000-nit master on every display. The point is to make each output intentional while keeping the common work connected to one timeline.
Resolve 21.1 extends this idea to individual trim passes for Dolby Vision, HDR10+, and HDR Vivid. The Blackmagic 21.1 release notes say that each HDR format can be graded independently instead of sharing a common trim. That is a version-specific change, so don't copy a 21.1 tutorial's HDR format workflow into an older build without checking the version.
When you review, don't only look at the hero pass. Change the active pass, move through representative shots, and check the brightest and darkest material. A trim can be technically selected and still be creatively wrong.
The hero grade carries the intent, while each trim pass carries the responsibility of a particular delivery target.

How do I make 16:9, 9:16, and 1:1 versions with MultiMaster trims?
Use a separate trim when the difference is mainly output sizing, framing, or a controlled color change, and use a separate timeline when the edit or graphics must be rebuilt. Resolve 21.1 explicitly adds output-sizing overrides for each trim, so the manager can support different framing targets from one timeline.
A practical decision table looks like this:
| Need | MultiMaster trim | Separate timeline |
|---|---|---|
| Same cut, different output color space | Yes | Usually unnecessary |
| Same cut, small reframing adjustment | Often | Use one if the reframing is extensive |
| 16:9 to 9:16 with a simple subject move | Often | Use one if titles or graphics need redesign |
| Different duration or shot order | No | Yes |
| Different end card or legal text | Maybe, if the change is a controlled node or layer decision | Yes when the graphic is a different composition |
| Different editorial story | No | Yes |
Create a Vertical9x16 pass, set its output sizing, and inspect every shot where the subject approaches an edge. Then check subtitles, logos, lower thirds, and alpha-channel graphics. If the version needs a new animation or different copy, stop forcing it into the trim system.
This is where people sometimes confuse output versioning with nesting. If you need to decide whether the whole edit should stay in one timeline or become a nested structure, read the compound clip versus nested timeline guide before you start changing the project.
The manager can keep versions connected. It can't make different editorial decisions for you.

Why does MultiMaster Trim Manager look like it did nothing?
When the image doesn't change, check the selected pass, the enabled trim graphs, the pass settings, and the Deliver selection in that order. Most “nothing happened” reports are state problems, not evidence that the manager failed.
| Symptom | Check first | Fix |
|---|---|---|
| The manager menu is missing | Version and edition | Confirm DaVinci Resolve 21 or 21.1, then verify Free versus Studio. |
| A pass exists but the node graph looks unchanged | Trim Passes switch and active-pass menu | Turn on Trim Passes and select the named pass from the node graph's three-dot menu. |
| A test node has no visible effect | Enabled trim graph position | Enable the graph element where the correction belongs, then test again. |
| The Color page looks correct but the export doesn't | Deliver page video settings | Select the intended Trim Pass under the video render settings before adding the job. |
| The crop is wrong | Output sizing and mismatched-resolution controls | Check the pass-specific Output settings and review edge framing. |
| A blanking change is missing | Use Trim blanking | In Output Sizing, enable Use Trim blanking before setting pass-specific blanking. |
| Switching versions is confusing | Pass names and render labels | Use consistent names in the manager, render preset, and filename. |
The official guide is especially clear about the Deliver failure: you select the specific Trim Pass you want to render under the video settings. Selecting a pass in the Color page is not the same as confirming the pass in the render job.
If a result still looks unchanged after those checks, save the project, clear or rebuild the relevant cache, and render a short representative range. Keep the test range small enough that you can compare the hero grade and trim output side by side. I would rather find a state mistake in ten seconds than discover it after a long queue finishes.

How do I select the correct MultiMaster pass in Deliver?
Select the Trim Pass in the Deliver page's video render settings, then verify the job name before rendering. This is the final handoff between the Color page decision and the file that leaves Resolve.
Use this short delivery check:
- Open the Deliver page.
- Choose the render preset and confirm its resolution, frame rate, codec, and audio settings.
- Find the video render setting for the Trim Pass.
- Select
Hero,HDR1000,SDR709,DolbyVision, or the exact pass you intend to output. - Add the job to the Render Queue.
- Read the queue entry and confirm the pass name is visible in the job details or filename.
- Render a short check when the version is new or the project has changed.
- Open the finished file and inspect it outside the Color page as a real deliverable.
Don't rely on memory here. A project with five passes can look correct in the viewer while the queued job points at the wrong one. The extra check costs very little compared with delivering SDR footage with an HDR trim or a vertical file with the hero framing.
Blackmagic's 21.1 notes also mention individual timeline caching for each trim. That can reduce the need to recache every time you switch deliverables, but it doesn't replace a render check. Cache state is about processing. It isn't approval.

What is the best way to learn DaVinci Resolve 21's MultiMaster Trim Manager?
The best way to learn DaVinci Resolve 21's MultiMaster Trim Manager is to combine the official manual with a small real project, then use a visual walkthrough for the parts that are hard to see from text. Start with one hero grade and two passes. Add complexity only after you can identify the active pass and the Deliver selection without hesitation.
There is no reason to pretend the usual learning resources don't exist. They each solve a different problem:
| Resource | Best use | Trade-off |
|---|---|---|
| Blackmagic's official training | Structured exercises for Color page fundamentals | It teaches a path, not your exact project state. |
| Blackmagic's Resolve 21 guide | Exact menu names, trim graph elements, and Deliver behavior | It is a reference document, so you must turn the explanation into practice. |
| Casey Faris's Resolve course | Seeing the pages and the larger Resolve workflow explained on video | A general course may not cover the latest MultiMaster details. Check the version. |
| Resolve community discussions | Edge cases, alternate workflows, and practical questions | Community advice can mix builds and personal preferences. Verify it against Blackmagic's current guide. |
We teach Resolve through commercial work, courses, and a large editor community, so our advice is straightforward here: learn the control by using it on a project that has a real output decision. Watch a video when you need to see the page. Open the manual when you need the exact behavior. Then make two short test renders.
That loop is faster than collecting ten explanations and never deciding which pass is active.
At the product level, an on-screen assistant can help when your version, panel layout, or project state doesn't match a tutorial. TryUncle is the on-screen assistant for DaVinci Resolve on Mac and Windows. Ask in plain words and Uncle points at the exact control on your screen. If you want that kind of visual help while you work, the assistant can guide you toward the relevant control while you keep the edit and the grading decisions in your hands.
Should I use MultiMaster trims or separate timelines?
Use MultiMaster trims when the edit is shared and the deliverables need controlled output-specific grading, sizing, or blanking. Use separate timelines when the editorial structure, graphics, duration, or story changes enough that the versions are no longer the same master.
Choose a MultiMaster trim when:
- The hero grade should remain common.
- The target needs a different HDR or SDR output treatment.
- The output needs a manageable reframing or sizing change.
- You can review the pass on the correct monitoring path.
- The team can name and render the pass without ambiguity.
Choose a separate timeline when:
- The shot order or duration changes.
- The vertical edit needs different pacing.
- The title design needs a rebuilt composition.
- Legal text, logos, or end cards are materially different.
- One deliverable must evolve independently from the master.
The right question isn't “Can Resolve technically put this in a trim?” The right question is “Will the next revision remain understandable?” A single timeline is valuable when it keeps the versions connected. It becomes a liability when nobody can tell which pass owns a creative decision.
For a broader view of what Resolve 21 adds around the Color page, the DaVinci Resolve 21 review gives you the version context. Keep the Color page basics guide nearby when you need to revisit grading foundations.
The best MultiMaster workflow is the smallest versioning system that keeps every required deliverable traceable.
What should I do before delivering a MultiMaster project?
Before delivery, confirm the hero grade, each pass name, each pass's output settings, the active trim graph locations, and the Deliver selection. A pass is finished only when the version is identifiable and the rendered file has been reviewed.
Use this final checklist:
- The hero grade contains the shared creative intent.
- Every trim has a destination-based name.
- HDR, SDR, or framing settings are stored on the intended pass.
- The active Color page pass matches the correction you are making.
- The Deliver page selects the same pass you reviewed.
- The render name identifies the output standard or aspect ratio.
- A short test render has been checked before the full queue.
- The finished file has been opened and reviewed outside the node graph.
MultiMaster Trim Manager is a version-control tool for color and delivery decisions. It works best when you keep the hero grade clean, keep trims narrow, name every pass clearly, and treat the Deliver page as part of the workflow rather than an afterthought.
Set up one HDR1000 pass and one SDR709 pass first. Render both. If you can explain exactly which correction belongs to each output, you’re ready to add more.
Frequently asked questions
- How do I use MultiMaster Trim Manager in DaVinci Resolve 21?
- Open Color > MultiMaster Trim Manager, turn on Trim Passes, add and name a pass, configure its monitor, output, and color settings, enable the trim node graphs you need, make the trim grade, and choose that Trim Pass in Deliver before rendering.
- Why is MultiMaster Trim Manager missing in DaVinci Resolve 21?
- Check that you are running DaVinci Resolve 21 or 21.1, confirm whether your build is Free or Studio, and verify that Trim Passes is enabled in Color > MultiMaster Trim Manager. Blackmagic identifies the individual trim additions in 21.1 as a Studio update.
- How do I render HDR and SDR versions from one timeline?
- Keep the common creative correction in the hero grade, create separate passes such as HDR 1000 and SDR Rec.709, configure each pass's output color management, grade only the differences, and select the correct Trim Pass in the Deliver page video settings.
- Why does my MultiMaster trim not affect the render?
- The most common cause is that the Deliver page is still set to the hero grade or another Trim Pass. Select the intended Trim Pass under the Deliver page's video render settings, confirm the pass is active, and check that its trim node graphs are enabled.
- Can MultiMaster Trim Manager make 9:16 and 1:1 versions?
- Yes, Resolve 21.1 lets you override output sizing for each trim, so the manager can support different framing targets. Use separate timelines when the edit, graphics, duration, or layout needs to change substantially rather than only the output framing.
Sources
- DaVinci Resolve 21 New Features Guide, MultiMaster Trim Manager
- DaVinci Resolve 21 What’s New, MultiMaster Trim Manager
- Blackmagic Design announces DaVinci Resolve 21.1
- DaVinci Resolve support and Studio 21.1 update information
- DaVinci Resolve official training
- Casey Faris, Introduction to DaVinci Resolve
- DaVinci Resolve community discussion about MultiMaster workflows
- TryUncle
Put this guide to work with TryUncle.
Ask about the step you’re on. TryUncle sees your screen and points at the control you need, so you can keep learning in your own project.
Get TryUncle for Mac or WindowsKeep reading
Reviews · Jul 7, 2026 · 22 min
DaVinci Resolve 21 Review: What's New and Is It Worth Upgrading?
A close look at DaVinci Resolve 21: the new Photo page, IntelliSearch, CineFocus, Krokodove, what Blackmagic actually shipped, and who should upgrade now.

Guides · Jul 7, 2026 · 35 min
How to Color Grade in DaVinci Resolve: The Basics
Learn how to color grade in DaVinci Resolve: build a node chain, balance shadows and highlights with Lift, Gamma, and Gain, and read the scopes.
Comparisons · Jul 16, 2026 · 31 min
Compound Clip vs Nested Timeline in DaVinci Resolve: Which One?
Compound clip or nested timeline in DaVinci Resolve? The real difference in linking, grading, audio buses, multicam, and render load, plus a decisive pick.