Articles / Guidesupdated for DaVinci Resolve 21.1 (November 2026)
What Does the Bitmap Node Do in DaVinci Resolve?
Quick answer
The Bitmap node in DaVinci Resolve’s Fusion page turns selected values from an image, such as its alpha, luminance, or a color channel, into a mask. That mask can limit an effect or drive a composite. You can often connect an image directly to an Effect Mask instead; Bitmap is useful when you need channel, threshold, edge, or fitting controls.
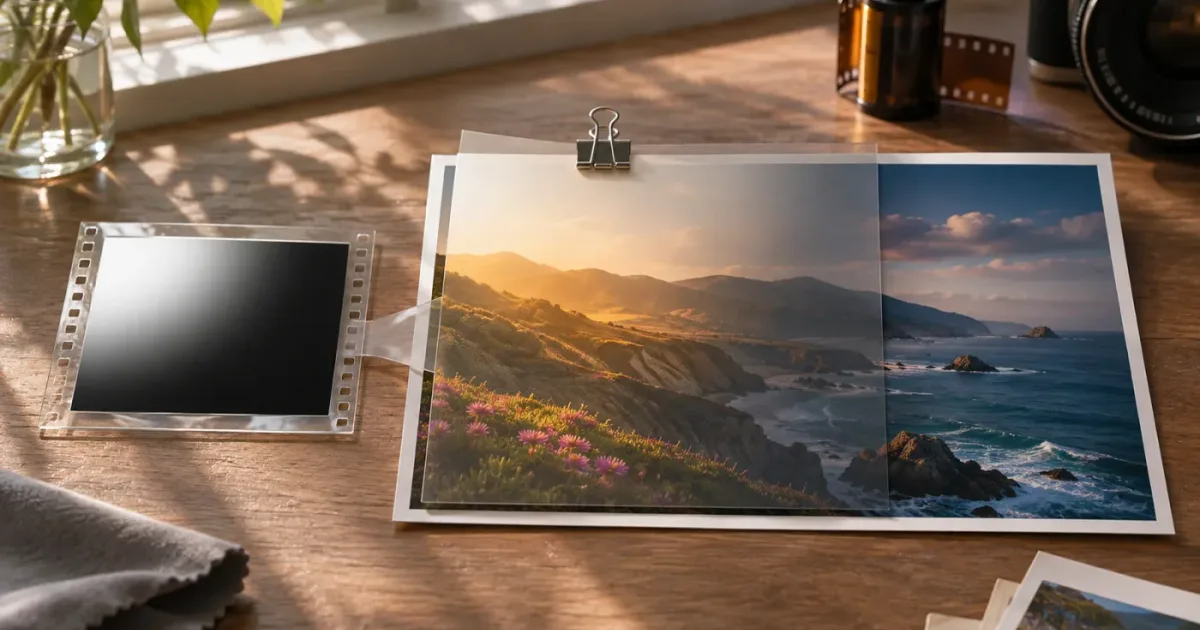
I reach for Bitmap when an image already contains the shape or tonal pattern I want to use as a mask. It’s a translator: image values in, mask coverage out. As of November 2026, the current Resolve release covered here is DaVinci Resolve 21.1.
What does the Bitmap node do in DaVinci Resolve?
The Bitmap node, shown in Fusion references as Bitmap Mask [BMP], turns selected values from an image into mask coverage. The resulting mask can control where an effect acts, or it can be used in a composite. Blackmagic’s Fusion reference describes Bitmap as a way to let images in the node flow act as masks for tools and effects. (documents.blackmagicdesign.com)
Think of the node as a translator, not a drawing tool. A Rectangle or Polygon node creates a shape mask. Bitmap reads an image that already exists, selects a channel or value from that image, and makes those values available as a mask. A black-and-white image, a clip’s alpha, a color channel, a luminance pattern, or certain auxiliary data can provide the source values. (documents.blackmagicdesign.com)
A mask is a control map. In the common case, black means an effect is blocked, white means it is allowed, and gray allows a partial amount. Exact results depend on the receiving tool, its mask settings, and whether the mask is inverted or combined with other masks. So Bitmap does not, by itself, blur a clip, recolor a subject, or composite two pictures. It supplies the mask data those operations can use.
The Bitmap node converts image values into mask coverage; it doesn’t create a shape from scratch.
A useful way to read a basic branch is:
Image source
    |
 Bitmap
    |
Effect Mask input on a tool
The first connection supplies data to Bitmap. The second connection sends its mask output to the blue Effect Mask input of a compatible tool. The receiving tool still needs its ordinary image input if it is going to process a picture. For instance, a Blur node needs an image to blur, and the Bitmap output tells the Blur where to apply that blur.
That distinction explains why a Bitmap node can appear to do nothing when you add it. It isn’t a visible treatment like Glow or Color Corrector. Its output is a mask. If you don’t connect that output to a tool that uses a mask, you may see no change in the final image.
For a quick conceptual test, imagine a soft grayscale gradient connected to Bitmap. If you choose Luminance, bright parts of the gradient become more influential mask areas than dark parts. Connect that output to a Blur’s Effect Mask input and the blur is limited according to the mask. This is a worked example of the signal flow, not a claim about a measured result.
The important question is not “What does Bitmap do to my footage?” It’s “Which values from this image should control the next tool?” Once you can answer that, the node’s purpose becomes much clearer.
Why is the Bitmap node in the Fusion node graph?
Bitmap belongs in the Fusion node graph because Fusion passes image and mask data between connected tools. The node sits between an image source and a downstream tool when you need to interpret, shape, or adjust the source as a mask. (documents.blackmagicdesign.com)
Fusion is node-based. The current image is not simply a stack of layers with one fixed order. A node takes inputs, performs an operation or provides data, and sends its output onward. Blackmagic’s Fusion manual describes the Fusion page as a place to build a composition from connected tools, with MediaIn and MediaOut marking the clip’s entry and exit in Resolve. (documents.blackmagicdesign.com)
Bitmap is one small part of that flow. It usually sits on a side branch, because its output is used as a mask rather than as the main picture. Here is a common arrangement:
MediaIn --------------------------> Blur ----------------> MediaOut
                                      ^
                                      |
                                     BMP
                                      ^
                                      |
                                  MediaIn or map
The top line carries the picture being processed. The lower branch carries the image used to create the mask. That lower image may be the same source as the picture, another clip, a still graphic, a procedural texture, or an image with transparency.
A source does not have to be a separate PNG file. A Fusion node that generates image data can also be a source. For example, a noise pattern or graphic can be treated as an image and routed into Bitmap. The node then uses a selected channel or value from that generated image to make a mask.
Some practical reasons to add a separate Bitmap node include:
- You want to choose a channel independently of the tool receiving the mask.
- You need to adjust the source’s tonal range before it becomes a mask.
- You want to soften, invert, or fit the mask source using Bitmap’s controls.
- You need to connect image data to a mask input that requires a mask tool.
- You want a clearly labeled mask branch that is easy to inspect later.
But the graph can be simpler. If all you need is to use an image as a regular Effect Mask, you may be able to connect that image directly to the receiving tool and choose the channel there. Blackmagic’s reference specifically says Bitmap is not required for many common Effect Mask connections. (documents.blackmagicdesign.com)
That’s why a node’s presence in a tutorial doesn’t automatically mean every Fusion effect needs one. The author may need its additional controls, may be following a particular node arrangement, or may be using a mask input that needs an explicit mask node. Check what the downstream tool receives before copying the node graph exactly.
How does Bitmap turn an image channel into a mask?
Bitmap turns image data into a mask by reading the channel you select and mapping its values to coverage. The Fusion reference lists color channels, alpha, hue, saturation, luminance, auxiliary coverage, and, in supported rendered images, Object or Material ID data as possible mask sources. (documents.blackmagicdesign.com)
The exact list and layout of Inspector controls can vary with the software version and the available input data. Use the current Inspector and the Resolve 21.1 manual if a control described in an older tool reference doesn’t appear as expected. Blackmagic lists its 21.1 manual on its current product welcome page. (blackmagicdesign.com)
Here’s the practical meaning of the main channel choices:
| Channel choice | What Bitmap reads | A useful case | Common trap |
|---|---|---|---|
| Alpha | The source image’s transparency values | A PNG whose transparent background and opaque artwork already define the mask | The image may be fully opaque, so Alpha produces a solid mask even if the RGB picture looks black and white |
| Luminance | A brightness-derived value | A grayscale map where brighter and darker areas should influence the mask differently | A contrast-heavy source may clip to mostly full-on and full-off coverage |
| Red, Green, or Blue | One color channel’s pixel values | A channel that has stronger separation between the areas you want and the areas you don’t | A color image’s red channel may not correspond to the intended subject |
| Hue | The image’s hue information | A source where color differences matter more than overall brightness | Hue is not a general-purpose subject selector; check how the selected values map in the output |
| Saturation | The source’s saturation information | A map where vivid and muted regions need different mask values | A low-saturation image may give little useful contrast |
| Auxiliary coverage | Additional coverage data, when the input has it | A rendered image that carries a coverage channel | The channel may not exist in ordinary media |
| Object or Material ID | ID data in supported 3D-rendered images | Separating objects or materials from a render that includes those IDs | A normal video or PNG does not gain ID data just because Bitmap is connected |
Blackmagic’s older Fusion reference identifies the available image channels and notes that Object or Material IDs require the relevant channels to be present in the rendered image. Treat that as an input-data requirement, not a magic feature that recognizes arbitrary objects in ordinary footage. (documents.blackmagicdesign.com)
Alpha versus luminance
The Alpha option reads the source’s transparency. It does not automatically inspect whether a pixel looks visually dark or light. If a grayscale PNG has an opaque background and opaque artwork, the alpha may be white everywhere. Bitmap can then produce a uniform mask, despite the visible RGB image having a clear black-and-white pattern.
Luminance, by contrast, uses brightness information. If your image is a black-and-white map and you want its bright areas to drive the effect, Luminance is a sensible first test. If you want the dark areas to drive it, you can invert the result or use the relevant range controls, depending on your setup.
This is one of the most common Bitmap misunderstandings. “I have a black-and-white image” does not tell you whether to choose Alpha or Luminance. Ask instead: “Is the distinction stored in transparency, or in visible brightness?” Choose the channel that actually contains the distinction.
Color channels as masks
A color channel can sometimes separate parts of an image more usefully than luminance. Suppose a color source has a bright red element on a darker background. The red channel may give a different mask pattern from the luminance channel. That can be helpful if you are building a mask from a color-coded map or using a particular channel as a control signal.
It does not mean Bitmap is a substitute for every keyer. A color channel is still just values from an image. If a subject and background share similar values in the selected channel, the resulting mask may not isolate them cleanly. You might need to preprocess the source, combine masks, or use a different tool better suited to keying or rotoscoping.
IDs and auxiliary channels
Auxiliary channels are additional data that some image sources carry. Object or Material IDs can identify parts of certain 3D renders, but only when those channels were included in the render. A typical video clip or flattened image should not be assumed to contain them. (documents.blackmagicdesign.com)
If choosing Object or Material does not produce the separation you expected, inspect the source and confirm the needed channel exists. Switching Bitmap options cannot recreate data that the file never contained.
The best Bitmap channel is the one that already contains the separation you need.
How do I connect Bitmap to an effect?
To use Bitmap, feed an image into its image input, choose the channel that contains useful mask data, then connect the Bitmap output to the receiving tool’s mask input. The image being processed must also reach that tool through its regular image input. (documents.blackmagicdesign.com)
A simple connection sequence looks like this:
- Open the Fusion page for a clip or Fusion composition.
- Find the image that will provide the mask. It could be the clip itself, another MediaIn, a still, or a generated image.
- Add Bitmap from the Fusion node tools. In Blackmagic’s reference, the tool is called Bitmap Mask [BMP]. The Fusion manual explains that tools can be added through the Effects Library or the node editor’s contextual menu. (documents.blackmagicdesign.com)
- Connect the mask source to Bitmap’s main image input.
- Select Bitmap and choose an appropriate Channel in the Inspector.
- Inspect the Bitmap output. Confirm that the intended regions are bright or opaque and unwanted regions are dark or transparent, as appropriate for the receiving operation.
- Connect Bitmap’s output to the blue Effect Mask input on the target tool.
- Connect the image you want to process to the target tool’s normal image input if it isn’t already connected.
- Adjust the threshold, softness, inversion, or source fitting only if the mask needs it.
- Check the final output through MediaOut and confirm the effect is limited to the intended area.
This is a general wiring recipe, not a guarantee that every Fusion tool uses identical inputs or responds identically to a mask. Some tools expose mask behavior in a Settings or Common Controls area. Others have specialized mask inputs. Follow the tool’s own controls and the Resolve manual when a particular input behaves differently.
A common wiring mistake is connecting Bitmap to the effect’s main image input instead of its Effect Mask input. Then the tool may process the mask image as the picture, or the graph may not produce the intended result. Another mistake is connecting only the mask branch and forgetting the actual clip that should be affected.
It can help to label the branches in your head:
- Picture branch: the image you want to alter.
- Mask branch: the image values that describe where or how strongly the alteration applies.
- Output branch: the result that continues toward MediaOut.
When you can trace all three, the node graph becomes much easier to diagnose. For foundational examples of node wiring and Fusion page layout, see the Fusion page tutorial for beginners.
Do I need Bitmap, or can I connect an image directly?
You do not always need Bitmap to use an image as an Effect Mask. Blackmagic’s Fusion tool reference says an image can connect directly to a tool’s Effect Mask input, with the receiving tool’s controls used to select which channel creates the mask. Bitmap adds processing and fitting controls, and some specialized mask inputs may require it. (documents.blackmagicdesign.com)
Here’s a quick decision table:
| Situation | Add Bitmap? | Why |
|---|---|---|
| You want to connect a simple mask image to an ordinary Effect Mask input | Maybe not | The receiving tool may let you select the source channel directly |
| You need to choose and shape a channel in its own branch | Usually yes | Bitmap provides a dedicated place to select the channel and adjust mask data |
| You need to adjust the mask’s tonal range before it reaches the effect | Yes, if its controls fit the task | The Bitmap reference includes Low and High controls and black/white clipping options |
| The target uses a specialized mask input | Possibly | Blackmagic notes that some inputs, such as Garbage Mattes and Pre-Masks, may require a Bitmap Mask tool |
| You want a geometric shape you can draw and animate | No | Use a shape mask such as Polygon or Rectangle instead |
| You want a mask based on a selected color in an image | Not necessarily | A keyer or color-based mask tool may be a more direct fit |
| You want a node to blur the clip itself | No | Bitmap produces mask data; use a blur effect on the image branch |
The direct connection can save nodes and make a graph easier to read. The separate Bitmap node can make the mask logic more explicit. Neither arrangement is automatically more correct. Use the smallest graph that gives you the controls you need and remains understandable to someone who has to revisit it later.
A practical test: connect the image directly to the effect’s mask input and see whether the effect offers a channel selector that handles your source. If that gives you the mask you want, there’s no need to add Bitmap merely because a tutorial includes it. If you need thresholding, fitting, softening, or a specialized mask connection, add Bitmap and make those choices explicit.
What do Bitmap’s Inspector controls change?
Bitmap’s Inspector controls change how it reads or shapes the mask source, not the basic job of the downstream effect. The Fusion tool reference lists controls including Level, Filter, Soft Edge, Invert, Fit Input, Center, Channel, Low and High, Clip Black and Clip White, plus object and material options in the relevant context. (documents.blackmagicdesign.com)
The precise names and availability may vary by Resolve release and input. The following is a practical reading guide to the controls documented in Blackmagic’s Fusion reference. Don’t assume that every option will appear or behave identically in every composition.
| Control | What it helps you change | A sensible first move |
|---|---|---|
| Channel | Which source values become the mask | Choose the channel that carries the desired distinction |
| Low and High | The range of values used to shape mask coverage | Adjust gently while watching the output |
| Clip Black | How the low end is clipped toward black | Use when unwanted low values should stop contributing |
| Clip White | How the high end is clipped toward white | Use when selected high values should become fully on |
| Level | The strength or level of the Bitmap mask output | Change only after confirming the channel is correct |
| Soft Edge | How soft the mask edge becomes | Add only as much softness as the composite needs |
| Filter | The filtering used when processing or resizing the mask source | Compare options if the mask is being fit or resampled |
| Invert | Reverses the mask’s light and dark relationship | Use when the correct area is selected but the wrong side is affected |
| Fit Input | How the source is fitted into the mask canvas | Check for cropping, stretching, or empty bands |
| Center | Where the fitted source sits | Reposition only when the source and target don’t align |
| Use Object / Use Material | Use object or material ID information where available | Confirm the source contains those channels first |
Channel comes before threshold
When a mask looks wrong, first check Channel. A Low or High adjustment can’t rescue a channel that contains no useful information. If the input is an opaque image and the channel is Alpha, for example, the source may be uniformly opaque. No threshold slider can invent a subject/background distinction that Alpha doesn’t contain.
Low, High, and clipping
Low and High provide a way to shape the range of values used for the mask. Clipping options can make the extremes behave as black or white. The exact visual result depends on the incoming values and other controls, so treat a setting change as a test rather than as a universal recipe. Blackmagic’s reference identifies the range controls and describes the clipping behavior in the Bitmap tool documentation. (documents.blackmagicdesign.com)
A restrained workflow works best:
- Choose a channel that produces visible differences.
- Check the unadjusted mask.
- Move one range control at a time.
- Watch whether the boundary becomes more useful or simply loses detail.
- Stop when the unwanted influence is reduced without destroying the edges you need.
If the mask suddenly becomes entirely black or entirely white, undo the most recent change and inspect the source channel. Extreme threshold settings can collapse a useful gray range into a nearly uniform result.
Soft Edge and Filter
Soft Edge can soften the boundary of the mask. That can help when the transition is too abrupt for the image or effect. But softening is not the same as fixing a bad source. If the subject is missing, or the channel is wrong, increasing softness just makes the wrong mask less crisp.
Filter choices matter when Bitmap fits or resamples its input. Different filtering can change how the result looks around edges. The older Blackmagic tool reference lists Box, Bartlett, Multi-box, and Gaussian options, with Gaussian selected in its displayed default example. Defaults can differ between versions, so check the control shown in your Resolve installation rather than treating an old example as a current preset. (documents.blackmagicdesign.com)
Invert
Invert reverses the mask relationship. If the effect is affecting the background when you intended to affect the subject, inversion is a quick test. It doesn’t improve the separation itself; it swaps which side of the existing mask is treated as on or off.
Fit Input and Center
Fit Input controls how the source image is placed into the mask canvas. If the source and composition have different dimensions, the chosen fit can stretch, crop, or leave space. Center shifts the placement. The Fusion tool reference documents a set of fit options and center controls. (documents.blackmagicdesign.com)
If the mask appears offset, scaled unexpectedly, or cut off, inspect Fit Input and Center before rebuilding the mask. Also confirm that the source and target are meant to line up in the same coordinate space. An image mask can be technically correct and still land in the wrong place.
How do I use a black-and-white image as a mask?
To use a black-and-white image as a mask, connect it to Bitmap, choose Luminance if its visible brightness should control coverage, inspect the output, and connect that output to the target tool’s Effect Mask input. Choose Alpha instead only if the image’s transparency is the intended control. (documents.blackmagicdesign.com)
A grayscale image can encode a gradual mask:
- Black areas can represent little or no effect.
- White areas can represent full effect.
- Gray areas can represent partial effect.
That is a useful mental model, but inspect the actual Bitmap output and the receiving tool. A downstream tool may combine multiple masks or invert them. Don’t infer the final result only from the colors in the source image.
Worked example: softening only the bright half of a gradient
This example describes a node setup you can construct. It is not a report of hands-on testing.
- Create or import a grayscale gradient image.
- Connect the gradient to Bitmap.
- Select Luminance as the channel.
- View Bitmap’s output and verify that the brighter and darker ends differ.
- Connect Bitmap to a Blur node’s Effect Mask input.
- Connect the image you intend to blur to the Blur node’s image input.
- View the final output and check whether the blur follows the gradient.
- Adjust the mask range or softness only if the effect boundary needs refinement.
The visual check at step four matters. If Bitmap’s output is uniformly white, the receiving effect may be applied everywhere. If it is uniformly black, the effect may be blocked everywhere. Neither outcome means the node is broken by itself; it can mean the wrong channel was selected, the source has no useful contrast in that channel, or the mask controls have clipped the range.
Why Alpha can fail on a grayscale image
A grayscale image can look like a mask while having an alpha channel that says “fully opaque everywhere.” Those are two separate sets of values. RGB describes visible color; Alpha describes transparency. If the mask information is stored in the visible black-and-white tones, Alpha may ignore it. Luminance is the more relevant test.
Conversely, if a PNG contains a transparent background around an opaque logo, Alpha may be exactly what you want. Luminance might include background tones or the logo’s internal shading in a way that changes the mask. The source’s visual appearance alone does not tell you which channel is correct.
What if the mask seems backward?
If the intended region is dark and the excluded region is bright, either invert the mask or use a range that selects the desired side. Start with Invert because it is easy to reverse and evaluate. If that fixes the selection, you may not need to rework the source.
If inversion gives the correct overall region but the edge is still poor, then refine the source or adjust the mask controls. Keep channel choice, inversion, and threshold changes separate while troubleshooting. Changing all three at once makes it hard to know which change helped.
Can I use footage itself to make a Bitmap mask?
Yes, you can use footage as the source for a Bitmap mask if a channel in that footage contains values useful for controlling the effect. Bitmap can read image channels such as luminance, alpha, and color channels, but it does not automatically recognize a person, object, or semantic category in ordinary footage. (documents.blackmagicdesign.com)
This distinction matters. If you select Luminance, you are making a brightness-based mask. You are not telling Fusion to “select the person.” If the person and background have similar brightness, the mask may not separate them. A color channel may help in a specific image, but it still reads channel values rather than understanding the object.
A Bitmap mask made from footage can be useful for effects that should follow tonal regions. For example, you might use brightness variation to limit a treatment to brighter image areas. That is different from isolating a moving subject. A moving subject generally requires an appropriate key, a tracked or animated shape, or another tool designed to create that separation.
If the source clip changes over time, the mask source changes with it. That may be what you want, as with a tonal effect that follows the changing image. It may be a problem if you expect the mask to remain fixed while the footage changes. In that case, consider a still mask, a tracked shape, or a separate branch with the behavior you need.
Don’t confuse Bitmap with Magic Mask, a keyer, or a rotoscoping tool. Bitmap converts channel data to mask data. A keyer identifies pixels according to keying criteria. A drawn mask defines a region through its shape and may be animated or tracked. Those tools solve overlapping but distinct problems.
Bitmap reads image values; it doesn’t identify objects in ordinary footage.
When should I use Bitmap instead of Polygon or Rectangle?
Use Bitmap when the mask should come from image data, such as alpha, luminance, or a channel pattern. Use Polygon or Rectangle when you want to draw a shape yourself. Those approaches can be combined, but they start from different kinds of information. (documents.blackmagicdesign.com)
| Need | Starting tool | Why |
|---|---|---|
| A mask based on an existing grayscale map | Bitmap | The tonal values already describe the mask |
| A mask based on transparency in a graphic | Bitmap | The alpha channel can carry the desired coverage |
| A hand-drawn boundary around an irregular subject | Polygon | You create the shape directly |
| A simple rectangular region | Rectangle | A shape tool is direct and adjustable |
| A soft oval vignette or selected circular region | Ellipse | The mask geometry is the point of the task |
| A mask painted along a changing or detailed area | Mask Paint or another suitable roto tool | A painted mask is different from channel conversion |
| A color-based selection | A suitable keyer or color-selection tool | The selection depends on color criteria rather than a pre-existing mask image |
| An effect driven by brightness or texture | Bitmap | Image values provide the control map |
The Polygon Mask node is often more direct if you need to draw around a shape or animate its outline. The guide to a Fusion Polygon mask that isn’t visible also covers a common point of confusion: a mask node provides mask data, but it won’t necessarily appear as a finished graphic in the composite by itself.
A shape mask is easier to understand when you need a defined boundary. Bitmap is more flexible when a source map contains texture, tonal falloff, or a channel pattern that would be tedious to draw by hand. Neither wins in every case. Choose by asking where the mask information comes from.
You can also combine approaches. A Bitmap output may need to be constrained with a shape mask, or a drawn mask may limit an image-derived one. Blackmagic’s reference notes that Bitmap can provide additional options for combining masks. (documents.blackmagicdesign.com) If you do combine them, inspect each branch separately before diagnosing the combined result.
How do I inspect the Bitmap output without changing the effect?
Inspect the Bitmap output by viewing the Bitmap node directly, then return to the final output to compare. Viewing the mask separately helps distinguish a mask problem from a downstream effect or connection problem. Fusion’s viewers can display outputs from selected nodes, and its manual explains how the Node Editor and viewers work together. (documents.blackmagicdesign.com)
A useful check has three stages:
- View the source. Confirm that the input image contains the information you expect.
- View Bitmap. Confirm that the selected channel produces a useful mask rather than a uniform result.
- View the final output. Confirm that the target effect is limited to the intended region.
If the source looks correct but Bitmap does not, inspect Channel, Low, High, clipping, and inversion. If Bitmap looks correct but the final effect does not, inspect the connection to the target’s mask input, the target’s own mask controls, and the picture input. If the final effect appears in the opposite area, test Invert before rebuilding the mask.
This sequence avoids a common debugging loop: changing the source image, the effect amount, and Bitmap thresholds all at once. That makes the result harder to explain and harder to undo. Change one variable, check the output, and keep the earlier state available.
You can also temporarily reduce the effect strength while testing. That makes it easier to see where it is applied without confusing the mask itself with an aggressive color or blur change. The purpose is inspection, not a prescribed numerical setting.
If a node is selected and you need its built-in help, Blackmagic’s Fusion manual notes that the Effects Library provides tool information, and the current DaVinci Resolve manual is available through Blackmagic’s site. (documents.blackmagicdesign.com) Resolve’s official training page is another place to find broader learning material for the application.
Why is my Bitmap mask all white or all black?
A Bitmap mask that is all white or all black usually means the chosen channel or its value range is not distinguishing the intended regions. It can also happen when the source is uniformly opaque, the mask has been inverted or clipped, or the source is fitted in a way that hides the useful area. Check the output before changing the downstream effect. (documents.blackmagicdesign.com)
Use this troubleshooting table to narrow it down:
| What you see | First thing to check | Next useful test |
|---|---|---|
| All white | Is the selected channel constant or mostly high? | Try another channel, then inspect the Low and High range |
| All black | Is the selected channel constant or mostly low? | Test a different channel and temporarily undo recent clipping or threshold changes |
| Correct shape, wrong side | Is the mask inverted? | Toggle Invert and compare the downstream effect |
| Correct shape, weak effect | Is the mask mostly gray, or is the target effect itself subtle? | Inspect the mask separately, then check the target tool’s mask controls |
| Mask shifted or cropped | Does the source fit the composition dimensions? | Check Fit Input and Center |
| Mask has harsh edges | Is the source already binary or heavily clipped? | Refine the source range or add modest softness |
| Effect applies everywhere | Is Bitmap connected to the intended Effect Mask input? | Confirm the image input and mask input are not confused |
| Effect disappears | Is the mask black, disconnected, or connected to a different input? | View Bitmap, then trace its output to the target |
| Works on one clip but not another | Does the second clip carry the same useful channel values? | Compare the source channels rather than assuming the clips are equivalent |
| Object or material selection does nothing | Does the source contain those ID channels? | Verify the render includes the required auxiliary data |
If Alpha gives you all white
Check whether the source is transparent where you expect it to be transparent. Many ordinary images have an opaque alpha channel across the whole frame. Their visible grayscale values are in the color channels, not in Alpha. Try Luminance if brightness is the intended control.
If Luminance gives you all black
The source may be very dark, the channel range may have been clipped, or the result may be affected by other controls. View the source and Bitmap output separately. If the source itself has variation but the output does not, check the selected channel, Low and High, Clip Black, and Clip White.
If the mask seems inverted
Use Invert as a diagnostic. If the right area becomes active, the mask data may be sound and only its polarity was opposite your intent. If neither normal nor inverted looks right, inspect the channel and the source values before adjusting the effect.
If the mask appears misplaced
Check the relationship between the source dimensions and the mask canvas. Fit Input and Center affect how the input is placed. If the image was transformed or generated in another branch, confirm that the mask source shares the coordinate space you expect. Blackmagic’s Fusion tool reference documents these fit and center controls. (documents.blackmagicdesign.com)
If the effect is not constrained
Make sure Bitmap is connected to the target’s mask input, not just placed nearby in the graph. A connected image branch that ends at no useful input cannot restrict the target. Also check whether the receiving tool combines masks or has its own inversion or mask controls.
The core troubleshooting rule is simple: inspect the mask, then inspect the connection, then inspect the effect. This gives you three separate places to look instead of one vague problem called “Bitmap not working.”
What is the difference between Bitmap and a keyer?
Bitmap reads selected values from an image and turns them into mask coverage. A keyer creates a selection using its keying process. Use Bitmap when your source already contains useful mask data; use a keyer when you need to derive a selection from image characteristics such as a color range or a background. (documents.blackmagicdesign.com)
These tools can produce similar-looking results, but their inputs and jobs differ:
| Tool type | Starting information | Best starting question |
|---|---|---|
| Bitmap | Channel or auxiliary values in an image | “Which values in this image should control the mask?” |
| Polygon or Rectangle | A shape you define | “Where should the mask boundary go?” |
| Keyer | Image features evaluated by a keying operation | “Which pixels should this keying process select?” |
| Painted or roto mask | Marks or paths you create | “Which region do I need to trace or revise?” |
A Bitmap mask can be useful after a keyer if you need to manipulate the resulting image or channel, but you do not add Bitmap just to make every keyer output valid. The direct mask connection may already do what you need. Blackmagic’s reference notes that connecting an image directly to an Effect Mask can be enough for many common tasks. (documents.blackmagicdesign.com)
It helps to decide what you know about the selection:
- If you already have a black-and-white map, use that map.
- If you can draw the boundary accurately, use a shape mask.
- If the selection depends on a key color or image feature, use a keyer suited to the job.
- If the boundary changes across frames, consider tracking, animation, or a time-aware masking workflow.
- If the source contains useful auxiliary IDs, check whether Bitmap can use that data.
No single mask tool replaces the others. The most maintainable node tree is usually the one whose nodes make the source of the selection obvious.
Can Bitmap use Fast Noise or another generated image?
Bitmap can use an image generated in Fusion as a source if that node supplies image data with values you can use as mask coverage. The Bitmap reference describes masks made from images in the flow, and Fusion’s manual describes generators as tools that create image data within a composition. (documents.blackmagicdesign.com)
A generated gradient or noise pattern can provide a changing mask without importing a separate still. The pattern is still just image values. Choose the channel that expresses the pattern you want, then connect Bitmap to the target’s mask input.
Worked example: noise-driven effect
This is a hypothetical node design, not a tested effect preset:
Fast Noise -> Bitmap -> Effect Mask on Glow
MediaIn ----------------> Glow -> MediaOut
The intended logic is that the generated texture provides mask values, and the Glow node receives the picture to process plus the mask that limits the glow. If the result is uneven in a way you don’t want, inspect the generated source first. The Bitmap node only converts what it receives; it cannot make a noisy source behave like a clean geometric shape.
You might use a generated image when a mask should have texture, variation, or a procedural quality. You might instead use a Polygon or Rectangle when the edge should be crisp and predictable. If you are experimenting with a procedural source, the Fast Noise follow tracker guide covers another way Fusion’s noise tools can participate in a node setup.
As with any mask branch, keep a clear distinction between the source that generates the pattern, the Bitmap node that interprets it, and the downstream effect that uses it. If the result changes over time, inspect the source at different frames. A mask that looks right on one frame may be too strong or too weak at another.
How does Bitmap behave with Resolve 21.1?
DaVinci Resolve 21.1 is the version context for this guide, and Blackmagic’s current product page lists a 21.1 manual. The core Bitmap role described here is image-to-mask conversion. The references available for the tool’s detailed controls include earlier Fusion manuals, so don’t treat an old screenshot or default value as proof that every control is unchanged in 21.1. (blackmagicdesign.com)
Resolve 21 adds many features across the application, but the official new-features guide is not a reason to assume Bitmap itself acquired a new function. The guide’s listed Resolve 21 highlights include page and workflow changes, while the Bitmap definition remains a matter for the Fusion tool reference and current manual. (documents.blackmagicdesign.com)
When matching an older Fusion tutorial to Resolve 21.1:
- Confirm that the node is the Bitmap Mask tool, not a different control with a similar name.
- Check the current Inspector labels. A legacy PDF may use a different presentation or wording.
- Look at the actual input and output connections instead of copying a node’s screen position.
- Confirm whether the tutorial selects Alpha, Luminance, or another channel.
- Treat default values shown in old screenshots as examples, not universal current defaults.
- Check the current Resolve 21.1 manual if a control or behavior differs.
- Test the output using a small section of your composition before building a larger node tree around it.
The distinction between a stable concept and a version-specific interface is useful. Bitmap’s purpose is not the same thing as the exact position of a dropdown, a default filter, or an Inspector tab. For current details, Blackmagic’s published manual is the source to check. (blackmagicdesign.com)
Resolve Free versus Studio is not the central distinction for this node’s basic purpose. The question is whether the desired tool and workflow are available in your installation, and whether the image contains the channel data you need. If a particular feature or effect is unavailable in your edition, check the official manual and Blackmagic’s product information rather than assuming Bitmap itself changes into a different kind of node.
What does Bitmap not do?
Bitmap does not draw a polygon, track a subject, generate a key from scratch, or apply a visible effect by itself. It converts selected image values into a mask that another tool can use. (documents.blackmagicdesign.com)
That short answer prevents several common wrong turns:
- It does not automatically isolate a person. Choosing Luminance means the mask follows brightness values, not semantic object recognition.
- It does not create transparency in the source file. It reads a channel or value and outputs mask coverage for the Fusion graph.
- It does not draw an editable spline. Use a shape mask when you need to place points and define a boundary.
- It does not guarantee a clean edge. The quality depends on the source data and how the mask is shaped.
- It does not necessarily need to appear between every image and mask input. Some Effect Mask inputs can accept an image directly.
- It does not make missing auxiliary channels appear. Object and Material IDs need to exist in the source render.
- It does not replace the image input on the effect. The effect still needs the picture it will process.
- It does not choose the best channel for you. You need to inspect the source and choose the channel that contains the intended separation.
A useful boundary test is to disconnect the Bitmap branch mentally and ask what each remaining node does. The target effect processes an image. Bitmap supplies control data. If you expect Bitmap itself to look like a finished composite, the graph is being read as if every node were an effect node. Some Fusion nodes create or modify pictures; others create masks, route data, or set up the flow.
This distinction is also why the node can feel abstract at first. The output is not necessarily a second picture intended for the viewer. It is a map that tells another tool how strongly to work at each location.
A Bitmap output is control data for another tool, not a finished visual effect.
What does a Fusion artist say about working with nodes?
Fusion nodes are small tools whose value often comes from how they work together. Gedaly Guberek, identified by DVResolve as a Blackmagic Design Certified Master Trainer, writes of the common nodes: “Most of them are simple, but have a lot of power. Especially when used with one another.” (dvresolve.com)
Bitmap is a good example of that point. By itself, it may look like a small mask utility. Connected to an image source and a target effect, it becomes part of a larger decision: which pixels should be affected, and by how much? The node is more useful when you understand its neighbors than when you memorize its name.
For example, the same Bitmap output could be sent to different compatible tools, or the same target effect could receive different mask sources. The result changes because the graph changes. The purpose is not to collect nodes; it’s to create a readable chain from source data to intended output.
If you’re learning Fusion, try tracing a small graph from left to right:
- Find the original image.
- Find the tool that changes it.
- Find any side branches entering that tool.
- Ask whether each side branch carries an image, a mask, or another kind of data.
- Follow the output to MediaOut.
The Fusion page beginner guide is a broader companion if the node editor itself still feels unfamiliar.
What’s the simplest way to remember Bitmap?
Remember Bitmap as “image values to mask.” It reads selected information from an image, makes mask coverage from it, and gives that mask to another tool. Choose it when the source already contains useful channel or tonal data; skip it when a direct Effect Mask connection or a hand-drawn shape does the job. (documents.blackmagicdesign.com)
Here is the short decision path:
- Already have a grayscale map? Try Luminance.
- Already have transparency? Try Alpha.
- Need a single color channel? Test Red, Green, or Blue.
- Need an editable drawn boundary? Use Polygon, Rectangle, or another shape mask.
- Need the effect limited by an image? Try a direct Effect Mask connection first.
- Need more control over channel, range, fitting, or softness? Add Bitmap.
- Need a subject recognized in footage? Bitmap alone is not the object-selection tool.
- Need to debug the result? View the source, then Bitmap, then the final output.
TryUncle is the on-screen assistant for DaVinci Resolve on Mac and Windows, ask in plain words and Uncle points at the exact control on your screen. If you’re stuck identifying which Fusion input or Inspector control you’re looking at, TryUncle can provide on-screen guidance while you work; you still make and apply the changes yourself.
Use Bitmap when image data should define the mask; use a shape mask when you need to draw the boundary.
Frequently asked questions
- What does the Bitmap node do in DaVinci Resolve?
- The Bitmap node converts values from an incoming image into mask coverage. You choose a source channel, such as alpha, luminance, or red, then connect the mask output to a compatible mask input.
- Do I need a Bitmap node to use an image as an Effect Mask?
- Not always. Blackmagic’s Fusion reference says you can connect an image directly to an Effect Mask and choose the source channel in the receiving tool’s controls. Bitmap adds separate channel, threshold, fit, and edge controls, and it is needed for some specialized mask inputs.
- Should I choose Alpha or Luminance in the Bitmap node?
- Choose Alpha when the image’s transparency already defines the area you want. Choose Luminance when its brightness should define the mask, as with a black-and-white map. Check the result in the viewer because a fully opaque image can have an unhelpful alpha channel even when it looks like a useful grayscale mask.
- Why is my Bitmap mask all white or all black?
- First check the selected channel, the incoming image, and the Low and High controls. A constant or unsuitable channel can produce an all-white or all-black mask. Temporarily view the Bitmap output and test a channel that actually contains the differences you need.
Sources
Put this guide to work with TryUncle.
Ask about the step you’re on. TryUncle sees your screen and points at the control you need, so you can keep learning in your own project.
Get TryUncle for Mac or WindowsKeep reading
Guides · Jul 10, 2026 · 32 min
DaVinci Resolve Fusion Page Tutorial for Beginners
Learn the DaVinci Resolve Fusion page from zero: nodes, MediaIn/MediaOut, the Merge node, planar tracking, and keying a green screen, step by step.
Fixes · Nov 10, 2026 · 24 min
DaVinci Resolve Fusion Polygon Mask Not Visible? Fix It
Fix a DaVinci Resolve Fusion polygon mask that is not visible. Check the blue mask connection, viewer controls, selected node, and mask settings.
Guides · Nov 10, 2026 · 28 min
DaVinci Resolve Fast Noise Follow Tracker: Fusion Guide
Make Fusion Fast Noise follow tracked motion in DaVinci Resolve 21. Build a Match Move, tune the track, and fix drift, cropping, and render issues.