Articles / Guidesupdated for DaVinci Resolve 21.0.3 (July 2026)
How to Create a VHS Retro Look in DaVinci Resolve
Quick answer
To create a VHS retro look in DaVinci Resolve, crop to 4:3, push a warm-magenta color cast with lifted blacks, then build a node chain for chroma bleed, scan lines, tracking-style displacement, and tape noise, in that order. DaVinci Resolve Studio's one-node Analog Damage effect does the same job with presets if you own it.
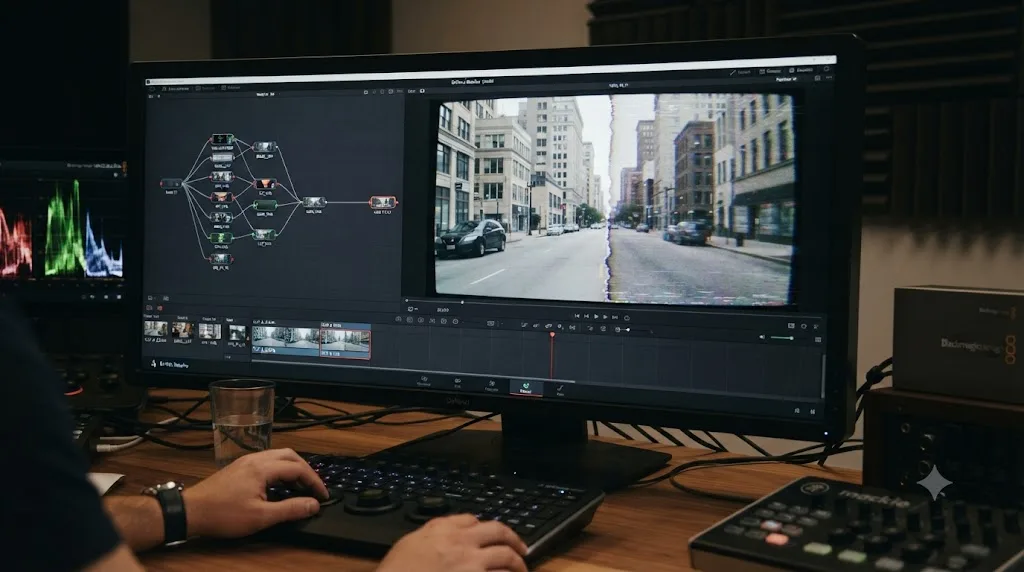
I've spent seven-plus years cutting commercial and narrative work, and the VHS request has become one of the recurring asks in the 100,000+ member video-editing community we run: someone wants their 4K footage to look like it was dubbed off a rental tape in 1994, and instead they drop a scan-line overlay on top of pristine digital footage and wonder why it reads as a filter instead of a format. As of August 2026, on DaVinci Resolve 21.0.3, building the real thing takes a specific node order, whether or not you own Studio.
This guide builds a VHS retro look from a clean, balanced shot to a finished tape-damaged frame, node by node, with the reasoning behind each move so you can adapt it instead of copying settings that only worked on someone else's footage.
What makes a color grade actually read as VHS?
A VHS look reads as authentic when the image has lost resolution and color bandwidth before any visible damage gets added on top, not when scan lines and grain get layered onto an untouched 4K frame. Real VHS tape recorded video through a genuinely narrow pipe: about 3 MHz of luminance bandwidth and roughly 300 kHz of chroma bandwidth, against a horizontal resolution around 240 television lines, according to Wikipedia's technical breakdown of the format. Every artifact people associate with VHS, the soft edges, the color smearing, the wobble, traces back to that narrow pipe and the mechanical process of reading it back off a spinning tape head.
VHS damage isn't random. Every artifact traces back to a real physical or electronic limit of the format, and copying that limit is what makes the effect read as authentic instead of decorative. Scan lines came from an interlaced 480i broadcast signal splitting each frame into two fields. Color bleed came from that 300 kHz chroma bandwidth, roughly a tenth of the luma bandwidth, forcing color detail to smear into neighboring pixels. Tracking distortion came from a spinning head reading a track it wasn't perfectly aligned with, which VHS decks fought using azimuth recording, angling one head six degrees one way and the second head six degrees the other, per the same Wikipedia entry.
That's the order this guide follows: lose resolution and bandwidth first, then add the visible symptoms of that loss. Skip the first step and every later step is decorating clean footage instead of degrading it.
Colorist Lewis McGregor, writing for Frame.io's PremiumBeat blog, put the appeal of the look plainly:
"Making your footage look like you shot it on celluloid (or like a VHS transfer) is undoubtedly one of the most popular post-production techniques."
Source: DaVinci Resolve's Lens Reflections and Film Damage FX, by Lewis McGregor, PremiumBeat
How do you create a VHS retro look in DaVinci Resolve?
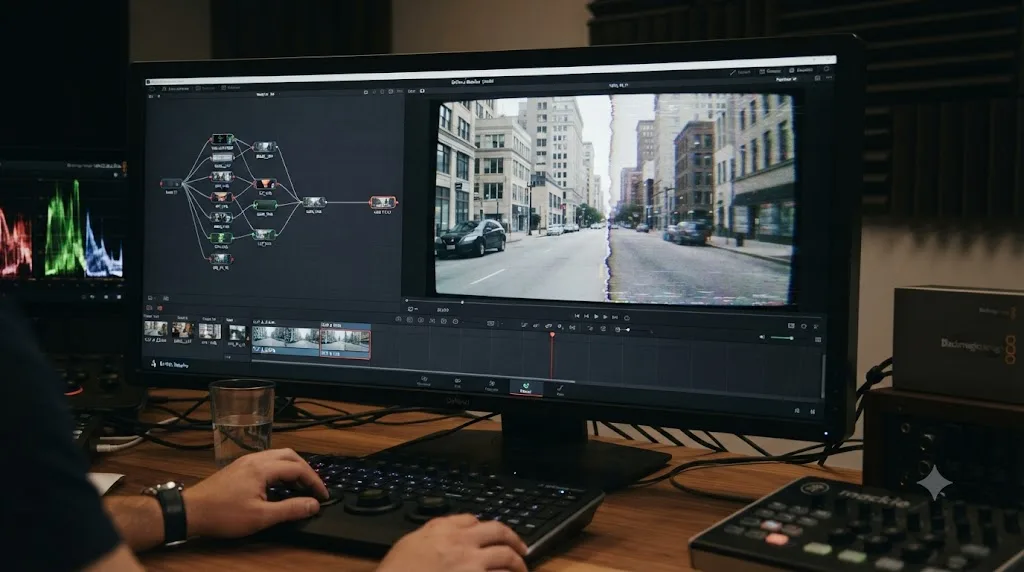
You get there through a node chain that separates degradation from decoration: balance the shot, crop to 4:3, build a color-cast look, blur only the chroma channel for bleed, add scan lines and tracking distortion in Fusion, then finish with tape noise and a vignette. Skipping the balance and crop steps is the single most common reason a VHS grade looks like a sticker slapped on a modern shot instead of a genuine format.
This mirrors the correction-then-style structure our color grading basics guide covers for any grade. A VHS look just adds a very specific, physically motivated style on top of that same foundation, and it needs Fusion, not just the Color page, for two of its signature moves.
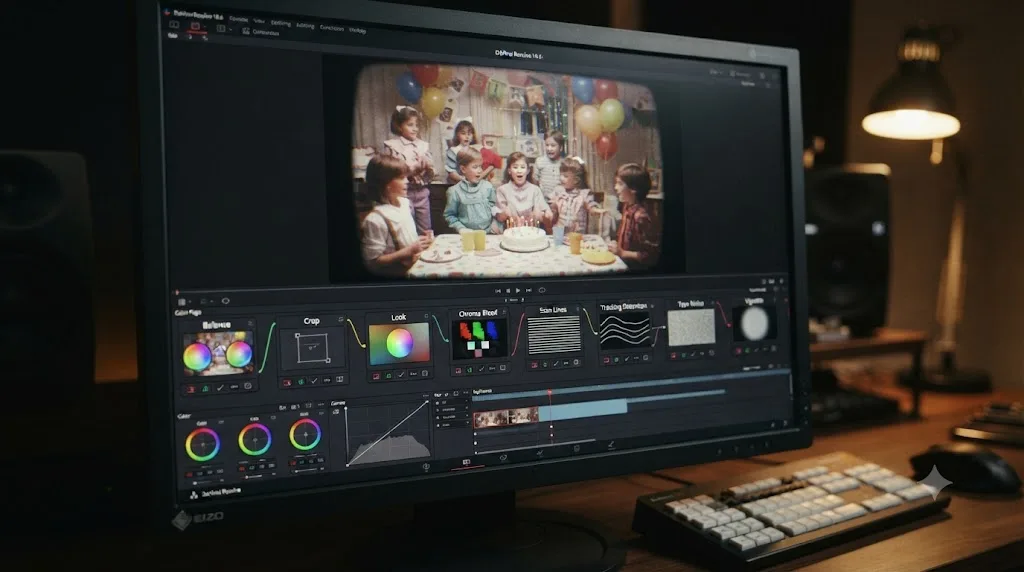
Here's the node structure this guide builds, top to bottom:
| Node or stage | Job | Where it lives |
|---|---|---|
| Balance | Normalize log footage, correct exposure and white balance | Color page |
| Crop / sizing | Reframe to 4:3 | Color page |
| Look (color cast) | Lift blacks, push a warm-magenta tint, mild oversaturation | Color page |
| Chroma bleed | Blur only the U and V channels in a YUV-switched node | Color page |
| Scan lines | Tiled dark line pattern, composited in Multiply mode | Fusion page or Adjustment Clip |
| Tracking distortion | Displace node fed by Fast Noise, keyframed sparingly | Fusion page or Adjustment Clip |
| Tape noise / dropout | Static texture overlay, occasional dropout band | Edit page timeline or Fusion |
| Vignette / edge damage | Soft circular vignette, optional tape edge softness | Color page |
Eight stages for the full treatment, though the color cast and chroma bleed alone get you most of the way there on a shot that just needs to feel "off" rather than fully tape-damaged.
How much of this VHS chain do you actually need?
Not every project needs all eight stages. A five-second cutaway in a nostalgia montage reads as VHS with far less work than a hero shot meant to hold the screen for twenty seconds while someone examines it.
Three tiers, roughly, depending on how much scrutiny the shot will get:
| Tier | Stages included | Skips | Best for |
|---|---|---|---|
| Quick pass | Balance, color-cast look, chroma bleed | Crop, scan lines, tracking distortion, tape noise, vignette | A brief insert or background plate nobody stares at |
| Standard | Balance, crop, look, chroma bleed, scan lines, vignette | Tracking distortion, dropout | A featured shot in a montage, held for a few seconds |
| Full authenticity | All eight stages, including tracking distortion and dropout | Nothing | A hero shot, a found-footage sequence, or anything held long enough for the audience to really look |
The quick pass leans entirely on the color-cast and chroma-bleed nodes, since those two alone shift the palette and softness enough to read as "off" without a full rebuild. Add the crop and scan-line stages for the standard tier and you've covered what most projects actually need: a shot that reads as tape at normal viewing speed and normal viewing distance, without the time cost of hand-keyframed tracking wobble.
Save the full eight-stage chain, tracking distortion included, for shots the story specifically calls attention to. Tracking wobble and dropout are the two most labor-intensive stages to keyframe convincingly, and they're also the two an audience is least likely to consciously register on a shot that's on screen for two seconds. Spend that time on the shots that earn it, and lean on the quick-pass or standard tier for everything else in the same sequence, so the whole edit doesn't take on the render and revision cost of the full chain for footage nobody's going to scrutinize.
If you're applying any tier across many clips in the same project, build it once as a macro and PowerGrade before you decide which tier each shot gets, covered later in this guide. That way switching a shot from quick pass to full authenticity is a matter of adding a couple of saved nodes, not rebuilding the chain from scratch.
What aspect ratio and frame settings does an authentic VHS look need?
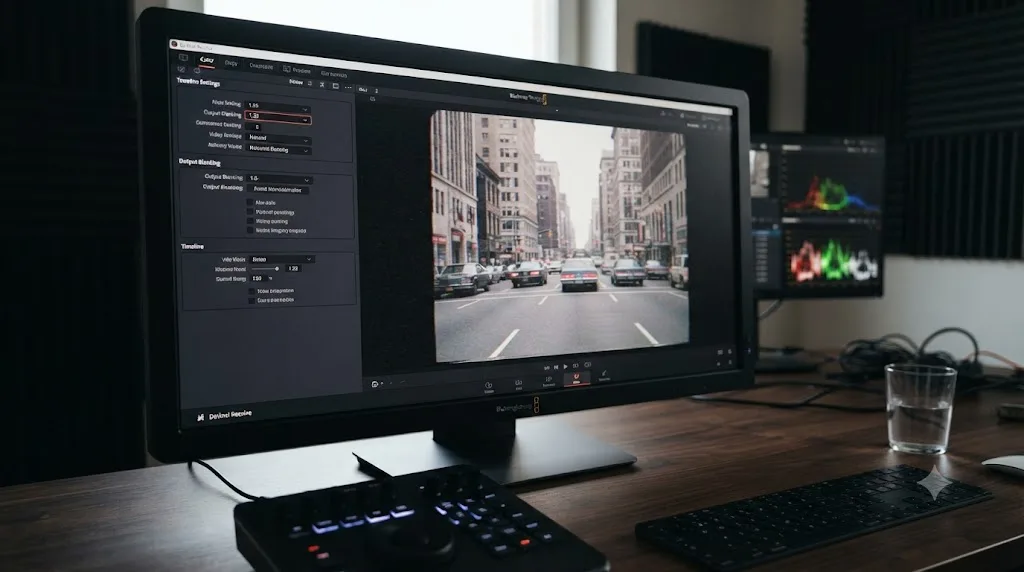
4:3, because VHS is a standard-definition format built entirely around a 4:3 broadcast frame, and a widescreen 16:9 crop is one of the fastest tells that an otherwise convincing VHS grade is fake. Open Timeline settings, find Output Blanking, and set it to 1.33. Resolve pillarboxes the frame automatically, adding black bars on the left and right without altering your actual footage underneath.
If you'd rather keep some picture visible at the edges behind a decorative border, a common look for VHS-styled title cards and intros, crop each clip individually instead. Open the Inspector's Transform panel, reduce the Zoom slightly, and adjust Position until the frame reads as 4:3 within your 16:9 canvas, leaving room for a border graphic or timestamp text around it.
Resolution matters here too, even though it's less visible than the aspect ratio. Real VHS delivered roughly 240 lines of horizontal resolution, a fraction of what a modern camera captures even at 1080p, let alone 4K. Downsampling your timeline's working resolution, or adding a deliberate soft blur before your other VHS nodes, recreates that resolution ceiling honestly instead of relying on scan lines alone to sell the era.
A VHS look that skips the resolution loss and jumps straight to scan lines and grain is decorating clean footage instead of degrading it. That's the difference between a project that reads as a genuine tape transfer and one that reads as an Instagram filter with black bars.
How do you build the VHS color cast?
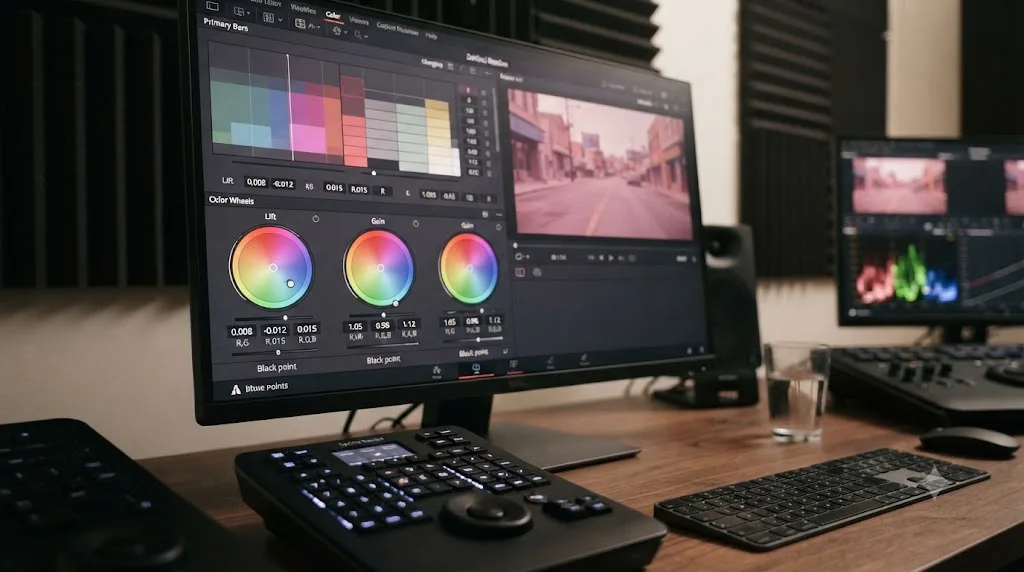
Add a new serial node after your balance pass, labeled "look," and push three moves: lift the black point so nothing sits at a true, crushed zero, pull Gain down slightly so whites go soft instead of clipping bright and clean, and add a warm, faintly magenta tint into both Lift and Gain. VHS tape never reproduced a truly neutral black or a truly clean white, and a grade that keeps both intact reads as digital no matter what damage you layer on afterward.
The practical moves, in order:
- Raise the Lift wheel slightly toward the center, lifting your black point off zero. A few points is usually enough. Push further and the image starts to look foggy rather than tape-worn.
- Pull the Gain wheel down a small amount, so your whites sit slightly below full brightness. This mimics the soft highlight rolloff a consumer VCR's playback electronics produced, rather than the hard clip a digital sensor delivers.
- Nudge both Lift and Gain toward a warm, faintly magenta hue, not a strong, obvious tint, just enough that skin and neutral surfaces read as slightly warmer and pinker than a clean digital grade would show them.
- Drop overall contrast a touch in Gamma, since consumer tape decks rarely reproduced the full contrast range a modern camera captures, and a VHS image that's too contrasty reads as a LUT rather than a format.
- Raise Saturation modestly, five to ten points above your balanced starting point. Consumer VCRs, and the cheap RF or composite connections most people used to watch them, tended to push color slightly hot rather than reproduce it accurately.
| Move | Wheel or control | Direction |
|---|---|---|
| Lifted blacks | Lift | Slightly up from zero |
| Soft whites | Gain | Slightly down from full |
| Warm-magenta cast | Lift and Gain | Both nudged warm, faint pink |
| Reduced contrast | Gamma | Slightly compressed |
| Modest oversaturation | Saturation | 5-10 points above balanced |
None of these moves needs to be dramatic on its own. It's the combination, soft blacks, soft whites, a warm tint, and slightly hot color, that builds the specific, recognizable VHS palette rather than a generic vintage look.
How do you create chroma bleed in DaVinci Resolve?
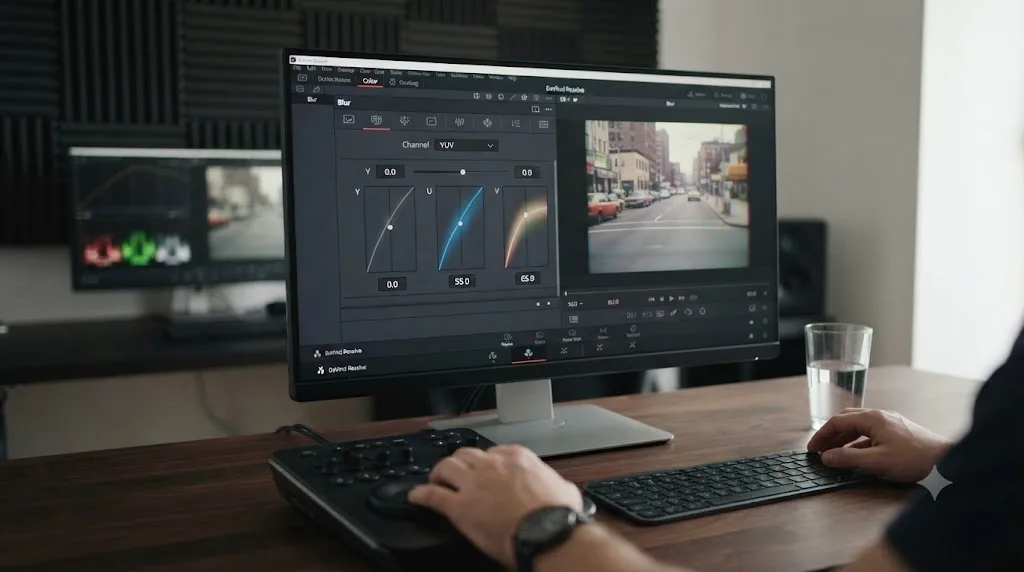
Right-click a new serial node and switch its color space from RGB to YUV, open the Blur palette, click the link icon to unlink the three channel sliders so they read Y, U, and V instead of R, G, and B, then raise only the U and V sliders while leaving Y at zero, a technique documented on Blackmagic's own user forum for isolating chroma from luma on a single node. That blurs color information across neighboring pixels without softening edge detail, which is precisely what happened inside a real VHS deck, where chroma bandwidth sat at roughly a tenth of luma bandwidth.
Chroma bleed is a bandwidth problem, not a blur problem, and building it as one changes where you apply it in the node chain. A generic Gaussian blur applied to the whole image softens everything, edges included, which reads as an out-of-focus shot, not a tape. Blurring only the chroma channel keeps edges sharp while letting color smear past its own boundaries, which is the specific, recognizable signature of a red logo bleeding into the blue sky behind it, or a bright title card's colored text smearing into its own background.
The setup, step by step:
- Add a new serial node after your color-cast look node, labeled "chroma bleed."
- Right-click the node and choose Color Space, then YUV from the context menu.
- Open the Blur palette and locate the three channel radius sliders.
- Click the link or chain icon to unlink them, which relabels the sliders Y, U, and V for this node.
- Raise U and V together, a small amount at first, watching how far color starts to smear past hard edges in the frame.
- Leave Y at zero. Any luma blur here re-introduces the generic soft-focus look this technique is specifically built to avoid.
- Judge the result at 100% zoom, since chroma bleed is subtle enough to disappear entirely at a scaled-down preview resolution.
For an extra, optional touch on the brightest highlights and titles, a light Chromatic Aberration pass, included free in ResolveFX, adds a small amount of red-green-blue edge fringing on top of the chroma bleed. Real VHS didn't produce true chromatic aberration, that's a lens artifact, but the two effects visually reinforce each other enough that a small amount reads as extra "cheap dub" character rather than a mismatch, as long as it stays subtle.
How do you add scan lines in DaVinci Resolve?
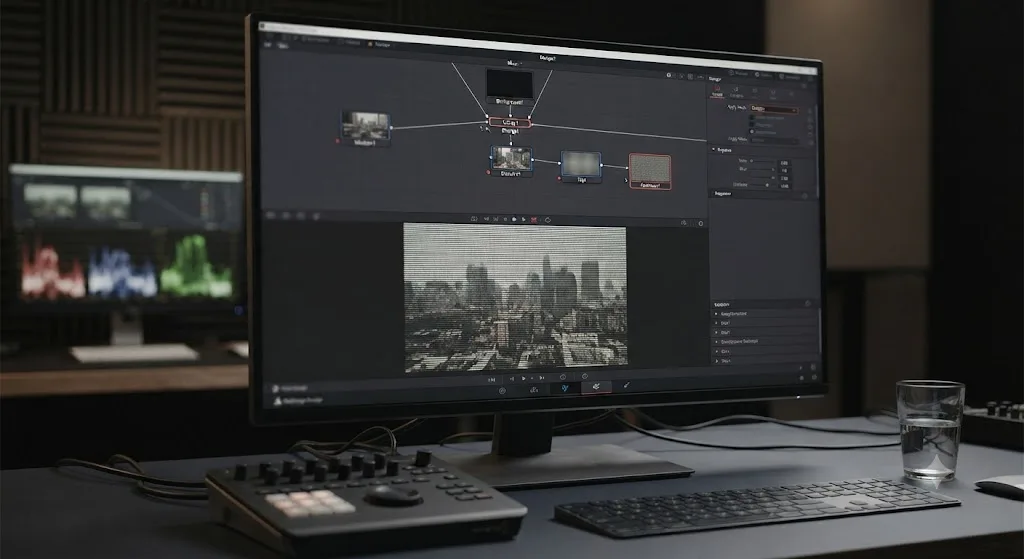
On the free version, build them in Fusion: add an Adjustment Clip above your graded footage from Effects > Toolbox > Effects, open it on the Fusion page, and tile a thin, dark, semi-transparent rectangle or grid pattern across the full frame height, then composite that pattern over your image in Multiply blend mode so the lines darken the image instead of covering it with flat black bars. DaVinci Resolve Studio users can skip this entirely and use Analog Damage's dedicated Scan Lines section, which controls line sharpness and frequency with sliders instead of a hand-built Fusion tree.
The free-version build, in Fusion:
- Add a Background node set to a dark gray or black, sized to your frame.
- Add a Rectangle or Grid tool and set its height to a thin fraction of your frame, repeated at a regular vertical interval to simulate individual scan lines rather than one continuous stripe.
- Lower the pattern's opacity so the lines darken rather than fully block the image beneath them, somewhere in the range of 15 to 30 percent opacity depending on how aggressive you want the effect.
- Merge the line pattern over MediaIn1 using a Merge node set to Multiply, so the lines interact with your image's existing brightness instead of sitting as a flat overlay.
- Save the result back to the Edit page as an Adjustment Clip effect, which applies across every clip beneath it on the timeline rather than requiring you to rebuild the pattern per shot.
A faster shortcut for the same visual result, without touching Fusion at all, is a pre-made scan-line texture clip, a video or still with the line pattern baked in, composited on its own track in Multiply or Overlay blend mode directly on the Edit page timeline. It's less flexible than a Fusion-built pattern, since you can't adjust line frequency or sharpness after the fact, but it's a legitimate route if you'd rather skip node-building entirely.
A scan-line overlay dropped straight onto pristine 4K footage looks like a filter. A scan-line overlay dropped onto footage that's already lost resolution, saturation, and sharpness looks like a tape. That's the entire reason this guide builds resolution loss and color cast before scan lines rather than after.
How do you fake VHS tracking distortion and tape wobble?
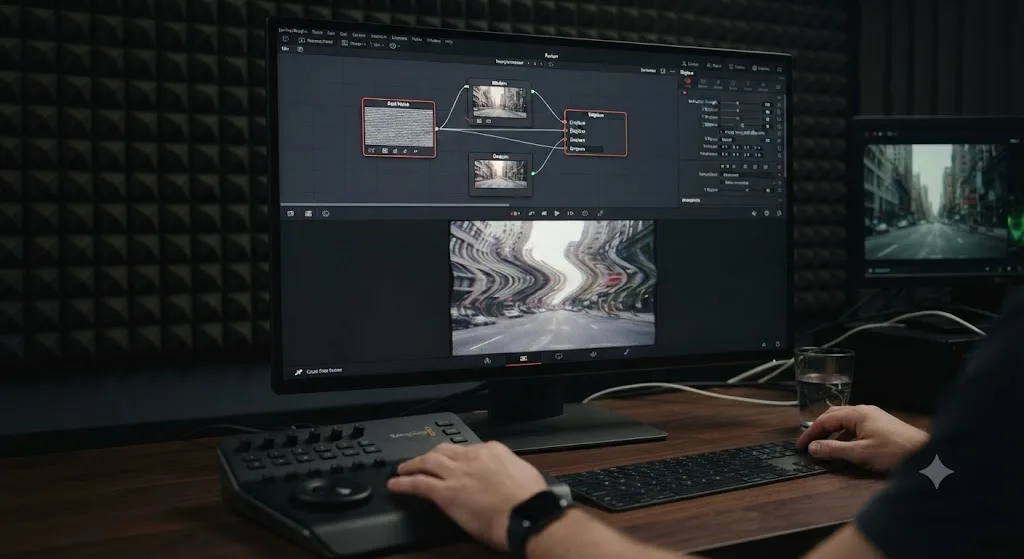
Feed a Fast Noise node into a Displace node's map input on the Fusion page, then keyframe the noise's seethe rate sparingly across the clip so the frame warps and wobbles occasionally rather than constantly. Per the Fusion reference manual's entry on Displace, the Displace node uses a second image, in this case a Fast Noise pattern, as a map that pushes pixels around based on that map's brightness values, and increasing the noise's seethe rate specifically produces the kind of undulating, heat-distortion-like movement that reads as tape wobble when it's applied at a low intensity.
Real VHS tracking distortion came from a spinning playback head reading a track it wasn't precisely aligned with, an alignment problem VHS decks fought using azimuth recording, one head angled six degrees one way and the second angled six degrees the other, according to Wikipedia's technical entry on the format. When alignment drifted, usually from a worn tape, a cheap deck, or a tape that had been paused and left sitting on the heads, the image would visibly warp, jump, or roll near the top or bottom of the frame.
The Fusion build:
- Add a Fast Noise node, set to a moderate scale, feeding nothing into the composite directly.
- Add a Displace node, connect your MediaIn as the primary input and the Fast Noise node as the displacement map input.
- Keep the X and Y Displacement values low. A large displacement reads as a glitch effect, not tape wobble. You want the frame to shimmer subtly, not visibly tear.
- Keyframe the Fast Noise's Seethe rate, holding it near zero for most of the clip and pushing it up only in short bursts, mimicking the moments a real tape would briefly lose tracking rather than staying constantly unstable.
- Concentrate the effect toward the top and bottom edges if you want a more targeted look, using a mask on the Displace node so the middle of the frame stays comparatively stable while the edges show more distortion, closer to how a real tracking problem actually presented on a CRT.
For an occasional harder glitch, a brief horizontal tear or a rolling band across the frame, a handful of frames cut out with the Blade tool and treated with Resolve's built-in Digital Glitch effect from Effects > Toolbox > Effects > Fusion Effects adds a sharper, more damaged moment without rebuilding the Displace setup for every occurrence.
How do you add tape noise, static, and dropout?
By layering a noise or static texture clip over your graded footage in Overlay or Screen blend mode on the Edit page, since DaVinci Resolve's Studio-only Film Grain and noise-reduction tools aren't built for adding tape-style static and are gated behind the paid tier, exactly the way Film Grain is per Blackmagic's own Studio product page. Free-version users get an identical visual result through the same overlay technique our black and white conversion guide covers for adding film grain: a texture clip on its own track, blended rather than baked into a single node.
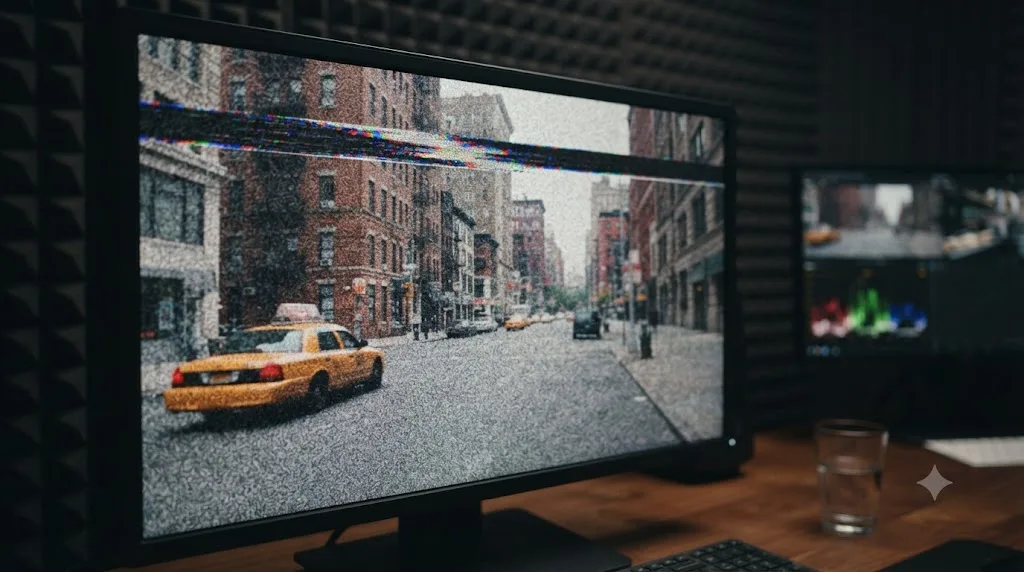
Three layers of noise typically stack into a convincing tape-damaged image:
- Fine, constant static, a subtle grain or noise texture composited across the whole frame at low opacity, present throughout the clip rather than appearing and disappearing.
- Occasional dropout bands, short horizontal streaks or a brief flash of white or black noise across a narrow strip of the frame, timed to a handful of specific frames rather than looping continuously. Real VHS dropout came from physical gaps in the tape's magnetic coating, which read as random, isolated glitches, not a steady pattern.
- A soft, low-frequency roll or jitter near the top of the frame, an occasional slight vertical shift, mimicking the way a badly tracked tape's picture would roll or judder near the frame edge before a deck's automatic tracking correction caught up.
DaVinci Resolve Studio users get a considerably faster route through Analog Damage's Broadcast Signal section, which per the Studio reference manual includes dedicated Signal Noise, Chroma Noise, Detail Loss, and Ghosting controls in one panel, all adjustable with sliders rather than layered texture clips. Mixing Light contributor Dan Moran, describing the effect shortly after its release in Resolve 16, called it exactly what a colorist working with archival or tape-sourced material had been missing:
"The power to add analogue warmth, noise, mush, and general tape-based artefacts have arrived and it's as great as I hoped."
Source: My Favourite New Feature In Resolve 16: Analog Damage, by Dan Moran, Mixing Light
Whichever route you take, add noise and dropout after your chroma bleed and scan-line work, not before. Noise interacts with contrast and sharpness, and building it on top of an already-degraded image reads as consistent tape damage, while building it first and stacking cleaner effects on top of it can look like two different eras of damage fighting each other in the same frame.
Should you use the Analog Damage effect instead of building it by hand?
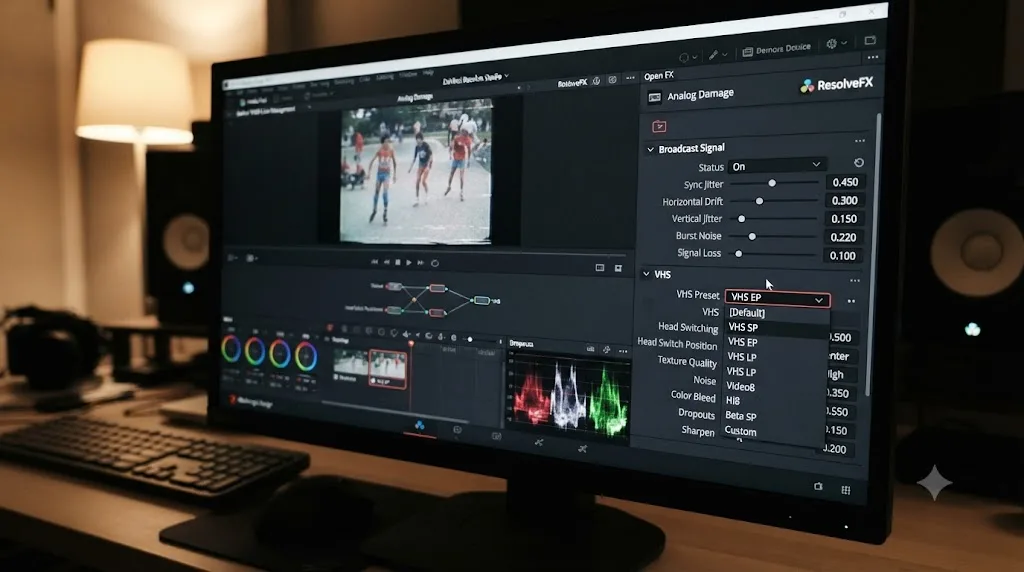
If you own DaVinci Resolve Studio, yes, for speed, though the manual chain in this guide still gives you finer control over exactly how much of each artifact shows up. Analog Damage is a single ResolveFX node that bundles most of the techniques covered above, plus a few this guide's free-version workflow can't easily replicate, into one panel with a preset menu.
Per the Studio reference manual, Analog Damage organizes its controls into seven sections:
| Section | Controls | What it replaces from the manual workflow |
|---|---|---|
| Telecine Source | Vignetting, shutter weave | Vignette node, plus a subtle frame-judder this guide's Displace setup doesn't cover |
| Broadcast Signal | Signal noise, chroma noise, detail loss, ghosting, chroma misalignment | The tape noise and dropout layer, plus a ghosting artifact hard to fake manually |
| Color Dials | TV-style brightness, contrast, color, tint | The color-cast look node |
| Scan | Image shift, aspect, overscan | The 4:3 crop step |
| Scan Lines | Line sharpness, frequency | The Fusion scan-line build |
| TV Construction | Phosphor properties, defocus, screen curvature, edge masking | A CRT-specific look this guide doesn't build, useful if you're simulating a television rather than a tape |
| VHS | A "Restless Foot" tape-artifact control with height, offset, and jitter | The Fusion Displace and Fast Noise tracking-distortion setup |
The four-node manual chain and the one-node Analog Damage effect solve the same problem for two different budgets, not two different looks. Both are aiming at the same physical reference: a real, degraded analog signal. Analog Damage just gets there through pre-built sliders instead of a hand-assembled node tree, at the cost of the $295 Studio license, per CineD's breakdown of what Studio adds over the free tier.
Boris FX's own coverage of the effect notes a genuinely fast Studio-only route: apply Analog Damage to a single node, pick a preset from the effect's built-in menu, options include looks labeled Clean VHS, Old VHS, 1980s, and 1990s, and then fine-tune from there rather than building every parameter from zero, per Boris FX's guide to making a VHS effect in DaVinci Resolve.
If you're mid-grade on the Studio version and can't find where a specific Analog Damage control lives, whether it's the VHS section's jitter slider or the Broadcast Signal panel's chroma misalignment control, that specific kind of "I know this exists somewhere in this menu" moment is what TryUncle is built for. TryUncle is the on-screen assistant for DaVinci Resolve on macOS - ask in plain words and Uncle points at the exact control on your screen.
Do you need DaVinci Resolve Studio for a VHS retro look?
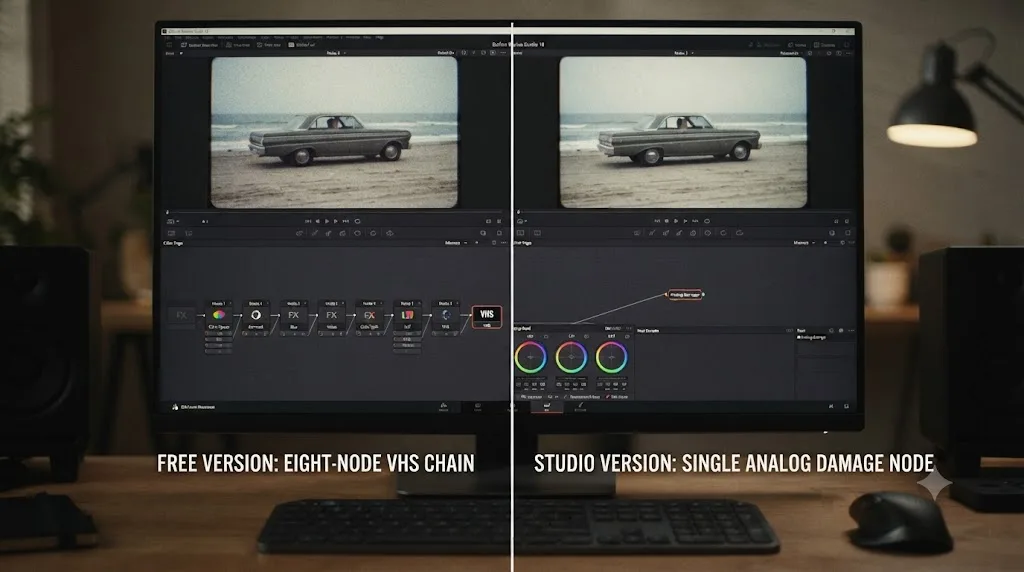
No. Every technique in this guide's main workflow, the color-cast wheels, the YUV chroma blur, Chromatic Aberration, Vignette, and every Fusion node used for scan lines and tracking distortion, is included in the free version. Studio's Analog Damage effect is a genuine convenience, not a requirement, and Film Damage, a related but different aging effect built for celluloid rather than tape damage, ships free as well, per PremiumBeat's coverage of the effect.
| Tool | Free version | Studio |
|---|---|---|
| Color wheels, curves, node system | Yes | Yes |
| Fusion page, Displace, Fast Noise | Yes | Yes |
| Blur palette, YUV color space switch | Yes | Yes |
| Chromatic Aberration, Vignette (ResolveFX) | Yes | Yes |
| Film Damage (celluloid-style aging) | Yes | Yes |
| Analog Damage (dedicated VHS/broadcast effect) | No | Yes |
| Film Grain ResolveFX | No | Yes |
| Magic Mask, temporal noise reduction | No | Yes |
The honest tradeoff: the free version gets you every visual result this guide describes, just assembled by hand across roughly eight nodes instead of one. If you're building VHS looks often enough that the assembly time adds up across many projects, Analog Damage's $295 Studio license, a one-time purchase rather than a subscription per Blackmagic's own product page, pays for itself in saved setup time fast. If this is a one-off look for a single project, the free-version chain in this guide gets you there without spending anything.
How do you add a VHS timestamp or on-screen display text?
With a Text+ node in Fusion or a Basic Title on the Edit page, set to a monospaced, pixelated font and composited in a corner with a slight glow, mimicking the on-screen date, time, or "PLAY" and "SP" indicators consumer camcorders and VCRs used to burn directly into the video signal. A blocky, low-resolution-styled font sells this detail more than the exact font choice does, since almost nobody remembers the specific typeface a 1990s camcorder used, but everybody recognizes the general shape of that chunky, slightly glowing on-screen text.
The setup:
- Add a Text+ node on the Fusion page, or a Basic Title clip on the Edit page if you'd rather stay out of Fusion entirely.
- Choose a blocky, monospaced font. A dedicated pixel or VCR-style font, several are available as free downloads and install like any other system font, gets closer to the real thing than a standard sans-serif with letter-spacing tweaks.
- Position the text in a lower or upper corner, small relative to the frame, the way a camcorder's timestamp actually sat rather than centered as a title card.
- Add a slight glow, ResolveFX Light's Glow effect on a low intensity, since camcorder on-screen text typically bloomed slightly against dark backgrounds the way any bright element on a CRT display did.
- Keep the content period-appropriate. A date stamp reading a format and a decade consistent with the rest of your VHS treatment sells the illusion further than a stylistically perfect font with an anachronistic date.
This step is optional. A lot of convincing VHS grades skip on-screen text entirely, since not every real VHS recording had a visible timestamp burned in, and adding one when your reference footage or creative brief doesn't call for it can tip a subtle grade into costume territory.
What does a complete VHS grade look like from start to finish?
Here's a worked example on a hypothetical clip: a handheld shot of a birthday party, shot on a modern mirrorless camera in 4K, that needs to look like it was pulled off a home VHS tape from the early 1990s.
- Balance first. New serial node, labeled "balance." Correct exposure and white balance exactly as you would for any normal grade. Judge nothing about the VHS style yet.
- Crop to 4:3. Set Timeline Output Blanking to 1.33, converting the frame to a standard-definition shape.
- Build the color-cast look. New node, labeled "look." Lift blacks slightly, pull Gain down a touch, push a warm-magenta tint into both wheels, compress contrast a bit in Gamma, and raise saturation 5 to 10 points.
- Add chroma bleed. New node, labeled "chroma bleed." Switch it to YUV, unlink the Blur palette's channel sliders, and raise U and V while leaving Y untouched.
- Build scan lines in Fusion. An Adjustment Clip above the graded footage, with a tiled thin-line pattern merged over the image in Multiply mode at a modest opacity.
- Add tracking distortion. In the same Fusion composition, a Fast Noise node feeding a Displace node, keyframed to wobble only occasionally, concentrated slightly toward the top and bottom of the frame.
- Layer tape noise and one dropout band. A subtle static texture across the whole clip, plus a single brief horizontal glitch cut in with the Blade tool at one point in the shot, treated with the Digital Glitch Fusion effect.
- Add a soft vignette. New node at the end of the color chain, a gentle circular vignette darkening the corners, mimicking a consumer camcorder lens and CRT display combined.
- Optional: add a timestamp. A small, blocky, glowing date-and-time overlay in the lower corner, period-appropriate to the early-1990s reference.
- Save the chain. Group the Fusion nodes into a macro and export its .setting file, and grab a still of the full color-page chain into a PowerGrade album, so both halves of the recipe apply to the rest of the footage in one move each.
Eight to ten steps depending on whether the timestamp makes the cut, and every one of them undoable on its own if a client note or a second look changes your mind about how far to push a specific artifact.
How is a VHS look different from a general "retro" or "80s" grade?
A VHS look is built around a specific format's physical limits, resolution loss, narrow chroma bandwidth, interlacing, and tape-head artifacts, while a general retro or "80s" grade is built around a color palette and film-stock character with none of those mechanical artifacts required. The two get confused often because they share a decade and a warm, slightly desaturated sensibility, but they solve entirely different problems in the node graph.
| VHS retro look | General 80s / retro film grade | |
|---|---|---|
| Core mechanism | Format-accurate degradation: resolution loss, chroma bandwidth limit, tracking distortion | Color palette and contrast styling, closer to a film-stock LUT |
| Aspect ratio | 4:3, non-negotiable for authenticity | Flexible, often kept at the source's native widescreen ratio |
| Signature artifacts | Scan lines, chroma bleed, tracking wobble, tape noise | Warm highlights, lifted blacks, grain, sometimes light leaks |
| Typical use | Found-footage, home-video pastiche, nostalgia edits referencing tape playback specifically | Music videos, fashion, any project wanting an 80s color mood without implying a specific playback format |
| Studio shortcut | Analog Damage (ResolveFX) | Film Look Creator or a film-emulation LUT |
Our cyberpunk neon color grading tutorial covers a different but related case: a stylized color palette built without any format-degradation artifacts at all, since a cyberpunk scene is meant to look like it was shot cleanly under colored light, not recorded onto tape. If your brief calls for "retro" without specifically referencing tape playback, camcorders, or a VCR, the lighter general-retro route in that comparison table is usually the better fit than the full VHS chain this guide builds.
The practical tell, if you're not sure which one a project actually needs: does the story or the footage's premise involve someone watching or recording on a physical tape, camcorder, or CRT? If yes, build the VHS chain. If the brief is just "make it feel like the 80s" without that specific mechanical reference, a color-only retro grade gets there faster and reads as more intentional than tape artifacts nobody in the story is meant to be watching through.
What mistakes make a VHS effect look fake instead of authentic?
A handful of habits separate a VHS grade that reads as a deliberate recreation from one that reads as a preset dragged onto a clip and left there.
| Mistake | Why it hurts | The fix |
|---|---|---|
| Adding scan lines to full-resolution, unsoftened footage | The image is too sharp underneath the lines for them to read as a bandwidth limit | Lose resolution and soften the image before adding visible damage |
| Skipping the 4:3 crop | Widescreen framing is an instant, obvious anachronism for a format that never shipped in 16:9 | Crop or pillarbox to 4:3 before anything else |
| Using a generic full-frame blur instead of chroma-only blur | Softens edges along with color, reading as out-of-focus rather than bandwidth-limited | Switch the node to YUV and blur only U and V |
| Constant, uniform tracking distortion | Real tracking problems came and went; constant wobble reads as a shader effect | Keyframe distortion in short, occasional bursts, not throughout the whole clip |
| No color cast at all | Clean, accurate color under scan lines and grain looks like a digital filter over real footage | Lift blacks, soften whites, and push a warm-magenta tint before adding damage |
| Overdoing the timestamp or on-screen text | An anachronistic font or an overly crisp overlay draws attention to itself instead of the footage | Use a blocky, period-appropriate font, kept small, with a slight glow, or skip it entirely |
| Grain and static too clean or too uniform | Real tape dropout was random and isolated, not a looping, even texture | Layer a subtle constant static pass with occasional, isolated dropout bands on top |
A VHS look that skips the resolution loss and jumps straight to scan lines and grain is decorating clean footage instead of degrading it. Every mistake in this table traces back to that same root cause: treating VHS as a filter to apply rather than a signal chain to recreate.
Three additional problems show up often enough in practice to call out individually, since they're less about missing a step and more about a step going wrong:
The Displace node creates harsh tearing instead of a subtle wobble. This usually means the displacement values are too high relative to the Fast Noise scale feeding it. Lower the X and Y Displacement amount first, and if the tearing persists, increase the Fast Noise node's Detail or Scale setting so the noise pattern varies more smoothly across the frame instead of in sharp, small clusters that yank neighboring pixels in opposite directions.
Lifted blacks show visible banding instead of a smooth, soft floor. Lifting the black point compresses the shadow range into fewer available code values, and a wide, smooth gradient in the original footage, a sky or a dimly lit wall, can start showing stepped bands once that range gets compressed further by a codec. A small amount of the tape-noise layer's grain, applied even to the darkest parts of the frame rather than skipped there, breaks up the banding and reads as authentic tape texture at the same time.
Chroma bleed reads as a color cast instead of a directional smear. This usually means the U and V blur values are pushed too high across the whole frame rather than just at high-contrast edges, or that the chroma-bleed node sits before the color-cast look node in the chain instead of after it. Blurring chroma on top of an already-tinted image smears the tint itself outward rather than smearing genuine color transitions in the shot, which reads as a soft, undirected color wash. Move the chroma-bleed node after the look node if it isn't already, and pull the U and V values back until the smear is visible mainly at hard color-to-color transitions, not as a general softness across the frame.
Does your source footage or camera change how you build this look?
Yes, mainly in how much resolution and detail you need to remove before the rest of the chain reads as convincing. A 4K source from a modern mirrorless or cinema camera carries far more detail than a VHS tape ever recorded, which means the softening and downsampling step at the start of this guide's workflow needs to work harder on a sharp 4K master than it would on footage that started out softer, like an older DSLR clip or a phone recording.
Log or RAW footage needs the same normalization this site's other grading guides insist on before any style gets applied. Apply your Color Space Transform or camera LUT on an earlier node, before your balance pass, so the color-cast and chroma-bleed nodes downstream are working with correctly mapped color rather than a flat, unconverted log image. Building a VHS grade on top of unconverted log footage compounds two separate problems, the log curve's flatness and the intentional VHS softness, into an image that's just muddy rather than convincingly analog.
A few source-specific notes worth knowing before you start:
- Footage already shot at 1080p or lower needs less aggressive downsampling than a 4K or 6K master, since it's already closer to the detail ceiling this guide is trying to simulate.
- Footage with a shallow depth of field, a common look from a modern large-sensor camera, can work against the VHS illusion, since consumer camcorders of the VHS era shot on small sensors with a much deeper, less cinematic depth of field. A convincing VHS grade sometimes benefits from a small amount of added depth-of-field compensation, or simply choosing footage that was already shot with a smaller aperture and a busier, more in-focus background.
- Footage with heavy existing compression artifacts, phone video pulled from a messaging app, for instance, can actually help sell a degraded look faster, since some of the detail loss this guide's workflow is manually building is already present in the source.
- High frame rate footage conformed down to a standard rate benefits from a touch of added motion blur or a slightly lower shutter angle look, since VHS playback and the interlaced broadcast signals it recorded never carried the crisp, high-frame-rate motion clarity a modern 60fps or higher capture produces.
Does this workflow change for PAL versus NTSC footage?
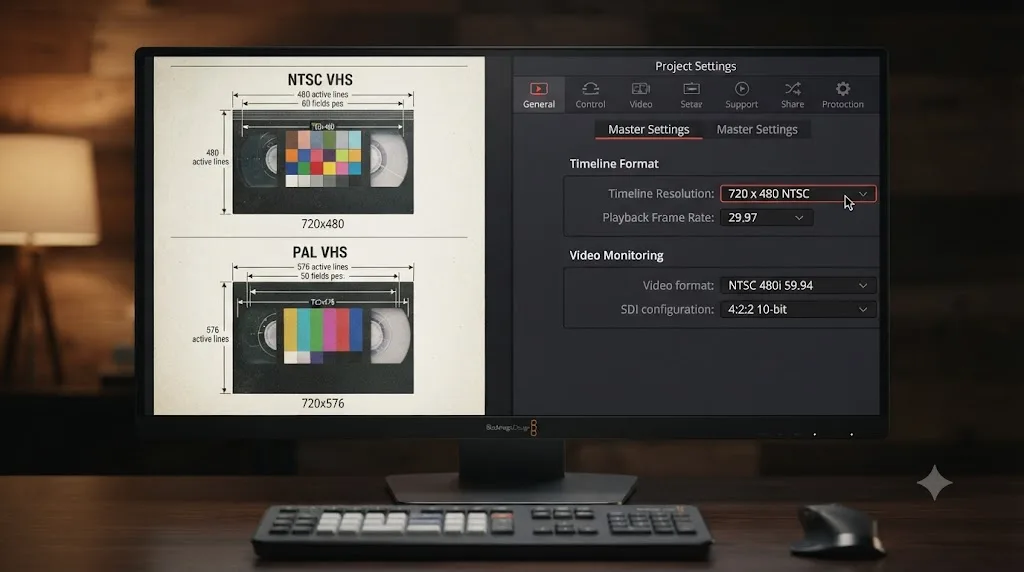
Only slightly, and mostly in frame rate and the numbers you type into Resolve's project settings, not in the node chain itself. VHS was never one format. It adapted to whichever broadcast standard a country used, and North America's NTSC and Europe's PAL differ enough that a VHS look built for one can look subtly wrong dropped onto footage meant for the other.
NTSC VHS ran at 525 lines and roughly 29.97 frames per second, with a playback head spinning at 1798.2 rpm, one full rotation per frame. PAL VHS ran at 625 lines and 25 frames per second, with the head spinning at exactly 1500 rpm, per Wikipedia's technical entry on the format. Tape speed differed too: NTSC decks pulled tape past the heads at 3.335 cm/s, PAL decks at the slower 2.339 cm/s.
None of that changes which nodes you build. It changes three settings:
- Match your project frame rate to the standard you're referencing, not necessarily your source footage's native rate. A shot destined for an NTSC-style VHS look should conform to 29.97fps, or 23.976, since a lot of NTSC VHS content was itself a film telecine; a PAL-style look calls for 25fps.
- Adjust your resolution ceiling accordingly. PAL's 625-line signal actually carried slightly more vertical resolution than NTSC's 525 lines, though PAL's slower frame rate meant it resolved motion less smoothly. If you're downsampling for the resolution-loss step earlier in this guide, a PAL-referenced grade can hold a hair more vertical detail than an NTSC one before it stops reading as authentic.
- Watch color stability on PAL-referenced looks that reference low-speed, long-play recording. Per Wikipedia, color reproduction on PAL tapes degraded more aggressively at slow recording speeds than NTSC did, sometimes dropping to intermittent color or full monochrome on paused playback. If your creative reference is a PAL long-play home recording specifically, and not just "European VHS" generally, an occasional, brief color dropout or desaturation flicker is more period-accurate than constant, even color.
A VHS look built without picking a broadcast standard first is really an NTSC look by default, since most VHS tutorials and stock references originate from North America. If your project is set in, or references, a PAL-market country, that default is the wrong one, and the fix is a frame-rate and resolution adjustment, not a different node chain.
Does hardware or OS change how this effect performs?
Somewhat, mostly because of the Fusion work rather than the Color page nodes. The color-cast wheels and the YUV chroma blur are lightweight compared to a heavy secondary grade, and rarely tax a GPU on their own. The Fusion scan-line and Displace-based tracking distortion nodes, especially when applied across a full Adjustment Clip spanning many timeline clips at once, add real per-frame render cost, particularly at 4K.
Per Blackmagic's own tech specs page, Resolve's minimum GPU requirement sits at 4 GB of VRAM, and a Fusion composition stacking a Fast Noise generator, a Displace node, and a tiled scan-line pattern across a 4K timeline pushes noticeably past that floor during playback. If a heavily built VHS chain starts stuttering while you're adjusting parameters, switch Playback > Timeline Proxy Resolution to Half while you work, then switch back to Full to judge fine detail like scan-line sharpness or the exact intensity of the tracking wobble, and cache the finished, effects-heavy sections with Render Cache set to Smart before committing to a final export.
Analog Damage, on the Studio side, is a single GPU-accelerated ResolveFX node rather than a full Fusion composition, and generally renders lighter than the equivalent hand-built Fusion chain for the same visual result, since it's optimized as one native effect rather than several composited layers.
Platform differences follow the same pattern as any other grade: Mac decodes H.264, H.265, and ProRes in hardware on Apple silicon, which helps playback stay responsive while you're tuning a Fusion-heavy composition, while Windows reserves some hardware-accelerated decode for Studio specifically, meaning free-version users on Windows working with compressed source footage lean harder on the CPU. None of that changes the visual result of the technique, just how smoothly you can iterate on it while building the look.
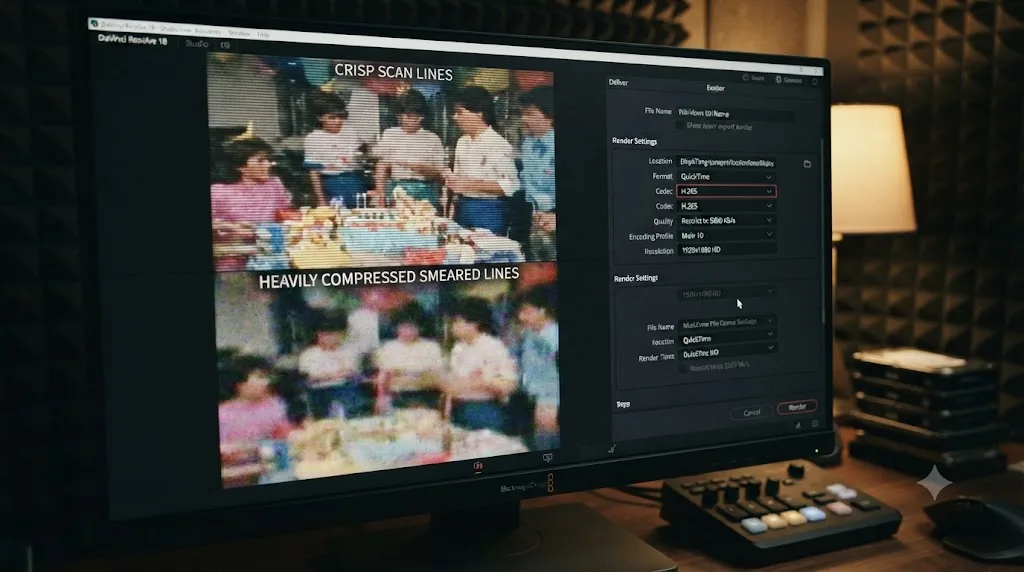
Why does your VHS effect fall apart after export or upload?
Because fine, repeating, high-contrast detail, exactly what scan lines and chroma bleed are, is the first thing a compressed delivery codec throws away, and a VHS grade that looked perfect in the Resolve viewer can lose most of its texture by the time a platform finishes re-encoding it. This is a delivery problem, not a grading mistake, and it catches people who build a careful eight-node chain and then export at a platform's default settings without accounting for it.
Block-based codecs like H.264 and H.265 allocate bits based on how much a region of the frame changes and how much visual complexity it carries. A tight, repeating pattern of thin, dark scan lines is exactly the kind of detail these codecs are tuned to discard first when bitrate runs low, since a human eye is less likely to miss a few softened scan lines than a blurred face or a banded sky. The same logic hits your tape-noise layer: fine grain compresses poorly and often gets smoothed into flat color patches by aggressive noise-aware encoding.
A few habits keep the finished look intact through export and re-upload:
- Render your master at a higher bitrate than the delivery platform's recommended minimum, not the minimum itself. A VHS grade with scan lines and noise needs more bits to hold its texture than a clean, smooth grade of the same resolution.
- Deliver an intermediate codec like ProRes 422 HQ or DNxHR HQ to any platform or client that will re-compress on their end, rather than handing over an already-compressed H.264 file for them to re-encode a second time. Every re-encode pass loses a little more of the fine detail this look depends on.
- Avoid an extra scaling pass between your grade and your export. Resizing a frame after scan lines are baked in can create moire or banding where the resize algorithm and the line pattern's frequency interact badly. Render at your working resolution and let the platform handle any downscale on playback rather than downscaling yourself and re-upscaling later.
- Check the result at the platform's actual delivered quality, not your local export. A YouTube or Instagram upload gets re-compressed after you upload it, and the version your audience sees is rarely your master file. Upload a test clip, wait for the platform to finish processing it, and judge your scan lines and tape noise against that re-compressed version, not the file sitting on your drive.
A VHS grade that reads as authentic in your viewer and reads as muddy on the platform your audience actually watches isn't a wasted effort, it's an export setting. Budget a test upload into your workflow before you commit to a final delivery bitrate on a project where this look matters.
What changes if you're building this for a short-form vertical video?
The node chain stays identical. The frame math around it doesn't. A 4:3 crop makes sense inside a 16:9 timeline, since pillarboxing a horizontal frame down to 4:3 still leaves you with a horizontal video. Drop that same 4:3 VHS-look frame into a 9:16 vertical canvas for Reels, TikTok, or Shorts, and you've got a small horizontal rectangle floating in the middle of a tall, mostly empty frame, which reads as a mistake rather than a period-correct choice.
Two approaches handle this without touching the VHS node chain itself:
- Center the 4:3 VHS frame in the vertical canvas and fill the space above and below it. A blurred, duplicated copy of the same footage, scaled to fill the full 9:16 canvas and pushed behind the sharp 4:3 frame, is the most common solution, the same technique widely used for horizontal video repurposed to vertical regardless of style. Keep the background blur strong enough that it doesn't compete with the scan lines and tracking distortion happening in the frame itself.
- Frame the shot as a "video within a video," styled like old camcorder playback on a CRT or a TV showing a tape. A vertical shot of a television or monitor displaying your 4:3 VHS-styled footage, with the rest of the vertical frame showing the room around it, is more production work but sells the format harder than a blurred-background fill, since it gives the audience an actual object, a TV, a VCR's tracking display, that explains why the footage looks the way it does.
Whichever route you take, build the VHS node chain on the 4:3 sub-frame first, exactly as this guide describes, then handle the vertical composition as a separate step downstream. Building the look and the vertical framing in the same pass makes every later adjustment to either one harder to isolate, since a change to the Displace node's mask, for instance, now has to account for the surrounding vertical frame too.
A 4:3 VHS look doesn't need to become 9:16 native to read as authentic on a vertical platform. It needs an honest reason to exist inside a taller frame, and a blurred fill or an on-screen playback device both give it one.
How do you save and reuse this VHS look as a preset?
Two separate saves cover the two separate halves of this workflow: a PowerGrade for the Color page nodes, and a Fusion macro for the scan-line and tracking-distortion work. Together they turn an hour of node-building into a couple of drag-and-drop moves on your next project.
For the Color page side, grab a still of your finished balance, look, and chroma-bleed nodes into the Gallery, then save it into a dedicated PowerGrade album, the same mechanic our full PowerGrades guide covers in depth. Applying it to a new clip with Append Node Graph adds the entire color-cast and chroma-bleed structure on top of that clip's own fresh balance node, rather than replacing whatever correction you've already built.
For the Fusion side, select the Fast Noise, Displace, and scan-line nodes together, group them, and export the group as a macro, which saves a .setting file to your Fusion Macros folder. Per Mixing Light's guide to building and reusing Fusion setups and macros, a saved macro shows up in Fusion's Insert Tool menu on any project on the same machine, and the .setting file itself is a genuinely portable, shareable file, drop it into a teammate's Macros folder and the exact same scan-line and tracking-distortion tool becomes available on their system too.
Guided practice inside Resolve beats guessing where a Studio-only effect went missing. The fastest way to build a VHS recipe that actually holds up across a full project isn't downloading someone else's preset pack. It's building the chain once on a real clip, judging what the specific combination of resolution loss, chroma bleed, and tracking distortion actually needs for your footage, and saving that judgment as a macro and a PowerGrade you built yourself.
Where do you go from here?
Balance the shot honestly first. Crop to 4:3 before you touch a single slider. Build the warm, soft-blacked color cast, then blur only the chroma channel for bleed, not the whole image. Add scan lines and tracking distortion in Fusion, layer tape noise on top, and finish with a soft vignette. That sequence, in that order, is the entire method, whether you're building it node by node on the free version or reaching for Analog Damage's presets on Studio.
Pick one clip from your own footage today, ideally something with a bit of movement and a face in frame rather than a static landscape, and run it through the eight-stage chain above. Notice where the degradation actually needs to happen for the scan lines and grain on top of it to read as tape instead of filter, adjust from there, and save the result as a macro and a PowerGrade before you move to the next clip. Once that clicks on one shot, the rest of a VHS-styled project is the same eight moves, repeated with a little judgment about how worn a particular tape is supposed to look.
Frequently asked questions
- How do you make a video look like VHS in DaVinci Resolve?
- Crop the frame to 4:3, build a color-cast node that lifts blacks and pushes a warm-magenta tint, blur only the chroma channel for color bleed, add a scan-line overlay from the Fusion page, distort the frame slightly with a Displace node fed by Fast Noise for tracking wobble, then layer tape noise and a soft vignette on top. DaVinci Resolve Studio's Analog Damage effect bundles most of this into one node with presets.
- How do you add scan lines in DaVinci Resolve?
- On the free version, build a tiled line pattern in Fusion with a Rectangle or Grid tool set to a thin height and a dark, semi-transparent fill, then composite it over your graded clip in Multiply or Overlay mode. DaVinci Resolve Studio users can skip the Fusion work and use Analog Damage's dedicated Scan Lines section, which controls line sharpness and frequency directly.
- How do you get chroma bleed on footage in DaVinci Resolve?
- Right-click a node and switch its color space to YUV, open the Blur palette, click the link icon to unlink the channel sliders, and raise only the U and V sliders while leaving Y at zero. That blurs color information without softening detail, which is exactly what a VHS tape's narrow chroma bandwidth actually did to the signal.
- What aspect ratio should you use for a VHS retro look?
- 4:3, since VHS is a standard-definition format and almost every tape played back at a 4:3 frame. Set Output Blanking to 1.33 in Timeline settings for a full pillarboxed crop, or crop each clip in the Inspector's Transform panel if you want to keep some picture at the edges visible behind a border.
- Is there a built-in VHS effect in DaVinci Resolve?
- Yes, called Analog Damage, but it's restricted to DaVinci Resolve Studio. It shipped in Resolve 16 and includes a dedicated VHS section with tape-artifact controls alongside Broadcast Signal, Scan Lines, and TV Construction sections. The free version has no single VHS effect, so the look has to be built node by node.
- Do you need DaVinci Resolve Studio for a VHS retro look?
- No, but Studio makes it a five-minute job instead of a half-hour one. Every technique in the free-version workflow, the color cast, the YUV chroma blur, the Fusion scan lines and tracking distortion, works without Studio. Studio's Analog Damage effect just bundles all of it into one node with ready-made presets.
- Why does my VHS effect look fake instead of authentic?
- The most common cause is skipping the resolution and bandwidth loss and jumping straight to scan lines and grain on top of a sharp, clean 4K image. Real VHS lost detail before any of the visible damage was added. Downsample and soften the image first, then layer scan lines, chroma bleed, and noise on top of that softer base, not on top of your original footage.
- Does this VHS look need different settings for PAL versus NTSC footage?
- Only the frame rate and resolution ceiling, not the node chain. Match your project to 29.97fps for an NTSC-style look or 25fps for a PAL-style one, and remember PAL's 625-line signal can hold a touch more resolution before the effect stops reading as authentic. The color-cast, chroma-bleed, scan-line, and tracking-distortion nodes work identically either way.
Sources
- DaVinci Resolve product page, free version (Blackmagic Design)
- DaVinci Resolve Studio product page (Blackmagic Design)
- DaVinci Resolve - Tech Specs (Blackmagic Design)
- DaVinci Resolve 21 officially released with new photo editing, AI tools, and much more (PetaPixel)
- DaVinci Resolve 21.0.3 Update (Newsshooter)
- DaVinci Resolve: Why Pay for the Studio Version? (CineD)
- DaVinci Resolve Reference Manual: Analog Damage (Studio Version Only)
- My Favourite New Feature In Resolve 16: Analog Damage, by Dan Moran (Mixing Light)
- DaVinci Resolve's Lens Reflections and Film Damage FX, by Lewis McGregor (PremiumBeat)
- How to Make VHS Effect in DaVinci Resolve (Boris FX)
- DaVinci Resolve VHS Effect Free Version (2025 Update) (Beginners Approach)
- Fusion Reference Manual: Displace [Dsp]
- VHS (Wikipedia)
- Building and Re-using Fusion Setups and Macros in DaVinci Resolve (Mixing Light)
Keep reading
Guides · Jul 26, 2026 · 38 min
DaVinci Resolve Cyberpunk Neon Color Grading Tutorial
Grade a cyberpunk neon look in DaVinci Resolve: split-tone magenta and cyan, isolate practical neon signs, add glow, and keep saturated color off the clip.
Guides · Jul 26, 2026 · 37 min
DaVinci Resolve Black and White Conversion Tutorial
Convert clips to black and white in DaVinci Resolve with the RGB Mixer's Monochrome mode, correct node order, contrast curves, and selective color tricks.
Guides · Jul 17, 2026 · 25 min
How to Use PowerGrades in DaVinci Resolve
Save, apply, and organize PowerGrades in DaVinci Resolve: grab a still, build an album, apply or append a full node tree, and share it as a .drx file.