Articles / Guidesupdated for DaVinci Resolve 21.0.2 (July 2026)
DaVinci Resolve Panasonic S5 II V-Log Import Settings, Explained
Quick answer
Set DaVinci Resolve's Color Space Transform to Input Color Space Panasonic V-Gamut, Input Gamma Panasonic V-Log, output to DaVinci Wide Gamut, then Rec.709. Shoot V-Log at ISO 640 or 4000, the S5 II's dual native ISOs. The camera ships no built-in conversion LUT, and its 10-bit V-Log files may need DaVinci Resolve Studio to decode reliably in the free version.
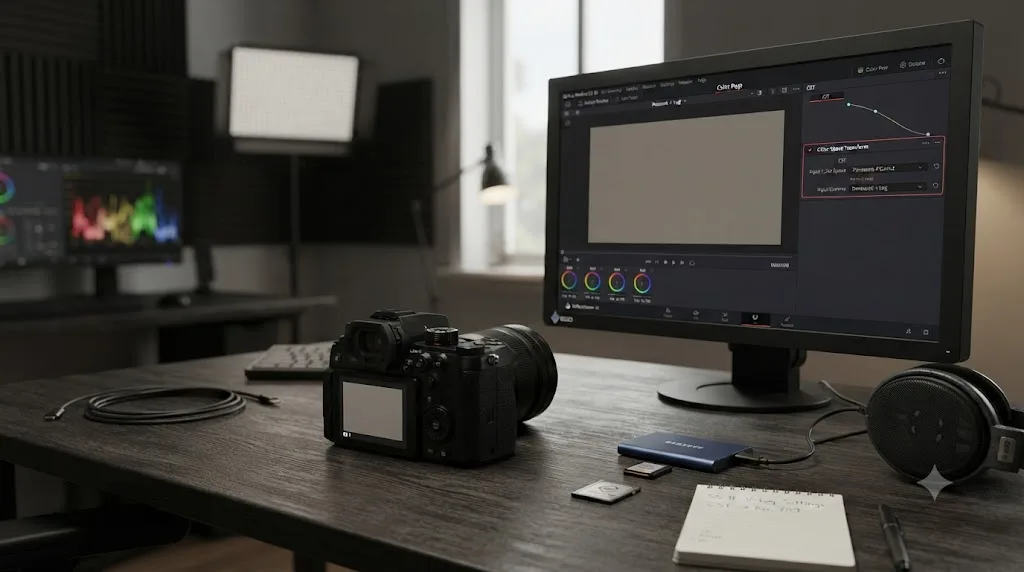
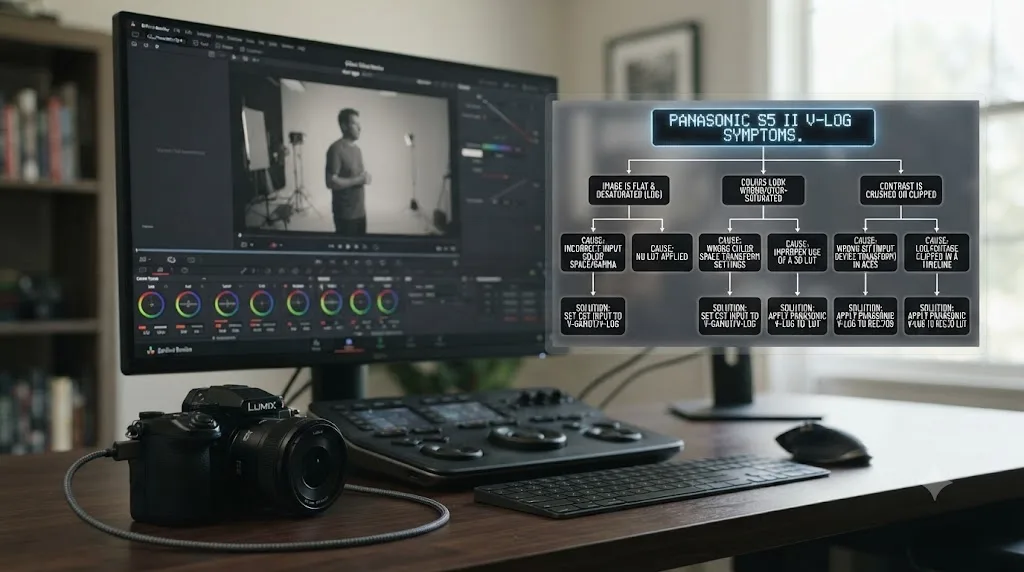
Your Panasonic S5 II shoots V-Log, you drop the file into DaVinci Resolve, and it sits there flat and grey with nothing obvious to click. That's not a broken import. It's a color conversion that hasn't happened yet, and the settings that finish it are specific enough that guessing gets you close and wrong instead of exact and right.
Here's the Color Space Transform setup Resolve's own Panasonic preset is built around, the dual native ISO the S5 II's V-Log curve actually expects, the LUT gap Panasonic leaves for you to fill yourself, and the import, proxy, and RAW questions that come up before you ever touch a node.
What does the S5 II actually record when you shoot V-Log?
Before you touch a Resolve setting, know exactly what file you're holding, because "V-Log footage" from an S5 II can mean more than one codec depending on which recording mode you picked on set.
The S5 II offers 4:2:2 10-bit recording at up to C4K/4K 60p, and according to Digital Camera World's review of the camera, that mode carries "no video recording limits," meaning you can roll as long as your card and battery allow. That 4:2:2 path uses H.264 with Long GOP compression, not H.265. Robin Parmar, writing a detailed technical breakdown of the Lumix S line's film look and V-Log implementation, documented the same underlying codec on the closely related original S5: "This setting gives us 10-bit colour (4:2:2) using LongGOP compression...the data rate is 'only' 150 Mbps," he wrote.
Step up to the S5 II's open-gate 5.9K/6K mode and the codec changes underneath you. That mode records 4:2:0 10-bit using H.265 (HEVC) with Long GOP compression, using the sensor's full width in a 3:2 aspect ratio you can reframe to 16:9, 9:16, 1:1, or 2.2:1 in post. Two genuinely different codecs, two different chroma subsampling ratios, both wrapped in V-Log, and Resolve treats them differently the moment a file refuses to decode.
| Recording mode | Bit depth / chroma | Codec | Frame rate ceiling |
|---|---|---|---|
| C4K/4K, full sensor width | 10-bit 4:2:2 | H.264, Long GOP | Up to 60p |
| C4K/4K, APS-C/Super35 crop | 10-bit 4:2:0 | H.265, Long GOP | Up to 60p |
| 5.9K/6K open gate, full sensor width | 10-bit 4:2:0 | H.265, Long GOP | Up to 30p |
V-Log on the S5 II isn't one fixed file type, it's a gamma curve that lands inside at least two different codecs depending on which recording mode you picked. That distinction matters the moment a clip won't import cleanly, because the fix for a color mismatch and the fix for a codec decode problem aren't the same fix, and guessing wrong wastes an editing session on the wrong menu.
What Color Space Transform settings does V-Log/V-Gamut footage need?
This is the core answer, and it's worth writing down once so you're not hunting a forum thread mid-edit.
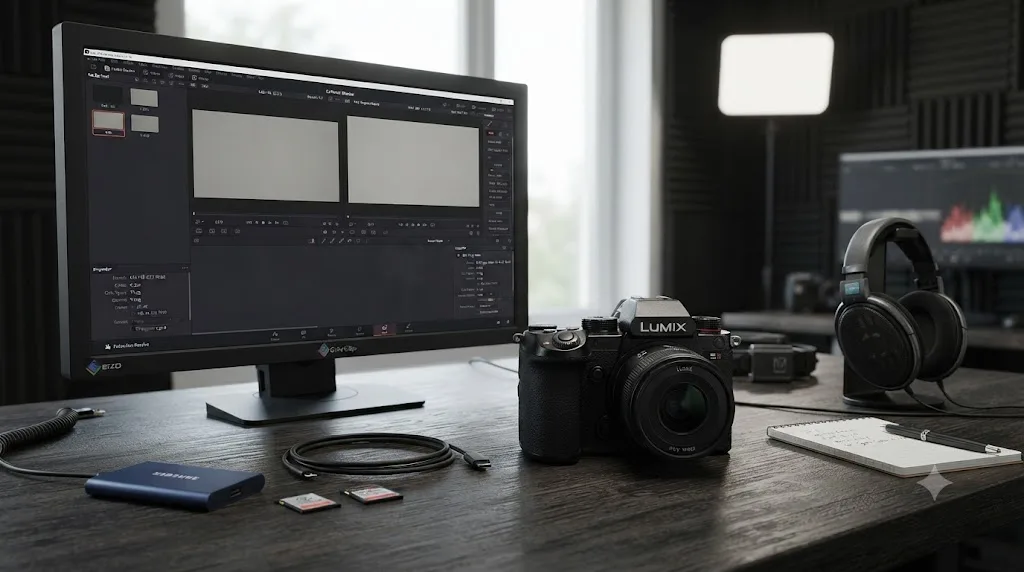
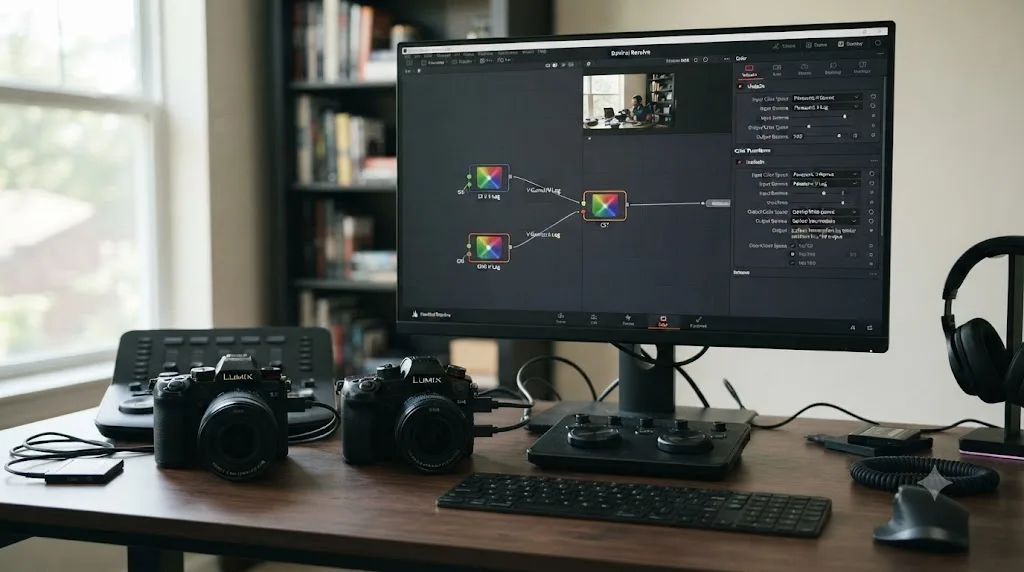
DaVinci Resolve ships a preset built specifically for this camera family. Right-click your V-Log clip, or add a Color Space Transform to your first node, and look for Panasonic V-Gamut/V-Log in the Input Color Space dropdown. That single preset carries both the color space (V-Gamut) and the gamma curve (V-Log) together, unlike some manufacturers whose menus split them into two separate fields. Set:
- Input Color Space: Panasonic V-Gamut
- Input Gamma: Panasonic V-Log
- Output Color Space: DaVinci Wide Gamut
- Output Gamma: DaVinci Intermediate
That takes your flat V-Log source into Resolve's own working space, where your actual grading happens. On your last node, before final output, reverse it:
- Input Color Space: DaVinci Wide Gamut
- Input Gamma: DaVinci Intermediate
- Output Color Space: Rec.709 (or Rec.2100 for HDR delivery)
- Output Gamma: Rec.709, or Rec.709-A for consistency with Apple software (or ST 2084/HLG for HDR)
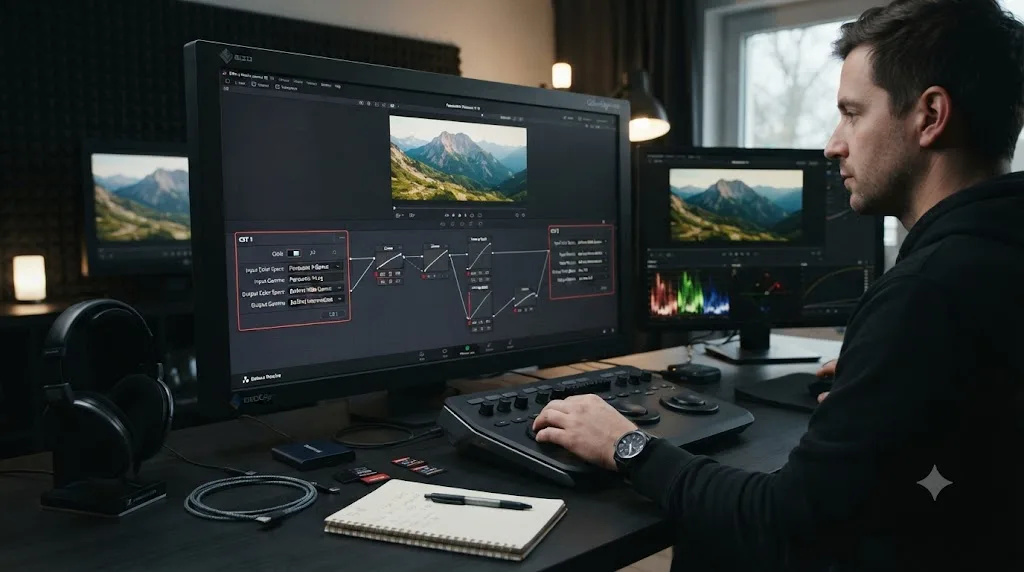
One Color Space Transform converting in, one converting back out, at the front and back of your node tree. That's the entire plumbing this workflow needs. If you're delivering HDR instead of Rec.709, only the output half of that second transform changes; the input side stays DaVinci Wide Gamut and DaVinci Intermediate exactly as written above. Confirm your Project Settings Timeline Color Space and your monitoring setup actually support HDR before you commit to that path, since grading toward Rec.2100 on an SDR reference display is a reliable way to end up with a delivery that looks wrong everywhere except your own room.
Resolve Color Management or a manual Color Space Transform, which one?
Both get you to the same finished image. Which one fits your project depends on how much of it is S5 II footage shot the same way, and whether Resolve is even setting the input color space for you automatically.
Resolve Color Management, set under Project Settings, Color Management, with Color Science set to DaVinci YRGB Color Managed, lets you assign Panasonic V-Gamut and Panasonic V-Log as a clip's input color space directly through Clip Attributes, and Resolve applies the conversion to every downstream node without a Color Space Transform effect anywhere in your tree. That's the faster setup for a project built almost entirely from S5 II footage shot consistently in V-Log.
It's worth knowing this handoff doesn't always happen automatically. A discussion on Blackmagic's own user forum, titled directly Input Color Space Panasonic V-Log not automatically set, covers exactly the situation where Resolve doesn't tag V-Log clips with the correct input color space on ingest, leaving footage sitting in Rec.709 as though it were an untagged clip rather than a recognized V-Log source. When that happens, you set the tag manually, once per clip or per bin, through Clip Attributes rather than relying on automatic detection every time.
A manual Color Space Transform node, the setup detailed above, gives you more control per clip or per group, which matters the moment you're mixing S5 II footage with a different camera in the same timeline. Our guide to color matching different cameras in DaVinci Resolve covers that multi-camera normalization step in more depth, and it lists V-Gamut with V-Log as Panasonic's standard input pairing for exactly this reason.
| Situation | Better fit |
|---|---|
| Project is entirely S5 II footage, consistent V-Log settings | Resolve Color Management, once you confirm the tag actually applied |
| Mixing S5 II with another camera brand or log format | Manual Color Space Transform per camera group |
| Resolve isn't auto-tagging V-Log clips correctly | Manual Color Space Transform, or set the tag by hand in Clip Attributes |
| You want per-clip override flexibility | Manual Color Space Transform |
Does the S5 II ship with a V-Log to Rec.709 LUT?
No, and this is the gap that trips up more S5 II shooters than the Color Space Transform math itself, because it's easy to assume a camera this capable ships with a first-party conversion LUT the way some competitors do.
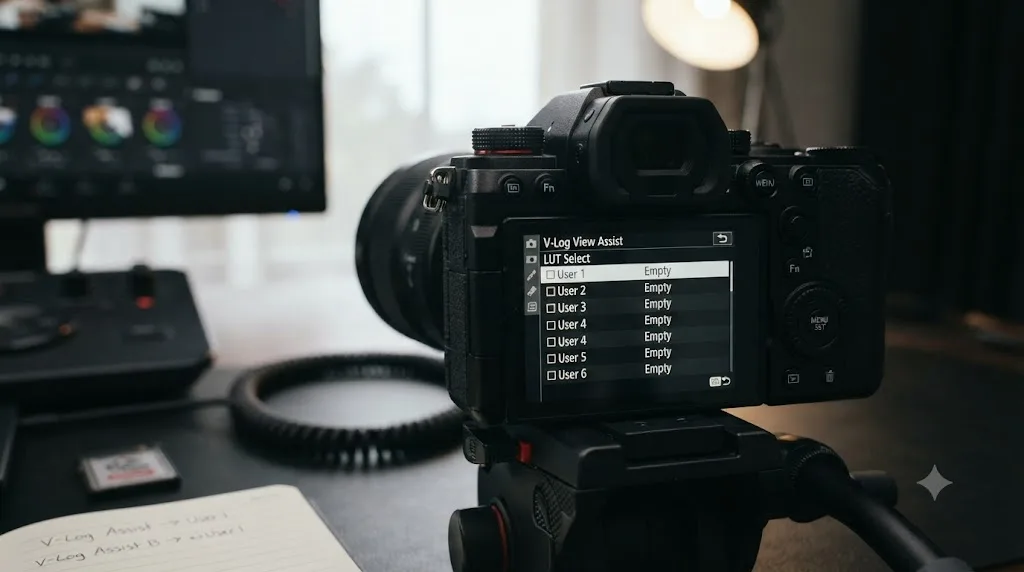
The S5 II includes a feature called V-Log View Assist, which lets you load LUT data onto the camera and preview a graded look live, on the rear screen or over HDMI, while you're still shooting flat. Per Panasonic's own support documentation, you can register LUT data and view footage with that LUT applied on the monitor or viewfinder, with several LUT slots available for different looks. What that page doesn't offer is a LUT to load in the first place. V-Log View Assist is a monitoring tool, not a conversion utility, and the camera arrives with nothing loaded into it.
Panasonic does maintain a public LUT library, but it's built for a different part of the lineup. The VARICAM LUT LIBRARY offers 35 conversion and creative LUTs, including a genuine V-Log to Rec.709 conversion, but that page states plainly the library is built "to VariCam cinema cameras and the AU-EVA1," Panasonic's cinema and compact cinema lines, not the S-series hybrid mirrorless bodies. Loading one of those LUTs onto S5 II footage is not the drop-in match it looks like, since VariCam's sensor and color pipeline aren't identical to the S5 II's, even though both use V-Log and V-Gamut by name.
That gap is why a small third-party market exists specifically for this camera. Cinema Tools sells a V-Log LUT pack built for the Panasonic S5 II, and similar packs exist from other colorists and grading educators. Our guide to installing LUTs in DaVinci Resolve covers the mechanics of getting a .cube file into Resolve's LUT folder if you haven't set one up before.
Panasonic gives S5 II shooters a way to preview a LUT on set and a genuine V-Log to Rec.709 conversion built for a different camera line, but nothing built specifically for this camera to actually apply. A manual Color Space Transform using the Panasonic V-Gamut/V-Log preset covered above sidesteps the gap entirely, since it doesn't depend on any external file at all, and it's the more reliable default unless you've specifically vetted a third-party S5 II LUT against your own footage first.
What ISO should you shoot V-Log at?
The Color Space Transform math assumes you exposed the footage the way V-Log's curve was designed for, and the S5 II's sensor gives you exactly two ISOs that setup was actually built around.
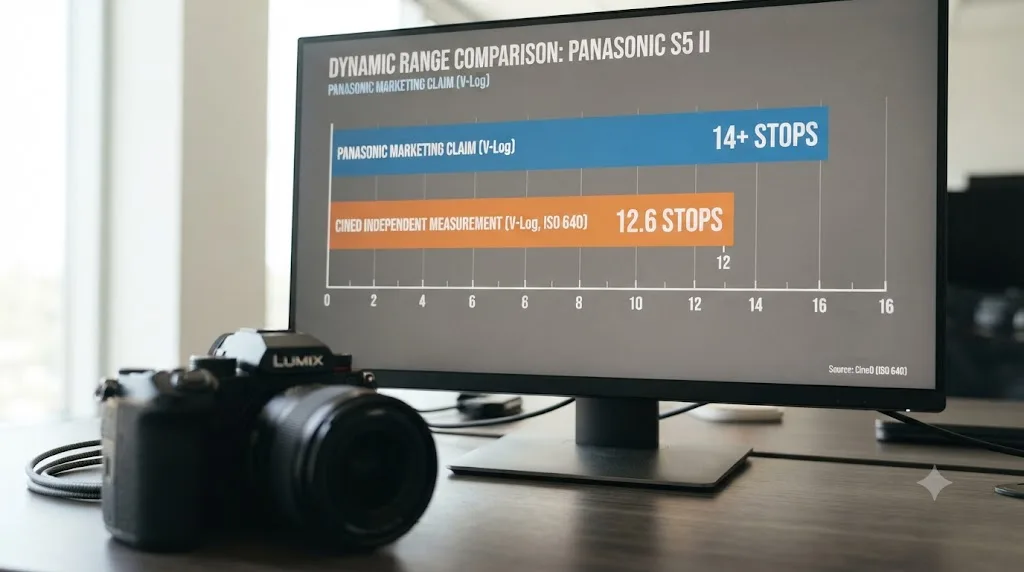
The S5 II uses a dual native ISO sensor, and multiple independent tests confirm the same two values for V-Log specifically. CineD's own lab test of the camera measured dynamic range "with base ISOs of 640 and 4000 for V-Log," running IMATEST analysis at ISO 640 across the camera's 5.9K open gate, UHD full frame, and APS-C recording modes. Digital Camera World's review confirms the same pairing, describing the S5 II's "Dual Native ISO of ISO 640 and 4000, enabling cleaner footage at higher sensitivities while maintaining 14 stops of dynamic range" in its full review of the camera.
A Low ISO circuit handles the base sensitivity of 640, and a Low Noise circuit switches in at 4000, the same dual-gain architecture Panasonic carried down from its S1H and VariCam broadcast line. Shooting V-Log between those two points, at ISO 1600 or 2500 for instance, still works and still produces a usable image, but you're not gaining anything the sensor's dual-gain design was built to give you at either of its two actual native points. Shoot closer to ISO 640 in good light, and switch up to ISO 4000 once you need the extra sensitivity in a dim interior or at dusk, rather than treating the range in between as neutral ground.
CineD's own testing puts a useful check on Panasonic's marketing number. Panasonic and most reviews quote 14+ stops of dynamic range for V-Log on the S5 II, a figure DPReview's review of the camera confirms directly, noting "the LUMIX S5II and S5IIX contain 14+ stop V-Log/V-Gamut capture." CineD's own IMATEST measurement at ISO 640 came in lower in practice, "12.3 stops at SNR = 2 and 13.7 stops at SNR = 1" in 5.9K open gate mode, with the tester calling the result "a really solid result, more or less on par with the best full-frame consumer cameras in this price bracket." Both numbers describe the same sensor; they're measuring dynamic range by different methodologies, and the gap between a vendor's marketing figure and an independent lab's measured figure is normal across the whole camera industry, not a defect specific to this camera.
V-Log's dynamic range on the S5 II is real, well-tested, and genuinely competitive, but the number on the spec sheet and the number an independent lab actually measures rarely match exactly, and that's true of every camera manufacturer's marketing claim, not just Panasonic's. Expose at or near ISO 640 or ISO 4000, watch your scopes rather than the spec sheet, and you'll get the dynamic range the sensor can actually deliver regardless of which number you read going in.
Should you shoot V-Log at all, or does Cinelike D2/V2 make more sense?
V-Log isn't the only Photo Style on the S5 II built around dynamic range, and it's worth knowing what you're giving up before you commit an entire shoot to a two-node Color Space Transform workflow you may not actually need.
Panasonic's own camera manual describes three profiles that matter for this decision. Cinelike D2 is, in Panasonic's words, "a setting that creates a film-like finishing touch using a gamma curve and gives priority to the dynamic range," and the manual adds that "this function is suitable for video editing processes." Cinelike V2 is described the same way except it "gives priority to the contrast" instead, trading some dynamic range for a punchier, more finished look straight off the sensor. V-Log, by contrast, is what Panasonic calls "a gamma curve setting intended for post-production processing," built to "add rich gradation to images during post-production editing," per the same manual page.
That distinction has a real consequence for your Resolve workflow. Cinelike D2 and V2 are contrast curves designed to look reasonably close to a finished image straight out of camera; neither needs a Color Space Transform to become watchable, and most editors treat them as a normal Rec.709-ish source with a light grade on top. V-Log needs the full Panasonic V-Gamut/V-Log Color Space Transform covered earlier in this guide before it looks like anything at all, and it needs a colorist's attention, or at minimum a few minutes with scopes, to come out looking right.
Reach for Cinelike D2 over V-Log when you're delivering the same day, when there's no time budgeted for a proper grade, or when you want a run-and-gun setup that doesn't depend on remembering the right Color Space Transform preset under deadline pressure. Reach for V-Log when the project is actually headed for a color pass, when you need the extra highlight and shadow latitude for a mixed-lighting scene, or when you're intercutting with other Log footage that already lives in a graded pipeline.
| Photo Style | Priority | Needs a Color Space Transform | Best fit |
|---|---|---|---|
| Cinelike D2 | Dynamic range, film-like | No | Same-day delivery, run-and-gun, minimal grading time |
| Cinelike V2 | Contrast, film-like | No | A punchier look with no post-production step |
| V-Log | Maximum dynamic range, full grading latitude | Yes, Panasonic V-Gamut/V-Log | Any project getting a real color grade |
Cinelike D2 and V2 are built to look finished with no Color Space Transform at all, and V-Log is built to look flat until you apply one. If you've been defaulting to V-Log out of habit on a project that never actually gets graded, the Cinelike profiles may save you a step without costing you the footage quality you actually need.
What shooting habits make the Color Space Transform easier to grade?
The Panasonic V-Gamut/V-Log preset does the same math no matter how the clip was shot, but two on-set habits decide whether that math produces a clean image or a fight with noise and hue shifts once you're grading.
White balance is the first one. A guide to shooting and grading Panasonic V-Log puts it plainly: "Fix white balance before styling. A creative LUT won't 'repair' incorrect lighting; it will amplify it." Auto white balance can drift clip to clip, or even shot to shot within the same scene, and that drift rides straight through the Color Space Transform into your grade, showing up as a hue shift your primary wheels then have to chase down clip by clip instead of setting once. Set a manual white balance for a scene, or use a gray card and dial in a Kelvin value, and every clip from that setup lands in DaVinci Wide Gamut consistently, which is the entire point of grading in a normalized intermediate space to begin with.
Exposure is the second habit, and it interacts directly with the ISO guidance covered above. The same guide notes that "underexposed V-Log often turns noisy and muddy after LUTs," and a separate breakdown of the S5 II's V-Log settings observes that "many users expose slightly brighter than standard settings to protect shadow detail, while still avoiding clipped highlights." V-Log's flat curve has real highlight latitude built in, so a clip that looks a touch hot in the flat preview usually still has recoverable highlight detail once it's through the Color Space Transform. A clip that looks correctly exposed in the flat preview but was actually underexposed rarely recovers as cleanly, because pulling shadow detail up after the fact multiplies whatever noise was already sitting in the ISO 4000 signal path.
A manual white balance and a slightly hot exposure, not a slightly dark one, are the two habits that make a Panasonic V-Gamut/V-Log Color Space Transform behave the way it's supposed to. Neither one is a Resolve setting, but both decide how much work your node tree has to do to fix a problem that was easier to avoid on set.
Does this guide apply to the S5 IIX as well as the standard S5 II?
Mostly yes on color, no on nearly everything else, and the distinction is worth thirty seconds before you assume "S5 II" covers one specific camera.
Panasonic sells the S5 IIX alongside the standard S5 II, built on the same sensor and the same V-Gamut/V-Log color science. Every Color Space Transform setting in this guide, Input Color Space Panasonic V-Gamut, Input Gamma Panasonic V-Log, applies to S5 IIX footage exactly the way it applies to standard S5 II footage. Where the two cameras genuinely diverge is recording format and output, not color.
The S5 IIX ships with several professional video features built in that the standard S5 II lacks entirely. It records internal ALL-Intra compression rather than being limited to Long GOP, it can capture direct to an external SSD over USB-C, and it outputs RAW video over HDMI without any additional purchase. The standard S5 II needs a separate Software Upgrade Key, DMW-SFU2, priced at $200, just to unlock RAW output over HDMI at all, and even with that key installed, it still can't record to SSD or handle IP streaming, both of which stay exclusive to the S5 IIX regardless of firmware version, per PetaPixel's coverage of the RAW compatibility announcement.
| Feature | Standard S5 II | S5 IIX |
|---|---|---|
| V-Gamut/V-Log color science | Yes, included | Yes, identical |
| ALL-Intra internal recording | No | Yes, built in |
| Direct-to-SSD recording | No | Yes, built in |
| RAW output over HDMI | Only with paid DMW-SFU2 key | Built in, no extra purchase |
| IP streaming | No | Yes |
If your footage tags as Panasonic V-Gamut and Panasonic V-Log in Clip Attributes, the S5 II versus S5 IIX distinction doesn't change a single Color Space Transform setting in this guide. Treat the difference as a recording-format and workflow question, the same way you'd treat the difference between a camera's internal and external recording paths, not a color science question at all.
Can you intercut S5 II footage with other Panasonic V-Log cameras?
If your kit isn't a single S5 II, if it's an S5 II paired with a GH6, an S1H, or an older GH5, this is the question that decides whether you need one Color Space Transform setup or several.
Panasonic builds V-Log and V-Gamut around a shared color science that traces back to its VariCam cinema line, and the company has said directly that footage from its more recent hybrid bodies is meant to match it. Covering the GH6's launch, Newsshooter reported that "according to Panasonic, the GH6's recorded footage is compatible with V-Log footage recorded by VariCam or other cameras such as the GH5/GH5S/GH5 II, S5, S1H, and S1." A separate technical breakdown of the GH6 makes the same point from the color science side, noting that "the LUMIX GH6 offers the renowned colorimetry of the VariCam line of cinema cameras and uses their V-LOG picture profile and wider V-Gamut."
That means the same Panasonic V-Gamut/V-Log Color Space Transform preset covered throughout this guide is, per Panasonic's own claim, the correct starting point for footage from any of these bodies, not just the S5 II. In practice, "compatible" means the color space and gamma curve are the same on paper, not that every sensor renders V-Log identically down to the pixel. A Four Thirds GH6 sensor and a full-frame S5 II sensor differ in noise floor, in how each camera's internal processing handles the log curve at the extremes of its dynamic range, and in generation-to-generation tuning even within the same sensor format. Treat the shared preset as your correct starting point on every clip, then still cross-check skin tones and neutral grays on your scopes when two different camera bodies sit in the same scene, the same normalization step covered in our guide to color matching different cameras in DaVinci Resolve.
| Camera | V-Log/V-Gamut compatibility | Sensor format |
|---|---|---|
| Panasonic S5 II / S5 IIX | Native, this guide's exact settings | Full-frame |
| Panasonic S1 / S1H | Confirmed compatible, per Panasonic | Full-frame |
| Panasonic GH5 / GH5S / GH5 II | Confirmed compatible, per Panasonic | Four Thirds |
| Panasonic GH6 | Confirmed compatible, per Panasonic | Four Thirds |
| VariCam / EVA1 | Source of the color science | Super 35 / cinema |
Panasonic's own claim is that V-Log footage from an S5 II, a GH6, an S1H, and even its VariCam cinema line all start from the same Color Space Transform preset. That's a real head start on a multi-camera Panasonic shoot, but it's a starting point for matching, not a guarantee that skips the matching step entirely.
Should you shoot 4K, 5.9K/6K open gate, or the APS-C crop mode for V-Log?
This decision happens on set, before you ever open Resolve, and it quietly sets how much reframing room and how much noise you're working with once you get to color.
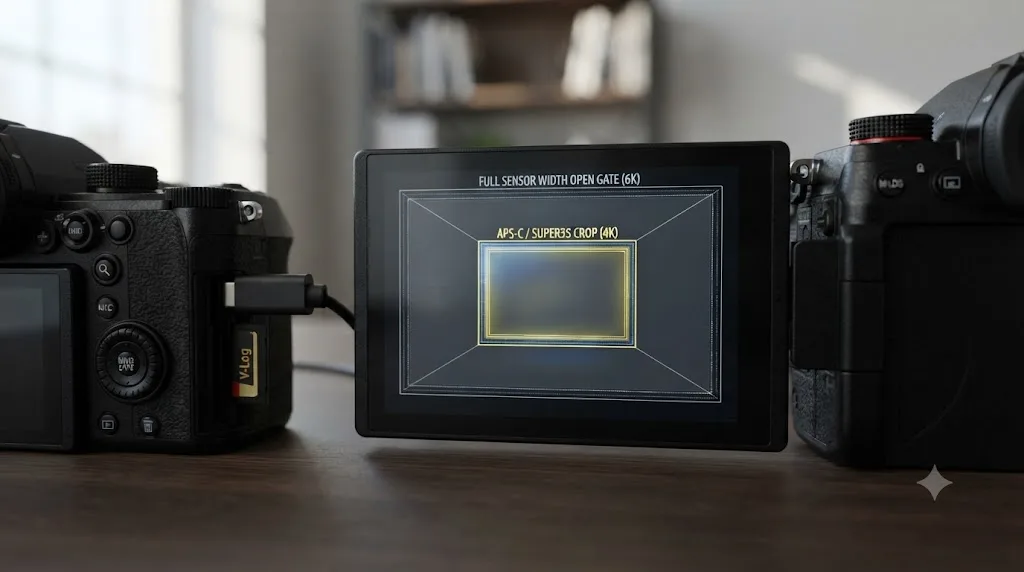
The S5 II's 5.9K/6K open gate mode uses the sensor's full width in a 3:2 aspect ratio, capped at 30p, and gives you the most flexibility to reframe a single take into 16:9, 9:16, 1:1, or a wide 2.2:1 crop after the fact without losing resolution in any of them. That's the mode to reach for on a shoot where you know you'll need both a horizontal delivery and a vertical social cut from the same footage. Push past 30p, and the S5 II switches to a Super35/APS-C sensor crop to hit 4K at up to 60p. According to reviews of the camera's recording modes, Engadget's review notes that "you can shoot 5.9K video at 30p using the full width of the sensor, but 60p 4K video requires an APS-C crop and some loss of sharpness," and DPReview's own testing found the quality penalty from that crop mild enough that "most viewers probably won't notice the difference in practice."
That crop carries two real consequences beyond field of view. Your wide lenses get noticeably less wide the moment you switch into the APS-C 4K60 mode, which matters if you're shooting a tight interior with a specific lens kit chosen for full-frame coverage. And per DPReview's testing, you'll hit visible noise sooner in low light in the cropped mode than in the full-sensor open gate mode, since a smaller active sensor area at the same output resolution collects less light per pixel.
None of this changes your Color Space Transform settings. A Super35 crop mode changes field of view and effective resolution, not the color space the sensor data is encoded in, so a cropped 4K60 clip still tags as Panasonic V-Gamut and Panasonic V-Log the same as an open-gate 5.9K clip. What it does change is your proxy and decode considerations, since the cropped mode records 4:2:0 H.265 rather than the full-width 4K mode's 4:2:2 H.264, per the codec table earlier in this guide.
| Mode | Sensor coverage | Frame rate ceiling | Best for |
|---|---|---|---|
| 5.9K/6K open gate | Full sensor width, 3:2 | 30p | Maximum reframing flexibility, multi-aspect delivery |
| C4K/4K, full sensor width | Full sensor width | 60p | Standard 16:9 delivery with 4:2:2 color |
| C4K/4K, APS-C/Super35 crop | Cropped | 60p | High frame rate when you don't need full sensor coverage |
Open gate buys you reframing room, and the APS-C crop buys you frame rate, and the S5 II makes you choose one or the other rather than giving you both at once. Pick based on what your delivery actually needs before the shoot, since switching modes mid-project means your reframing and noise math changes clip by clip rather than staying consistent across the whole edit.
Does DaVinci Resolve import S5 II V-Log footage cleanly, or does it show Media Offline?
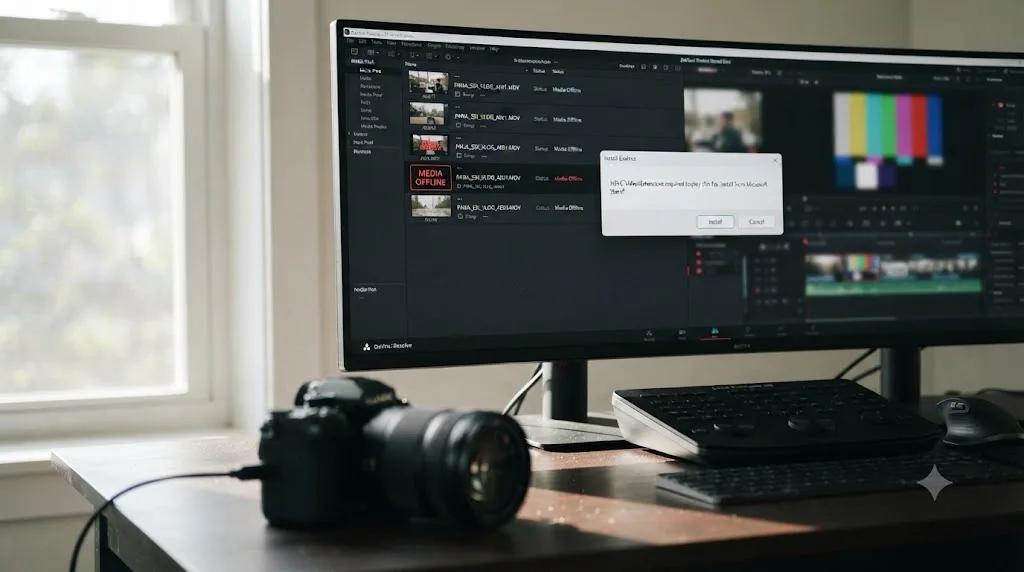
If a V-Log clip shows up as Media Offline, refuses to generate a thumbnail, or plays back as a stuttering mess, that's a different failure mode than a wrong-looking grade, and it's worth ruling out before you touch a single Color Space Transform setting.
A thread on Blackmagic's own user forum, Lumix S5 V-log 4:2:2 10 bit as offline, please help!, describes exactly this symptom on the closely related original S5, footage that plays fine elsewhere but sits offline in Resolve specifically because of its 10-bit 4:2:2 chroma. It's the same underlying pattern we've documented on other 10-bit mirrorless bodies: Blackmagic's own free version product page caps its stated support at, in the company's words, "virtually all 8-bit video formats," and V-Log footage from the S5 II is 10-bit no matter which recording mode captured it. In practice, plenty of 10-bit 4:2:0 H.265 footage, the S5 II's open-gate 5.9K/6K mode, decodes without issue in the free version. The 4:2:2 H.264 mode, the camera's higher-quality full-width 4K/60p option, is more likely to be the one that actually trips the wall, matching what editors report with the same chroma configuration from other manufacturers.
Windows adds a second, unrelated wrinkle specifically for the S5 II's H.265 clips. Microsoft doesn't ship HEVC decoding natively with Windows, so even Resolve Studio needs the separate "HEVC Video Extensions" package from the Microsoft Store installed at the OS level before any H.265 file, the S5 II's open-gate 5.9K/6K mode included, decodes at all. Filmmaking Elements' guide to fixing HEVC media offline errors walks through that install directly. Mac users skip this particular wall, since macOS has included HEVC decoding at the operating system level since Sierra, though they can still hit the free-versus-Studio 10-bit limitation described above regardless of platform.
You have three real options if a V-Log clip won't come online:
- Upgrade to Studio. Puget Systems' breakdown of hardware decoding support in DaVinci Resolve confirms Studio adds hardware-accelerated H.264 and H.265 decoding on supported GPUs, which resolves both the 10-bit decode gap and, on Windows, still requires the separate Microsoft HEVC extension for H.265 specifically.
- Transcode before you import. Convert the offending clips to an intraframe codec like ProRes or DNxHR outside Resolve first, using whatever converter you already have on hand, then bring the transcoded files in instead of the originals.
- Generate proxy or optimized media inside the free version, though this path is inconsistent for 10-bit 4:2:2 sources specifically on Free, since Resolve still has to decode the original once to build the proxy, which is exactly the step that's failing. It tends to work more reliably once you're already on Studio.
Our dedicated DaVinci Resolve Media Offline guide covers the broader set of causes behind that specific error message, everything from moved files to a missing render cache, if the fix above doesn't fully resolve your case.
An S5 II clip that won't come online in Resolve isn't a color science problem and no Color Space Transform setting fixes it, it's a decode limitation tied to the file's bit depth, chroma subsampling, or codec. Confirm which version of Resolve you're running and which exact recording mode captured the clip before you spend time troubleshooting a Color Space Transform on a file that hasn't actually decoded yet.
Do you need proxies for 5.9K/6K V-Log editing?
Often yes, and the reason differs depending on which recording mode you shot.
The S5 II's 5.9K/6K open gate files are large by resolution alone, and their H.265 Long GOP compression leans on inter-frame prediction that's efficient for storage but expensive to decode in real time without hardware acceleration, especially on a laptop GPU with no dedicated HEVC decode block. The C4K/4K 4:2:2 H.264 mode is smaller on disk but carries its own decode cost from the same Long GOP structure. Both situations respond to the same fix: build a lower-resolution stand-in before you start a heavy multi-clip edit.
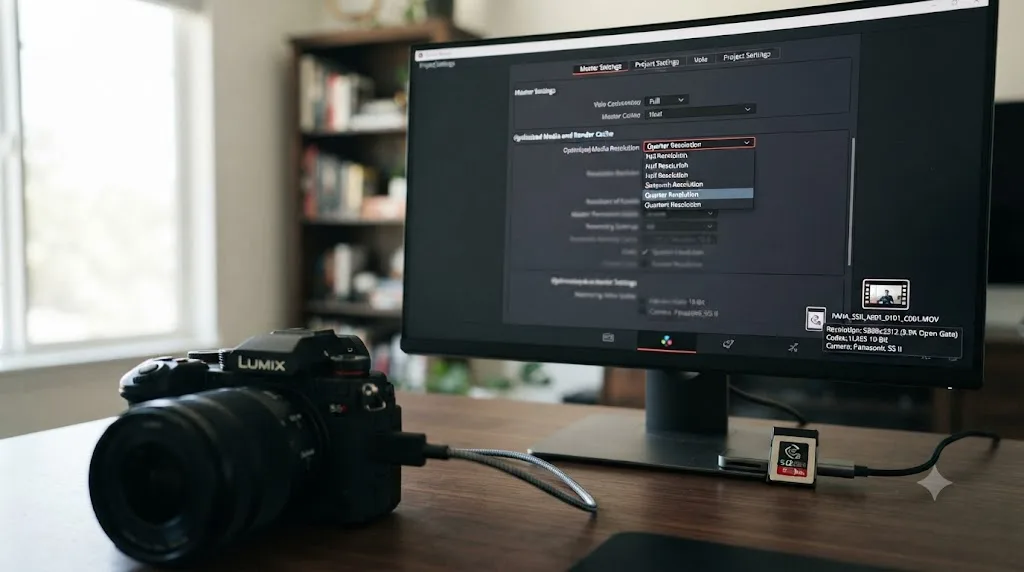
Right-click a clip or bin in the Media Pool and choose Generate Optimized Media to have Resolve transcode a full local proxy copy in the background, at a resolution and codec you set under Project Settings, Master Settings, Optimized Media and Render Cache. For 5.9K/6K sources specifically, Pixflow's proxy workflow guide recommends leaving Proxy Media Resolution on "Choose Automatically," which sizes proxies proportional to your timeline resolution, turning a 6K clip into a quarter-resolution proxy on a 4K timeline automatically, and dropping it further to eighth resolution manually if playback still stutters on a lower-powered machine.
Codec choice follows your platform, the same rule that applies across every camera brand. On a Mac, ProRes, typically ProRes 422 or ProRes 422 LT, is the standard proxy codec. On Windows, DNxHR fills the same role, with DNxHR LB for the smallest files and DNxHR HQX when storage isn't a constraint, per Beginners Approach's breakdown of Resolve's proxy resolution and codec options. Our full guide to proxy media setup for a slow laptop walks through the exact Project Settings panel and a decision tree for which resolution tier fits your specific hardware.
Proxies fix playback performance, not color. Building optimized media from an S5 II clip doesn't change or skip the Color Space Transform step covered earlier in this guide; Resolve relinks to your full-resolution originals automatically for the final render regardless of what you cut with, so your Panasonic V-Gamut/V-Log tagging still applies exactly the same way it would without proxies in the pipeline.
Is there a Blackmagic RAW or ProRes RAW workflow for the S5 II?
Yes, though getting the RAW signal out of the camera in the first place is more involved than the internal V-Log workflow covered above, and it's worth understanding the two RAW paths separately since they're not interchangeable.
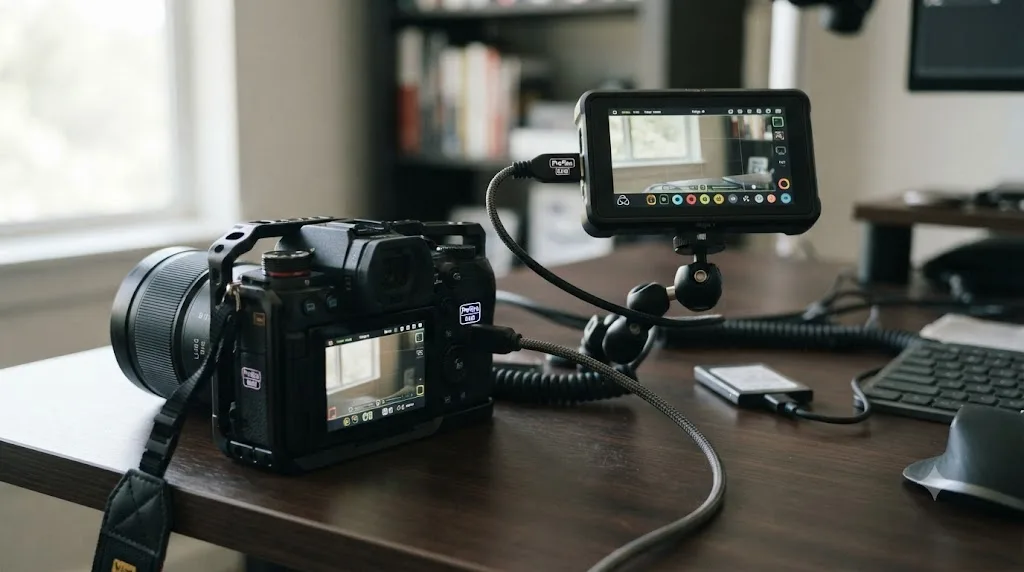
The S5 II can output 12-bit RAW video data over HDMI, but that capability isn't active out of the box the way it is on the S5 IIX. Per PetaPixel's coverage of the announcement, the standard S5 II needs the separate Software Upgrade Key DMW-SFU2, priced at $200, installed and activated through a firmware update before RAW output over HDMI works at all. Once that key is installed, the S5 II can send RAW data to a compatible external recorder, saving it as either ProRes RAW on an Atomos Ninja V, Ninja V+, or Shogun Connect, or as Blackmagic RAW on a compatible Blackmagic recorder, both added to the S5 II's feature set through the same paid unlock.
DaVinci Resolve decodes both resulting formats natively once you have the files. Blackmagic RAW decodes with no plugin required on any platform, since it's Blackmagic's own format. ProRes RAW decodes natively on Mac; Windows support for ProRes RAW depends on your specific setup and is worth confirming before you commit a shoot to that path if you're editing on a PC. Either way, RAW footage from an S5 II opens through Resolve's Camera RAW panel rather than through a standard Color Space Transform node, giving you post-capture control over white balance, ISO, and exposure that baked-in V-Log MOV files don't offer.
The practical tradeoff is cost and complexity stacked on top of an already capable internal codec. The S5 II's internal V-Log recording, in either the 4:2:2 or 4:2:0 modes covered earlier, already gives most projects enough dynamic range and color latitude for a standard delivery. RAW over HDMI adds real value when you're pushing toward a heavier VFX pipeline, need post-capture ISO and white balance flexibility beyond what Log offers, or are already invested in an Atomos or Blackmagic recorder for other cameras on the same shoot. For a single-camera S5 II project headed to a standard Rec.709 or HDR10 delivery, the internal V-Log path with the Color Space Transform settings covered throughout this guide gets there with far less hardware and far less up-front cost.
| Path | What you need | What you get |
|---|---|---|
| Internal V-Log MOV | Nothing extra; included standard | 10-bit 4:2:2 or 4:2:0 Log footage, Color Space Transform workflow |
| ProRes RAW over HDMI | DMW-SFU2 key ($200) plus a compatible Atomos recorder | 12-bit RAW, native Mac decode in Resolve, Camera RAW panel control |
| Blackmagic RAW over HDMI | DMW-SFU2 key ($200) plus a compatible Blackmagic recorder | 12-bit RAW, native decode on any platform, Camera RAW panel control |
RAW over HDMI on the S5 II is a real, well-supported workflow, but it's a paid add-on bolted onto a camera whose standard internal V-Log recording already covers most delivery targets without it. Don't assume you need the upgrade key just because the option exists; check whether your actual delivery spec needs RAW-level latitude before spending $200 and adding an external recorder to your kit.
Do you need DaVinci Resolve Studio for any of this?
Not for the core V-Log color workflow this guide covers. The Panasonic V-Gamut/V-Log Color Space Transform preset, Resolve Color Management's automatic tagging once it's correctly applied, and native Blackmagic RAW decoding all work in the free version, with no functional restriction on the color math itself.
Where Studio genuinely enters the picture is threefold. First, reliably decoding some of the S5 II's 10-bit files, particularly the 4:2:2 H.264 mode, since Blackmagic's own free version page caps its stated support at "virtually all 8-bit video formats," per the free product page. Second, a delivery target that needs Dolby Vision metadata authoring or HDR10+ analysis and export, both listed on Blackmagic's Studio product page as Studio-exclusive. Third, noise reduction, which matters more on this camera than most, since V-Log footage shot at the S5 II's higher native ISO of 4000 shows more grain once it's pulled out of Log and into a normal-contrast grade, and Resolve's Temporal and AI Spatial noise reduction tools are Studio-only.
Getting Panasonic S5 II V-Log footage to grade correctly is a color management problem, and color management is not a feature Blackmagic gates behind the Studio license. Don't let a general free-versus-Studio comparison talk you into buying $295 of software just to make your V-Log footage look right, unless you've actually hit one of the specific decode or noise reduction walls above. Our full DaVinci Resolve Studio price breakdown covers exactly what the license does and doesn't change if you're weighing it for other reasons, like HDR delivery or cleaning up noise from a dim, high-ISO shoot.
A step-by-step example: taking one V-Log clip from flat to Rec.709
Here's the full sequence in order, from a fresh S5 II clip in the Media Pool to a delivered Rec.709 grade, with every step from earlier in this guide placed where it actually happens in a real node tree.
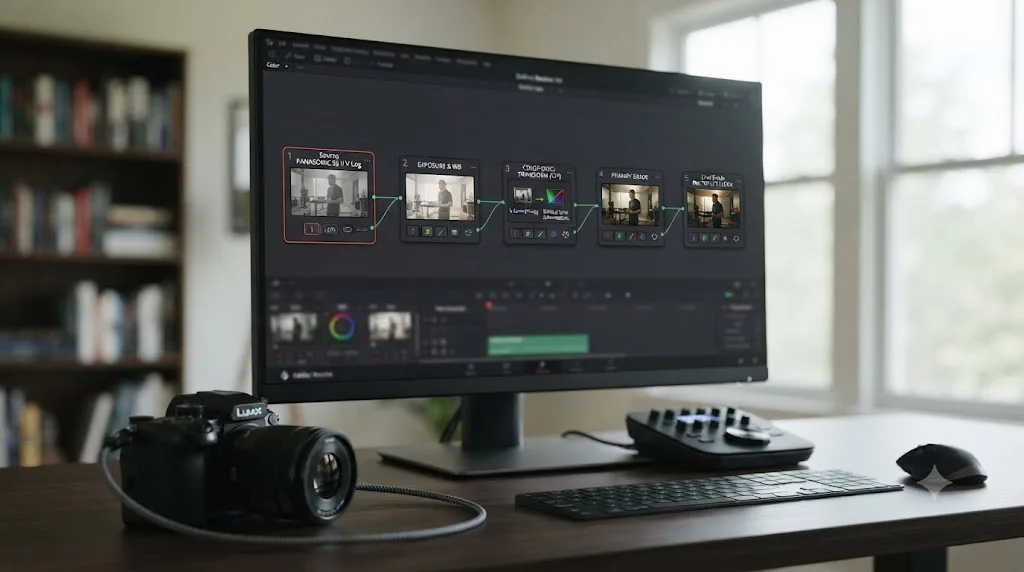
- Confirm the source. Right-click the clip, check Clip Attributes, and confirm it's V-Log, note which recording mode captured it (open gate 5.9K/6K, full-width 4K, or APS-C crop 4K60), and check whether it was shot near ISO 640 or ISO 4000.
- Build optimized media if the clip is stuttering on scrub. If it's a large open-gate H.265 file playing back roughly, generate optimized media at Quarter or Eighth Resolution before you touch color, so you're not fighting playback performance and grading decisions in the same pass.
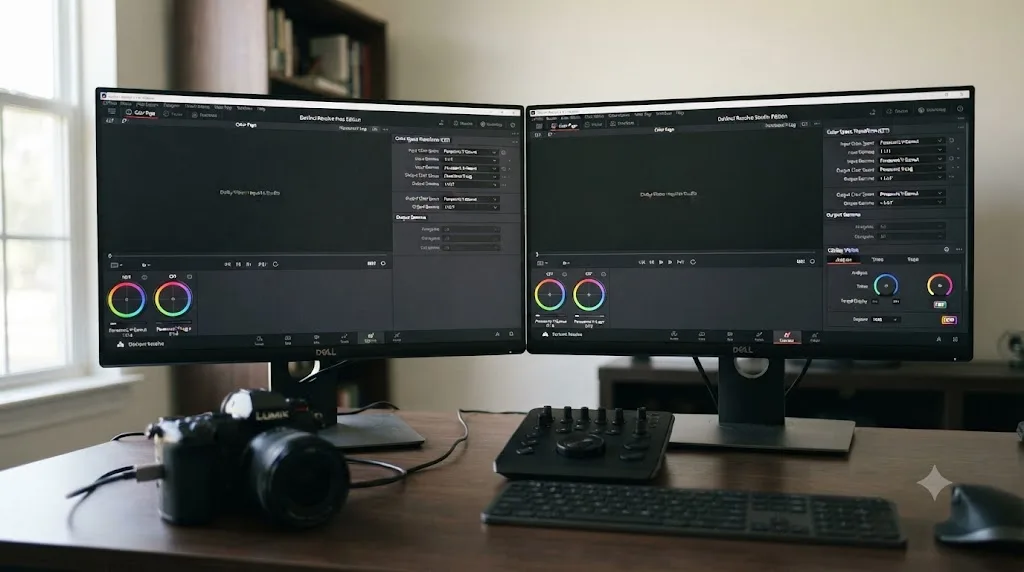
- Node 1, Color Space Transform in. Set Input Color Space to Panasonic V-Gamut, Input Gamma to Panasonic V-Log, Output Color Space to DaVinci Wide Gamut, Output Gamma to DaVinci Intermediate.
- Node 2, Noise Reduction, if the shot needs it. If the clip was shot at ISO 4000 and shows visible grain once it's out of Log, add a Temporal or Spatial Noise Reduction node here, right after the Color Space Transform, before any contrast or saturation moves.
- Node 3, primary correction. With the clip sitting in DaVinci Wide Gamut, set your white balance using an eyedropper on a neutral reference in frame if you have one, then bring your black point and white point in toward the edges of your waveform with the Lift and Gain wheels, watching for clipping on the scopes rather than trusting your eyes alone.
- Node 4, creative grade. Do your actual look here: contrast shaping, color balance between shadows and highlights, any secondary qualifiers or power windows the shot needs. This is the node where S5 II footage behaves like footage from any other camera; nothing about V-Log changes how you grade once you're in a normal working space.
- Node 5, Color Space Transform out. Input Color Space DaVinci Wide Gamut, Input Gamma DaVinci Intermediate, Output Color Space Rec.709, Output Gamma Rec.709 or Rec.709-A.
- Check the result against the troubleshooting table below before you call the grade final, particularly if this clip is intercut with footage from a different camera or a different S5 II recording mode.
Five nodes handle the entire mechanism from flat V-Log source to finished Rec.709 delivery, with Noise Reduction as the one optional insertion depending on how the clip was shot. Everything else, from the creative color decisions to the specific tool choices in node 4, is the same grading work you'd do on footage from any camera once it's sitting in a normal working space. A common mistake worth naming directly: adding a third or fourth Color Space Transform "just to compare," then forgetting to remove it. Two conversions per clip, one in and one out, is correct. Three is almost always leftover from experimenting, and it's the fastest way into the log-on-log problem covered next.
Why does V-Log footage still look wrong after you've applied the Color Space Transform?
If you've followed the settings above and it's still off, work through these in order before assuming your footage is somehow bad.
First, the wrong preset. Resolve's Color Space Transform dropdown lists presets for a lot of manufacturers, several with names that look similar at a glance. Confirm you picked Panasonic V-Gamut specifically for Input Color Space and Panasonic V-Log specifically for Input Gamma, not a visually adjacent option from a different brand's menu section.
Second, log-on-log. If a clip looks oversaturated, hue-shifted, or has crushed color that doesn't respond normally to your color wheels, check whether a third-party LUT is stacked on top of a Color Space Transform doing the same conversion, or whether Resolve Color Management is set to automatic tagging while a manual node is also transforming the same clip. This is exactly the layered-conversion trap covered in the LUT section above: since the S5 II ships no first-party LUT of its own, editors reaching for a third-party pack sometimes forget to remove the manual Color Space Transform once the LUT is in place, doubling the conversion.
Third, check that the clip is actually V-Log to begin with. The S5 II offers several Photo Style profiles beyond V-Log, Cinelike D2 and V2 among them, and a clip shot in one of those can look a little flat and get mistaken for Log footage, especially deep into a long shoot day. Applying a V-Log Color Space Transform to non-Log footage produces a specific kind of wrong: washed-out, low-contrast color that looks like an incomplete conversion because, in a sense, it is one, just applied to the wrong input. The same mix-up happens in the other direction if the camera was set to HLG for an HDR test shot rather than V-Log; an HLG clip run through a V-Log Color Space Transform looks similarly wrong, just with a different, more contrasty flavor of incorrect than a Cinelike clip produces.
Fourth, timeline color space mismatch. If your project's overall Color Management is set to a working space your output node doesn't actually match, Rec.709 versus Rec.2100 being the most common version of this mistake, footage can look correct in isolation and wrong the moment it's viewed against your monitoring setup or exported.
Fifth, and easy to miss because the symptom looks like a color problem: check whether the clip actually decoded, or whether you're grading a low-resolution proxy that never got relinked to full-resolution media before export. A proxy built at Eighth Resolution can mask fine noise or banding that shows up the moment the final render relinks to the original file.
| Symptom | Likely cause | Fix |
|---|---|---|
| Color looks close but subtly off across the whole clip | Wrong manufacturer preset selected in the Input Color Space dropdown | Confirm Panasonic V-Gamut and Panasonic V-Log specifically, not a similarly named preset |
| Oversaturated or hue-shifted color that won't respond to normal grading | Third-party LUT and Color Space Transform both applied | Remove one; don't convert the same clip twice |
| Footage stays washed out and low-contrast no matter what you adjust | Clip wasn't actually shot in V-Log, likely Cinelike D2 or V2 instead | Check Clip Attributes and the original Photo Style setting before reapplying the transform |
| Footage looks contrasty and oddly clipped rather than washed out | Clip was shot in HLG, not V-Log, and got the wrong Color Space Transform | Confirm the Photo Style and switch Input Gamma to match the actual curve used |
| Footage looks right in the viewer, wrong on export or external monitor | Project color management doesn't match output target | Check Project Settings, Color Management, against your actual delivery spec |
| Grade looks correct but noisy at ISO 4000 | Noise Reduction not applied, or applied after the Color Space Transform instead of before | Add Temporal/Spatial Noise Reduction (Studio only) right after the Color Space Transform in |
| Clip won't come online, shows Media Offline | 10-bit decode limitation in the free version, or a missing Windows HEVC extension | Upgrade to Studio, install the Microsoft HEVC extension on Windows, or transcode before import |
When the menus alone don't get you there fast enough
Everything in this reference is a settings problem with a settings answer, but finding the right menu on a deadline is its own kind of friction, especially the first few times you're bouncing between Project Settings, the node graph, and Clip Attributes trying to confirm exactly what a clip is before you touch its color.
TryUncle is the on-screen assistant for DaVinci Resolve on macOS. Ask in plain words and Uncle points at the exact control on your screen. If you're on a Mac asking "why is my V-Log footage still grey" out loud at your screen, that's a faster route to the Color Space Transform panel than searching this page a second time mid-session. It's a paid app, currently in founder pricing at $29.99 a month for the first 100 seats, and it's macOS only, so it won't help a Windows editor working through Resolve's menus or the HEVC extension issue covered earlier. Check TryUncle for current pricing before deciding if it fits your workflow.
It's worth knowing the category has other tools built on a different premise. Sottocut, PremiereCopilot, heyeddie.ai, and cutagent.ai automate parts of an edit or answer chat questions about your footage, rather than watching your live screen and pointing at controls. If your goal is automating a cut, those solve a different problem. If your goal is finding the right Color Space Transform setting faster while you're the one making the decisions, on-screen guidance is the more direct tool for that specific job. Guided help inside Resolve beats pausing a tutorial video shot on a different camera's menu to compare against your own.
What's the full settings cheat sheet at a glance?
Before the table, here's the one-line version of everything above. Use Resolve Color Management if your project is entirely S5 II footage shot the same way, but verify the tag actually applied since it doesn't always set itself automatically. Switch to a manual Color Space Transform node the moment you're mixing camera brands, or if RCM isn't tagging your clips correctly. Reach for a third-party LUT only after you've confirmed it's actually built for the S5 II, not the VariCam line. Consider the RAW-over-HDMI path only if your delivery genuinely needs it, since it costs $200 and adds an external recorder to your kit. And if a clip won't come online at all, that's a decode problem tied to bit depth and chroma, not a color space problem, and belongs in the import-failure section above, not in your node tree.
| Setting | Value |
|---|---|
| Shooting ISO for V-Log | 640 or 4000 (dual native ISO) |
| Input Color Space | Panasonic V-Gamut |
| Input Gamma | Panasonic V-Log |
| Intermediate Output Color Space | DaVinci Wide Gamut |
| Intermediate Output Gamma | DaVinci Intermediate |
| Final Output Color Space (SDR delivery) | Rec.709 |
| Final Output Gamma (SDR delivery) | Rec.709 (or Rec.709-A for Apple software) |
| Final Output Color Space (HDR delivery) | Rec.2100 |
| Built-in V-Log to Rec.709 LUT | None; third-party or manual CST only |
| Alternative Photo Styles needing no CST | Cinelike D2 (dynamic range), Cinelike V2 (contrast) |
| Other Panasonic bodies sharing this CST preset | S1, S1H, GH5/GH5S/GH5 II, GH6, per Panasonic |
| Open gate resolution and frame rate ceiling | 5.9K/6K at up to 30p |
| APS-C crop mode frame rate ceiling | 4K at up to 60p |
| 4:2:2 mode codec | H.264, Long GOP, up to 60p |
| 4:2:0 open gate/crop mode codec | H.265, Long GOP |
| RAW output over HDMI, standard S5 II | Requires paid DMW-SFU2 key ($200) |
| RAW output over HDMI, S5 IIX | Built in, no extra purchase |
| Proxy codec | ProRes on Mac, DNxHR on Windows |
| Studio required for basic V-Log grade | No |
| Studio required for reliable 10-bit decode | Often, especially 4:2:2 sources |
| Studio required for Dolby Vision/HDR10+ delivery | Yes |
| Studio required for Noise Reduction | Yes |
| Blackmagic RAW native decode in Resolve | Yes, both editions |
Match Panasonic V-Gamut and Panasonic V-Log to your first node, keep your exposure near ISO 640 or ISO 4000, confirm the clip actually decoded before you blame the color, and the rest of this workflow is two Color Space Transform nodes doing exactly what they're built to do. Most S5 II footage that "looks wrong" in Resolve isn't broken. It's one preset, one missing LUT you were never given in the first place, or one codec extension away from correct, and now you know which one.
Frequently asked questions
- What Color Space Transform settings does Panasonic S5 II V-Log footage need in DaVinci Resolve?
- On your first node, set Input Color Space to Panasonic V-Gamut, Input Gamma to Panasonic V-Log, Output Color Space to DaVinci Wide Gamut, and Output Gamma to DaVinci Intermediate. On your last node, reverse it: Input DaVinci Wide Gamut/DaVinci Intermediate to Output Rec.709. That two-node pairing is the entire mechanism; everything else is creative grading layered on top.
- What ISO should I shoot V-Log at on the Panasonic S5 II?
- ISO 640 or ISO 4000. The S5 II uses a dual native ISO sensor, and V-Log's dynamic range is built around those two specific sensitivities, not the values in between. Shooting at, say, ISO 1600 in V-Log still works, but you're paying a noise penalty without gaining anything the color science was designed to capture at that setting.
- Does the Panasonic S5 II come with a V-Log to Rec.709 LUT?
- No, not preinstalled. The S5 II's V-Log View Assist feature lets you load up to four LUT files to preview a graded look on the camera's screen or over HDMI, but you have to supply the LUT yourself. Panasonic's own downloadable LUT library is built for its VariCam and EVA1 cinema cameras, not the S-series, so most S5 II shooters use a third-party V-Log LUT or a manual Color Space Transform instead.
- Do I need DaVinci Resolve Studio to grade Panasonic S5 II V-Log footage?
- Not for the color math itself. The Panasonic V-Gamut/V-Log Color Space Transform preset and Resolve Color Management both work in the free version. Studio matters more for decoding some of the S5 II's 10-bit files reliably, for Dolby Vision or HDR10+ delivery, and for noise reduction on footage shot at the higher native ISO.
- Why does my S5 II V-Log footage still look wrong after I apply the Color Space Transform?
- Work through three things in order: whether you picked Panasonic V-Gamut/V-Log specifically rather than a similarly named preset for another manufacturer, whether a LUT is stacked on top of a Color Space Transform doing the same conversion twice, and whether the clip was actually shot in V-Log at all rather than one of the S5 II's other Photo Style profiles. Log-on-log, two conversions applied to the same clip, is the most common cause of oversaturated, contrasty color that won't respond normally to grading.
- What's the difference between the S5 II and S5 IIX for a DaVinci Resolve workflow?
- Color science is identical: both cameras use the same V-Gamut and V-Log, so every Color Space Transform setting in this guide applies to both. Where they diverge is recording format. The S5 IIX ships with internal ALL-Intra recording, direct-to-SSD capture, and RAW output over HDMI built in. The standard S5 II needs a separate $200 Software Upgrade Key, DMW-SFU2, just to unlock RAW output over HDMI, and it has no ALL-Intra or SSD recording at all.
- Should I shoot 4K, 5.9K/6K open gate, or the APS-C crop mode for V-Log on the S5 II?
- 5.9K/6K open gate at up to 30p uses the sensor's full width and gives you the most reframing room in post, useful if you're delivering multiple aspect ratios from one take. 4K up to 60p is available in a Super35/APS-C crop, which narrows your field of view and adds noise faster in low light. Pick open gate when you need the flexibility and can stay at 30p or below; drop to the APS-C 4K60 mode only when you specifically need the higher frame rate.
- Can DaVinci Resolve decode Blackmagic RAW or ProRes RAW recorded from the S5 II's HDMI output?
- Yes, once you have the footage. DaVinci Resolve decodes Blackmagic RAW natively with no plugin, and ProRes RAW natively on Mac. Getting that RAW signal out of the S5 II in the first place is the harder part: the standard S5 II needs the paid DMW-SFU2 upgrade key and a compatible external recorder like an Atomos Ninja V, since the camera can't output RAW over HDMI out of the box the way the S5 IIX can.
Sources
- CineD: Panasonic LUMIX S5 II Lab Test, Rolling Shutter, Dynamic Range and Latitude
- Digital Camera World: Panasonic Lumix S5 II review
- DPReview: Panasonic Lumix DC-S5II review
- T3: Panasonic Lumix S5 II review
- Engadget: Panasonic S5 II review, the full-frame vlogging camera you've been waiting for
- Panasonic Support: Do the LUMIX S5II & S5IIX feature LUT Assist functions?
- PetaPixel: Panasonic Announces Blackmagic RAW Compatibility for S5 IIX and S5 II
- Panasonic Global: VARICAM LUT LIBRARY
- Theatre of Noise: The film look and Lumix S cameras (Robin Parmar)
- Panasonic DC-S5M2 Operating Instructions: Photo Style
- Discover Cameras: Panasonic Vlog Settings Explained
- AAA Presets: Mastering Your Panasonic V-Log
- Newsshooter: Panasonic GH6 Review & In-Depth User Guide
- ProVideo Coalition: LUMIX GH6, the tech behind the new Panasonic camera
- Blackmagic Forum: Input Color Space Panasonic V-Log not automatically set
- Blackmagic Forum: Lumix S5 V-log 4:2:2 10 bit as offline, please help!
- Puget Systems: What H.264 and H.265 Hardware Decoding Is Supported in DaVinci Resolve Studio?
- Filmmaking Elements: DaVinci Resolve HEVC/H.265 Media Offline, 6 Fixes
- DaVinci Resolve product page (free version specs, Blackmagic Design)
- DaVinci Resolve Studio product page (Blackmagic Design)
- Pixflow: DaVinci Resolve Proxy Workflow, Edit 4K & 8K Smoothly
- Beginners Approach: DaVinci Resolve Proxy (Tips & Fixes)
- Cinema Tools: V-Log LUT for Panasonic S5 II
Put this guide to work with TryUncle.
Ask about the step you’re on. TryUncle sees your screen and points at the control you need, so you can keep learning in your own project.
Get TryUncle for Mac or WindowsKeep reading
Guides · Jul 12, 2026 · 39 min
How to Color Match Different Cameras in DaVinci Resolve
Match footage shot on different cameras in DaVinci Resolve with Color Space Transform, Color Match, and Shot Match, plus settings by camera brand.
Guides · Jul 10, 2026 · 26 min
How to Install LUTs in DaVinci Resolve: Folders and Fixes
Install LUTs in DaVinci Resolve: find the real LUT folder, apply them to a node instead of a clip, and fix the LUT-not-showing-up refresh bug for good.
Fixes · Jul 15, 2026 · 25 min
DaVinci Resolve Proxy Media Setup for a Slow Laptop
Set up proxy media in DaVinci Resolve on a slow laptop: resolution, codec, the Blackmagic Proxy Generator, and the exact settings that stop the stutter.