Articles / Guidesupdated for DaVinci Resolve 21.1 (September 2026)
DaVinci Resolve Photo Page: Copy Effects to Other Photos
Quick answer
In DaVinci Resolve 21, select the photo with the effect, copy its attributes, select the target photos, then open Paste Attributes and enable Plugins under Photo Attributes. Apply the paste and check the effect on your targets. For RAW settings rather than effects, use the Photo Album's middle-click method only when the source and targets use the same RAW format.
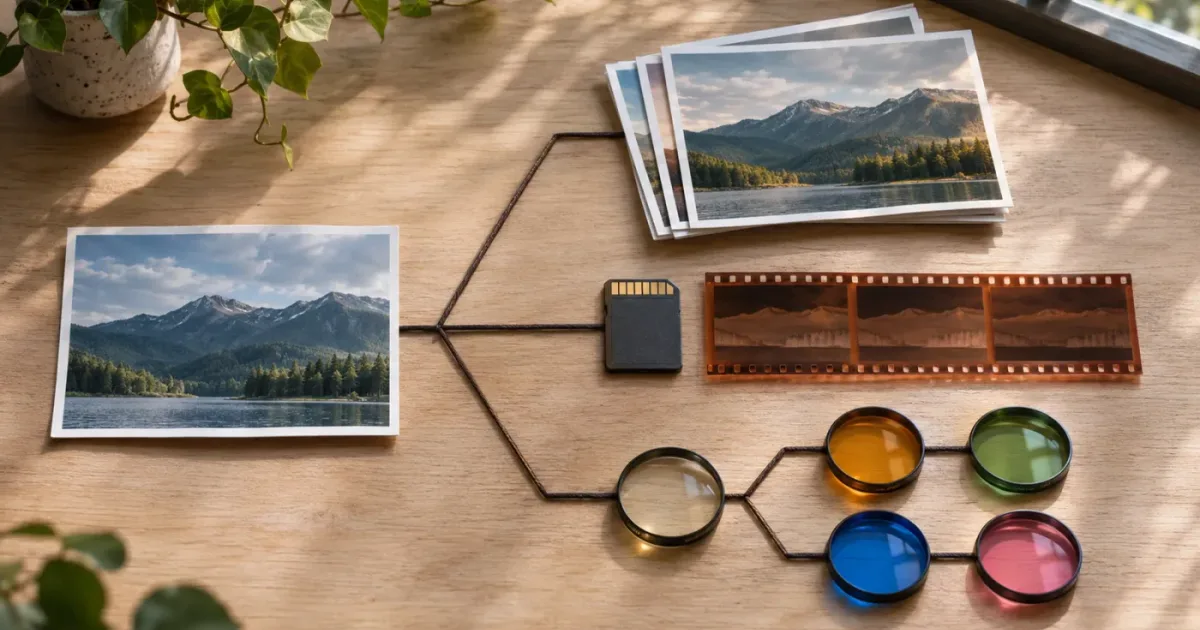
I wanted to reuse a good effect without rebuilding its settings on every photo. The confusing part is that Resolve offers more than one way to copy photo adjustments, and the methods don't copy the same things. As of November 2026, this guide covers DaVinci Resolve 21.1 and the Photo Page workflow documented for Resolve 21.
How do I copy effects from the DaVinci Resolve Photo Page to other photos?
Use Paste Attributes to copy a Photo Page effect and its custom settings to one or more selected photos. In the Paste Attributes window, enable Plugins under Photo Attributes, then apply the paste.
The fast recipe:
- In the Photo Album, select the photo that already has the effect.
- Choose Copy Attributes from its context menu, or use the copy command.
- Select the photo or photos that should receive the effect.
- Choose Paste Attributes from the Edit menu or the selected photos' context menu.
- In the Paste Attributes window, enable Plugins under Photo Attributes.
- Turn off any other attribute checkboxes you don't want to transfer.
- Click Apply.
The key is step five. Copying a photo and pasting attributes opens a choice of what to transfer. It doesn't mean every visible adjustment will be included automatically. The official DaVinci Resolve 21 New Features Guide describes applying edits between album photos and identifies Plugins as the Photo Attributes checkbox for pasting effects.
This guide uses “effect” to mean an item applied from the Photo Page's effects library, with its adjustable parameters. That's different from RAW development settings and from a color grade built with nodes. Resolve has copy workflows for all three, but picking the wrong one can make it look as if the paste failed.
For Photo Page effects, Paste Attributes with Plugins selected is the direct method.
The effect copies as an editable effect, not as a flattened picture of its appearance. After pasting, open the Inspector's Effects tab on a target photo and check that the effect appears. Its controls should still be available for adjustment.
If you only want to transfer an effect and don't want to overwrite or add unrelated edits, keep the other attribute boxes off. A batch paste is convenient, but it can be difficult to spot an unwanted transfer if you select everything without checking what Resolve has selected.
Before you start, make sure you're in the Photo Page and working with photos in an album. Resolve has other copy-and-paste workflows on its editing and color pages. A control with a similar name in a different context may offer different categories or affect a different kind of object.
If you're uncertain what you've copied, stop before applying the paste to a large selection. Try one target first. Confirm that the effect appears in its Effects tab, then decide whether to extend the operation to more photos.
Why doesn't middle-click copy my Photo Page effect?
Middle-clicking a source photo after selecting target photos is a quick way to copy RAW settings in the Photo Album, not a way to copy Photo Page effects. It also depends on the photos using the same RAW format.
That distinction explains a common surprise. You select a target, middle-click the edited source, and see some settings change, but the effect you expected is missing. The Photo Page's album method explicitly does not copy applied effects. For effects, use Paste Attributes and enable Plugins.
Think of the two paths this way:
| What you want to transfer | Photo Page method | Important limit |
|---|---|---|
| A Photo Page effect and its parameters | Copy Attributes, select targets, then Paste Attributes with Plugins enabled | You choose the attribute checkbox; inspect the result on targets |
| RAW adjustments | Select targets, then middle-click the source photo in the album | Only RAW settings transfer, and source and targets must use the same RAW format |
| A node-based grade | Use the Color page's grade-copy workflow or a shared node | This is a grade workflow, not the Photo Album's Plugins checkbox |
| The same linked node adjustment across photos | Use shared nodes where they fit the intended workflow | A linked shared adjustment is different from a one-time independent paste |
The Photo Page's middle-click route can be useful when you are developing a set of RAW images from the same camera format and want to copy the RAW controls. It isn't a shortcut for transplanting an OFX or Fusion effect.
Middle-click is for compatible RAW settings; Plugins in Paste Attributes is for Photo Page effects.
If a click seems to transfer some adjustments but not others, don't assume the whole operation failed. Check the target's RAW controls and Effects tab separately. Different kinds of edits live in different parts of the Inspector and use different copy rules.
A useful way to remember the distinction is to ask what you selected on the source. Did you change a camera RAW control, apply something from the Photo Page's effects library, or build a node graph? The action that created the adjustment is a better guide than its visual result. Several different tools can make a photo warmer, softer, sharper, or more contrasty, but that doesn't make them the same kind of attribute.
For example, if two images look warmer after a transfer, that alone doesn't prove you copied a Photo Page effect. Check which control changed on the target. The target's Effects tab can confirm an effect transfer; the RAW controls can confirm whether RAW development settings changed. The viewer is useful for judging the look, but it doesn't tell you which transfer method produced it.
What exactly does the Plugins checkbox copy?
The Plugins checkbox in Paste Attributes transfers the selected photo's applied Photo Page effect or effects and their settings. It's the checkbox to use when the goal is to reproduce an effect on other photos.
That doesn't mean every setting visible in the Inspector is a plugin. A Photo Page image can have source RAW settings, other photo adjustments, color grades, and effects. The Paste Attributes window separates categories so that you can choose the parts that belong on the targets.
A practical way to decide:
- If you applied an item from the Effects Library, select Plugins.
- If you changed camera RAW development controls, use the RAW settings workflow and check the format limitation.
- If you created a node grade, use a grade-copy or shared-node approach appropriate to the Color page.
- If your intention is to copy several kinds of adjustments, inspect the available checkboxes and select only the categories you mean to transfer.
The word “Plugins” can be misleading if you read it as referring only to third-party extensions. In this Photo Page paste workflow, it is the Photo Attributes checkbox Blackmagic documents for transferring effects. The effect should appear in the target photo's Effects tab after applying the paste.
Don't assume one checkbox will make two different source photos look identical. It copies an effect and its values; it can't make different compositions, lighting, lenses, or source colors match by itself. You may need to adjust the pasted effect on each target. And if your specific effect depends on content in the source image, the same numeric values can produce a different visual outcome on another image.
A selective paste is safer than checking all available attributes. For instance, suppose the source uses a particular effect but the target photos have already received independent RAW corrections. Pasting Plugins alone keeps the transfer focused on the effect rather than intentionally including unrelated RAW attributes. Always read the checkbox labels in the Paste Attributes window before you click Apply.
Plugins transfers an effect; it doesn't promise identical-looking results across different source photos.
One practical distinction helps when you inspect the result: a transfer has a technical side and a creative side. Technically, you want the effect and its parameters to appear on the target. Creatively, you want the target to look right. The checkbox addresses the first job. It doesn't decide the second.
This matters when an effect uses a mask, a point, or another control that relates to the image. A value can transfer successfully while the control's position or size needs attention on the new composition. Treat that as a reason to inspect and adjust the target, not as proof that the paste did nothing.
It also matters when the source has several effects. Plugins is a category, not a promise that you can choose a specific individual effect from a list within that category. If your goal is to transfer one effect but not another, inspect the available workflow in your installed version and use a one-target test before processing a batch. If the dialog offers only the category-level choice, don't assume it will isolate an effect that the dialog doesn't separately identify.
How do I apply one effect to several photos at once?
Select all intended target photos before opening Paste Attributes, enable Plugins, and apply once. Resolve's Photo Page instructions support copying attributes and effects from one photo to multiple selected photos.
A careful batch operation has four parts: choose a suitable source, select compatible targets, transfer only the intended attribute, and review the outcome. The paste itself is just one part of the job.
Worked example: a shared soft-glow effect
This is a worked example, not a report of a hands-on test. Imagine a set of portrait photos from the same session. One photo has a soft-glow effect that you want to try on five other images in the same album.
- Choose the source. Select the photo where the effect is already set the way you want. Confirm the intended effect appears in the Inspector's Effects tab.
- Copy the attributes. Right-click the source photo and choose Copy Attributes, or use the copy command.
- Select targets. Select the five intended target photos in the Photo Album. Before continuing, make sure the source itself isn't accidentally part of the target selection unless you intend to paste onto it.
- Open Paste Attributes. Use Edit > Paste Attributes or the target selection's context menu.
- Choose the effect category. Under Photo Attributes, turn on Plugins. Leave unrelated categories unchecked unless you deliberately want to copy those too.
- Apply. Click Apply.
- Inspect the batch. Select each target and open its Effects tab. Confirm the effect is present, then compare its appearance in the viewer.
Why review five photos individually if the paste was one operation? Because the effect's parameter values can transfer while the visual result varies. A bright background, a dark background, a close crop, and a wide composition can react differently to the same effect. One might need less intensity, another may need a mask or a different effect altogether.
For a larger batch, divide images into sensible groups first. Similar lighting and composition can be more useful grouping criteria than simply selecting every photo in an album. A single paste across a whole album is fast, but only if the same look makes sense for the whole set.
Consider separating the batch by:
- Camera or source format, especially if RAW settings are part of the work.
- Lighting condition, such as open shade versus direct sun.
- Subject type, such as portraits, products, interiors, or landscapes.
- Orientation and framing, where a crop or framing-dependent effect may behave differently.
- Intended delivery, such as a consistent gallery set versus a few individually styled images.
These are workflow choices, not restrictions imposed by Resolve. The point is to make review manageable and avoid confusing a successful attribute transfer with a consistent aesthetic result.
If the target set contains photos with existing edits, pause before applying. Decide whether the effect should be added to those edits or whether your selected attributes will replace or alter particular categories. The Paste Attributes window is where you control what is copied. If the result doesn't match your intent, undo promptly, adjust the selection or checkboxes, and try again on a small representative subset.
A batch is easiest to review when you define its boundary before selecting. “All five portraits from this setup” is a clear boundary. “Everything in the album” may not be. A mixed album can contain closeups, wide shots, different lighting, and earlier edits. Applying one effect to all of them may be possible, but it can turn a quick transfer into a long cleanup.
One workable approach is to select a small group that shares the visual conditions the effect was designed for. Apply the effect, inspect the group, and then decide whether the next group belongs in the same batch. If a target needs different treatment, leave it out. You don't lose anything by deciding that one photo should be edited separately.
A second worked example: imagine product photos shot on a clean background, with a subtle effect used to soften highlights. The effect may make sense across several images if the lighting and product framing are similar. But a reflective object, a dark product, or a photo with a different background might show the effect more strongly. Copying the same settings gives you a starting point. It doesn't remove the need to judge each image.
For a group of unrelated travel photos, a single batch is less likely to make sense. A sunlit beach, an interior, and a night street scene begin from different conditions. You could still copy the effect to each image if that is the intended style, but plan on individual adjustments and treat the transfer as a first pass rather than a finished grade.
What is the safest way to batch-edit photos without losing other adjustments?
Use a test target first, keep the paste selective, and verify the result before applying the same operation to the full set. For an edit that shouldn't be shared, create or use an image version so you can preserve an alternate look.
Resolve's guide explains that Photo Page edits are non-destructive: the edits are stored in the project, and the original photos aren't altered by those edits. That is reassuring, but it doesn't remove the need to understand what your paste will do inside the project. You can still replace an edit choice or alter the appearance attached to a photo.
A safe batch procedure looks like this:
- Choose one representative target photo.
- Copy the desired source attributes.
- Paste only the intended category, usually Plugins for an effect.
- Compare the target's before and after appearance.
- If the result is sensible, repeat with the rest of the target group.
- Review edge cases individually instead of forcing one treatment everywhere.
The pilot photo should be a real member of the target group, not necessarily the easiest image in the album. Choose one that reveals likely problems: the darkest frame, the brightest background, or the most different composition. If the effect is meant for close portraits, don't validate it only on a wide environmental portrait.
Use image versions when you need to explore more than one grade or look without treating one version as the only intended result. Blackmagic's Resolve 21 Photo Page material describes multiple grade versions that reference the same original source file. A version is useful when you want to compare alternatives, such as a subtle effect and a stronger one, while keeping the original image file intact.
Don't confuse versions with copied effects. A version gives you an alternate image treatment; Paste Attributes transfers selected attributes to targets. If your actual goal is a reusable starting point for independent photos, a copied effect may be simpler. If your goal is ongoing, linked consistency across an album, investigate shared nodes instead.
One more precaution: check the target selection before clicking Apply. In a thumbnail interface, it's easy to have the wrong item active or to miss that several images remain selected. Confirm the highlighted targets are the ones you mean to change. Then inspect at least one target from each meaningful subgroup.
A useful small-batch test can answer several questions at once. Does Plugins appear in the dialog? Does the effect appear on the target? Do the copied values produce a plausible starting point? Does the target have existing adjustments you want to preserve? Those checks can prevent repeating an operation across a selection that wasn't ready.
If your first test doesn't look right, undo the operation before changing other controls. Then check the cause. Was the wrong photo copied? Did you paste to the wrong target? Was Plugins enabled? Is the effect present but disabled? Did the paste work but the image content make the result look different? Each cause has a different next step. Repeating the same paste without identifying the problem may make the project harder to interpret.
Non-destructive editing also doesn't mean every decision is automatically reversible in the way you expect after every later action. It means the edit process does not directly overwrite the original photo file. Keep your project organized, save the work, and use versions when you need separate treatments. For a broader explanation of saving project work, the site's guide to saving work in DaVinci Resolve covers project-saving habits.
Should I copy the effect, use a shared node, or make an image version?
Copy an effect for a one-time transfer, use a shared node when you want a common linked adjustment, and create an image version when you want a separate look for the same source. These approaches solve different problems.
| Method | Best for | What to remember |
|---|---|---|
| Paste Attributes with Plugins | Applying an existing effect to selected photos | One-time transfer; adjust targets separately if needed |
| Shared node | Maintaining a common node-based adjustment across an album | Changes to the shared node are designed to affect its connected uses |
| Image version | Comparing distinct treatments of one photo | The versions reference the source photo; they aren't the same as copying to other images |
| RAW-settings copy | Reusing RAW development settings on compatible photos | The Photo Album's middle-click copy has a same-RAW-format requirement |
Resolve 21's Photo Page adds shared nodes as a way to apply the same look across an album. That's useful if you genuinely want the linked behavior. If you later revise that shared node, the change is intended to carry across the connected uses. That can save repetitive work, but it also means a change may affect more images than you expect. Use it deliberately.
By contrast, Paste Attributes is a practical choice when you want to apply an effect's current settings to a defined target group, then make later corrections independently. If your idea of “copy this look” means “start with the same settings, then tune each photo,” a one-time paste is usually easier to reason about than a shared link.
An image version helps when the question is “what if this same photo had a different look?” It doesn't automatically make other photos share the same adjustment. Keep the task clear:
- Same effect parameters on selected photos: Paste Attributes with Plugins.
- One evolving adjustment shared across several photos: shared node.
- Alternative treatments of the same photo: image versions.
- Compatible RAW development settings: RAW settings transfer.
A shared node is for linked consistency; Paste Attributes is for a selected one-time transfer.
There isn't one best method for every batch. A wedding set, a product catalog, and a group of unrelated travel photos may each need different levels of consistency. Start with the smallest scope that matches your intent. A simple effect transfer is often safer than creating a shared dependency across an entire album.
Before choosing a shared node, ask what needs to stay connected. If you want to make one common adjustment and have that same adjustment update across all connected photos, a shared node may fit. If you want each photo to become independent after receiving a starting look, Paste Attributes may better match the job. The more future editing flexibility matters, the more important this difference becomes.
A version solves yet another problem. It lets you compare treatments of one source photo, not automatically distribute those treatments to a set of separate source photos. If you're weighing “warm” against “neutral” on a single image, versions can keep that comparison tied to the same source. If you want a batch to inherit an effect, use the copy workflow.
Here's a decision table for the common cases:
| Your actual goal | Start here | Why |
|---|---|---|
| Give selected photos the same effect settings once | Paste Attributes with Plugins | Transfers the effect category to the chosen targets |
| Make one node adjustment remain connected across several images | Shared node | Better suited to a linked, ongoing adjustment |
| Compare two treatments of the same photo | Image version | Keeps alternate looks associated with one source |
| Reuse camera RAW development settings | RAW transfer method | This is a different operation from copying effects |
| Make each photo look visually identical despite different lighting | No copy method alone | You must assess and adjust each image individually |
That final row matters. “Same values” and “same appearance” are not synonyms. A copied effect can be technically consistent while the images remain visually uneven. If the deliverable depends on a consistent set, judge the photos as a group as well as one at a time.
Why did the effect paste but look different on the target photo?
An effect can paste successfully while looking different because its parameters are being applied to a different image. Transfer success and visual matching are separate questions.
Check the target in this order:
- Is the effect present? Open the target's Effects tab. If the effect is listed, the copy probably worked.
- Is the effect enabled? Look for its enable or disable control. A disabled effect may retain settings without changing the image.
- Are the parameters appropriate? Compare the copied values with the target's composition and exposure.
- Does the effect depend on image content? A mask, blur, relight, or subject-specific effect can respond differently when the subject or background changes.
- Are you viewing the intended version? Check that you're looking at the image version you edited.
- Is the target a suitable match? If not, adjust it individually or exclude it from the batch.
The first check matters most. Don't repeat the paste immediately just because the viewer doesn't look identical to the source. You might paste the same settings twice or accidentally transfer additional attributes. Confirm the effect exists before taking action.
For a localized effect, inspect the mask or overlay controls. The position and size of a control that made sense on the source may not line up with the target composition. An effect can be present, enabled, and correctly transferred while its on-image placement needs attention.
For a global effect, compare intensity and image characteristics. A glow that looks restrained on a low-contrast image can become overpowering on a high-contrast target. A color effect can make skin or product colors diverge if the starting white balance or exposure differs. Resolve copies parameters; it doesn't automatically evaluate your creative intent and rebalance them for every photo.
If you need a consistent series, define what “consistent” means before copying. It could mean equal effect values, similar perceived warmth, matching skin tone, equal contrast, or a consistent visual style. Those goals aren't identical. A copied numeric value gives you the first kind of consistency, not necessarily the others.
A quick comparison can help you make a decision without turning the batch into guesswork. Look at the source and one target side by side, if your Photo Page layout allows it, or move between them while keeping the key visual feature in mind. Ask one question at a time. Is the effect present? Is its strength acceptable? Is the affected area correct? Does the overall image still fit the rest of the set?
Don't begin by changing several controls at once. If you adjust the effect, the RAW settings, and a node grade together, you may not know which change solved the mismatch. First confirm the effect transfer. Then make one deliberate correction and check again.
Some effects are especially sensitive to what is in the frame. A blur that looks soft around a simple background may become distracting around fine hair or detailed foliage. A glow that works on a small bright highlight may spread across a larger bright area in another image. A localized effect can also need repositioning when the subject moves within the frame. Those differences aren't proof of a failed paste.
Why is the Plugins checkbox missing or unavailable?
First confirm that you copied attributes from a photo with a Photo Page effect and opened the Photo Page Paste Attributes window for selected photos. The available checkboxes depend on the source attributes and the operation you're performing.
If Plugins is absent, greyed out, or doesn't produce the effect you expected, check these possibilities:
- The source photo has no applied effect. A look or another adjustment may be present, but the Plugins category may not contain the effect you intend to copy.
- You copied from the wrong item. Make sure the selected source is a photo in the album, not a still, timeline clip, or other item from a different workflow.
- You opened a different Paste Attributes dialog. Resolve has attribute-copy operations in other pages. The relevant Photo Page procedure uses Photo Attributes and the Plugins checkbox.
- The selected source changed. Re-select the source photo, copy its attributes again, then select targets and open Paste Attributes.
- Your target selection isn't active. Re-select the intended photo or photos before opening the paste window.
- The UI labels differ from an older tutorial. Resolve 21 introduced the Photo Page, so instructions for a previous major version may describe a different interface or a Color-page workflow.
When a dialog's labels differ from a tutorial, don't check every box just to make the paste work. Look for the Photo Attributes section, identify Plugins, and check the source and target names shown by the dialog if available. Resolve's included manual and the Blackmagic Design support page are the safest references for the version you have installed.
If the effect category still isn't offered, use a single target as a diagnostic. Select one target, reopen Paste Attributes, and see whether Plugins becomes available. This removes the ambiguity of a multi-selection. If it works on one, the issue may have been the original selection or the source. If it still doesn't, revisit whether the copied source actually has the desired effect applied.
Try this troubleshooting sequence before you change the project:
| What you see | What to check next | Why |
|---|---|---|
| Plugins isn't listed | Confirm you're using Photo Page Paste Attributes and copied from an effected photo | A different page or source can expose different attribute choices |
| Plugins is listed but unchecked | Enable it, leave unrelated categories off, then apply to one test target | A listed category does not mean it's selected |
| Apply completes but no visible change appears | Check the target's Effects tab and whether the effect is enabled | The effect may have transferred without an obvious viewer change |
| The effect appears on one target but not another | Inspect the target selection and its active image version | Targets or versions may not be the ones you intended |
| The dialog contains unfamiliar controls | Check the installed Resolve version and its manual | Interface instructions can vary across versions |
These are diagnostic branches, not claims that every failure has the same cause. Start with the simplest check that matches what you see. If the category is missing, investigate the page and source. If the category is present but the image doesn't change, inspect the effect on the target before reopening the paste dialog.
If you are following an older guide, don't assume that a missing control means your installation is broken. Resolve 21 introduced the Photo Page as a new part of the application, and the Resolve 21.1 Manual is listed on Blackmagic Design's support page. The manual for your installed version is a better reference than a video recorded against a different build.
Why did a RAW adjustment copy but not the effect?
The Photo Album's middle-click copy operation transfers RAW settings only, subject to the same-format condition. It intentionally doesn't copy applied effects.
This is easy to mix up because both actions can begin with selecting a source and target photos. But their outcomes differ:
- Middle-click source after selecting targets: RAW settings can transfer when the photo formats match.
- Copy Attributes and Paste Attributes: selected Photo Attributes, including Plugins, can transfer to the targets.
If a RAW adjustment copied successfully but the effect didn't, that is consistent with the documented method. Repeat the operation using Paste Attributes and Plugins, not the RAW-settings shortcut.
The file type matters for RAW controls. A RAW photo has camera-specific development settings. A JPEG or another already-processed photo doesn't expose the same camera RAW controls. And even two RAW files may not share a compatible RAW format for the album's direct RAW-settings transfer. When in doubt, copy the effect separately and keep the RAW adjustments individual.
This separation is useful rather than arbitrary. RAW corrections often depend on capture conditions, camera metadata, exposure, and white balance. A stylistic effect may be shared across a set, while RAW development requires individual judgment. Keeping those operations separate helps you avoid applying source-specific adjustments where they don't belong.
Consider a batch that contains RAW photos from one camera and exported JPEGs from another source. The Photo Page effect path is still the one to investigate for the effect. The RAW-settings route is not a universal way to synchronize both groups. A photo's file type and development controls affect whether RAW settings exist and whether the stated same-format condition applies.
If your goal is to establish a similar starting look across mixed formats, treat the effect and the RAW corrections as separate tasks. Copy the effect where appropriate, then judge each photo's development individually. Don't use a RAW-settings paste as a shortcut for every adjustment that happens to make the image look different.
Can I copy an effect between albums?
You can work with photos in albums, but remember that the same source image's edits are shared across albums in the project. Moving or adding a photo to another album doesn't necessarily create an independent copy of that photo's grade and effects.
Blackmagic's Resolve 21 guide states that grades and effects for still images in albums are applied at the source level. If the same image appears in multiple albums in the same project, changing it in one album can change its appearance in another. Use image versions when you need alternate treatments of one source image.
That source-level behavior affects how you plan album organization. An album is a way to organize and work with photos, not a guarantee that every appearance of a file is an isolated duplicate. Before using a second album to create an alternate treatment, decide whether you want:
- The same photo and same edit visible in more than one collection.
- A separate version of the same photo with a different grade.
- A distinct output file created by exporting an edited image.
Those are different goals. Albums group and arrange images. Versions help you keep multiple treatments associated with a source. Export produces a new file for delivery. Avoid treating an album as a duplicate-file command.
If you need to make an alternate look, create a version and work on that version. If you only want the same edited source to appear under another collection, use the album organization tools. Then verify what version is active before copying or exporting.
This distinction becomes important in a handoff. A teammate who sees the same photo in more than one album might assume each album has a separate grade. Don't rely on album membership alone to communicate that intent. If you need distinct treatments, use the version workflow and name or organize your alternatives clearly. If you need a new delivered file, export it as an output rather than expecting a second album to create a new original.
When testing an effect on an alternate version, make sure the version you intend is active before copying attributes. A correct copy from the wrong version can still produce the wrong starting point. Verify the source's effect in the Inspector and confirm the selected target version before you apply anything.
How do I avoid copying the wrong effect or overwriting useful edits?
Select the exact category you want, verify the source and targets, and test the paste on one representative photo before processing the batch. Don't use “select all” as a substitute for deciding what should travel.
A useful pre-paste checklist:
- Does the source photo show the effect you mean to reuse?
- Is the correct source selected when you invoke Copy Attributes?
- Are only intended target photos selected?
- Is Plugins enabled in the Photo Attributes section?
- Are unrelated checkboxes off?
- Is the target photo version the one you intend to edit?
- Have you considered whether each target can use the same effect parameters?
- Do you know how to undo if the result isn't right?
For a mixed album, make smaller selections. You might select one lighting group, apply and review, then select another group. This takes more thought up front but makes mistakes easier to spot. If a batch contains only a few photos, applying the effect individually can be more efficient than spending time organizing a complex selection.
When you do apply to several targets, review the result before exporting. Check the effect list, enable state, and rendered appearance. If one target needs a different strength, adjust it on that target rather than reapplying the source's attributes to the whole batch.
If you are trying to preserve an existing treatment, consider whether copying a full category will replace or add the relevant attribute on the target. The safe answer is to use the most selective checkbox set available and test one photo. If you don't know what a checkbox includes, pause and consult the installed Resolve manual rather than guessing.
A selection audit is worth the few seconds it takes. Before opening Paste Attributes, scan the highlighted thumbnails. Check the first and last photo in the visible selection, and look for any unexpected gaps or additional highlighted images. If the selection spans more than one visible section of the album, scroll through it before you apply the paste.
The source deserves its own check. If the source photo is also selected as a target, decide whether you intend to paste back onto it. If you don't, remove it from the target selection before applying. This avoids an unnecessary operation and makes the target group easier to understand afterward.
An efficient batch plan might look like this:
- Sort or group the photos for review.
- Choose a source whose effect settings match the intended starting point.
- Apply the effect to one representative target.
- Inspect that target and adjust the effect if needed.
- Apply the settings to the rest of that group.
- Review outliers separately.
- Export only after checking the complete set.
This is not a mandatory Resolve procedure. It's a way to reduce the risk of a broad paste hiding a poor fit. For a small group of similar photos, you may not need to create elaborate groups. For a large album with varied subjects, the extra selection and review steps can save more time than they take.
What is the difference between Photo Page effects and Color Page grades?
A Photo Page effect is an item applied from the Photo Page's effects library; a Color Page grade is built with color tools and nodes. They may both change an image, but their transfer controls and organization aren't identical.
DaVinci Resolve 21 integrates the Photo Page with Resolve's color toolset, and Blackmagic describes using albums with node-based grading. That integration is why colorists may move between photo and Color workflows. It doesn't mean the Plugins checkbox is a universal copy command for every grade node.
Use the Photo Page method when the thing you want to repeat is an effect in the Photo Page's Effects tab. Use the Color Page grade-management workflow when you want to transfer or organize node grades. Use shared nodes when the intended behavior is linked, ongoing adjustments across several photos.
The quote from Grant Petty, Blackmagic Design CEO, gives the vendor's wider product framing: “With DaVinci Resolve, you get a complete set of editing, advanced color correction, professional Fairlight audio post production tools, Fusion visual effects and now photo editing all in one application.” It appears in the DaVinci Resolve 21 New Features Guide. That's Blackmagic's description of Resolve's integrated scope, not a claim that every page uses the same copy controls.
If the goal is to learn the Photo Page's broader organization and editing flow, see how to use the DaVinci Resolve 21 Photo Page. For issues that appear after applying RAW adjustments, the guide to Photo Page RAW grading artifacts addresses a different problem.
A simple diagnostic question helps: where did you create the adjustment? If you applied an effect from the Photo Page's Effects Library, start with Plugins in Photo Attributes. If you built a node-based grade, look at grade-copy or node-sharing tools instead. If you changed RAW development settings, use the RAW workflow. The viewer alone can't identify which category applies because all three kinds of work can change the visible image.
The distinction also helps when you work across pages. Blackmagic says Photo Albums can pass full-resolution stills to Cut, Edit, Color, and Fusion for additional processing. That integration expands what you can do with a still. It doesn't make every page's controls interchangeable. Choose the page and transfer method based on the adjustment you actually want to reuse.
What changed between DaVinci Resolve 21 and 21.1?
The core workflow in this guide is for DaVinci Resolve 21's Photo Page, and the version context here is Resolve 21.1, whose manual is listed by Blackmagic Design in September 2026. Check your installed version if a tutorial shows a different control or menu.
Resolve 21 introduced the dedicated Photo Page, image albums, photo effects, and editing integrations. Resolve 21.1 updated the product after that introduction. The official 21.1 announcement describes new and expanded features across Resolve, including expanded support for camera formats on the Photo Page. That announcement doesn't say the copy-effects recipe in this guide has changed.
If you're following an older tutorial from the Resolve 21 beta period, be alert to interface changes, renamed controls, or details that were clarified in the later reference manual. Don't assume every video recorded during the beta uses the same build as your installed 21.1 version.
Before troubleshooting an apparent mismatch:
- Check Help > About DaVinci Resolve for the installed version.
- Confirm you're on the Photo Page rather than the Color Page.
- Look for Photo Attributes in the Paste Attributes window.
- Confirm the source contains an applied effect.
- Consult the current manual from Blackmagic's official Resolve support page.
Version numbers matter most when interface instructions diverge. The basic decision still holds: use Plugins in Photo Attributes for Photo Page effects; use the RAW transfer route for compatible RAW settings; use node-grade tools for node grades.
A tutorial can also be correct for an earlier version and still fail to match your screen. Check whether the video is showing the Photo Page, whether its source image actually has an effect applied, and whether its paste dialog is the Photo Attributes dialog. Those details are more useful than copying a sequence of clicks from a video without checking the context.
Blackmagic's Resolve 21 What's New page describes the Photo Page and its effects support. For exact controls in a particular build, use the manual listed for that version on the support page. A product overview is helpful for understanding the feature; the manual is the better source for procedural details.
What if the effect needs more controls than the Photo Page provides?
Resolve 21's Photo Page includes effects and tools, and albums can connect still images to other Resolve pages for additional processing. The right next step depends on which control you need, not merely on the fact that you want to copy an effect.
Blackmagic's Resolve 21 guide says that Photo Albums can pass full-resolution stills to the Cut, Edit, Color, and Fusion pages for additional processing. If your goal is a node-based grade or a Fusion treatment, the Photo Page may not be the only place to manage that part of your workflow.
Before moving pages, decide whether you need:
- A Photo Page effect repeated on selected photos.
- More detailed node-based color work.
- A Fusion composition or effect.
- A delivery operation for a still image.
- An alternate version of a photo.
For a Photo Page effect, start with Paste Attributes. Moving to another page simply because the transfer is unclear can create a second set of controls and make it harder to identify which adjustment you copied. Use the Photo Page's Effects tab to confirm the effect transfer first.
If your end goal is a delivered JPEG and the exported image looks soft, that's a separate issue from copying effects. The Photo Page JPEG export softness guide covers export quality rather than attribute transfer.
A useful rule is to move to another page only when you can name the control you need there. “I need a node to make a secondary adjustment” is a concrete reason to use the Color Page. “The effect didn't look the same” is not enough by itself. First confirm that the Photo Page effect transferred. Then decide whether another tool is needed to shape the result.
How can on-screen guidance help if I can't find Paste Attributes?
If the menu labels in your installed Resolve build don't match a tutorial, identify the page you're on and the selected source and targets before looking for the command. That context narrows the problem to the Photo Page workflow instead of a different copy operation.
TryUncle is an on-screen assistant for Mac and Windows. You can ask where to find a control and get guidance based on the screen you're working on. For this task, a focused question might be: “I want to copy this Photo Page effect to these selected photos. Where is Paste Attributes, and which checkbox transfers the effect?”
On-screen guidance can help you locate a control while you work, but you still choose the photos, check the attribute selection, and judge whether the result looks right. It isn't a substitute for confirming what the manual says or reviewing each image after the paste.
What should I do next?
For one effect copied to several photos, use Copy Attributes, select your targets, open Paste Attributes, enable Plugins under Photo Attributes, and apply. For RAW settings, use the Photo Album middle-click workflow only when the RAW-format condition fits. For a linked album-wide adjustment, consider shared nodes; for alternate treatments of one source, use image versions.
That distinction is the whole decision. Pick the method that matches the thing you want to transfer, then review a target before committing the same look to the rest of the set.
Frequently asked questions
- How do I copy an effect to other photos in the DaVinci Resolve Photo Page?
- Select the edited photo, copy its attributes, select the target photo or photos, then open Paste Attributes and enable Plugins under Photo Attributes. Click Apply to transfer the effect and its settings.
- Why didn't middle-click copy my Photo Page effect?
- Middle-clicking in a Photo Album copies RAW settings only, and only when the source and targets use the same RAW format. Use Paste Attributes and select Plugins to copy a Photo Page effect.
- Can I paste an effect to several photos at once in DaVinci Resolve 21?
- Yes. Select the target photos in the Photo Album, open Paste Attributes, enable Plugins under Photo Attributes, and apply. Review the targets afterward because the same effect settings may not suit every image.
- Does copying an effect change the original photo file?
- Photo Page edits are stored in the DaVinci Resolve project rather than written into the original photo by the edit itself. Exported files are separate outputs.
- How do I apply the same look to an entire Photo Album?
- For a one-time transfer, use Paste Attributes. For an adjustment you intend to keep linked across photos, consider a shared node when it suits your workflow. Resolve 21 also supports multiple grade versions of an image.
Sources
Put this guide to work with TryUncle.
Ask about the step you’re on. TryUncle sees your screen and points at the control you need, so you can keep learning in your own project.
Get TryUncle for Mac or WindowsKeep reading
Guides · Sep 29, 2026 · 24 min
How to Use DaVinci Resolve 21 Photo Page
Learn how to use DaVinci Resolve 21 Photo page to import, organize, grade, compare, and export still photos in Resolve 21.1.
Fixes · Nov 2, 2026 · 29 min
DaVinci Resolve Photo Page RAW Grading Artifacts: Fixes
Fix odd color, brightness, banding, noise, or detail in DaVinci Resolve 21 Photo page RAW grades with a step-by-step diagnostic workflow.
Fixes · Nov 2, 2026 · 37 min
DaVinci Resolve Photo Page JPEG Export Soft? Fix It in 21.1
Fix a soft JPEG export from the DaVinci Resolve 21 Photo page. Check preview resolution, output size, JPEG compression, RAW settings, focus, and color.