Articles / Fixesupdated for DaVinci Resolve 21.1 (October 2026)
DaVinci Resolve Photo Page RAW Grading Artifacts: Fixes
Quick answer
In DaVinci Resolve 21, first check whether the file is genuinely RAW, then compare the ungraded image, RAW settings, Color page grade, preview resolution, and exported file separately. Update to Resolve 21.1, test with default RAW decoding and color management, and check whether the artifact appears in a full-resolution export before changing more controls.
I know how frustrating this one can be. A photo looks clean in its camera software, then strange color, noisy shadows, broken highlights, or odd edge detail appears in Resolve. The first useful question isn’t “Which slider fixes it?” It’s “Where does the artifact first appear?”
As of October 2026, DaVinci Resolve 21.1 is the version to use as the baseline for this diagnosis. Blackmagic’s 21.1 release notes describe expanded support for still photography and camera formats, but that doesn’t mean every RAW format or every camera-specific image will render identically to another RAW developer. Blackmagic’s 21.1 announcement names new camera support, while the Resolve support page lists the current software updates.
Why does DaVinci Resolve Photo page RAW grading create artifacts?
DaVinci Resolve Photo page RAW grading can appear to create artifacts when the issue is actually in RAW decoding, color interpretation, a grade or effect, the preview, or the export. Separate those stages before changing settings; a single “RAW fix” cannot correct problems with different causes.
The Photo page is a still-image workspace integrated with Resolve’s color and effects tools. Blackmagic’s Resolve 21 New Features Guide describes its link to the Color page and its node-based grading workflow. That integration gives you many grading choices, but it also means a result can be affected at several points.
For troubleshooting, use “artifact” as a description, not a diagnosis. It might mean a colored edge, banding in a smooth sky, unusually crunchy detail, a bright or dark preview, a color cast, clipped-looking highlights, or noise that seems to increase after grading. Those symptoms don’t all share a cause.
A useful investigation has four reference states:
- The source file before Resolve processes it, if you can view it in the camera maker’s software or another RAW developer.
- The ungraded version in Resolve.
- The graded photo in Resolve, with the grade and effects enabled.
- A rendered file opened in another suitable image viewer.
The comparison tells you where to look next. If the ungraded Resolve image already differs from the source, begin with RAW decoding and color interpretation. If the difference first appears after one node or effect, inspect that change. If the viewer looks wrong but the exported file does not, investigate the preview or display path instead of rebuilding the grade.
A RAW artifact diagnosis starts by finding the first stage where the image changes.
That principle matters because a strong correction can make a small existing problem more visible. Lift dark shadows and you may reveal sensor noise. Add contrast and you may make highlight transitions look harsher. Increase sharpening and you may turn fine texture into halos. These changes can create a visible symptom without proving that Resolve damaged the source data.
The rest of this guide follows the image through those stages. It uses controlled comparisons rather than guessed settings. Camera RAW controls vary by format, so exact labels and available adjustments can differ from one supported camera type to another.
How do I tell whether the image is actually RAW?
A file is usable as camera RAW in Resolve only when Resolve recognizes its format and exposes the corresponding RAW controls. If the RAW tab is unavailable, don’t try to fix RAW decoding with a slider that isn’t active.
Select the photo in the Photo page and look at the Inspector. The Resolve 21 manual describes RAW controls as applying to recognized RAW media; processed images such as JPEGs don’t have the same pre-debayered sensor data available to adjust. A JPEG can still be edited, but it has already passed through camera processing and compression.
That difference changes the diagnosis:
| What you imported | What to expect in the Inspector | What to check first |
|---|---|---|
| A camera RAW file that Resolve recognizes | RAW controls should be available | Camera-format support, decode settings, and color interpretation |
| A JPEG exported by the camera | RAW controls may be unavailable | Camera picture style, JPEG processing, and the Photo controls |
| A TIFF or other rendered image | The source is already processed | Bit depth, embedded color profile, and prior edits |
| A file converted by another application | The conversion may have changed its data or profile | Conversion settings, embedded profile, and whether the export is scene-referred or display-referred |
| A filename with a RAW-looking extension that Resolve does not recognize | The file may not decode as expected | Exact camera model, file variant, and version-specific support |
Don’t infer the format from the filename alone. A photo can be renamed, exported, converted, or copied through an application that changes what the file contains. Check the extension and the camera or conversion workflow that produced it.
If you expected RAW controls but see only standard Photo controls, verify that the source file is the original camera RAW rather than a JPEG preview, an in-camera RAW-plus-JPEG companion, or a copy exported from a catalog application. For a batch of images, test one original file first. A whole folder of JPEGs will not gain RAW latitude simply because the camera also recorded RAW files.
This is also where supported-format claims need care. Resolve 21.1’s release announcement names expanded support for specific still-camera formats, including Fujifilm GFX and X series, Leica SL, and Sony A7R V1. That is useful version context, not a promise that every model, firmware, RAW variant, or metadata combination works identically. Check the current Blackmagic support page and test the exact file from your camera.
If the file is recognized and RAW controls appear, the next job is to establish what those controls are doing. Don’t assume every manufacturer exposes the same settings or that a setting name maps perfectly to a control in a different RAW developer.
Why does my RAW photo look different in Resolve than in my camera software?
A RAW photo can look different in Resolve because RAW development includes choices about decoding, white balance, color space, gamma, and image processing. Compare the original interpretation before applying a creative grade, and don’t assume another application’s rendering is a neutral reference.
RAW data isn’t a finished picture. The RAW developer interprets sensor data and produces a viewable image. Different applications can choose different starting interpretations, so a difference in appearance does not by itself show that the file is corrupted or that the grade added an artifact.
The 21 New Features Guide explains that the Photo page’s RAW controls include camera-specific options and suggests using a color space associated with the camera manufacturer or a common video standard, depending on the workflow. Resolve 21.1’s own release announcement also calls out expanded camera and still-photography support. Use those official notes to establish whether your format is listed, then compare one original image rather than an entire shoot.
A disciplined comparison looks like this:
- Open the original in the camera manufacturer’s RAW tool, if available.
- In Resolve, select the photo and record the current RAW settings before changing them.
- Create a version or duplicate for testing.
- Reset or neutralize the RAW adjustments on that test version.
- Compare framing, exposure, white balance, shadow detail, and highlight roll-off.
- Change one RAW setting at a time and note whether the particular artifact changes.
This isn’t a requirement to make Resolve match the camera maker’s application pixel for pixel. Those applications may use different processing, profiles, and defaults. The point is to learn whether your Resolve image changes because of one adjustable RAW interpretation, rather than mixing that question with a creative grade.
Color space and gamma deserve special attention. A mismatched interpretation can make an image look unusually flat, contrasty, saturated, or shifted. The right setting depends on the file and the intended workflow. Avoid copying a color-space choice from a video camera tutorial unless the RAW file and pipeline actually match.
A practical worked example: suppose a landscape file looks too dark and slightly green in Resolve, while a camera application shows a brighter, warmer rendering. That’s a symptom description, not proof of an exposure bug. First compare the ungraded Resolve image with the original RAW viewer. Then adjust white balance or the relevant camera RAW controls on a test version. If the green cast remains only after a node is enabled, the RAW interpretation is no longer the first suspect.
Keep notes. Write down the file extension, camera model, Resolve version, and settings that changed the image. If you later need to report a reproducible issue, this is much more useful than “RAW looks weird.”
How do I fix color or brightness artifacts in a RAW grade?
To troubleshoot color or brightness artifacts, establish a neutral RAW baseline, verify that the image is being interpreted as expected, and then reintroduce the grade one adjustment at a time. Don’t compensate for a possible decoding issue by stacking more corrections on top.
Start by checking the RAW tab, not the node graph. Record the current values. If a control is set unexpectedly, restore a known baseline on a version of the photo and compare. The Resolve 21 manual describes camera RAW adjustments as non-destructive and specific to the supported file type. That makes a separate version useful: you can compare alternatives without overwriting the original image.
Then ask three separate questions.
Is the cast present before the Color page grade? If yes, investigate RAW interpretation, white balance, and color management. If no, inspect the grade or effects.
Does the appearance change when you bypass the grade? The Photo page has a bypass control for Color and Fusion effects. In the Resolve manual, the default bypass shortcut is Shift-D. The shortcut can be useful, but confirm the current bypass state before drawing conclusions: the interface should make clear whether grades or effects are bypassed.
Does the rendered file have the same problem? If not, the viewer or display path may be responsible. If yes, trace the render settings and processing path.
A simple test matrix keeps the investigation honest:
| Test state | What it isolates | What a difference suggests |
|---|---|---|
| Original opened in camera RAW software | Camera or third-party interpretation | A baseline for comparison, not an absolute color truth |
| Resolve image with no Color or Fusion effects | RAW decoding and Photo adjustments | If the artifact appears here, start upstream of the node grade |
| Resolve image with Color page grade bypassed | The contribution of the grade or effect stack | If the issue disappears, restore tools in stages |
| Resolve image with each suspect node disabled in turn | A particular node or group of nodes | The first node that restores the artifact narrows the cause |
| Full-resolution exported image | Rendered output rather than reduced viewer preview | A preview-only issue becomes less likely if export is clean |
| Same export viewed in another color-managed application | Resolve’s display versus the file | A disagreement may involve display profiles or the other viewer |
Don’t use an export test to make a final color judgment on an unmanaged screen. Use it to answer a narrower question: is the file itself affected in the same way as the Resolve viewer? If the appearance changes between applications, check that each application and display is using a suitable color-management path before concluding that one file is “wrong.”
What if the RAW photo is too dark or blown out?
First check the RAW exposure and white-balance controls, then check whether a node, LUT, or output transform is changing the display. A dark-looking preview does not automatically mean the highlights are unrecoverable, and a bright-looking image does not prove that the source contains usable highlight detail.
The Resolve guide describes RAW exposure adjustments in terms of stops and notes that subsequent adjustments can retrieve image data above the current displayed white level. Treat that as a description of the RAW control’s behavior, not as a guarantee that every clipped sensor channel can be recovered. If the camera recorded no usable detail in a channel, a slider cannot recreate it faithfully.
Try the following on a version:
- Compare the image with the RAW adjustment at its neutral or recorded setting.
- Check white balance and the selected RAW color space and gamma.
- Make a modest exposure change, then watch the highlights and shadows.
- Check the scopes as well as the Viewer.
- Bypass the Color page grade and compare again.
- Export a test to confirm that the output follows the viewer.
Change one setting at a time. If you lower exposure and then add gain, contrast, a LUT, and a highlight effect all at once, the next preview won’t tell you which change mattered.
What if the color changes after I add a node or LUT?
A node or LUT can introduce a color or tonal change, so disable it temporarily and compare before resetting the RAW controls. A LUT intended for a different input color space or gamma can produce an unexpected result when applied to a photo.
Use the node graph as a set of controlled switches. Disable the last-added node first. If the artifact disappears, inspect that node’s tool, key, and input assumptions. If not, re-enable it and test the preceding node. This process is slower than deleting the whole grade, but it preserves the chance of identifying the actual change.
For a LUT, verify what input the LUT expects and what output it produces. Don’t assume a video LUT designed for a specific log format is appropriate for a camera still RAW interpretation. A LUT may make a photo look immediately more contrasty while also causing channel clipping, posterization, or strong color shifts.
A LUT can make a mismatch more visible without proving that the RAW file is damaged.
If you need a creative look, keep it separate from technical correction. One node or stage can handle the underlying balance; another can carry the look. That separation helps you see whether the color artifact arrives with the technical setup or the creative treatment.
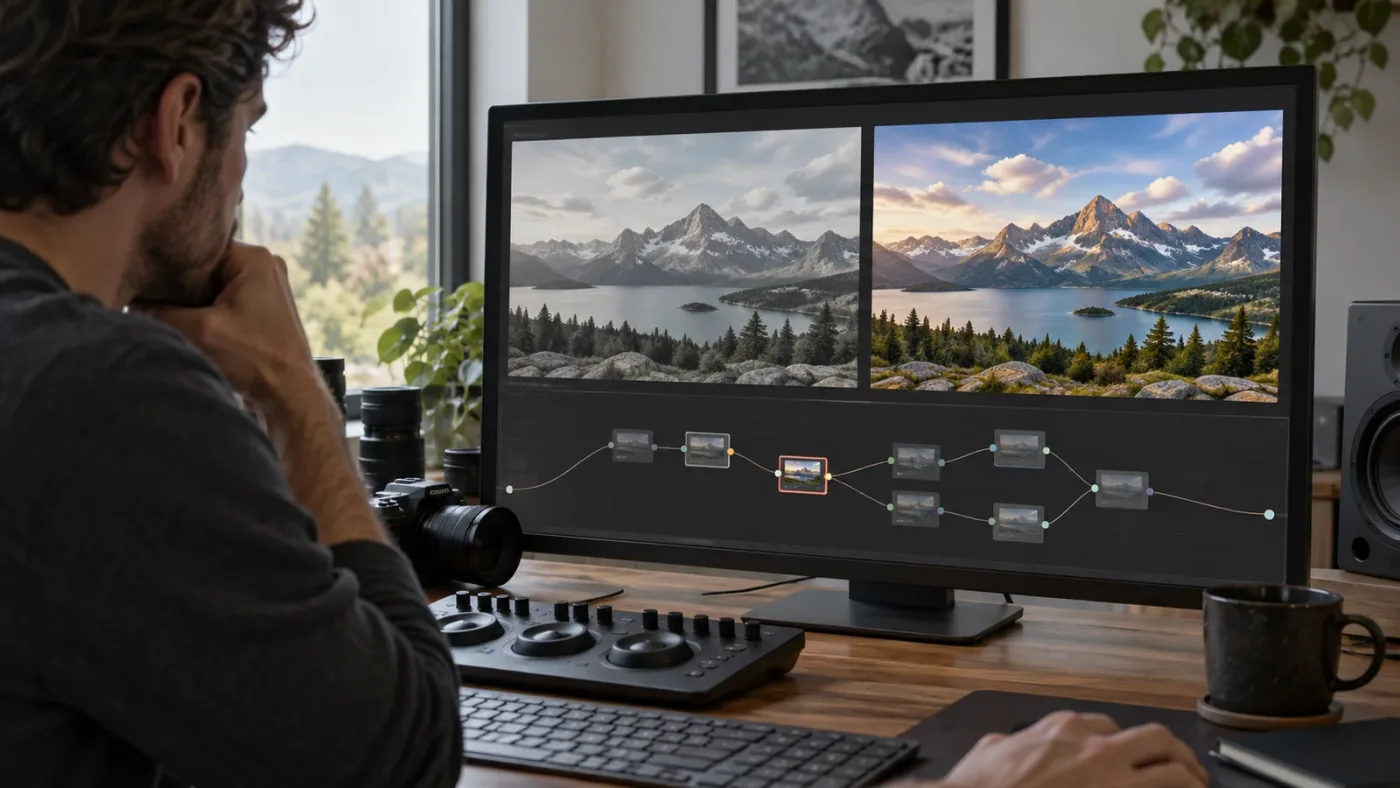
Why does the Photo page RAW tab disappear or stay greyed out?
The RAW tab is greyed out when the selected image is not recognized as RAW media, or when the source is already processed. Confirm the selected file and the format Resolve sees before troubleshooting grading controls.
This is a common false alarm when a project contains both RAW and JPEG files from the same camera. The two files can show nearly identical scenes but have different processing histories. Select the actual RAW original in the Media Pool or Photo Album, not its JPEG companion.
The manual describes the Inspector as context-sensitive: selecting a recognized RAW photo activates the RAW controls, while selecting a normal post-debayered image such as a JPEG deactivates them. That behavior is useful evidence. It does not mean a JPEG has broken RAW settings; it means those settings don’t apply to that processed file.
Check the source chain:
- Did you import from the camera card, or from an application that exports previews?
- Does the filename match the original camera file, including its actual extension?
- Is the selected photo an exported TIFF, JPEG, or PNG rather than the camera original?
- Did a conversion tool render the RAW file into a different format?
- Does Resolve 21.1 list the relevant camera format in the available support information?
If you have the original and a processed derivative, import both into a test project and label them clearly. A one-image test is easier to interpret than a full album with duplicate filenames and mixed formats.
Some formats have sidecar files or camera-specific variants. Keep the original directory structure intact while testing, and avoid renaming or moving components unless the manufacturer’s instructions say that is safe. If Resolve still does not recognize a camera RAW file that appears supported, make a copy of the source for troubleshooting, note the exact software version and camera model, and consult Blackmagic Design’s official support resources.
If you have only the JPEG, use the Photo controls available for processed images. Don’t waste time looking for RAW latitude that the file no longer contains.
Why do I see noise, blotches, or colored pixels after grading RAW?
Noise and colored texture can become more visible after a RAW grade, especially when you lift dark areas or increase local contrast. First decide whether the noise is present in the source, introduced by a particular grade, or visible only in the preview.
A shadow lift changes how much attention the viewer pays to low-level image data. It can reveal sensor noise that was already in the file. Strong saturation adjustments can make color noise more obvious; sharpening and texture effects can make grain-like detail harder to distinguish from real fine detail.
Use a consistent viewing setup. Zoom into a representative dark area at a useful scale, then compare it with a full-resolution export. Don’t diagnose the photo from a tiny thumbnail or from a preview that has been reduced to improve performance.
Try this order:
- View the ungraded source or the cleanest Resolve baseline.
- Bypass all Color and Fusion effects.
- Inspect the same shadow area at the same zoom level.
- Re-enable the exposure change that lifts the shadows.
- Add saturation or sharpening only after checking the exposure change.
- Compare an export with the preview.
If colored blotches appear only after lifting a deep shadow, reduce the lift and reassess the image before applying noise reduction. If a particular noise-reduction effect changes texture or creates smearing, bypass it and compare. Noise reduction is not a neutral switch: it trades detail for a smoother appearance, and the right setting depends on the photograph.
A useful worked example: imagine a low-light portrait with dark hair against a dim background. You raise the shadows, increase saturation, and sharpen the eyes. The background now looks mottled. Test the three changes separately. If the mottling appears as soon as the shadow lift is enabled, the lift is exposing low-level image texture. If it appears after sharpening, inspect the sharpening instead. This example illustrates a diagnostic method; it is not a measured result or a guarantee about every image.
Can lower RAW decode quality cause artifacts?
Lower decode quality changes the resolution used for processing or preview, so compare at a higher quality before judging fine detail. Resolve’s New Features Guide describes Full, Half, and Quarter decode-quality options for RAW, and says lower-resolution decoding can improve performance on slower systems.
That option is a performance trade-off, not a universal image-quality fix. If an artifact looks like jagged edges, softened detail, or a blocky preview, test Full decode quality on one photo. If the detail changes with decode quality but the original-sized export looks correct, the working preview may have misled you. If the full-quality export contains the same defect, keep investigating the file, processing settings, grade, and output path.
The exact choices available can depend on format and project behavior. Save the test as a separate version or duplicate so you can return to the previous setting. Don’t change decode quality, color space, sharpening, and output format together.
Why is the Resolve preview different from my RAW export?
A preview can differ from a full-resolution export because Resolve may use reduced-resolution viewing settings to keep large photos responsive. Check the preview-resolution control and compare the exported file before treating a viewer-only issue as an image defect.
The manual documents Photo preview-resolution options including Auto, Full, Half, and Quarter. In the current manual, Auto reduces images larger than 4K to 4K for preview, while the final output uses the image’s native resolution. This distinction matters when inspecting fine detail: a preview mode is not necessarily a one-to-one view of every source pixel.
A reduced preview can make detail appear softer or change the appearance of small structures. It shouldn’t be used to decide whether the final file has sharpening halos, fine noise, or thin-edge artifacts. Those need a full-resolution check.
Make a small, controlled export. Keep the format and quality settings suitable for the comparison, and don’t resize the image if the goal is to examine its native-resolution detail. Then open the export in another viewer and compare a crop at the same scale.
If the issue appears in the Viewer but not in the exported file, check:
- Photo preview resolution.
- Viewer zoom and scaling.
- Whether Color or Fusion bypass is enabled.
- Display or monitor color management.
- Whether the other image viewer interprets the embedded color profile.
- Whether you are comparing the same version of the photo.
If the issue appears in both the Resolve viewer and the exported file, test the grade and RAW settings. If the issue appears only in the other application, that application’s color handling may be involved. A mismatch between viewers is a reason to investigate, not a reason to assume that the export is automatically right or wrong.
A reduced-resolution Photo page preview is not a substitute for checking a full-resolution export.
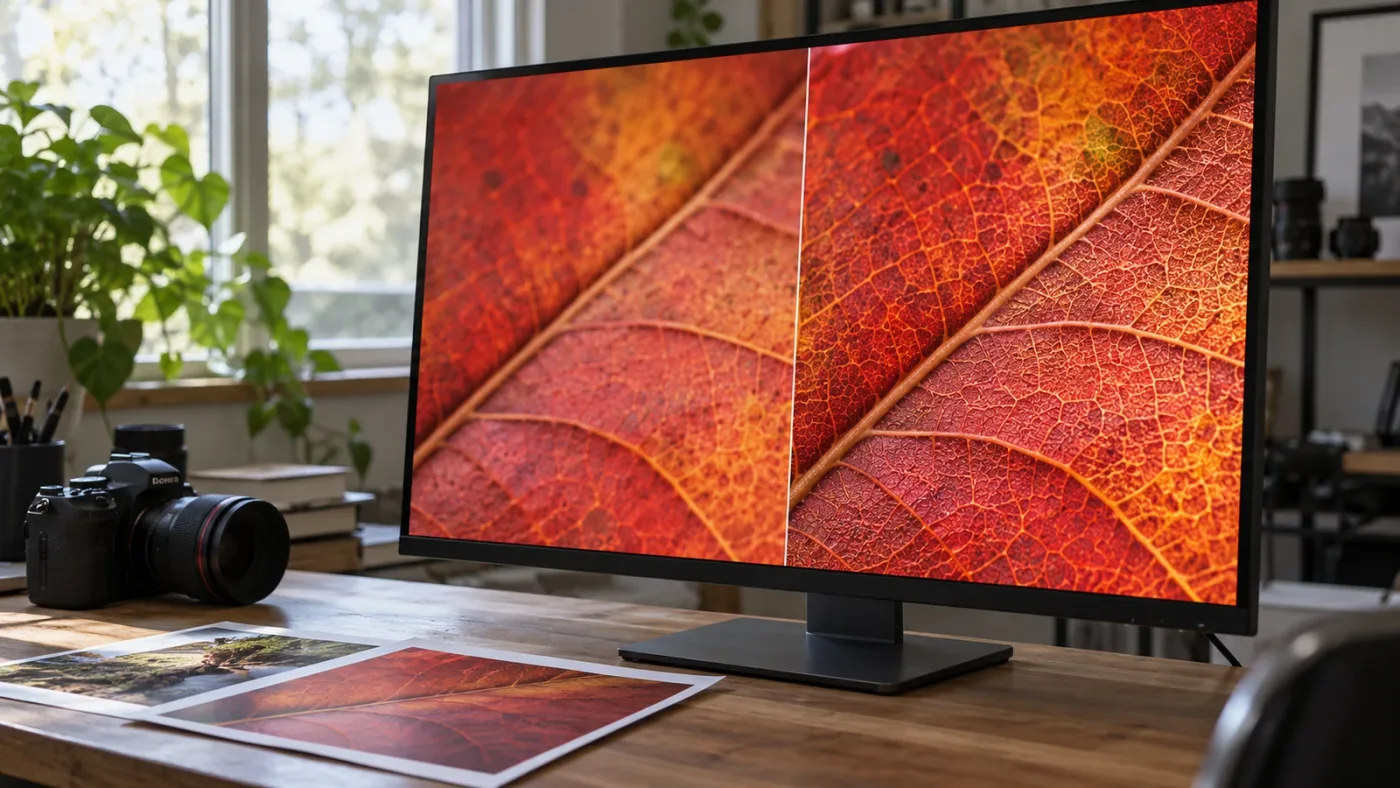
How do I find the node or effect that adds the artifact?
Find the responsible node or effect by turning the grade back on in stages and stopping when the artifact returns. This is more reliable than resetting the whole image because it identifies which processing step changes the result.
Use a version or duplicate first. Then follow this sequence:
- Confirm that the clean, ungraded version is the reference.
- Enable the Color page grade while leaving Fusion effects bypassed.
- If the artifact appears, disable the most recently added node.
- Re-enable that node and test its controls one at a time.
- If the grade is clean, bypass Color and test Fusion effects.
- Test any applied Photo effects separately.
- Check any LUT or output transform after isolating the node that invokes it.
The Photo page integrates with Resolve’s Color and Fusion tools, so the relevant adjustment might not live in the Photo tab. The New Features Guide explains that Photo Albums can pass stills into other Resolve pages, including Color and Fusion. That flexibility is useful, but it means you should trace effects across the whole chain.
Watch for common sources of a sudden change:
- A node with a large exposure or gain correction.
- A saturation adjustment that pushes one channel harder than the others.
- A qualifier that selects a narrow range and creates noisy edges.
- A tracked or static Power Window that exposes a boundary.
- A sharpening effect that produces bright or dark halos.
- A blur or glow that creates a boundary around highlights.
- A LUT expecting a different input space.
- A Fusion effect that adds processing beyond the Color page grade.
Do not assume that every contour is a mask problem. A contour that moves or changes when you disable a particular effect is evidence about that effect. A contour that is visible in the ungraded source may instead reflect source data, compression, or a display issue.
Scopes can help answer whether the image’s levels or channel balance changed, but a scope doesn’t identify the cause on its own. Use it alongside the visual bypass tests. For scope-reading context, see the sibling guide on how to read DaVinci Resolve scopes.
If you can reproduce the artifact only with a particular sequence of nodes, document that sequence. Include the starting file, relevant settings, and the first node that makes the defect visible. This is both a better basis for troubleshooting and a clearer report if you need to ask for help.
How do I check whether a color-management mismatch is involved?
A color-management mismatch is more likely when the image changes noticeably between applications, or when a color-space or gamma choice alters the ungraded interpretation. Compare a known baseline before adding a creative look, and make sure you understand which stage is transforming the image.
Resolve 21 adds Photo page workflows within a larger color-management system. Blackmagic’s 21 New Features Guide notes Adobe RGB color-space and gamma support for the Photo page introduction. That is a specific compatibility fact, not a general instruction to choose Adobe RGB for every RAW file.
Keep these separate:
- The color space and gamma selected for RAW interpretation.
- The project’s color-management settings.
- Any input or output transforms in the node graph.
- The file’s embedded profile.
- The display profile and the application used to view the export.
When those layers are mixed together, a correct adjustment in one place can appear wrong in another. For example, an input transform that assumes one camera space can produce a visible shift if the source is being interpreted as another. Likewise, a viewer that ignores or misreads an embedded profile can disagree with Resolve.
Make one deliberate test. Record the current settings, create a version, and change only the part of the pipeline you suspect. Export the test and inspect its profile and appearance in an application that handles the profile appropriately. If you don’t know what a transform expects, don’t add another one just to force the colors toward a preferred look. Return to the known state and identify the input and output assumptions first.
Avoid broad claims such as “set every still to Rec.709” or “always use camera native space.” Those instructions can be wrong for a particular source and delivery. The appropriate setup depends on the camera RAW format, the project, and the output you need.
For more on one particular color-management symptom, the related guide DaVinci Resolve Color Space Transform makes the image look desaturated covers a different, narrower problem. Here, the key is to test the RAW interpretation and color-management stages independently.
What changed in Resolve 21.1, and should I update?
Resolve 21.1 expands Photo page camera-format support, so it is a sensible version to test when an older 21.x build shows a format-specific issue. Updating is not proof that an artifact is fixed, and it should not replace a controlled before-and-after comparison.
Blackmagic announced Resolve 21.1 on September 8, 2026. Its release announcement names support for Fujifilm GFX and X series, Leica SL, and Sony A7R V1 formats, plus Photo page image adjustments through DaVinci Resolve color panels. The official 21.1 release announcement is the source for those version-specific changes.
Blackmagic’s support page also lists earlier 21.0 updates that matter to photo diagnosis. It says DaVinci Resolve 21.0.1 improved DNG and Apple ProRAW decoding and added Sony α7R VI ARW RAW still support. It lists 21.0.2 as adding faster image bypass switching and improved Inspector text display. These are release-note claims; they don’t establish that every DNG or ProRAW file will render identically across all applications.
Before updating a working project:
- Make a project backup.
- Record the current Resolve version and the camera format involved.
- Keep the original media unchanged.
- Test the same file after updating.
- Compare the clean baseline and a controlled export.
- Save notes about any changed result.
Resolve 21.1 and earlier 21.0 versions are not interchangeable when you’re reporting a camera-format problem. Include the exact version number in a forum post or support request. If the issue disappears after updating, note which version fixed it and keep the original and test project available. If it remains, you’ve ruled out one possible version-specific cause.
Don’t update in the middle of an important deliverable without protecting the project and checking compatibility with your other tools. The update path is a decision, not a grading control.
What should I do if the artifact only appears in the exported file?
If the artifact appears in the export but not in the Resolve viewer, check the output settings, render path, and the application used for comparison. Keep the source, project, and export intact while testing a small representative result.
Start with the simplest export that can confirm whether the defect follows the rendered file. Avoid changing multiple export parameters at once. If you render a new format, change the color settings, resize the image, and alter the grade simultaneously, you won’t know which step mattered.
Check these points in order:
- Confirm that you exported the intended photo version.
- Confirm whether the export is resized or using the photo’s native dimensions.
- Check the output format and quality settings.
- Inspect whether the image has an embedded color profile.
- Open the export in a second application that handles profiles.
- Compare the same image region at a comparable display scale.
- Repeat with the grade bypassed, then with the grade enabled.
If the bypassed export is clean and the graded export is not, return to the node isolation steps. If both exports show the same defect, examine the RAW decode and source. If only one viewer shows it, check that application’s profile handling and display path.
For a batch, test one representative photo first. A single controlled test is easier to interpret than regenerating a full set of deliverables. Keep the test filename distinct from the final output so you don’t mistake an earlier render for the latest one.
When should I convert the RAW file or use another developer?
Convert the RAW file or use another RAW developer when the exact camera format isn’t supported in your Resolve build, when a controlled test still gives an unusable interpretation, or when your workflow depends on a camera-specific correction Resolve doesn’t provide. Keep the camera original and treat a conversion as a new source with its own limitations.
A conversion may produce a TIFF or another rendered image that Resolve can grade, but it can also bake in the converting application’s white balance, tone curve, profile, and other processing. That can be a useful fallback for a project. It is not equivalent to retaining every adjustment available from the original camera RAW file.
Use this decision table:
| Situation | Sensible next step |
|---|---|
| RAW tab is missing for a JPEG or rendered TIFF | Edit the processed file using Photo controls; locate the camera original if you need RAW controls |
| RAW tab is missing for a camera RAW file | Check format support, exact Resolve version, and source-file integrity |
| The image differs before any grade | Test RAW decode, white balance, and color interpretation |
| The image changes after a node or effect | Isolate that node or effect |
| Viewer differs from a clean full-resolution export | Check preview resolution and display behavior |
| Export differs from Resolve and other viewers agree with each other | Inspect Resolve’s export path, selected version, and output settings |
| A camera-specific profile or correction is missing | Develop or convert in the camera maker’s supported RAW tool, then bring a rendered file into Resolve |
| The issue appears only in one camera format or one file | Compare another original from the same camera before changing the whole project |
When converting, preserve the original RAW file and keep the converted file beside it with an unambiguous name. Write down which application created the conversion and which settings you used. That will help you reproduce the result later.
If the picture is important and the file’s native RAW interpretation remains unreliable in your workflow, completing the RAW development in the camera maker’s application may be the most practical answer. Resolve can still handle further grading and finishing on a high-quality rendered image. The honest trade-off is that some RAW-specific adjustments may no longer be available afterward.
How do I report a reproducible Photo page RAW artifact?
A useful bug report identifies the exact source format, Resolve version, settings, and point in the workflow where the artifact first appears. Attach a representative source only when you can share it safely, and avoid describing a subjective mismatch as a universal decoding failure.
Write down:
- DaVinci Resolve version, such as 21.0.1 or 21.1.
- Operating system and computer model.
- Camera make and model.
- The precise RAW format or file extension.
- Whether the RAW tab is available.
- The RAW decode and color settings used.
- Whether the issue is present with Color and Fusion effects bypassed.
- Whether it appears in a full-resolution export.
- The export format and whether another viewer shows the same issue.
- The smallest reproducible test you can make.
Describe the symptom precisely. “The sky develops a band after I enable this node” is more useful than “Resolve makes RAW photos bad.” If possible, compare the same source in the camera maker’s software and in Resolve, while noting that their defaults may not match.
Don’t post client images or sensitive photographs publicly without permission. If you can’t share the original, provide a written reproduction and a cropped, non-sensitive sample that demonstrates the problem. Keep your project copy and source untouched until the investigation is complete.
For support guidance, Blackmagic notes on its official support page that technical support for the free version of DaVinci Resolve 21 is available through its community forums. Use the correct support route for your edition, and include the version and source details so other users can distinguish a file-format issue from a project setting.
What is the shortest safe diagnostic workflow?
The shortest safe workflow is to identify the file type, compare a clean Resolve baseline with the source, bypass grades, verify preview resolution, and inspect a controlled export. Change one variable at a time and keep the camera original unchanged.
- Record the version and file. Note the Resolve version, camera, and exact source format.
- Confirm RAW recognition. Select the original and check whether the Inspector exposes RAW controls.
- Create a test version. Keep a clean reference and avoid overwriting the original.
- Check the ungraded baseline. Compare it with a camera RAW developer if available.
- Bypass Color and Fusion. See whether the artifact remains without those effects.
- Change one RAW control. Test decode quality, white balance, or a relevant camera setting separately.
- Restore the grade in stages. Isolate the first node or effect that brings the artifact back.
- Compare a full-resolution export. Separate a viewer-preview issue from a rendered-file issue.
- Update or convert only when the evidence points there. Check official camera support before deciding.
The visible confirmation is simple: you can identify the first state where the artifact appears and reproduce it by returning to that state. If you can’t, the diagnosis is not finished yet.
The most common mistake is to make several changes at once because the image looks wrong. That may improve the appearance, but it hides the cause and can create a harder-to-reverse grade. A controlled test gives you both a safer workflow and a clearer answer.
If you get stuck locating a specific Photo page control while following these checks, TryUncle is the on-screen assistant for DaVinci Resolve on Mac and Windows, asking in plain words and pointing at the relevant control on your screen. Keep the diagnosis independent of any assistant: the test result, source file, and rendered comparison determine what to do next.
Which fix should I try first for my artifact?
Try the fix that matches the first stage where the problem appears, not the most dramatic-looking symptom. RAW-tab problems start with file recognition; a preview-only issue starts with preview settings; a node-specific issue starts with node isolation; and an export-only issue starts with output and color-management checks.
| First place you see the problem | Start here | Avoid doing this first |
|---|---|---|
| RAW tab is unavailable | Confirm the selected file is the original RAW and check format support | Searching for RAW controls on a JPEG |
| Ungraded Resolve image differs from the camera software | Check RAW decode and color interpretation | Adding a creative LUT to force a match |
| Image changes after one node | Disable and inspect that node | Resetting the entire grade before identifying it |
| Small detail looks wrong in the Viewer only | Check preview resolution and zoom | Judging fine detail from a reduced preview |
| Shadows look noisy after exposure changes | Compare the baseline with the lifted version | Applying strong noise reduction before isolating the lift |
| Only one application shows the color shift | Check profile and display handling | Assuming the export is necessarily damaged |
| Full export contains the defect | Repeat with a controlled grade-bypass test | Re-rendering a whole album with many settings changed |
| One camera format causes the issue | Check the exact Resolve version and supported format | Treating one camera’s behavior as a universal RAW rule |
For practical Photo page orientation, the sibling guide How to use the DaVinci Resolve 21 Photo page explains the broader still-image workspace. For general node-based grading, see how to color grade in DaVinci Resolve.
The safest first fix is the smallest test that can confirm or rule out one cause.
If the artifact persists after these checks, stop changing the image and preserve the test. Capture the exact version, camera format, relevant settings, and whether the exported file shares the symptom. That gives you a useful next step: a version-specific support question, a camera-maker RAW workflow, or a deliberate conversion for finishing in Resolve.
Frequently asked questions
- Why does my RAW photo look different in the DaVinci Resolve 21 Photo page?
- Check the camera RAW decode settings, selected color space and gamma, project color management, and whether you are viewing a reduced-resolution preview. Compare the ungraded image and a full-resolution export before deciding that the RAW file or grade is damaged.
- Why is the RAW tab greyed out in DaVinci Resolve Photo page?
- The RAW tab is available for media Resolve recognizes as RAW. A JPEG or another already-debayered image does not provide the same camera RAW controls. Check the actual file format and whether the image was converted before import.
- How do I fix noisy or blotchy RAW photos in DaVinci Resolve 21?
- Start with a clean baseline: reset the RAW adjustments on a version of the photo, inspect it at full resolution, and temporarily bypass Color page grades and effects. Then change one relevant RAW control at a time. If the noise remains in the original or appears only after a heavy exposure lift, it may not be a Photo page grading artifact.
- Does Resolve 21.1 fix DaVinci Resolve Photo page RAW grading artifacts?
- Resolve 21.1 expands Photo page camera-format support, but that does not establish that every artifact in every RAW file is fixed. Update, check Blackmagic Design's camera-support notes, and compare a controlled export from the same original file.
Sources
Put this guide to work with TryUncle.
Ask about the step you’re on. TryUncle sees your screen and points at the control you need, so you can keep learning in your own project.
Get TryUncle for Mac or WindowsKeep reading
Guides · Sep 29, 2026 · 24 min
How to Use DaVinci Resolve 21 Photo Page
Learn how to use DaVinci Resolve 21 Photo page to import, organize, grade, compare, and export still photos in Resolve 21.1.

Guides · Jul 7, 2026 · 35 min
How to Color Grade in DaVinci Resolve: The Basics
Learn how to color grade in DaVinci Resolve: build a node chain, balance shadows and highlights with Lift, Gamma, and Gain, and read the scopes.
Fixes · Jul 30, 2026 · 23 min
DaVinci Resolve Color Space Transform: Image Looks Desaturated
Why a DaVinci Resolve Color Space Transform makes your image look desaturated, and the exact Tone Mapping, Gamut Mapping, and node fixes that restore it.