Articles / Fixesupdated for DaVinci Resolve 21.1 reference documentation, November 2026
DaVinci Resolve PowerGrade Watermark in Free Version: Fix It
Quick answer
A DaVinci Resolve Studio watermark after applying a PowerGrade in the free version usually means the grade uses a Studio-only feature. Select the affected clip, inspect its Color page node graph, and bypass suspect effects one at a time. Disable or replace the trigger, or use Studio if the effect is essential. There’s no export setting that keeps a Studio-only effect active while removing its limitation.

I know the moment: a grade looks promising, then a DaVinci Resolve Studio mark covers the image. The PowerGrade may be mostly ordinary color corrections with just one effect the free version can’t fully use. In DaVinci Resolve 21, the reliable fix is to find that effect in the grade’s node graph and decide what to do with it.
Why does a PowerGrade create a watermark in the free version?
A PowerGrade is a saved grade that can be applied to another clip, and its node graph may include features that require DaVinci Resolve Studio. The watermark is Resolve’s notice that the free version has encountered one of those features, not proof that every part of the PowerGrade is unusable.
Blackmagic Design explains in its DaVinci Resolve 20 Beginner’s Guide that Studio-only filters can be applied in the free version, but the watermark remains when the affected clip plays. The guide also says that opening the same project in Studio removes that limitation. That description is useful for understanding the behavior in Resolve 21, but it is a Resolve 20 guide, so check the current feature split in Blackmagic’s Resolve 21 product information before assuming a specific effect is still restricted.
The key distinction is between the saved grade as a whole and the individual operation that triggers the watermark. A PowerGrade might contain several regular nodes for exposure, contrast, curves, saturation, and color shaping, then one node that uses a Studio-only effect. The free version can still show and process much of the grade, but it can’t provide a clean result while the restricted feature is active.
A PowerGrade watermark usually points to a restricted feature inside the grade, not a broken PowerGrade file.
That matters because deleting the entire PowerGrade is usually unnecessary. A more careful diagnosis can preserve the parts that work in the free version and isolate the element that doesn’t. If the particular effect is essential to the look, Studio may be the appropriate answer. If it isn’t, disabling or replacing it may be enough.
A watermark that says “DaVinci Resolve Studio” is also different from a creator logo, a demo stamp from a third-party plugin, or text that has been burned into the original footage. Don’t start cropping or blurring the image until you know which kind you’re seeing. This guide is about the Studio mark triggered by a feature in a PowerGrade.
How can I tell whether the PowerGrade caused the watermark?
If the mark appears when you apply a PowerGrade and disappears when that grade is bypassed, the grade is a strong suspect. Confirm the link by comparing the same clip with and without its grade, then check whether a Studio-only feature is active in its graph.
Start with the visible evidence. Does the watermark show only over a particular shot? Does it appear after applying the PowerGrade? Does it stop when you bypass the grade? Those clues narrow the problem, but they don’t yet identify the exact effect. Another correction, plugin, or track-level treatment may also be involved.
Use a small, controlled test rather than changing several things at once:
- Choose one clip that displays the Studio watermark.
- Note the clip and the point in the timeline where you can see it clearly.
- Temporarily bypass the clip’s grade.
- Watch the Viewer again at the same point.
- If the mark disappears, restore the grade and inspect its nodes individually.
- If the mark remains, continue the search outside that grade.
This comparison does not require you to delete the grade or alter the exported file. It’s a diagnostic check. The aim is to learn whether the mark follows the grade before you edit any part of the node tree.
When bypassing a grade changes the image but not the watermark, don’t assume the PowerGrade is innocent in every case. A different clip, an adjustment clip, a group correction, or a separate effect may still be contributing. Resolve projects can stack changes in more than one place. A grade can also be applied at different levels, so inspect the part of the project that actually affects the shot you’re viewing.
Check what kind of mark you have, too. If a plugin displays its own company name or a “demo” overlay, that may be a licensing watermark from the plugin rather than Resolve’s Studio limitation. If the mark is visible in the original media file when opened outside Resolve, it’s part of the footage. A Studio watermark points instead to a feature the free version can’t fully use.
Avoid judging the final outcome from a single paused frame. Blackmagic’s guide describes the Studio watermark in relation to playback on an affected clip. Scrub and play through the relevant section, and later inspect an actual test render. That gives you a clearer answer than staring at one still in the Viewer.
How do I find the affected clip before inspecting the PowerGrade?
Play the timeline and write down which clips show the Studio mark before opening node after node. The affected clip is your starting point; inspecting every grade in the project at once wastes time and makes it easy to change the wrong correction.
Move through the timeline at normal playback speed, especially if the watermark seems intermittent. Note the shot where it first appears, whether it stays for the whole clip, and whether it returns later. If the timeline contains many shots, place a temporary marker or record the clip name and timecode in a note. The useful fact is the match between a specific visible section and the effect stack that influences it.
Then inspect the layers that can affect that section:
| Where the effect may be | What to check | What the check tells you |
|---|---|---|
| The clip itself | Its Color page grade and any clip-level effects | Whether the trigger travels with the graded shot |
| An adjustment clip | The adjustment clip spanning the affected section | Whether a shared effect is applied above several clips |
| A group grade | Group Pre-Clip or Post-Clip corrections, if the project uses groups | Whether a group-level correction affects multiple clips |
| A timeline-level treatment | Any project-specific effect affecting the whole timeline | Whether the source is broader than one PowerGrade |
| A third-party effect | Plugin name, license state, or demo overlay | Whether the mark belongs to the plugin rather than Resolve |
This table is a diagnostic map, not a claim that every project uses these structures. If the project doesn’t use groups or adjustment clips, skip those rows. If the watermark follows only one clip, start there. If it appears on several shots at once, look for something they share before examining each grade independently.
There’s an important clue in the difference between one affected clip and many. A Studio-only effect inside one PowerGrade usually points you to the clip carrying that grade. A mark across a run of clips may indicate a shared grade, an adjustment clip, or another treatment that spans them. The pattern doesn’t prove which one is responsible, but it helps direct your inspection.
If you didn’t create the timeline, don’t assume the visible correction is on the selected clip. The PowerGrade may have been applied at a group level, or someone may have put another effect on an adjustment clip. Follow the layers affecting the picture, not just the thumbnail that looks like the grade you remember applying.
Keep your first pass reversible. Don’t delete a node or remove attributes from the clip while you’re still diagnosing. Record the clip, the node you’re testing, and whether bypassing it changes the image or watermark. That short note protects you from losing track when the grade contains many nodes.
Where is the PowerGrade node graph in DaVinci Resolve 21?
The node graph is on the Color page, where Resolve assembles corrections into a node tree. Select a clip that shows the mark, open the Color page, and inspect the grade attached to that clip rather than trying to diagnose the PowerGrade from its Gallery thumbnail alone.
A PowerGrade is saved as a still with grade information. Blackmagic’s Resolve 21.1 Reference Manual describes the Gallery as a place where stills store a clip’s grade so it can be copied later, and describes the Node Editor as the place for building multi-correction grades from individual corrections. That distinction explains why the thumbnail is not a full diagnostic view: the node editor is where you can examine the operations that make up the grade.
A practical route is:
- Select the clip that displays the watermark.
- Switch to the Color page.
- Open the Gallery if it is not already visible, and locate the applied still or PowerGrade if you need to identify its source.
- Make sure you are viewing the selected clip’s node graph.
- Inspect the nodes and any node-based effects connected to them.
- Test a suspect node by bypassing it, then watch the Viewer.
Resolve 21 offers a layer-list view for node graphs, as noted on Blackmagic’s What’s New page. If the project is using a layer list rather than a connected graph, use the view that lets you inspect the corrections in context. The visual arrangement may differ, but the diagnostic goal does not: find the effect contributing to the image and test that operation without discarding the rest of the grade.
A node’s label can help, but it isn’t proof of what the node does. A node called “Film” could contain a look built from regular controls, a Studio effect, or a mix. Likewise, an unlabeled node may still contain a restricted effect. Inspect the actual operation or effect name where Resolve exposes it, and don’t decide from a thumbnail, label color, or the seller’s description alone.
If you need a refresher on reading a grade’s structure, see how to use PowerGrades in DaVinci Resolve. For a deeper look at graph organization, shared nodes versus regular nodes explains why a change to a shared correction can affect more than one clip.
How do I test nodes without damaging the PowerGrade?
Bypass one suspect node at a time, observe the Viewer, and turn the node back on before testing the next one. This controlled comparison identifies the trigger while preserving the original grade and gives you a way to confirm that the node, rather than another change, caused the watermark.
Make a copy of the grade or save a version of the project before experimenting if you’re worried about losing the original. The exact backup method depends on how you manage your project, but the principle is simple: keep a recoverable original before changing a supplied grade. Do not start by deleting every node that looks unfamiliar.
Use a repeatable test:
- Keep the playhead on the affected clip at a frame where the watermark is visible.
- Choose one node that contains or controls a likely Studio-only effect.
- Bypass that node using the control available in your Resolve layout.
- Check both the watermark and the image.
- Restore the node before you test a different suspect.
- When one node changes the watermark, toggle it again to verify the result.
The image comparison matters as much as the watermark. If the mark disappears but the image loses a distinctive glow, grain, halation, or noise-reduction treatment, you’ve learned the cost of removing that node. You haven’t yet decided whether that cost is acceptable.
Don’t mistake a node that changes the image for the watermark trigger. Most ordinary correction nodes change the picture. The relevant test is whether bypassing the node affects the Studio mark as well. A node can be visually subtle and still contain a restricted operation, while an obvious contrast node may be entirely available in the free version.
If the grade has many nodes, work in a logical order. Start with nodes explicitly labeled for effects, film treatment, texture, blur, noise cleanup, or other specialized processing. Then test nodes with names that match the PowerGrade’s advertised look. After that, examine unlabeled nodes. Names are search aids, not verification.
A quick all-grade bypass can answer whether the watermark is related to color processing, but it cannot identify the node. Use it only as an initial split in the diagnosis. Restore the grade and continue node by node. Leaving the whole grade bypassed may make the Viewer clean, but it doesn’t solve the request to keep the look.
If you bypass the suspect node and the watermark still appears, re-enable it and test another candidate. The trigger could be elsewhere in the graph, on another clip, or in a different part of the effect stack. Avoid deleting nodes while you’re uncertain. Bypass is a test; deletion is a decision.
For a long graph, you can make the search less chaotic without assuming that a particular node is responsible. First test nodes that visibly host named effects. If none changes the mark, test the remaining nodes one at a time. You can temporarily bypass a small group to determine whether the trigger is somewhere in that group, then restore the group and test its members individually. That narrows the search, but it does not replace the one-at-a-time confirmation. Make sure you restore each test state before moving on.
A node can also hold more than one operation or be part of a shared setup. If bypassing it removes both the watermark and a useful correction, don’t assume the entire node must be discarded. Inspect what it contains and whether the effect can be separated from the other work. If it can’t, preserve the original and treat the replacement as a separate grade rather than trying to dismantle the only copy.
Which node is likely to contain a Studio-only effect?
A node that contains a Studio-only Resolve FX, OpenFX, or another restricted feature is a likely trigger, but a node’s name or position alone cannot confirm it. Inspect the effect itself and verify by bypassing the node while watching the watermark.
Resolve Studio includes additional effects and tools beyond the free version. Blackmagic’s Studio product page lists Studio features, while its general DaVinci Resolve page describes the free version and Studio as separate editions. The exact list can change between releases, so don’t rely on an old forum post or a product listing from another year to classify every node in a Resolve 21 project.
Potentially suspicious nodes are those that use a specialized effect that the free version identifies as Studio-only. A PowerGrade creator may have added that effect deliberately, or it may be bundled into a look whose product page emphasizes a visual style instead of enumerating every underlying operation. If a particular effect is mentioned by name in the seller’s instructions, use that name as a lead, then confirm it in Resolve.
A useful distinction:
| What you see in the grade | How to treat it |
|---|---|
| Ordinary primary correction controls | Don’t assume they require Studio; test only if the watermark evidence points there |
| A named Resolve FX or OpenFX | Check whether that effect is available in your installed edition and version |
| A DCTL or supplied look component | Identify what it does and whether the PowerGrade depends on another Studio feature |
| A third-party plugin | Check the plugin’s own license and watermark behavior separately |
| A node labeled “grain,” “glow,” or “film” | Treat the label as a clue only; inspect the actual tool inside it |
| An unfamiliar or empty-looking node | Inspect its connections and controls before removing it |
This is deliberately cautious. Similar-looking results can be made with different tools. A node labeled “grain” could refer to an effect, a DCTL, or a collection of ordinary adjustments. The label isn’t enough to say whether it is restricted, and the name of a preset doesn’t tell you the licensing status of each component.
The node graph may also contain effects that don’t visibly change the current frame. A key, mask, or secondary correction might be prepared for a later adjustment. Disabling it could appear to have no cost on one shot and still matter elsewhere. Before permanently removing a node, check other clips that use the same PowerGrade or shared correction.
If Resolve shows a limitation dialog when you select or activate an effect, note its name and the edition you’re using. That is more useful than trying to infer the restriction from a node’s color. Then look up the current feature split in Blackmagic’s official product information or manual for your version.
A node label is a clue, not proof that its effect is free or Studio-only.
Don’t build a list of “always restricted” effect names from a post written for an earlier release. The availability of a tool can depend on Resolve version, edition, and sometimes how a third-party effect is licensed. When the exact node matters, the strongest evidence is the limitation dialog or a repeatable bypass test in the installation you’re using, followed by a check against current Blackmagic documentation.
What does bypassing a node do to the grade?
Bypassing a node lets you compare the picture with that node’s operation active and inactive. It does not replace the effect, and it doesn’t establish that the rest of the PowerGrade is compatible with the free version.
Look at three things during the test:
- The watermark: Does it vanish while the node is bypassed?
- The image: Which part of the look changes?
- The rest of the graph: Does the grade remain connected and does the shot still look usable?
If the mark disappears when the node is off and returns when it is on, you have strong evidence that the node contains a trigger. You still need to decide whether the visual change is acceptable. An effect may be the defining part of the look. Turning it off can make a technically clean image that no longer matches the PowerGrade’s intended style.
If the image barely changes, that doesn’t automatically mean the node is unnecessary. The effect may be subtle, may depend on the scene, or may be designed for a different kind of footage. Compare more than one frame and, where practical, another shot. The PowerGrade may behave differently on bright exteriors, dark interiors, skin tones, or scenes with strong highlights.
Also distinguish a node’s direct contribution from what later nodes do with it. The output of one correction feeds into subsequent operations. Removing an earlier step can change how a later step behaves, even if that later node remains enabled. This is why a one-at-a-time test is more informative than bypassing half the graph and judging the result in isolation.
A screenshot or still of the node graph can help you restore the setup, but don’t treat a still thumbnail as a substitute for checking the rendered result. Color display, viewer settings, and the source footage can affect how the grade appears. The watermark diagnosis is about feature availability; the visual judgment remains about whether the edited picture meets your needs.
If you’re working on a deadline, make the smallest reversible change that addresses the mark. Disable the confirmed trigger and render a short test. If the shot is acceptable, keep going. If the look falls apart, restore the effect and consider a replacement or Studio rather than quietly removing unrelated nodes.
There’s another useful distinction: a node can be the trigger even when the restricted effect contributes only a small part of the visible style. The trigger test answers “which operation is causing the limitation?” It doesn’t answer “is this operation important?” Those are separate decisions. First identify the cause. Then judge the picture without it.
What should I do if disabling one node removes the watermark?
If bypassing a node removes the watermark, confirm that result by re-enabling it, then choose whether to leave it off, replace the effect, or use Studio. The right choice depends on how much of the PowerGrade’s look comes from that node and whether a free tool can achieve an acceptable substitute.
There are three sensible outcomes:
| Choice | Best when | Trade-off |
|---|---|---|
| Leave the node disabled | The image still works without the effect | The final grade may differ from the advertised look |
| Replace the effect with a free tool | A free tool can produce a suitable result for your footage | You may need to rebuild part of the look and retune the grade |
| Use DaVinci Resolve Studio | The restricted effect is essential to your intended result | You need an activated Studio license and must check the current terms and price |
Don’t treat the replacement route as a promise of identical results. A free blur isn’t automatically equivalent to a particular lens effect. A basic texture adjustment isn’t necessarily the same as a dedicated film-grain tool. Noise reduction can be particularly difficult to replace because the desired result depends on the footage and the specific method.
The sensible test is visual and practical. Compare the original PowerGrade with the modified version on representative footage. Check skin, highlights, shadows, and any areas where the effect is meant to be most visible. If you’re grading a sequence rather than one clip, compare neighboring shots as well. A replacement that looks acceptable on one frame may not hold up across a moving shot or a different exposure.
If a node combines multiple operations, disabling the whole node can remove more than the Studio-only feature. Look inside it where possible. If the node is a single effect, bypassing it may be straightforward. If it contains a compound setup, you may need the PowerGrade creator’s instructions to separate the restricted operation from the free corrections.
The creator may provide a free-version variant, an alternate node tree, or an explanation of which effect is optional. Ask for that before rebuilding a complicated look. A preset seller who advertises compatibility should be able to tell you which parts require Studio, but don’t assume that every PowerGrade listing includes this information.
If the effect is central to the grade and you need that exact treatment, Studio is the direct route. Blackmagic’s documentation says the watermark associated with a Studio-only feature disappears when the same project is opened in Studio. Verify that the Studio license is active and that you have installed the Studio edition, rather than assuming that merely purchasing a license has changed the running application.
What if I can’t find the Studio-only node?
If you can’t find the trigger in the selected clip’s Color page graph, check shared or track-level effects and confirm you’re inspecting the clip that actually displays the mark. The watermark may come from another part of the timeline, not the PowerGrade you first suspected.
Work outward from the clip:
- Confirm the selected timeline clip is the one displaying the watermark.
- Check whether an adjustment clip overlaps that section.
- If the project uses groups, inspect the group corrections as well as the clip correction.
- Check whether the same effect is applied elsewhere in the stack.
- Look for third-party plugins that may display their own demo watermark.
- Temporarily bypass the grade or effects in a controlled way to determine which layer matters.
Don’t remove all clip attributes as a first response. Broad removal commands can clear corrections and settings you intended to keep. A PowerGrade can be only one layer of the final image, and resetting the whole clip may erase useful work without identifying the actual trigger.
Try one clean test clip if the project allows it. Apply the PowerGrade to a copy of a clip, note whether the watermark appears, and inspect only that test. This can separate the PowerGrade from unrelated timeline effects. Keep the test inside a duplicate project or a safely reversible setup; don’t overwrite a client timeline just to see what happens.
If the watermark appears across many clips, look for a shared source before testing every grade. An adjustment clip can affect several shots. A group-level grade can affect multiple clips assigned to that group. A timeline-wide or plugin-level effect can also make a local PowerGrade appear responsible when it isn’t.
If the mark doesn’t behave like a Studio watermark, change your diagnosis. A plugin watermark may require activation or removal of that plugin. A source-file logo is part of the media. A text overlay could be a title, a burn-in, or a graphic. The name and behavior of the mark tell you where to look; don’t try to hide one kind of watermark using a fix meant for another.
For especially complex graphs, simplify the test rather than the project. Duplicate the clip, bypass one level at a time, and watch for the moment the mark changes. Record each result. That takes longer than randomly deleting nodes, but it preserves the grade and leads to a defensible conclusion.
Could a group grade or shared node be the real trigger?
Yes. If the same watermark appears on clips that share a group correction or shared node, inspect that common correction before changing each clip separately. A PowerGrade may be part of the problem, but a group-level effect can make the symptom seem wider than the preset itself.
Resolve 21’s official feature notes describe group grade versions and explain that group corrections can affect clips in a group uniformly. The same notes describe layer-list node graphs, where nodes are shown in rows rather than only as a connected diagram. That matters during diagnosis because the selected clip’s visible node view may not be the only correction stage in the image pipeline. Check the clip grade and the project’s group setup, if it uses one.
Use the pattern of affected shots to guide the search:
| Symptom | First place to inspect |
|---|---|
| One clip shows the mark; nearby clips do not | That clip’s grade and clip-level effects |
| Several clips in one group show it | Group Pre-Clip or Post-Clip corrections, plus each clip’s own grade |
| Every clip under an adjustment clip shows it | The adjustment clip and the effects applied to it |
| The mark appears only on clips using one PowerGrade | That PowerGrade and any effects added after it |
| The mark appears in different projects or with unrelated grades | The active Resolve edition, a plugin, or the media itself |
This is a search order, not a diagnosis by itself. One group can contain a mix of graded and ungraded shots. An adjustment clip can overlap only part of a timeline. A shared node can be used in more than one place. Use the pattern to decide where to test, then confirm the cause with a reversible bypass.
If you find the trigger in a shared node, pause before disabling it. The change may affect multiple shots, not just the one you used to troubleshoot. Compare representative clips in the group. A shared correction that works on a daylight exterior may not suit a dim interior, even when the watermark issue is solved.
When multiple clips share a watermark, look for a shared correction before editing each clip.
If you aren’t sure which group version or node graph is active, don’t delete or overwrite versions while diagnosing. Record which clip and correction stage you’re viewing. Blackmagic’s Resolve 21.1 Reference Manual is the source to consult for the current Color page controls and node-editor terminology. The exact labels can vary with the selected view and project layout.
Can a free alternative preserve the PowerGrade’s look?
A free alternative can sometimes preserve the broad character of a PowerGrade, but it may not reproduce a Studio-only effect exactly. Replace only the confirmed trigger, then compare the result on your actual footage instead of expecting a one-click equivalent.
A PowerGrade is a starting point, not a guarantee that the same settings suit every camera, exposure, or scene. A grade made for one clip can react differently to another. The source image, color management, contrast, and node order all influence the result. So a replacement should be evaluated as a new grade, not as a feature-for-feature conversion.
Think in terms of the visual job the restricted effect is doing:
| Desired result | A free-version direction to investigate | What to watch |
|---|---|---|
| Softer highlights or a gentle glow | Build a restrained glow-like treatment with available tools | Highlight clipping, halos, and whether the effect looks too strong |
| Added texture | Use a supported grain or texture approach available in your edition | Fine detail, shadow noise, and consistency across shots |
| Cleaner image | Balance exposure and color carefully before adding sharpening or contrast | Don’t mistake smoothing for actual noise removal |
| Local color or brightness adjustment | Try a qualifier or Power Window where appropriate | Edges, tracking, and spill onto nearby colors |
| Lens-like blur | Test a free blur tool and shape its contribution carefully | Focus falloff, edge behavior, and resolution |
| A distinctive film treatment | Rebuild the look with controls available in the free edition | Matching the intended contrast and color without claiming equivalence |
These are directions, not guaranteed substitutes. Some looks can be approximated with ordinary corrections; others depend on a dedicated effect or a chain of operations that has no direct free counterpart. If you’re not sure what the effect is meant to accomplish, ask the grade’s creator before removing it.
Test the alternate grade on more than one frame. For a moving shot, play through motion. For a multi-shot sequence, check cuts and adjacent footage. If the replacement changes contrast or color balance, recheck the rest of the node tree because later nodes may respond differently to the new input.
Don’t stack several substitute effects just to recreate a marketing image. That can add complexity without improving the clip. Compare the image to your goal, not to the name of the PowerGrade. If the footage needs a natural correction rather than a stylized look, a simpler free grade may be more useful than a poor imitation of an effect that requires Studio.
The same principle applies when a PowerGrade contains several restricted nodes. Disable and evaluate them separately. If you bypass all of them at once, you may remove the very component that gives the grade its identity, and you won’t know which change mattered.
For a broader grounding in color correction before rebuilding a look, see how to color grade in DaVinci Resolve. The goal is not to preserve a preset at any cost. It’s to make an image that works for your footage and can be exported cleanly in the edition you have.
How do I compare a replacement across different shots?
Use a small set of representative shots rather than judging the replacement on the first clip you tested. A PowerGrade can produce different results on different footage, so a workaround that removes the watermark and looks fine on one frame may create a mismatch elsewhere.
Choose examples based on the footage you actually have. A useful comparison might include a face, a bright highlight, a shadow-heavy shot, and a shot with strong saturated colors. These are categories for your review, not a claim that every project needs exactly four clips. The point is to look at the conditions where the effect or replacement may behave differently.
For each selected shot:
- Keep an untouched copy or version of the original grade.
- Apply the same confirmed change to the test version.
- Compare the original and modified images at the same playhead position.
- Play the shot to check movement, tracking, and changes over time.
- Compare the modified shot with the clips before and after it.
- Note whether the visual change is acceptable, not just whether the watermark is gone.
A still comparison helps with color and texture. Playback helps with effects that move or depend on tracking. For example, a local mask or blur can appear reasonable on one frame and drift as a subject moves. If the PowerGrade contains no tracking or motion-sensitive effect, that particular check may not apply. Use the visual task as your guide.
Don’t chase a pixel-for-pixel match to the PowerGrade’s marketing image. The creator may have used different footage, color management, or other corrections. Your decision is whether the result fits your project, not whether you can reproduce an image made under different conditions.
If the modified grade is acceptable on some clips but not others, avoid forcing one answer across the whole sequence. You may choose another grade for the outlier shots, adjust the replacement per clip, or use Studio for the shots that need the restricted effect. Keep track of which option you used so the final sequence remains consistent.
A clean image is not automatically a matching image; review the grade on the footage you’ll actually deliver.
The colorist Paul Paulson described a simple starting point for grading in a Blackmagic Design report about Alien: Romulus: “I typically start with doing offset grading to get a general balance on the shot.” That’s not a rule for diagnosing a watermark. It is a useful reminder that the creative result matters as well as the technical trigger. If removing the effect leaves the shot unbalanced, treat that as a grading decision rather than assuming the preset is now finished. Blackmagic Design’s report identifies Paulson as the film’s colorist and describes his approach.
When should I choose DaVinci Resolve Studio instead?
Choose DaVinci Resolve Studio when the Studio-only effect is important to the result and you need to keep using it. Stay with the free version when disabling or replacing the effect gives you an image you’re happy to deliver.
This is a feature decision, not a judgment about whether the free version is a “real” editor. Blackmagic describes the free version as a full video-editing application and lists additional Studio features separately on its product pages. The exact feature split is what matters here. If the feature you need is restricted, the free version won’t turn it into a clean effect by hiding the mark.
Before paying, identify the actual feature that triggered the watermark. Don’t buy Studio based only on the PowerGrade’s product name or a vague compatibility claim. Confirm the effect in the node graph, check Blackmagic’s current list for the Resolve 21 version you run, and decide whether you need that effect in your work beyond this one preset.
Before staying with Free, ask yourself:
- Does the grade still look right with the suspect node disabled?
- Is there a free effect that serves the same visual purpose well enough?
- Can the creator provide a free-compatible version?
- Does the watermark disappear throughout the full clip and in a rendered test?
Before choosing Studio, ask:
- Is the restricted effect central to the look?
- Will you use Studio-only tools in other projects?
- Is your license active in the installed Studio edition?
- Have you checked Blackmagic’s current pricing and licensing details?
Blackmagic’s Resolve 21 product information is the place to verify current feature availability, and its Studio page explains the additional features. Prices and feature descriptions may change; don’t copy a number from an older tutorial or from another region and treat it as current.
One practical option is to ask the PowerGrade creator which node requires Studio and whether there’s an alternate. That answer may settle the decision faster than rebuilding a look. If the response confirms that a signature effect is Studio-only and that there’s no free alternative, you can choose whether to use a different grade or move to Studio.
Neither choice is a failure. A clean, simpler grade is better than exporting a watermark you didn’t intend to include. A paid tool is worthwhile only when its specific capabilities matter to your work.
What if I can’t tell whether the Studio edition is installed?
Check the edition you’re actually running before you change the grade or buy another license. A purchased Studio license does not help if the open application is the free edition, and a watermark that appears in Free doesn’t by itself tell you whether a license was purchased for that computer.
Start by checking the application’s version and edition information, then confirm your activation status using Blackmagic’s current instructions. The exact menus can vary by operating system and release, so use the official Resolve product information and Studio product page rather than a screenshot from an older version. Don’t share activation details publicly.
If someone else prepared the project, ask which edition they used and whether the project relies on Studio-only features. A project can open in Free while still containing effects that Free can’t fully use. Opening successfully is not the same as confirming that every effect is available.
Keep the project unchanged while you check. If you decide to switch editions, save a recoverable copy first and follow Blackmagic’s current installation and activation guidance. Then reopen the same project in the Studio edition and revisit the affected clip. The official Resolve 20 Beginner’s Guide says the Studio watermark disappears when its project is opened in Studio, but this reference is for Resolve 20, so verify current details if your installation behaves differently.
If you’re still seeing a mark in a confirmed Studio installation, check whether it is actually Resolve’s watermark. A third-party plugin may have its own demo mark, or the text may be part of a title, media file, or overlay. The logo and wording matter. Don’t repeatedly reinstall Resolve before identifying which application or asset produced the mark.
How do I confirm the watermark is gone before exporting?
Play the full affected clip after changing the node, then render a short test and inspect the resulting file. A clean-looking paused Viewer frame is not enough to confirm that the watermark is gone from every affected section or from the output.
Use a final check in this order:
- Keep the confirmed Studio-only node disabled or replace it with your chosen alternative.
- Play the entire affected clip, including its beginning and end.
- Check other clips that use the same PowerGrade or shared correction.
- Inspect any adjustment clips or group corrections that affect those shots.
- Render a short test covering the relevant footage.
- Open the rendered file in a player and inspect it at normal size.
- If the watermark remains, return to the timeline and check other effects or clips.
A short test render is especially useful when the mark was visible during playback or the timeline has several layers. It separates the viewer preview from the file you intend to deliver. You don’t need to render the entire project before you know that the watermark has been removed.
Check the actual output, not only a proxy or cached preview. If you’ve changed a grade or an effect and the Viewer seems not to update, allow Resolve to refresh its image before concluding that the test failed. Cache behavior and playback performance can make a visual check confusing, so use a rendered test when you need confidence.
Also review shots that share nodes. A shared correction can affect several clips; a change made to that shared setup may change more than the single clip you used for diagnosis. If the PowerGrade is applied independently on each clip, check each one that matters. Don’t assume that fixing the first shot automatically fixed every use of the grade.
If the watermark is gone but the image has changed, assess the look separately. A clean export and a good grade are different checks. Decide whether the modified grade still meets the project’s creative needs, especially on skin, highlights, and neighboring shots.
Keep the original grade available until you’ve approved the test. If you decide the replacement doesn’t work, restore the original and choose between a different look and Studio. That is safer than deleting nodes first and trying to recreate them later.
What if the PowerGrade creator says it works in the free version?
Ask which Resolve version and which edition they tested, and request the names of any Studio-only effects in the grade. A PowerGrade can be mostly free-version compatible while containing one node that produces a Studio watermark in your project.
“Works in the free version” can mean several different things. The creator may mean the grade imports, the nodes appear, or the look can be previewed. It might not mean that every effect renders cleanly in Free. Blackmagic’s documentation explains that free users may encounter Studio-only filters and see the watermark while using them, so clarify exactly what the compatibility statement covers.
Send the creator useful details:
- Your DaVinci Resolve version and point release.
- Whether you’re using the free edition or Studio.
- The name of the PowerGrade or the file you imported.
- The effect or node you found during testing.
- Whether bypassing that node removes the watermark.
- A still or short screen recording that shows the issue, if you can share it safely.
Don’t send private client footage or a project containing confidential media unless you’re authorized to share it. A screenshot of the node graph or a test clip may be enough to identify the effect. Remove personal information from any image before sending it.
Ask whether the creator offers a free-version node tree, a separate PowerGrade without Studio effects, or a written explanation of which nodes are optional. If the grade is sold as compatible with the free edition, it’s reasonable to ask the seller to clarify what that claim means. But don’t assume that a seller’s answer changes the software limitation: a Studio-only effect still requires Studio for clean use.
If the creator says no Studio effect is involved, test the plugin and other project layers. A third-party plugin can display its own watermark, and it may be easy to mistake that for Resolve’s Studio mark. Check the wording and logo carefully.
When the creator can’t help, you can still make a safe decision. Keep the original PowerGrade intact, disable the verified trigger on a copy, and compare. If the resulting grade doesn’t fit your footage, choose another PowerGrade or use a version that includes the required effect.

Can TryUncle help me locate the relevant node?
If the graph is open and you’re unsure where to look, on-screen guidance can help you orient yourself while you inspect the controls. It doesn’t remove effects or change the grade for you; you still make and verify each edit.
TryUncle is an on-screen assistant for Mac and Windows. You can ask a question about the screen in front of you and get guidance toward the relevant control while you work. For this task, that may help when the Color page layout differs from a tutorial or you’re trying to locate where a node’s effect is shown. Learn more about TryUncle. The diagnostic answer remains the same either way: identify the effect, test it reversibly, and check the output.
What is the safest fix for a DaVinci Resolve PowerGrade watermark?
The safest fix is to identify the affected clip, test the PowerGrade nodes one at a time, then disable or replace only the confirmed Studio-only feature. Use Studio if the effect is essential, and render a short test before committing to a full export.
Don’t try to hide the watermark with a crop, blur, or export option. That treats the visible mark rather than the feature that caused it. Keep the original grade, make a reversible change, and decide based on the image you actually need.
If the grade still works without the restricted node, stay with the free version and check the rendered file. If removing the node destroys the look you need, confirm the effect’s status in Blackmagic’s current Resolve 21 documentation and decide whether Studio is worth it for your work. The goal is a clean, intentional grade, not a preset that you can’t inspect or control.
Frequently asked questions
- Why does a PowerGrade add a DaVinci Resolve Studio watermark in the free version?
- The PowerGrade contains or activates a feature that is available only in DaVinci Resolve Studio. In the free version, the Studio watermark identifies that limitation. Inspect the Color page node graph and other effects affecting the shot. Bypass the suspect operation or replace it with a free tool, then check the full clip.
- Can I remove the PowerGrade watermark without buying DaVinci Resolve Studio?
- Yes, if you can accept removing or replacing the Studio-only effect. You cannot keep that feature active in the free version and remove its limitation with a Deliver setting. If the effect is essential, use Studio or choose another grade.
- How do I find the Studio-only node in a DaVinci Resolve PowerGrade?
- Select an affected clip, open the Color page, and inspect the node graph and its effects. Bypass one suspect node at a time while watching the Viewer. Re-enable it to confirm that the watermark returns. If it doesn’t, check group, adjustment-clip, timeline, and third-party effects.
- Will the watermark disappear if I open the project in DaVinci Resolve Studio?
- Blackmagic Design’s Beginner’s Guide says the Studio watermark associated with a Studio-only filter disappears when the same project is opened in Resolve Studio. Make sure you are actually running the Studio edition and that its license is active.
- Can I use a Studio PowerGrade in DaVinci Resolve Free?
- You may be able to apply and inspect the grade, but a Studio-only effect in its node graph can trigger the limitation watermark. Applying the grade is not proof that every included effect works cleanly in the free edition.
- Why is the watermark still visible after I bypass a node?
- The selected node may not contain the trigger, or another effect may be contributing. Check the clip, group, adjustment clip, and other layers affecting the shot. Confirm you are looking at the right clip and give the Viewer time to refresh before testing again.
Sources
- DaVinci Resolve 21.1 Reference Manual
- DaVinci Resolve 20 Beginner's Guide, Studio-only filters
- DaVinci Resolve product page
- DaVinci Resolve Studio product page
- DaVinci Resolve 21 What's New
- Blackmagic Design announces DaVinci Resolve 21.1
- Colorist Paul Paulson discusses grading Alien: Romulus in DaVinci Resolve
- DaVinci Resolve official training
Put this guide to work with TryUncle.
Ask about the step you’re on. TryUncle sees your screen and points at the control you need, so you can keep learning in your own project.
Get TryUncle for Mac or WindowsKeep reading
Guides · Jul 17, 2026 · 25 min
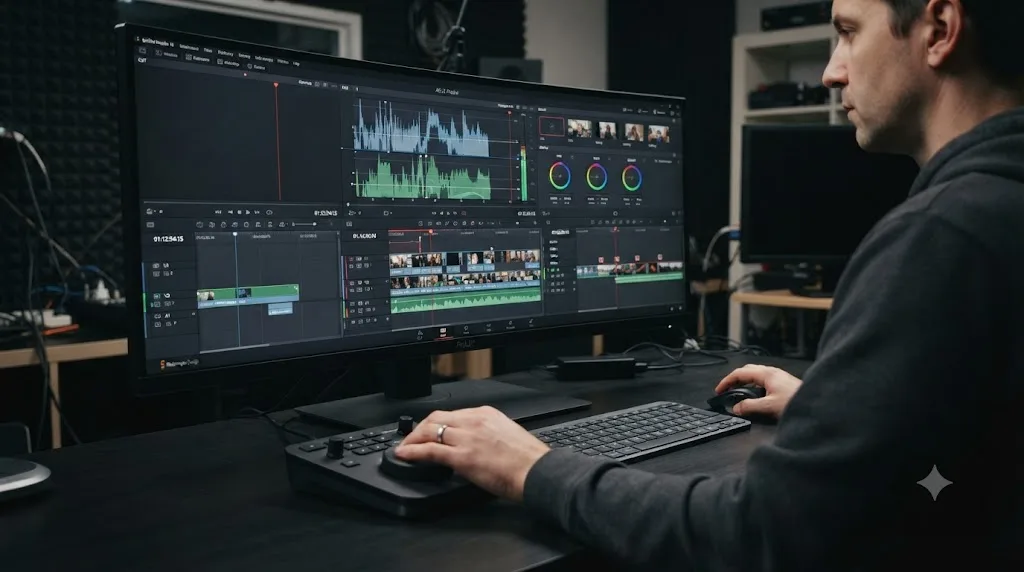
How to Use PowerGrades in DaVinci Resolve
Save, apply, and organize PowerGrades in DaVinci Resolve: grab a still, build an album, apply or append a full node tree, and share it as a .drx file.
Guides · Jul 26, 2026 · 32 min
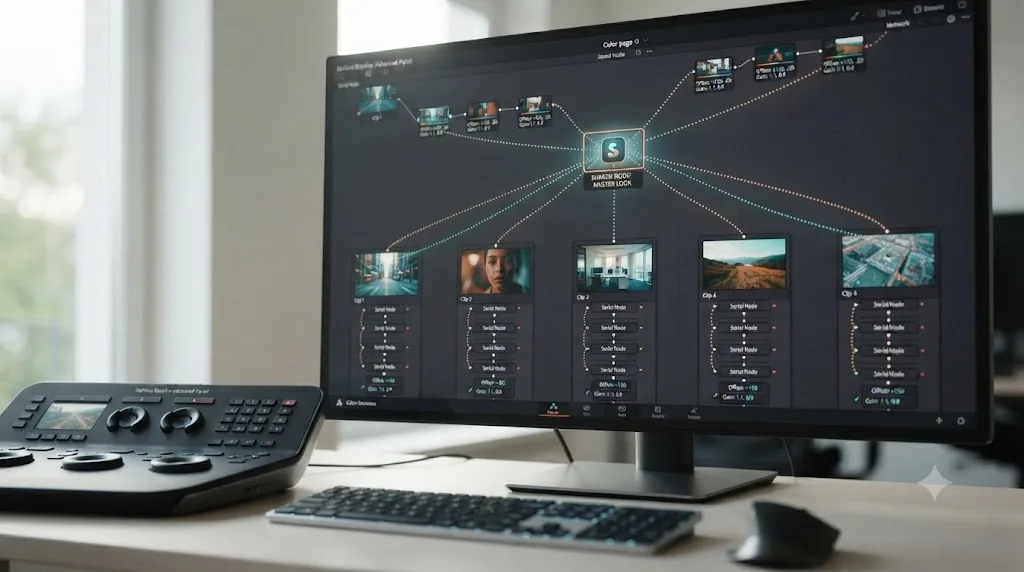
DaVinci Resolve Shared Nodes vs Regular Nodes, Explained
Shared nodes update every clip using them at once; regular nodes affect just one. How to create, apply, lock, and undo a shared node in DaVinci Resolve.
Guides · Jul 16, 2026 · 29 min
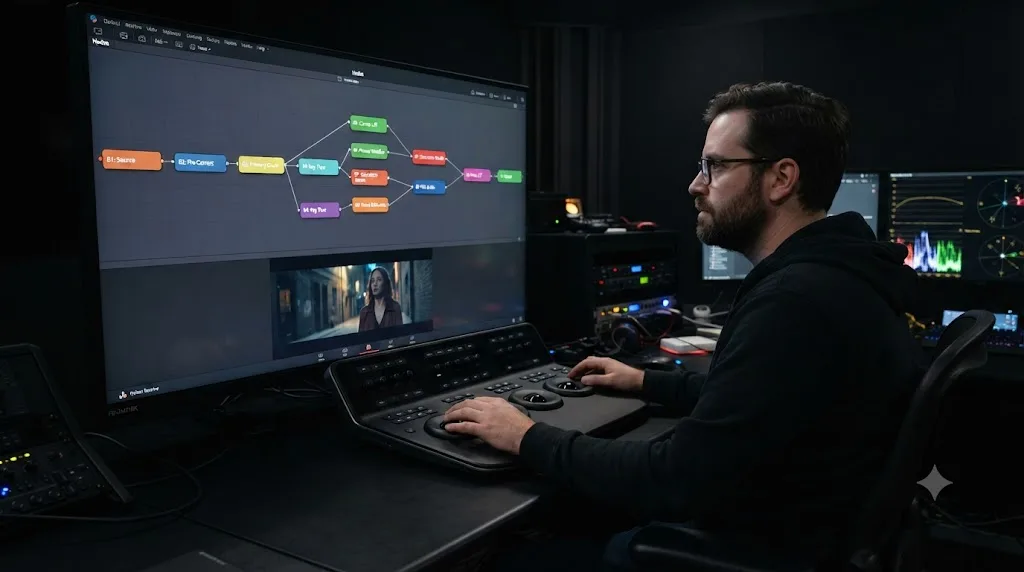
DaVinci Resolve Node Labels and Colors for Organized Grading
Rename and color-code DaVinci Resolve nodes so a six-node grade still makes sense months later. Labels, colors, badges, and a system that actually holds up.