Articles / Guidesupdated for DaVinci Resolve 21.0 and 21.1 (September 2026)
How to Make a Music Cue Build Tension in DaVinci Resolve
Quick answer
To make a music cue build tension in DaVinci Resolve, start with a restrained cue, mark the story turns, then build layers, density, and volume with Fairlight keyframes and automation. Delay the strongest hit, leave space for dialogue and effects, and release the cue only when the picture earns it.
I make a tension cue by controlling information. The first bars promise that something is coming, the middle makes the promise harder to ignore, and the ending either pays it off or refuses to. Loudness is only one part of that design.
I’ve spent more than 7 years cutting commercial video, and this is the Fairlight habit that keeps paying off: decide where the viewer’s expectation changes before you touch a fader. Our 100,000+ member professional video-editing community asks versions of this question often because a cue can sound exciting by itself and still flatten a scene.
As of September 2026, this workflow is written for DaVinci Resolve 21. Resolve 21 adds subframe, audio-sample-accurate keyframing on the Edit page, and Fairlight adds folder tracks that can nest to 3 levels. Those details matter when the cue has to move around a cut or when a large mix becomes hard to read. Blackmagic Design’s Resolve 21 New Features Guide documents both changes.
What does it mean to make a music cue build tension?
To make a music cue build tension means to create an expectation, delay or complicate its answer, and then choose a deliberate release. In DaVinci Resolve, you do that by editing the cue’s arrangement and timing, then shaping levels and space in Fairlight so the musical change follows the story change.
The word “tension” can sound vague until you turn it into a sequence of audience questions:
- What is about to happen?
- How soon will it happen?
- Is the threat real, or is this a false alarm?
- What information is being withheld?
- When will the cue let me stop waiting?
Music answers those questions through rhythm, pitch, harmony, texture, register, dynamics, and repetition. Editing gives you another set of answers: when a layer appears, how long a phrase lasts, whether the next hit lands on the cut, and whether the soundtrack suddenly leaves the viewer alone.
Research on musical expectation gives you a useful reason to work this way. A review by Marcus T. Pearce and colleagues describes how satisfying, violating, delaying, or leaving musical implications ambiguous can lead to different emotional responses, including tension. The paper on auditory expectation is not a DaVinci Resolve manual, but its central idea transfers cleanly to picture editing: the cue needs to establish a pattern before you can bend it.
That pattern doesn’t need to be complicated. A two-note pulse can be enough. So can a repeated bass note, a rising texture, a phrase that stops one beat early, or a low rumble that stays under a person’s apparently normal conversation. The audience doesn’t need to name the pattern. They only need to feel that the next event has become important.
There are three separate kinds of growth to keep apart:
| Kind of growth | What changes | What the viewer may feel | Resolve decision |
|---|---|---|---|
| Density | More notes, pulses, layers, or events arrive in the same time | The scene is becoming busier or less stable | Add or reveal a layer, or edit out a gap |
| Intensity | The same material becomes more forceful, bright, wide, or present | The existing idea is becoming harder to ignore | Raise level, change tone, increase articulation, or automate a filter |
| Information | A new motif, harmony, hit, or sound changes the meaning of what came before | The story has crossed a threshold | Introduce the new element at a marker, then decide whether to resolve |
Most weak tension cues use only intensity. Everything gets louder. A stronger cue changes at least two dimensions, often density and information, while keeping intensity under control until the picture needs the release.
A tension cue works when each new musical fact changes what the audience expects next.
You can apply this idea to a documentary reveal, a product film, a trailer, a suspense scene, a sports highlight, or a quiet interview. The genre changes the vocabulary. The editing problem stays the same.
How do I choose the right music cue for tension?
Choose a cue that contains unused headroom in its arrangement. The right music cue gives you a small idea to begin with, a meaningful way to add pressure, and at least one possible release that doesn’t sound like a generic ending.
Start with the picture, not the music library. Watch the scene without sound and write down the emotional job of each section. You’re not looking for a mood label such as “dark” or “cinematic.” You’re looking for a change in audience expectation.
Try a spotting note like this:
| Picture range | Story question | Musical job | Material to look for |
|---|---|---|---|
| Before the first clue | Is the ordinary world still safe? | Establish a quiet pattern without explaining it | Sparse pulse, low sustained tone, soft texture |
| First clue | Did I notice something important? | Add a small change that the viewer can feel before naming | New note, short accent, filtered layer |
| Confirmation | Is the danger real? | Repeat the idea with less room around it | Denser rhythm, closer edit, stronger bass |
| False release | Can I relax now? | Remove or soften material, then preserve a trace | Tail, held tone, missing beat, reduced level |
| Reveal or action | What does this mean now? | Pay off, invert, or interrupt the expectation | Full layer, impact, silence, tonal shift |
| Aftermath | What should remain? | Let the consequence speak | Reduced cue, unresolved tail, new stable bed |
The cue doesn’t have to contain separate stems for every row. One stereo file can still expose different sections. You can cut a rhythmic passage away from an opening pad, lower the bright material with EQ, or use a short excerpt that only carries the pulse.
When you audition music, listen for behavior rather than adjectives. A cue that is already huge may be useful for a climax, but it has nowhere to grow. A cue with a quiet intro, a recognisable pulse, a middle lift, and a clean ending gives you more editorial choices. The most useful phrase may be the one that almost resolves and then repeats.
Ask these questions before committing:
- Does the cue have a clear first idea within the first few seconds?
- Can I remove a layer without the music sounding broken?
- Is there a point where the rhythm becomes more active?
- Does the harmony create a question, or does it settle immediately?
- Can I end the cue on the picture event rather than on the file’s natural ending?
- Does the cue leave room for speech and important effects?
- Would the scene become more tense if the cue stopped for a moment?
The last question matters. A tense cue isn’t necessarily a dense cue. In an interview about suspense, editor Saar Klein said, “I have found that people are so used to music in these types of scenes that it creates more tension to intentionally play it dry.” The published interview excerpt attributes the line to Klein, whose editing credits include The Bourne Identity.
That quote is a useful guardrail. If the music tells the viewer “be nervous” from the first frame, the viewer may stop discovering the scene. Try removing the first obvious cue and see whether the image becomes more uncomfortable.
If you need search terms, start with a story function and a texture. “Restrained pulse with rising strings” is more useful than “epic tension.” “Low ostinato with sparse percussion” tells you what to listen for. “Unresolved piano texture with a clean stop” tells you how the file might behave in an edit.
For an audio-first workflow, you can also compare a music library with stems, a composer-made cue, and a track you already own. Our sibling guide on the best music library with stems for video editing is useful when the decision is about access to separated parts rather than the creative method itself.
How do I mark the story before I edit the music?
Mark the story before you cut the cue. In DaVinci Resolve, create markers for the start of expectation, every genuine escalation, any false release, the peak, and the first moment after the peak where the audience needs a new emotional state.
You can work on the Edit page or Fairlight page. Resolve 21’s New Features Guide says that markers can start and end between frames when you zoom in, and that the Edit timeline supports subframe audio keyframes and marker placement. That precision is useful when a sound needs to land between visible frame boundaries, but the first spotting pass should stay simple.
Use marker names that describe the story function, not only the picture event:
| Marker name | Meaning | Question to answer |
|---|---|---|
| CUE IN | The audience begins waiting | What changes if the cue starts 1 second later? |
| FIRST CLUE | The image gives the viewer a reason to worry | Does the cue acknowledge this or stay neutral? |
| PRESSURE 1 | The scene can’t return fully to normal | Which new layer arrives here? |
| FALSE SAFE | A temporary relief or misleading calm | Does the cue thin, stop, or keep a trace? |
| NO TURN BACK | The story crosses a threshold | What material has been saved for this moment? |
| PEAK | The tension changes into an event or a sharper question | Is the release musical, visual, or silent? |
| AFTERMATH | The audience needs to process the change | What should be absent now? |
The marker list is a plan, not a promise. If the cue makes the first clue too obvious, move the musical change later. If the image already carries a strong sound effect, move the music’s accent away from it. If a dialogue line is the actual turn, let the line own that turn.
Resolve 21’s Fairlight folder tracks can help once your spotting grows. Blackmagic documents a maximum of 3 folder nesting levels in the Resolve 21 New Features Guide. You might use one folder for music, one for effects, and one for dialogue, then keep music stems inside the music folder. Don’t create folders just because you can. A small scene may be faster to mix with 4 clearly named tracks than with a miniature hierarchy.
Name tracks by function. “MUSIC FULL,” “MUSIC PULSE,” “MUSIC LOW,” and “MUSIC TAIL” tell you more than “A1,” “A2,” “A3,” and “A4.” If you have only a stereo cue, call it “MUSIC FULL” and use clip edits and automation to create the states you need.
You can press C to snap the playhead to the pointer in the Fairlight timeline. Blackmagic lists that Resolve 21 shortcut in the New Features Guide. It’s a small navigation detail, but it makes spotting longer sequences less tiring when you are moving between waveform detail and picture context.
Don’t mark every cut. Mark moments where meaning changes. A cue becomes mechanical when it reacts to the edit’s geometry rather than to the edit’s story.
How do I prepare a music cue in DaVinci Resolve 21?
Prepare the cue by separating editorial decisions from mix decisions. First place the right musical material at the right story range. Then decide how loud, bright, dense, and present each part should be.
Use this order:
- Duplicate the timeline or create a version before experimenting with large music edits.
- Import the cue into the Media Pool and place it on a dedicated music track.
- Watch the complete scene once with the cue at a conservative level.
- Trim the cue so the first musical event supports the first meaningful story question.
- Find the cue’s natural phrase boundaries, repeated sections, lifts, pauses, and endings.
- Add clip edits at musical boundaries rather than cutting randomly through a sustained note.
- Move the strongest section later if the picture’s peak arrives later.
- Duplicate a promising section only when the repetition still sounds intentional.
- Add short fades or crossfades where a cut exposes an unnatural click or tail.
- Label the clip or track with the version and intended role.
Resolve’s Edit page has a curve editor that shows keyframe positions and animation curves under clips. Blackmagic says keyframes can be copied, pasted, moved in groups, and edited there. The official Edit page description supports using that view when a volume shape needs to be read in context with the picture.
Work with phrases, not just file duration
A cue may be 2 minutes long, while your scene needs 38 seconds. Don’t drag the file’s beginning to the scene’s beginning by habit. Find the section that gives you the correct opening state and enough unused material for growth.
For example, imagine a 42-second scene with a reveal at 31 seconds. The cue has a soft 8-second intro, a 16-second pulse section, a 4-second lift, and a 12-second full section. You could structure it like this:
| Scene time | Cue section | Edit purpose |
|---|---|---|
| 00:00 to 00:08 | Soft intro | Establish the question without showing the full threat |
| 00:08 to 00:20 | Pulse section | Give the audience a pattern to anticipate |
| 00:20 to 00:27 | Pulse with a reduced gap | Make the waiting feel less comfortable |
| 00:27 to 00:31 | Lift or held note | Delay the strongest information before the reveal |
| 00:31 to 00:42 | Full section, impact, or silence | Change the audience’s state at the reveal |
The times are an editorial example, not a universal recipe. The point is to budget the cue’s information. If you spend the full section at 00:08, you can’t make 00:31 feel like a meaningful arrival without another idea.
Create a false release
A false release is a brief reduction that seems to give the audience a way out, but the scene keeps the underlying question alive. You can lower the cue, remove the pulse, filter the top end, or leave only a tail. The reduction should change the pressure, not erase the story.
If the picture genuinely becomes safe, let the cue resolve. If the picture only looks safe, keep a small trace. A low sustained note can work, but don’t leave it because “tension music should always drone.” Leave it because the story has not answered its question.
Avoid accidental looping
When you duplicate a phrase, listen for a seam in rhythm, harmony, ambience, and reverb. A loop can work if the repetition becomes part of the tension. It fails when the listener hears the editor searching for more music.
Resolve gives you several ways to repair a seam. You can place the edit at a transient, use a short crossfade, overlap a tail under the next phrase, or use a layer from another part of the cue to mask the transition. Keep the fix small. A long crossfade can blur the beat that should create anticipation.
Use audio layers for alternatives
Resolve’s Fairlight workflow supports audio layers for building a seamless composite from different takes and for trying alternate music cuts. Blackmagic describes audio layers as a non-destructive way to try combinations of sound. That makes them useful when you want to keep two possible rises in one track while deciding which one tells the story more clearly.
Keep the alternatives named. “Rise late,” “Rise early,” and “Dry reveal” are better than three anonymous clips stacked under the same track header.
How do I build tension by adding layers?
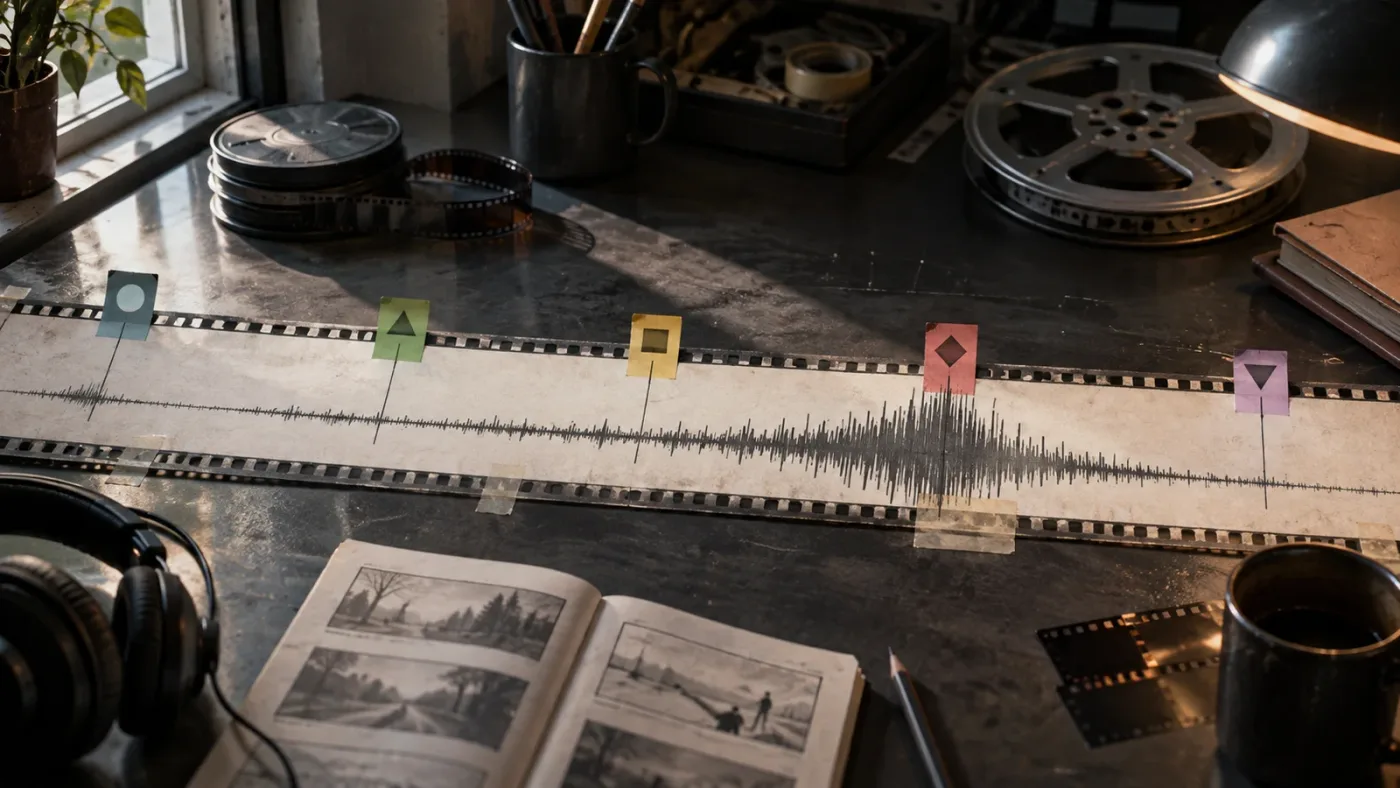
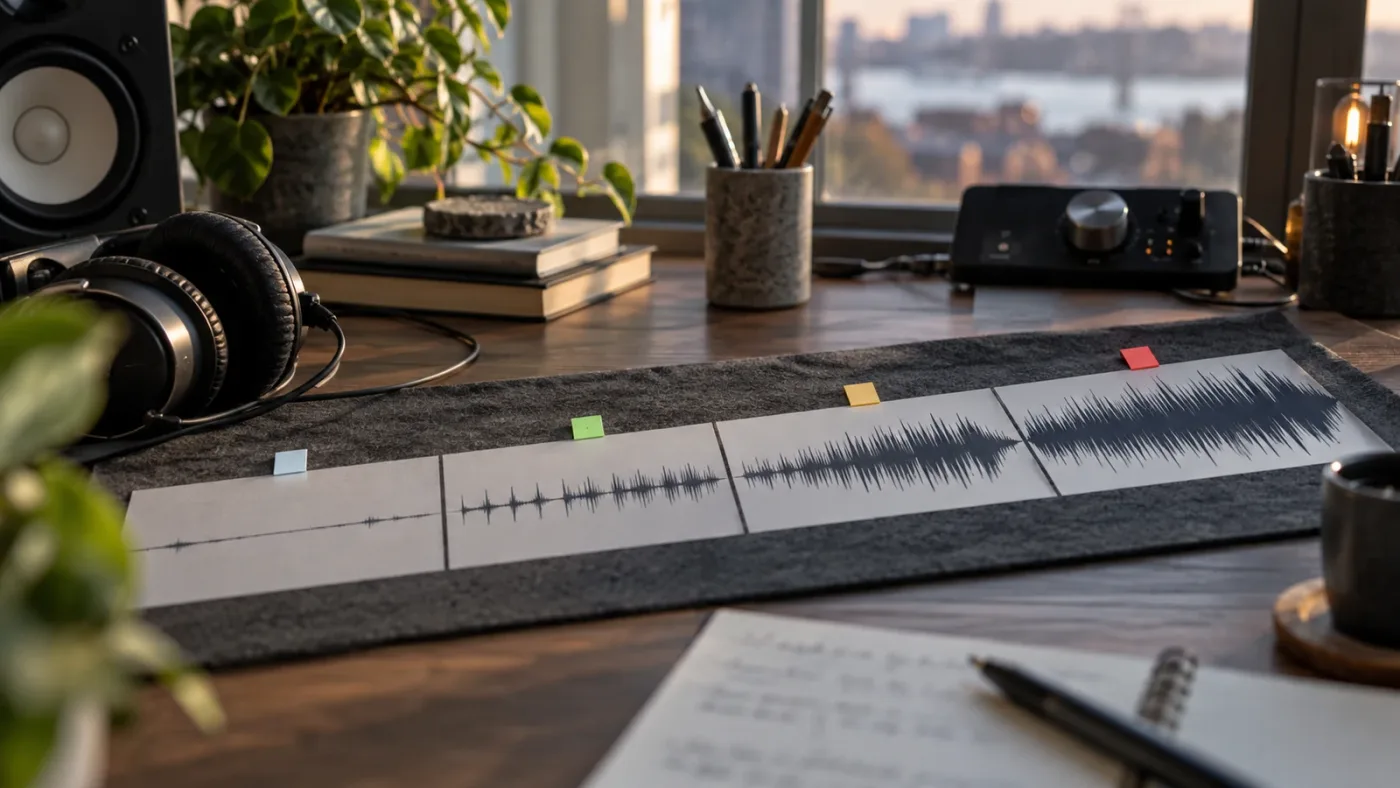
Add layers according to story thresholds, not according to a fixed count. Each layer should either change the audience’s expectation, increase the cost of waiting, or prepare the release.
If you have stems, audition them one at a time and write down what each one does:
| Layer | Job | Bring it in when... | Remove it when... |
|---|---|---|---|
| Low bed | Keeps the question alive | The image becomes quietly suspicious | Dialogue or a low effect needs ownership |
| Pulse | Establishes anticipation | The viewer notices a pattern of action or delay | The pattern has become predictable or the scene needs air |
| High texture | Adds alertness or instability | The picture reveals a new detail | The texture competes with speech or becomes a cliché |
| Percussion | Gives the body a sense of movement | The scene turns toward action | The visual hit should feel exposed |
| Bass accent | Marks a threshold | The audience should feel a change before seeing it | The reveal has its own low-frequency impact |
| Full harmony | Expands the emotional meaning | The picture earns a larger statement | The cue needs to leave space for consequence |
| Tail | Carries the unresolved question | The event has happened but the meaning has not settled | Silence or dialogue should define the aftermath |
The table is not a requirement to use 7 layers. It is a way to avoid treating “add everything” as an arrangement. A two-stem cue can still have a low bed and a pulse. A single stereo file can expose a pulse by cutting between active and less active phrases.
Add the smallest layer first
When you add a layer, begin lower than you think. Let it be felt as a change in pattern before it becomes a new foreground object. If the layer is already obvious at its entrance, the scene may have lost the possibility of a second, stronger arrival.
Automate the entrance if a hard cut sounds like a mistake. A short fade can feel like a layer emerging from the world. A longer fade can feel like a change in the world itself. Choose based on the picture.
Change register before volume
If a cue needs to feel larger, try opening a higher or lower register before raising the whole mix. Register changes the perceived shape of the cue while preserving headroom for the release.
You can create this editorially by cutting to a section with a higher texture, by isolating a stem, or by using EQ to reduce a range and then restore it later. Don’t confuse EQ with arrangement. If a part is musically busy, filtering it may hide some information, but it won’t make the arrangement sparse.
Shorten the gaps
Tension often grows when the gaps between events get shorter. This can happen through editing, not tempo. Take a pulse section and remove a small rest before the next event. Repeat the idea once or twice, then stop before the audience becomes numb.
The edit must preserve a recognizable pattern. If you remove random pieces, the result may sound broken instead of urgent. Align your changes with the marker plan and let the picture tell you which gap matters.
Save the fullest layer
Reserve the fullest layer for the story turn. It might be a full harmonic stack, a wider texture, a larger percussion phrase, or simply the return of a part you removed earlier. The audience experiences its return as information because you taught them that it was missing.
The strongest layer is often the layer you deliberately withhold.
That principle works with a single cue and with a full stem-based arrangement. It also protects you from the common temptation to make the intro sound like a trailer climax.
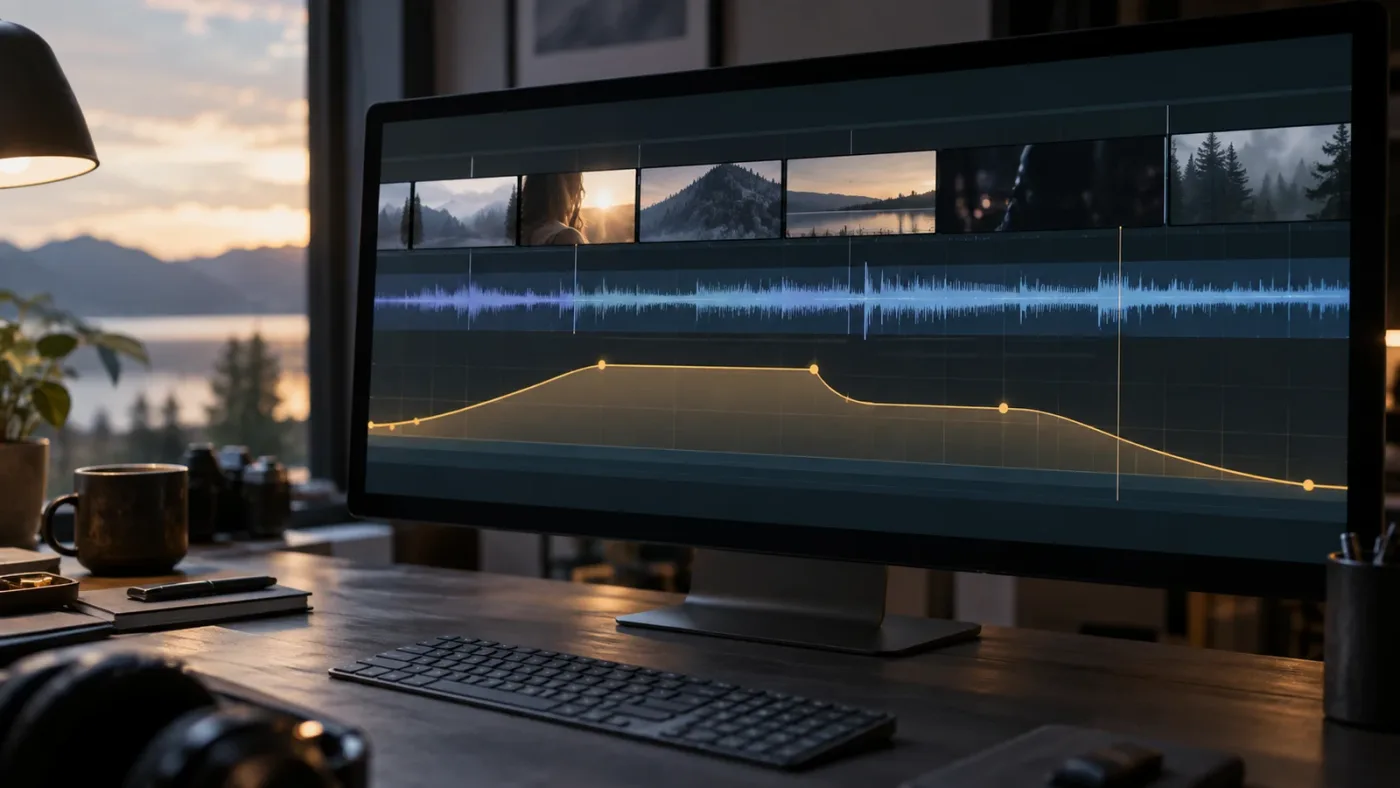
How do I use volume automation to make the rise feel intentional?
Use volume automation to create shape, not to draw a straight line from quiet to loud. A convincing rise contains ramps, holds, small dips, and a release that may be softer than the peak.
DaVinci Resolve supports volume changes on clips and tracks. Blackmagic’s Fairlight page describes recording fader changes with automation, while the Fairlight training material describes clip gain curves and keyframes for controlling sections of a clip. In Resolve 21, the Edit page’s subframe audio keyframing gives you finer placement when the volume change must sit precisely around a cut.
The four-point dip
For a simple controlled dip, create 4 points around the section that must be quieter:
| Point | Position | Purpose |
|---|---|---|
| A | Before the line or sound effect | Preserve the original level until the story needs space |
| B | At the start of the dip | Begin lowering without a sudden hole |
| C | At the end of the phrase | Hold the lower level while the important material happens |
| D | After the phrase | Return only when the picture gives the music room |
On the Edit page, the Fairlight Audio Guide describes the clip’s volume level curve and adding keyframes with Option-click on macOS or Alt-click on Windows. Resolve 21 adds subframe movement when the timeline is zoomed close enough. Blackmagic’s Fairlight training guide is the place to verify the current terminology if your controls look different.
The exact amount of the dip depends on the voice, music, effects, monitoring, and delivery. Don’t copy a number from a template and assume it will work. Lower the music until the line has space, then listen again at a quieter monitoring level. If the music disappears completely, the dip may be longer or deeper than the scene needs.
The ramp and hold
For an escalation, use a ramp into a hold. The ramp creates movement. The hold tells the audience that the new state has arrived. If you keep raising the fader without a hold, the cue can feel like it is waiting for the editor to stop.
Try this pattern:
- Begin near the cue’s opening level.
- Raise gradually toward the first pressure marker.
- Hold for a short section so the viewer learns the new intensity.
- Dip or thin one element at the false release.
- Return with a slightly different layer or level.
- Stop the rise before the peak.
- Let the picture event create the final change.
That last step is important. A soundtrack that reaches its loudest point just before every reveal can make the reveal feel late. Sometimes the cue should peak on the event. Sometimes it should pull back and let the event stand exposed.
Clip gain or track automation?
Use clip gain when you are making a local change to one piece of music. Use track automation when you want to ride the combined output of a group of music clips or stems. Use a bus when several tracks need to move together and their internal balance should remain intact.
| Need | Best starting control | Why |
|---|---|---|
| Lower one phrase | Clip gain keyframes | The change stays attached to that clip |
| Ride a single music stem | Track fader automation | The whole stem follows one performance |
| Move 3 music stems together | Music bus automation | Internal stem balance stays consistent |
| Make dialogue control the music dip | Sidechain dynamics or manually drawn dips | The music responds to speech without flattening the entire cue |
| Make a final master correction | Main bus, used carefully | It affects the whole mix, so it can hide a local problem |
Fairlight’s automation modes give you different ways to record movement. The Fairlight Audio Guide explains that Write records absolute control changes, while Trim changes levels relative to automation already recorded. It also documents Touch, Latch, and Snap behavior, including a default 250 ms glide time for Snap mode. Use those modes when a mouse performance is faster than placing many points, then inspect the recorded curve and remove unnecessary movement.
Recorded automation is not automatically musical. A shaky fader pass can create accidental tremolo. A few deliberate points usually read more clearly than constant motion.
How do I keep dialogue and sound effects clear while music builds?
Keep dialogue and story-critical effects ahead of the music by making room before the mix becomes crowded. Duck the music locally, reduce competing frequencies when appropriate, and decide which event owns each moment.
Blackmagic’s Fairlight training describes balancing dialogue, music, and effects as part of the audio-post workflow. Tom Carlson, a Hollywood music editor interviewed by Oxford University Press, describes the final mix as a negotiation among music, effects, and dialogue. The interview transcript gives his blunt description of that territory: “It’s a big battle for territory.”
That line isn’t a reason to make everything quiet. It’s a reason to assign ownership.
Dialogue owns language
If the viewer must understand a sentence, the music should support the sentence’s meaning rather than compete with its consonants and rhythm. Draw the music dip around the phrase. If the phrase has a dramatic pause, don’t automatically raise the music into the pause. The pause may be the tension.
Effects own physical events
A door latch, footstep, weapon movement, breath, impact, or machine change can tell the audience where the body is. If the effect carries the physical truth of the scene, let it speak. Move the music’s accent earlier or later, thin the music briefly, or use a silent hole around the effect.
Music owns the invisible question
Music is strongest when the image and effects show what is happening while the cue carries what it means. If the cue is also trying to announce every visible action, the mix becomes crowded and the tension loses ambiguity.
Use a sidechain only when it solves a repeated problem
Sidechain compression can make one track reduce the level of another when the controlling signal arrives. In dialogue mixing, that can be a useful automatic dip. But an automatic dip doesn’t know which words matter, whether the speaker is intentionally quiet, or whether a sound effect should own the same moment.
For a short scene, manual keyframes are often easier to understand and revise. For a long interview with recurring speech, sidechain processing can save time, but check every important line. Automation is a starting shape, not a story decision.
Check the cue in context
Soloing music is useful for finding clicks, bad edits, and harsh material. It is not enough to judge tension. Play the full scene with dialogue and effects. Then mute the music and ask what the picture and production sound already accomplish. The gap between those two versions tells you what the music is contributing.
If the scene works without music, that doesn’t mean the cue failed. It may mean the cue can be quieter, later, or more selective.
How do I use silence as part of the tension cue?
Use silence when the audience needs to lose the musical prediction. A brief absence can create more pressure than another layer because it removes the guide the viewer has been following.
Silence can mean several things:
- The expected impact did not arrive.
- The character is no longer able to interpret the situation.
- The picture has become too immediate for music to explain.
- The audience must listen for a small physical detail.
- The cue is refusing to tell the viewer what to feel.
Don’t treat silence as a universal dramatic button. If the room tone and production sound vanish with the music, the moment may sound like a technical dropout. Sometimes the correct move is to remove only the music while leaving the world alive.
The dry reveal
To build a dry reveal, let the cue rise toward the moment, then remove it before the key image or line. The effect may be startling because the audience expects the music to confirm the event. The picture has to carry enough information to survive on its own.
The missing beat
To create a missing beat, establish a pulse, omit one expected event, then resume or transform the pattern. The omission should be close enough to the established pattern that the viewer can feel the absence.
The tail without the body
To keep a tail without the main arrangement, cut or fade the active section while allowing a sustained texture or reverb tail to continue. This preserves the question without keeping the full cue in the foreground.
The false ending
A false ending can suggest that the scene has settled, then introduce a new piece of information. Keep it shorter than a true resolution. If you give the viewer a full cadence and a long clean fade, the next turn may feel like a second scene rather than a complication.
Leave enough room to hear the result. A silence that lasts only a fraction of a second can work around a hit. A longer silence may change the scene’s rhythm. The picture decides.
Silence builds tension when it removes an expectation the cue has already taught the audience to trust.
How do I make the peak land without making it louder?
Make the peak land by changing meaning, timing, or contrast before reaching for level. A peak can be a new harmony, a sudden absence, a displaced accent, a wider texture, a dialogue line, or a cut into a different sound world.
Here are 6 ways to create a peak:
| Peak method | What the audience notices | Best when |
|---|---|---|
| Full arrangement | Several previously withheld parts arrive | The reveal deserves a broad emotional statement |
| Sudden silence | The expected musical answer disappears | The image or effect can carry the event alone |
| Displaced hit | The accent lands before or after the visible cut | You want uncertainty about cause and effect |
| Harmonic change | The cue moves into a new tonal state | The story’s meaning changes more than its action |
| Texture removal | The sound becomes stark or exposed | A character reaction or small effect matters |
| Dialogue takeover | A line becomes the answer | The story’s information is verbal |
The loudest point and the dramatic peak are not the same thing. A loud impact at the wrong moment can reduce tension because it tells the audience exactly how to categorize the event. A quieter change can make the viewer work harder.
The delayed hit
If the picture shows a hand opening a door at 00:31, don’t assume the music must hit on the first frame of the opening. Test a hit at the hand movement, at the cut to the interior, after the viewer sees what is there, and nowhere at all. Each version assigns a different meaning to the event.
The pre-lap
A cue can begin its change before the picture changes. That’s a pre-lap, and it can make the audience anticipate a new scene before seeing it. Use it when the sound should pull the viewer forward. Keep it restrained if the next image is supposed to surprise.
The post-lap
A cue can continue across a cut after the image changes. That can connect two spaces, preserve a question, or make the new image feel contaminated by the previous one. If the cue resolves immediately after the cut, the scene may feel more settled than the picture intends.
The anti-hit
The anti-hit is the choice to remove the impact you trained the audience to expect. It works best when the cue has clearly prepared a pattern and the image can sustain the absence. It is not a license to avoid every payoff. A release matters because something was held back.
How do I make one stereo music file build tension?
Make one stereo file build tension by editing its sections, repeating only useful material, shaping its volume, and creating contrast with silence or sound design. Stems are convenient, but the method doesn’t depend on them.
Start by finding 3 kinds of usable material inside the file:
- The least dense section.
- The recognisable repeating section.
- The strongest or most informative section.
Place those sections on the timeline as separate clips when you need independent control. Add short fades at the seams. If the cue has a clear bass or high texture, use EQ to reduce one element temporarily, but don’t claim that a filter has recreated a missing stem.
Make a sparse edit
Cut away from the full phrase to a section with fewer attacks. Keep a tail if the room can support it. The sparse section becomes a state the audience understands. When the fuller section returns, it carries new weight.
Repeat with a difference
Repeat a phrase only after deciding what should change. You might remove the final beat, shorten the gap, raise the register, move the phrase under a different image, or let the second repetition stop before resolution. Identical repetition establishes stability. Changed repetition turns stability into a question.
Use the cue’s natural ending selectively
A long natural ending can make a scene feel complete. If the picture isn’t complete, cut earlier and build your own tail. Conversely, a clean ending may be the right release after a stressful sequence. The editorial choice is not “always cut music early.” It is “make the ending agree with the story.”
Don’t fake stems with extreme processing
Heavy EQ, aggressive gating, or hard clipping can make a stereo file feel smaller, but it can also create artifacts. If you need separate control over a pulse, bass, and texture for a complex sequence, find a cue with stems or choose a different cue. A simpler source can give you better decisions than a complicated rescue.
For a practical selection workflow, first search by the musical behavior you need, then check whether the source offers stems or alternate versions. The sibling guide on how to find music by mood in DaVinci Resolve covers discovery. This guide begins after you have a candidate and asks how to make that candidate serve the picture.
How do I fit the cue to a scene without forcing the edit?
Fit the cue to the scene by moving musical phrase boundaries around the picture’s meaning, not by forcing every cut to land on a beat. The audience should feel a relationship between sound and image, but not a metronome dictating the edit.
Start with a rough timing pass. Place the cue under the complete scene, mark the peak, and find the closest useful musical change. If the closest change is 6 seconds early, don’t immediately speed up the cue. First test a later cue start, a phrase edit, a shortened gap, a pre-lap, or a held section.
Choose the anchor
Pick one anchor for the cue:
- The first clue.
- The main cut.
- The reveal.
- The first line after the reveal.
- The start of action.
- The moment of silence.
One anchor keeps the cue from reacting to everything. You can still support secondary events, but the main arc has a spine.
Use markers as a timing grid, not a cage
Markers show where the story changes. They don’t prove that a musical hit belongs on the same frame. Try moving the accent 3 ways: exactly on the cut, slightly before, and slightly after. Listen for which version creates the intended relationship.
Resolve 21’s sample-accurate audio keyframing is especially useful once you are making small adjustments around a marker. The New Features Guide says you need to be almost completely zoomed in to make those precise edits. Don’t zoom in too early. Work at story scale, then use sample-level precision for the final relationship.
Change the cue before changing speed
Time-stretching can be useful, but a changed tempo may alter the character of a cue. Try editorial rearrangement first. If you do retime, compare the pitch and transient behavior and listen for a new artifact. Fairlight also includes Elastic Wave retiming, which Blackmagic presents as a way to stretch audio while preserving pitch. The official Fairlight page describes that tool and its keyframe controls.
Let the image resist the beat
If the video cut lands off the beat, that may be valuable. A visual event that arrives just before a musical accent can make the audience feel that the cue is chasing the picture. A hit after the event can make the sound feel like a consequence. Perfect synchronisation is only one option.
How do I choose a music source for a tension cue?
Choose a music source based on the cue’s required flexibility, licensing, delivery, and revision needs. A composer-made cue can be the best answer for a specific film. A library can be the fastest answer when you need several options, alternate versions, or stems for recurring edits.
The creative decision comes first. Don’t choose a subscription and then search for a reason to use it.
| Source | Choose it when | Watch for |
|---|---|---|
| Composer-made cue | The story needs a specific arc, motif, or revision path | Briefing time, revision scope, ownership, and delivery terms |
| Music library | You need to audition multiple moods and build quickly | License scope, publishing channels, client use, and cancellation terms |
| Single-track license | One cue solves one defined project | Whether future edits, paid media, and client publication are covered |
| Existing owned music | You control the rights and the cue already fits | Whether the recording and composition rights are both cleared |
| Original music made in-house | You can create or commission the required parts | Time, quality control, and documentation of rights |
If you choose a library, check whether it provides stems, instrumental versions, clean endings, loopable sections, and licensing that matches where the video will appear. “Royalty-free” does not mean every use is automatically covered. Read the current plan and project terms.
The assigned affiliate for this page is Epidemic Sound. This is an affiliate link, which means we may earn a commission if you choose to subscribe through it. It doesn’t change the tutorial or make Epidemic Sound the right source for every editor.
If you want a music-first service to evaluate after you understand the cue structure, check Epidemic Sound’s current offering. Treat it as one option alongside composer-made music, single-track licensing, and other libraries. Confirm the plan’s rights for your exact channel, client, advertising, or broadcast use before publishing.
The important Resolve-specific question is not whether a library has many tracks. It is whether the available versions let you delay, thin, repeat, and release the cue without fighting the source file. Epidemic Sound’s dedicated Resolve integration is a separate buying consideration for users of paid Resolve Studio, so don’t treat it as a replacement for the editorial method described here.
How do I finish the mix after the cue works emotionally?
Finish the mix by checking translation, ownership, and continuity after the emotional decisions are stable. Don’t master away a timing problem or use loudness processing to make a weak cue feel more tense.
Fairlight provides track-level processing for EQ and dynamics, and Blackmagic says every track includes a 6-band parametric EQ, dynamics processing, and 6 real-time effect slots. The Fairlight page also lists more than 25 Fairlight FX plugins for repair, creative sound design, and mixing. Those are useful tools, but the numbers describe available tools, not a recommendation to use all of them.
Listen at two levels
Listen once at your normal working level and once more quietly. A cue that only works when it is loud may be relying on intensity rather than structure. A quiet pass can reveal whether the rhythm, silence, and story timing still communicate.
Do not make a clinical claim from a casual speaker check. Use the second listening level as a decision aid, not as a substitute for a proper monitoring environment.
Check the low end with the whole scene
Low music, room tone, impacts, voice, and effects can compete even when the waveform looks tidy. Solo the music to locate problems, then return to the full mix. If the cue’s low material owns the same moment as a physical effect, decide which one tells the story better.
Use EQ to make room, not to change the cue’s identity by accident
Cut a competing area gently when the cue is masking dialogue or an important effect. Listen for whether the correction makes the music feel unnatural. If it does, use volume, arrangement, or timing first.
Watch the automation around edits
Zoom out and inspect the full cue. A dip that sounds correct in a close-up may last too long in the scene. A rise that feels dramatic on one shot may already be at full level before the next story marker. The curve should have a relationship with the whole sequence.
Keep a clean version
Duplicate the music track before committing to heavy processing. Keep one clean source and one shaped version. If the picture changes later, the clean version lets you reconsider the cue without trying to reverse every decision.
Check the ending
The ending deserves the same care as the build. Decide whether the cue ends on:
- The visible event.
- A reaction shot.
- The dialogue answer.
- A continuing mystery.
- A transition into another scene.
- A return to ordinary sound.
The right ending can be short. Don’t leave a tail because the file has one. Don’t cut every tail because clean edits feel efficient. Listen to what the audience should carry into the next moment.
Why is my tension cue too loud too early?
Your cue is too loud too early when its arrangement, level, or frequency density has already reached the state the story is supposed to earn later. Fix the earliest overstatement first, then rebuild the later rise from the new headroom.
Use this diagnostic order:
- Mute the busiest layer.
- Lower the opening level.
- Remove the first impact.
- Delay the first rhythmic subdivision.
- Create a brief gap before the first clear clue.
- Recheck the cue under dialogue and effects.
- Save the fuller return for the marker that changes the story.
If the cue still feels early, change its start point. A cue can be musically restrained and still be narratively early if it begins before the viewer has a reason to wait.
Why does my cue feel repetitive instead of tense?
Your cue feels repetitive instead of tense when it repeats without changing the audience’s expectation. Add a difference to the second pass, shorten a gap, remove a resolving note, change register, or stop the pattern before it becomes background wallpaper.
Repetition can create security. Security is useful because the audience notices when it breaks. If every repetition is already different, the audience has no baseline. If none is different, the cue may become furniture.
Try a 3-pass test:
| Pass | Change | Question |
|---|---|---|
| First | Keep the pattern clear | Does the audience understand what is repeating? |
| Second | Remove or delay one expected event | Does the audience feel the absence? |
| Third | Change the layer or context | Does the repeated idea now mean something new? |
If the answer is no, the source material may not have enough variation for the scene. Choose another cue or add a carefully designed sound-design contrast instead of forcing the same loop to carry a full arc.
Why does the music fight the dialogue even after I lower it?
Music can fight dialogue after a volume dip when its rhythm, midrange, transients, or changes in intensity still pull attention. Lowering the fader solves level, not every form of competition.
Try these decisions in order:
- Move the busiest musical event away from the key word.
- Reduce the layer with the strongest attack.
- Shorten the dip so the music returns during a natural pause.
- Use EQ only if the overlap is tonal rather than rhythmic.
- Test the cue with the dialogue at the intended level.
- Remove the music for one phrase and decide whether the absence tells the story better.
Speech is not only a meter reading. A line can be intelligible and still feel emotionally crowded. If the words are the reveal, give them the foreground.
What is the best way to learn DaVinci Resolve for this workflow?
The best way to learn this workflow is to use official Fairlight lessons for the controls, then practice one short scene until you can explain each change as a story decision. A long course or video can show the path, but a repeatable exercise gives you judgement.
Blackmagic’s official training page includes an Introduction to Audio course and the Fairlight Audio Guide. Blackmagic describes the guide as covering sound editing, sweetening, recording, mixing, and mastering. The official training catalog is the strongest starting point for terminology and page-level workflow.
Casey Faris is another widely used learning reference for Resolve. His 2025 beginner course lists a Fairlight section at 4:16:55 and a section on how to learn Resolve at 5:05:42. The course page on YouTube makes the scope and chapter positions visible. Treat it as a broad visual orientation, then verify version-specific controls against Blackmagic’s current documentation.
Our team has taught more than 100,000 students on Udemy, works as an official Udemy Business Partner, and has taught and worked with Fortune 500 companies. That experience shapes the advice here: learn the control, then use it to solve a picture problem. Memorising a Fairlight mode without knowing what the scene needs won’t build taste.
Which learning route fits which problem?
| Route | Best for | Limitation | How to use it for tension cues |
|---|---|---|---|
| Blackmagic official training | Correct terminology and structured Fairlight practice | It cannot see your specific scene | Learn clip levels, automation, routing, and delivery, then apply them to one cue |
| Casey Faris and similar long-form video lessons | Seeing a complete Resolve workflow | A broad course may not solve your exact musical decision | Copy the exercise once, then rebuild it with your own markers |
| Community questions | Unusual edge cases and alternate approaches | Answers vary in context and version | Bring a precise problem such as “my music dip masks the dialogue pause” |
| A Resolve-aware assistant | Finding a control while you work | It cannot replace listening judgement | Ask where a control is, then decide whether using it serves the scene |
| A conventional course platform | A planned curriculum and exercises | Progress can stay passive if you only watch | Stop each lesson and reproduce the move inside a real timeline |
If the exact problem is “I can’t find the Fairlight control,” contextual help can shorten the search. If the problem is “the cue tells the story too early,” only repeated listening and deliberate comparison will solve it.
Someone searching for the best way to learn DaVinci Resolve may need a structured course, while someone trying to learn DaVinci Resolve fast may need one narrow exercise and a real timeline. If you’re comparing an AI tool to learn DaVinci Resolve or an app that helps you while using DaVinci Resolve, separate control-finding from creative judgement. The first can be assisted. The second has to be heard.
If your bottleneck is finding a Fairlight control, contextual help can shorten the search. It can’t decide whether a silence makes the reveal more honest, whether a cue is announcing danger too early, or whether the picture needs music at all. Make those decisions by listening and comparing versions.
Guided help can answer “where is the automation control?” It cannot answer “does this silence make the reveal more honest?” Make that second decision yourself.
How do I troubleshoot a tension cue that still feels flat?
Troubleshoot a flat cue by checking story timing, contrast, source material, and mix ownership in that order. A flat cue usually needs a better change, not a louder plugin.
Use this branch:
| Symptom | Likely cause | First fix |
|---|---|---|
| The cue feels dramatic immediately | Too much information at the opening | Remove a layer or delay the first accent |
| The middle feels unchanged | No new expectation is introduced | Add a distinct layer, missing beat, or harmonic change |
| The peak feels small | The fullest material arrived early | Rebuild the opening and save the return |
| The reveal feels predictable | The cue confirms it too clearly | Try a delayed hit, a displaced hit, or silence |
| The scene feels crowded | Music owns moments that belong to speech or effects | Draw local dips and move musical accents |
| The cue feels like a loop | Repetition has no changed context | Remove a beat, change a layer, or edit before resolution |
| The ending feels sentimental | The cue resolves too completely | Cut the cadence or leave a controlled tail |
| The cue feels empty | The picture needs an actual musical identity | Add one restrained motif, not a full stack |
| The automation sounds nervous | Too many points or an accidental recorded pass | Delete points and redraw the main shape |
| The edit sounds technically correct but emotionally wrong | The cue’s behavior doesn’t match the story | Rewatch muted and remap the markers |
The flatness audit
Play the scene 5 times, each time listening for one thing:
- Story changes.
- Musical entrances.
- Musical absences.
- Dialogue and effects ownership.
- The aftermath.
Don’t change the mix between each pass. Take notes first. If you edit after every play, you can lose the original problem under a pile of small corrections.
Check whether the source is wrong
Sometimes the cue is simply the wrong cue. If it has no sparse material, no useful phrase boundary, no change in density, and no ending you can use, stop processing it. A different source can solve in 2 minutes what a complicated edit cannot solve in 30.
This is not a verdict on the track’s quality. It is a verdict on fit.
How do I revise the cue after picture changes?
Revise the cue by protecting the story markers and rechecking every musical entrance around the changed picture. Don’t repair the old automation blindly when the event it supported has moved.
When picture changes, work from the marker plan:
- Lock the new picture or work from the latest approved timeline.
- Rewatch without music.
- Move, rename, or delete story markers.
- Recheck the cue start and first clue.
- Recheck the false release.
- Recheck the peak and the first aftermath sound.
- Inspect automation around every moved marker.
- Listen for a rise that now happens before the image earns it.
- Keep or discard the old version based on story, not sunk effort.
If a cut moves by 4 frames, the correct response may be to leave the music alone. If a reveal moves from the middle of the cue to its ending, rebuild the cue’s information budget. The size of the picture change doesn’t tell you the size of the audio change.
Use Resolve 21’s subframe controls only when you’ve established the new story relationship. Precision editing is the final adjustment, not the first diagnostic.
How do I finish a cue that builds tension without over-editing it?
Finish when the cue’s entrances, absences, peak, and aftermath each have a clear story reason and survive a full-scene listen. Remove edits that only prove you worked on the cue.
Use this final pass:
- Turn off every nonessential plugin.
- Listen from before the cue begins.
- Write down the first moment you start waiting.
- Write down the moment the cue first tells you what to expect.
- Decide whether that expectation is too early.
- Listen through the false release without touching the mouse.
- Listen through the peak and the next line or effect.
- Mute the music and compare what the scene already communicates.
- Remove one layer or automation move.
- Compare the leaner version against the previous version.
The final edit may be the leaner one. Tension isn’t a reward for adding work. It is the result of managing what the audience knows, hears, and expects over time.
If you want to explore the mechanics of timing music to picture next, use our guide on how to fit music to video length in DaVinci Resolve 21. It handles the adjacent duration problem. The rule here is simpler: make the cue’s strongest information arrive at the story’s strongest change.
A music cue builds tension through delayed information, controlled contrast, and a release chosen for the picture.
What is the final decision rule for a tension cue?
Keep the cue when it makes the viewer wait for the right thing. Change it when it announces the answer early, competes with the story’s owner, or reaches its fullest state before the picture earns it.
The working sequence is straightforward:
- Define the release.
- Mark the story turns.
- Choose music with room to grow.
- Edit the cue into states rather than one continuous block.
- Reveal layers according to the markers.
- Shape volume with ramps, holds, dips, and releases.
- Let dialogue and effects own their moments.
- Test silence and delayed hits.
- Compare versions instead of trusting the first exciting pass.
- Remove every move that doesn’t change expectation.
After you do that, the right next step is not another plugin. Play the scene again with the music muted, then bring the cue back at its leanest useful shape. If the return of one withheld layer changes the scene, you’ve found the tension. If nothing changes, the cue is probably solving the wrong problem.
The strongest music cue doesn’t tell the audience to panic. It gives them a pattern, takes away certainty, and waits with them.
Frequently asked questions
- How do I make a music cue build tension in DaVinci Resolve?
- Choose a cue with room to grow, place markers on story turns, edit the cue around those markers, and automate volume and density so each new layer arrives later than the viewer expects. Keep dialogue clear and remove sound at the release point.
- Why does my tension music sound too obvious in DaVinci Resolve?
- The cue is probably announcing the danger before the picture has earned it. Lower the opening, remove an early pulse or impact, leave a gap before the reveal, and reserve the fullest arrangement for the actual turn.
- How do I duck music under dialogue in DaVinci Resolve?
- On the Edit page, use the clip gain line and add keyframes before and after each spoken phrase, then lower only the required section. On Fairlight, you can also record fader automation or use sidechain compression when the dialogue track should control the dip.
- Can I build tension with one music track in DaVinci Resolve?
- Yes. Use clip edits, filtered sections, reversed tails, strategic gaps, volume ramps, and a delayed resolution. Multiple stems make the job easier, but tension comes from controlled expectation, not from the number of tracks.
- What should happen when the tension cue reaches its peak?
- Choose a specific release: a hit, a cut to silence, a tonal change, a line of dialogue, or a new scene. The peak works when the cue changes the audience's expectation instead of simply becoming louder.
Sources
- DaVinci Resolve 21 New Features Guide
- DaVinci Resolve Fairlight
- DaVinci Resolve Edit
- DaVinci Resolve Training
- The Fairlight Audio Guide to DaVinci Resolve 20
- The Fairlight Audio Guide to DaVinci Resolve 18
- Blackmagic Design Announces DaVinci Resolve 21
- The Effects of Contextual Certainty on Tension Induction and Resolution
- Auditory Expectation: The Information Dynamics of Music Perception and Cognition
- A Tradeoff Between Musical Tension Perception and Declarative Memory
- Suspense with a Camera: Jeffrey Michael Bays Talks Building Suspense with Oscar-Nominated Editor Saar Klein
- Take 2 Extended Interviews: Tom Carlson
Keep reading

Guides · Aug 30, 2026 · 8 min
DaVinci Resolve: Choose Music for a Montage
A Resolve 21 workflow for choosing montage music by arc, tempo, structure, edit points, licensing, and delivery needs.
Guides · Aug 29, 2026 · 8 min
DaVinci Resolve Find Music by Mood: A Practical Workflow
Learn how to find music by mood for a DaVinci Resolve 21 edit, choose tempo, audition tracks, and bring licensed audio into your timeline.
Guides · Aug 24, 2026 · 7 min
DaVinci Resolve Fit Music to Video Length: 21 Guide
Fit music to your video in DaVinci Resolve 21 with Music Editor, beat markers, Elastic Wave, and a clean manual fallback.