Articles / Guidesupdated for DaVinci Resolve 21.1 (November 2026)
How to Match ADR to Location Audio in DaVinci Resolve
Quick answer
To match ADR to location audio in DaVinci Resolve 21, align the replacement to the actor’s lip movement, then compare it with nearby production dialogue and match level, microphone perspective, tone, ambience, and room reflections. Use Fairlight’s ADR panel to record and manage takes, then edit and mix the chosen take against the original scene. No single effect can make a poor performance or recording identical.
I start with the cut, not a plug-in. If the new line lands on the wrong mouth movement, or sounds like the actor stepped closer to the microphone, no amount of ambience will disguise the mismatch.
As of November 2026, this guide uses DaVinci Resolve 21.1’s Fairlight workflow. It separates two jobs that often get confused: replacing dialogue in time, and making the replacement belong in the recorded scene. The first is about performance and sync. The second is about sound.
How do I match ADR to location audio in DaVinci Resolve?
To match ADR to location audio in DaVinci Resolve, first line up the replacement performance with the actor’s visible speech, then compare it with production dialogue from the same scene and match the differences you can hear. Work through performance, timing, level, microphone perspective, tone, reflections, and ambience; don’t start by adding a large reverb preset.
ADR, or automated dialogue replacement, is dialogue recorded after the original filming to replace or supplement production sound. Fairlight’s ADR panel supports cue creation, rehearsal and recording cues, text prompts, multiple takes, and take selection. It helps organize the recording process, but the match itself still depends on editorial decisions and listening. Blackmagic describes the built-in ADR panel and its list, setup, and record functions in its Fairlight overview.
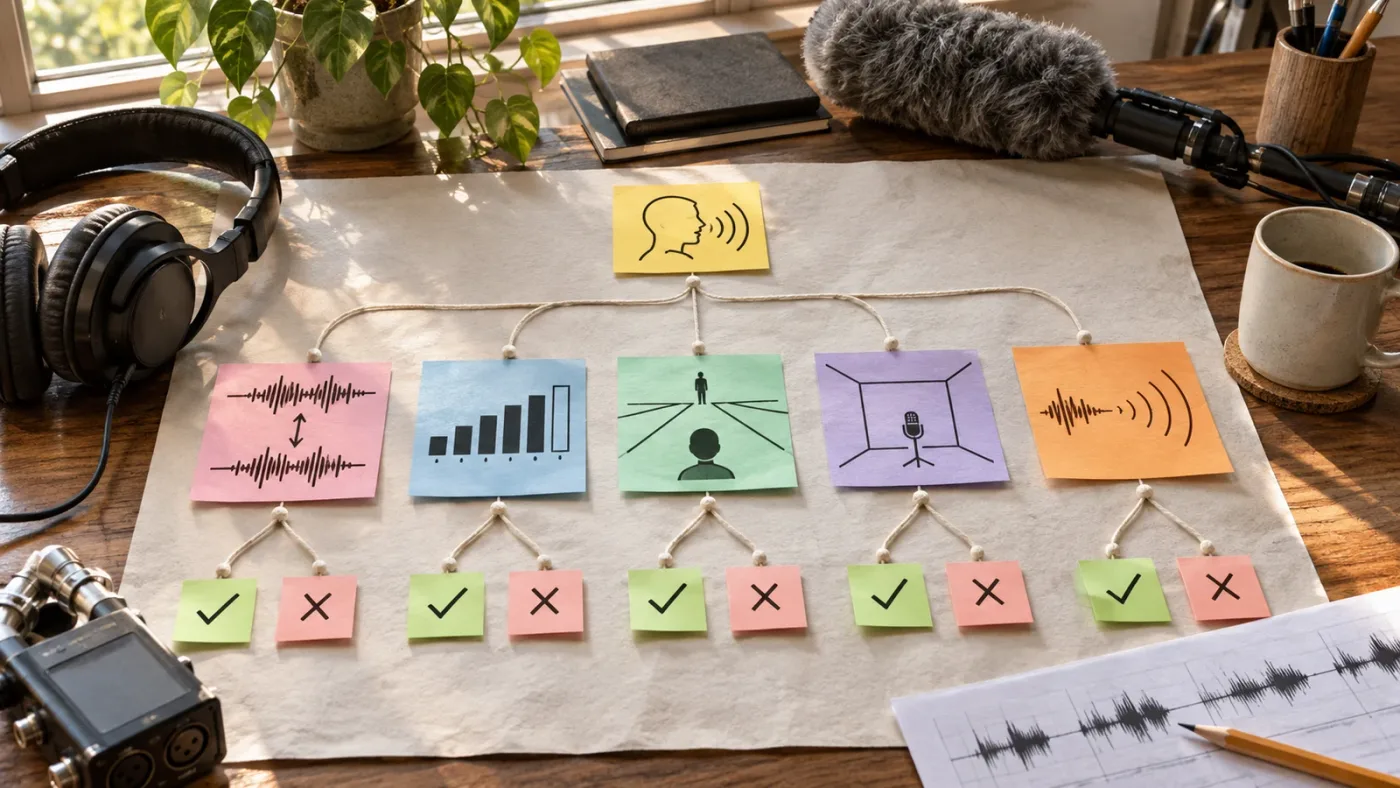
A useful way to think about the task is to separate sync from sonic continuity:
- Sync: Does the actor’s mouth movement agree with the new performance?
- Performance: Does the new take have the same intention, pace, emphasis, and energy?
- Perspective: Does the voice sound as if it comes from the same distance and direction?
- Tone: Do the voice and microphone sound compatible with the production track?
- Space: Do reflections and ambience suggest the same environment?
- Continuity: Does the sound remain believable when the edit moves from production dialogue into ADR and back?
These are related, but they aren’t interchangeable. A take can be perfectly synchronized and still sound detached. A take can have a close tonal match and still feel wrong because the actor speaks a different phrase rhythm or pushes a consonant too hard.
A convincing ADR edit matches the performance and perspective before it tries to match the room.
Use this order as a diagnostic path, not a rigid recipe. If the actor’s delivery is obviously different, repair that first. If the performance feels right but the voice abruptly changes from roomy to dry, work on the space and background. If you don’t know what’s wrong, compare the replacement against the line immediately before and after it.
DaVinci Resolve 21.1’s Reference Manual has a dedicated Fairlight ADR chapter, listed as Chapter 174. Blackmagic’s official Fairlight training also includes a 47-minute lesson called “Recording VO and ADR.” The manual is the reference for controls; the training is useful for seeing the recording workflow. Neither removes the need to judge the sound in context.
This guide treats numerical examples as worked examples, not measured outcomes. Your line, room, actor, microphone, and mix determine the useful settings. A setting that helps one line may make another sound artificial.
Why does ADR sound different from the location audio?
ADR sounds different from location audio when the replacement changes one or more cues the listener uses to place a voice in a scene. The actor’s delivery, microphone distance, room reflections, noise floor, EQ, and level all contribute to that impression.
The word “match” can imply that there’s one correct filter or preset. There usually isn’t. Location audio is a record of a specific performance, microphone position, room, and moment. Replacement audio is a new recording made later, perhaps in a different room with a different microphone. You’re trying to make the cut feel continuous, not prove that the two recordings came from the same chain.
Start by finding a reference that makes sense. The closest line is often the best place to begin, but “closest” means more than nearest on the timeline. Look for production dialogue from the same character, shot size, movement, and microphone perspective. A close lavalier recording and a distant boom recording can sound quite different even when they capture the same line. Choosing the wrong reference can lead you to process the ADR toward the wrong sound.
When you compare the two, listen for these clues:
| What you hear | Likely mismatch | First thing to check |
|---|---|---|
| ADR seems pasted on, even at a similar level | Performance, sync, or perspective | Compare the line’s timing, emphasis, and apparent distance |
| ADR sounds brighter or more intimate | Microphone position or frequency balance | Compare consonants, breath, and high-frequency detail |
| The voice is clear but the scene suddenly feels silent | Missing room tone or background ambience | Listen to the gaps before and after the replacement |
| A hollow or metallic quality appears | Excessive or mismatched processing, reflections, or phase issues | Bypass processing and compare again |
| The new line blooms after each word | Too much reverb or a mismatched decay | Reduce the effect and recheck the scene transition |
| ADR feels louder even when meter readings look similar | Different average energy, vocal emphasis, or spectral balance | Match perceived loudness in the mix, not only peaks |
| The recording feels closer than the picture suggests | Microphone perspective | Use the appropriate production reference and reconsider the capture position |
| The replacement is technically clean but still distracts | Performance or scene context | Revisit the take before adding more processing |
The table is a way to narrow the problem, not a set of automatic diagnoses. For example, a line may feel “too bright” because its microphone is closer, its EQ differs, or the actor delivered sharper consonants. A tone control cannot fix all three in the same way.
A useful listening method is to play a short range that includes the previous production line, the ADR, and the following production line. Don’t audition only the replacement in isolation. Isolation helps you hear clicks, breaths, and noise; the transition tells you whether the ADR belongs. Repeat the comparison at a comfortable, ordinary listening level. If you turn the ADR up dramatically, the edit may become obvious for reasons unrelated to its tone.
Dialogue editor Brad Semenoff describes a practical part of this problem in an interview with A Sound Effect: “Making sure that the ADR sync is as tight as possible is also a big help obviously.” The same response emphasizes preparing surrounding production dialogue so the room sound doesn’t drop out when ADR enters. That’s a concise reminder that the edit around the replacement matters as much as the clip itself.
A line can be clean, clear, and in sync while still sounding like it belongs to a different shot.
Which production recording should I use as the ADR reference?
Use the production recording that best matches the replacement’s shot, distance, movement, and intended perspective, not automatically the loudest or cleanest track. A close microphone and a distant microphone record different proportions of direct voice and surrounding sound.
Before processing, check what production audio you actually have. A scene may include a boom track, one or more lavaliers, a camera reference, or a mix track. Their relative usefulness depends on the scene and the edit. If the dialogue editor or production mixer supplied notes, use them to understand which mic or combination was intended. Don’t assume that the most isolated track represents the sound the audience should hear.
A simple reference-selection matrix helps:
| Picture or performance context | Reference to audition first | Why it may fit | Watch for |
|---|---|---|---|
| Tight close-up with intimate speech | The production mic that sounds closest and most direct | The picture supports a close vocal perspective | A lav may have clothing noise or an unnatural chest-heavy sound |
| Medium shot with a natural conversational distance | The dialogue track that resembles the scene’s normal balance | It may preserve the intended blend of voice and room | A close ADR mic can sound too present |
| Wide shot across a room | A more distant or room-influenced production line | The voice should feel connected to the space shown | Don’t bury intelligibility merely to make it distant |
| Actor moves during the line | Production audio from a similar movement or position | Perspective changes may be part of the scene | A static replacement may need automation or a different take |
| A noisy location take is being replaced | The cleanest usable dialogue reference from that scene | It offers a target without copying the defect being removed | The noise may be part of the scene bed and should remain separately |
| Several production mics disagree | Compare each mic in context, then choose the intended sound | A single source may have clearer perspective than a rough mix | Avoid combining tracks blindly; phase and tone can change |
The goal isn’t to imitate every flaw in the production recording. If the original has a distracting bump or handling noise that ADR is meant to remove, don’t add it back just because it exists in the reference. Instead, distinguish the unwanted defect from the scene’s useful acoustic character. The replacement can be cleaner than the original while still sharing its perspective and background.
If you have multiple production microphones, audition them one at a time. Listen for the character of the voice and how much environment each track includes. A lavalier may have a different balance of low and high frequencies than a boom, while a camera reference may contain a different blend or more room sound. The “right” source is a creative choice that should agree with the surrounding shots and the intended mix.
Keep a note of the chosen reference for each replacement. That doesn’t have to be elaborate. A marker or clip label can record the character, scene, source track, and the reason for the choice. This becomes useful when a line is revised, the cut changes, or someone else needs to review the decision.
When the location track itself is inconsistent, don’t force the ADR to mimic a section that will be removed or covered. Pick a clean nearby phrase with similar perspective, and preserve the scene’s general environment using the appropriate background bed. If the scene moves from quiet interior to a noisy exterior, one reference may not fit both sides of the line.
Blackmagic describes Fairlight as an integrated environment for dialogue recording, editing, mixing, and repair. The page’s integration with picture is useful here because you can judge the reference against the shot instead of making a sound-only decision. For broader context on handling dialogue in a scene, see the site’s guide to mixing audio in Fairlight.
How do I prepare the ADR session in Fairlight?
Prepare the ADR session by protecting the original dialogue, creating a clearly labeled record track, confirming the microphone input, and adding a cue that identifies the line and character. Then rehearse with the picture and guide dialogue before recording a take.
The exact controls are documented in Resolve 21.1’s Reference Manual under Fairlight’s ADR and recording chapters. Menus can shift between versions or workspace layouts, so if a control doesn’t appear where expected, check the manual shipped with your installed Resolve version. This guide focuses on a stable workflow rather than assuming every screen layout is identical.
- Protect the original. Keep production dialogue on its own track. Duplicate the timeline or project if your edit is fragile, and avoid recording over the source clip. The original may be needed for comparison, alternate edits, or a later decision to restore the production line.
- Create a dedicated record track. Name it for its purpose, such as
ADR Character A. Dialogue is commonly recorded as mono, but match the track’s channel configuration to your recording input and project needs. Do not change track format casually in a project with established routing. - Check the recording input. Confirm that the microphone and interface are selected at the operating-system and Resolve levels. Speak into the microphone and watch the input meter. If it doesn’t move, troubleshoot the input selection, permissions, connection, or patching before opening the ADR cue list.
- Patch the input to the intended record track. Fairlight recording requires an input route to the track. Blackmagic’s Fairlight description explains the basic sequence: choose the track input, select the microphone or input device, patch it, arm the track, and record.
- Open the ADR controls. The Fairlight ADR interface is organized around cue listing, setup, and recording functions. In Resolve 21.1, the manual’s ADR chapter gives the current controls and terminology.
- Create a cue with enough context. Identify the character and line. Include the scene or cue ID if your project needs it. Keep cue naming consistent so actors and editors can find the right replacement.
- Set the guide and recording behavior. Decide whether the talent needs to hear the original line, the cue beeps, a visual streamer, text, or a combination. The best choice depends on the performer and the line. Don’t make a cue method more complicated than the performer needs.
- Rehearse before recording. Play the picture and guide line. Check that the actor can hear the cue, understand the timing, and perform without fighting distracting timeline audio.
- Record multiple takes when useful. Fairlight’s ADR workflow supports recording multiple takes and marking or rating favorites, as Blackmagic’s product documentation explains. Keep the alternatives until you’ve judged their performance and sync against the scene.
A record track should have an obvious name and purpose. Avoid placing ADR directly over the original production clip before you’ve established a safe comparison workflow. Separate tracks let you mute, solo, compare, and revise without losing the source. They also make it easier to present an alternate to a reviewer.
The guide track can be the original production dialogue, but choose its monitoring level carefully. If the actor hears a loud guide while performing, the captured take may contain bleed or the performer may follow the wrong timing. If you mute the guide entirely, the actor may lose the rhythm or emotional reference. Rehearse and decide which monitoring arrangement supports the performance.
If the actor needs words on screen, ensure the cue text is readable and matches the approved line. If the actor needs visual timing, confirm that the streamer or other visual cue runs across the right portion of the frame. A cue setup that is technically active but poorly timed can make good performance harder.
The session should also be organized for a later editor. Track names, cue labels, take ratings, and notes are not busywork. They help distinguish “best performance” from “best sync,” which may not be the same take. A clear label can note that a take is preferred for emotion but needs a small timing adjustment, or that an alternate has better mouth sync but a weaker delivery.
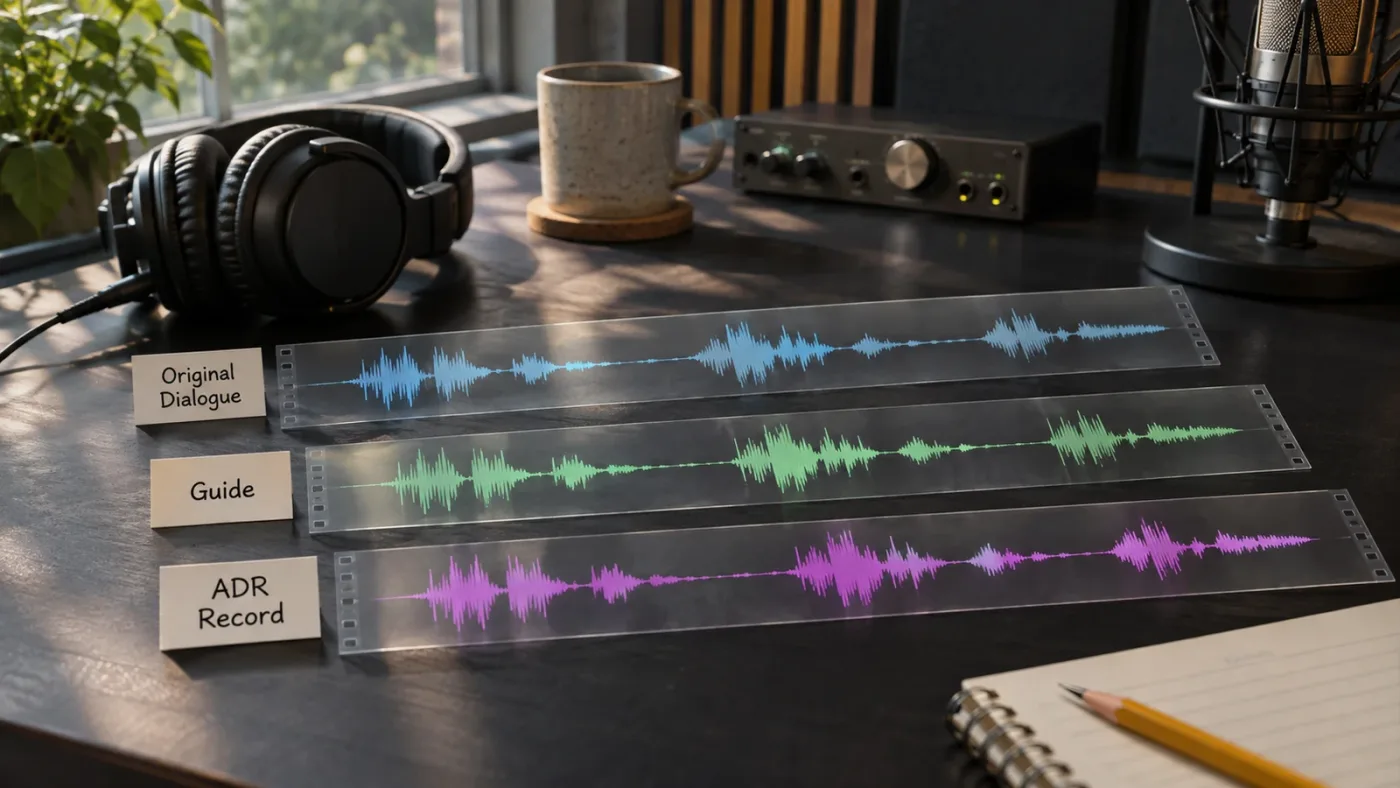
Should I use Fairlight ADR or the Edit page voiceover tool?
Use Fairlight ADR for planned dialogue replacement with cues, guide playback, repeated takes, and ADR-specific session controls. Use the Edit page voiceover tool for simpler scratch narration or quick voiceover recording when you don’t need a structured ADR session.
The difference is practical. A quick scratch line may need only a record button and a destination track. A replacement line often needs a character cue, repeatable timing, a guide, multiple takes, and a comparison against picture. Blackmagic’s Resolve 20 New Features Guide distinguishes the simplified Cut and Edit page voiceover tool from Fairlight’s more appropriate ADR toolset for serious, precise ADR work.
| Need | Better starting point | Reason |
|---|---|---|
| Scratch narration over an edit | Edit page voiceover | A simple, direct recording workflow may be enough |
| One quick guide line that is not a final replacement | Edit page voiceover | Less setup when cue management is unnecessary |
| Re-recording an actor’s line to match picture | Fairlight ADR | Cues and takes support a structured replacement session |
| Several lines across a scene | Fairlight ADR | Cue labels and take handling help keep lines organized |
| Record and compare multiple performances | Fairlight ADR | The ADR workflow supports multiple takes and favorites |
| A musician, Foley performer, or general recording task | Fairlight recording tools | Choose the recording workflow that fits the source and track setup |
| A project where the menu or tool differs by version | The manual for the installed version | Version-specific documentation is safer than copying an old tutorial |
Resolve 20’s feature guide is evidence for the voiceover-versus-ADR distinction in that release. The current 21.1 Reference Manual should be your authority for the installed version’s exact interface. Don’t assume a shortcut or button location from a 20 tutorial is unchanged unless you confirm it in 21.1.
A common trap is choosing the simpler tool because it starts recording faster, then trying to reconstruct an ADR workflow afterward. If you need to rerecord multiple lines, a little session setup can save confusion. Conversely, there’s no prize for using the ADR panel for a one-off scratch track if a basic voiceover is all the job requires.
How do I get the ADR performance and lip sync right?
Get the performance and lip sync right by comparing the new line with the actor’s mouth movement, consonant timing, pauses, and emotional shape. Use the best take first; treat stretching or micro-editing as a repair for small timing differences, not as a substitute for a convincing performance.
A lip-sync check is more than lining up the start of the waveform. The onset of a word may begin with a quiet breath or an unvoiced consonant that is difficult to see on the waveform. Watch the mouth. Listen to the sound. Then adjust the clip so the speech feels attached to the visible articulation rather than merely aligned to a convenient waveform peak.
Work through the line in pieces:
- Beginning: Does the first visible mouth opening agree with the first audible sound? Check whether the actor begins with a breath or a consonant that looks early or late.
- Middle: Do stressed syllables and mouth shapes remain close through the phrase? A line may start in sync and drift if its pace differs from the original.
- End: Does the final consonant, breath, or mouth closure land naturally? Don’t cut away the tail just to hit the next edit.
- Pauses: Do the gaps between phrases match the actor’s movements and the scene’s rhythm?
- Emotion: Does the new line carry the same intent? A technically accurate word spoken with a different intention can sound like a different take.
If the whole phrase is early or late by a consistent amount, move the clip as a whole. If the beginning lines up but the end drifts, first ask whether another take has a closer delivery. If no take fits, consider whether a small timing correction is appropriate. Blackmagic notes that Fairlight’s Elastic Wave retiming can stretch a clip without changing pitch and can be used to synchronize ADR takes with picture. That capability is not permission to stretch every line until it fits. Extreme or uneven changes can alter articulation and make a performance feel unnatural.
Use the smallest intervention that solves the problem. For a minor discrepancy, a simple move or edit may be enough. For a phrase with a timing change in the middle, a carefully placed edit or localized retime may help. Preserve the original recording so you can compare and undo the repair. Don’t flatten or overwrite the only good take.
Watch consonants especially closely. Plosives such as “p” and “b,” fricatives such as “s” and “f,” and final consonants can make a lip-sync mismatch more apparent than a vowel. A wave peak isn’t necessarily the point where the mouth opens. Use the picture as the primary visual guide, and use the waveform as supporting evidence.
If an actor’s mouth is obscured, use the performance rhythm, the available picture, and the surrounding edit. A reaction shot may let dialogue play off-screen, so perfect visible lip matching may not be the goal. Don’t force a replacement to match lips that aren’t visible if the scene’s edit intentionally keeps the character off screen.
Take selection deserves more attention than many processing decisions. One take may have the right pace but different emotion; another may have stronger emotion but a slightly late final consonant. Choose the take that best supports the scene, then decide whether the timing issue is small enough to edit without damaging the delivery. A poor emotional match is often more noticeable than a small technical offset.
The best take is the one that serves the scene, not the one with the prettiest waveform.
How do I match ADR loudness without making it sound pasted on?
Match ADR loudness by comparing perceived level in the full scene, then adjust clip gain or automation so the replacement does not jump forward or disappear. Don’t rely on peak meters alone; a line with sharper consonants or more upper-midrange energy can seem louder even if its peak is similar.
Start with the voice’s apparent level relative to nearby dialogue. Play the phrase before the replacement, the ADR, and the next phrase. Keep the music and effects in the mix if they affect the scene’s balance. If the ADR sounds too prominent, lower it a little and replay the transition. If it vanishes, raise it gradually. Make the decision in context, not by matching a number without listening.
A useful sequence:
- Set a neutral starting point. Bypass unnecessary processing and place the ADR at a level where you can hear it clearly without forcing it forward.
- Compare adjacent lines. Listen to the same character before and after the replacement, if available. Use a comparable phrase rather than a whisper as the reference for a shout.
- Match broad level first. Use clip gain or the control appropriate to your mix. Avoid heavy compression as the first remedy for a line that is simply too loud.
- Check the beginning and end. A sudden level change at the edit can reveal the replacement even if the middle sounds right.
- Automate only where the scene calls for it. If the character turns away, moves, or is masked by a passing sound, a static setting may not preserve the scene’s perspective.
- Recheck tone after level changes. A change in level can alter how strongly you notice room sound, consonants, and noise.
Level is tied to performance. A replacement with harder consonants, louder breaths, or a more projected delivery may seem louder even after its fader is lowered. If you find yourself turning it down far below the neighboring dialogue, consider whether the take is simply too forceful. A better performance may need less correction.
Clip gain and automation serve different purposes. Clip gain is useful for setting the general level of a line. Automation can shape changes over time, such as a voice that grows quieter as the actor turns away. The site’s guide to audio clip gain versus automation explains that choice in more detail.
Don’t use compression to erase every difference between takes. Compression can control dynamics, and Avid’s ADR guidance discusses it alongside level automation, EQ, and ambience. But compression cannot make a close, forceful delivery sound like a relaxed distant line by itself. If you compress the new voice heavily, you may make breaths and room noise more obvious while reducing the natural change in the performance.
Be careful with loudness meters. They help you assess and manage levels, but a meter does not know whether the actor is supposed to sound far away, exhausted, angry, or calm. Use meters to avoid technical problems and to keep a mix under control; use listening and picture context to make the scene believable.
Why does ADR sound too clean, close, or bright?
ADR sounds too clean when its recording contains less room sound or background noise than the production track. It sounds too close when the replacement has a stronger direct voice and less environmental sound, and it sounds too bright when the microphone, position, performance, or processing emphasizes different high-frequency detail.
“Too clean” is not always a defect. The original line may be noisy enough that replacing it with a cleaner performance is the reason for recording ADR. The goal is usually to remove distracting defects without removing all the clues that make the voice belong in the scene.
Treat these as separate questions:
- Is the voice too direct? Check microphone distance and perspective. A close recording may have stronger detail and less room than a boom recorded farther away.
- Is it too bright? Compare the consonants and vocal body with the selected reference. A tonal adjustment may help, but first rule out a different microphone perspective or performance.
- Is it too dry? Listen for reflections around words and tails after phrases. A room effect may help if the production really contains a room signature.
- Is it too isolated? Listen between words. The replacement may have near-silence where the production track has steady ambience.
- Is it simply a different performance? If the actor’s delivery, effort, and rhythm changed, processing can’t recreate all of that.
A practical diagnostic is to bypass every effect on the ADR, then compare the dry take with production dialogue. If the mismatch is present before processing, the issue may come from the recording or performance. If the mismatch appears only after enabling an effect, inspect that effect before adding another. This keeps you from building a chain of corrections on top of a problem caused by the previous correction.
For a distant shot, don’t assume that adding reverb is enough. A distant perspective often has a different balance between direct voice and the environment. A microphone farther from the actor may capture more room and less close detail; a reverb plugin can add reflections, but it doesn’t recreate every aspect of that capture. Avid’s guidance identifies EQ, reverberation, ambience, level automation, and dynamics as parts of ADR mixing. Those are separate controls for separate symptoms, not a recipe that must be applied wholesale.
Avoid “fixing” brightness by cutting so much high-frequency detail that the replacement becomes dull or muffled. Compare the voice’s natural character and consonants. Make a restrained tonal change, then listen again at the edit. If you can hear the EQ correction as an effect, it may be too strong.
If the source was recorded in a very different space, think about whether you can improve the raw recording instead. Recording closer or farther from the microphone, turning slightly off-axis, or using a quieter room can sometimes produce a more useful starting point than extensive processing. For a pickup recording, follow the original mic and room notes when available. If those details aren’t known, make the cleanest practical recording and match it during the edit.
A clean ADR take is a useful source, but cleanliness alone doesn’t create continuity.
How do I add room tone and ambience without making the ADR obvious?
Add room tone and ambience by keeping the scene’s background bed continuous across the dialogue replacement, then shaping it so the sound does not suddenly disappear or change at the edit. Use production ambience when it is available and appropriate; don’t assume that reverb alone can replace room tone.
Room tone is the low-level sound of a location during a pause in dialogue. It might include ventilation, distant traffic, insects, a refrigerator, or the overall noise character of an interior. The exact sound depends on the scene. It isn’t interchangeable with reverb: room tone is a continuing background; reverb is the reflection and decay of sound in a space.
Listen to a gap before and after the replacement. Is there a steady background? Does it change when the ADR begins? Does the sound become unnaturally silent between words? Those transitions can reveal a new recording even when the spoken line itself is convincing.
Use a practical layering approach:
- Find a usable section of the location’s ambience or room tone.
- Put it on a separate, clearly named track so it remains adjustable.
- Extend or repeat it only as needed to cover the dialogue edit.
- Listen for obvious loops, sudden changes, or a noise character that doesn’t belong.
- Blend the background so it supports both the production dialogue and the ADR.
- Check the complete scene, including pauses, breaths, and cutaways.
A room-tone bed should not become a conspicuous loop. If a repeated section has a noticeable event, fade, or tonal change, choose another portion or edit the loop points. Don’t make the background louder than the dialogue simply to hide the edit. The objective is continuity, not a new layer that attracts attention.
Sometimes you have no useful room tone. You can still reduce the gap by preserving appropriate surrounding production ambience, using a sound bed from the same scene, or building a subtle environment from other elements already in the mix. Be careful: a generic ambience from another location may make the scene less believable. If the visual setting changes, the background should reflect that transition rather than flattening every shot into the same noise bed.
Listen to the room in pauses as well as under speech. The replacement may sound fine while the actor is speaking, but a sudden dead gap between words can make it feel pasted in. Conversely, excessive ambience can make a quiet line sound distant or muddy. Set the bed low enough that it does not compete with the dialogue, then check whether it preserves the sense of a continuous space.
For more on building and placing this layer, see how to add room tone in DaVinci Resolve. That workflow is related, but the important ADR-specific choice is to use the sound of the same scene where possible, rather than treating every room as interchangeable.
The dialogue editor Brad Semenoff’s discussion of ADR at A Sound Effect is particularly relevant here: he describes preparing surrounding production dialogue so “the air doesn’t drop out” when ADR enters. That phrase captures a common continuity failure. The background doesn’t need to be loud. It needs to remain believable.
How do I match reverb and room reflections in Fairlight?
Match reverb by comparing how the production voice reflects and decays, then add only enough processing to make the ADR feel compatible with that space. A large reverb effect is not a shortcut to matching a room; too much can make the line sound washed out or distant.
First decide whether the production recording has a clear reverberant character. A close microphone in a treated location may have little audible reverb. A wide shot in a reflective interior may carry more. The right match depends on the reference and shot, not on the word “ADR.”
Avid’s published ADR guidance names room size, decay, pre-delay, diffusion, and the balance of wet and dry sound as relevant considerations when using reverb to match a space. It also warns that too much reverb can make dialogue sound distant or washed out, while too little can leave it unnaturally dry. Those parameters are useful listening prompts, not prescribed numerical settings.
Try this order:
- Compare tails. Listen to the end of a phrase or a short pause. Does production dialogue leave audible reflections that the ADR lacks?
- Check early reflections. Does the production voice have a sense of a nearby wall or room boundary? Don’t focus only on the long tail.
- Add a small amount of matching space. Bring up the effect gradually and listen in the cut.
- Check the direct voice. If the ADR still feels too close, reverb may not be the only issue. Reconsider microphone perspective and tonal balance.
- Listen to the next production line. If the space seems to “switch off” after the ADR, your effect may be too obvious or too long.
- Check mono compatibility when relevant. A spacious effect that seems convincing on headphones can become unstable or less clear in another playback arrangement.
The word “reverb” covers different qualities. A room’s early reflections, tail length, tone, and stereo character don’t all respond the same way. If the effect’s tail is close but the voice still seems too direct, changing the wet balance may not solve the early-reflection mismatch. If the tail is long and obvious, a shorter or lower-level effect may work better. Work from what you hear.
Don’t apply the same reverb indiscriminately to every ADR line in a project. A character may move from a reflective hallway into a soft-furnished room. A wide exterior shot may have little room reflection but still carry wind or traffic. Group lines by their actual acoustic setting, and use separate settings when the picture or production reference supports that choice.
iZotope’s article about Dialogue Match describes its own workflow for analyzing and transferring EQ, reverb, and ambience characteristics from a production line to ADR. That is useful evidence that these are distinct matching dimensions. It does not mean Resolve includes the Dialogue Match plug-in, or that an analysis-based effect can decide which reference is artistically correct. Treat the article as a description of the iZotope tool, not as a Resolve feature claim.
If a room effect makes the ADR sound more artificial, bypass it. A dry replacement with a well-chosen ambience bed may fit better than a heavily reverberant one. The cut is the test.
How do I make the replacement sound farther away or closer?
Make a replacement sound farther away or closer by matching the scene’s microphone perspective, not by changing reverb alone. Compare directness, vocal detail, room sound, level, and any movement in the actor’s position before choosing a correction.
Perspective is the perceived position of the voice relative to the listener and the scene. The audience hears more than loudness. A very close recording often has clear consonants and breath detail. A more distant one may contain more environment and less direct vocal detail. These differences can persist even when both recordings are equally loud.
Use the frame as evidence. A close-up may support a direct, intimate vocal. A wide shot across a room may call for a less intimate sound. But the camera framing doesn’t always map exactly to microphone distance: the production mix may have been designed to keep dialogue clear, or a close lav may be used during a wide shot. When the audio already has an intentional perspective, use that as your reference rather than applying a simplistic wide-shot rule.
For a replacement that sounds too close:
- Check whether a less close recording or a different microphone position is available.
- Compare the line to a production recording with similar distance.
- Reduce excessive high-frequency detail only if the reference supports that tonal change.
- Add space carefully, and listen for whether the voice remains unnaturally direct.
- Preserve intelligibility. Don’t bury important dialogue under ambience.
For a replacement that sounds too distant:
- Check whether the ADR is too quiet or simply lacks detail.
- Compare it with a closer reference from the same scene.
- Reduce unnecessary room effect or background masking.
- Avoid brightening the line so much that it becomes detached from the environment.
- Check whether the actor’s original performance was actually more intimate.
If the actor moves, a fixed clip level and a fixed effect may not follow the scene. Automation can shape a gradual change, but don’t invent a dramatic movement that the picture doesn’t show. Watch for changes in the actor’s orientation, distance, or position, and listen for similar changes in production audio.
A useful worked example: imagine a replacement line for a character speaking across a kitchen. The ADR was recorded close and sounds unusually present. First compare it to a production line recorded at a similar distance. If that line has less breath and consonant detail, consider whether the ADR take or mic position can be improved. Then compare the room reflections. Add a restrained space effect only if the reference has those reflections, and retain a low background bed if the kitchen ambience continues under the original dialogue. This is a worked example, not a measured Resolve result; the actual adjustments depend on the audio.
The opposite case is a close-up recorded with a distant-sounding replacement. Don’t raise the level without checking the performance and tone. The line may be loud enough but lack the direct detail that makes the image feel intimate. A different take, mic position, or reference may be the better fix than more gain.
How do I match ADR EQ without overprocessing it?
Match ADR EQ by comparing the replacement and production reference for broad tonal differences, then making small changes that improve continuity without erasing the natural voice. EQ can adjust spectral balance; it cannot turn one performance, microphone, and room into an exact copy of another.
Listen for the voice’s weight, clarity, and consonant detail. Is the ADR unnaturally boomy? Does it have a thin or nasal quality? Is the upper end sharper than nearby dialogue? Identify one audible difference before touching controls. If you change several things at once, you may not know which change helped.
A safe, reversible workflow looks like this:
- Keep an unprocessed version available.
- Match the general level before making tone judgments.
- Compare the ADR with a reference from the same scene.
- Make one small EQ move at a time.
- Bypass the change and listen again to make sure it improves the transition.
- Stop when the ADR belongs in the scene, even if the two waveforms or spectra do not look identical.
A comparison should be made at a similar listening level. A louder signal can seem clearer or fuller, so don’t confuse “more detail” with “better EQ.” If you adjust tone while one clip is much louder, you may overcorrect the replacement.
Avid’s ADR material describes EQ matching as part of aligning the tonal quality of replacement dialogue with original audio. iZotope’s Dialogue Match article explains how its own system uses reference and target audio to create a profile involving EQ, reverb, and ambience. Both sources support the general principle that tonal matching is one part of a larger task. They don’t establish a universal EQ curve, and they don’t replace listening.
Avoid copying a setting from an unrelated scene. A low-frequency cut that helps one lavalier recording may make a different voice sound thin. A high-frequency reduction that softens a bright mic can erase useful consonants on another take. The best adjustment depends on the source and the reference.
If the ADR sounds harsh, the cause might be an emphatic performance or a close microphone rather than a simple EQ peak. If it sounds hollow, the issue may involve room reflections or phase behavior. If it sounds muffled, it might be a different mic or excessive processing. Before creating a complex EQ chain, test whether another take or recording position produces a closer match.
Don’t make the ADR identical to the production track’s defects unless the scene needs them. If the original includes a handling sound or transient that the replacement doesn’t, the aim may be to remove that flaw while maintaining the scene’s broader tone and ambience. Preserve what helps continuity; don’t preserve every artifact.
What if the ADR still sounds wrong after EQ and reverb?
If ADR still sounds wrong after EQ and reverb, stop adding processing and check the take, sync, microphone perspective, source reference, and background continuity again. The problem may be editorial or performance-related, not a missing effect.
Use a reset rather than chasing the mismatch. Bypass the processing on the replacement and replay the surrounding scene. Then ask these questions in order:
- Is this the right take? Compare the phrasing, emotional intent, pace, and effort with the original performance.
- Is the reference appropriate? Confirm that you aren’t matching a lavalier ADR line to a distant boom recording, or a close-up to a wide perspective without reason.
- Is the line aligned? Check the mouth movements, stressed syllables, consonants, and phrase ending.
- Is the level comparable? Match perceived dialogue level before judging tone.
- Is the scene background continuous? Listen between words and across the cut.
- Did a plug-in introduce the problem? Bypass each effect and compare.
- Can the recording be improved? If possible, record another take with a more suitable mic distance, orientation, room, or performance direction.
The order matters. If you begin with a long processing chain, you can make the line more complicated while leaving the main problem untouched. A misperformed line cannot be repaired by room tone. A missing room bed cannot be fixed by raising the ADR. A wrong perspective may not respond well to EQ alone.
A common error is to match a technical measurement without matching the scene. Two clips can have similar peaks or spectral balance and still sound different because one contains sharper consonants, a more intimate performance, or stronger early reflections. Use meters and visual tools to help identify the issue, then decide by listening to the actual transition.
Another error is processing the replacement in solo for too long. Solo is useful for finding clicks, clipping, breaths, or noise. But the match is ultimately judged against the production line, effects, music, and picture. Return to the scene often. If the replacement sounds fine alone but jumps out in the mix, the context has revealed the problem.
If the line is emotionally different, discuss whether a pickup is possible. The actor may need a clearer performance direction, a guide line, or a different cue strategy. If another recording isn’t possible, you may need to decide whether a less perfect but more believable take is preferable to an overprocessed take. That’s a creative tradeoff, not an automatic technical fix.
Resolve’s Fairlight tools can support the recording and editing stages. They cannot guarantee an invisible replacement. Blackmagic’s own training treats recording ADR and working with audio track layers as distinct lessons, which is a useful reminder that capturing a take and assembling the best performance are separate parts of the process.
How do I check the final ADR edit in context?
Check the final ADR edit by listening from before the replacement through the next production dialogue, while watching the scene. Confirm that sync, performance, level, perspective, tone, reflections, and ambience remain believable as the edit crosses into and out of the new line.
Use a compact review pass:
- Watch without staring at the waveform. Does the line appear to come from the person on screen?
- Listen with the surrounding dialogue. Does the voice change abruptly when the replacement starts or ends?
- Listen through the pauses. Does room tone continue naturally?
- Listen to the consonants and breaths. Do they sound like the same distance and performance style?
- Check the line at normal playback level. A sound that only works when you listen for it may not work in the scene.
- Review the next cut. The line may seem matched in isolation but become obvious when production dialogue returns.
- Check the complete scene. A replacement that fits one shot may conflict with the following acoustic space.
If you’re working with another editor or mixer, keep the session easy to inspect. Label the ADR track and cues. Retain the original production source. Keep alternate takes until they’re no longer needed. Note which production line was used as the reference if that choice might not be obvious later.
Don’t judge the edit only through headphones at an unusually high level. Use a consistent, comfortable playback level and, if possible, check the mix on the monitoring system intended for the project. The goal is not to prove that every signal characteristic matches; it’s to confirm that the replacement doesn’t pull attention away from the scene.
Once you’ve chosen the take and matched the transition, save the project and keep a version of the original dialogue. If a later picture change shifts the cut, the ADR sync may need another review. The audio decision is tied to the edit, so a changed shot or timing can change what sounds convincing.
For a quick reference, this decision table maps the first symptom to a useful next move:
| Symptom at playback | First decision | Next action |
|---|---|---|
| Mouth timing is off | Is another take closer? | Choose a better take or make a small, reversible timing edit |
| ADR starts at the right time but drifts | Does the performance pace differ? | Compare takes before considering limited retiming |
| Voice jumps forward | Is it too loud, too close, or too bright? | Check level, perspective, and tone separately |
| Space disappears on the replacement | Is ambience present under the ADR? | Restore or build a continuous scene bed |
| Reverb sounds artificial | Does the reference actually have that tail? | Reduce or bypass the effect and reassess |
| The voice sounds unlike the character | Is the delivery or mic perspective wrong? | Revisit the take or recording setup |
| Every change makes the line worse | Is the source mismatch too large? | Reset processing and reconsider the reference |
Can TryUncle help when I can’t find the Fairlight control?
TryUncle can help when you’re stuck locating a Fairlight control or following a Resolve workflow, but it doesn’t replace the listening and editorial decisions that make ADR fit a scene. Use the manual for exact behavior and verify important changes in your timeline.
TryUncle is the on-screen assistant for DaVinci Resolve on Mac and Windows: ask in plain words and Uncle points at the exact control on your screen. That can be useful when a tutorial’s interface doesn’t match your Resolve version or you can’t find the control you need. You still choose the take, perform the edit, and judge the sound.
What is the practical order for matching ADR?
The practical order is to select the right reference and take, solve sync and performance, match perceived level and perspective, then address tone, reflections, and ambience. Finish by listening across the edit in the complete scene.
Use this sequence when you return to a difficult line:
- Protect the production dialogue and organize the ADR take.
- Choose a reference that fits the shot and microphone perspective.
- Select the most convincing performance.
- Align the line with the picture.
- Match perceived level against adjacent dialogue.
- Correct the largest tonal difference with restrained processing.
- Add or adjust room reflections only if the reference supports them.
- Preserve continuous ambience through the edit.
- Listen before, during, and after the replacement.
- Keep the original available and revisit the match if the picture edit changes.
If you need the exact Fairlight controls, start with the Resolve 21.1 Reference Manual and its ADR chapter. If you need a visual walkthrough of recording cues and takes, Blackmagic’s Recording VO and ADR training is a focused companion. For the sound itself, use the scene as your reference. The most convincing match is the one that stops calling attention to the replacement.
Frequently asked questions
- How do I make ADR sound like the original location audio in DaVinci Resolve?
- In Fairlight, align the ADR to the picture, choose the closest production-dialogue reference, and compare level, voice tone, microphone perspective, room reflections, and ambience. Fix the largest audible difference first, then replay the cut with the surrounding production audio.
- Why does my ADR sound too clean compared with production dialogue?
- The ADR recording may have less room sound or background noise, a closer microphone perspective, or a brighter tone than the location recording. Add only the room character and ambience needed to bridge the edit, and avoid treating the whole line as if it were recorded from the same position when the picture shows otherwise.
- Can I match ADR automatically in DaVinci Resolve 21?
- Resolve’s Fairlight ADR tools help cue, record, and manage replacement takes, but they do not automatically make a take acoustically identical to production dialogue. You still need to edit for sync and judge tone, perspective, level, and ambience by listening in context.
- Should I use the Edit page voiceover tool or Fairlight ADR?
- Use Fairlight ADR when you need cue-based replacement dialogue, rehearsals, multiple takes, or ADR-specific visual and audio cues. The Edit page voiceover tool is intended for simpler voiceover or scratch recording, according to Blackmagic Design’s Resolve 20 feature guide.
- What should I do if ADR is in sync but still sounds wrong?
- Keep the sync, then identify the main mismatch: performance, microphone distance, tone, reflections, level, or background bed. Correct one mismatch at a time and compare the result with the original dialogue immediately before and after the replacement.
Sources
Put this guide to work with TryUncle.
Ask about the step you’re on. TryUncle sees your screen and points at the control you need, so you can keep learning in your own project.
Get TryUncle for Mac or WindowsKeep reading
Guides · Jul 11, 2026 · 31 min
How to Mix Audio in DaVinci Resolve Using Fairlight
Mix audio in DaVinci Resolve's Fairlight page: build a dialogue/music/effects bus structure, gain-stage your clips, EQ and compress dialogue, then duck music under it.
Guides · Aug 26, 2026 · 8 min
How to Add Room Tone in DaVinci Resolve 21
Learn how to add room tone in DaVinci Resolve 21 by recording, looping, patching, fading, and blending ambience under dialogue.
Guides · Aug 30, 2026 · 9 min
DaVinci Resolve Audio Transition Between Dialogue Clips
Learn how to add a clean DaVinci Resolve audio transition between dialogue clips, choose the right crossfade, and fix clicks, dips, and room-tone gaps.